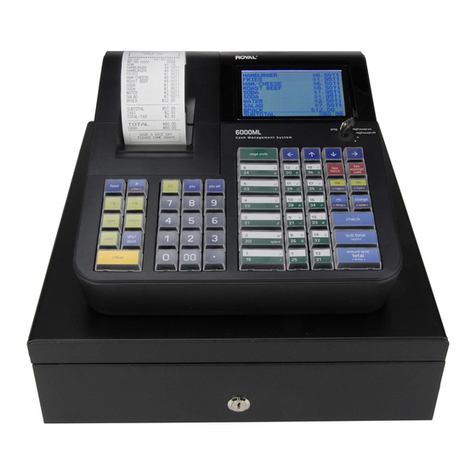
IBM 4800-C41 User manual

PointOfSale
Linux Operating Systems Configuration
Guide
G362-0570-00


PointOfSale
Linux Operating Systems Configuration
Guide
G362-0570-00

Note
Before using this information and the product it supports, be sure to read the general information under Appendix A,
“Safety information,” on page 19 and Appendix B, “Notices,” on page 25.
July 2009
This edition applies to SUSE Linux Enterprise 11 and to all subsequent releases and modifications until otherwise
indicated in new editions. IBM support for SUSE Linux Enterprise Point of Sale 11 is provided under product
number 5799-HRL.
Current versions of Retail Store Solutions documentation are available on the IBM Retail Store Solutions Web site at
http://www.ibm.com/solutions/retail/store/support. Click Publications.
A form for reader’s comments is also provided at the back of this publication. If the form has been removed,
address your comments to:
IBM Corporation
Retail Store Solutions Information Development
Department ZBDA
PO Box 12195
Research Triangle Park, North Carolina 27709 USA
When you send information to IBM, you grant IBM a nonexclusive right to use or distribute whatever information
you supply in any way it believes appropriate without incurring any obligation to you.
© Copyright International Business Machines Corporation 2009.
US Government Users Restricted Rights – Use, duplication or disclosure restricted by GSA ADP Schedule Contract
with IBM Corp.

Contents
About this guide ...........v
Publications accessibility ..........v
Who should use this guide .........v
How this guide is organized .........v
Where to find more information ........v
Publications .............v
Downloads .............vi
Notice statements ............vi
Providing feedback ............vi
Chapter 1. Common configuration
procedures .............1
RS-232 serial port configuration ........1
SLED 11 and SLES 11 installation procedures . . 1
SLEPOS 11 installation procedures ......2
RS-485 touch screen configuration .......2
Serial touch screen calibration ........3
IBM 4820-2xx/4xx/5xx SurePoint Solution serial
touch screen coordinates .........4
Providing serial touch screen coordinates in
xorg.conf ..............5
Tone support for Elo touch screens ......5
FBdev driver configuration .........6
VIA display driver installation and configuration . . 6
MSR, Intermac scanner, and Omni scanner
configuration ..............7
JavaPOS packages installation ........8
RMA packages installation..........9
Chapter 2. SUSE Linux Enterprise
Desktop 11 procedures........11
IBM 4694-207/247/307/347 .........11
IBM AnyPlace Kiosk 4836/4838........11
IBM SurePOS 100 4613-1x8 .........11
IBM SurePOS 300 4810-32x/33x/34x ......12
IBM SurePOS 500 4840 ..........13
IBM SurePOS 500 4846-5xx .........13
IBM SurePOS 500 4851/4951-514 .......13
IBM SurePOS 700 4800-7x1 .........13
IBM SurePOS 700 4800-7x2 .........14
IBM SurePOS 700 4800-7x3 .........14
Chapter 3. SUSE Linux Enterprise Point
of Service 11 procedures .......15
Hardware requirements ..........15
SLEPOS Admin, Image, and Branch Servers . . 15
SLEPOS client terminals .........16
POSBranch Server configuration .......16
POS client image creation..........16
Video and serial touch screen configuration . . . 17
Additional package and application installation . . 17
Appendix A. Safety information ....19
Appendix B. Notices .........25
Appendix C. Trademarks .......27
Index ...............29
© Copyright IBM Corp. 2009 iii

iv Linux OS Configuration

About this guide
This guide provides necessary information to configure the Linux®operating system (OS) environments
on supported IBM®Point of Sale hardware devices. It includes procedures to configure these system units
and displays, along with associated input devices:
vIBM 4694-207/247/307/347
vIBM 4820-1xx/2xx/4xx/5xx SurePoint™Solution
vIBM AnyPlaceTM Kiosk 4836 and 4838-x3x/3xx/5xx/7xx/9xx
vIBM SurePOS™100 4613-1x8
vIBM SurePOS 300 4810-32x/33x/34x
vIBM SurePOS 500 4846-5xx, 4851/4951
vIBM SurePOS 700 4800-72x/74x/78x
Publications accessibility
The softcopy version of this guide and other related publications are accessibility enabled.
Who should use this guide
This guide is intended for systems integrators or administrators who are responsible for installing and
configuring supported Linux operating systems on IBM Point of Sale hardware devices. It is not intended
to provide general or comprehensive configuration information for the OSs that are covered in this guide.
How this guide is organized
This guide contains these chapters:
vChapter 1, “Common configuration procedures,” on page 1, which presents configuration procedures
that are common to all Linux environments, for supported IBM Point of Sale hardware devices. If
applicable, perform these procedures before proceeding to the OS-specific parts of this guide.
vChapter 2, “SUSE Linux Enterprise Desktop 11 procedures,” on page 11, which presents configuration
procedures that are specific to the SUSE Linux Enterprise Desktop 11 (SLED 11) operating system, for
specific IBM Point of Sale hardware devices.
vChapter 3, “SUSE Linux Enterprise Point of Service 11 procedures,” on page 15, which presents
configuration procedures that are specific to the SUSE Linux Enterprise Point of Service 11 (SLEPOS 11)
operating system, for supported IBM Point of Sale hardware devices.
In addition, there are Appendices that address safety, legal, and trademark information.
Where to find more information
Publications
Familiarity with these publications is assumed before you proceed with the configuration procedures in
this guide:
vIBM Remote Management Agent User’s Guide, GC30-4106
vIBM Point of Sale Subsystem UnifiedPOS User’s Guide, Keyboards, and Code Pages, GC30-4078
vJava for Retail POS Programming Guide
© Copyright IBM Corp. 2009 v

Downloads
The following drivers and utilities might be required for your configuration, depending upon your
hardware:
vposIBM_setseriel: http://www.ibm.com/support/docview.wss?uid=pos1R4000245
vSensor driver: http://www.ibm.com/support/docview.wss?rs=219&uid=pos1R4000167
vElotone support: http://www.ibm.com/support/docview.wss?uid=pos1R4000246
Notice statements
Notices in this guide are defined as follows:
Notes These notices provide important tips, guidance, or advice.
Important These notices provide information or advice that might help you avoid inconvenient or
problem situations.
Attention These notices indicate potential damage to programs, devices, or data. An attention notice
is placed just before the instruction or situation in which damage could occur.
Caution These statements indicate situations that can be potentially hazardous to you. A caution
statement is placed just before the description of a potentially hazardous procedure step
or situation.
Danger These statements indicate situations that can be potentially lethal or extremely hazardous
to you. A danger statement is placed just before the description of a potentially lethal or
extremely hazardous procedure step or situation.
Providing feedback
Your feedback is important in helping IBM provide accurate and high-quality information.
To provide feedback:
vGo to http://www.ibm.com/solutions/retail/store. Click Support, then click Publications. Click the
publication comments within the introductory text. Provide the requested information and your
comments. Be sure to include the name and form number of the document in the [Publication ID] field.
vYou can mail your comments to:
IBM Corporation Retail Store Solutions
Information Development Department ZBDA
P.O. Box 12195 Research Triangle Park,
North Carolina 27709 USA
Be sure to include the name and form number of the document.
If applicable, include a reference to the specific location of the text (for example, the page or table
number) on which you are commenting.
Between major revisions of this document, there might be minor technical updates. The latest version of
this document is available on the Retail Store Solutions Web site at www.ibm.com/solutions/retail/store/
support/publications/.
vi Linux OS Configuration

Chapter 1. Common configuration procedures
This chapter presents configuration procedures that are common to all supported Linux operating
systems, for the indicated IBM Point of Sale hardware devices.
RS-232 serial port configuration
You can automatically configure the RS-232 ports on a system using the posIBM_setserial utility. On
supported systems, the configuration matches port (tty) assignments to the labeled alphabetical order.
You can download the utility at http://www.ibm.com/support/docview.wss?uid=pos1R4000245.
The posIBM_setserial utility only supports these IBM POS and AnyPlace Kiosk systems certified for SLES
11, SLED 11, and SLEPOS 11:
vIBM 4694-207/247/307/347
vIBM AnyPlace Kiosk 4836-132(12")/135(15")/13V(volume control)
vIBM AnyPlace Kiosk 4838-xxx/132 (12")/135 (15")/13V (volume control)/137/1Z7 (E37/EZ7
preload)/3yz (y=1 [depot] or 3 [onsite], z=0 [no preload] or E [preload])
vIBM SurePOS 100 4613-108(mono)/118 (color)
vIBM SurePOS 300 4810-32H/33H/340 (E40 preload)
vIBM SurePOS 300 4910-E4D/E4F/E4S/E4T
vIBM SurePOS 500 4840-563/573
vIBM SurePOS 500 4846-565/545 (E65/E45 preload)
vIBM SurePOS 500 4851-514
vIBM SurePOS 500 4951-514 (Express)
vIBM SurePOS 700 4800-721/722/723/741/742/743/781/782/783/C41/C42/C43
SLED 11 and SLES 11 installation procedures
The posIBM_setserial utility comes in an RPM Package Manager (RPM) package and follows the normal
RPM installation procedure:
1. Download the package from the IBM support site.
2. Copy the package to the system onto which you want to install it.
3. On the command line, enter the following command:
rpm –ivh posIBM_setserial.xxx.rpm
Where xxx is the release number of the RPM package.
4. Reboot the system. The package will run the posIBM_setserial service.
© Copyright IBM Corp. 2009 1

SLEPOS 11 installation procedures
To use the posIBM_setserial utility in SLEPOS, you can use the normal installation procedure for SLED or
SLES, but you can also include it in your image creation so that an image loaded through SLEPOS
Branch server to the terminal automatically runs the posIBM_setserial utility.
To integrate the package into the image:
1. Start and run the YaST2 Image Creator provided with SLEPOS. Refer to the SLEPOS 11 guide at
http://www.novell.com/documentation/slepos11/ for more information.
2. From the Image Creator Configuration Overview, edit the image in which you want to include the
rpm package:
a. From the Image Preparation, select Add and Local Directory.
b. In Path to Directory section, browse to the directory in which the RPM is located.
c. Click Add to return to the image configuration screen.
d. Click Change to make changes to the image.
e. Select Filter > Search and look for posIBM_setserial.
f. Check the box so that the package is included in the SLEPOS image.
3. Click Yes to save the image configuration and start building the image. Refer to the SLEPOS 11 guide
at http://www.novell.com/documentation/slepos11/ for information about image deployment.
RS-485 touch screen configuration
To configure an RS-485-attached touch screen:
1. Install the latest JavaPOS package.
2. Edit the /etc/aipsys.conf file to remove the ! under the # RS-485 Touch Emulation line:
# RS-485 Touch Emulation. To enable, remove the "!" and set to "on".
# Valid values are "on" and "off"
mouse=on
3. Reboot the system with the RS-485 touch screen attached. You should see these lines in the
/etc/X11/xorg.conf file:
[...]
Section "InputDevice"
Driver "evdev"
Identifier "Touchscreen"
Option "evBits" "+1 +3"
Option "keyBits" "-272-274 +330"
Option "absBits" "+0-1"
Option "Pass" "3"
EndSection
[...]
Section "ServerLayout"
[...]
InputDevice "Touchscreen" "SendCoreEvents"
[...]
EndSection
2Linux OS Configuration

Serial touch screen calibration
This chapter provides the procedures for configuring the serial touch screen installed in these IBM Point
of Sale hardware devices:
vIBM 4694-207/247/307/247 with serial-attached IBM 4820-2xx/4xx/5xx SurePoint Solution
vIBM AnyPlace Kiosk 4836 and 4838-x3x/3xx/5xx/7xx/9xx
vIBM SurePOS 300 4810-32x/33x/34x with serial-attached IBM 4820-2xx/4xx/5xx SurePoint Solution
vIBM SurePOS 500 4840, 4851/4951 with serial-attached IBM 4820-2xx/4xx/5xx SurePoint Solution
vIBM SurePOS 500 4846-5xx
vIBM SurePOS 700 4800-72x/74x/78x with serial-attached IBM 4820-2xx/4xx/5xx SurePoint Solution
To calibrate a serial touch screen, you must provide the serial touch screen’s minimum and maximum X
and Y coordinates to X Window System.
The following variables are used in the procedure in this section, and they vary based on individual
system:
Table 1. Serial touch screen calibration variable values based on system
System
(screen size)
/dev/ttySn
value1driver2minimum_X maximum_X minimum_Y maximum_Y
IBM
4694-207/247/
307/347
0or 1 microtouch or
elographics
See “IBM 4820-2xx/4xx/5xx SurePoint Solution serial touch
screen coordinates” on page 4, if applicable to your installation.
IBM AnyPlace
Kiosk
4836/4838-132
(12")
1 microtouch 3 3963 32 4077
IBM AnyPlace
Kiosk
4836/4838-135
(15")
1 microtouch 0 3977 96 4062
IBM AnyPlace
Kiosk
4836/4838-137
(17")
1 microtouch 9 3870 190 4090
IBM AnyPlace
Kiosk 4838-3xx
(15")
4 elographics 18 3998 122 4045
IBM AnyPlace
Kiosk 4838-5xx
(15")
4 elographics 5 4024 32 4039
IBM AnyPlace
Kiosk 4838-7xx
(17")
4 elographics 17 3865 178 4037
IBM AnyPlace
Kiosk 4838-9xx
(19")
4 elographics 12 3973 110 4057
IBM SurePOS
300 4810-32x
0,1,4,5,6,or
7
microtouch or
elographics
See “IBM 4820-2xx/4xx/5xx SurePoint Solution serial touch
screen coordinates” on page 4, if applicable to your installation.
IBM SurePOS
300
4810-33x/34x
0or 1 microtouch or
elographics
See “IBM 4820-2xx/4xx/5xx SurePoint Solution serial touch
screen coordinates” on page 4, if applicable to your installation.
Chapter 1. Common configuration procedures 3

Table 1. Serial touch screen calibration variable values based on system (continued)
System
(screen size)
/dev/ttySn
value1driver2minimum_X maximum_X minimum_Y maximum_Y
IBM SurePOS
500 4840
4 elographics See “IBM 4820-2xx/4xx/5xx SurePoint Solution serial touch
screen coordinates,” if applicable to your installation.
IBM SurePOS
500 4846-545
4 elographics 71 4003 112 4079
IBM SurePOS
500 4846-565
4 elographics 6 4066 163 4023
IBM SurePOS
500 4851/4951
5 elographics See “IBM 4820-2xx/4xx/5xx SurePoint Solution serial touch
screen coordinates,” if applicable to your installation.
IBM SurePOS
700
4800-7x3/7x3/
7x3
0,1,4,or5 microtouch or
elographics
See “IBM 4820-2xx/4xx/5xx SurePoint Solution serial touch
screen coordinates,” if applicable to your installation.
Table notes:
1. If more than one value is listed, use the ttyS number for the RS-232 serial port to which the touch
screen is attached (which is a value one less than the physically enumerated port number, because
ttyS numbering starts with 0 not 1).
2. If more than one value is listed, use microtouch or elographics based on the type of serial touch
screen that is attached to the system:
Table 2. Touch screen drivers by 4820 model
4820 model Touch driver
IBM 4820-42T SurePoint Solution
IBM 4820-4FT SurePoint Solution
IBM 4820-FBT SurePoint Solution
microtouch
IBM 4820-2WN SurePoint Solution
IBM 4820-2WB SurePoint Solution
IBM 4820-2GN SurePoint Solution
IBM 4820-2GB SurePoint Solution
IBM 4820-5WN SurePoint Solution
IBM 4820-5GN SurePoint Solution
elographics
IBM 4820-2xx/4xx/5xx SurePoint Solution serial touch screen
coordinates
The following variables are used in the procedure in this section with the specified, serial-attached
SurePoint Solution:
Table 3. SurePoint Solution serial touch screen coordinate values
System minimum_X maximum_X minimum_Y maximum_Y
IBM 4820-2xx/4xx
SurePoint Solution
0 16350 16350 0
IBM 4820-5xx
SurePoint Solution
-46
Note: This value is
negative.
3922 46 4094
4Linux OS Configuration

Providing serial touch screen coordinates in xorg.conf
To provide the X Window System with the specific minimum and maximum X and Y coordinates for the
serial touch screen:
1. Launch the terminal application from Init 3 text console mode.
2. Use a text editor to add the following section to the /etc/X11/xorg.conf file:
Section "InputDevice"
Driver "driver"
Identifier "Mouse[3]"
Option "ButtonNumber" "1"
Option "ButtonThreshold" "17"
Option "Device" "/dev/ttySn"
Option "InputFashion" "Touchpanel"
Option "MinX" "minimum_X"
Option "MaxX" "maximum_X"
Option "MinY" "minimum_Y"
Option "MaxY" "maximum_Y"
Option "Name" "unique_device_id"
Option "ReportingMode" "Scaled"
Option "SendCoreEvents" "on"
EndSection
See Table 1 on page 3 and Table 3 on page 4 (as applicable) for the variable values; unique_device_id is
any alphanumeric string by which you would like the device identified in the OS.
3. Add the following line to the ServerLayout section in the /etc/X11/xorg.conf file:
InputDevice "Mouse[3]" "SendCoreEvents"
For example:
Section "ServerLayout"
Identifier "Layout[all]"
InputDevice "Keyboard[0]" "CoreKeyboard"
InputDevice "Mouse[1]" "CorePointer"
InputDevice "Mouse[3]" "SendCoreEvents"
Option "Clone" "off"
Option "Xinerama" "off"
Screen "Screen[0]"
EndSection
Tone support for Elo touch screens
IBM provides a utility which turns on or off the audible feedback for external 4820 Elo USB and RS-232
Elo touch screens. You can download the IBM_elotone4sle-1.0.0-0.i586.rpm package from IBM support
web site at http://www.ibm.com/support/docview.wss?uid=pos1R4000246.
To install the package on SLED 11 or SLES 11, enter the following command on the command line:
rpm -ivh IBM_elotone4sle-1.0.0-0.i586.rpm
To install the package on SLEPOS 11, refer to the SLEPOS 11 documentation.
To activate the tone on an external 4820 Elo touch screen, enter the following on the command line:
./elotone4sle {--help} -s [DOWN | UP | BOTH | OFF] -d port -f frequency -t time
[DOWN | UP | BOTH | OFF]
Specifies whether the tone sounds when a touch is first recognized (DOWN), when a touch
is released (UP), at both times (BOTH), or not at all (OFF).
port Specifies either USB-attached (usb) or RS-232 serial-attached (/dev/ttySn).
frequency Specifies the frequency value in hertz for the tone.
time Specifies the duration in milliseconds that the tone sounds.
Chapter 1. Common configuration procedures 5

For example, the ./elotone4sle -s DOWN -d /dev/ttyS1 -f 1000 -t 200 command configures an RS-232
serial-attached Elo touch screen to sound a 1000 Hz tone for 200 ms when a touch is first recognized but
not upon its release.
Note: USB Elo touch screen are automatically configured at startup. No additional configuration is
required.
FBdev driver configuration
This chapter provides the procedures for configuring the serial touch screen installed in these IBM Point
of Sale hardware devices:
vIBM 4694-207/247/307/347
vIBM AnyPlace Kiosk 4838-5xx/7xx/9xx
vIBM SurePOS 100 4613-1x8
vIBM SurePOS 500 4840
vIBM SurePOS 700 4800-781/741/722/7x3
By default, these terminals use the FBdev when setup, which only supports a single display.
To set the color depth and resolution of the display:
1. Launch the terminal application from Init 3 text console mode.
2. Use a text editor to add vga=nnnnn to the /boot/grub/menu.lst file, after showopts, where nnnnn is
determined by the color depth and resolution of the attached monitor, as shown in Table 4:
Table 4. VGA codes for FBdev for monitor color depth and resolution
Color depth Resolution
(values in bits) 640x480 800x600 1024x768 1280x1024
8 0x301 0x303 0x305 0x307
15 0x310 0x313 0x316 0x319
16 0x311 0x314 0x317 0x31A
24 0x312 0x315 0x318 0x31B
Alternately, you can add vga=nnnnn as a boot parameter.
VIA display driver installation and configuration
To install the VIA display driver:
1. Download the VIA video driver package from http://linux.via.com.tw/download/OEM/driver/
5.74.33.85a-sl11-47651-3-IBM.tgz.
2. Put the package in a temporary directory (for example, /tmp).
3. On the command line, enter the following:
tar -xvf 5.74.33.85a-sl11-47651-3-IBM.tgz
The package expands into the temporary directory, in a /74.33.85a-sl11-47651-3-IBM directory.
4. Follow the instructions in the /74.33.85a-sl11-47651-3-IBM/README.txt file to complete the
installation.
5. (Dual display only) Launch the terminal application from Init 3 text console mode and use a text editor
to edit the /etc/X11/xorg.conf file to suit desired dual-video and attached-monitors configurations.
Sample xorg.conf files for the supported dual-video configurations are provided with the driver
package.
6Linux OS Configuration

MSR, Intermac scanner, and Omni scanner configuration
To configure a magnetic stripe reader (MSR) (0x4b3/4543), or an Intermac (0x4b3/454b) or Omni
(0x4b3/454c) scanner:
1. On the command line, enter the following:
mount -t usbfs usbfs /proc/bus/usb
2. If the scanner is driven correctly by the driver, you will see the ID of the device in
/proc/bus/usb/devices. For example, an Intermac (0x4b3/454b) scanner shows:
T: Bus=03 Lev=01 Prnt=01 Port=01 Cnt=02 Dev#= 3 Spd=12 MxCh= 0
D: Ver= 1.10 Cls=ff(vend.) Sub=00 Prot=00 MxPS= 8 #Cfgs= 2
P: Vendor=04b3 ProdID=454b Rev= 1.01
S: Manufacturer=I.B.M. Corp.
S: Product=I.B.M. Bar Code Scanner
S: SerialNumber=USBSCANNER00000000001
C: #Ifs= 1 Cfg#= 1 Atr=80 MxPwr=100mA
I: If#= 0 Alt= 0 #EPs= 1 Cls=ff(vend.) Sub=00 Prot=00 Driver=
E: Ad=01(O) Atr=02(Bulk) MxPS= 64 Ivl=0ms
C:* #Ifs= 1 Cfg#= 2 Atr=a0 MxPwr=100mA
I:* If#= 0 Alt= 0 #EPs= 3 Cls=ff(vend.) Sub=00 Prot=00 Driver=ti_usb_3410_5052
E: Ad=81(I) Atr=02(Bulk) MxPS= 64 Ivl=0ms
E: Ad=01(O) Atr=02(Bulk) MxPS= 64 Ivl=0ms
E: Ad=83(I) Atr=03(Int.) MxPS= 2 Ivl=1ms
3. Check the dmesg.txt file to determine the port to which the device is linked. In this example, the
Intermac scanner is linked to USB port 3-2:
usb 3-2: new full speed USB device using uhci_hcd and address 3
usb 3-2: configuration #1 chosen from 2 choices
usb 3-2: New USB device found, idVendor=04b3, idProduct=454b
usb 3-2: New USB device strings: Mfr=1, Product=2, SerialNumber=3
usb 3-2: Product: I.B.M. Bar Code Scanner
usb 3-2: Manufacturer: I.B.M. Corp.
usb 3-2: SerialNumber: USBSCANNER00000000001
You will also see ttyUSBUSB_port in /sys/bus/usb/devices/3-2 if it is driven successfully, where
USB_port is the USB port number to which it is linked.
4. On the command line, enter the following:
rm -fr /dev/ttySn
where nis the ttyS number for the RS-232 serial port to which the scanner is attached (which is a
value one less than the physically enumerated port number, because ttyS numbering starts with 0 not
1).
5. On the command line, enter the following:
ln -s /dev/ttyUSBUSB_port /dev/ttySn
to link the USB port from dmesg.txt to the serial port to which the scanner is connected.
6. On the command line, enter the following:
chmod 666 /dev/ttySn
7. On the command line, enter the following:
/bin/stty -F /dev/ttySn9600 raw -echo
Note: For MSRs and Intermac scanners use 19200 in place of 9600.
If successful, the scanner will light up.
8. On the command line, enter the following:
cat /dev/ttySn
9. Scan a barcode and confirm that there is output on the display. For an MSR, swipe a magnetic card
and confirm that there is output.
Chapter 1. Common configuration procedures 7

Sometimes the scanner might be configured to turn off after each scan. In such cases, use the barcode
provided in the scanner configuration documentation to configure the scanner back to default factory
setting so that it remains on after every scan.
These scanners are driven by the ti_usb_3410_5052 driver.
For more information, refer to the following publications:
vIntermac: http://www-01.ibm.com/support/docview.wss?rs=219&uid=pos1R1003340
vOmni: http://www-01.ibm.com/support/docview.wss?rs=219&uid=pos1R1003410
JavaPOS packages installation
POS drivers need to be installed manually or configured together in SLEPOS 11 image creation according
to the documentation for the latest release at the IBM Support web site.
To install the JavaPOS packages:
1. Install the following packages:
vFor POSBranch, SLES 11, and SLED 11:
– UPOS 1.12.x:
- ibm-javapos-version-build.i386.rpm
- ibmposs-build.i386.rpm
- javax-usb-1.0.2-1.i386.rpm
- javax-usb-ri-1.0.2-1.i386.rpm
- javax-usb-ri-linux-1.0.2-1.i386.rpm
– Install kernel module package:
- Default kernel: http://forgeftp.novell.com/driver-process/staging/pub/update/ibm/sle11/
common/i586/ibm-aipsvcp-kmp-default-1.0_2.6.27.19_5-1.i586.rpm
- Physical Address Extension (PAE) kernel (SLES/SLED only, if applicable to your hardware):
http://forgeftp.novell.com/driver-process/staging/pub/update/ibm/sle11/common/i586/
ibm-aipsvcp-kmp-pae-1.0_2.6.27.19_5-1.i586.rpm
vFor SLEPOS 11:
a. Start and run the SLEPOS YaST2 Image Creator provided with SLEPOS.
b. From the Image Creator Configuration Overview, edit the image that will include the RPM
Package Manager (RPM) package:
c. From Image Preparation, select Add and Local Directory.
d. In the Path to Directory section, browse to the directory that contains the RPM.
e. Click Add to add the RPM and return to the image configuration screen.
f. Click Change to make changes to the image.
g. Select Filter > Search.
h. Search for these JavaPOS RPM packages and check the boxes for them:
– ibm-javapos-version-build.i386.rpm
– ibmposs-build.i386.rpm
– javax-usb-1.0.2-1.i386.rpm
– javax-usb-ri-1.0.2-1.i386.rpm
– javax-usb-ri-linux-1.0.2-1.i386.rpm
2. Remove the old Java symbolic links and re-link them to the IBM JVM.
#rm /usr/bin/java
#ln -s /opt/ibm/java2-i386-50/jre/bin /usr/bin/java
8Linux OS Configuration

3. Setup the OS path as required, which can be added to your .profile:
#export PATH=/opt/ibm/java2-i386-50/jre/bin:$PATH$
4. Copy the sample JavaPOS provided in the package documentation to the /opt/ibm/javapos/etc/
directory:
#cp /opt/ibm/javapos/docs/jposSample.xml /opt/ibm/javapos/etc/jpos.xml
RMA packages installation
Refer to the IBM Support documentation at http://www-01.ibm.com/support/docview.wss?rs=219
&uid=pos1R4000158 for the latest release and for support for Linux.
Chapter 1. Common configuration procedures 9

10 Linux OS Configuration

Chapter 2. SUSE Linux Enterprise Desktop 11 procedures
This chapter presents configuration procedures that are specific to the SUSE Linux Enterprise Desktop 11
(SLED 11) operating systems, for these IBM Point of Sale hardware devices:
vIBM 4694-207/247/307/347
vIBM 4820-1xx/2xx/4xx/5xx Display
vIBM AnyPlace Kiosk 4836 and 4838-x3x/3xx/5xx/7xx/9xx
vIBM SurePOS 100 4613-1x8
vIBM SurePOS 300 4810-32x/33x/34x
vIBM SurePOS 500 4846-5xx, 4851/4951
vIBM SurePOS 700 4800-72x/74x/78x
Note: After you have configured SUSE Linux Enterprise Desktop 11 for you particular system, see
“JavaPOS packages installation” on page 8 and “RMA packages installation” on page 9, if
necessary for your environment.
IBM 4694-207/247/307/347
To fully configure SLED 11 to run on the IBM 4694-207/247/307/347:
1. Install SLED 11 according to the documentation at http://www.novell.com/documentation/sled11/
index.html.
2. Perform the procedures in “Serial touch screen calibration” on page 3.
IBM AnyPlace Kiosk 4836/4838
To fully configure SLED 11 to run on the IBM AnyPlace Kiosk 4836/4838:
1. Install SLED 11 according to the documentation at http://www.novell.com/documentation/sled11/
index.html.
2. Setup the video display:
vFBdev driver (default, 4838-5xx/7xx/9xx only): see “FBdev driver configuration” on page 6.
vVIA driver: see “VIA display driver installation and configuration” on page 6.
3. Perform the procedures in “Serial touch screen calibration” on page 3.
4. If necessary, perform the procedures in “MSR, Intermac scanner, and Omni scanner configuration” on
page 7.
IBM SurePOS 100 4613-1x8
To fully configure SLED 11 to run on the IBM SurePOS 100 4613-1x8:
1. Install SLED 11 according to the documentation at http://www.novell.com/documentation/sled11/
index.html.
2. Setup the video display:
vFBdev driver (default): see “FBdev driver configuration” on page 6.
vVIA driver: see “VIA display driver installation and configuration” on page 6.
© Copyright IBM Corp. 2009 11

IBM SurePOS 300 4810-32x/33x/34x
To fully configure SLED 11 to run on an IBM SurePOS 300 4810-32x/33x/34x:
1. Install SLED 11 according to the documentation at http://www.novell.com/documentation/sled11/
index.html.
2. (4810-34x only) Uninstall all Compiz packages (refer to the SLED 11 documentation).
3. (4810-33x/34x only) Launch the terminal application from Init 3 text console mode.
4. (4810-33x only) Open the /etc/X11/xorg.conf file in a text editor and modify the Driver line in the
"Device" section as follows:
Driver "fbdev"
5. (4810-33x only) Perform the procedures in “FBdev driver configuration” on page 6.
6. Perform the procedures in “Serial touch screen calibration” on page 3.
7. (Dual display on 4810-34x only) Setup dual display:
a. Download the xorg-x11-driver-video-xxx.rpm from http://download.opensuse.org/repositories/
X11://XOrg://sle11/openSUSE_11.1/i586/ (xxx is the full version number of the most-current
release of this driver).
b. On the command line, enter the following command:
rpm -ivh xorg-x11-driver-video-xxx.rpm
c. Open the /etc/X11/xorg.conf file in a text editor and add to the configuration of the attached
monitors as follows:
Section "Monitor"
Identifier "Monitor[TV]"
Option "Ignore" "yes"
EndSection
Section "Monitor"
Identifier "Monitor[LVDS]"
Option "Ignore" "yes"
EndSection
Section "Device"
[...]
Option "monitor-LVDS" "Monitor[LVDS]"
Option "monitor-TV" "Monitor[TV]"
[...]
EndSection
Section "Monitor"
Identifier "Monitor[0]"
[...]
EndSection
Section "Monitor"
Identifier "Monitor[1]"
[...]
EndSection
Section "Screen"
Device "Device[0]"
Identifier "Screen[0]"
Monitor "Monitor[0]"
[...]
EndSection
Section "Screen"
Device "Device[0]"
12 Linux OS Configuration
This manual suits for next models
10
Table of contents
Other IBM Cash Register manuals
