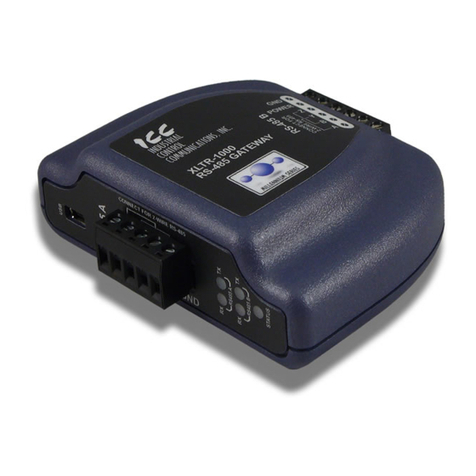
ICC XLTR-1000 User manual

March 1, 2010
ICC #10756 © 2010 Industrial Control Communications, Inc.
ICC
INDUSTRIAL CONTROL COMMUNICATIONS, INC.
XLTR-1000
Multiprotocol RS-485 Gateway
Instruction Manual

1
ICC
XLTR-1000
User's Manual
Part Number 10756
Printed in U.S.A.
©2010 Industrial Control Communications, Inc.
All rights reserved
NOTICE TO USERS
Industrial Control Communications, Inc. reserves the right to make changes and
improvements to its products without providing notice.
Industrial Control Communications, Inc. shall not be liable for technical or editorial
omissions or mistakes in this manual, nor shall it be liable for incidental or
consequential damages resulting from the use of information contained in this
manual.
INDUSTRIAL CONTROL COMMUNICATIONS, INC.’S PRODUCTS ARE NOT
AUTHORIZED FOR USE AS CRITICAL COMPONENTS IN LIFE-SUPPORT
DEVICES OR SYSTEMS. Life-support devices or systems are devices or
systems intended to sustain life, and whose failure to perform, when properly
used in accordance with instructions for use provided in the labeling and user's
manual, can be reasonably expected to result in significant injury.
No complex software or hardware system is perfect. Bugs may always be present
in a system of any size. In order to prevent danger to life or property, it is the
responsibility of the system designer to incorporate redundant protective
mechanisms appropriate to the risk involved.
This user’s manual may not cover all of the variations of interface applications,
nor may it provide information on every possible contingency concerning
installation, programming, operation, or maintenance.
The contents of this user’s manual shall not become a part of or modify any prior
agreement, commitment, or relationship between the customer and Industrial
Control Communications, Inc. The sales contract contains the entire obligation of
Industrial Control Communications, Inc. The warranty contained in the contract
between the parties is the sole warranty of Industrial Control Communications,
Inc., and any statements contained herein do not create new warranties or modify
the existing warranty.
Any electrical or mechanical modifications to this equipment without prior written
consent of Industrial Control Communications, Inc. will void all warranties and
may void any UL/cUL listing or other safety certifications. Unauthorized
modifications may also result in equipment damage or personal injury.

2
ICC
APPLICABLE FIRMWARE
Modbus – BACnet Firmware Version 2.100
Modbus – Metasys Firmware Version 2.100
Modbus – Toshiba Firmware Version 2.100
Modbus – Sullair Firmware Version 2.100
BACnet – Metasys Firmware Version 2.100
BACnet – Toshiba Firmware Version 2.100
BACnet – Sullair Firmware Version 2.100
Metasys – Toshiba Firmware Version 2.100
Metasys – Sullair Firmware Version 2.100
Toshiba – Sullair Firmware Version 2.100

3
ICC
Usage Precautions
•Please use the interface only when the ambient temperature of the
environment into which the unit is installed is within the following
specified temperature limits:
Operation: -10 ∼+50°C (+14 ∼+122°F)
Storage: -40 ∼+85°C (-40 ∼+185°F)
•Avoid installation locations that may be subjected to large shocks or
vibrations.
•Avoid installation locations that may be subjected to rapid changes in
temperature or humidity.
Operating Environment
•Proper ground connections are vital for both safety and signal reliability
reasons. Ensure that all electrical equipment is properly grounded.
•Route all communication cables separate from high-voltage or noise-
emitting cabling (such as ASD input/output power wiring).
Installation and Wiring

4
ICC
TABLE OF CONTENTS
1. Introduction .................................................................................. 6
2. Features ........................................................................................ 7
3. Gateway Concepts....................................................................... 8
4. Precautions and Specifications................................................ 10
4.1 Installation Precautions .......................................................................10
4.2 Maintenance Precautions....................................................................11
4.3 Inspection............................................................................................11
4.4 Maintenance and Inspection Procedure..............................................11
4.5 Storage................................................................................................12
4.6 Warranty..............................................................................................12
4.7 Disposal ..............................................................................................12
4.8 Environmental Specifications ..............................................................12
5. Gateway Overview ..................................................................... 13
5.1 Power Supply Electrical Interface........................................................14
5.2 RS-485 Port Electrical Interface..........................................................14
6. Installation .................................................................................. 16
6.1 Mounting the Gateway.........................................................................16
6.1.1 Panel / Wall Mounting.....................................................................16
6.1.2 DIN Rail Mounting...........................................................................17
6.2 Wiring Connections .............................................................................18
6.3 Grounding............................................................................................18
7. LED Indicators............................................................................ 19
7.1 Gateway Status...................................................................................19
7.2 RS-485 Network Status LEDs.............................................................19
8. Configuration Concepts............................................................ 20
8.1 USB Configuration Utility.....................................................................20
8.2 Timeout Configuration Tab..................................................................21
8.2.1 Timeout Time..................................................................................22
8.2.2 Timeout Object Configuration .........................................................22
8.3 Port Configuration Tabs Protocol Selection Group..............................23
8.4 Service Object Configuration...............................................................24
8.4.1 Description of Common Fields........................................................24
8.4.2 Viewing the Status of a Service Object...........................................25
8.5 General Object Editing Options...........................................................26

5
ICC
8.6 Protocol Configuration.........................................................................27
8.6.1 Modbus RTU Master.......................................................................27
8.6.2 Modbus RTU Slave.........................................................................33
8.6.3 Modbus RTU Sniffer .......................................................................39
8.6.4 BACnet MS/TP Client .....................................................................43
8.6.5 BACnet MS/TP Server....................................................................50
8.6.6 Metasys N2 Slave...........................................................................57
8.6.7 Toshiba ASD Master.......................................................................63
8.6.8 Sullair Supervisor Master................................................................68
9. Protocol-Specific Information................................................... 72
9.1 Modbus RTU.......................................................................................72
9.1.1 Modbus RTU Master.......................................................................72
9.1.2 Modbus RTU Slave.........................................................................73
9.1.3 Modbus RTU Sniffer .......................................................................76
9.2 BACnet MS/TP....................................................................................77
9.2.1 Protocol Implementation Conformance Statement..........................77
9.2.2 BACnet MS/TP Client .....................................................................81
9.2.3 BACnet MS/TP Server....................................................................83
9.3 Metasys N2 Slave ...............................................................................85
9.3.1 Overview.........................................................................................85
9.3.2 Metasys Objects .............................................................................86
9.4 Toshiba ASD Master...........................................................................87
9.4.1 Overview.........................................................................................87
9.4.2 Toshiba Service Objects.................................................................88
9.4.3 Parameter Mapping.........................................................................88
9.5 Sullair Supervisor Master ....................................................................89
9.5.1 Sullair Service Objects....................................................................90
9.5.2 Parameter Mapping.........................................................................90
10. Troubleshooting..................................................................... 91
11. Appendix A: Database Endianness...................................... 92
11.1 Ex: Modbus - Profibus.........................................................................94
11.2 Ex: Modbus - DeviceNet......................................................................95
11.3 Ex: BACnet - DeviceNet......................................................................96
11.4 Ex: BACnet - Modbus (Analog Objects-Registers)..............................98
11.5 Ex: BACnet - Modbus (Binary Objects-Discretes)...............................99
12. Appendix B: Status Information......................................... 101

6
ICC
1. Introduction
Congratulations on your purchase of the ICC XLTR-1000 Multiprotocol RS-485
Communications Gateway. This gateway allows information to be transferred
seamlessly between various RS-485-based networks. In addition to the
supported fieldbus protocols, the gateway hosts a USB interface for configuring
the gateway via a PC.
Before using the gateway, please familiarize yourself with the product and be
sure to thoroughly read the instructions and precautions contained in this manual.
In addition, please make sure that this instruction manual is delivered to the end
user of the gateway, and keep this instruction manual in a safe place for future
reference or unit inspection.
For the latest information, support software and firmware releases, please visit
http://www.iccdesigns.com.
Before continuing, please take a moment to ensure that you have received all
materials shipped with your kit. These items are:
•XLTR-1000 gateway in plastic housing
•Documentation CD-ROM
•DIN rail adapter with two pre-mounted screws
•Four black rubber feet
Note that different gateway firmware versions may provide varying levels of
support for the various protocols. When using this manual, therefore, always
keep in mind that the firmware version indicated on your unit must be listed on
page 2 for all documented aspects to apply.
This manual will primarily be concerned with the gateway’s hardware
specifications, installation, wiring, configuration and operational characteristics.
To maximize the abilities of your new gateway, a working familiarity with this
manual will be required. This manual has been prepared for the gateway installer,
user, and maintenance personnel. With this in mind, use this manual to develop a
system familiarity before attempting to install or operate the gateway.

7
ICC
2. Features
Supported Protocols
The gateway currently provides support for the following fieldbus protocols:
•Modbus RTU Master
•Modbus RTU Slave
•Modbus RTU Sniffer
•BACnet MS/TP Client
•BACnet MS/TP Server
•Johnson Controls Metasys N2 Slave
•Toshiba ASD Protocol Master
•Sullair Supervisor Network Master
Note that any combination of these protocols may be configured on the gateway’s
“RS-485 A” and “RS-485 B” ports.
Supported Baud Rates
The gateway currently provides support for the following baud rates:
•2400
•4800
•9600
•19200
•38400
•57600
•76800
•115200
Note that not all protocols support every baud rate listed above. Refer to section
9 for more information.
Field-Upgradeable
As new firmware becomes available, the gateway can be upgraded in the field by
the end-user. Refer to section 8.1 for more information.
USB Interface
The gateway can be connected to a PC via a USB mini type-B cable. This
simultaneously supplies power while providing the ability to configure the
gateway, monitor data, and update firmware on the device using the ICC
Gateway Configuration Utility. Refer to section 8.1 for more information.
Flexible Mounting Capabilities
The gateway includes all hardware for desktop, panel/wall and DIN-rail mounting
capabilities. Refer to section 6.1 for more information.

8
ICC
3. Gateway Concepts
The XLTR-1000 is a member of the Millennium Series communication gateways.
Members of this family are designed to provide a uniform interface, configuration
and application experience. This commonality reduces the user’s learning curve,
reducing commissioning time while simplifying support. All Millennium Series
gateways are configured using the ICC Gateway Configuration Utility. The XLTR-
1000 provides simultaneous support for two different communication protocols,
allowing complex interchanges of data between otherwise incompatible networks.
The heart of the Millennium Series concept is its internal database. The database
is a 4 KB, byte-wise addressable data array. The database allows data to be
routed from any supported network to any other supported network. Data may be
stored into the database in either big-endian style (meaning that if a 16-bit or 32-
bit value is stored in the database, the most significant byte will start at the lowest
address) or little-endian style (meaning that if a 16-bit or 32-bit value is stored in
the database, the least significant byte will start at the lowest address).
The other fundamental aspect of the Millennium Series is the concept of a
configurable “service object”. A service object is used for any master/client
protocol to describe what service (read or write) is to be requested on the
network. The gateway will cycle through the defined service objects in a round-
robin fashion; however, the gateway does implement a “write first” approach. This
means that the gateway will perform any outstanding write services before
resuming its round-robin, read request cycle.
Additionally, the database and service objects provide the added benefit of “data
mirroring”, whereby current copies of data values (populated by a service object)
are maintained locally within the gateway itself. This greatly reduces the request-
to-response latency times on the various networks, as requests (read or write)
can be entirely serviced locally, thereby eliminating the time required to execute a
secondary transaction on a different network.
Regardless of their network representation, all data values are stored in the
gateway’s internal database as integer values (either 8-, 16- or 32-bits in length,
depending on the protocol and/or object configuration). This means that even if a
network variable is accessed by the gateway as a 32-bit floating-point number,
this native representation will always be converted to an equivalent integer
representation prior to being stored in the database. Once in the database, this
value will then be accessible to the network operating on the other port of the
gateway, which may then impose its own conversion process on the data. A
port’s conversion may be implicit (e.g. all Modbus holding registers are
interpreted by the protocol as 16-bit unsigned integers) or explicit (as configured
in a BACnet service object).
In order to facilitate the free scaling and conversion of native data values, a user-
configurable “multiplier” and “data type” exist for some network configurations. All
network values are scaled by a multiplier prior to being stored into the database
or after being retrieved from the database. The data type is used to determine

9
ICC
how many bytes are allocated for the value in the database and whether or not to
interpret the number as signed or unsigned upon retrieval from the database.
A typical use of the multiplier feature is to preserve the fractional components of
a network value for insertion into the database. For example, if the floating-point
value “3.19” is read by the gateway from a remote BACnet device, then we could
use a multiplier value of 0.01 to preserve all of the significant digits of this value:
the network representation (3.19) will be divided by the multiplier value (0.01) to
obtain a resultant value of 319, which will then be inserted into the database.
Similarly, when a value in the database corresponding to a specific service object
is changed (which therefore requires that this updated value be written to the
associated remote device on the network), the service object’s multiplier value
will first be multiplied by the database value in order to obtain the resultant
network value. For example, if 3000 is written to the database at a location
corresponding to a certain service object on the other port, and that service
object’s multiplier value is 0.1, then the database value (3000) will be multiplied
by the multiplier value (0.1) to obtain the resultant network value of 300.0, which
will then be written to the network as a native floating point value.
An appropriate data type should be selected based on the range of the network
data values. For example, if the value of an Analog Output on a remote BACnet
device can vary from –500 to 500, a 16-bit signed data type should be used. If
the value can only vary from 0 to 150, for example, an 8-bit unsigned data type
may be used. Care must be taken so that a signed data type is selected if
network data values can be negative. For example, if 0xFF is written to the
database at a location corresponding to a service object with an 8-bit unsigned
data type, the resultant network value will be 25510 (assuming a multiplier of 1).
However, if 0xFF is written to the database at a location corresponding to a
service object with an 8-bit signed data type, the resultant network value will be
−110 (again, assuming a multiplier of 1). It is also important to select a data type
large enough to represent the network data values. For example, if a value of 257
is read by the gateway from a remote device and the data type corresponding to
that service object is 8-bit unsigned, the value that actually will be stored is 1
(assuming a multiplier of 1). This is because the maximum value that can be
stored in 8-bits is 255. Any value higher than this therefore results in overflow.
The Millennium Series gateways also provide a powerful data-monitoring feature
that allows the user to view and edit the database in real time, as well as view the
status of service objects via the ICC Gateway Configuration Utility’s Monitor tab
when connected via USB to a PC.
When properly configured, the gateway will become essentially “transparent” on
the networks, and the various network devices can engage in seamless dialogs
with each other.

10
ICC
4. Precautions and Specifications
Rotating shafts and electrical equipment can be hazardous.
Installation, operation, and maintenance of the gateway shall be
performed by Qualified Personnel only.
Qualified Personnel shall be:
•Familiar with the construction and function of the gateway, the
equipment being driven, and the hazards involved.
•Trained and authorized to safely clear faults, ground and tag
circuits, energize and de-energize circuits in accordance with
established safety practices.
•Trained in the proper care and use of protective equipment in
accordance with established safety practices.
Installation of the gateway should conform to all applicable National
Electrical Code (NEC) Requirements For Electrical Installations, all
regulations of the Occupational Safety and Health
Administration, and any other applicable national, regional, or
industry codes and standards.
DO NOT install, operate, perform maintenance, or dispose of this
equipment until you have read and understood all of the following
product warnings and user directions. Failure to do so may result in
equipment damage, operator injury, or death.
4.1 Installation Precautions
•Avoid installation in areas where vibration, heat, humidity, dust,
metal particles, or high levels of electrical noise (EMI) are
present.
•Do not install the gateway where it may be exposed to
flammable chemicals or gasses, water, solvents, or other fluids.
•Where applicable, always ground the gateway to prevent
electrical shock to personnel and to help reduce electrical noise.
Note: Conduit is not an acceptable ground.
•Follow all warnings and precautions and do not exceed
equipment ratings.

11
ICC
4.2 Maintenance Precautions
•Do Not attempt to disassemble, modify, or repair the gateway.
Contact your ICC sales representative for repair or service
information.
•If the gateway should emit smoke or an unusual odor or sound,
turn the power off immediately.
•The system should be inspected periodically for damaged or
improperly functioning parts, cleanliness, and to determine that
all connectors are tightened securely.
4.3 Inspection
Upon receipt, perform the following checks:
•Inspect the unit for shipping damage.
•Check for loose, broken, damaged or missing parts.
Report any discrepancies to your ICC sales representative.
4.4 Maintenance and Inspection Procedure
Preventive maintenance and inspection is required to maintain the gateway in its
optimal condition, and to ensure a long operational lifetime. Depending on usage
and operating conditions, perform a periodic inspection once every three to six
months.
Inspection Points
•Check that there are no defects in any attached wire terminal crimp points.
Visually check that the crimp points are not scarred by overheating.
•Visually check all wiring and cables for damage. Replace as necessary.
•Clean off any accumulated dust and dirt.
•If use of the interface is discontinued for extended periods of time, apply
power at least once every two years and confirm that the unit still functions
properly.
•Do not perform hi-pot tests on the interface, as they may damage the unit.
Please pay close attention to all periodic inspection points and maintain a good
operating environment.

12
ICC
4.5 Storage
•Store the device in a well ventilated location (in its shipping carton, if
possible).
•Avoid storage locations with extreme temperatures, high humidity, dust, or
metal particles.
4.6 Warranty
This gateway is covered under warranty by ICC, Inc. for a period of 12 months
from the date of installation, but not to exceed 18 months from the date of
shipment from the factory. For further warranty or service information, please
contact Industrial Control Communications, Inc. or your local distributor.
4.7 Disposal
•Contact the local or state environmental agency in your area for details on
the proper disposal of electrical components and packaging.
•Do not dispose of the unit via incineration.
4.8 Environmental Specifications
Item Specification
Operating Environment Indoors, less than 1000m above sea level, do not
expose to direct sunlight or corrosive / explosive
gasses
Operating Temperature -10 ∼+50°C (+14 ∼+122°F)
Storage Temperature -40 ∼+85°C (-40 ∼+185°F)
Relative Humidity 20% ∼90% (without condensation)
Vibration 5.9m/s2{0.6G} or less (10 ∼55Hz)
Grounding Non-isolated, referenced to power ground
Cooling Method Self-cooled
This device is lead-free / RoHS-compliant.

13
ICC
5. Gateway Overview
Gateway Overview (Front)
“RS-485 B”
TX and RX LEDs
“RS-485 A” terminal
block
USB connector
Gateway status LED
“RS-485 A”
TX and RX LEDs
Shield terminal
“RS-485 B” terminals
Power terminals
Gateway Overview (Back)

14
ICC
5.1 Power Supply Electrical Interface
When the gateway is not plugged into a PC via the USB cable, it must be
powered by an external power source. Ensure that the power supply adheres to
the following specifications:
Voltage rating......................... 7 - 24VDC
Minimum Current rating.......... 50mA (@24VDC)
•Typical current consumption of the XLTR-1000 when powered from a 24V
supply is approximately 15mA.
•ICC offers an optional 120VAC/12VDC power supply (ICC part number
10755) that can be used to power the gateway from a standard wall outlet.
•The power supply must be connected to the gateway’s “RS-485 B” terminal
block at terminals #5 (POWER) and #6 (GND) as highlighted in Figure 1.
Figure 1: “RS-485 B” Terminal Block Power Supply Connections
5.2 RS-485 Port Electrical Interface
In order to ensure appropriate network conditions (signal voltage levels, etc.)
when using the gateway’s RS-485 ports, some knowledge of the network
interface circuitry is required. Refer to Figure 2 for a simplified network schematic
of the RS-485 interface circuitry. Both the “RS-485 A” and “RS-485 B” ports have
4 terminals for four-wire communication. For two-wire communication, connect a
jumper wire between TB:1 (A / RXD+) and TB:3 (Y / TXD+) and a wire between
TB:2 (B / RXD-) and TB:4 (Z / TXD-).
The GND terminals (terminal #5 on port “RS-485 A” and terminal #6 on port “RS-
485 B”) are internally connected.

15
ICC
Figure 2: RS-485 Interface Circuitry Schematic
Figure 3 highlights the terminals on the gateway’s “RS-485 B” terminal block that
are specific to RS-485 network connections. Equivalent terminals exist on the
“RS-485 A” terminal block for connection to that separate subnet.
Figure 3: “RS-485 B” Terminal Block Network Connections

16
ICC
6. Installation
The gateway’s installation procedure will vary slightly depending on the mounting
method used. Before mounting the gateway, install the 4 black rubber feet
(Figure 4) onto the bottom of the enclosure.
Figure 4: Rubber Feet
6.1 Mounting the Gateway
The gateway may be mounted on a panel, a wall or a DIN rail. In all cases, the
gateway is mounted using the two keyhole-shaped screw holes on the bottom of
the enclosure. A DIN rail adapter with two pre-mounted screws is provided for
mounting the gateway on a DIN rail. The user must choose the appropriate
hardware for mounting the gateway on a panel or wall. When choosing screws for
panel or wall mounting, ensure the head size matches the keyhole screw holes
on the back of the enclosure. The following describes the method for the two
mounting options.
6.1.1 Panel / Wall Mounting
To mount the gateway on a panel or wall, drill two holes 25mm apart vertically.
Screw two #6 pan head screws (or equivalent) into the holes and mount the
gateway onto the screws. Several test-fitting iterations may be required in order
to arrive at the proper screw height adjustment.
Figure 5: Panel / Wall Mounting Diagram

17
ICC
6.1.2 DIN Rail Mounting
The DIN rail adapter (Figure 6) can clip onto 35mm and G-type rails. To mount
the gateway to a DIN rail, clip the DIN rail adapter onto the DIN rail and mount
the gateway on the screws (the screws should already be seated into the adapter
at the proper height). Refer to Figure 7, Figure 8, and Figure 9.
Figure 6: DIN Rail Adapter
Figure 7: DIN Rail Adapter Attachment
Figure 8: Unit with Attached
DIN Rail Adapter
Figure 9: Example Installation

18
ICC
6.2 Wiring Connections
Note that in order to power the unit, a power supply must also be installed. Refer
to section 5.1 for more information.
1. Mount the unit via the desired method (refer to section 6.1).
2. Connect the various networks to their respective plugs/terminal blocks.
Ensure that any wires are fully seated into their respective terminal blocks,
and route the network cables such that they are located well away from any
electrical noise sources, such as adjustable-speed drive input power or
motor wiring. Also take care to route all cables away from any sharp edges
or positions where they may be pinched.
3. Take a moment to verify that the gateway and all network cables have
sufficient clearance from electrical noise sources such as drives, motors, or
power-carrying electrical wiring.
4. Connect the power supply to the gateway’s “RS-485 B” terminal block on the
terminals labeled POWER and GND. Pay particular attention to the proper
polarity.
6.3 Grounding
Grounding is of particular importance for reliable, stable operation.
Communication system characteristics may vary from system to system,
depending on the system environment and grounding method used. The
gateway has two logic ground terminals (terminal #5 on port “RS-485 A” and
terminal #6 on port “RS-485 B”) that are internally connected. These ground
terminals serve as the ground reference for both power and RS-485
communication signals.
The gateway is also provided with a “Shield” terminal adjacent to the “RS-485 B”
terminal block. This shield terminal has no internal connection: its purpose is
simply to provide a cable shield chaining location between devices. The shield is
then typically connected to ground at one location only.
Please be sure to consider the following general points for making proper ground
connections:
Grounding method checkpoints
1. Make all ground connections such that no ground current flows through the
case or heatsink of a connected electrical device.
2. Do not connect the Shield terminal to a power ground or any other potential
noise-producing ground connection (such as a drive’s “E” terminal).
3. Do not make connections to unstable grounds (paint-coated screw heads,
grounds that are subjected to inductive noise, etc.)

19
ICC
7. LED Indicators
The gateway contains several different LED indicators, each of which conveys
important information about the status of the unit and connected networks. These
LEDs and their functions are summarized here.
7.1 Gateway Status
The gateway has one dichromatic LED to indicate the status of the device. On
startup, the LED blinks a startup sequence: Green, Red, Green, Red. Always
confirm this sequence upon powering the gateway to ensure the device is
functioning properly.
Solid green.............The status LED lights solid green when the gateway has
power and is functioning normally.
Flashing green........The status LED flashes green when the gateway is
connected to a PC via a USB cable.
Flashing red............If a fatal error occurs, the status LED will flash a red error
code. The number of sequential blinks (followed by 2
seconds of OFF time) indicates the error code.
7.2 RS-485 Network Status LEDs
The gateway has one red and one green LED for each of the two RS-485 ports to
indicate the status of that RS-485 network.
Green (TX) LED .....Lights when the gateway is transmitting data on that RS-485
port.
Red (RX) LED ........Lights when the gateway is receiving data on that RS-485
port. Note that this does not indicate the validity of the data
with respect to a particular protocol: only that data exists and
is being detected. Also note that if a 2-wire RS-485 network
is in use, that the corresponding RX LED will light in
conjunction with the TX LED (as transmitting devices on 2-
wire RS-485 networks also receive their own transmissions).
Other manuals for XLTR-1000
3
Table of contents
Other ICC Gateway manuals