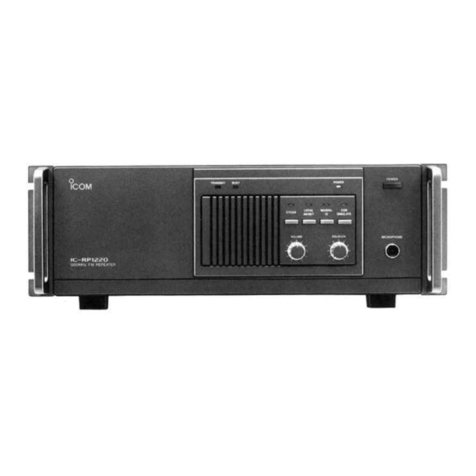
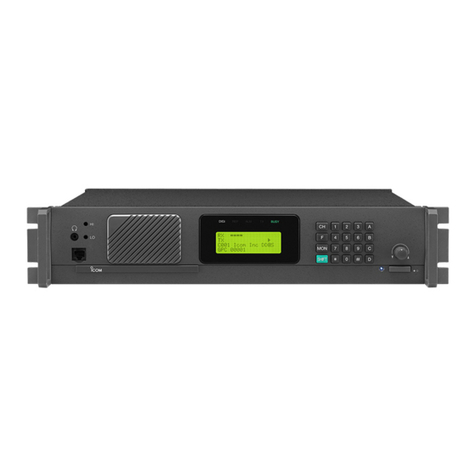
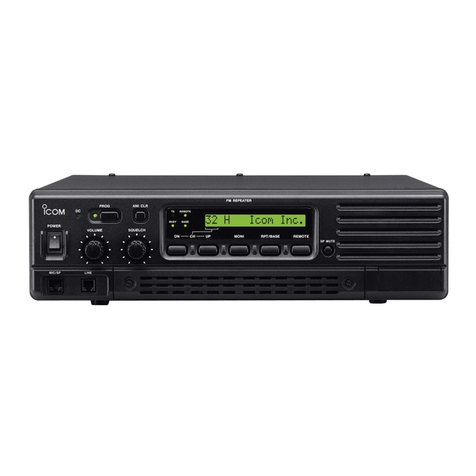
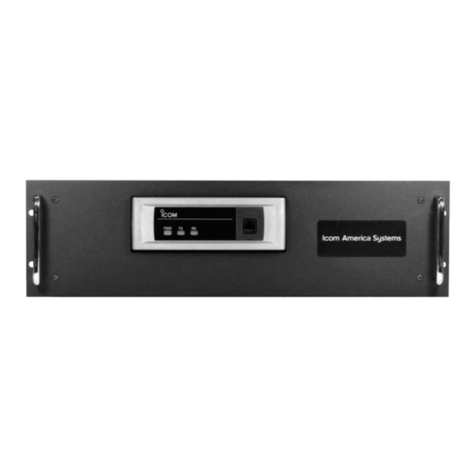
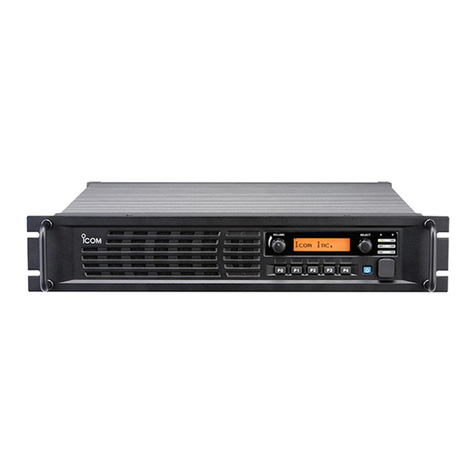
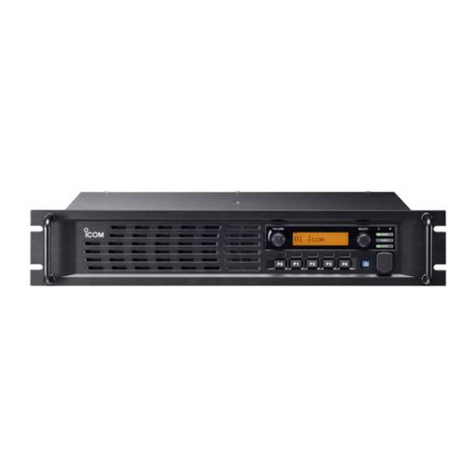
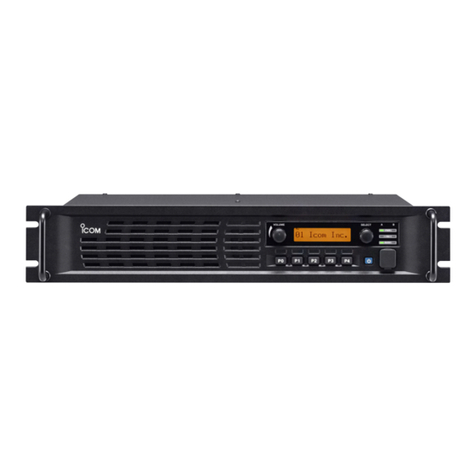
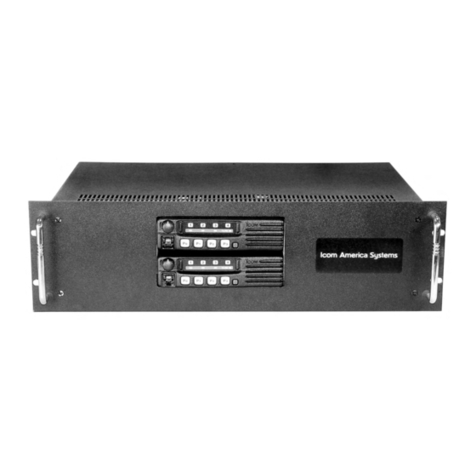
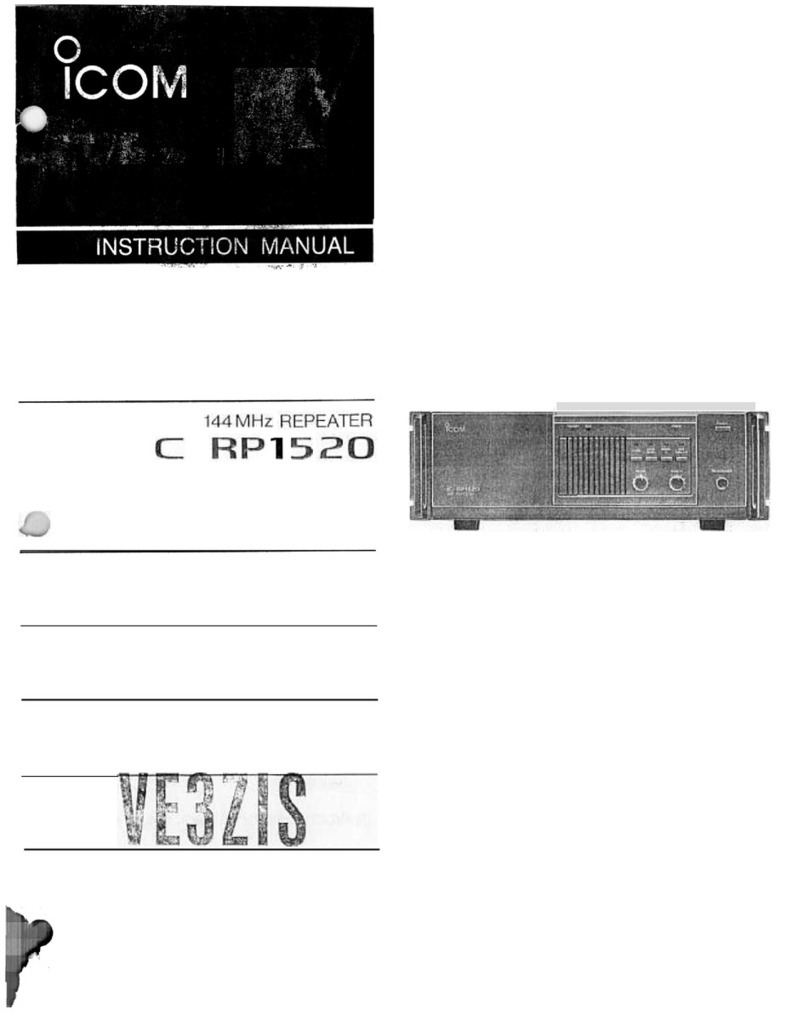
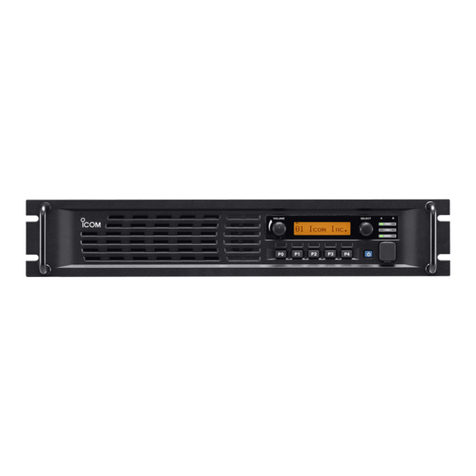
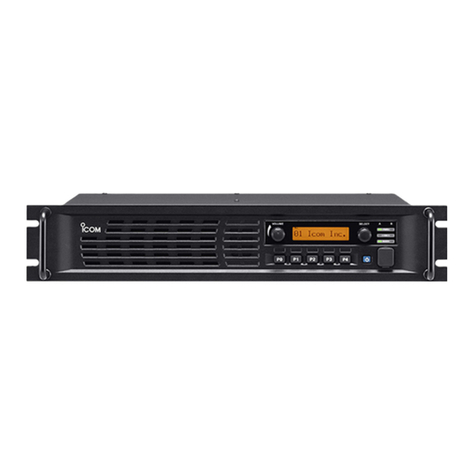
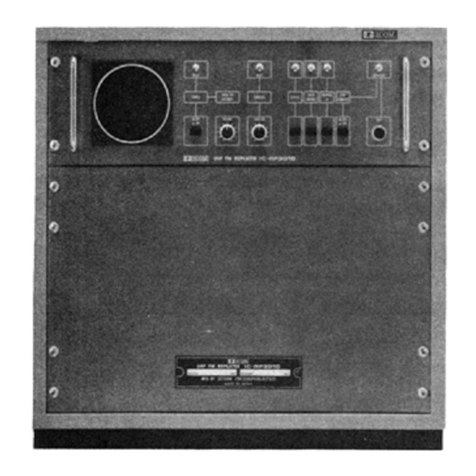
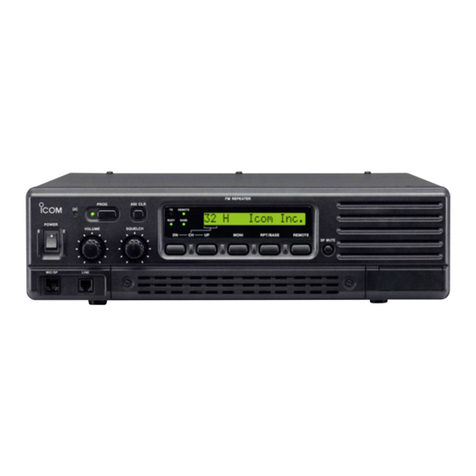
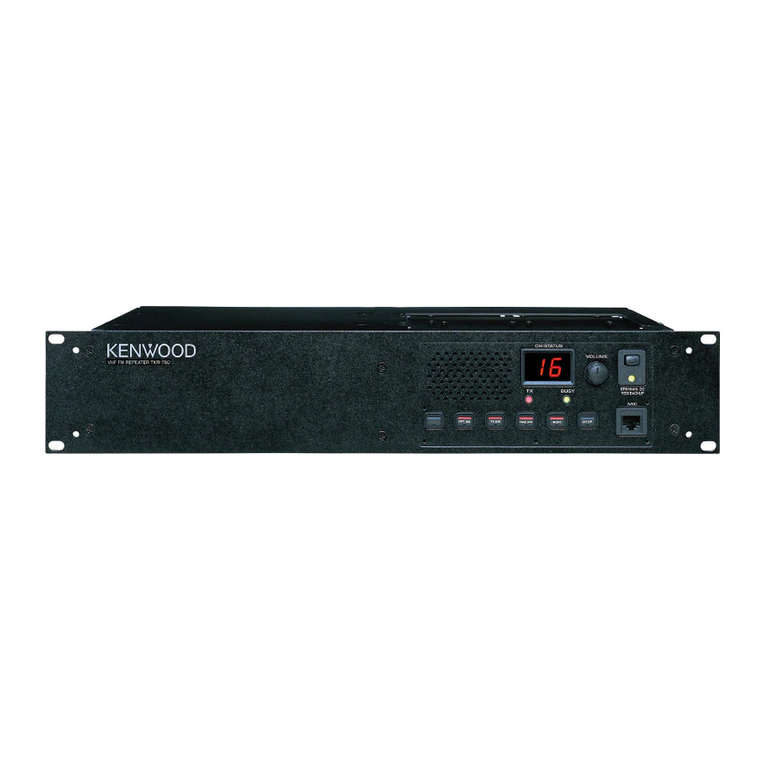
Icom iC-FR5000 User manual

S-14425XZ-C1
Jun. 2008
VHF FM REPEATER

This service manual describes the latest service information
for the IC-FR5000 IC-FR5100 VHF FM REPEATER at the
time of publication.
NEVER connect the repeater to an AC outlet or to a DC
power supply that uses more than specifed. This will ruin
the repeater.
DO NOT expose the repeater to rain, snow or any liquids.
DO NOT reverse the polarities of the power supply when
connecting the repeater.
DO NOT apply an RF signal of more than 20 dBm (100 mW)
to the antenna connector. This could damage the repeater’s
front-end.
To upgrade quality, any electrical or mechanical parts and
internal circuits are subject to change without notice or
obligation.
MODEL VERSION CH. SPACING
(kHz) TX
POWER FREQUENCY
RANGE
IC-FR5000 USA-01 7.5/15/30 50 W 136–174 MHzEXP-01 12.5/25.0
IC-FR5100 EUR-01 12.5/20.0/25.0 25 W
Be sure to include the following four points when ordering
replacement parts:
1. 10-digit Icom parts numbers
2. Component name
3. Equipment model name and unit name
4. Quantity required
<ORDER EXAMPLE>
1110003491 S.IC TA31136FNG IC-FR5000 MAIN UNIT 5 pieces
8820001210 Screw 2438 screw IC-FR5000 Top cover 10 pieces
Addresses are provided on the inside back cover for your
convenience.
Icom, Icom Inc. and logo are registered trademarks of Icom Incorporated (Japan) in the United States, the United
Kingdom, Germany, France, Spain, Russia and/or other countries.
ORDERING PARTS
1. Make sure the problem is internal before disassembling
the repeater.
2. DO NOT open the repeater until the repeater is
disconnected from its power source.
3. DO NOT force any of the variable components. Turn
them slowly and smoothly.
4. DO NOT short any circuits or electronic parts. An
insulated tuning tool MUST be used for all adjustments.
5. DO NOT keep power ON for a long time when the
repeater is defective.
6. DO NOT transmit power into a Standard Signal
Generator or a Sweep Generator.
7. ALWAYS connect a 50 dB to 60 dB attenuator between
the repeater and a Deviation Meter or Spectrum
Analyzer when using such test equipment.
8. READ the instructions of test equipment throughly
before connecting a test equipment to the repeater.
REPAIR NOTES
INTRODUCTION CAUTION
UNIT ABBREVIATIONS:
F=FRONT UNIT
M=MAIN UNIT
CN=CONNECT UNIT
CONTENTS
SECTION 1 SPECIFICATIONS
SECTION 2 INSIDE VIEWS
SECTION 3 DISASSEMBLY INSTRUCTION
SECTION 4 OPTIONAL UNIT INSTALLATION
SECTION 5 CIRCUIT DESCRIPITON
5-1 RECEIVER CIRCUITS. . . . . . . . . . . . . . . . . . . . . . . . . . . . . . . . . . . . . . . . . . . . . . . . . . . . . . . . 5-1
5-2 TRANSMITTER CIRCUITS . . . . . . . . . . . . . . . . . . . . . . . . . . . . . . . . . . . . . . . . . . . . . . . . . . . . 5-1
5-3 OTHER CIRCUITS . . . . . . . . . . . . . . . . . . . . . . . . . . . . . . . . . . . . . . . . . . . . . . . . . . . . . . . . . . 5-2
5-4 CPU (M: IC20) PORT ALLOCATION. . . . . . . . . . . . . . . . . . . . . . . . . . . . . . . . . . . . . . . . . . . . . 5-3
SECTION 6 ADJUSTMENT PROCEDURES
6-1 PREPARATION . . . . . . . . . . . . . . . . . . . . . . . . . . . . . . . . . . . . . . . . . . . . . . . . . . . . . . . . . . . . . 6-1
6-2 FREQUENCY ADJUSTMENT. . . . . . . . . . . . . . . . . . . . . . . . . . . . . . . . . . . . . . . . . . . . . . . . . . 6-6
6-3 TRANSMIT ADJUSTMENT . . . . . . . . . . . . . . . . . . . . . . . . . . . . . . . . . . . . . . . . . . . . . . . . . . . . 6-7
6-4 RECEIVE ADJUSTMENT . . . . . . . . . . . . . . . . . . . . . . . . . . . . . . . . . . . . . . . . . . . . . . . . . . . . . 6-8
SECTION 7 PARTS LIST
SECTION 8 MECHANICAL PARTS
SECTION 9 BOARD LAYOUTS
SECTION 10 BLOCK DIAGRAM
SECTION 11 VOLTAGE DIAGRAM
FRONT UNIT . . . . . . . . . . . . . . . . . . . . . . . . . . . . . . . . . . . . . . . . . . . . . . . . . . . . . . . . . . . . . . 11-1
MAIN UNIT (1/3) . . . . . . . . . . . . . . . . . . . . . . . . . . . . . . . . . . . . . . . . . . . . . . . . . . . . . . . . . . . . 11-2
MAIN UNIT (2/3) . . . . . . . . . . . . . . . . . . . . . . . . . . . . . . . . . . . . . . . . . . . . . . . . . . . . . . . . . . . . 11-3
MAIN UNIT (3/3) . . . . . . . . . . . . . . . . . . . . . . . . . . . . . . . . . . . . . . . . . . . . . . . . . . . . . . . . . . . . 11-4
CONNECT UNIT . . . . . . . . . . . . . . . . . . . . . . . . . . . . . . . . . . . . . . . . . . . . . . . . . . . . . . . . . . . . 11-5

1 - 1
SECTION 1 SPECIFICATIONS
MGENERAL [FR5000] [FR5100]
• Frequency coverage 136–174 MHz
• Conventional channels max. 32 ch
• Type of emission Wide
16K0F3E
Middle – 14K0F3E
Narrow
11K0F3E/11K0F7E/11K0F7D/11K0F7W
/
8K50F3E ([EXP-01] only) 8K50F3E
Digital 4K00F1E/4K00F1D/4K00F3E
• Antenna impedance 50 Ω(Nominal)
• Operating temperature range –22˚F to +140˚F (–30˚C to +60˚C) –25˚C to +55˚C
• Power supply requirement
(nominal) 13.6 V DC (Negative ground) 13.2 V DC (Negative ground)
• Current drain (Approx.) Receiving 500 mA (stand-by), 1900 mA (max.audio)
Transmitting 15 A (at 50 W) 8.0 A (at 25 W)
• Dimensions
(Projections not included) 19 (W)×3 15⁄32 (H)×10 1⁄4(D) in. 483 (W)×88 (H)×260 (D) mm
• Weight (Approx.) 12 Ib 5 17/32 oz. 5.6 kg
MTRANSMITTER [FR5000] [FR5100]
• Output power 50 W 25 W
• Modulation Variable reactance frequency modulation
• Max. frequency deviation Wide ±5.0 kHz
Middle – ±4.0 kHz
Narrow ±2.5 kHz
• Frequency stability ±0.5 ppm ±0.2 kHz
• Spurious emissions 80 dB typ. 0.25 μW (≤1 GHz), 1.00 μW (>1 GHz)
• Adjacent channel power Wide 76 dB typ. 76 dB typ.
Middle – 76 dB typ.
Narrow 69 dB typ. 70 dB typ.
Digital 65 dB typ. 66 dB typ.
• Audio harmonic distortion 1% typ. (at AF 1 kHz 40% deviation)
• Intermodulation attenuation – 40 dB min.
• Audio frequency response +2 dB to –8 dB of 6 dB/oct. Wide/Middle from 300 Hz to 3000 Hz
Narrow from 300 Hz to 2550 Hz
• FM Hum and noise
(300 Hz–3000 Hz, 750 µs) Wide 52 dB typ. –
Narrow 49 dB typ.
• Audio input impedance (Microphone) 600 Ω

1 - 2
MRECEIVER [FR5000] [FR5100]
• Receive system Double-conversion superheterodyne system
• Intermediate frequencies 1st IF: 46.35 MHz, 2nd IF: 450 kHz
• Sensitivity Wide/Narrow 0.3 μV typ. at 12 dB SINAD –10 dBμV max. at 12 dB SINAD
Wide/Middle/Narrow – –10 dBμV max. at 12 dB SINAD
Digital 0.25 μV typ. at 5% BER 0 dBμV emf max. at 1% BER (PN9)
• Squelch sensitivity (at threshold) 0.25 μV typ.
• Adjacent channel selectivity Wide 80 dB typ. (TIA-603-B)
85 dB typ. (TIA-603) 86 dB typ.
Middle – 83 dB typ.
Narrow 56 dB typ. (TIA-603-B)
77 dB typ. (TIA-603) 77 dB typ.
Digital 66 dB typ. (EN 301 166, 400 Hz @1%)
63 dB typ. (EN 301 166, PN15 @5%) 67 dB typ.
• Spurious response Analog 90 dB 80 dB typ.
Digital 90 dBµV emf 90 dBµ Vemf typ.
• Intermodulation Wide 78 dB typ. 72 dB typ.
Middle – 72 dB typ.
Narrow 78 dB typ. 71 dB typ.
Digital 75 dBµV emf typ. 76 dBµV emf typ.
• Hum and noise Wide 52 dB typ. –
Middle – –
Narrow 50 dB typ. –
Digital 66 dB typ. –
• Audio output power
(at 5% distortion with a 4 Ω load)
4.0 W typ. 3.5 W min.
• Audio output impedance 4 Ω
Specifications are measured in accordance with TIA–603–B (for Wide and Narrow) or EN 300 166 (Digital) for FR5000.
Specifications are measured in accordance with EN 300 086 (for Wide, Middle and Narrow) or EN 301 166 (Digital) for FR5100.
All stated specifications are subject to change without notice or obligation.

2 - 1
SECTION 2 INSIDE VIEWS
RXVCOs
• MAIN UNIT
(TOPVIEW)
• MAIN UNIT
(BOTTOM VIEW)
Power SW (VCC line)
(Q57)
8V regulator (8V line)
(IC27)
AF AMP
(IC34)
FUNCTION
(Ref.No.)
2nd IF filter (Wide)
(FI1)
2nd IF filter (Narrow)
(FI2)
CPU
(IC20)
5V regulator (DSP5V line)
(IC39)
CPU clock
(X5)
PLL IC (TX lopp)
(IC3)
TXVCOs
Optional digital unit slot
TX power AMP
(IC22)
1st mixer (DBM)
(D62, L27, 32)
5V regulator (CPU5V)
(IC30)
5V regulator (+5V line)
(Q41)
EEPROM
(IC21)
DSP
(IC12)
AF SW
(IC35)
PLL IC (RX loop)
(IC4)
Ref. OSC
(X1)
Level converter
(IC26)
8V regulator (T8V line)
(Q45)
D/A converter
(IC20)
Discriminator
(X3)
IF IC
(IC5)
FUNCTION
(IC40)
Liner codec
(IC8)

2 - 2
• FRONT UNIT
FRONT CPU
(IC503)
CLOCK OSC
(X501)
LCD DRIVER
(IC500)
ANALOG SW
(IC506)
AF POWER AMP.
(IC509)
SPEAKER SW
(Q508)

3 - 1
SECTION 3 DISASSEMBLY INSTRUCTION
1. Removing the front panel
qUnscrew 11 screws from the top cover.
3. Removing the MAIN UNIT
qUnscrew 9 screws, and remove the cover.
(If you are going to install an optional unit, see page 4-1 for the installation.)
2. Removing the MAIN UNIT assembly
qUscrew 5 screws which settles the MAIN UNIT assembly.
P
0
P
1
P
2
P
3
P
4
P
0
P
1
P
2
P
3
P
4
P
0
P
1
P
2
P
3
P
4
PWR TX RX
PWR TX RX
PWR TX RX
wUnscrew 7 screws from the front panel.
eDisconnect the cable from the MAIN UNIT assembly, and remove the front panel.
wTurn the MAIN UNIT assembly upside down.
(To be continued to next page)

3 - 2
MAIN
MAIN
J9
J9
J9
J4
J4
Unscrew
ANT case
Unsolder
ANT case
Flat cable
Disconnect
Disconnect
Black
Black
Black
Black
Red
Red
Red
Red
W4
W4
Unsolder 2 points
Unsolder 4 points
Unscrew
Clip
15 screws
wUnsolder 2 points at the ANT cases.
eUnscrew 4 screws from the ANT cases,
and remove them.
rDisconnect the flat cabe from J4 and the
speaker cable from J9.
tUnsolder 2 points at the bottom of ANT connectors.
yUnsolder 4 points at the PA module leads.
uUnscrew 2 screws from W4.
iRemove the clip from the side of chassis.
oUnscrew 15 screws from the MAIN UNIT, then take off
the MAIN UNIT PCB from the chassis.

4 - 1
SECTION 4 OPTIONAL UNIT INSTALLATION
PWR TX RX
qDisassembly the repeater until the MAIN UNIT is exposed. (See the page 3-1)
wModify the patterns on the MAIN UNIT as below.
eRemove the protective paper of optional unit, and install it to the J1 as below.
Aand F; Cut the pattern B; Short the pattern
rReplace the cover, screws, etc. to recover the whole assembly.
NOTE:When uninstalling the scrambler unit
Be sure to recover the disconnected or connected points, otherwise no TX modulation or AF output is available.
Install UT-109R or UT-110R as follows.
<MAIN UNIT (bottom side)>

5 - 1
SECTION 5 CIRCUIT DESCRIPTION
5-1 RECEIVER CIRCUITS
RF BPF CIRCUITS
RX signals from the RX antenna connector (J11) are passed
through the 1st stage of BPF (D28, 29, 31, 32, L44, 47) then
amplified by the RF AMP (Q36). The amplified RX signals
are passed through the 2nd stage of BPF (D28, 29, 31,
32, L44, 47) to remove unwanted signals for good image
response then applied to the 1st mixer (L27, 32, D62).
Being mixed with 1st LO signals from the RX VCO, the RX
signals are converted into the 46.35 MHz 1st IF signal.
The 1st and 2nd stage of the BPFs are tuned to the pass
band frequency by tracking voltage “T1” and “T2” from
the DAC (IC17). The gain of low noise RF AMP (Q36) is
controlled by the AGC circuit (Q39, D27) according to the
RX signal strength.
IF FILTER/IF AMP CIRCUITS
The 1st IF signal from the 1st mixer (L27, 32, D62) is
amplified by the buffer AMP (Q63, 64, 71) and 1st stage of
IF AMP (Q19) then filtered by crystal filter (FI3 or FI4), and
then applied to the IF IC (IC5).
The crystal filters (FI3 or FI4) are switched by the “NWC1”
signal from the CPU (IC20) according to the RX mode;Wide
(Middle), Narrow or Digital.
<ANALOG RX>
Being mixed with the 2nd LO, the 1st IF signal is converted
into the 450 kHz 2nd IF signal. The 2nd IF signal is passed
through the external ceramic filter (FI1 or FI2), then FM-
demodulated by the internal quadrature detector with
discriminator (X3). The demodulated AF signals are
amplified by the AF AMP (IC36), and applied to the LINER
CODEC (IC8). The AF signals are converted into the
digital audio signal then processed by the DSP (IC12) then
recovered to the analog audio signals.
The ceramic filter (FI1 or FI2) is switched by the “NWC2”
signal from the CPU (IC20) according to the RX mode;Wide
(Middle), Narrow or Digital.
<DIGITAL RX>
The 450 kHz 2nd IF signal is amplified by IC7 then applied
to the DSP (IC12) via ADC (IC9), and digital-demodulated.
The processed digital signal is converted into the analog
audio signal by the LINEAR CODEC (IC8).
AF AMPLIFIER CIRCUITS
The AF signals from the LINEAR CODEC are amplified by
the AF AMP (IC36) and level-adjusted by DAC (IC2), then
applied to IC28 via IC29 to be power-amplified.
SIGNALING (DECODE)
The Continious Tone (CTCSS/DTCS), Single Tone (5-Tone/
DTMF/CW_ID) signals in the demodulated AF signals are
decoded in the DSP (IC8).
5-2TRANSMITTER CIRCUITS
MODULATION CIRCUITS
The demodulated signals are applied to the MIC AMP (IC25).
The amplified Demodulated signals are passed through the
SW IC (IC35) which selects the source of Demodulated signals
from J5 (from MIC) and from D-SUB connector (DEXM).
The Demodulated signals from the SW IC are amplified by
an AMP (IC1) then applied to the LINEAR CODEC IC (IC8)
where the Demodulated signals are converted in to the
digital audio signals.
The converted digital audio signals are processed (pre-
emphasis, limit, etc.) by the DSP (IC12), then recovered to
the analog audio signals by LINER CODEC IC (IC8).The AF
signals are amplified by IC1 and level-adjusted by Electronic
VR (IC2), then applied to the TX VCO andTCXO (X1) as the
modulation signals.
SIGNALING (ENCODE)
The Continious Tone (CTCSS/DTCS), Single Tone (5-Tone/
DTMF/CW_ID) signals are encoded, and mixed with
Demodulated signals in the DSP (IC12).
YGR/PA CIRCUITS
The output signals from TX VCOs are amplified to the level
required for the PA module by pre-AMPs (Q37, 38), then
amplified by the PA module (IC22) to obtain TX output power.The
power-amplified TX signal is passed through the ANT SW (D44)
and LPF (for harmonics removal) then applied to theTX antenna.
APC CIRCUIT
D45, D48 and D49 detect the TX power, and the detected
voltage is applied to the IC23 in APC circuit. Comparing the
detected voltage which is in proportion to the TX power and
power setting voltage as the reference voltage, IC23 adjusts
the bias voltage of PA module (pin 2: VGG terminal) and pre-
AMP (Q38) to control the TX power.

5 - 2
5-3 FREQUENCY SYNTHESIZER CIRCUITS
RX PLL CIRCUIT
The RX PLL IC (IC4) outputs resulting signal; phase-comparison
of reference signal (15.3 MHz) from the TCXO (X2) and fedback
OSC signal from the RX VCO. The phase-difference signal is
passed through the active loop filter (Q11, 14) and applied to the
RX VCO as the lock voltage.The voltage of RX LV (lock voltage)
is adjusted to appropriate one by “RX LVA” signal.
A portion of reference frequency signal (15.3 MHz) from the
TCXO (X2) is passed through the tripler (Q2) to extract 3rd
harmonic, then applied to the IF IC (IC5).
RXVCO
There are 2 VCOs;VCO for lower band (Q21, D8, 16, L17) and
higher band (Q20, D7, 15, L20), and these VCOs (=OSC freq.)
are switched by the VCO SW (Q26, 30).The OSC frequencies
of these VCOs are adjusted (=Locked) to desired one by the
RX LV signal (Lock Voltage).The output signals of these VCOs
are applied to the 1st mixer (L27, 32, D62) via buffer (Q25).
A portion of output signal from the buffer (Q25) is applied to
the doubler (Q32) to extract 2nd harmonic, then applied to
the PLL IC (IC4) via the LPF.
TX PLL CIRCUIT
TX PLL IC (IC3) outputs resulting signal; phase-comparison
of reference signal (15.3 MHz) from the TCXO (X1) and
fedback OSC signal from the TX VCO.The phase-difference
signal from the PLL IC (IC3) is passed through the active
loop filter (Q10, 13) and applied to the TX VCO as the lock
voltage. The rock voltage “TX LV” is adjusted to appropriate
one by the LVA signal.The OSC signal of TCXO (X1) is FM-
modulated by applied modulation signals.
TXVCO CIRCUITS
There are 2 VCOs; VCO for lower band (Q23, D10, 14, L62)
and higher band (Q22, D9, 13, L14), and these VCOs (=OSC
frequencies) are switched by the VCO SW (Q27, 28). The
OSC frequencies of these VCO are adjusted (=Locked) to
desired one by theTX LV signal (Lock Voltage).
The modulation signals applied to the Variable Capacitor
(VD; D18 or D30) vary the capacitor reactance of it for FM
modulation.The output signals of these VCOs are applied to
theYGR/PA circuits via buffers (Q24, 35).
A portion of these output signal is passed through the
doubler (Q33) to extract 2nd harmonic, then applied to the
PLL IC (IC3) via the LPF.
5-4 OTHER CIRCUITS
POWER SUPPLY
The power supply is switched by Q57 (ON/OFF). 5V (REF5)
from the regulator (IC30) is passed through L58 to supply to
CPU. The 5V also supplies to other sections of the repeater
via Q41 as “+5V.”
8V from the regulator (IC27) are supplies to various circuits,
and also supplies to TX circuits as “T8V” and RX circuits as
“8V.”
5V from the regulator (IC39) supplies DSP as “DSP5” and
supplies logic circuits; CPU, DSP, etc. via regulators (IC13,
14, 15).
The regulator “F8V” (IC41) provides the supply for FRONT
UNIT.
COMPANDER
The compander in the DSP (IC12) compresses the
amplitude of Demodulated signals in TX, and expands in RX
to provide high quality, high S/N ratio recovered sounds.
LEDs
DS1 (BUSY), DS2(PWR) and DS3 (TX) indicate the
repeater’s status:Power ON,T/RX and Cloning.

5 - 3
Pin
No. LINE NAME DESCRIPTION IN/
OUT CONDITION
1–11 D5–D15 DSP data bus line. I/O –
15–28 A1–A14 DSP data bus line. I/O –
29 HRW DSP data line. I/O –
32 FANS Cooling fan (CH:MF1) rotation detect. I "H"=While the cooling fan is rotating.
33 TLED TX indicator LED control signal. O "H"=TX
34 LEDR RX indicator LED control signal. O "H"=Squelch open.
35 PLSCK PLL (M: IC4) serial clock. O –
36 PLSSO PLL (M:IC4) serial data. O –
41 PWON Power line "VCC" control signal. O "H"=Power ON.
42 AFON2 AF power AMP. (M: IC28) control signal. O "H"=AF power AMP ON.
43 AFON AF output select signal. O "H=AF signals are output from the
[ACCESSORY CONNECTOR].
44 ESCL Serial clock to the EEPROM (M:IC21). O –
45 ESDA Serial data to the EEPROM (M:IC21). O –
46 TXC TX power line "T8V" control signal. O "H"=TX
47 RXC RX power line "R8V" control signal. O "H"=RX
48 RPLST RX PLL (M: IC4) strobe. O –
49 TPLST TX PLL (M: IC3) strobe. O –
50 RUNLK RX PLL (M: IC4) unlock signal. I "L"=Unlocked
51 TUNLK TX PLL (M: IC3) unlock signal. I "L"=Unlocked
52 XCTS Serial data from the RS-232 line driver (M: IC26). I –
53 XRTS Serial data to the RS-232 line driver (M: IC26). O –
55 EXDA External D/A port. O –
56 BEEP Beep sounds (square waves). O –
57–59 OPV3–OPV1 Optional unit detect. I –
60 MMUT MIC mute signal to the installed optional unit. O "H"=MIC mute
61 HANG Microphone hang-up detect. I "L"=Hang-up
62 PTT [PTT] key input.(pull up) I –
63 RMUT RX mute signal to the installed optional unit. O "H"=RX mute
64 EXAD External A/D port. I –
65 TEMP Temperature detect. I –
68 RLVIN RX PLL lock voltage. I –
69 BATV Voltage monitor (divided voltage of "VCC"). I –
70 TLVIN TX PLL lock voltage. I –
71 RSSI RSSI signal from the IF IC (M: 5). I –
74 XTXD External data to the RS-232 driver (M:IC26). O –
75 XRXD External data from the RS-232 driver (M:IC26). I –
76 TMUT TX mute signal. O "H"=TX mute
77 HINT DSP IC control signal. O –
78 INT1 DSP IC control signal. O –
79 HRDY DSP IC control signal. O –
81 HDS1 DSP IC control signal. O –
82 HDS2 DSP IC control signal. O –
100 RES CPU reset signal from the reset IC (F: IC501). O –
101–108 EXIO1–EXIO8 External data bus line. I/O +5 V pull-up
112 POSW [PWR] key input.(pull-up) I –
113 NOIS Noise detect. I "H"=RX signal is absent (squelch close).
114 CSFT Clock frequency shift signal. O –
119 SSO Serial data to the seri-para converter (M: IC31). O –
120 SCK Clock signal to the seri-para converter (M: IC31). O –
121 EXIO9 External data bus line. I/O +5 V pull-up
122 DSDA Serial data to the DAC (M: IC17). O –
5-5 CPU (M: IC20) PORT ALLOCATION

5 - 4
Pin
No. LINE NAME DESCRIPTION IN/
OUT CONDITION
123 DAST Strobe to the DAC (M: IC2). O –
125 FMDA Data from the FRONT CPU (F: IC502). I –
126 MFDA Data to the FRONT CPU (F: IC502). O –
127 OPT2 Port for optional unit. O –
128 OPT1 Port for optional unit. I –
129 OPT3 Port for optional unit. I –
131 CSO Port for optional unit. O –
132 CSI Port for optional unit. I –
133 EXOE Output enable signal to the seri-para converter (M: IC31). O –
134 EXST Strobe to the seri-para converter (M: IC31). O –
135 DRES Reset signal to the DSP IC (M: IC12). O –
136 HCS DSP data line. I/O –
138 GPIO2 DSP data line. I/O –
139 GPIO1 DSP data line. I/O –
140–144 D0–D4 DSP data bus line. I/O –
5-5 CPU (M: IC20) PORT ALLOCATION (continued)

6 - 1
SECTION 6 ADJUSTMENT PROCEDURE
6-1 PREPARATION
¤ REQUIRED EQUIPMENTS
EQUIPMENT SPECIFICATION EQUIPMENT SPECIFICATION
Adjustment
Software "CS-FR5000" (Revision 1.0 or later) JIG cable Modified OPC-1122U (USB type)
(see the illust below)
Power Supply
Output voltage :
13.6 V DC
[FR5000]
13.2 V DC
[FR5100]
Current capacity : More than 20 A
[FR5000]
More than 10 A
[FR5100]
Attenuator
Power attenuation : 40 dB
Capacity : More than 60 W
[FR5000]
More than 30 W
[FR5100]
RF Power Meter
(terminated type)
Measuring range :
1–60 W
[FR5000]
1–30 W
[FR5100]
Frequency range : 100–300 MHz
Impedance : 50
Ω
SWR : Less than 1.2 : 1
Standard Signal
Generator (SSG) Frequency range : 0.1–300 MHz
Output level : 0.1 mV to 32 mV
(–127 to –17 dBm)
Audio Generator Frequency range : 300–3000 Hz
Output level : 1–500 mV
Frequency Counter Frequency range :0.1–300 MHz
Frequency accuracy
: ±1 ppm or better
Input level : Less than 1 mW
AC Millivoltmeter Measuring range : 10 mV to 10 V
Oscilloscope Frequency range : DC–20 MHz
Measuring range : 0.01–20 V
Modulation
Analyzer Frequency range : 30–300 MHz
Measuring range :0 to ±10 kHz External Speaker Input impedance : 4 Ω
Capacity : More than 5 W
¤JIG CABLE
Add a jumper wire here
OPC-1122U
(USB type Cloning cable)
+
GND
MIC
PTT
GND
PTT
4.7 µF
+−
AC MILLIVOLT METER
(10 mV to 10 V)
AUDIO GENERATOR
(300–3000 Hz/1–100 mV)
+−
GND
SP
+−
EXT. SPEAKER
(5 W/4 Ω)

6 - 2
¤CONNECTION
(Loose Coupling)
FREQUENCY COUNTER
(0.1–300 MHz)
MODULATION ANALYZER
(0.1–300 MHz)
STANDARD SIGNAL GENERATOR
(0.1–300 MHz)
OSCILLOSCOPE
(DC to 10 kHz)
ATTENUATOR
(30 dB/60 W)
RF POWER METER
Black
Red
20 A
fuses
DC power supply
DC power cable
<Rear view>
(Detect output)

¤ADJUSTMENT CHANNEL LISTS
Clone the adjust channels into the repeater before starting adjustment. Each channel must be assigned [Frequency], [RF
PWR], [CH Type], [TX C.Tone] and [W/N] as below.
• Channel list
6 - 3

6 - 4
¤ WHOLE PROCEDURE OFTHE ADJUSTMENT
qConnect the repeater and PC with the JIG cable (see the page 6-2).
wTurn the repeater power ON.
eBoot up 'CS-FR5000.'
rSet the [Digital Function] to "Enable."
ySet or modify adjustment values as specified in the guidances on the pages 6-6 to 6-9.
tClick or [Read <– TR] in the [Adjust] menu, then the "Adjust Utility" window (see the page 6-5) appears.
*For [FR5100]:
Set the [Wide Band Width] to "Middle" when adjust "ANALOG DEVIATION" in Middle mode.

Mode setting
TX output power
Analog deviation
Digital deviation
Receive sensitivity (Band center)
Receive sensitivity (Band high)
CTCSS/DTCS deviation
Squelch
TX frequency
Lock volatge
(Preset)
Lock volatge
(Adjustment)
S-meter
Modulation balance
Modulation balance (High)
¤ADJUST UTILITY WINDOW
6 - 5

6-2 FREQUENCY ADJUSTMENT
1) Select an adjustment item using cursor or [↑] / [↓] keys of the PC’s keyboard.
2) Set or modify the adjustment value as specified using [←] / [→] keys of the PC’s keyboard, then push the [ENTER] key.
ADJUSTMENT ADJUSTMENT CONDITION OPERATION ADJUSTMENT
ITEM VALUE
PLL LOCK
VOLTAGE
-Preparation-
1
–
1) Connect an RF power meter to the
TX antenna.
2) Set the preset adjustment value on
the adjustment utility window.
[LV (RX L)] 161 [3.15V]
[LV (RX H)] 153 [3.00V]
[LV (TX L)] 51 [1.0V]
[LV (TX H)] 36 [0.7V]
-Adjust-
RX
(Band center)
2 • CH. : 1-1
• Receiving • Select the item [RX LVA L], then
push the [ENTER] key. [RX LVA L]
(Automatic
adjustment)
RX
(Band high) 3 • CH. : 1-2
• Receiving •
Select the item [RX LVA H], then
push the [ENTER] key.
[RX LVA H]
TX
(Band low) 4 • CH. : 1-3
• Transmitting • Select the item [TX LVA L], then push
the [ENTER] key. [TX LVA L]
TX
(Band center) 5 • CH. : 1-4
• Transmitting • Select the item [TX LVA H], then
push the [ENTER] key. [TX LVA H]
LOCK
VOLTAGE
VERIFY
RX
(Band low)
1 • CH. : 1-5
• Receiving • Verify the lock voltage at each
channels on the [RX LIVIN] item on
the "I/O Check window" as below. [RX LIVIN]
(I/O Check
window)
0.5–1.5 V
(Verify)
RX
(Band center) 2 • CH. : 1-6
• Receiving
TX
(Band center) 3 • CH. : 1-7
• Transmitting • Verify the lock voltage at each
channels on the [TX LIVIN] item on
the "I/O Check window" as below. [TX LIVIN]
(I/O Check
window)
3.0–4.5 V
(Verify)
TX
(Band high) 4 • CH. : 1-8
• Transmitting
2.0–3.5 V
(Verify)
TX
FREQUENCY 1–1) Set the item [TX Mode] to "1."
2) Connect an RF power meter to the
TX antenna. [TX Mode]
"1"
2 • CH. : 1-9
• Transmitting 1) Adjust the frequency using [←] / [→]
keys of the PC’s keyboard.
2) Push the [ENTER] key to store the
adjust value.
[TX REF]
173.9000 MHz
6 - 6
• I/O CHECK WINDOW
*The above voltages are just an example.
Lock voltage verify
Other manuals for iC-FR5000
3
This manual suits for next models
2
Table of contents
Other Icom Repeater manuals

Icom
Icom IC-FR6000-L User manual

Icom
Icom IC-FR6100 User manual

Icom
Icom IC-FR6100 User manual

Icom
Icom IC-UR8050 User manual

Icom
Icom IC-FR3100 User manual

Icom
Icom CY-5300 User manual

Icom
Icom ID-RP1 User manual

Icom
Icom IC-RP1520 User manual

Icom
Icom UHF FM Repeater iFR6100 User manual

Icom
Icom IC-RP4520 User manual

Icom
Icom id- rp2 User manual

Icom
Icom IC-FR5200H User manual

Icom
Icom UR-FR5000 User manual

Icom
Icom IC-FR5100 Series User manual

Icom
Icom ID-RP2C User manual

Icom
Icom ID-RP2010V User manual

Icom
Icom CY 6000 User manual

Icom
Icom ID-RP2000V User manual

Icom
Icom IC-RP2210 Service manual

Icom
Icom ID-RP2010V User manual