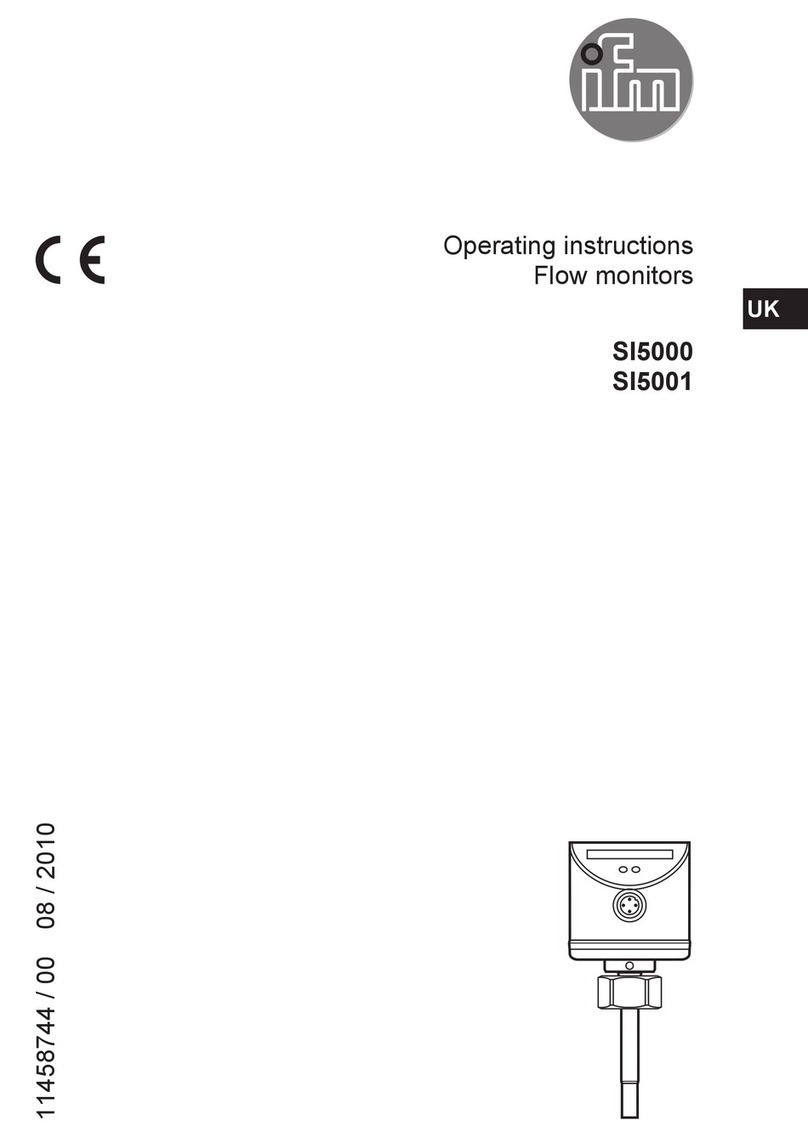
IFM efector300 SD0523 User manual

Operating instructions
Compressed air meter
SD0523
80000453 / 01 0 / 2015
UK

2
Contents
1 Preliminary note���������������������������������������������������������������������������������������������������4
1�1 Symbols used ������������������������������������������������������������������������������������������������4
2 Safety instructions �����������������������������������������������������������������������������������������������5
3 Functions and features ����������������������������������������������������������������������������������������5
4 Function���������������������������������������������������������������������������������������������������������������6
4�1 Process measured signals ����������������������������������������������������������������������������6
4�2 Volumetric flow monitoring�����������������������������������������������������������������������������6
4�3 Consumed quantity monitoring����������������������������������������������������������������������6
4�3�1 Consumed quantity monitoring with pulse output���������������������������������7
4�3�2 Consumed quantity monitoring with preset counter �����������������������������7
4�4 Temperature monitoring���������������������������������������������������������������������������������7
4�5 Volumetric flow or temperature monitoring / switching function���������������������8
4�5�1 Hysteresis function �������������������������������������������������������������������������������8
4�5�2 Window function �����������������������������������������������������������������������������������8
4�6 Volumetric flow or temperature monitoring / analogue function���������������������9
4�7 Adjustment to the internal pipe width�������������������������������������������������������������9
4�8 Set standard conditions of the volume flow �������������������������������������������������10
4�9 Low flow cut-off (LFC)����������������������������������������������������������������������������������10
4�10 Customer-specific calibration (CGA) ���������������������������������������������������������10
5 Installation����������������������������������������������������������������������������������������������������������10
5�1 Installation location �������������������������������������������������������������������������������������� 11
5�2 Installation conditions ���������������������������������������������������������������������������������� 11
5�3 Installation position �������������������������������������������������������������������������������������� 11
5�4 Installation example using the process adapter E40195 �����������������������������12
6 Electrical connection������������������������������������������������������������������������������������������13
7 Operating and display elements ������������������������������������������������������������������������14
8 Menu������������������������������������������������������������������������������������������������������������������15
8�1 Menu structure���������������������������������������������������������������������������������������������15
8�2 Explanation of the menu������������������������������������������������������������������������������16
8�2�1 Extended functions (1)������������������������������������������������������������������������16
8�2�2 Extended functions (2)������������������������������������������������������������������������17
9 Parameter setting ����������������������������������������������������������������������������������������������18

3
UK
9�1 Parameter setting in general �����������������������������������������������������������������������18
9�1�1 Extended menu 1 �������������������������������������������������������������������������������19
9�1�2 Extended menu 2 �������������������������������������������������������������������������������19
9�1�3 Locking / unlocking �����������������������������������������������������������������������������19
9�1�4 Timeout�����������������������������������������������������������������������������������������������20
9�2 Settings for volumetric flow monitoring��������������������������������������������������������20
9�2�1 Adjustment to the internal pipe width��������������������������������������������������20
9�2�2 Configure limit value monitoring with OUT1 ���������������������������������������20
9�2�3 Configure limit value monitoring with OUT2 ���������������������������������������20
9�2�4 Configure analogue value for volumetric flow�������������������������������������20
9�3 Settings for consumed quantity monitoring �������������������������������������������������21
9�3�1 Configure quantity monitoring via pulse output ����������������������������������21
9�3�2 Configure quantity monitoring via the preset counter �������������������������21
9�3�3 Configure program-controlled meter reset������������������������������������������21
9�3�4 Deactivate meter reset �����������������������������������������������������������������������21
9�3�5 Configure meter reset using an external signal ����������������������������������21
9�4 Settings for temperature monitoring ������������������������������������������������������������22
9�4�1 Configure limit value monitoring with OUT2 ���������������������������������������22
9�4�2 Configure analogue value for temperature �����������������������������������������22
9�5 User settings (optional)��������������������������������������������������������������������������������22
9�5�1 Set standard unit of measurement for volumetric flow �����������������������22
9�5�2 Configure standard display�����������������������������������������������������������������23
9�5�3 Set output status in fault condition������������������������������������������������������23
9�5�4 Set measured value damping�������������������������������������������������������������23
9�5�5 Set low flow cut-off �����������������������������������������������������������������������������23
9�5�6 Calibrate curve of measured values ���������������������������������������������������23
9�5�7 Reset calibration data�������������������������������������������������������������������������24
9�5�8 Set standard pressure which serves as a reference for measured and
display values for volumetric flow�����������������������������������������������������������������24
9�5�9 Set standard temperature which serves as a reference for measured
and display values for volumetric flow����������������������������������������������������������24
9�6 Service functions �����������������������������������������������������������������������������������������24
9�6�1 Read min/max values for volumetric flow �������������������������������������������24
9�6�2 Reset all parameters to factory setting �����������������������������������������������24
9�7 Set preset counter / pulse value (ImPS)������������������������������������������������������25
10 Operation���������������������������������������������������������������������������������������������������������27
10�1 Read set parameters ���������������������������������������������������������������������������������27

4
1 Preliminary note
1.1 Symbols used
►Instructions
> Reaction, result
[…] Designation of pushbuttons, buttons or indications
→Cross-reference
Important note
Non-compliance can result in malfunction or interference�
Information_Supplementary note�
10�2 Change display unit in the Run mode��������������������������������������������������������27
10�3 Fault indications�����������������������������������������������������������������������������������������28
10�4 General operating conditions���������������������������������������������������������������������28
11 Technical data and scale drawing ��������������������������������������������������������������������28
12 Factory setting �������������������������������������������������������������������������������������������������28

5
UK
2 Safety instructions
• Please read this document prior to set-up of the unit� Ensure that the product is
suitable for your application without any restrictions�
• If the operating instructions or the technical data are not adhered to, personal
injury and/or damage to property can occur�
• Ensure before mounting the components into or removing them from the
compressed air system that the installation is at a standstill and no pressure is
applied�
• Improper or non-intended use may lead to malfunctions of the unit or to un-
wanted effects in your application� That is why installation, electrical connec-
tion, set-up, operation and maintenance of the unit must only be carried out by
qualified personnel authorised by the machine operator�
• In order to guarantee the correct condition of the device for the operating time
the device must only be used in media to which the wetted parts are sufficiently
resistant(→Technicaldata).
• The responsibility whether the measurement devices are suitable for the
respective application lies with the operator� The manufacturer assumes no
liability for consequences of misuse by the operator� Improper installation and
use of the devices result in a loss of the warranty claims�
3 Functions and features
The unit monitors the standard volume flow of compressed air in industrial use�
It detects the 4 process variables flow velocity, volumetric flow quantity, consumed
quantity, medium temperature�
• Application: compressed air systems in industrial use�
• All indications apply for standard volume flow to DIN ISO 2533, i�e� volume flow
at 1013 hPa, 15 °C and 0 % relative air humidity�
Theunitcanbesettodifferentstandardconditions(→9.5.8and→9.5.9).
• The general operating conditions of compressed air equipment apply�

6
4 Function
4.1 Process measured signals
• The unit displays the current process values�
• It generates 2 output signals according to the parameter setting�
OUT1: 4 selection options Parameter setting
- Switching signal for volumetric flow quantity limit
value
(→9.2.2)
- or switching signal for flow velocity (→9.2.2)
- or pulse signal for quantity meter (→9.3.1)
- or switching signal for preset counter (→9.3.2)
OUT2: 6 selection options Parameter setting
- Switching signal for volumetric flow quantity limit
value
(→9.2.3)
- or switching signal for flow velocity limit value (→9.2.3)
- or switching signal for temperature limit value (→9.4.1)
- or analogue signal for volumetric flow quantity (→9.2.4)
- or analogue signal for flow velocity (→9.2.4)
- or analogue signal for temperature (→9.4.2)
If not used as an output, OUT2 (pin 2) can instead be
used as an input for an external reset signal�
(→9.3.5)
4.2 Volumetric flow monitoring
The volumetric flow is monitored by a calorimetric measuring system, the meas-
ured signals are evaluated by the electronics�
• 2 switching signals for volumetric flow limit values can be provided (output 1
andoutput2).Ontheswitchingfunctions→4.5.
• An analogue signal which is proportional to the volumetric flow (4���20 mA) can
beprovidedonoutput2.Ontheanaloguefunctions→4.6.
4.3 Consumed quantity monitoring
The unit has an internal quantity meter which continuously totals the volumetric
flow quantity� The sum corresponds to the current consumed quantity since the
last reset�
• The current meter reading can be displayed�

7
UK
• In addition the value before the last reset is saved� This value can also be
displayed�
The meter saves the totalled consumed quantity every 10 minutes� After a
power failure this value is available as the current meter reading� If a time-
controlled reset is set, the elapsed time of the set reset interval is also saved�
So the possible data loss can be maximum 10 minutes�
• Overflow: After the maximum value (9 999 999 Nm³) the meter is reset to 0�
The meter can be reset as follows:
• Manualreset(→9.3.3).
• Time-controlledautomaticreset(→9.3.3).
• Externalinputsignalonpin2(→9.3.5).
4.3.1 Consumed quantity monitoring with pulse output
Output 1 provides a counting pulse each time the value set in [ImPS] is reached
(→9.3.1).
4.3.2 Consumed quantity monitoring with preset counter
2 types of monitoring are possible:
• Time-dependent quantity monitoring�
- Settings: [ImPS] = quantity x, [ImPR] = [no], [rTo] = time t�
- If the quantity x is reached during t, output 1 switches and remains switched
until the counter is reset�
- If the quantity x is not reached after the time t has elapsed, the meter is auto-
matically reset and counting starts again; output 1 does not switch�
• Non time-dependent quantity monitoring�
- Settings: [ImPS] = quantity x, [ImPR] = [no], [rTo] = [OFF]�
- If the quantity x is reached, output 1 switches and remains switched until the
counter is reset�
4.4 Temperature monitoring
• A switching signal for temperature limit values can be provided on output 2� On
theswitchingfunctions→4.5.
• An analogue signal which is proportional to the temperature (4���20 mA) can be
providedonoutput2.Ontheanaloguefunctions→4.6.

8
4.5 Volumetric flow or temperature monitoring / switching
function
OUTx changes its switching state if it is above or below the set switching limits
(SPx, rPx)� The following switching functions can be selected:
4.5.1 Hysteresis function
Normally open: [OUx] = [Hno]
Normally closed: [OUx] = [Hnc]
First the set point (SPx) is set, then the
reset point (rPx) with the requested
difference�
HY = hysteresis
4.5.2 Window function
Normally open: [OUx] = [Fno]
Normally closed: [OUx] = [Fnc]
The width of the window can be set by
means of the difference between SPx
and rPx�
SPx = upper value
rPx = lower value�
FE = window

9
UK
4.6 Volumetric flow or temperature monitoring / analogue
function
• Analogue start point [ASP] determines at which measured value the output
signal is 4 mA�
• Analogue end point [AEP] determines at which measured value the output
signal is 20 mA�
Minimum distance between [ASP] and [AEP] = 25 % of the final value of the
measuring range�
Example of volumetric flow monitoring:
Factory setting Measuring range scaled
I [mA]
20
4
0 MEW Q
I [mA]
20
4
0 MEWAEPASP Q
MEW = final value of the measuring range
In the set measuring range the output signal is between 4 mA and 20 mA�
It is also indicated:
Volumetric flow above the measuring range: output signal > 20 mA�
4.7 Adjustment to the internal pipe width
The unit can be used for different internal pipe widths� The selected internal pipe
widthmustbesetviathemenu(→9.2.1Adjustmenttotheinternalpipewidth).
Set the internal pipe widths before defining values for switching limits (SPx,
rPx) and analogue limit values (ASP, AEP)�
4.8 Set standard conditions of the volume flow
The unit is adjusted to a standard volume flow to DIN ISO 2533, i�e� volume flow
at 1013 hPa, 15 °C and 0 % relative air humidity�

10
The unit can be set to different standard conditions:
• Via the menu item [rEF�P] the standard pressure is set, which serves as a refer-
enceforthemeasuredanddisplayvaluesforvolumetricflow(→9.5.8).
• Via the menu item [rEF�T] the standard temperature is set, which serves as a
referenceforthemeasuredanddisplayvaluesforvolumetricflow(→9.5.9).
4.9 Low flow cut-off (LFC)
Withthisfunctionsmallvolumetricflowquantitiescanbeignored(→9.5.5).Flows
below the LFC value have no effect on the display and output signals�
4.10 Customer-specific calibration (CGA)
The customer-specific calibration allows changing the gradient of the curve of
measured values� It influences the display and the outputs�
140 % MEW
100 % MEW
60 % MEW
MEWQ
A
V1
V0
V2
A Operating value for display
and output signals
Q Volumetric flow
MEW Final value of the measuring
range
V0 Curve of measured values
with factory setting
V1,
V2
Curve of measured values
after calibration
The change in the gradient is indicated in per cent� Factory setting = 100 %� After
achangethecalibrationcanberesettofactorysetting(→9.5.7).
5 Installation
The rules and regulations for the installation and operation of compressed
air equipment must be observed�
Installation in pipes:
►Insert the unit into a G1 process adapter and tighten the nut� Tightening torque
max� 50 Nm� Ensure that the unit is correctly oriented�
5.1 Installation location
• Downstream of the cold dryer / near the load�

11
UK
• If compressed air is fed into the main pipe through parallel pipes, the unit
should be mounted in the main pipe�
• Installation downstream of the maintenance unit is also possible (if oil is used
for the loads, the units must be mounted upstream of the oiler)�
5.2 Installation conditions
Recommendation:
►Use a straight inlet pipe with a length of 20 x pipe diameter�
►In case of disturbances on the inlet side caused by elbows, valves, slides etc�
use an inlet pipe with a length of 50 x pipe diameter�
►Use a straight outlet pipe with a length of 5 x pipe diameter�
5.3 Installation position
• Permitted installation positions: pipe length vertical, any position (fig� 1, 2); pipe
length horizontal, unit vertical (fig� 3, 5); unit on side, pipe length left (fig� 4)�
• Avoid the installation position in fig� 6 (unit on side, pipe length right)� If the flow
rate is low, the specified measurement accuracy cannot be adhered to�
F
F
1 2 3 4
5 6

12
5.4 Installation example using the process adapter E40195
For an ideal alignment of the sensor's measuring probe to the direction of flow of
the medium (fig� 4), observe the following notes on welding of the E40195 process
adapter into the pipe:
►Drill a hole for the process adapter into the pipe and remove all burrs�
►Align the adapter with the alignment mark at a max� offset of ± 2° to the pipe
axis (fig� 1 and 2)�
►Ensure that the adapter does not extend into the pipe (fig� 2)�
►Install the adapter precisely vertically in the pipe (fig� 3)�
1
±
2°
1
2
1
1: Alignment mark
3
90°
F
4

13
UK
6 Electrical connection
The unit must be connected by a qualified electrician�
The national and international regulations for the installation of electrical
equipment must be adhered to�
Voltage supply according to EN 50178, SELV, PELV�
►Disconnect power�
►Connect the unit as follows:
43
2 1
BK: black
BN: brown
BU: blue
WH: white
BN
WH
BK
BU
4
1
3
2OUT2
L+
L
OUT1
Colours to DIN EN 60947-5-2
Sample circuits:
2 x positive switching 1 x positive switching / 1 x analogue
L
L+
3 BU
4 BK
2 WH
1 BN
L+
L
3 BU
4 BK
2 WH
1 BN
Pin 1 L+
Pin 3 L-
Pin 4
(OUT1)
Switching signal: limit values for volumetric flow�
Switching signal: quantity meter reached preset value�
Pulses: 1 pulse every time the defined volumetric flow quantity is reached�
Pin 2
(OUT2/InD)
Switching signal: limit values for volumetric flow�
Switching signal: limit values for temperature�
Analogue signal for volumetric flow�
Analogue signal for temperature�
Input for signal "meter reset"�

14
7 Operating and display elements
9
10 11
OU1
OU2
10
3
Mode/Enter Set
Nm
3
Nm
3
/min
Nm
3
/h
°C
1 2 3 4 5 6 78
Nm/s
1 to 8: indicator LEDs
- LED 1 = current volumetric flow in standard cubic metres/minute(Nm3/min)�
- LED 2 = current volumetric flow in standard cubic metres/hour (Nm3/h)�
- LED 3 = current flow velocity in standard metres/second (Nm/s)�
- LED 4 = current consumed quantity since the last reset in standard cubic metres (Nm3)�
- LED 4 flashing = consumed quantity before the last reset in standard cubic metres (Nm3)�
- LED 4 and 6 = current consumed quantity since the last reset in 103standard cubic
metres�
- LED 4 and 6 flashing = consumed quantity before the last reset in 103cubic metres�
- LED 5 = current medium temperature in °C�
- LED 7, LED 8 = switching state of the corresponding output�
9: Alphanumeric display, 4 digits
- Indication of the current volumetric flow quantity (if [SELd] = [FLOW] is set)�
- Indication of the meter reading (if [SELd] = [TOTL] is set)�
-Indicationofthecurrentmediumtemperature(→10.2).
- Indication of the parameters and parameter values�
10: Mode/Enter button
- Selection of the parameters and acknowledgement of the parameter values�
11: Set button
- Setting of the parameter values (scrolling by holding pressed; incrementally by pressing
once)�
- Change of the display unit in the normal operating mode (Run mode)�

15
UK
8 Menu
8.1 Menu structure
MM
M
M
S
M
S
M
S
M
S
M
SS
Nm3/min
S
15s15s
S
Nm/s
15s
S
Nm3
S
15s
Nm3*
15s
°C
M
M
M
M
M
M
M
S
M
S
M
S
M
S
M
S
SS
M
S
M
S
M
M
M
M
M
S
M
M
S
M
M
S
MM
S
MM
S
MM
S
MM
S
MM
S
MM
S
MM
S
MM
S
MM
S
M
S
M
M
MM
S
MM
S
MM
S
MM
S
MM
S
Nm/h
= [Mode/Enter] /
= [Set]
Nm3= current meter reading in Nm3/ Nm3* = saved meter reading in Nm3

16
8.2 Explanation of the menu
SP1/rP1 Upper / lower limit value for volumetric flow�
ImPS Pulse value�
ImPR Pulse repetition active (= pulse output) or not active
(= preset counter function)�
OU1
Output function for OUT1 (volumetric flow or consumed quantity):
- Switching signal for the limit values: hysteresis function or window function,
either normally open or normally closed�
- Pulse or switching signal for quantity meter�
OU2
Output function for OUT2 (volumetric flow or temperature):
- Switching signal for the limit values: hysteresis function or window function,
either normally open or normally closed�
- Analogue signal: 4-20 mA [I]�
As an alternative: configure OUT2 (pin 2) as input for external reset signal:
Setting: [OU2] = [InD]�
SP2/rP2 Upper / lower limit value for volumetric flow or temperature�
ASP / AEP Analogue start value / analogue end value for volumetric flow or temperature�
DIn2 Configure the input (pin 2) for meter reset�
8.2.1 Extended functions (1)
EF Extended menu
HI / LO Maximum / minimum value memory for volumetric flow�
diA Indication of the internal pipe diameter in mm�
FOU1 Status of output 1 in case of an internal fault�
FOU2 Status of output 2 in case of an internal fault�
dAP Measured value damping / damping constant in seconds�
rTo Meter reset: manual reset / time-controlled reset�
diS Update rate and orientation of the display�
Uni Standard unit of measurement for volumetric flow: Nm³/min or Nm/s�
SELd Standard measured variable of the display: volumetric flow value, meter
reading or medium temperature�
SEL2
Standard measured variable for evaluation by OUT2:
- Limit value signal or analogue signal for volumetric flow�
- Limit value signal or analogue signal for temperature�
LFC Low flow cut-off�
rES Restore factory setting�

17
UK
8.2.2 Extended functions (2)
EF2 Extended menu 2�
diA Setting of the inner pipe diameter in mm�
CGA Calibration of the curve of measured values: define gradient�
CAR Reset the calibration data�
rEF�P Standard pressure which serves as a reference for measured and display
values for volumetric flow�
rEF�T Standard temperature which serves as a reference for measured and display
values for volumetric flow�

18
9 Parameter setting
During parameter setting the unit remains in the operating mode� It continues to
monitor with the existing parameters until the parameter setting has been com-
pleted�
9.1 Parameter setting in general
3 steps must be taken for each parameter setting:
1Select the parameter
►Press [Mode/Enter] until the re-
quested parameter is displayed�
2Set the parameter value
►Press and hold [Set]�
> Current setting value of the param-
eter flashes for 5 s�
> After 5 s: setting value is changed:
incrementally by pressing once or
scrolling by holding pressed�
Numerical values are incremented continuously� To reduce the value: let the display
move to the maximum setting value� Then the cycle starts again at the minimum
setting value�
3Confirm the parameter value
►Briefly press [Mode/Enter]�
> The parameter is displayed again�
The new setting value is saved�
Set other parameters
►Start again with step 1�
Finish parameter setting
►Press [Mode/Enter] several times until the current measured value is displayed or wait
for 15
s
�
> The unit returns to the operating mode�

19
UK
9.1.1 Extended menu 1
►Press [Mode/Enter] until [EF] is
displayed�
►Press [Set] briefly�
> The first parameter of the submenu is
displayed (here: [HI])�
9.1.2 Extended menu 2
►Press [Mode/Enter] until [EF] is displayed�
►Press [Set] briefly�
> [EF2] is displayed�
►Press [Set] briefly�
> The first parameter of the extended menu [diA] is displayed�
If the extended menu is protected by an access code, [Cod] flashes in the
display�
►Press and hold [Set] until the valid code no� is displayed�
►Briefly press [Mode/Enter]�
9.1.3 Locking / unlocking
The unit can be locked electronically to prevent unintentional settings�
►Make sure that the unit is in the
normal operating mode�
►Press [Mode/Enter] + [Set] for 10 s�
> [Loc] is displayed�
During operation: [LOC] is briefly displayed if you try to change parameter values�
For unlocking:
►Press [Mode/Enter] + [Set] for 10 s�
> [uLoc] is displayed�
Factory setting: not locked�

20
9.1.4 Timeout
If no button is pressed for 15 s during parameter setting, the unit returns to the
operating mode with unchanged values�
9.2 Settings for volumetric flow monitoring
9.2.1 Adjustment to the internal pipe width
►Select [diA] and set a numerical value in mm�
Set the internal pipe widths before defining values for switching limits
(SPx, rPx) and analogue limit values (ASP, AEP)�
9.2.2 Configure limit value monitoring with OUT1
► Select[Uni]andsettheunitofmeasurement(→9.5.1).
►Select [OU1] and set the switching function�
- [Hno] = hysteresis function/normally open�
- [Hnc] = hysteresis function/normally closed�
- [Fno] = window function/normally open�
- [Fnc] = window function/normally closed�
►Select [SP1] and set the value at which the output switches�
►Select [rP1] and set the value at which the output resets�
9.2.3 Configure limit value monitoring with OUT2
► Select[Uni]andsettheunitofmeasurement(→9.5.1).
►Select [SEL2] and set [FLOW]�
►Select [OU2] and set the switching function�
- [Hno] = hysteresis function/normally open�
- [Hnc] = hysteresis function/normally closed�
- [Fno] = window function/normally open�
- [Fnc] = window function/normally closed�
►Select [SP2] and set the value at which the output switches�
►Select [rP2] and set the value at which the output resets�
9.2.4 Configure analogue value for volumetric flow
► Select[Uni]andsettheunitofmeasurement(→9.5.1).
►Select [SEL2] and set [FLOW]�
►Select [OU2] and set the function�
- [I] = current signal proportional to volumetric flow (4…20 mA)�
►Select [ASP] and set the value at which the minimum value is provided�
►Select [AEP] and set the value at which the maximum value is provided�
Table of contents
Other IFM Measuring Instrument manuals