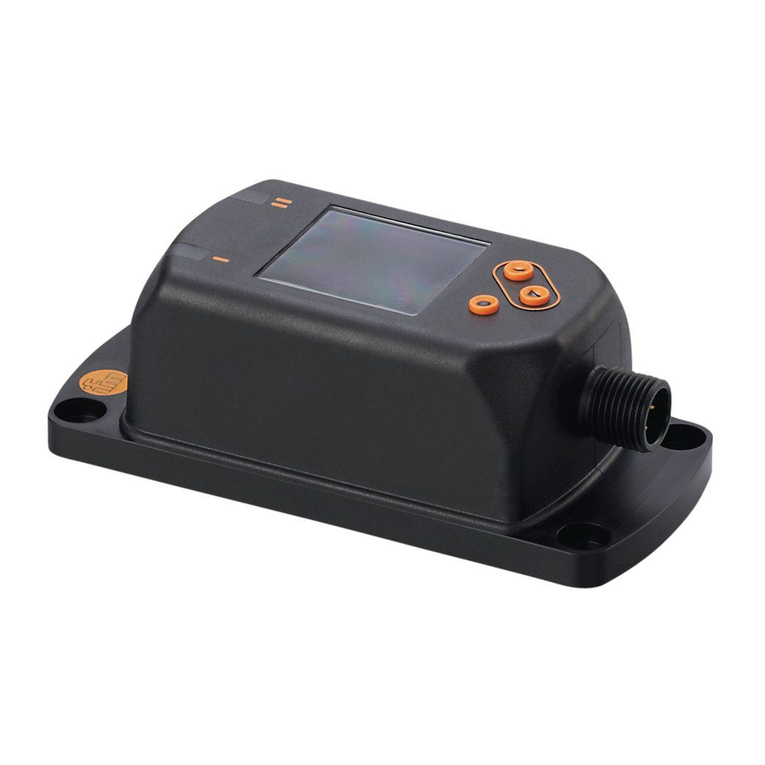
IFM FX460 User manual

Operating instructions
Multifunction displays
for digital signals
FX460
80257642 / 00 09 / 2019
UK

Operating instructions FX460
2
Contents
1 Preliminary note � � � � � � � � � � � � � � � � � � � � � � � � � � � � � � � � � � � � � � � � � � � � � � � � � 4
1�1 Symbols and warnings used � � � � � � � � � � � � � � � � � � � � � � � � � � � � � � � � � � � 4
2 Safety instructions � � � � � � � � � � � � � � � � � � � � � � � � � � � � � � � � � � � � � � � � � � � � � � � 5
3 Functions and features � � � � � � � � � � � � � � � � � � � � � � � � � � � � � � � � � � � � � � � � � � � � 5
3�1 Product characteristics: � � � � � � � � � � � � � � � � � � � � � � � � � � � � � � � � � � � � � � � 6
4 Installation� � � � � � � � � � � � � � � � � � � � � � � � � � � � � � � � � � � � � � � � � � � � � � � � � � � � � � 6
5 General� � � � � � � � � � � � � � � � � � � � � � � � � � � � � � � � � � � � � � � � � � � � � � � � � � � � � � � � 7
5�1 Operating mode � � � � � � � � � � � � � � � � � � � � � � � � � � � � � � � � � � � � � � � � � � � � � 7
6 Dimensions and mounting � � � � � � � � � � � � � � � � � � � � � � � � � � � � � � � � � � � � � � � � � 8
7 Electrical connection� � � � � � � � � � � � � � � � � � � � � � � � � � � � � � � � � � � � � � � � � � � � � � 8
7�1 DC voltage supply � � � � � � � � � � � � � � � � � � � � � � � � � � � � � � � � � � � � � � � � � � � 9
7�2 Auxiliary voltage output � � � � � � � � � � � � � � � � � � � � � � � � � � � � � � � � � � � � � � � 9
7�3 Incremental inputs A, B � � � � � � � � � � � � � � � � � � � � � � � � � � � � � � � � � � � � � � � 9
7�4 Control inputs � � � � � � � � � � � � � � � � � � � � � � � � � � � � � � � � � � � � � � � � � � � � � � 10
7�5 Analogue output (DX2022, DX2032) � � � � � � � � � � � � � � � � � � � � � � � � � � � � �11
7�6 Control outputs (DX2022, DX2023, DX2032, DX2033) � � � � � � � � � � � � � � �11
7�7 AC voltage supply (DX2021, DX2022, DX2023) � � � � � � � � � � � � � � � � � � � 12
8 Operation / touch screen � � � � � � � � � � � � � � � � � � � � � � � � � � � � � � � � � � � � � � � � � 12
8�1 Display for parameter setting � � � � � � � � � � � � � � � � � � � � � � � � � � � � � � � � � � 12
8�2 Display during operation� � � � � � � � � � � � � � � � � � � � � � � � � � � � � � � � � � � � � � 13
8�3 Error messages � � � � � � � � � � � � � � � � � � � � � � � � � � � � � � � � � � � � � � � � � � � � 14
9 Parameter / menu overview � � � � � � � � � � � � � � � � � � � � � � � � � � � � � � � � � � � � � � � 16
9�1 Overview � � � � � � � � � � � � � � � � � � � � � � � � � � � � � � � � � � � � � � � � � � � � � � � � � 16
9�2 General menu� � � � � � � � � � � � � � � � � � � � � � � � � � � � � � � � � � � � � � � � � � � � � � 18
9�3 Speed mode � � � � � � � � � � � � � � � � � � � � � � � � � � � � � � � � � � � � � � � � � � � � � � � 21
9�4 Process Time mode � � � � � � � � � � � � � � � � � � � � � � � � � � � � � � � � � � � � � � � � � 23
9�5 Timer mode � � � � � � � � � � � � � � � � � � � � � � � � � � � � � � � � � � � � � � � � � � � � � � � 25
9�6 Counter mode � � � � � � � � � � � � � � � � � � � � � � � � � � � � � � � � � � � � � � � � � � � � � 27
9�7 Velocity mode � � � � � � � � � � � � � � � � � � � � � � � � � � � � � � � � � � � � � � � � � � � � � 29
9�8 Preselection Values � � � � � � � � � � � � � � � � � � � � � � � � � � � � � � � � � � � � � � � � � 31
9�9 Preselection 1 Menu� � � � � � � � � � � � � � � � � � � � � � � � � � � � � � � � � � � � � � � � � 31
9�10 Preselection 2 Menu� � � � � � � � � � � � � � � � � � � � � � � � � � � � � � � � � � � � � � � � 35
9�11 Preselection 3 Menu� � � � � � � � � � � � � � � � � � � � � � � � � � � � � � � � � � � � � � � � 35
9�12 Preselection 4 Menu� � � � � � � � � � � � � � � � � � � � � � � � � � � � � � � � � � � � � � � � 36
9�13 Analogue menu � � � � � � � � � � � � � � � � � � � � � � � � � � � � � � � � � � � � � � � � � � � 37
9�14 Command menu� � � � � � � � � � � � � � � � � � � � � � � � � � � � � � � � � � � � � � � � � � � 38
9�15 Display menu � � � � � � � � � � � � � � � � � � � � � � � � � � � � � � � � � � � � � � � � � � � � � 40
9�16 Linearisation menu � � � � � � � � � � � � � � � � � � � � � � � � � � � � � � � � � � � � � � � � � 43
10 Linearisation � � � � � � � � � � � � � � � � � � � � � � � � � � � � � � � � � � � � � � � � � � � � � � � � � � 43
11 Technical data � � � � � � � � � � � � � � � � � � � � � � � � � � � � � � � � � � � � � � � � � � � � � � � � � 45
UK
Operating instructions FX460
3
12 Maintenance, repair and disposal� � � � � � � � � � � � � � � � � � � � � � � � � � � � � � � � � � 47
12�1 Servicing� � � � � � � � � � � � � � � � � � � � � � � � � � � � � � � � � � � � � � � � � � � � � � � � � 47
12�2 Cleaning the housing surface� � � � � � � � � � � � � � � � � � � � � � � � � � � � � � � � � 47
12�3 Repair� � � � � � � � � � � � � � � � � � � � � � � � � � � � � � � � � � � � � � � � � � � � � � � � � � � 47
12�4 Disposal � � � � � � � � � � � � � � � � � � � � � � � � � � � � � � � � � � � � � � � � � � � � � � � � � 47
13 Approvals/standards � � � � � � � � � � � � � � � � � � � � � � � � � � � � � � � � � � � � � � � � � � � � 47
Licences and trademarks
All trademarks and company names used are subject to the copyright of the respective companies�

Operating instructions FX460
4
1 Preliminary note
Technical data, approvals, accessories and further information at www�ifm�com�
1.1 Symbols and warnings used
►Instructions
> Reaction, result
[…] Designation of keys, buttons or indications
→Cross-reference
Important note
Non-compliance may result in malfunction or interference�
Information
Supplementary note�
WARNING!
Warning of serious personal injury� Death or serious irreversible injuries
may result�
CAUTION!
Warning of personal injury�
Slight reversible injuries may result�
NOTE!
Warning of damage to property

UK
Operating instructions FX460
5
2 Safety instructions
●The described unit is a subcomponent to be integrated into a system� The
builder of the system is responsible for the safety of the system� It is the
system builder’s responsibility to perform a risk assessment and to draft a
documentation, in accordance with legislation and standard requirements, to be
provided to the system operator and the system user� The documentation must
contain all information and safety instructions required by the operator, the user
and, if applicable, by any service personnel authorised by the builder of the
system�
●Read this document before setting up the product and keep it during the entire
service life�
●The product must be suitable for the corresponding applications and
environmental conditions without any restrictions�
● Only use the product for its intended purpose (→ 3 Functions and features).
●If the operating instructions or the technical data are not adhered to, personal
injury and/or damage to property may occur�
●In case of malfunctions of the unit, please contact the manufacturer� Tampering
with the unit is not allowed�
●Installation, electrical connection, set-up, programming, configuration,
operation and maintenance of the product must be carried out by personnel
qualified and authorised for the respective activity�
●Protect units and cables against damage�
●Replace damaged units, since otherwise the technical data and safety will be
impaired�
3 Functions and features
This device must only be used in industrial machines and installations� Other uses
do not comply with the regulations and are the sole responsibility of the user�
The manufacturer is not liable for damage caused by improper use� The device
must only be installed in compliance with the instructions and only be used and
operated in a perfect technical condition that is in accordance with the technical
data� The device is neither suited for explosion-protected areas nor for areas that
are excluded in DIN EN 61010-1�

Operating instructions FX460
6
3.1 Product characteristics:
●Multifunction device with operating modes such as speed sensor, counter,
processing time display, position display, timer for operating times, stop watch
or process display
●HTL pulse pick-up / sensor inputs with PNP, NPN or NAMUR inputs
●7-segment display with symbols and units
●Parameter setting via clear text and touch screen
●24 VDC auxiliary voltage output for sensor supply (DX202x devices)
●Input frequency up to 250 kHz
●Functions such as scaling, filters, start-up delay
●Standardised 96 x 48 mm housing for panel mounting and protection rating
IP65 (front)
4 Installation
The device may only be installed and operated in an environment that is in
accordance with the permissible temperature range� Provide sufficient ventilation
and avoid direct contact of the unit with hot or aggressive gases or liquids�
Before installation and maintenance works, the unit must be disconnected from all
voltage sources� Also ensure that contact with disconnected voltage supply wires
is prevented�
Devices that are supplied via AC may only be connected via switches or circuit
breakers to the low voltage supply system� This switch must be positioned close to
the device and clearly marked as disconnecting device�
Ingoing and outgoing cables for extra-low voltage must be separated from
dangerous live cables (SELV circuits) by double and/or reinforced insulation�
The choice of all cables and their insulation must guarantee that they comply
with the permissible voltage and temperature range� Moreover, both device
and country-specific standards are to be observed that apply to the cables with
regard to their structure, shape and quality� Please view the technical data for
specifications concerning permissible wire cross-sections for the screw terminal
connections�
Before set-up, all connections and cables must be checked if they are tightly fitted
in the screw terminals� All (even unused) screw terminals must be turned to the
right up to the end stop and thereby reliably attached, so that they cannot get
loose due to shocks and vibration�
Voltage spikes on the connections of the device are to be limited to the values of
overvoltage category II�

UK
Operating instructions FX460
7
With regard to installation conditions, wiring, environmental conditions as well as
screening and grounding of connected cables, the general standards for control
cabinet construction in the machine industry as well as the manufacturer's specific
screening instructions apply�
5 General
The device is designed as panel-mounting display unit for HTL pulses�
5.1 Operating mode
In general, all functions can be configured in the parameter menu� The device can
be operated in the following display modes:
●Speed:
Indication of rotational speed (RPM), operation as tachometer or for frequency
measurement� Only input A is active� Input B is unused�
●Process time:
Operation as baking time or processing time display (reciprocal rotational
speed)� Only input A is active� Input B is unused�
●Timer:
Operation as stop watch� Start and stop functions are freely configurable�
Depending on the parameter setting, only input A or inputs A and B are active�
●Counter:
Operation as position display, pulse, totalisator, differential, up or down counter�
Inputs A and B are active�
●Velocity:
Speed indication from operating time measurement� Input A serves as start
input and input B as stop input�
In addition, the devices can be used for control and regulating purposes�
Monitoring limits such as maximum speed, minimum speed, standstill or a window
function is also possible�
Function diagram

Operating instructions FX460
8
6 Dimensions and mounting
EPS Source
Product Scale Drawing
Frame Size: 80 mm x 27 mm
Original Scale Drawing (MTD)
P_MZ_e200_0088
48
96 116
112
48
96 116
112
►Make a panel cut-out (91 x 43 mm) and fix the device into the panel with the 2
screws�
7 Electrical connection
Original Wiring Drawing (MTD)
EPS Source
Product Scale Drawing
Frame Size: 75 mm x 45 mm
AN_i_FX460_GG
32% 312,5%
12345678910
GND 115 - 230 V AC
0 V AC
GND
18...30 V DC
Aux. Out
Input A
NC
NC
Input B
GND
Ctr. In 1
11 12 13 14 15 16 17 18 19 20 21 22 23
Ctr. In 2
Ctr. In 3
AGND
20 mA Out
+/- 10 V Out
Com +
Ctr. Out 1
Ctr. Out 2
Ctr. Out 3
Ctr. Out 4
DX2022 / DX2032
DX2023 / DX2033
24 25 26 27 28 29 30 31 32 33 34 35 36 37 38 39
series DX202x
NC
NC
12345678910
GND 115 - 230 V AC
0 V AC
GND
18...30 V DC
Aux. Out
Input A
NC
NC
Input B
GND
Ctr. In 1
11 12 13 14 15 16 17 18 19 20 21 22 23
Ctr. In 2
Ctr. In 3
AGND
20 mA Out
+/- 10 V Out
Com +
Ctr. Out 1
Ctr. Out 2
Ctr. Out 3
Ctr. Out 4
DX2021 / DX2031 DX2022 / DX2032
DX2023 / DX2033
24 25 26 27 28 29 30 31 32 33 34 35 36 37 38 39
series DX202x
NC
NC
Connections on the rear of the housing
The terminals 16, 17 and 18 must not be used�

UK
Operating instructions FX460
9
7.1 DC voltage supply
The device can be supplied with direct voltage between 18 and 30 VDC via the
terminals 1 and 2� The current consumption depends, among other things, on the
level of the supply voltage and the setting and is typically at appr� 100 mA plus the
sensor current consumed at the auxiliary voltage output�
All GND connections are internally connected with each other�
7.2 Auxiliary voltage output
Auxiliary voltage for pulse pick-up /sensor supply is provided at terminals 3 and 4�
The output voltage depends on the device supply:
●In case of DC device supply, the output voltage is approx� 1 V less than the
supply voltage applied at terminals 1 and 2 and the max� load must not exceed
250 mA�
●In case of AC device supply, the output voltage is 24 VDC (± 15%) and the
max� load must not exceed 150 mA at temperatures up to 45 °C� At higher
temperatures the max� output current is reduced to 80 mA�
7.3 Incremental inputs A, B
On terminals 5 and 7, two pulse inputs for HTL signals are available� The
characteristic (PNP, NPN, Namur or Tri-State) of the incremental inputs can be set
in the GENERAL MENU�
Connection of the incremental inputs:
PNP NPN

Operating instructions FX460
10
Namur Tri-State
Open PNP inputs are generally "LOW" and open NPN inputs "HIGH"�
The input stages are designed for electronic pulse pick-ups�
Remark on mechanical switching contacts:
If mechanical contacts are to be used as pulse source, a standard, external
capacitor of about 10 μF must be connected to the terminals between GND (-) and
the corresponding input (+)� This damps the maximum input frequency to approx�
20 Hz and contact bouncing is suppressed�
7.4 Control inputs
On terminals 10, 11 and 12, three control inputs with HTL-PNP characteristic are
available�
These inputs can be configured in the COMMAND MENU and are used for
functions that can be triggered externally such as resetting the display value,
changing the display, locking buttons of the touch screen or releasing the latching
of control outputs�
Connection of the control inputs
Open control inputs are generally "LOW"�

UK
Operating instructions FX460
11
The input stages are designed for electronic control signals�
Remark on mechanical switching contacts:
If mechanical contacts are to be used as pulse source, a standard, external
capacitor of about 10 μF must be connected to the terminals between GND (-) and
the corresponding input (+)� This damps the maximum input frequency to approx�
20 Hz and contact bouncing is suppressed�
7.5 Analogue output (DX2022, DX2032)
On terminals 13 and 14 / 15, a 16 bit analogue output is available�
This output can be configured and scaled in the ANALOG MENU� The following
configuration is possible:
●Voltage output: -10 … +10 V
●Voltage output: 0 … 20 mA
●Voltage output: 4 … 20 mA
The analogue output is proportional to the source and refers to the AGND
potential�
AGND and device GND are internally connected�
Parallel operation of voltage and current output is not permitted�
7.6 Control outputs (DX2022, DX2023, DX2032, DX2033)
On terminals 20, 21, 22 and 23, four control outputs are available�
The switching conditions can be set in the PRESELECTION MENU�
The outputs Ctrl� Out 1 – Ctrl� Out 4 are fast PNP outputs with a switching capacity
of 5 – 30 V / 200 mA per channel�
The switching voltage is determined by the voltage at terminal 19 (Com+)�
To switch inductive loads, external damping measures are recommended�
Connection of the control outputs

Operating instructions FX460
12
7.7 AC voltage supply (DX2021, DX2022, DX2023)
On terminals 24 and 25, the device can be supplied with an alternating voltage
between 115 and 230 V AC� The power consumption depends, among other
things, on the level of the supply voltage and the setting and is at approx� 3 VA
plus the sensor current consumed at the auxiliary voltage output�
8 Operation / touch screen
8.1 Display for parameter setting
The individual parameter menus and their parameters are described in a separate
chapter (→ 9 Parameter / menu overview)�
Device parameter setting:
In order to be able to set device
parameters, the touch screen must be
pressed for 3 seconds�
Select menu:
The required parameter menu can
be selected via the arrow keys and
confirmed with ok�
To close the menu selection, press C�
Select parameter:
The required parameter can be
selected via the arrow keys and
confirmed with ok�
To close the parameter selection,
press C�
Edit parameters:
When the parameter value is flashing,
it can be edited via the arrow keys
and stored with ok�
To close the editing mode, press C�
Parameter changes are only active
after quitting the menu selection�

UK
Operating instructions FX460
13
8.2 Display during operation
The following displays are available� Depending on the device version and the
selected operating mode, only certain visualisations are possible�
Display with unit and status line:
In order to access the next display,
you need to tap the touch screen�
Only for DX2022, DX2023, DX2032
and DX2033�
Display in counter and batch counter
/ total counter mode or in timer and
total counter mode:
In order to access the next display,
you need to tap the top of the touch
screen�
Only for COUNT MODE A+B / A-B or
TOTAL TIME MODE�
Two-line display with units:
In order to access the next display,
you need to tap the touch screen�
Only for COUNT MODE A+B / A-B or
TOTAL TIME MODE�
Large display (4-digit):
In order to access the next display,
you need to tap the touch screen�
Only if LARGE DISPLAY parameter is
activated
Display of the keyboard commands:
In order to access the next display,
you need to tap the top of the touch
screen�
Only in the operating modes TIMER
and COUNTER

Operating instructions FX460
14
Display with quick-start function to
enter the preselection values:
In order to access the next display,
you need to tap the top of the touch
screen or "Skip"�
Only for DX2022, DX2023, DX2032
and DX2033�
Display with min / max value
indication:
In order to access the next display,
you need to tap the top of the touch
screen or "SKIP"�
8.3 Error messages
Error message in the display Description
ERROR: MAXIMUM DISPLAY VALUE Display value of the one-
line display is greater
than
+ 99 999 999�
ERROR: MINIMUM DISPLAY VALUE Display value of the one-
line display is smaller
than
- 99 999 999�
ERROR: MAX� TOP DISPLAY VALUE Upper display value of
the two-line display is
greater than
+ 99 999 999�
ERROR: MIN� TOP DISPLAY VALUE Upper display value of
the two-line display is
smaller than
- 99 999 999�
ERROR: MAX� DOWN DISPLAY VALUE Lower display value of
the two-line display is
greater than
+ 99 999 999�

UK
Operating instructions FX460
15
Error message in the display Description
ERROR: MIN� DOWN DISPLAY VALUE Lower display value of
the two-line display is
smaller than
- 99 999 999�
ERROR: MAX� LARGE DISPLAY VALUE Display value of the
large display is greater
than + 9999�
ERROR: MIN� LARGE DISPLAY VALUE Display value of the
large display is smaller
than - 9999�
The described error messages are automatically reset as soon as the
corresponding display value is again in the range that can be displayed�

Operating instructions FX460
16
9 Parameter / menu overview
9.1 Overview
This section gives an overview of the individual menus and their parameters� The
menu name is always in bold characters� The respective parameters are arranged
directly under the menu name� Default values are greyed out� Depending on the
device version and the selected operating mode only certain menus are displayed�
The following menu structure is valid for software version 06B or higher�
Menü / Parameter Menü / Parameter
GENERAL MENU WAIT TIME (S)
OPERATIONAL MODE STANDSTILL TIME (S)
ENCODER PROPERTIES AVERAGE FILTER
COUNTING DIRECTION
SCALE UNITS MODE TIMER
SCALE UNITS (BATCH) TIME BASE
LINEARIZATION MODE START / STOP
PIN PRESELECTION AUTO SET / RESET
PIN PARAMETER LATCH FUNCTION
BACK UP MEMORY SET VALUE
FACTORY SETTINGS INC / DEC MODE
TOTAL TIME MODE
MODE SPEED TOTAL TIME SET VALUE
DISPLAY VALUE
BASE FREQUENCY (HZ) MODE COUNTER
DECIMAL POINT COUNT MODE
SAMPLING TIME (S) FACTOR
WAIT TIME (S) SET VALUE
STANDSTILL TIME (S) DECIMAL POINT
AVERAGE FILTER BATCH / TOTAL MODE
FOR/REV DETECTION BATCH / TOTAL SET VALUE
ROUND LOOP VALUE
MODE PROCESS TIME
DISPLAY FORMAT
DISPLAY VALUE
BASE FREQUENCY (HZ)
SAMPLING TIME (S)

UK
Operating instructions FX460
17
Menü / Parameter Menü / Parameter
MODE VELOCITY PRESELECTION 3 MENU
START / STOP SOURCE 3
DISPLAY VALUE MODE 3
BASE TIME (S) HYSTERESIS 3
DECIMAL POINT PULSE TIME 3
WAIT TIME (S) OUTPUT TARGET 3
STANDSTILL TIME (S) OUTPUT POLARITY 3
OUTPUT LOCK 3
PRESELECTION VALUES START UP DELAY 3 (S)
PRESELECTION 1 EVENT COLOR 3
PRESELECTION 2
PRESELECTION 3 PRESELECTION 4 MENU
PRESELECTION 4 SOURCE 4
MODE 4
PRESELECTION 1 MENU HYSTERESIS 4
SOURCE 1 PULSE TIME 4
MODE 1 OUTPUT TARGET 4
HYSTERESIS 1 OUTPUT POLARITY 4
PULSE TIME 1 OUTPUT LOCK 4
OUTPUT TARGET 1 START UP DELAY 4 (S)
OUTPUT POLARITY 1 EVENT COLOR 4
OUTPUT LOCK 1
START UP DELAY 1 (S) ANALOG MENU
EVENT COLOR 1 ANALOG SOURCE
ANALOG FORMAT
PRESELECTION 2 MENU ANALOG START
SOURCE 2 ANALOG END
MODE 2 ANALOG GAIN (%)
HYSTERESIS 2 ANALOG OFFSET (%)
PULSE TIME 2
OUTPUT TARGET 2
OUTPUT POLARITY 2
OUTPUT LOCK 2
START UP DELAY 2 (S)
EVENT COLOR 2

Operating instructions FX460
18
Menü / Parameter Menü / Parameter
COMMAND MENU LINEARIZATION MENU
INPUT 1 ACTION P1(X)
INPUT 1 CONFIG� P1(Y)
INPUT 2 ACTION P2(X)
INPUT 2 CONFIG� P2(Y)
INPUT 3 ACTION ���
INPUT 3 CONFIG� P23(X)
P23(Y)
DISPLAY MENU P24(X)
SOURCE DUAL TOP P24(Y)
SOURCE DUAL DOWN
COLOR
BRIGHTNESS
CONTRAST
SCREEN SAVER (S)
UP-DATE-TIME (S)
FONT
START DISPLAY
LARGE DISPLAY
9.2 General menu
OPERATIONAL MODE
This parameter defines which measuring function (operating mode) the device is supposed to fulfil�
SPEED Indication of rotational speed (RPM), operation as tachometer or for
frequency measurement
PROCESS TIME Operation as baking time or processing time display (reciprocal
rotational speed)
TIMER Stop watch / timer
COUNTER Operation as position display, pulse, totalisator, differential, up or down
counter
VELOCITY Speed indication from operating time measurement
ENCODER PROPERTIES
This parameter defines the characteristic of the pulse inputs�
PNP PNP (switching towards +)
NPN NPN (switching towards –)
NAMUR Connect sensor (-) to GND and sensor (+) to input (A, B)

UK
Operating instructions FX460
19
TRI-STATE Tri-State
COUNTING DIRECTION
With this parameter, it is possible to invert the rotational direction of the pulse input (only in the COUNTER
A, B 90° operating mode)�
FORWARD Up
REVERSE Down
SCALE UNITS
This parameter defines which unit is indicated on the display� It does not influence the display value� The
decimal point for decimal places is set with the DECIMAL POINT parameter� With the two-line display, the
set unit and the display value's decimal point are automatically adopted for the total counter / total timer as
well� The batch counter unit can be set separately via the SCALE UNITS (BATCH) parameter�
Hz Default
kHz
m/s
m/min
km/h
mph
1/min
RPM
1/sec
RPS
Stk/h
pcs/h
mm
m
inch
feet
Stueck
pcs
sec
min
Min:Sec
H:M:S
Min:Sec:00
l/min�
gal/min
ml/min
gr/min

Operating instructions FX460
20
inch/min
H:M
Edit Unit With this parameter, a customer-specific unit with max� 16 digits can be
edited�
Open the "Edit Unit" menu with the [OK] button� Use the arrow keys to
change the unit� Keep the arrow key pressed for fast scrolling� Save
with [OK]� Quit the "Edit Unit" menu with [C]�
SCALE UNITS (BATCH)
This parameter defines which unit is indicated for the batch counter on the two-line display� Available units:
see SCALE UNITS parameters�
LINEARIZATION MODE
This parameter defines the linearisation function(→ 10 Linearisation)�
OFF No linearisation
1 QUADRANT Linearisation in the 1st quadrant
4 QUADRANT Linearisation in all 4 quadrants
PIN PRESELECTION
This parameter defines the PIN code for locking the quick-start function to enter the preselection values
in the PRESELECTION VALUES menu (emergency PIN: 6079)� Locking the quick start is only useful if all
parameters are locked�
0000 Access not locked
…
9999 Access after entering the PIN code 9999
PIN PARAMETER
This parameter defines the PIN code for the locked access for all parameters (emergency PIN: 6079)�
0000 Access not locked
…
9999 Parameter setting of the device is only possible after entering the PIN
code�
BACK UP MEMORY
NO No backup memory in the event of power failure
YES Backup memory in the event of power failure active� Saves actual value
in case of a power failure�
Table of contents
Other IFM Monitor manuals

IFM
IFM CR0452 Owner's manual

IFM
IFM efector 300 SID User manual

IFM
IFM Ecomat 200 DS2001 User manual

IFM
IFM AX460 User manual

IFM
IFM Efector 300 SL5105 User manual

IFM
IFM SL020 Series User manual

IFM
IFM ecomatDisplay CR1203 User manual

IFM
IFM SI5012 User manual

IFM
IFM E2M231 User manual

IFM
IFM Ecomat 200 DA 340 User manual

IFM
IFM DP2122 User manual

IFM
IFM Efector 300 VS2000 Exi User manual

IFM
IFM Efector 300 SLG User manual

IFM
IFM E30430 User manual

IFM
IFM PK55 Series User manual

IFM
IFM ecomatDisplay CR1150 User manual

IFM
IFM DP2200 User manual

IFM
IFM ecomatDisplay CR1152 User manual

IFM
IFM ecomatDisplay CR1058 User manual

IFM
IFM E30391 User manual