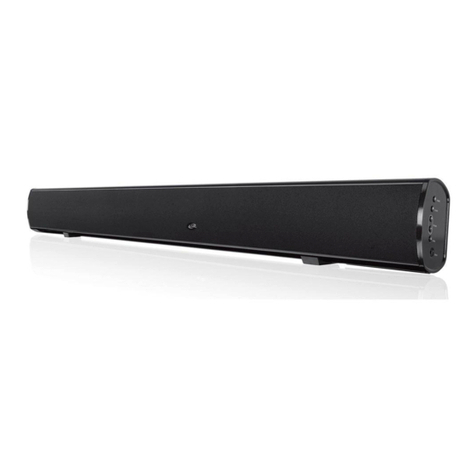
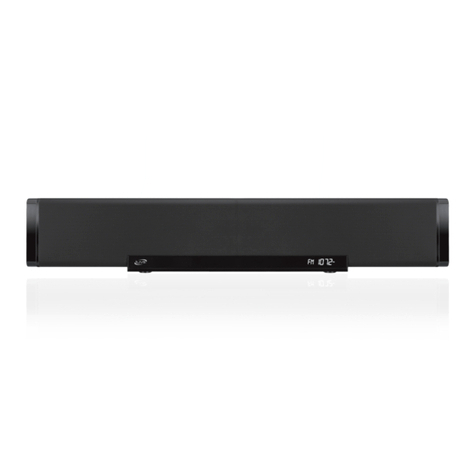
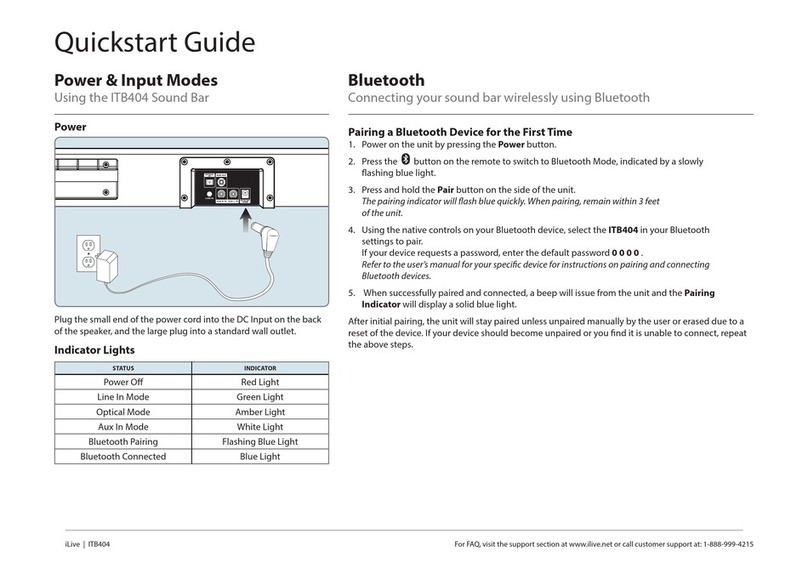
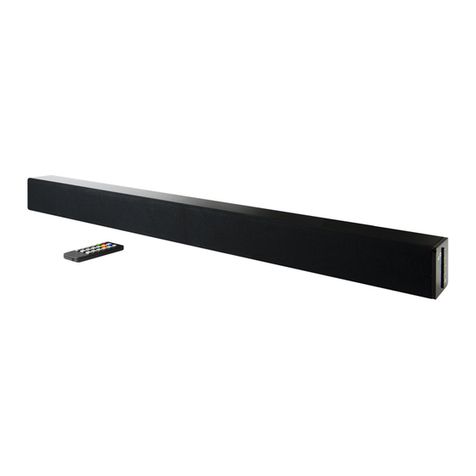
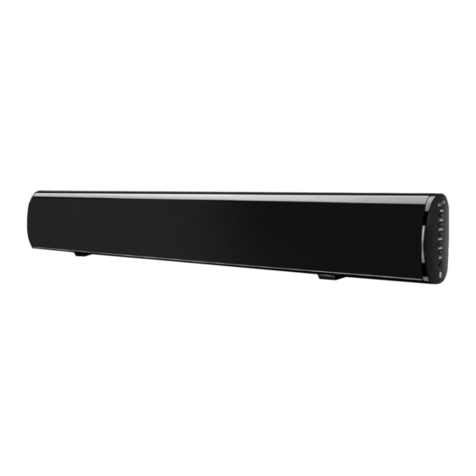
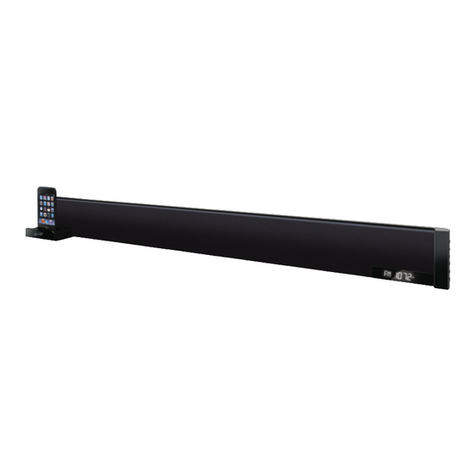
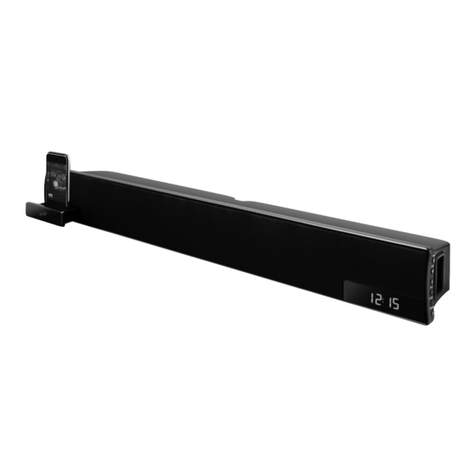
iLive ITP180B User manual

1
ITP180B User GuideCustomer Helpline Number: 0844 481 5000
ITP180B
User Guide
Bar Speaker for iPhone + iPod

2ITP180B User Guide
Congratulations on purchasing this Bar Speaker with Dock for iPhone and iPod. You can now
listen to FM radio, your iPod, or other external devices, through your bar speaker’s 2.1
channel speakers. The bar speaker can also allow you to play your iPod’s video and audio
content through an attached television.
Please read the warning section on page 18 carefully before using your bar speaker.
Welcome
•Headphones
•3.5mmlineincable
•2xAAAbatteries
You may also need
Bar Speaker with Dock for iPod
You should have
AVcables(x2)
iPod adapters x6
Wallmountfittings
Remotecontrol

3
ITP180B User GuideCustomer Helpline Number: 0844 481 5000
Need something else?
There are a wide range of accessories and
other products that can be ordered direct to
yourdoorfromASDA.Formoreinformation
see www.asda.com
Your Bar Speaker with dock
for iPhone and iPod
Set up
Everyday use
Advanced use
Mounting the bar speaker
iPod and iPhone Compatibility information
Troubleshooting
Maintenance
Technical specifications
Warnings
Contents
01
02
03
04
05
06
07
08
09
10

4ITP180B User Guide
Your Bar Speaker with dock for iPhone and iPod
Motorised Dock for iPod Display
Tip:
Where a button that appears on both the radio
andremotecontrolisreferencedinthisguide
you can use either button to use that function.
STANDBY
SOURCE
VOLUME
PLAY/PAUSE
S
iPod DRAWER
LINE IN
STANDBY
Press to turn the
bar speaker off
or on.
LINE INPUT
(3.5mm)
iPod DRAWER
Press to open
or close the
motorizeddock
for iPhone/iPod.
SOURCE
Press to switch
between iPhone/
iPod,AV,AUX,
andFMmodes.
VOLUME
Press to adjust
thevolume.
PLAY/PAUSE
Press to play or
pause a docked
iPhone or iPod.
Video input
Reset
S-video outputs
Video output
FM antenna
Subwoofer
output
Auxiliary inputs
R and L
AV inputs
R and L
01

5
ITP180B User GuideCustomer Helpline Number: 0844 481 5000
iPod
ALARM
With the power off, press
tosetthealarm.
MUTE
Presstomutethevolume.
CLOCK
With the power off,
press to set the clock.
SLEEP
Press repeatedly to set the
sleeptimer.
BASS
WiththeEQsettoFLAT,press
to adjust the levels of bass.
REV/FWD/MIN/HR
Press to rewind or fast
forward a docked iPhone
or iPod. Press to adjust the
hourandminutewhen
settingtheclockoralarm.
MENU
Presstooperatemenusona
docked iPhone or iPod.
TUN/SKIP
Press to skip between
tracks on a docked iPhone or
iPod. Press to tune the radio.
ALBUM/CHAPTER/ PLAYLIST
Presstoskipthroughalbums,
chapters, or playlists on a
docked iPhone or iPod.
STANDBY/ON
Press to turn the bar
speaker off or on.
SOURCE
PresstoswitchbetweenAV,
AUX,FM,andiPhone/
iPodmodes.
DISPLAY
Press to view the clock on
the display
iPod DRAWER
Press to open or close the
motorizeddockforiPhone/iPod.
NUMBER KEYPAD
REPEAT
Press to repeat a single track
orentirealbumonadocked
iPhone or iPod.
TREBLE
With the EQ set to
FLAT,presstoadjust
the levels of treble.
MENU UP/DN
Press to navigate upand
downinmenusona
docked iPhone or iPod.
SELECT
Presstomakeselections
on a docked iPhone
or iPod.
SHUFFLE
Press to play songs
fromadockediPhoneor
iPodinarandomorder.
EQ
Press to adjust the EQ.
VOLUME
Presstoadjustthevolume.
PLAY/PAUSE
Press to play or pause a
docked iPhone or iPod.
STOP
Press to stop a
docked iPhone or
iPod during play.
MEMORY
Press to cycle through
saved radio stations.
iPod
Press to switch to iPhone/
iPodmode.
MEM
Press to save a radio station
tothebarspeaker’smemory.

6ITP180B User Guide
Set up
Setting up your Home Music system
1Plug the power cable into a standard
three pin wall socket and switch the
power on at the wall.
Thedisplaywillilluminatetoread00.00
Note:
Youmayneedtorepositiontheaerialfor
optimumreception.Thebestpositionis
dependent on the station and the strength
of the signal.
Aerial positioning
02

7
ITP180B User GuideCustomer Helpline Number: 0844 481 5000
The remote control battery
Youwillneedtoinsert2AAAbatteries
(notincluded)intotheremoteas
described below.
1Removethebatterycoverfromthe
backoftheremoteasshown.
2Insert the batteries as shown. Make
sure you place the batteries in with
thepositive(+)andnegative(-)ends
the correct way round.
3Replace the battery cover.
2
1
Setting the time
1 Withthemusicsystemoff,pressthe
CLOCK buttononyourremotecontrol.
Thetimewillbeginblinking.
2Press the MIN and HR buttons on
theremotetoadjusttheminuteandhour.
3 Wait5secondstofinishsettingtheclock.

8ITP180B User Guide
Everyday use
Note:
Youcanselectthedesiredvolumeusingthe
VOLUME +and -.PresstheMUTEbuttonto
turn the sound off, press it again to return to
thepreviousvolumelevel.
Volume
03
Using the FM radio
Turnyourmusicsystemonusingthe
STANDBYbutton(STANDBY/ON
ontheremotecontrol).
1Select FM by pressing the SOURCE
button on your bar speaker or
remotecontrol.
2You can select the desired frequency by
pressing and holding the TUN and
buttonsonyourremotecontrol.
3Fine tuning can be done by pressing
the TUN and buttons on your
remotecontrol.
Saving your favourite stations
1Once you have selected a station as
described above you can save it so
you can listen to it at a later date.
2Press the MEM button on your
remotecontrol.
3Press the MENU UP or
MENU DN buttonsontheremote
to select a preset.
4Press and hold the MEM button on your
remotecontrolagaintosavethestation.
Upto20stationscanbesavedtothebar
speaker’smemory.
Listening to a saved station
Once you have saved your preset stations
youcanscrollthroughthembypressing
the MEMORY and buttons on
yourremotecontrol.

9
ITP180B User GuideCustomer Helpline Number: 0844 481 5000
Playing your iPod
You can play your iPod through your bar
speaker. Turn the speaker on using the
STANDBY(STANDBY/ON on the
remotecontrol)buttonandthenselect
theiPodmodeusingtheSOURCE button.
Connect your iPod to the cradle on the
frontofthesystemtodothisyouneed
to open the iPod draw by pressing the
buttonwhenintheiPodmode.Onceyou
have done this you will have to select the
correct adapter. See the chart below on
page15forfurtherdetailsoncompatible
iPods.
1Press the STANDBY button
(STANDBY/ON ontheremotecontrol)
to turn the unit on.
2Press the SOURCE button to switch
theunittoiPodmode.
3Press the iPod drawer button to open
themotorizeddockforiPod.
4Press the button to begin playing
the docked iPod.
Press the and buttons to skip tracks.
Press FWD and REV to search tracks
while listening.
Note:
Charging your iPod
Whilethepowerison,themicrosystemwill
automaticallychargeyouriPod.
Press the CHAPTER, ALBUM, or
PLAYLISTSbuttonsontheremoteto
navigatethroughthechapters,albums,
or playlists on a docked iPod.
You can use the DIRECTIONAL
buttons and button
ontheremotetonavigatetheiPod’s
menuandmakeselections.
Press the REPEAT button to turn the
repeat option on the docked iPod, off
or on. Press the REPEAT button once to
repeat the current audio track and twice
torepeatanentirealbumorplaylist.
Press the MENUbuttonontheremote
toaccessthedockediPod’smenu.
There are a range of other functions you
can use whilst playing your iPod, please
seebeloworpage5formoredetails.
Please note, if the docked iPod is not
updatedwiththelatestfirmwarefrom
Apple,itmaynotfunctionproperly
with the unit.
Setting the Sleep Timer
Press the SLEEP button, 90 will be displayed.
Press the SLEEPbuttontoselectatime
between90and1minute/s.
Select 0 to turn the sleep function off.
Aftertheselectedtimehasexpired,
the unit will turn itself off.
10 ITP180B User Guide
Bar speaker placement
Thebarspeakerdepends,inpart,onitsenvironmenttohelpproducearealisticsurround
soundenvironment.We’vesuggestedtwopotentialplacementoptionsinthediagrams
belowtohelpyougetthemostoutofyourbarspeaker.
Advanced use
04
Note:
When placing the bar speaker on an
entertainmentcenter,bookshelf,oranytype
of enclosed space, be sure to allow at least
2-3inchesofspacearoundthebarspeaker
for ventilation. If the bar speaker is enclosed
in a tight space, without ventilation, heat
generatedfromthebarspeakercouldproduce
apotentialheathazard.
Ventilation
POWER
SOURCE
VOLUME
PLAY/PAUSE
S
iPod DRAWER
LINE IN
2-3 inches

11
ITP180B User GuideCustomer Helpline Number: 0844 481 5000
STANDBY
SOURCE
VOLUME
PLAY/PAUSE
S
iPod DRAWER
LINE IN
Connecting an external device
You can connect an external device
(MP3player,CDplayerTVetc)barspeaker
in several ways.
Using a RCA audio cable Aand B
Your bar speaker can connect to two devices
atthesametimeusingtheAUX
andAVsocketsasshownbelow.
To play the external device you will need to
selecteitherAVorAUXusingtheSOURCE
button(forAUXmakesurenothingis
connected to the LINE IN on the side of
theunit).
Using a 3.5mm line-in cable C
You can also connect an external device to
your bar speaker using the LINE-IN socket
on the side of the unit as shown below.
To play the external device you will need
toselectAUXusingtheSOURCE button.
Once the device is connected you can
control playback as you would usually.
Inadditiontothissomeofthemusic
systemcontrolswillstillwork.
Press the VOLUME + and - buttons
onthemusicsystemorremotecontrol
toincreaseorreducethevolume.
Press the MUTE button to turn the
sound off, press it again to return to
thepreviousvolumelevel.
External device
External device
AB
C

12 ITP180B User Guide
Playing audio and video through another device
YoucanplayAudioorVideofromyouriPodthroughanattachedTV.Youwillneedtouse
anRCA(video)cable Aas shown below. Make sure the yellow cable is connected to the
VIDEO OUT socket.
YoucanalsoplayyouriPhoneoriPodthroughyourTVusingaS-videocable Bas shown
below. You can also attach a Sub using an audio cable C. Connect the cable to SW OUT
as shown below.
Note:
You can connect an external video source such
asaDVD,gamesconsoleordigitaldecoder
toyourbarspeakerusingtheVIDEOIN socket.
This will allow the video source to be played
troughaconnectedTVasdescribedasabove.
Connecting an external video source
Subwoofer Television
CA
B
From video source
To TV

13
ITP180B User GuideCustomer Helpline Number: 0844 481 5000
Werecommendhavingthisbarspeakerprofessionallymounted.
Byusingtheincludedwallmountingaccessories,thebarspeakercanbemountedontoawall.
The included spacers should be used at your discretion to extend the face of the bar
speakerfartherfromthewall.Thesearetypicallyusedwhenmountingthebarspeaker
under a television, and the face of the bar speaker needs to be flush with the face
of the television.
You should have
•2xLargespacers(19mm)*
•2xMediumspacers(13mm)*
•2xSmallspacers(6mm)*
•2xMountingbrackets
•4xShortscrews
•4xLongscrews
•6xWallplugs
*Thespacersmaynotbeneededdependent
onwhereyouaremountingthespeaker.
If needed use one of the provided sets
as required.
You will need
•Level
•ManualorPowerScrewdriver
•StudFinder
•Pencil
•TapeMeasure
Mounting the bar speaker onto a wall 05

14 ITP180B User Guide
Getting started
1 UsetheTAPE MEASURE to decide
how high you’d like to hang the bar
speaker on the wall.
Thebarspeakermustbehungwithin
6feetofanACpoweroutletforthe
attachedACPowerCordtoreach.
2 UsetheSTUD FINDER to locate 2
parallel wooden studs to screw the
mountingbracketsinto.
3 Mark the wall at the center of the
studs using the pencil.
Line the LEVEL up on both of your
markstomakesuretheyarelevel.
Ifthey’renot,adjustthemarksas
neededtomakethemlevel.
4 Afteryou’vedoublecheckedyour
markings,DRILL through the top hole
onbothmountingbracketsdirectly
intothemarksyou’vemadeonthewall.
If you are using the brackets only and
no spacers, use the included short
screws. If you are using any of the
spacersorcombinationofthespacers,
use the long screws.
5 UsetheLEVEL to level each of the
hanging brackets, then DRILL the
secondscrewintothebottomhole
onbothmountingbrackets.
6 Slidethebarspeakerontothemounting
brackets,andmakesurethereisa
firmandstableconnectionbefore
letting go of the bar speaker.
Finally, use the LEVELtoconfirm
that the bar speaker is level.
POWER
SOURCE
VOLUME
PLAY/PAUSE
S
iPod DRAWER
LINE IN

15
ITP180B User GuideCustomer Helpline Number: 0844 481 5000
iPod and iPhone Compatibility information 06
Pleasenote:ForadditionaliPodbrackets,pleasecontactcustomerservice.
Contactinformationforcustomerservicecanbefoundonthebackpageof
theinstructionmanual.
iPod and iPhone model Play and charge
compatibility
Included bracket Video out
compatibility
iPodmini4GB6GB
iPod4thgeneration20GB,40GB 10
iPod4thgeneration(colourdisplay)20GB30GB 10
iPod4thgeneration(colourdisplay)40GB60GB
iPodshuffle1st&2ndgeneration512MB1GB
iPodnano1stgeneration1GB2GB4GB 8
iPod5thgeneration(video)30GB60GB80GB 10
iPodnano2ndgeneration(aluminium)2GB4GB8GB 8
iPodclassic80GB,160GB(2007),120GB160GB(2009) 10
iPodnano3rdgeneration(video)4GB8GB 13
iPodtouch1stgeneration8GB16GB32GB 14
iPodtouch3rdgeneration32GB64GB 14
iPhone416GB32GB
iPhone4GB8GB16GB 12
iPhone3G8GB16GB 15
iPhone3GS8GB16GB32GB 15
iPodnano4thgeneration(video)8GB16GB 8
iPodtouch2ndgeneration8GB16GB32GB64GB 14
iPodnano5thgeneration(videocamera)8GB16GB 8

16 ITP180B User Guide
Troubleshooting
Problem What to do
No power Check that the power is switched on at the wall.
Check if the power cord is properly connected to the power outlet.
No sound CheckthatthevolumecontrolisNOTatminimumsetting.
CheckthatitisNOTsettomute.
Radio channel
reception is poor
Adjusttheantennalocationandpositiontoobtainthebestsignalreception.
Tune to the correct radio channel frequency.
Function disturbed Ifnoneoftheabovesolutionswork,tryswitchingoffandunpluggingyourmusicsystem,
leavingitfortwominutesandthenswitchingitbackonagain.
Theremotecontrol
won’t work
Inspect or replace the batteries.
Make sure there are no obstacles obscuring the front of the player.
TFTdisplayisfrozen
(orpartiallyfrozen)with
amosaiclikepattern
ESD(electrostaticdischarge)duetocontactwiththeTFTscreenframe.
Disconnecttheunitfromthepowersupplyandthenreconnect.
Need extra help?
Don’t worry we’re just the other end of the
phone.Ifyou’reexperiencingproblemsusing
your new product, before returning it to the
retailer just call 0844 481 5000
Monday-Friday9am-8pm,Saturday9am-5pm
Sunday11am-4pm.Callschargedatlocalrates.
Lovingyournewbarspeaker?ASDAhasawide
variety of electrical and other products that are
available either instore or online.
Formoreinformationvisityourlocalstore
or find us online at www.asda.com
Need something else?
1Do not use harsh or abrasive cleaning
agents or solvents.
2Polish the screen with soft cloth and if
necessaryarecommendedglasscleaner.
3 Donotattempttodisassemble
your product.
4Do not paint your product.
5Do not drop, throw or try to bend
your product.
6Do not expose your product to open
flamesorlittobaccoproducts.
07
Maintenance
08

17
ITP180B User GuideCustomer Helpline Number: 0844 481 5000
Technical specifications 09
Size 30”(W)x5”(D)x3.5”(H)
Output Power 10Wx2+30W
Standby power consumption <2w
Pleaseseethenameplateontherearofyourunitforfullproductdescription

18 ITP180B User Guide
Thisproductwasdesignedandmanufacturedto
meetstrictqualityandsafetystandards.Thereare,
however,someoperationprecautionsthatyou
should be aware of:
• Readallwarnings.
• Followallinstructions.
• Checkthemainsvoltagestatedonthemains
adaptor rating plate corresponds to the local
electricity supply, if it doesn’t, return the
product to the store where you bought it.
• Unwindandstraightentheadaptorcord
before use.
• Placetheproductonafirmandlevelsurface.
• Turnofftheapplianceduringthunderstorms.
• Tocompletelydisconnectthisproductfrom
themains,disconnecttheplugfromthe
wallsocketoutlet.Themainsplugisusedto
completelyinterruptthepowersupplytothe
unitandmustbewithineasyaccessbythe
user.
• Removetheadaptorfromtheoutlet,whenthe
productisunusedforalongperiodoftime
andduringthunderstorms.
• Cleanonlywithadrycloth,unplugthe
outlet before cleaning. Do not use aggressive
cleanersasthesewilldamagethesurface.
• Onlyuseattachments/accessoriesspecifiedby
themanufacturers.
• Donotlocatetheapplianceinthevicinityofa
heat source or in direct sunlight. Do not place
anakedflamesourceonornearthisproduct.
• Donotattempttoopenthecabinetorremove
any covers. If the power adapter or its lead
becomesdamaged,itmustbereplacedwith
anadapterofthesametypeandrating.
• Repairsmustonlybeperformedbythe
manufactureroritsserviceagentorsimilarly
qualified person.
• Donotimmersethemainunit,thepower
adapter or any accessories in water or any
other liquid.
• Donotexposethisproducttodrippingor
splashing or stand any vessel containing liquid
on or near this product.
• Undertheinfluenceofelectrostatic
phenomenon,theproductmaymalfunction
and require user to reset.
• Donotinstallthisequipmentinaconfined
orbuilding-inspacesuchasabookcaseor
similarunit,andremainawellventilation
conditions. The ventilation should not be
impededbycoveringtheventilationopenings
withitemssuchasnewspaper,table-cloths,
curtains etc.
• WARNING:Pleaserefertheinformation
onexteriorbottomenclosureforelectrical
andsafetyinformationbeforeinstallingor
operating the apparatus.
• WARNING:Toreducetheriskoffireorelectric
shock, do not expose this apparatus to rain or
moisture.Theapparatusshallnotbeexposed
to dripping or splashing and that objects
filled with liquids, such as vases, shall not be
placed on apparatus.
• WARNING:Thebattery(batteryorbatteries
orbatterypack)shallnotbeexposedto
excessive heat such as sunshine, fire or the
like.
• WARNING:Themainsplugisusedas
disconnect device, the disconnect device shall
remainreadilyoperable.
• WARNING:Topreventinjury,thisapparatus
mustbesecurelyattachedtothefloor/wallin
accordance with the installation instruction
CAUTION
RISK OF ELECTRIC SHOCK
DO NOT OPEN
CAUTION: TO REDUCE THE RISK OF ELECTRIC SHOCK, DO NOT
REMOVE COVER (OR BACK). NO USER SERVICEABLE PARTS INSIDE.
REFER SERVICING TO QUALIFIED SERVICE PERSONNEL.
Warnings
10
• CorrectDisposalofthisproduct.Thismarking
indicates that this product should not be
disposed with other household wastes
throughouttheEU.Topreventpossible
harmtotheenvironmentorhumanhealth
fromuncontrolledwastedisposal,recycleit
responsiblytopromotethesustainablereuse
ofmaterialresources.Toreturnyourused
device, please use the return and collection
systemsorcontacttheretailerwherethe
product was purchased. They can take this
productforenvironmentalsaferecycling.

19
ITP180B User GuideCustomer Helpline Number: 0844 481 5000
28 day no quibble refund
Ifyou’renotdelightedbyyourproduct,simplybringitbackwithin28daysforanoquibblerefund.
Don’tforgettoincludealloftheitem’soriginalcomponents(forexampleremotecontrolorpower
cable)andpackagingalongwithyourreceiptorotherproofofpurchase.
Free 1 year guarantee
Allourelectricalitemsarecoveredbyafull1yearASDAguaranteefromthedayyoubuyit.Inthe
unlikelyeventthatyourproductisfaultyoryouaresimplystrugglingtosetitup,don’tworry,here’s
what you should do:
1 FirstcallourCustomerHelplineastheymay
beabletohelpyouwiththeproblem.
2 Iftheproblemcan’tberesolved,youwill
receiveareferencenumber.
3 Takethereferencenumberalongwiththe
item,allitscomponentsandyourreceipt
to your nearest store for a full refund.
This does not affect your statutory rights.
Customer Helpline
0844 481 5000
Monday-Friday9am-8pm,Saturday9am-5pm
Sunday11am-4pm.Callschargedatlocalrates.
ThecontentsofthisguidewerecorrectatthetimeofgoingtopressbutASDAreservestherighttomake
subsequentmodificationsandchangestotheproductorthisguide.ASDAisaregisteredtrademarkof
WalmartLtd.Allothertrademarksorproductnamesareassignedtotheirrelevantregisteredowners.

©2010DigitalProductsInternational(DPI,Inc.)|Allothertrademarksappearinghereinare
the property of their respective owners. Specifications are subject to change without notice
Thissymbolontheproductorintheinstructionsmeansthatyourelectricaland
electronicequipmentshouldbedisposedattheendofitslifeseparatelyfromyour
householdwaste.ThereareseparatecollectionsystemsforrecyclingintheEU.
Formoreinformation,pleasecontactthelocalauthorityoryourretailerwhereyou
purchased the product.
ManufacturedforAsdaStoresLtd,AsdaHouse,Southbank,GreatWilsonStreet,Leeds.LS115AD
Other manuals for ITP180B
2
Table of contents
Other iLive Speakers System manuals

iLive
iLive WTX002A User manual

iLive
iLive IKB323SMP3U User manual

iLive
iLive v859-02 User manual

iLive
iLive ITB066B User manual

iLive
iLive ITBSW421 User manual

iLive
iLive ITB296B User manual

iLive
iLive ITB490B User manual

iLive
iLive ITP180B User manual

iLive
iLive ITB037 User manual

iLive
iLive ITB066B User manual

iLive
iLive ITB105 User manual

iLive
iLive ITB105B User manual

iLive
iLive ITBSW285B v1070-01 User manual

iLive
iLive ITB382B User manual

iLive
iLive ISB172 User manual

iLive
iLive ITB037SO User manual

iLive
iLive SR215W User manual

iLive
iLive ITB174B User manual

iLive
iLive IT 123 User manual

iLive
iLive ITB283B User manual