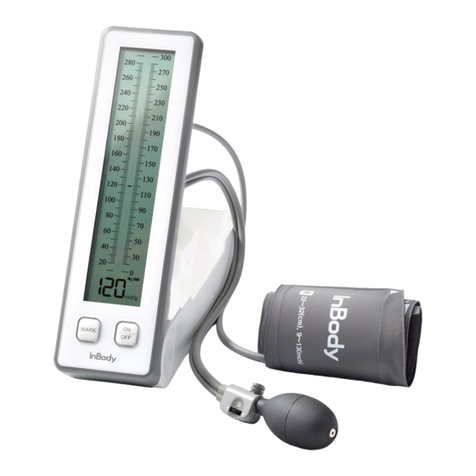
inbody BPBIO750 User manual

BPBIO750
User’s Manual

2 3
Please note the important information below before reading this manual.
Failure to observe these precautions can result in personal injury or equipment damage.
Le non-respect de ses précautions peut causer des blessures ou des dommages à l'appareil.
Warning
Avertissement
Failure to comply with safety precautions can damage the equipment.
Le non-respect de ses précautions peut causer des dommages à l'appareil.
Caution
Attention
Referring to notes can help improve equipment use.
Se référer aux notes peut aider à améliorer l'utilisation de l'appareil.
Note
Remarque
©2020 InBody Co., Ltd. All rights reserved. BM-USA-H2-B-201229
For any problems with BPBIO750 or any clinical questions, please contact us at the following:
InBody Co., Ltd. [HEAD OFFICE]
InBody Bldg., 625, Eonju-ro, Gangnam-gu, Seoul 06106 Republic of Korea
TEL: +82-2-501-3939 FAX: +82-2-578-5669
Website: inbody.com E-mail: info@inbody.com
©2020 InBody Co., Ltd. All rights reserved.
Reproduction, adaptation, or translation of this manual is prohibited without prior written consent from InBody Co., Ltd. under the copyright
laws. This user manual may be printed incorrectly and subject to change without notice. InBody Co., Ltd. shall not be liable for any errors,
incidental, or consequential damages that occurred by not complying with the content of the User’s Manual.
Visit our website (inbody.com) to view and download further information about the functions of the BPBIO750, the explanation of results
output, and more. InBody Co., Ltd. reserves the right to modify the appearance, specifications, etc. of this product to improve the quality of the
product, without prior notice for reasons of performance improvement.
Representative & Sponsor Information
InBody Europe B.V.
Gyroscoopweg 122, 1042 AZ, Amsterdam, The Netherlands
TEL: +31-20-238-6080 FAX: +31-6-5734-1858 Website: nl.inbody.com E-mail: info.eu@inbody.com
Australian Sponsor. [AUSTRALIA]
Emergo AUSTRALIA. Level 20, Tower II, Darling Park, 201 Sussex Street, Sydney, NSW 2000, AUSTRALIA
Customer Service Information
InBody USA [USA]
13850 Cerritos Corporate Dr. Unit C Cerritos, CA 90703 USA
TEL: +1-323-932-6503 FAX: +1-323-952-5009 Website: inbodyusa.com E-mail:contact@inbody.com
InBody Japan [JAPAN]
Tani Bldg., 1-28-6, Kameido, Koto-ku, Tokyo 136-0071 Japan
TEL: +81-3-5875-5780 FAX: +81-3-5875-5781 Website: www.inbody.co.jp E-mail: inbody@inbody.co.jp
InBody China [CHINA]
904, XingDiPlaza, No.1698 YiShanRoad, Shanghai 201103 China
TEL: +86-21-64439705
FAX: +86-21-64439706
Website: inbodychina.com
E-mail: [email protected]
InBody Asia [ASIA]
Unit 3A-11, Oval Damansara, 685 Jalan Damansara Kuala Lumpur, WP KL 60000 Malaysia
InBody India [INDIA]
Unit No. G-B 10, Ground Floor, Art Guild House, Phoenix Market City, L.B.S. Marg, Kurla (West), Mumbai 400070 India
TEL : +91-22-6223-1911 Website: inbody.in E-mail: india@inbody.com

2 3
I. BPBIO750 Installation
A. Product Components
B. Operating Environment
C. Installation Instructions
D. Loading and Reloading Printer Paper
E.ReplacingCuCover
F. Setup
G. Connecting to InBody
H. Precautions for Maintenance
II. Blood Pressure Test
A. Precautionary Steps
B. Test Instructions
C. Test Posture
III.Transportation and Storage
A. Cautions during Transportation
B. Repacking Instructions
C. Transportation and Storage Environment
IV. FAQ
A. Error Code
B. Regarding the Equipment
C. Regarding the Test
V. Others
A. Exterior and Functions
B. Safety Information
C.ProductClassication
D.Specications
E. EMC Information (Declaration)
5
6
6
10
11
13
17
18
19
19
22
23
24
24
25
25
27
29
30
30
31
User’s Manual Contents
BPBIO750

4 5
I.BPBIO750 Installation
A. Product Components
The
BPBIO750 consists of the following components. Make sure all of the following components are present.
*Please check each component of the system for damage prior to installation.
Basic Components
The BPBIO750
Power cable 110V or 220V (AC 250V 10A 1.8m (70.9 in.)) 1 EA
Two rolls of printing paper
User’s Manual
Twocucovers(Oneinstalled)
Optional Components
Desk for the BPBIO750, and two screws
Chair for the BPBIO750
Print
Start
Stop
Placeyourelbow on the elbow point.
PresstheSTART button.
Donotmove during the measurement.
SYS.
P.R
DIA.
*Pleaseconsultwith your doctor for accurate diagnosis.
Blood Pressure Guidelines
(Age18and O ver)
Stage2 Hypertension
DiastolicBloodPressure
SystolicBloodPressure
Stage1 Hypertension
Prehypertension
Normal
Start
Stop
BPBIO750
User’s Manual
Print
Print
Start
Stop
Placeyourelbow on the elbow point.
PresstheSTART button.
Donotmove during the measurement.
SYS.
P.R
DIA.
*Pleaseconsultwith your doctor for accurate diagnosis.
Blood PressureGuidelines
(Age18and Over)
Stage2 Hypertension
DiastolicBloodPressure
SystolicBloodPressure
Stage1 Hypertension
Prehypertension
Normal
Start
Stop
BPBIO750
User’s Manual
Print
Print
Start
Stop
Placeyourelbow on the elbow point.
PresstheSTART button.
Donotmove during the measurement.
SYS.
P.R
DIA.
*Pleaseconsultwith your doctor for accurate diagnosis.
Blood Pressure Guidelines
(Age18and O ver)
Stage2 Hypertension
DiastolicBloodPressure
SystolicBloodPressure
Stage1 Hypertension
Prehypertension
Normal
Start
Stop
BPBIO750
User’s Manual
Print
1
1
6
7
2
3
4
5
2
3
4
5
6
7
<110V or 220V>
BPBIO750
User’s Manual

4 5
C. Installation Instructions
1. OpentheBPBIO750box,andremovethepackingpads.TakeotheprotectivevinyloutoftheBPBIO750,
and takeout the BPBIO750 from the box. Remove the packing material.
B. Operating Environment
Please make sure the environment is adequate for the BPBIO750 installation. This equipment is
designedforindooruse.Ifinstallingtheequipmentoutdoors,thefollowingrequirementsmustbefullled.
Temperatures range 10 to 40ºC (50 to 104ºF)
Relative humidity 30 to 75% RH
Atmospheric pressure range 70 to 106 kPa
•Do not carry the equipment by holding the cuff.
•Keep packing material to repack the BPBIO750 at a later time. Dispose of trash according to local laws and
regulations.
•Refer to the figure below when transporting the BPBIO750.
Caution
• Ne transportez pas l’appareil en le tenant par le brassard.
• Conservez l’emballage original de l’appareil BPBIO750 pour le réemballer ultérieurement.
Disposez des déchets selon la réglementation locale en vigueur.
•Référez-vous à l’illustration ci-dessous pour transporter l’appareil BPBIO750.
Attention
Packing material
*Pleaseconsultwith your doctor for accurate diagnosis.
BloodPressure Guidelines
(Age18and Over)
Stage2Hypertension
DiastolicBloodPressure
SystolicBloodPressure
Stage1Hypertension
Prehypertension
Normal
Placeyourelbow on the elbow point.
PresstheSTARTbutton.
Donotmoveduring the measurement.
SYS.
P.R
DIA.
Print
Start
Stop
Packing pads
Package protective vinyl

6 7
2. Place the equipment on a solid table that can withstand the weight of the BPBIO750 (approx. 7.1kg (15.65lb)).
IfdeskfortheBPBIO750isavailable,alignthedesk-xinggroovesonthebottomoftheBPBIO750
withthegroovesonthedeskandsecurethemwithtwoxingscrews.
*desk for the BPBIO750 is sold separately.
3. Connect the power cable provided with the BPBIO750.
* Plug the power cable into a grounded 3-prong outlet.
•Install the BPBIO750 on the flat, vibration free floor.
If the equipment is installed where the floor is not flat, it may topple during a test or the test results may be
inaccurate.
Caution
•Installer le BPBIO750 sur un sol plat et sans vibration.
Si l'équipement est installé sur un sol qui n'est pas plat, il peut glisser pendant un test ou les résultats peuvent
être inexacts.
Attention
Placeyour elbow on the elbow point.
Pressthe START button.
Donot move during the measurement.
SYS.
P.R
DIA.
Fixing screws
Desk xing grooves Desk grooves
Print
Start
Stop
Placeyourelbow on the elbow point.
PresstheSTARTbutton.
Donotmove during the measurement.
SYS.
P.R
DIA.
*Pleaseconsultwith your doctor for accurate diagnosis.
Blood PressureGuidelines
(Age18and Over)
Stage2Hypertension
DiastolicBloodPressure
SystolicBloodPressure
Stage1Hypertension
Prehypertension
Normal
Start
Stop
BPBIO750
User’s Manual
Print
Start
Stop
Anti-theft
groove
Grounded
terminal
Grounded
terminal
3-prong
outlet
<110V> <220V>
Anti-theft
groove

6 7
•Do not install the equipment where the power cable is difficult to disconnect.
•Do not plug or disconnect the power cable with wet hands. There is a risk of electric shock.
•Always use an outlet supplied to the correct power supply (AC100-240 V).
An incorrect power supply may cause fire or malfunction.
•When using a multiple tab, use it having enough power capacity or use an extension cable.
•Do not disassemble the equipment arbitrary. This may cause electric shock or injury, product malfunction, and/or
inaccurate results. Unauthorized disassembly will void the manufacturer’s warranty.
•Do not let the BPBIO750 touch with other electronic devices when on. This may cause in electric shock.
Warning
•N’installez pas l’appareil dans un lieu difficile d’accès.
•Ne branchez pas et ne débranchez pas le câble d’alimentation si vos mains sont mouillées; ce geste comporte
des risques d’électrocution.
•Utilisez toujours une prise reliée à un circuit électrique approprié (CA 100-240V); dans le cas contraire,
un incendie ou un mauvais fonctionnement pourrait se produire.
•Lorsque vous utilisez une prise multiple, assurez-vous qu’elle fournit suffisamment de puissance, ou utilisez
une rallonge électrique.
•Ne démontez pas l’appareil de façon arbitraire; ceci comporte des risques d’électrocution et de blessure,
un mauvais fonctionnement de l’appareil, et des résultatsinexacts. Le cas échéant, la garantie du manufacturier
serait annulée.
•Ne mettez pas l’appareil BPBIO750 en contact avec d’autres appareils électroniques lorsqu’il est en marche,
ceci comporte des risques d’électrocution.
Avertissement
•Plugging the device into an ungrounded outlet may cause malfunction or electric shock and/or inaccurate
results.
Caution
•Branchez l’appareil à une prise de courant n’ayant pas été mise à terre pourrait causer un mauvais
fonctionnement et/ou des résultats inexacts.
Attention

8 9
•Do not operate or touch the device while it is calibrating. It may cause errors to future tests.
• Ne manipulez pas l’appareil BPBIO750 et ne le faites pas fonctionner pendant qu’il effectue un test
automatique (env. 10 s); des erreurs et des résultats inexacts pourraient en résulter.
Caution
Attention
Place your elbow on the elbow point.
Press the START button.
Do not move during the measurement.
Irregular signal was detected.
SYS.
P. R
DIA.
Place your elbow on the elbow point.
Press the START button.
Do not move during the measurement.
SYS.
P. R
DIA.
4. Use the anti-theft groove to prevent theft.
*Use the anti-theft cable which is used for laptop etc.
*Theft protection cable is sold separately.
5. Turn the BPBIO750 on by pressing the power switch located on the back of the device.
6. When the BPBIO750 is turned on, the following screen is displayed and a calibration is automatically
performed.
Power switch
7. Adjust the volume by turning the volume knob on the rear of the BPBIO750.

8 9
D. Loading and Reloading Printer Paper
1. Press the button below to open the cover while the BPBIO750 is turned on.
2. Insert the printer paper in the direction as shown below.
After inserting the printer paper, let a certain amount of paper come out of the cover, and close the cover to
complete the installation.
•The printer will not work if the paper is inserted in the wrong direction.
•Remove all trash from previous printer paper rolls when replacing with the new printer paper.
•L’imprimante ne fonctionnera pas si le papier n’est pas inséré adéquatement.
•Assurez-vous de bien retirer les résidus du papier précédent lorsque vous rechargez le papier
d’impression.
Caution
Attention
•Two rolls of printer paper are provided with the BPBIO750.
•If additional printer paper roll is needed, it must be purchased separately as it is a consumable item.
•Deux rouleaux de papiers sont fournis avec le BPBIO750.
•Si du papier supplémentaire est nécessaire, l'utilisateur peut l'acheter séparément comme un article
consommable.
Note
Remarque
PUSH

10 11
E.ReplacingCuCover
ThecucoveroftheBPBIO750shouldbereplacedperiodicallyforsanitarypurposes.Followtheguide
belowtoreplacethecucover.
1. Remove the front cover of the BPBIO750 by pushing downward, and loosen the screw with a screwdriver.
Remove the ring on the front of the BPBIO750 by pulling it forward.
2.Pushintheseamofthecucoverasshowntoseparatethecucover.
3.Pullthecucoverasshowntoremovefromthedevice.
SYS.
P. R
DIA.
Print
Front Cover
SYS.
P. R
DIA.
Front ring
Screw

10 11
4.Placetheseamofthenewcucoverdownasshown,andalignitwithfrontandrearring.
5. Attach the previously removed front and rear rings on the BPBIO750 and secure them with screws. Close
the front cover of the BPBIO750.
•The test result of blood pressure may be inaccruate if the seam does not face down.
•Les résultats de la pression artérielle pourraient être faussés si la ligne de couture n’est pas placée vers le
bas.
Caution
Attention
•Two cuff covers are provided with the BPBIO750. (One is already installed in the equipment.)
•If additional cuff cloth is necessary, the user must purchase it separately as a consumable item.
•Deux housses de brassard sont fournies avec l’appareil BPBIO750, l’une d’elles est préalablement installée
sur l’équipement.
•Au besoin, l’utilisateur peut faire l’achat de nouvelles housses de brassard auprès de son fournisseur.
Note
Remarque
Print
Front Cover
Front ring
Screw

12 13
F. Setup
Setup consists of time settings, sound settings, results sheet printing, pressure unit setting and communication
settings.
1. Setting Setup
1)When ' ' button and 'Print' button are pressed and held at the same time for 2 seconds while on
thehomescreen,''(Timesetting),whichistherstscreenoftheSetup,willblink.Thecurrent
setting status will be shown in the Diastolic ( ) column and Pulse (Hour value) column.
2) When the Systolic column is blinking, you can go to the desired setting item.
Press UP / DOWN buttons to move to the other setting items.
* UP/DOWN buttons are located beneath the printer cover of the device.
3) After moving to the desired setting item, press the button to change the setting value.
The set value can be changed with the UP / DOWN buttons, and the set value of the corresponding item is
displayed in the Pulse column.
4) After completing the settings, press the button to save the setting value. And then you can go back
to the desired setting item.
5) After completing all settings, press and hold the Print button for 2 seconds to return to the home screen.
Place your elbow on the elbow point.
Press the START button.
Do not move during the measurement.
SYS.
P. R
DIA.
Place your elbow on the elbow point.
Press the START button.
Do not move during the measurement.
SYS.
P. R
DIA.
Place your elbow on the elbow point.
Press the START button.
Do not move during the measurement.
SYS.
P. R
DIA.
Place your elbow on the elbow point.
Press the START button.
Do not move during the measurement.
SYS.
P. R
DIA.
Place your elbow on the elbow point.
Press the START button.
Do not move during the measurement.
SYS.
P. R
DIA.
Place your elbow on the elbow point.
Press the START button.
Do not move during the measurement.
SYS.
P. R
DIA.
Place your elbow on the elbow point.
Press the START button.
Do not move during the measurement.
SYS.
P. R
DIA.
Place your elbow on the elbow point.
Press the START button.
Do not move during the measurement.
SYS.
P. R
DIA.
Place your elbow on the elbow point.
Press the START button.
Do not move during the measurement.
SYS.
P. R
DIA.
Place your elbow on the elbow point.
Press the START button.
Do not move during the measurement.
SYS.
P. R
DIA.
Place your elbow on the elbow point.
Press the START button.
Do not move during the measurement.
SYS.
P. R
DIA.
Place your elbow on the elbow point.
Press the START button.
Do not move during the measurement.
SYS.
P. R
DIA.
Place your elbow on the elbow point.
Press the START button.
Do not move during the measurement.
SYS.
P. R
DIA.
Place your elbow on the elbow point.
Press the START button.
Do not move during the measurement.
SYS.
P. R
DIA.
Place your elbow on the elbow point.
Press the START button.
Do not move during the measurement.
SYS.
P. R
DIA.
Place your elbow on the elbow point.
Press the START button.
Do not move during the measurement.
SYS.
P. R
DIA.
Place your elbow on the elbow point.
Press the START button.
Do not move during the measurement.
SYS.
P. R
DIA.
Place your elbow on the elbow point.
Press the START button.
Do not move during the measurement.
SYS.
P. R
DIA.
UP
DOWN
Place your elbow on the elbow point.
Press the START button.
Do not move during the measurement.
SYS.
P. R
DIA.
Place your elbow on the elbow point.
Press the START button.
Do not move during the measurement.
SYS.
P. R
DIA.
Place your elbow on the elbow point.
Press the START button.
Do not move during the measurement.
SYS.
P. R
DIA.
Place your elbow on the elbow point.
Press the START button.
Do not move during the measurement.
SYS.
P. R
DIA.
Place your elbow on the elbow point.
Press the START button.
Do not move during the measurement.
SYS.
P. R
DIA.
Place your elbow on the elbow point.
Press the START button.
Do not move during the measurement.
SYS.
P. R
DIA.
Place your elbow on the elbow point.
Press the START button.
Do not move during the measurement.
SYS.
P. R
DIA.
Place your elbow on the elbow point.
Press the START button.
Do not move during the measurement.
SYS.
P. R
DIA.
Place your elbow on the elbow point.
Press the START button.
Do not move during the measurement.
SYS.
P. R
DIA.
Place your elbow on the elbow point.
Press the START button.
Do not move during the measurement.
SYS.
P. R
DIA.
Place your elbow on the elbow point.
Press the START button.
Do not move during the measurement.
SYS.
P. R
DIA.
Place your elbow on the elbow point.
Press the START button.
Do not move during the measurement.
SYS.
P. R
DIA.

12 13
2. Setup Example
The following is an example showing how to change the automatic result sheet printing option to manual
printing option.
1)While on the home screen, press and hold button and Print button at the same time for more
than2seconds.Thecurrentsettingisshownonthe''screen,therstscreenoftheSetup.
2) Press 'UP/DOWN' buttons to go to ' ' screen.
In the Pulse column, the existing setting value is ‘ ’ displayed.
3) Press the button to enter the corresponding item, and then use the UP / DOWN buttons to
change the current setting value from ‘ ’ to ‘ ’.
4) Press the button to save the setting value, and display will be returned to Setup screen.
5) Check the setting value of the Pulse column again, and if you think that the desired setting is completed,
press and hold the Print button for 2 seconds to return back to the home screen.
Place your elbow on the elbow point.
Press the START button.
Do not move during the measurement.
SYS.
P. R
DIA.
Place your elbow on the elbow point.
Press the START button.
Do not move during the measurement.
SYS.
P. R
DIA.
Place your elbow on the elbow point.
Press the START button.
Do not move during the measurement.
SYS.
P. R
DIA.
Place your elbow on the elbow point.
Press the START button.
Do not move during the measurement.
SYS.
P. R
DIA.
Place your elbow on the elbow point.
Press the START button.
Do not move during the measurement.
SYS.
P. R
DIA.
Place your elbow on the elbow point.
Press the START button.
Do not move during the measurement.
SYS.
P. R
DIA.
Place your elbow on the elbow point.
Press the START button.
Do not move during the measurement.
SYS.
P. R
DIA.
Place your elbow on the elbow point.
Press the START button.
Do not move during the measurement.
SYS.
P. R
DIA.
Place your elbow on the elbow point.
Press the START button.
Do not move during the measurement.
SYS.
P. R
DIA.
Place your elbow on the elbow point.
Press the START button.
Do not move during the measurement.
SYS.
P. R
DIA.
Place your elbow on the elbow point.
Press the START button.
Do not move during the measurement.
SYS.
P. R
DIA.
Place your elbow on the elbow point.
Press the START button.
Do not move during the measurement.
SYS.
P. R
DIA.
Place your elbow on the elbow point.
Press the START button.
Do not move during the measurement.
SYS.
P. R
DIA.
Place your elbow on the elbow point.
Press the START button.
Do not move during the measurement.
SYS.
P. R
DIA.
Place your elbow on the elbow point.
Press the START button.
Do not move during the measurement.
SYS.
P. R
DIA.
Place your elbow on the elbow point.
Press the START button.
Do not move during the measurement.
SYS.
P. R
DIA.
Place your elbow on the elbow point.
Press the START button.
Do not move during the measurement.
SYS.
P. R
DIA.
Place your elbow on the elbow point.
Press the START button.
Do not move during the measurement.
SYS.
P. R
DIA.

14 15
3. Detailed description of Setup
When setting up the Setup, the following messages will be displayed in the Systolic, Diastolic, and Pulse screen.
Function
Screen
Description
Systolic Diastolic Pulse
Hour setting setting hour (0-23)
Minute setting setting minute (0-59)
Year setting setting year (2000-2035)
Month setting setting month (1-12)
Day setting setting day (1-31)
Sound
Reading test instruction and measurement results
Reading test instruction only
Reading measurement results only
Beep guide
Printing options
Automatic printing of results sheet
Manual printing of results sheet
Screen timeout
duration
Display the test result value for 5 seconds
Display the test result value for 10 seconds
Display the test result value for 20 seconds
Display the test result value for 30 seconds
Display the test result value for 60 seconds
Display the test result value for 120 seconds
Date output format
YY / MM / DD
MM / DD / YY
DD / MM / YY
Pressure unit
mmHg
kPa
Communication
InBody
PC
Results
sheet item
Type of Results
sheet
3-line automatic output (vertical)
*F13-F18 function not available
3-line automatic output (horizontal)
Additional
result values
Output of Mean arterial pressure /
Pulse pressure / Pressure rate product
Not used
Blood pressure
graph
Print blood pressure graph
Not used
Test posture
check
Guide output about the elbow placement
Not used

14 15
Results
sheet item
Blood pressure
knowledge
Output of blood pressure common sense on
the Results sheet
Not used
Pulse graph
Output of pulse graph on the results sheet
Not used
Logo
Output of customized logo on the result sheets
Not used
Setting up the Elbow Sensor
Elbow sensor is operating
Elbow sensor is disable
Results
sheet item QR Code
Output of QR code
Not used
Measurement
mode setting
3 consecutive
measurements
3 consecutive measurements mode
One time measurement mode

16 17
G.Connecting to InBody
If the BPBIO750 connects to InBody products, the blood pressure test results can be transferred to the InBody.
*Only compatible with other InBody products
*Blood pressure values can be printed on the InBody Result Sheet.
*Serial cable is sold separately.
1.
TurnotheBPBIO750.
2.
Connect the serial cable to the RS232C (9-pin serial) connection terminal located on the back of the BPBIO750.
Connect the other end of the serial cable to the serial connection terminal on the InBody device.
*RefertotheInBodymanualtondthelocationoftheserialconnectionterminal.
3.
Turn on the BPBIO750.
\
4.
Devices will connect automatically.
Example: InBody770
Blood Pressure Monitor
serial connection terminal
•Refer to the InBody product manual to print the blood pressure values on the InBody Result Sheet.
Note
•Consultez le manuel du produit d'InBody pour la méthode d'impression des valeurs de la pression artérielle
sur la fiche des résultats d'InBody.
Remarque

16 17
Avant d’allumer l’appareil, assurez-vous que :
•l’appareil n’ait pas subi de dommage à la suite d’un impact
•l’appareil n’est pas contaminé
•l’appareil n’est pas mouillé
•le cordon d’alimentation est bien inséré dans la prise murale.
•le cordon d’alimentation n’est pas endommagé
•le cordon d’alimentation ne constitue pas un risque de chute.
Si un message d'erreur (code d'erreur) apparaît pendant l'auto-test, veuillez contacter le revendeur ou le
centre de service à la clientèle.
H.Precautions for Maintenance
Check the following before turning the equipment on.
•Never move the equipment while the power is on.
•Do not let foreign objects, like dust and liquid to enter the device.
Foreign objects can damage electric components.
•Clean the exterior of the equipment gently with a lint-free cloth once a week.
Do not scratch the LED screen while cleaning the equipment.
•Replace the cuff cloth when it becomes dirty or worn out.
•Packing material and other wastes should be disposed of according to the relevant laws and regulations.
•Make sure the equipment was not damaged from impact.
•Make sure the equipment is not contaminated.
•Make sure the equipment is not wet.
•Make sure the power cord is completely plugged in.
•Make sure the power cord is not damaged.
•Make sure the power cord is not a tripping hazard.
The BPBIO750 calibrates automatically when it is turned on. But it may be necessary for a specialist to
inspect the device once every two years to maintain its performance and safety. If an error message appears
during the calibration, please contact product support.
Caution
•Ne déplacez pas l’appareil lorsqu’il fonctionne.
•Ne laissez aucun corps étranger, tel de la poussière ou du liquide s’insérer dansl’appareil;
ces derniers pourraient endommager les composantes électriques.
•Nettoyez l’extérieur de l’appareil avec un chiffon doux et non pelucheux une fois par semaine, veillez
à ne pas gratter l’écran D.E.L. lors du nettoyage de l’appareil.
•Remplacez la housse du brassard lorsque celle-ci devient sale ou trop usée.
•Vous devez disposer des emballages et autres déchets conformément à la réglementation locale en vigueur.
Attention

18 19
Blood Pressure Test
A. Precautionary Steps
B. Test Instructions
1. Adjust the height of the chair so that the inserted upper arm and the heart are horizontal.
2. Rest for at least 5 minutes prior to taking the test.
*If examined in a bit unstable condition, the test result may be incorrect, and generally it will turn up higher than your usual blood
pressure.
II.
• User should rest at least 5 to 10 minutes before the test.
•Do not roll up the user’s sleeve, but take off thick clothes.
•User should sit up straight in the chair.
•Insert the user’s arm until the elbow is caught in the elbow groove.
•Adjust the height of the chair so that the inserted upper arm and the heart are horizontal.
•Test in a relaxed state.
•User should not talk or move during the test.
•Il est recommandé que l’utilisateur se repose de 5 à 10 minutes avant le test.
•Il n’est pas nécessaire de relever la manche de l’utilisateur, mais ce dernier devrait enlever les
vêtements plus épais.
•L’utilisateur doit s’asseoir bien droit sur la chaise.
•Insérez le bras de l’utilisateur dans le brassard jusqu’à ce que son coude atteigne le point prévu à cet effet.
•Ajustez la hauteur du siège afin que l’avant-bras de l’utilisateur, une fois inséré dans l’appareil,
soit parallèle à son cœur.
•Assurez-vous que l’utilisateur soit détendu pendant le test.
•Assurez-vous que l’utilisateur ne parle pas et ne bouge pas pendant le test.
Caution
Attention
Arm insertion portion

18 19
3. Insert the arm until the elbow is caught in the elbow groove, as shown.
*When the elbow is placed in the right position, the blue LED light will be turned on on the display.
4. Press the Start/Stop button to start the test.
5.Pressureisautomaticallyappliedtothecu,andthebloodpressureismeasured.
* Do not talk or move during the test.
*Relax while sitting up straight.
•If an emergency occurs during the test, press button or button on the front bottom of
the BPBIO750. The cuff will release quickly.
•Si une urgence survient pendant le test, appuyez sur le bouton Arrêt/Marche ou Arrêt d’urgence, en bas sur
le devant du BPBIO750. la pression du brassard se relâchera automatiquement.
Caution
Attention
SYS.
P. R
DIA.
SYS.
P. R
DIA.
Groove
SYS.
P. R
DIA.
SYS.
P. R
DIA.
SYS.
P. R
DIA.
SYS.
P. R
DIA.
Blue LED light.
Emergency stop button

20 21
6.Thecuisautomaticallyreleasedaftercompletingthetest.Waitforthecutofullyloosenandpull
out your arm.
7. Check the results on the screen.
*The voice guide will be heard and the Result Sheet will be printed depending on settings.
8. Others
The Start/Stop button on the rear of the BPBIO750 also allows you to proceed the test, which can be useful for the
administrator to conduct the test from the back of the device.
*Users may refer to the 'Blood Pressure Results' at the bottom left side of the device to check your blood pressure status.
*Please consult with your physician for accurate diagnosis.
· When the test is not completed due to a movement or other factors
· When irregular pulse is detected
Elbow position LED
· Blue: If the elbow is placed in the right position
· Red: If the elbow is not placed in the right position.
Systolic blood pressure
Diastolic blood pressure
Pulse rate
•If the user wants to test the blood pressure again, please take a rest sufficiently more than 5 minutes.
•Blood pressure can vary depending on the situation. Please consult your physician for accurate diagnosis.
•Si l'utilisateur veut reprendre le test de tension artérielle, bien vouloir se reposer suffisamment au moins 5
minutes avant de le faire.
•La tension artérielle peut varier selon la situation. Bien vouloir consulter votre médecin pour un diagnostic
exact.
Note
Remarque
Other manuals for BPBIO750
2
Table of contents
Other inbody Blood Pressure Monitor manuals
Popular Blood Pressure Monitor manuals by other brands
Omron
Omron M3-I Plus instruction manual
Omron
Omron HEM-629 instruction manual

alvita
alvita Plus manual

Hangzhou Hua'an Medical & Health Instruments
Hangzhou Hua'an Medical & Health Instruments MW-300C Operation guide

Sanitas
Sanitas SBM 22 Instructions for use

Welch Allyn
Welch Allyn ABPM 7100 quick start guide


