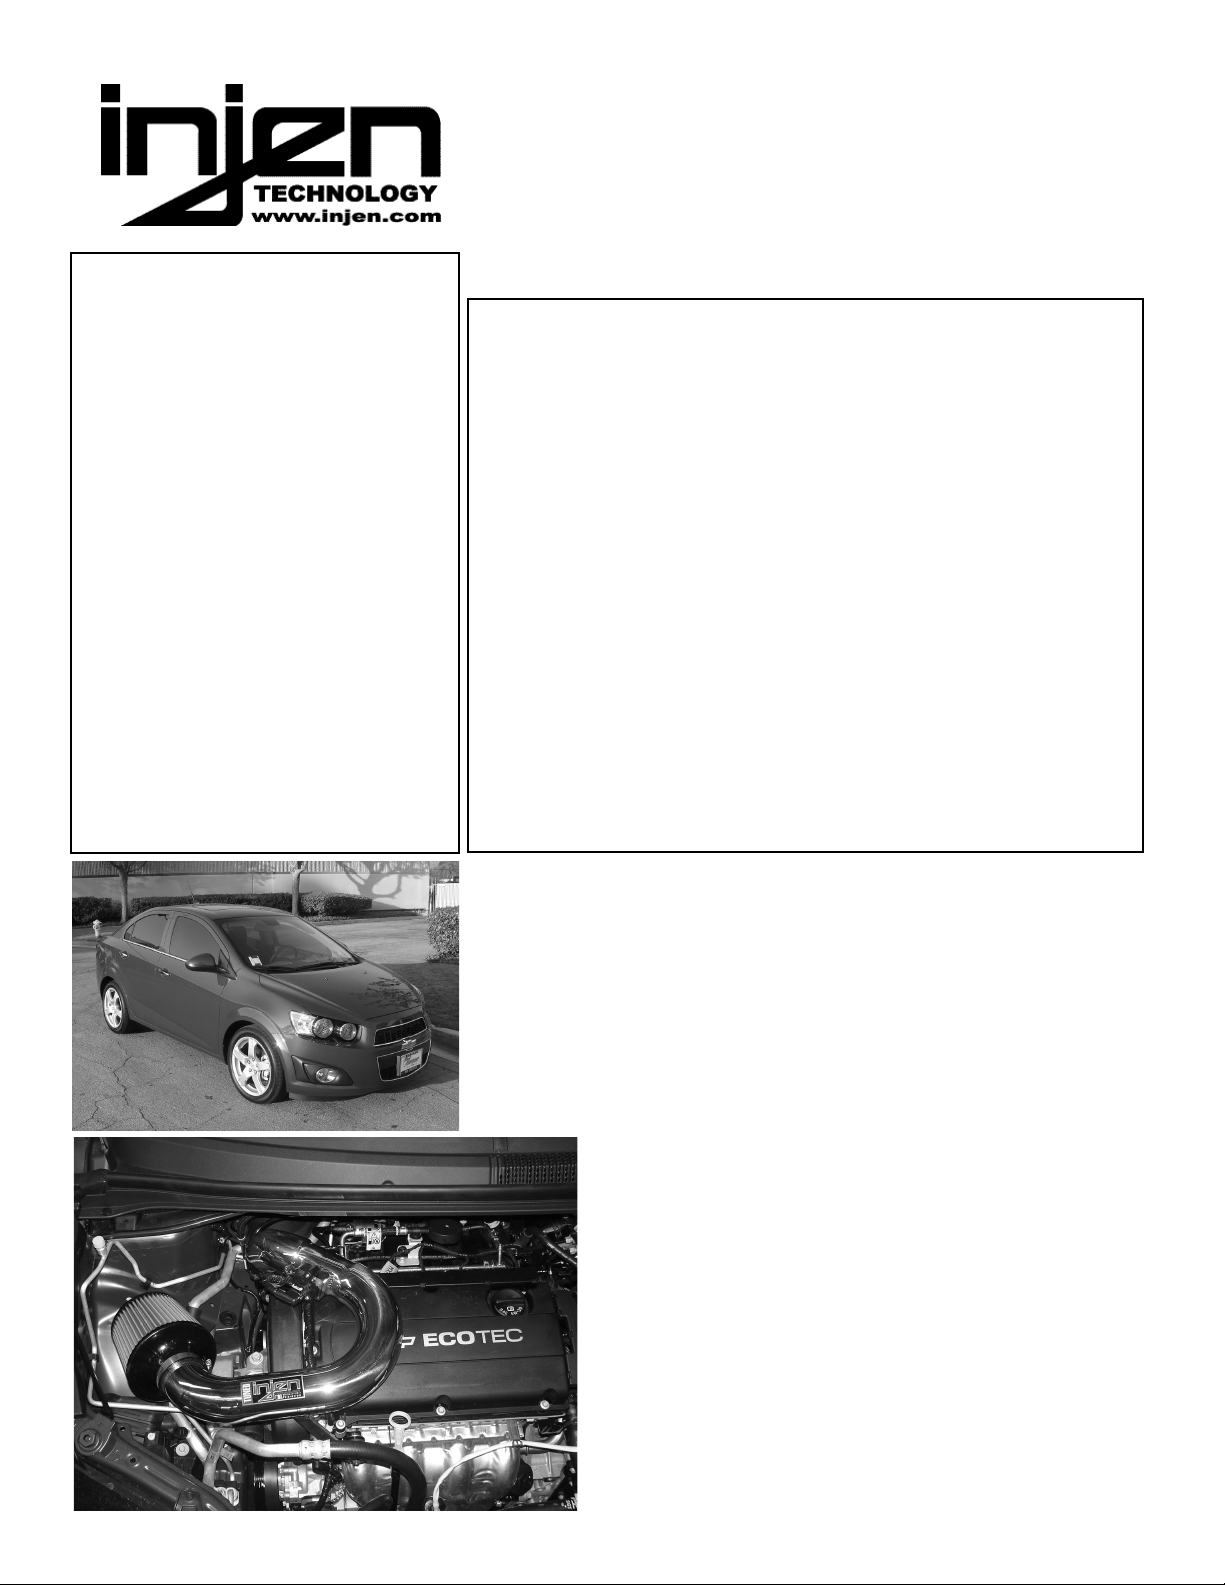
manuals.online logo
Brands
  1. Home
  2. •
  3. Brands
  4. •
  5. injen technology
  6. •
  7. Automobile Accessories
  8. •
  9. injen technology SP7035 User manual

injen technology SP7035 User manual

Part number SP7035
2012-2017 Chevro et SONIC
1.8L 4cy .
1- 1 pc. cold air intake
1- 2.75”web/nano performance dry filter
(#1013)
1- 2.50”-2.75” Step hose (#3116)
2- Power Bands #052 (#4003)
1- Vibramount (#6020)
2- M6Nuts (#6002)
2- Fender washers (#6010)
2- M4x16 button head (#6072)
1- 4 page instruction
Note: All parts and accessories now
sold on-line at :
“injenon ine.com”
Congratu ations! You have just purchased the best engineered,
dyno-proven co d air intake system avai ab e.
P ease check the contents of this box immediate y.
eport any defective or missing parts to the Authorized Injen
Technology dealer you purchased this product from.
Before installing any parts of this system, please read the instructions
thoroughly. If you have any questions regarding installation please
contact the dealer you purchased this product from.
Installation DOES require some mechanical skills. A qualified
mechanic is always recommended.
*Do not attempt to install the intake system while the engine is hot.
The installation may require removal of radiator fluid line that may
be hot.
Injen Technology offers a limited lifetime warranty to the original
purchaser against defects in materials and workmanship. Warranty
claims must be handled through the dealer from which the item was
purchased.
Injen Technology 244 Pioneer Place Pomona, CA 91768 USA
Please check the contents of this box immediately.
Note: This intake system was Dyno-tested with an Injen filter and
Injen parts. The use of any other filter or part will void the
warranty and CARB exemption number.
Parts and accessories are available on line at “Injenonline.com
Note: Injen strongly recommends that this system be installed by a
professional mechanic.
MR Technology
“The orld’s First Tuned air Intake System!”
Factory safe air/fuel ratio’s for Optimum performance
Patent# 7,359,795
Now equipped with “Air Fusion” Patent pending
“At Injen Technology, we didn’t copy the step down process, we
invented it!”
Figure 1 Figure 2
arning: Manufactures attempting to duplicate Injen’s
patented process will now face legal action.
MR Technology Step down process:
1- Calibration Method for Air Intake Tracts for Internal Combustion Engines.
Covered under Patent# 7,359,795
2- Calibration Device for Air Intake Tracts for Internal Combustion Engines.
Published and patent pending
3- Calibration Method and Device for Air Intake Tracts having Air Fusion Inserts
Published and patent pending
Page 1 of part# SP7035
Position the intake tube into the engine bay. Align the intake bracket to the Vibramount from figure
10. Use a 10mm wrench and tighten the M6 nut and
secure the bracket to the vibramount
Figure A: Place the 2.50-2.75 step hose and two
clamps onto the throttlebody. Figure B: Use a 8mm
nut drive and tighten the clamp on the throttle body
only for now.
Use a 10mm wrench and secure the M6 nut to the
Vibramount
Figure A: Pull out the air box from the side of the
vehicle. Iift up and pull the intake assembly out of the
vehicle. Figure B: Pull the air duct off of the air box
assembly
Figure A: Use a torx bit and remove the two torx
screws from the MAF sensor located on the air box
assembly. Figure B: ou may now detach the air
duct from the throttlebody
Stock box shown in this picture Use a 8mm nut driver and loosen the clamp on the air
duct located on the throttle body
Disconnect MAF sensor harness.
Figure A: ou may now lift the air box assembly out
of the engine bay. Figure B: Now you may remove
the air duct from the throttlebody and remove from
engine bay.
Locate the black bracket left of the oil dip stick. Place
the Vibramount with a washer and M6 nut to secure
it to the bracket
Attach the pipe to the hose located on the throttle-
body. Do not secure the clamp for now.
Figure 3 Figure 4 Figure 5
Figure 6 Figure 7 Figure 8
Figure 9 Figure 10 Figure 11
Figure 12 Figure 13 Figure 14
Page 2 of Part# SP7035
B
A
A
BAB
AB
Oil dip stick
Once the intake is finally adjusted for best fitment contin-
ue to tighten the other clamp on the throttlebody.
Install the air filter and tighten clamp using 8mm nut
driver.
Make sure the intake pipe clears the AC line by at
least 0.75” clearance or damage could be caused to
the AC line.
Figure 16 Figure 17
Page 3 of Part# SP7035
Re-connect the MAF sensor harness. Make sure the intake system is positioned
properly and you have clearance.
Figure 33
1. Upon completion of the installation, reconnect the negative battery terminal before you start the engine.
2. Align the entire intake system for the best possible fit. Once the intake has been properly fitted continue
to tighten all nuts, bolts and clamps.
3. Periodically, recheck the alignment of the intake system and make sure there is proper clearance around
and along the length of the intake. Failure to follow proper mainentance procedures may cause
damage to the intake and will void the warranty.
4. Start the engine and listen carefully for any odd noises, rattles and/or air leaks prior to taking it for a test
drive. If any problems arise go back and check the vacuum lines, hoses and clamps that maybe causing
leaks or rattles and correct the problem.
5. Check the filter for excessive dirt build up. Clean or replace the filter with an original Injen filter (can be
bought on-line at “injenonline.com”). Congratulations! You have just completed the installation of the best
intake system sold on the market. Enjoy the added power and performance of your new intake system.
Congratulations! ou have just completed the installation of this intake system.
Periodically, check the alignment of the intake, normal wear and tear can cause
nuts and bolts to come loose. Note: Check clearance and adjust if needed!
Failure to check the alignment and adjust the intake can cause damage that
will oid the warranty. Injen Technology is not responsible for any damages
caused by/from improper installation.
Figure 34
Place the MAF sensor onto the machined MAF sensor
adpter on the Injen intake pipe
Figure A: Use a 2.5mm allen wrench and tighten the
two allen bolts from figure 19. Figure B: Re-connect
the MAF sensor harness to the MAF sensor.
Place the two supplied M4x16 bolts onto the MAF
sensor to attach it to the machined MAF sensor
adapter.
Figure 19 Figure 20
Figure 15
Figure 18
A B

Other injen technology Automobile Accessories manuals

injen technology SP2115 User manual

injen technology

injen technology SP2115 User manual

injen technology EVO1107 User manual

injen technology

injen technology EVO1107 User manual

injen technology SP1870 User manual

injen technology

injen technology SP1870 User manual

injen technology SP1571 User manual

injen technology

injen technology SP1571 User manual

injen technology FM1573i User manual

injen technology

injen technology FM1573i User manual

injen technology SP3028 User manual

injen technology

injen technology SP3028 User manual

injen technology SP1230 User manual

injen technology

injen technology SP1230 User manual

injen technology RD1482 User manual

injen technology

injen technology RD1482 User manual

injen technology PF2057 User manual

injen technology

injen technology PF2057 User manual

injen technology SP1675 User manual

injen technology

injen technology SP1675 User manual

Popular Automobile Accessories manuals by other brands

Viking Stack-Rack Assembly and use instructions

Viking

Viking Stack-Rack Assembly and use instructions

ZZ2 ZZAIR-PRO instruction manual

ZZ2

ZZ2 ZZAIR-PRO instruction manual

Motorola T325 quick start guide

Motorola

Motorola T325 quick start guide

Lippert Components ground control 3.0 quick reference

Lippert Components

Lippert Components ground control 3.0 quick reference

Havis C-TM-SEATMT installation instructions

Havis

Havis C-TM-SEATMT installation instructions

Fiamma CARRY-BIKE 02094-38A Installation and usage instructions

Fiamma

Fiamma CARRY-BIKE 02094-38A Installation and usage instructions

CoverCraft Grommet Installation

CoverCraft

CoverCraft Grommet Installation

bosal 034101 FITTING INSTRUCTION

bosal

bosal 034101 FITTING INSTRUCTION

Spiker Scangauge installation instructions

Spiker

Spiker Scangauge installation instructions

Audi 8RO 071 065 Assembly instructions

Audi

Audi 8RO 071 065 Assembly instructions

Thule 1172 RAPID SYSTEM Fitting instructions

Thule

Thule 1172 RAPID SYSTEM Fitting instructions

Saris DOOR COUNTY 4800 operating instructions

Saris

Saris DOOR COUNTY 4800 operating instructions

Yakima K893 instructions

Yakima

Yakima K893 instructions

Big Country 372901 installation instructions

Big Country

Big Country 372901 installation instructions

E&G Classics 1045-019U-15B Upper Replacement

E&G Classics

E&G Classics 1045-019U-15B Upper Replacement

MARDER SCHRECK 16277 operating instructions

MARDER SCHRECK

MARDER SCHRECK 16277 operating instructions

EUFAB 16420 operating instructions

EUFAB

EUFAB 16420 operating instructions

bosal 027201 FITTING INSTRUCTION

bosal

bosal 027201 FITTING INSTRUCTION

manuals.online logo
manuals.online logoBrands
  • About & Mission
  • Contact us
  • Privacy Policy
  • Terms and Conditions

Copyright 2025 Manuals.Online. All Rights Reserved.