injen technology SP3028 User manual
Part number SP3028
Volkswagen
2010-12 Go f 2.5L 5 Cy .
2011-12 Jetta 2.5L 5 Cy .
(Manual Transmission Only)
(X-11083)
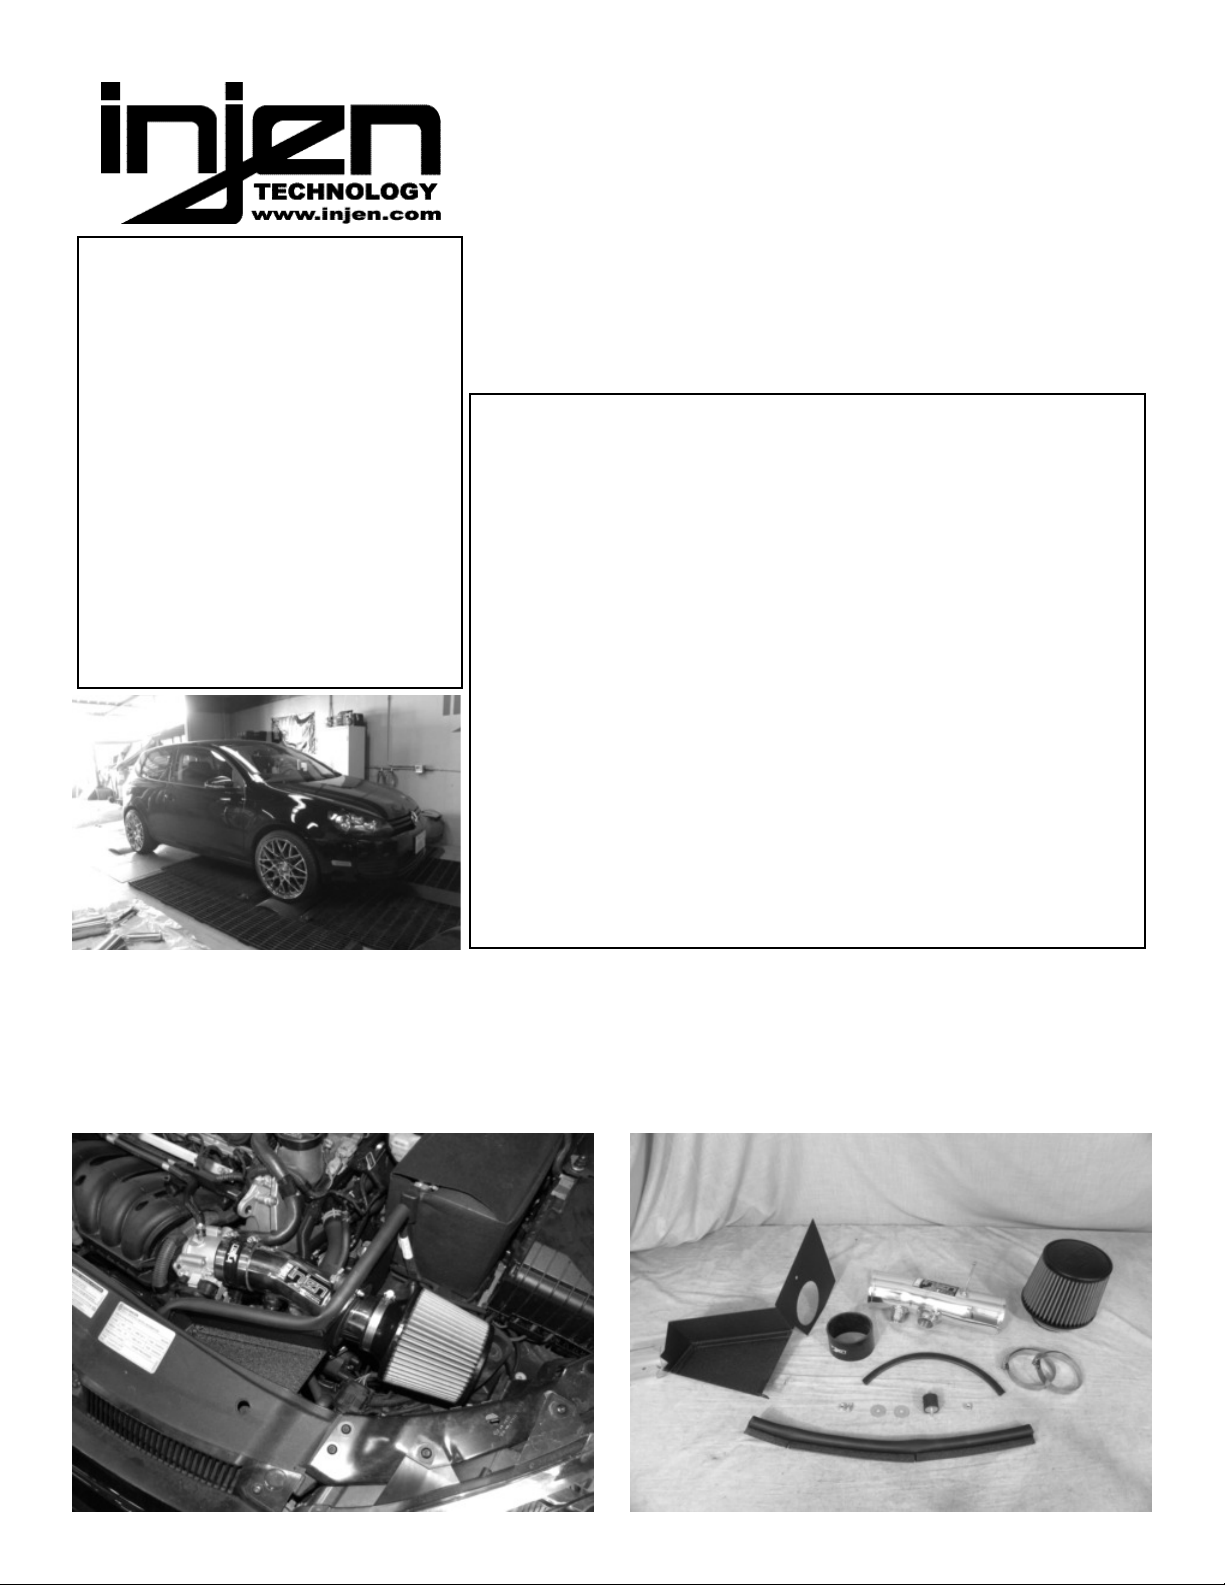
1- Short ram ntake sytem
1- Heat Shield
1- 3” Dry A r F lter (#1014)
(#3044)
1- 3.00” stra ght hose
2- med um clamps (.362) .048 (#4004)
(#6020)
1- M6 v bra mount
2- Fender washer (#6010)
(#6002)
(#6083)
(#6023)
2- M6 nut
1- M6 allen sta nless screw
1- V nyl tr m @ 11-1/2” L
1- Rubber tr m @ 17-1/2” L (#6058)
Congratu ations! You have just purchased the best engineered,
dyno-proven Power-F ow air intake system avai ab e.
P ease check the contents of this box immediate y.
Report any defective or missing parts to the Authorized Injen
Technology dealer you purchased this product from.
Before installing any parts of this system, please read the instructions
thoroughly. If you have any questions regarding installation please
contact the dealer you purchased this product from.
Installation DOES require some mechanical skills. A qualified
mechanic is always recommended.
*Do not attempt to install the intake system while the engine is hot.
The installation may require removal of radiator fluid line that may
e hot.
Injen Technology offers a limited lifetime warranty to the original
purchaser against defects in materials and workmanship. Warranty
claims must e handled through the dealer from which the item was
purchased.
Injen Technology 244 Pioneer Place Pomona, CA 91768 USA
Please check the contents of this box imme iately.
Note: This intake system was Dyno-teste with an Injen filter an
Injen parts the use of any other filter or part will voi the
warranty an CARB exemption number.
Parts an accessories are available on line at “Injenonline.com
Note: The installation of this cold air intake does require mechanical skills. Removal of the front bumper requires
loosening and removing several plastic plugs and screws that may be difficult. It is recommended that this
system be installed by a professional mechanic. Be sure to disconnect the negative terminal before proceeding.
Congratulations! ou have just purchased the worlds first tuned intake system.
M.R. Technology, Leading the way Patent# 7,359,795
Figure 1 Figure 2
Buy products from authorized and licensed manufacturers using any of our
patented processes, be are of cheap knock-offs, look for our licensing logo.
MR Technology Step down process:
1- Calibration Metho for Air Intake Tracts for Internal Combustion Engines.
Patent# 7,359,795
2- Calibration Device for Air Intake Tracts for Internal Combustion Engines.
Publishe an patent pen ing
3- Calibration Metho an Device for Air Intake Tracts having Air Fusion
Publishe an patent pen ing
4- Tuning Metho an Device for intake tracts having built-in
Air Filter Horns patent pen ing
Injen is the first and only intake manufacturer that tunes and controls air/fuel
ratios, short/long term fuel trim levels using the MR step do n process, Air
Fusion and built-in air intake horns.

Attach the vinyl trim to the inside of heat shield hole cut out
for the intake tube.
Use a channel lock plier to loosen the pressure clamp on
the throttle body and remove the plastic air duct from the
throttle body.
Install the straight hose with clamps to the throttle
body. Tightent the clamp on throttle body only using
8mm nut driver.
With the pressure clamp loose pull the air duct off the air
box Firmly lift up on the air box/engine cover and remove
from the engine bay
Picture of factory air intake system Use a T20 torx screw driver and remove the two torx
screws holding the front air box inlet.
Locate the two air pump lines connect to the throttle
body air duct. First disconnect the larger one by firm-
ly pressing on the two release tabs and pulling out
and remove the lines.
WithT25 torx bit loosen the 2 screws holding in the fac-
tory ram scoop and remove. Save screws for later
install.
Page 2 of Part# SP3028
Use a channel lock plier to loosen the pressure clamp
on the air air box
Figure 3 Figure 4 Figure 5
Figure 6 Figure 7 Figure 8
Figure 10
Figure 9
Figure 12
Air pump line 1
Air pump line 2
Tighten using 10mm wrench.
Install the provided vibra mount to the heat shield with
vibra mount closes to the engine. Secure using provid-
ed m6 nut.
Figure 13 Figure 14

Page 3 of Part# SP3028
Install the intake assembly into the vehicle and position
the intake tube to the throttle body. Position the heat
shied to the the tabs from step 10.
Connect the 2 pump lines to the intake tube fittings. Light
lubrication can be put to the inside of the fittings for easier
installation.
With the factory screws from step 10, secure and
tighten the heat shield.
A)Using provided M6 allen and fender washer, secure
and tighten the tab on heat shield. B)Position the best
fit and tighten the tab on intake tube using 10mm sock-
et or wrench.
Figure 17
Figure 18 Figure 19 Figure 20
Using 8mm nut driver, tighten the clamp on the intake
tube.
Figure 21
Attach the rubber trim to the top of the heat shield.
Figure 15
Install the intake tube and secure the bracket to the
vibra mount on heat shield using provided fender wash-
er and m6 nut.
Figure 16
Congratulations! ou have just completed the installa-
tion of the World’s first tuned intake system, the
Power-Flow intake, featuring MR Technology.
Periodically, check the system for fitment, this will
enhance the life of your Power-Flow system.
Now install the air filter to the intake tube and tighten
using 8mm nut driver.
Figure 23
Figure 22
1. Upon completion of the installation, reconnect the negative attery terminal efore you start the engine.
2. Align the entire intake system for the est possi le fit. Once the intake has een properly fitted continue
to tighten all nuts, olts and clamps.
3. Periodically, recheck the alignment of the intake system and make sure there is proper clearance around
and along the length of the intake. Failure to follow proper mainentance procedures may cause
damage to the intake and will void the warranty.
4. Start the engine and listen carefully for any odd noises, rattles and/or air leaks prior to taking it for a test
drive. If any pro lems arise go ack and check the vacuum lines, hoses and clamps that may e causing
leaks or rattles and correct the pro lem.
5. Check the filter for excessive dirt uild up. Clean or replace the filter with an original Injen filter (can e
ought on-line at “injenonline.com”). Congratulations! You have just completed the installation of the
est intake system sold on the market. Enjoy the added power and performance of your new intake
system.
A
B
Other injen technology Automobile Accessories manuals

injen technology
injen technology SP1675 User manual

injen technology
injen technology SP1230 User manual

injen technology
injen technology RD1482 User manual

injen technology
injen technology FM1573i User manual

injen technology
injen technology EVO1107 User manual

injen technology
injen technology SP1870 User manual

injen technology
injen technology SP7035 User manual

injen technology
injen technology SP2115 User manual

injen technology
injen technology SP1571 User manual

injen technology
injen technology PF2057 User manual


