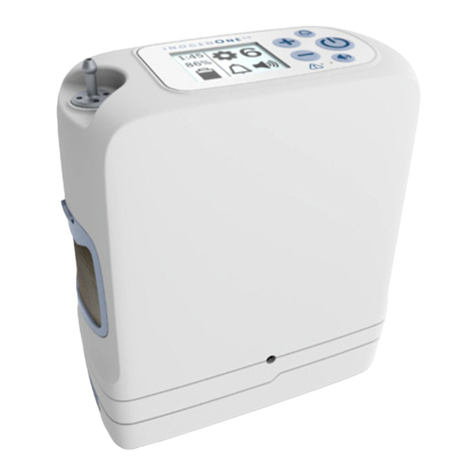
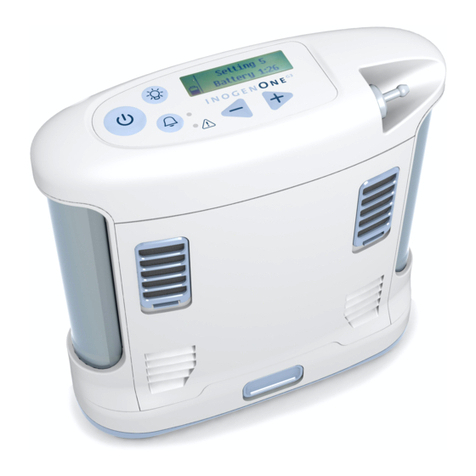
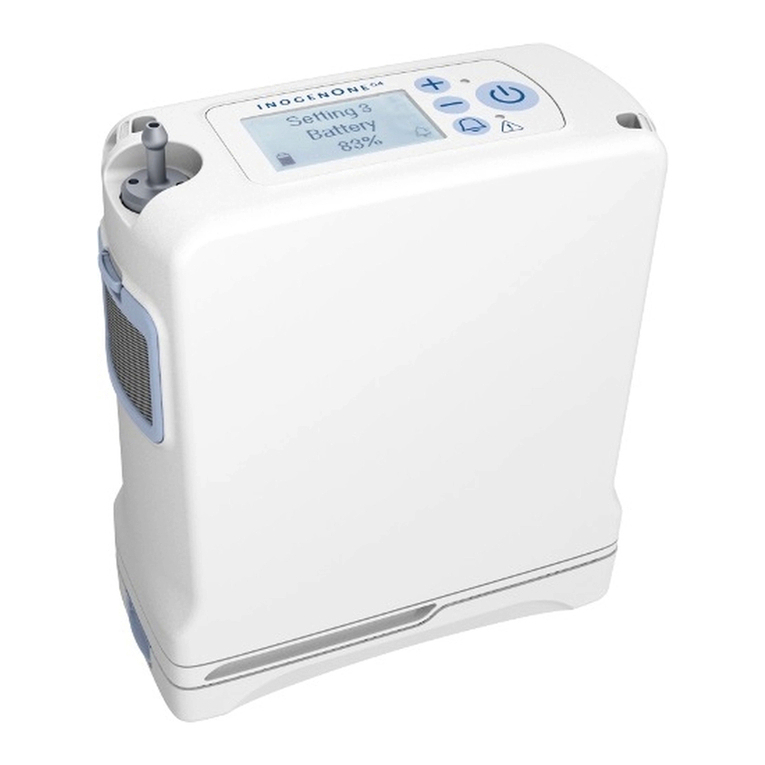
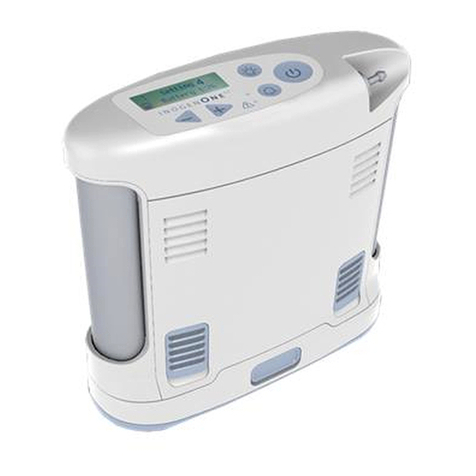
Inogen One G2 User manual

866-696-9558


Contents
Chapter 1 1 Intended Use, Contraindications and General Precautions
Chapter 2 3 Description of the Inogen One® G2 Oxygen Concentrator
3 Important Parts of the Inogen One® G2 Oxygen Concentrator
4 User Controls
5 User Interfaces
5 Input / Output Connections
6 Power Supply Options
9 Inogen One® G2 Accessories
Chapter 3 11 Operating Instructions
11 General Instructions
15 Additional Operating Instructions
18 Battery Operating Instructions
19 Battery Care and Maintenance
Chapter 4 21 Inogen One® G2 Oxygen Concentrator Audible and
Visible Signals (including Alarms)
Chapter 5 29 Troubleshooting
Chapter 6 31 Cleaning, Care and Maintenance
31 Cannula Replacement
31 Case Cleaning
32 Filter Cleaning and Replacement
34 Other Service and Maintenance
34 Disposal of equipment and accessories
Chapter 7 35 Symbols Used on Concentrator and Accessories
Chapter 8 37 Inogen One® G2 System Specifications
English


1Intended Use, Contraindications
and General Precautions
Intended Use, Contraindications and General Precautions Chapter 1 1
Intended Use
The Inogen One® G2 Oxygen Concentrator is used on a prescriptive basis by patients
requiring supplemental oxygen. It supplies a high concentration of oxygen and is used
with a nasal cannula to channel oxygen from the concentrator to the patient. The Inogen
One® G2 may be used in home, institution, vehicle, on an airplane and various mobile
environments.
CAUTION USA Federal law restricts this device to sale by or on the order of a
physician. May also be applicable in other countries.
CAUTION Use of a cannula other than a high flow cannula (e.g. Salter 1600Q)
may restrict oxygen delivery and/or attachment to nozzle fittings.
WARNING Availability of an alternate source of oxygen is recommended in case of
power outage or mechanical failure. Consult your equipment provider for
type of back-up system recommended.
CAUTION It is the responsibility of the patient to make back-up arrangements for
alternative oxygen supply when traveling; Inogen assumes no liability for
persons choosing not to adhere to manufacturer recommendations.
!
C
English

2
Contraindications
WARNING This device is NOT INTENDED to be life sustaining or life supporting.
CAUTION
Under certain circumstances, the use of non-prescribed oxygen
therapy can be
hazardous. This device should be used only when
prescribed by a physician.
CAUTION Additional monitoring or attention may be required for patients
using this device who are unable to hear or see alarms or communicate
discomfort. If the patient shows any signs of discomfort, a
physician should be consulted immediately.
CAUTION The Inogen One® G2 is not designed or specified to be used in
conjunction with a humidifier or nebulizer. Use of this device with a
humidifier or nebulizer may impair performance and/or damage the
equipment.
!
C
!
C
!
C
General Precautions
WARNING The device produces enriched oxygen gas which accelerates
combustion. Do NOT ALLOW SMOKING OR OPEN FLAMES within
10 feet of this device while in use.
WARNING Do not submerse the Inogen One® G2 or any of the accessories in liquid.
Do not expose to water or precipitation. Do not operate in exposed rain.
This could lead to electrical shock and/or damage.
CAUTION
Do not use oil, grease, or petroleum-based products on or near the
Inogen One® G2.
CAUTION Never leave the Inogen One® G2 in an environment which can reach
high temperatures, such as an unoccupied car in high temperature
environments. This could damage the device.

Important Parts of the Inogen One® G2 Oxygen Concentrator
Description of the Inogen One®
G2 Oxygen Concentrator
Description of the Inogen One® G2 Oxygen Concentrator Chapter 2 3
2
On/Off
Button
Alert/Alarm
Light
Flow Control
Display
Display
Backlight
Button
Breath
Detection
Light
Audible
Alarm
Button
English

4
User Controls
ON / OFF Button
Press once to turn “ON”; Press and hold for one second to turn “OFF”.
Audible Alarm Button
Pressing this button will toggle the Inogen One® G2’s breath detection
alert on and off:
1. Default Mode. When the Inogen One® G2 is powered up, the breath
detection alert is disabled. The display’s mode indication area is empty
in Default Mode.
2.
Breath Detection Alert Mode. The Inogen One® G2 will alert with
audible and visual signals for “no breath detected” when this mode is
enabled and no breath has been detected for 60 seconds. The display’s
mode indication area will show a bell icon when the alert is enabled.
Flow Setting Control Buttons
Use the – or + flow setting control buttons to select the setting
as shown on the display. There are five settings, from 1 to 5.
Display Backlight Button
Push on; automatically turns off after 10 seconds.

Description of the Inogen One® G2 Oxygen Concentrator Chapter 2 5
User Interfaces
Display
This screen displays information regarding flow setting, power
status, battery life and errors. If you would like to change the
language on the Inogen LCD Screen contact Inogen Client
Services.
Indicator Lights
A red light indicates either a change in operating status or a
condition that may need response (alarm). A flashing light is
higher priority than non-flashing.
Audible Signals
An audible signal (beep) indicates either a change in
operating status or a condition that may need response (alarm).
More frequent beeps indicate higher priority conditions.
Input / Output Connections
Particle Filter
The filter must be in place at the intake end of the concentrator
during operation to keep input air clean.
Cannula Nozzle Fitting
The nasal cannula connects to this nozzle for Inogen One® G2
output of oxygenated air.
DC Power In
Connection for external power from the Universal Power Supply.
English

6
Power Supply Options
Single and Double Rechargeable Lithium Ion Batteries
The battery will power the Inogen One® G2 without
connection to an external power source. When fully charged, a
single battery will provide 2 to 4 hours of operation; a double
battery will provide 4 to 8 hours of operation. The battery
recharges when properly installed in the Inogen One® G2 and
the concentrator is connected to AC or DC power. Recharging
time is up to 4 hours for a single battery and up to 8 hours
for a double battery. See information in the “Battery Care and
Maintenance” section.
UNIVERSAL POWER SUPPLY
Overview
The Inogen Universal Power Supply (BA-107/207) is used to power the Inogen One® G2
concentrator from an AC power source or a DC power source. This allows the user to
power the concentrator in the home, in a vehicle or other places where AC or DC power is
available.
Description
The Inogen One® G2 Universal Power Supply is specifically designed for use with the
Inogen One® G2 Oxygen Concentrator (IO-200). The Universal Power Supply provides the
precise current and voltage required to safely power the Inogen One® G2 and is designed
to operate from specified AC and DC power sources. When used with AC power sources,
the power supply automatically adapts to input voltages from 100V to 240V (50-60HZ)
permitting use with most power sources throughout the world.
The Universal Power Supply will charge the Inogen One® G2 Battery when used with AC
input power or when used with a DC power supply, such as the one found in your car. Due
to aircraft power limitations, the Universal Power Supply cannot be used to charge the
Inogen One® G2 Battery when used on an aircraft.
The Universal Power Supply is used with the following components:
• Power Supply with attached power output cable to connect to the Inogen One® G2
• Automobile DC cigarette lighter Power Input Cable
• AC Power Input Cable

7Description of the Inogen One® G2 Oxygen Concentrator Chapter 2
Power Output Plug
Universal Power Supply
LED Indicator Light
AC Input
DC cigarette lighter Power Plug for use in Automobile/RV/Boat/Aircraft
DC Input
AC Power Plug*
WARNING Do not wrap cords around Power Supply for storage. Doing so may lead to
damaged cords and a failure to provide power to the concentrator.
Model# BA-107
!
C
* Actual product appearance may vary.
English

8
Power Output Plug
Universal Power Supply
LED Indicator Light
AC Input
DC cigarette lighter
Power Plug for use in
Automobile/RV/Boat/Aircraft
DC Input
AC Power Plug*
Model# BA-207
WARNING Do not wrap cords around Power Supply for storage. Doing so may lead to
damaged cords and a failure to provide power to the concentrator.
!
C
* Actual product appearance may vary.

Inogen One® G2 Accessories
Nasal Cannula
A nasal cannula must be used with the Inogen One® G2 to provide
oxygen from the concentrator. A single lumen cannula up to 25 feet
in length is recommended to ensure proper breath detection and
oxygen delivery.
NOTE
Increasing the cannula length may reduce the perceived noise during
oxygen bolus delivery.
Carry Bag
The Carry Bag provides a protective cover with a handle and
shoulder strap to enable you to carry the Inogen One® G2.
The Inogen One® G2 can be operated using battery power
during transport with the Carry Bag.
Cart
The Cart has wheels and a telescoping handle
to provide easy transport of the Inogen One®
G2. The Inogen One® G2 can be operated using
battery power during transport. Place the
Carry Bag over the Cart. Make sure the Cart
handle is inserted between the elastic strap in
the back of the carry bag and the front of the
carry bag.
Description of the Inogen One® G2 Oxygen Concentrator Chapter 2 9
English

Inogen One® G2 Optional Accessory
External Battery Charger
1. Plug the External Battery Charger AC power supply
cord into an electrical outlet.
2. Plug the External Battery Charger AC power supply into
the battery charger.
3. Slide your charger onto the Inogen One G2 Battery by
clicking and locking into the charger.
4. When the battery is in the correct position, a solid red light
will indicate that the battery is charging.
5. When the green light illuminates, the battery is
fully charged.
CAUTION Avoid touching the recessed electrical contacts of the External Battery
Charger; damage to contacts may affect charger operation.
NOTE
These contacts are not powered unless a battery is in place and charging.
NOTE
To completely remove power from the External Battery Charger, remove
the plug.
Inogen One G2 Backpack
Alternative/optional way of carrying your Inogen One G2,
hands free, more comfort, out of your way with extra pockets
for additional accessories.
To order please call Inogen Client Services.
10

Operating Instructions
Operating Instructions Chapter 3 11
3
!
C
Intake
Exhaust
General Instructions
1. Place the Inogen One® G2 in a well ventilated
location.
Air intake and exhaust must have clear access.
Locate the Inogen One® G2 in such a way that any auditory
alarms may be heard.
WARNING Avoid use of the Inogen One® G2 in presence of pollutants, smoke
or fumes. Do not use the Inogen One® G2 in presence of flammable
anesthetics, cleaning agents or other chemical vapors.
CAUTION Do not obstruct air intake or exhaust when operating the device.
Blockage of air circulation or proximity to a heat source may lead to
internal heat buildup and shutdown or damage to the concentrator.
2. Ensure the particle filter is in place.
CAUTION Do not operate the Inogen One® G2 without the
particle filter in place. Particles drawn into the
system may damage the equipment.
3. Install the battery.
Insert the Inogen One® G2 battery by sliding battery into place
and locking at bottom of concentrator.
English

12
CAUTION The Inogen One® G2 battery acts as a secondary power supply in the event of
a planned or unexpected loss of the AC or DC external power supply. When
operating the Inogen One® G2 from an AC or DC external power supply, a
properly inserted Inogen One® G2 battery should be maintained in the unit.
This procedure will ensure uninterrupted operation and will operate all
alarms and alerts in the event of a loss of the external power supply.
NOTE
The Inogen One® G2 Battery requires an initial full charge of uninterrupted
charging from an empty state using the Inogen One® G2 on the AC power
source. Do not run the Inogen One® G2 on battery power until this initial
charging has been completed. Once the initial charge is completed, the battery
may be used with any amount of charge level.
4. Connect the Universal Power Supply.
Connect the AC Power plug to the Universal Power Supply. Connect the
AC Power Plug to the power source and connect the Power Output Plug to
the Inogen One® G2. The green LED on the Universal Power Supply will be
illuminated and a beep will sound from the concentrator.
CAUTION Ensure the Universal Power Supply is in a well ventilated location as it relies
on air circulation for heat dissipation. The Universal Power Supply may become
hot during operation. Make sure the Universal Power Supply cools down before
handling.
CAUTION The Universal Power Supply is not water resistant.
CAUTION Do not disassemble the Universal Power Supply. This may lead to
component failure and/or safety risk.
CAUTION Do not place anything in the Universal Power Supply port other than the
supplied wall cord. Avoid the use of electrical extension cords with the Inogen
One® G2. If an extension cord must be used, use an extension cord that has
an Underwriters Laboratory (UL) Mark and a minimum wire thickness of 18
gauge. Do not connect any other devices to the same extension cord.

Operating Instructions Chapter 3 13
NOTE Under certain conditions (see Technical Specifications) the Universal
Power Supply may shut down. The green LED will blink or will no longer
be illuminated. If this occurs, disconnect the Power Supply for at least
10 seconds and reconnect.
NOTE
When the
Universal
Power Supply is disconnected from the AC outlet, also
disconnect it from the concentrator to avoid unnecessary battery discharge.
5. Connect the nasal cannula tubing to the nozzle fitting.
Nozzle fitting is located next to the handle of the Inogen One® G2.
Use of a single lumen cannula up to 25 feet in length is recommended to
ensure proper breath detection and oxygen delivery
. Additional
titration may be needed to ensure proper oxygen
delivery when using a particular cannula.
CAUTION
To ensure oxygen flow, ensure that the nasal cannula is properly connected to
the nozzle fitting and that the tubing is not kinked or pinched in any way.
CAUTION
Replace the nasal cannula on a regular basis. Check
with your equipment
provider or physician to determine how often the
cannula should be replaced.
6. Turn on your Inogen One® G2 by pressing the ON/OFF Button.
A single short beep will sound after the Inogen logo is displayed. “Please
Wait” will appear while the concentrator starts up. The display will indicate
the selected flow setting and power condition. Following a brief start-up
sequence, a warm up period up to 2 minutes will initiate. During this time
period the oxygen concentration is building to but may not have reached
specification. Additional warm up time may be needed if your Inogen One®
G2 has been stored in extremely cold temperatures.
English

!
C
14
7. Set the Inogen One® G2 Concentrator to the flow rate prescribed by your physician or
clinician.
Use the + or – setting buttons to adjust the Inogen One® G2 to the desired setting.
The current setting can be viewed on the display.
8. Position the nasal cannula on your face and breathe through your nose.
The Inogen One® G2 will sense the onset of inhalation and deliver
a burst of oxygen at a precise time when you inhale. The Inogen
One® G2 will sense each breath and continue to deliver oxygen
in this manner. As your breathing rate changes, the Inogen One®
G2 will sense these changes and deliver oxygen only as you need
it. At times, if you inhale very quickly between breaths the Inogen
One® G2 may ignore one of the breaths, giving the appearance of a
missed breath. This may be normal as the Inogen One® G2 senses
and monitors the changes in your breathing pattern. The Inogen
One® G2 will normally sense the next breath and deliver oxygen
accordingly.
A green light will flash each time a breath is detected. Make certain that the nasal cannula
is properly aligned on your face and you are breathing through your nose.
WARNING If you begin to feel ill or are experiencing discomfort while using this
device, consult your physician immediately.
CAUTION The Inogen One® G2 is designed to provide a flow of high purity oxygen.
An advisory alarm, “Oxygen Low”, will inform you if oxygen concentration
drops. If alarm persists, contact your equipment provider.
General
To remove power, unplug the input cord from its source (i.e., AC wall outlet, DC car
cigarette lighter adapter).
CAUTION Ensure the Universal Power Supply is powered from only one power source
(AC or DC) at any given time. The Universal Power Supply may not operate
properly if simultaneously powered using both AC and DC sources.

Operating Instructions Chapter 3 15
Additional Operating Instructions
For Use In Home With AC Power
For operation of the Power Supply using an AC power source, follow these instructions:
1. Connect the AC Input to the power supply.
2. Connect the AC Power Plug to the power source and connect the Power Output
Plug to the Inogen One® G2. The green LED will be illuminated, indicating the
Universal Power Supply has input power.
Traveling With Your Inogen One® G2 System
The Inogen One® G2 System makes travel by plane, boat, car or train more convenient
for oxygen users than ever before. Now you get the same quality performance and
convenience while on the go that you’re used to receiving from your Inogen One® G2 at
home. Here are some useful and important instructions for maximizing performance
and convenience when using your Inogen One® G2 while traveling.
You should begin planning for a trip with a checklist of items to remember. This checklist
should include:
✓ Universal Power Supply
✓ Extra Battery(s) if required
✓ Important phone numbers, such as those of your physician and home healthcare
provider, or providers in the area you will be traveling
✓ Plan for backup oxygen in the event of a prolonged power outage or mechanical failure.
For Use In Automobile/RV/Boat
For operation of the Universal Power Supply using a DC power
source, follow these instructions:
1. Connect the DC Input to the power supply.
2. Connect the DC Power Plug (Cigarette Lighter Adapter) to
the power source and connect the Power Output Plug to the
Inogen One® G2. The green LED will be illuminated, indicating
the power supply has input power.
English

3. The plug should insert into the socket without excessive force and securely remain in
place. The Cigarette Lighter Adapter comes with a slide switch pre-adjusted to the narrow
position. This will fit most automobile cigarette lighter sockets. If the Cigarette Lighter
Adapter is loose in the socket, adjust the switch to the "wide" position.
WARNING Ensure that the automobile power socket is adequately fused for the Inogen
One® G2 power requirements (minimum 15 Amp). If the power socket cannot
support a 15 Amp load, the fuse may blow or the socket may be damaged.
WARNING The tip of the Cigarette Adapter Plug becomes HOT when in use. Do not touch
the tip immediately after removal from an auto cigarette lighter socket.
CAUTION Ensure the automobile power socket is clean of cigarette ash and the adapter
plug fits properly, otherwise overheating may occur.
CAUTION Do not use the Universal Power Supply with a cigarette plug splitter or with
an extension cable. This may cause overheating of the DC power input cable.
CAUTION Do not jump start the automobile with the Universal Power Supply connected.
This may lead to voltage spikes which could shut down and/or damage the
Universal Power Supply.
CAUTION When powering the Inogen One® G2 in an automobile ensure the engine is
running. Operating the device without the engine running may drain the car
battery.
Traveling By Air
The FAA allows the Inogen One® G2 onboard all U.S. aircraft, here are a few points to make air
travel easy.
Planning Your Flight
When flying with the Inogen One® G2, you must inform the airline that you will be using your
Inogen One® G2 onboard the aircraft. You must also keep a signed statement from your
physician with you that includes:
• Your ability to see/hear alarms and appropriately respond.
• When oxygen use is necessary (all or a portion of the trip).
• Maximum flow rate corresponding to the pressure in the cabin under normal operating
conditions.
16
!
C
!
C
Other manuals for One G2
3
Table of contents
Other Inogen Medical Equipment manuals

Inogen
Inogen One G3 User manual

Inogen
Inogen One G3 User manual

Inogen
Inogen at home User manual

Inogen
Inogen One G3 Technical Document

Inogen
Inogen One G2 User manual

Inogen
Inogen One G5 User manual

Inogen
Inogen Rove 6 User manual

Inogen
Inogen TAV User manual

Inogen
Inogen One User manual

Inogen
Inogen One G3 User manual
Inogen
Inogen at home User manual

Inogen
Inogen One G5 User manual

Inogen
Inogen InogenOne G4 User manual

Inogen
Inogen One IO-100 User manual

Inogen
Inogen One G3HF User manual

Inogen
Inogen One G4 User manual
Inogen
Inogen Rove 6 User manual

Inogen
Inogen TIDAL ASSIST User manual

Inogen
Inogen One G3 User manual
Inogen
Inogen One G5 User manual