Inogen One G5 User manual

1
USER MANUAL
PMS 661 main color/651 swish

2

Chapter 1
Glossary of Symbols 1
Chapter 2
Introduction 2
Intended Use 2
Contraindications and General Precautions 2
Cautions and Warnings 2
Chapter 3
Description of the Inogen One® G5 Oxygen Concentrator 5
User Controls 5
User Interfaces 5
Input/Output Connection 6
Chapter 4
Operating Instructions 6
General Instructions 6
Power Supply Options 8
Inogen One® G5 Accessories 10
Traveling with Inogen One® G5 12
Chapter 5
Audible and Visible Signals 12
Chapter 6
Troubleshooting 17
Chapter 7
Cleaning, Care and Maintenance 18
Cannula Replacement 18
Inogen One® G5 Column Change Procedure 19
Chapter 8
Specications 22
Disposal of Equipment and Accessories 23
Table of Contents

1
1. Glossary of Symbols
ONLY
ONLY
ONLY
ONLY
U.S. Federal Regulation
Restricts this Device to
Sale by order of Physician.
May also be applicable in
other Countries
Type BF Applied Part
Class II Device
No Open Flames
(Concentrator); Do not
incinerate (Battery).
No smoking
No oil or grease
Do Not Disassemble
Electrical Safety Agency
Certicate
European Declaration of
Conformity
The manufacturer of this
POC has determined this
device conforms to all
applicable FAA
requirements for POC
carriage and use on board
aircraft.
Compliant with the Waste
Electrical and Electronic
Equipment/Restriction
of the Use of Certain
Hazardous Substances in
Electrical and Electronic
Equipment (WEEE/RoHS)
recycling directive
Keep Dry
Indoor or Dry Location
Use Only, Do Not Get Wet
AC Power
DC Power
Refer to instruction
manual/booklet.
Manufacturer
Authorized Representative
in the European
Community
This symbol indicates use
of the automobile DC input
power cable (BA-306)
ONLY
ONLY
Symbol Key
ONLY
EC REP
ONLY

2
2. Introduction
Intended Use
The Inogen One® G5 Oxygen Concentrator
is used on a prescriptive basis by patients
requiring supplemental oxygen. It supplies a
high concentration of oxygen and is used with
a nasal cannula to channel oxygen from the
concentrator to the patient. The Inogen One®
G5 may be used in home, institution, vehicle
and various mobile environments.
Intended Life
The expected life for the Inogen One® G5
Oxygen System is 5 years, with the exception
of the sieve beds (metal columns) which have
an expected life of 1 year and the batteries,
which have an expected life of 500 full
charge/discharge cycles.
Contraindications and
Precautions
• This device is NOT INTENDED to be life
sustaining or life supporting.
• Under certain circumstances, the use of
non-prescribed oxygen therapy can be
hazardous. This device should be used
only when prescribed by a physician.
• USA Federal law restricts this device to
sale by or on the order of a physician.
May also be applicable in other
countries.
• Nasal cannula should be rated for 6 liters
per minute (e.g. Salter Labs 16SOFT) to
ensure proper patient usage and oxygen
delivery.
• Availability of an alternate source of
oxygen is recommended in case of
power outage or mechanical failure.
Consult your equipment provider for
type of back-up system recommended.
• It is the responsibility of the patient to
make back-up arrangements for
alternative oxygen supply when
traveling; Inogen assumes no liability
for persons choosing not to adhere to
manufacturer recommendations.
Cautions and Warnings
Cautions
• A caution indicates that a precaution
or service procedure must be followed.
Disregarding a caution could lead to a
minor injury or damage to equipment.
• Additional monitoring or attention
may be required for patients using this
device who are unable to hear or see
alerts or communicate discomfort. If the
patient shows any signs of discomfort,
a physician should be consulted
immediately.
• The Inogen One® G5 is not designed or
specied to be used in conjunction with
a humidier, nebulizer or connected
with any other equipment. Use of this
device with a humidier, nebulizer or
connected with any other equipment
may impair performance and/or
damage the equipment. Do not modify
the Inogen One® G5 Concentrator.
Any modications performed on the
equipment may impair performance or
damage equipment and will void your
warranty.
• Do not use oil, grease, or petroleum-
based products on or near the Inogen
One® G5.
• Do not use lubricants on the Inogen
One® G5 or its accessories.
• Never leave the Inogen One® G5 in an
environment which can reach high
temperatures, such as an unoccupied
car in high temperature environments.
This could damage the device.
• Avoid touching the recessed electrical
contacts of the External Battery Charger;
damage to contacts may aect charger
operation.
• Do not obstruct air intake or exhaust
when operating the device. Blockage
of air circulation or proximity to a
heat source may lead to internal heat
buildup and shutdown or damage to the
concentrator.

3
• The Inogen One® G5 Concentrator
is designed for continuous use. For
optimal sieve bed (columns) life, the
product should be used frequently.
• Do not operate the Inogen One® G5
without the particle lter in place.
Particles drawn into the system may
damage the equipment.
• The Inogen One® G5 battery acts as a
secondary power supply in the event
of a planned or unexpected loss of
the AC or DC external power supply.
When operating the Inogen One®
G5 from an AC or DC external power
supply, a properly inserted Inogen
One® G5 battery should be maintained
in the unit. This procedure will ensure
uninterrupted operation and will
operate all alerts and alerts in the event
of a loss of the external power supply.
• Ensure the power supply is in a well
ventilated location as it relies on air
circulation for heat dissipation. The
power supply may become hot during
operation. Make sure the power supply
cools down before handling.
• Do not disassemble the power supply.
This may lead to component failure
and/or safety risk.
• Do not place anything in the power
supply port other than the supplied
wall cord. Avoid the use of electrical
extension cords with the Inogen One®
G5. If an extension cord must be used,
use an extension cord that has an
Underwriters Laboratory (UL) Mark and
a minimum wire thickness of 18 gauge.
Do not connect any other devices to the
same extension cord.
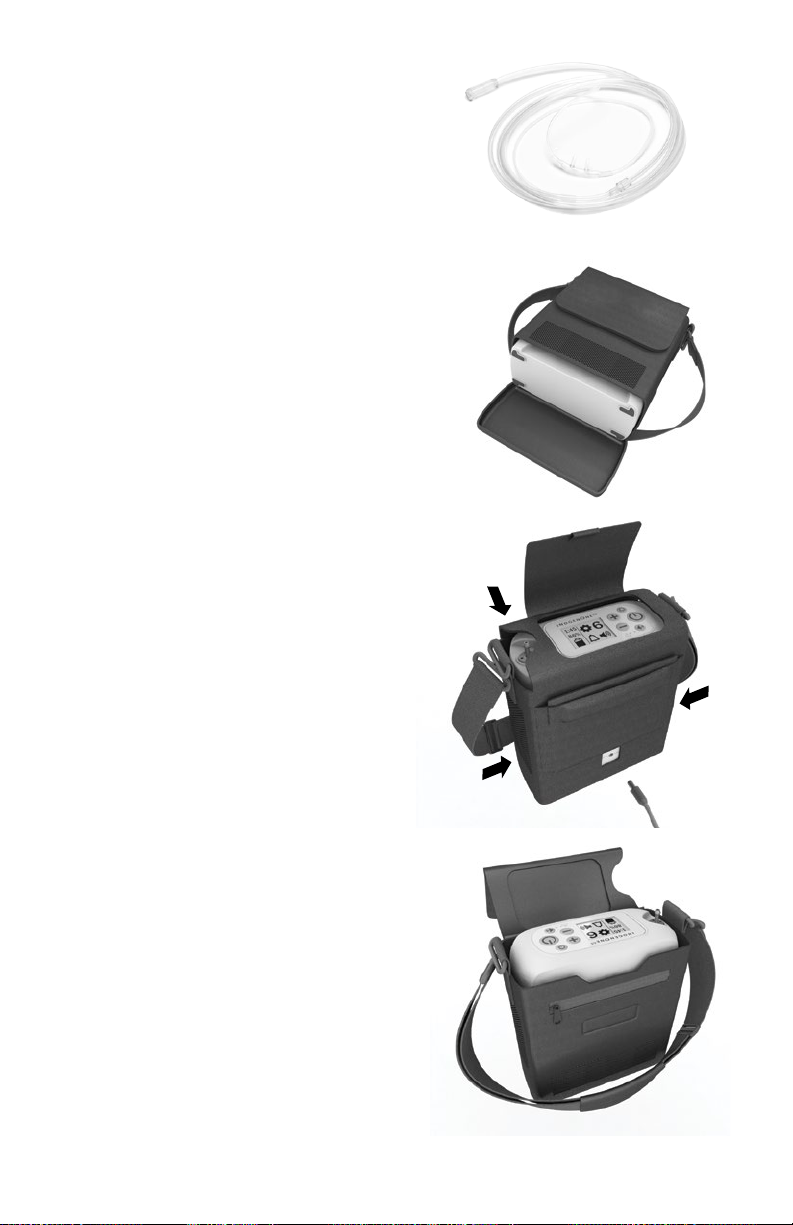
• To ensure oxygen ow, ensure that the
nasal cannula is properly connected to
the nozzle tting and that the tubing is
not kinked or pinched in any way.
• Replace the nasal cannula on a regular
basis. Check with your equipment
provider or physician to determine how
often the cannula should be replaced.
• The Inogen One® G5 is designed to
provide a ow of high purity oxygen.
An advisory alert, “Oxygen Low”, will
inform you if oxygen concentration
drops. If alert persists, contact your
equipment provider.
• Ensure the power supply is powered
from only one power source (AC or DC)
at any given time.
• Ensure the automobile power socket is
clean of cigarette ash and the adapter
plug ts properly, otherwise overheating
may occur.
• Do not use the power supply with
a cigarette plug splitter or with an
extension cable. This may cause
overheating of the DC power input
cable.
• Do not jump start the automobile with
the DC power cable connected. This may
lead to voltage spikes which could shut
down and/or damage the DC power
input cable.
• When powering the Inogen One® G5
in an automobile ensure the vehicle’s
engine is running rst before connecting
DC cable into cigarette lighter adapter.
Operating the device without the
engine running may drain the vehicle’s
battery.
• A change in altitude (for example, from
sea level to mountains) may aect total
oxygen available to the patient. Consult
your physician before traveling to higher
or lower altitudes to determine if your
ow settings should be changed.
Warnings
• A warning indicates that the personal
safety of the patient may be involved.
Disregarding a warning could result in
injury.
• The device produces enriched oxygen
gas, which accelerates combustion.
• Do not allow smoking or open ames
within 10 feet of this device while in use.

4
•• Avoid use of the Inogen One® G5 in
presence of pollutants, smoke or fumes.
Do not use the Inogen One® G5 in
presence of ammable anesthetics,
cleaning agents or other chemical
vapors.
• Do not submerse the Inogen One® G5
or any of the accessories in liquid.
• Do not expose to water or precipitation.
Do not operate in exposed rain. This
could lead to electrical shock and/or
damage.
• Do not use cleaning agents other than
those specied in this User Manual.
Do not use alcohol, isopropyl alcohol,
ethylene chloride or petroleum based
cleaners on the cases or on the particle
lter.
• Never leave the Inogen One® G5 in an
environment which can reach high
temperatures, such as an unoccupied
car in high temperature environments.
This could damage the device.
• Do not use power supplies, power
cables or accessories other than those
specied in this user manual. The use
of non-specied power supplies, power
cables or accessories may create a
safety hazard and/or impair equipment
performance.
• Do not wrap cords around power supply
for storage. Do not drive, drag or place
objects over cord. Doing so may lead to
damaged cords and a failure to provide
power to the concentrator.
• To avoid danger of choking or
strangulation hazard, keep cords away
from children and pets.
• If you begin to feel ill or are experiencing
discomfort while using this device,
consult your physician immediately.
• Ensure that the automobile power
socket is adequately fused for the
Inogen One® G5 power requirements
(minimum 15 Amp). If the power socket
cannot support a 15 Amp load, the
fuse may blow or the socket may be
damaged.
• The tip of the Cigarette Adapter Plug
becomes HOT when in use. Do not touch
the tip immediately after removal from
an auto cigarette lighter socket.
• It is the responsibility of the patient
to periodically check the battery and
replace as necessary. Inogen assumes
no liability for persons choosing
not to adhere to manufacturer
recommendations.
• Audible notications, ranging from
68dBA to 78dBA depending on the
users position, are to warn the user
of problems. To insure that audible
notications may be heard, the
maximum distance that the user can
move away from it must be determined
to suit the surrounding noise level.
Make sure the Inogen One® G5 is in a
location where the alerts can be heard
or will be recognized if they occur.
• Do not use any columns other than
those specied in this user manual.
The use of non-specied columns may
create a safety hazard and/or impair
equipment performance and will void
your warranty.
• Do not disassemble the Inogen One® G5
or any of the accessories or attempt any
maintenance other than tasks described
in this user manual; disassembly creates
a hazard of electrical shock and will
void your warranty. Do not remove the
tamper evident label. For events other
than those described in this manual,
contact your equipment provider for
servicing by authorized personnel.

5
3. Inogen One® G5 Oxygen Concentrator Description
User Controls
Item Description Function
1ON / OFF Button Press once to turn“ON”; Press and hold for one second to turn“OFF”.
2 Flow Setting
Control Buttons
Use the – or + ow setting control buttons to select the setting as shown
on the display. There are six settings, from 1 to 6.
3 Volume Control
Button
Pressing this button will change the volume level, from 1 to 4.
4 Audible Alert
Button
Pressing this button will toggle the Inogen One® G5’s breath detection
audible alert on and o.
Breath Detection Alert Mode. The Inogen One® G5 will alert with audible
and visual signals for“no breath detected”when this mode is enabled
and no breath has been detected for 60 seconds.
At 60 seconds, the device will enter into auto pulse mode and once
another breath is detected, the device will exit auto pulse mode and
deliver normally on inspiration. The display’s mode indication area will
show a bell icon, ashing yellow light and display message when the alert
is enabled.
If power is lost, the breath detection audible alert remains set in the user
preferred mode.
User Interfaces
Item Description Function
5 Display This screen displays information regarding ow setting, power status,
battery life and errors. Display appearance will vary. Before use, remove
the static cling FCC label from the screen.
6 Indicator Lights A green light indicates breath detection. A yellow light indicates either a
change in operating status or a condition that may need response (alert).
A ashing light is higher priority than non-ashing.
7 Audible Signals An audible signal (beep) indicates either a change in operating status or
a condition that may need response (alert). More frequent beeps indicate
higher priority conditions. The default volume is set at level 1 and can be
adjusted to higher settings but it can not be silenced. If power is lost, the
audible signal remains set in the user preferred adjusted setting.
8 Backlight A backlight will illuminate the screen for 15 seconds when the on/o
button is briey pressed.
4
1
5
8
3
6
7
2

6
Input / Output Connections
Particle Filter
The lters must
be in place at the
intake ends of
the concentrator
during operation
to keep input air
clean.
Cannula Nozzle
Fitting
The nasal cannula
connects to this
nozzle for Inogen
One® G5 output of
oxygenated air.
USB Port
For service use only.
DC Power In
Connection for
external power
from the AC power
supply or DC power
cable.
4. Operating Instructions
General Instructions
1. Place the Inogen One® G5 in a well
ventilated location.
2. Air intake and exhaust must have clear
access. Locate the Inogen One® G5 in
such a way that any auditory alerts may
be heard. Always operate the Inogen
One® G5 in an upright position (see
image for proper orientation).
3. Ensure particle lters are in place at both
ends of device.
4. Insert the Inogen One® G5 battery by
sliding battery into place until the latch
returns to the upper position.
5. Connect the AC input plug to the power
supply. Connect the AC power plug
to the power source and connect the
power output plug to the Inogen One®
G5. The green LED on the power supply
will be illuminated and a beep will sound
from the concentrator.
Intake
Vent
Exhaust
Vent
Intake
Vent
1., 2., 3.
4.
Intake
Vent
Intake
Vent

7
6. Connect the nasal cannula tubing
to the nozzle tting. Nozzle tting is
located on the top of the Inogen One®
G5. Use of a single lumen cannula up
to 25 feet in length is recommended
to ensure proper breath detection and
oxygen delivery. Additional titration
may be needed to ensure proper
oxygen delivery when using a particular
cannula, consult your physician.
7. Turn on your Inogen One® G5 by
pressing the ON/OFF Button. A single
short beep will sound after the Inogen
logo is displayed. Please wait icon ( )
will appear while the concentrator starts
up. The display will indicate the selected
ow setting and power condition.
Following a brief start-up sequence, a
warm up period up to 2 minutes will
initiate. During this time period the
oxygen concentration is building to but
may not have reached specication.
Additional warm up time may be
needed if your Inogen One® G5 has been
stored in extremely cold temperatures.
8. Set the Inogen One® G5 Concentrator
to the ow rate prescribed by your
physician or clinician. Use the + or –
setting buttons to adjust the Inogen
One® G5 to the desired setting. The
current setting can be viewed on the
display.
9. Position the nasal cannula on your face
and breathe through your nose. The
Inogen One® G5 will sense the onset of
inhalation and deliver a burst of oxygen
at a precise time when you inhale. The
Inogen One® G5 will sense each breath
and continue to deliver oxygen in this
manner. As your breathing rate changes,
the Inogen One® G5 will sense these
changes and deliver oxygen only as
you need it. At times, if you inhale very
quickly between breaths the Inogen
One® G5 may ignore one of the breaths,
giving the appearance of a missed
breath. This may be normal as the
Inogen One® G5 senses and monitors
the changes in your breathing pattern.
The Inogen One® G5 will normally sense
the next breath and deliver oxygen
accordingly.
5., 6.
7., 8.

8
DC power cable
(BA-306)
AC power supply
(BA-501)
Single battery (BA-500)
and double battery (BA-516)
10. A green light will ash each time a
breath is detected. Make certain that
the nasal cannula is properly aligned on
your face and you are breathing through
your nose.
Power Supply Options
Single and Double Rechargeable
Lithium Ion Batteries
The battery will power the Inogen One® G5
without connection to an external power
source. When fully charged, a single battery
will provide up to 4.5 hours of operation; a
double battery will provide up to 9 hours of
operation. The battery recharges when
properly installed in the Inogen One® G5 and
the concentrator is connected to AC or DC
power. Recharging time is up to 4 hours for a
single battery and 8 hours for a double
battery. While the Inogen One® G5 is
operating on battery power, the battery will
discharge. The display will indicate the
estimated remaining percentage (%) or
minutes of use.
When the concentrator detects that the
battery life is low, with less than 10 minutes
remaining, a low priority alert will sound.
When the battery is empty, the alert will
change to a high priority.
When battery life is low, do one of the
following:
• Plug the Inogen One® G5 into an AC or
DC power source using the AC power
supply or DC cable.
• Replace the battery with a charged
battery after turning o the Inogen
One® G5 (by pressing the ON/OFF
button). To remove battery press and
hold the battery latch button and slide
battery o the concentrator.
• If the battery is drained, charge
the battery or remove it from the
concentrator.
If the Inogen One® G5 is being powered by the
AC power supply or DC power, batteries will
charge during operation. Leaving your Inogen
One® G5 plugged in past the full charge time
will not harm the concentrator or the battery.
To ensure that your battery is properly
charging, inspect that the correct AC and
10.

9
DC power output plug adapter is being used and that the adapter is properly inserted into the
power outlet. Observe the display or lights that indicate charging status.
NOTE: When starting to charge a fully discharged battery, the charging process may start and
stop during the rst few minutes.
Always keep liquids away from batteries. If batteries become wet, discontinue use immediately
and dispose of battery properly.
To extend the run-time of your battery, avoid running in temperatures less than 41˚F (5˚C) or
higher than 95˚F (35˚C) for extended periods of time.
• Store battery in a cool, dry place. Store with a charge of 40-50%.
• If using multiple batteries, make sure that each battery is labeled (1, 2, 3 or A, B, C, etc.)
and rotate on a regular basis. Batteries should not be left dormant for more than
90 days at a time.
Battery Charge Indicator Gauge
When the single or double battery is not
attached to the Inogen® One G5 Concentrator,
you can check the battery gauge on the battery
to determine the amount of charge available.
Determine the amount of battery charge
available by pressing the green battery icon
button and observing how many LEDs
illuminate.
4 LEDs Light: 75% to 100% full
3 LEDs Light: 50% to 75% full
2 LEDs Light: 25% to 50% full
1 LED Lights: 10% to 25% full
1 LED Blinks: Battery is less than 10% full
and needs to be recharged
Power Supply Overview
The Inogen One® G5 AC power supply (BA-501) is used to power the Inogen One® G5
concentrator from an AC power source.
The Inogen One® G5 AC power supply is specically designed for use with the Inogen One® G5
Oxygen Concentrator (IO-500). The AC power supply provides the precise current and voltage
required to safely power the Inogen One® G5 and is designed to operate from specied AC
power sources. When used with AC power sources, the power supply automatically adapts to
input voltages from 100V to 240V (50-60HZ) permitting use with most power sources
throughout the world.
The AC power supply will charge the Inogen One® G5 Batteries when used with AC input power.
Due to aircraft power limitations, the AC Power Supply cannot be used to charge the Inogen
One® G5 Battery when used on an aircraft.
The AC power supply is used with the following components:
1. Power supply with attached power output cable to connect to the Inogen One® G5.
2. AC power input cable to the power source.
The DC power cable (BA-306) is designed for use with the Inogen One® G5 Oxygen
Concentrator (IO-500). The DC power input cable connects directly to the automobile
cigarette lighter or auxiliary DC power supply.

10
Inogen One® G5 Accessories
Nasal Cannula
A nasal cannula must be used with the
Inogen One® G5 to provide oxygen from the
concentrator. A single lumen cannula up to
25 feet in length is recommended to ensure
proper breath detection and oxygen delivery.
Carry Bag (CA-500)
The Carry Bag provides a protective cover with
a handle and shoulder strap to enable you to
carry the Inogen One® G5. The Inogen One®
G5 can be operated using battery power
during transport with the Carry Bag.
1. Insert the Inogen One G5 into the carry
bag through the bottom zippered
opening with the cannula barb facing
up on the right front side. Attach the
desired sized single or double battery
and zip up the bottom ap.
2. The cannula barb will be exposed at the
top of the bag for proper attachment.
The display screen can be accessed by
grabbing the short material pull tab at
the top ap, just above the grab handle
on the back top section of the bag.
3. Both intake vents should be visible
through the open mesh panels on
both sides of the bag. The exhaust vent
should be visible from the open mesh
panel on the front bottom panel of the
bag just above the zippered seam.
4. There is a small cut-out on the back
bottom section of the bag to plug
into AC or DC outlet for charging
accessibility.
5. There is a slim pocket under the front
ap of the bag with a zipper closure for
storage of small items such as ID cards
and currency. The extra cannula tubing
can be tucked into the open pocket on
the front ap of the bag.

11
6. There is one additional feature for
attaching the bag to a luggage or cart
handle for ease of not having to carry
the bag while also pulling luggage or a
cart.
7. The carry strap has a removable
shoulder pad and has an adjustable
strap from 24”to 48”in length.
8. For washing instructions, clean with
a damp cloth and mild detergent and
wipe dry.
Optional Accessories
Backpack (CA-550)
Alternative/optional way of carrying
your Inogen One® G5, hands free, more
comfort, out of your way with extra pockets
for additional accessories. To order please call
Inogen Client Services.
External Battery Charger (BA-503)
The Inogen One® G5 external battery charger will
charge the Inogen One® G5 single and double
batteries.
1. Plug the External Battery Charger AC
power supply cord into an electrical
outlet.
2. Plug the External Battery Charger AC
power supply into the battery charger.
3. Slide your charger onto the Inogen
One G5 Battery by clicking and
locking into the charger.
4. When the battery is in the correct
position, a solid red light will indicate
that the battery is charging.
5. When the green light illuminates, the
battery is fully charged.
NOTE: These contacts are not powered unless a battery is in place and charging.
To completely remove power from the external battery charger, remove the plug.

12
Traveling with your Inogen One G5 System
The FAA allows the Inogen One G5 onboard all U.S. aircraft, here are a few points to make air
travel easy.
• Ensure your Inogen One G5 is clean, in good condition and free from damage or other
signs of excessive wear or abuse.
• Bring enough charged batteries with you to power your Inogen One G5 for no less than
150% of the expected duration of your ight, ground time before and after the ight,
security screenings, connections and a conservative estimate for unanticipated delays.
• FAA regulations require that all extra batteries to be individually wrapped and protected to
prevent short circuits and carried in carry-on baggage onboard aircraft only.
• Some airlines may equip their aircraft with onboard electrical power. However, availability
varies by airline, type of aircraft and class of service. You must check with your airlines
for availability and any specic requirements for battery life duration 48 hours before
traveling. In this case, the following procedure regarding transition from battery power to
aircraft electrical power must be followed:
º Remove the battery from the Inogen One G5.
º Connect the DC power plug to the Inogen One G5 and plug into
available airline power.
NOTE: The AC Power Supply cannot be used to charge the Inogen One G5 battery when
onboard aircraft. Traveling by bus, train or boat, contact your carrier to nd out about power
port ability.
5. Audible and Visible Signals
Display
The Inogen One® G5 display contains power status icons, mode icons, informational icons and
notication icons.
Power Status Icons
These icons are examples of those shown in the display’s window when the
Inogen One® G5 is operating on battery power.
Battery is Empty
Battery has less than 10% charge
remaining. The icon ashes.
Battery has approximately 40% to 50% charge remaining.
Battery is full.

13
!C
The mode icons below are examples of those shown when the Inogen One® G5 is operating from
an external power supply and charging the battery. The lightning bolt indicates that an external
power supply is connected.
The battery is fully charged and is charging as necessary to
maintain its charge.
Battery is charging with charge level between 60% and 70%.
Battery is charging with charge level less than 10%.
The Inogen One® G5 is operating from an external power source
with no battery present.
Mode Icons
These are the mode icons shown in the display’s window.
The breath detection audible alert has been enabled.
The breath detection audible alert is disabled. This is the default
condition.
Sound Level 1
Sound Level 2
Sound Level 3
Sound Level 4
Display Icons
The icons below are examples of those shown when pertaining to Bluetooth functionality.
Bluetooth turned o.
Bluetooth turned on.
Pairing with Inogen Connect application.
Concentrator unpaired from mobile device.

14
Informational Icons
The following displayed icons are not accompanied by any audible feedback or any visual
change in the indicator lights.
Description Display Icons Condition/Action/Explanation
Setting X
Please Wait
Displayed during warm up. “X”represents the
selected ow setting (eg., Setting 2).
Setting X
Battery
Hours:Minutes
Default display when operating on battery
power.“X” represents the selected ow
setting (e.g., Setting 2).“HH:MM”represents
the approximate time remaining on the
battery charge (e.g., 1:45).
Setting X
Battery
Charging XX%
Default display when operating on an external
power supply and the battery is charging.
“xx%” represents the percent battery charge
(e.g., 86%).
Setting X
Battery XX%
Default display when the battery is not
charging or when the time remaining is not
available from the battery.
Battery
Charging XX%
Displayed when the concentrator is plugged in
and being used to charge a battery (not being
used for oxygen production). It is normal to see
a fully charged battery read between 95% and
100% when external power is removed. This
feature maximizes the useful life of the battery.
Sieve Reset Displayed when column maintenance is
required and once the replacement columns
have been installed.
Sieve Reset
Success
Displayed once the columns have been
successfully reset.
Notication Icons
The Inogen One® G5 monitors various parameters during operation and utilizes an intelligent
alert system to indicate a malfunction of the concentrator. Mathematical algorithms and time
delays are used to reduce the probability of false alerts while still ensuring proper notication of
an alert condition.
If multiple alert conditions are detected, the highest priority alert will be displayed.
Note that failure to respond to the cause of an alert condition for low, medium and high priority
alerts potentially will result in discomfort or reversible minor injury only and develop within a
period of time sucient to switch to a backup source of oxygen.
The following notication icons are accompanied by a single, short beep.
%
HH:MM

15
HH:MM
Vx.x:SN
O2
!C
Notication Icons (Continued)
Description Display Icons Condition/Action/Explanation
Please Wait
Shutting Down
On/O button has been pressed for two
seconds. Concentrator is performing
system shut down.
Hours:Minutes
Software Version:
Serial Number
Audible Alert button has been pressed for ve
seconds.
Low Priority Alerts
The following low priority alerts are accompanied by a double beep and a solid yellow light.
Description Display Icons Condition/Action/Explanation
Battery Low
Attach Plug
Battery power is low, with less than 10
minutes remaining. Attach external power
supply or power down and insert a fully
charged battery.
Replace Columns Column maintenance is required within 30 days.
Contact your equipment provider to arrange for
service.
Check Battery Battery error has occurred. Check the
connection of your battery and ensure that it is
properly attached and latched on concentrator.
If battery error recurs with same battery, stop
using the battery and switch to a new battery or
remove battery and operate concentrator using
external power supply.
Oxygen Low Concentrator is producing oxygen at a
slightly low level (<82%) for a period of
10 minutes. If condition persists, contact
your equipment provider.
Remove Battery
to Cool
Battery has exceeded its charging temperature
and charging has stopped. The battery will not
charge while this alert is present but will begin
to charge when the battery temperature
returns to the normal operating range. If
battery charging is desired sooner, remove the
battery from the concentrator and allow it to
cool in an open area for approximately 10-15
minutes. Then, re-insert the battery into the
Inogen One® G5. If the problem still persists,
contact your equipment provider.

16
O2
O2
Description Display Icons Condition/Action/Explanation
Service Soon The concentrator requires servicing at the
earliest convenience. The concentrator is
operating to specication and may continue to
be used. Contact your equipment provider to
arrange for service.
Sensor Fail The concentrator’s oxygen sensor has
malfunctioned. You may continue to use the
concentrator. If the condition persists, contact
your equipment provider.
Medium Priority Alerts
The following medium priority alerts are accompanied by a triple beep, repeated every
25 seconds, and a ashing yellow light.
Description Display Icons Condition/Action/Explanation
No Breath Detect
Check Cannula
Concentrator has not detected a breath for 60
seconds. Check that cannula is connected to
concentrator, there are no kinks in tubing and
cannula is positioned properly in your nose.
Oxygen Error Oxygen output concentration has been below
50% for 10 minutes. If condition persists, switch
to your backup oxygen source and contact your
equipment provider to arrange for service.
O2 Delivery
Error
A breath has been recognized, but proper
oxygen delivery has not been detected.
Battery HOT
Warning
Battery has exceeded temperature limit while
concentrator is running on battery power.
If possible, move concentrator to a cooler
location or power unit with an external power
supply and remove battery. If condition
persists, contact your equipment provider.
System Hot
Warning
Concentrator temperature has exceeded
temperature limit. If possible move
concentrator to a cooler location. Ensure air
intake and outlet vents have clear access and
particle lters are clean. If condition persists,
contact your equipment provider.
Low Priority Alerts (Continued)

17
!C
High Priority Alerts
The following high priority alerts are accompanied by a ve beep pattern, repeated every
10 seconds and a ashing yellow light.
Description Display Icons Condition/Action/Explanation
Battery Empty
Attach Plug
Concentrator has insucient battery power to
produce oxygen. Attach external power supply
or exchange battery, then restart unit if
necessary by pressing On/O button.
Battery HOT Battery has exceeded temperature limit while
concentrator is running on battery power.
Concentrator has stopped producing oxygen.
If possible, move concentrator to a cooler
location, then turn power o and back on.
Ensure air intake and outlet vents have clear
access and particle lters are clean. If condition
persists, switch to a backup source of oxygen and
contact your equipment provider.
System HOT Concentrator temperature is too high and
oxygen production is shutting down. Ensure air
intake and outlet vents have clear access and
particle lters are clean. If condition
persists, switch to a backup source of oxygen
and contact your equipment provider.
System COLD This may result from the concentrator being
stored in a cold environment (below 0ºC (32ºF)).
Move to a warmer environment to allow the
unit to warm up before starting it. If condition
persists, switch to a backup source of oxygen
and contact your equipment provider.
System Error Concentrator has stopped producing oxygen
and is shutting down. You should:
1. Switch to backup oxygen source
2. Contact your equipment provider
6. Troubleshooting
Problem Possible Cause Recommended Solution
Any problem accompanied
by information on
concentrator display,
indicator lights and/or
audible signals
Refer to Chapter 5 Refer to Chapter 5
Other manuals for One G5
5
Table of contents
Other Inogen Medical Equipment manuals

Inogen
Inogen at home User manual

Inogen
Inogen TAV User manual

Inogen
Inogen InogenOne G4 User manual

Inogen
Inogen One G3 User manual

Inogen
Inogen One IO-100 User manual

Inogen
Inogen One G5 User manual

Inogen
Inogen One G4 User manual

Inogen
Inogen One G4 User manual

Inogen
Inogen One G3 User manual

Inogen
Inogen One G3 User manual

Inogen
Inogen Rove 6 User manual

Inogen
Inogen One G3 User manual

Inogen
Inogen One G5 User manual

Inogen
Inogen One User manual

Inogen
Inogen One G5 User manual

Inogen
Inogen One G3HF User manual

Inogen
Inogen One G3 User manual

Inogen
Inogen One G4 User manual

Inogen
Inogen One G3 Technical Document

Inogen
Inogen Rove 6 User manual