Insta 288 User manual

MODEL
288
OPERATION AND MAINTENANCE MANUAL
MNL90
288 B 12.01.2017

1
FOR USE BY QUALIFIED PERSONNEL ONLY
Safety Summary
WARNING
In case of power cord damage, do not
attempt to repair or replace the power
cord. ontact the manufacturer or the
local distributor.
WARNING
Hot surface. Avoid contact.
CAUTION
The machine is to be operated by one
person only.
CAUTION
To reduce the risk of electric shock and
injury to persons, turn the machine off
and disconnect the machine from the
power supply before servicing and/or
cleaning.
CAUTION
During normal operation, the base of
the machine must be installed or placed
above the wall socket on a level, stable
surface.
CAUTION
Do not lean on the machine when the
lower platen is removed. are must be
taken to prevent machine from tipping
over. Keep upper platen as close as to
the center position.
I ter atio al Symbols
Power Off
Power O
Hot Surface
Risk of Electrical Shock
Protective Earth Termi al
Grou d
Wet Co ditio s
Start Actio
Cautio – War i g

2
FOR USE BY QUALIFIED PERSONNEL ONLY
Co gratulatio s!
Your selection of the Insta Graphic Systems heat
seal machine is a sound business decision. Insta
equipment is the result of the highest quality
engineering and time-tested design. Your new
machine, combined with Insta’s reputation for
innovation in the heat-sealing field, ensures that
you will be able to deliver the best-decorated
substrates possible for years to come.
This manual provides the installation, operation,
and maintenance procedures for your 288 series
machine, as well as easy to follow instructions for
on-the-spot maintenance.
Your model 288 machine will have a long, trouble-
free life. Read this manual. Keep it with your
machine; it’s your key to proper operation and
lasting service.
Ge eral Descriptio
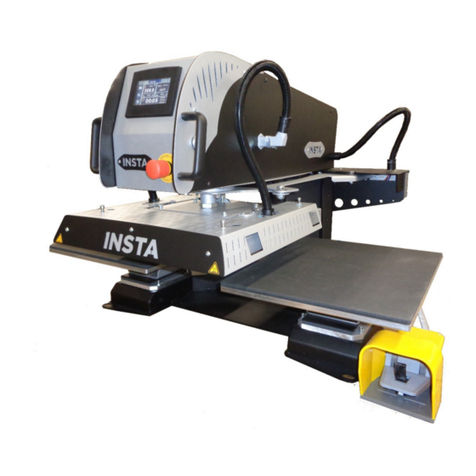
The 288 is a manual swing-away machine capable of
generating tremendous pressure that is evenly
distributed across the area of the 20’’ x 25’’ platen.
The 288 machine also features a quick-change
mechanism in the lower platen allowing the lower
platen to be switched or rotated in a matter of
seconds. The heating platen features a cast-in
tubular heating element that is densely coiled to
deliver rapid heating and constant, long-lasting and
uniform temperatures.
Limited Machi e Warra ty
Insta Graphic Systems warrants this heat seal
machine, when operated under normal conditions,
to be free from manufacturing defects in material
and workmanship for a period of one (1) year on
parts and 90 days on labor from the invoice date.
This warranty will be effective only when Insta
authorizes the original purchaser to return the
product to the factory in erritos, alifornia, freight
prepaid, and only when the product upon
examination has proven to be defective.
This warranty does not apply to any machine that
has been subjected to misuse, negligence, or has
been damaged accidentally or intentionally.
Insta shall not be liable for the injury, loss, or
damage, directly or indirectly, arising from the use
or the inability to use the product.
No claim of any kind shall be greater in amount
than the sale price of the product or part to which
claim is made.
See extended warranty information at the end of
the manual.
I stallatio
Please fill out the followi g for future use:
MODEL NO:
SERIAL NO:
MANUFACTURE DATE:
PURCHASE DATE:
PURCHASE VENDOR:

3
FOR USE BY QUALIFIED PERSONNEL ONLY
288 N MODEL, 230 VOLT
Use a desig ated 16 Amp A circuit.
Only industrial extension cords with
proper wire size (2.5 mm
2
) shall be
used.
IMPORTANT
The appliance must be plugged into
a proper receptacle of the proper
size and rating. Equally important,
the line voltage must be able to
accommodate this appliance as well
as other appliances operating on this
circuit.
Specificatio s
Voltage
230 Volts AC
50/60 Hertz
Model 288
230 V
33
00 Watts
14.3
Amps
Machine Weight
(Dry) 145 lbs 65.9 kg
Shipping
Weight
(Box & Pallet)
189 lbs 85.9 kg
Degree of Protectio
The IP (Ingress Protection) rating of this machine
according to IE 60529 is:
IP54 = IP
1
st
Digit = 5 (Dust Protected)
2
nd
Digit = 4 (Splashing Water)
1
st
Digit Protection from
solid objects 2
nd
Digit Protection from
moisture
0 Not protected 0 Not protected
1 Objects greater
than 50 mm 1 Dripping water
2 Objects greater
than 12 mm 2
Dripping water
when tilted up
to 15°
3 Objects greater
than 2.5 mm 3 Spraying water
4 Objects greater
than 1 mm 4 Splashing water
5 Dust protected 5 Water jets
6 Dust tight 6 Heavy seas
-- --- 7 0.15 m – 1 m
immersion
-- --- 8 +1 m
submersion
NOTE:
IEC 60529 does not specify sealing effectiveness against
the following: mechanical damage of the e uipment; the
risk of explosion; certain types of li uid conditions, e.g.
those that are produced by condensation; corrosive
vapor; fungus; vermin.

4
FOR USE BY QUALIFIED PERSONNEL ONLY
Safety a d Da ger Zo e Diagram
Operati g E viro me t
To maximize user safety, ensure that the
following operating conditions are met:
3. The workspace does not restrict access to the main
power switch or power cord.
4. The workspace is free of any forms of liquid.
5. The power cord is not overextended.
6. The machine is connected to a surge protector.
Taking these steps is crucial in maximizing user
safety and ensuring a long, trouble-free life for your
machine!
1. The machine is placed on an even, non-
flammable surface.
2. The surface can support a minimum of
300 lbs (136 kg).
Do not handle the
machinery with
wet hands
This is a hot surface.
Avoid contact with
upper platen shroud
Keep hands clear
between the upper
and lower platens
Machinery should be
operated on a secure
flat surface
Do not disable safety
lock during normal
operation
Always place handle in the
full back position when
machine is not in operation

FOR USE BY QUALIFIED PERSONNEL ONLY
Co figuri g Your Machi e
Once you have correctly installed your machine
will want to
configure the settings of your machine
to match your needs.
1.
Tur the machi e o
Plug
your machine
in
,
turn
power switch on,
and press the
button on the control panel
.
The display will briefly show the
controller program revision
2.
Set the operati g
T
emperature
a.
If the temperature is not shown, press
MODE
to cycle to the temperature
display.
NOTE
:
If the platen temperature is BELOW 2
25
°C, the controller will display “Lo F
” or “
depending on the
units the controller is set to.
b.
Press
SET
to display the current set
temperature.
To raise the temperature, hold
UP.
+
To decrease the temperature, hold
and DOWN.
+
3.
Give the machi e time to heat
FOR USE BY QUALIFIED PERSONNEL ONLY
Co figuri g Your Machi e
Once you have correctly installed your machine
, you
configure the settings of your machine
turn
the
main
and press the
POWER
.
The display will briefly show the
controller program revision
number.
emperature
If the temperature is not shown, press
to cycle to the temperature
25
°F OR 107
” or “
Lo C”
units the controller is set to.
to display the current set
To raise the temperature, hold
SET and
To decrease the temperature, hold
SET
Give the machi e time to heat
1
+
NOTE:
Heating may take between 20
minutes depending on the set
temperature. Do not leave the
machine unattended during t
2
2
2
2
MODEL 288
MODEL 288
MODEL 288
MODEL 288
5
1
1
1
+
Heating may take between 20
to 45
minutes depending on the set
temperature. Do not leave the
d during this time!
MODEL 288
MODEL 288
MODEL 288
MODEL 288

FOR USE BY QUALIFIED PERSONNEL ONLY
4.
Set the desired
P
ressure
Adjust the pressure adjust
crank
behind the top housing.
a.
Turn the
crank
CLOCKWISE
to
the pressure.
b.
Turn the
crank
COUNTER
-
CLOCKWISE
INCREASE the pressure.
NOTE:
Increasing the pressure increases the
force re uired to close the platens. To
avoid user injury or d
amage to the
machine, do not attempt to force the
platens closed at very high pressure
levels.
5.
Set the
A
pplicatio time
a.
Press
MODE
to cycle to the time display.
b.
Press
SET
to display the
application time.
To increase the appli
cation time, hold
SET and UP.
+
To decrease the application time, hold
SET and DOWN.
+
FOR USE BY QUALIFIED PERSONNEL ONLY
crank
located
to
DECREASE
CLOCKWISE
to
Increasing the pressure increases the
force re uired to close the platens. To
amage to the
machine, do not attempt to force the
platens closed at very high pressure
to cycle to the time display.
application time.
cation time, hold
To decrease the application time, hold
Increase pressure
1
2
+
2
2
MODEL 288
MODEL 288
MODEL 288
6
Decrease pressure
1
1
+
MODEL 288
MODEL 288
MODEL 288

7
FOR USE BY QUALIFIED PERSONNEL ONLY
Basic Operatio
1.
Swing the
upper platen
to the right using
the stainless steel handle.
2.
Place the substrate on the lower platen.
3.
Position the
transfer or lettering on the
substrate.
4
.
Swing the
upper platen
bac
k using the
stainless steel handle.
5
.
lose the platens by pulling the handle
down with both hands until the machine
self-locks.
NOTE:
Do not attempt to force the platens
closed. Doing so may result in user
injury or damage to the machine.
6
.
The timer will start automatically when
the platens are closed. A buzzer will
sound when the timer reaches zero.
7
.
Release the handle lock and
bring
the
handle up completely to the back to keep
the platen raised. Swing away the upper
assembly and remove the substrate.
WARNING
:
Use only the stainless steel handle to
swing the upper platen open and
closed. Do not push or pull the upper
platen to swing the top assembly.
WARNING:
When replacing the lower platen, Raise
up and keep the upper platen close to
the center position, Do not lean on
machine to prevent tipping over.
Co troller Features
Basic Co troller Fu ctio s
This controller has two (2) main control features:
1. Temperature – the temperature may be set
from 225 – 425 °F (107 – 218 ° ).
2. Timer – the cycle timer may be set from 1
second to 99:00 minutes.
Temperature Co trol
The temperature control has a range from 225 –
425 °F (107 – 218 ° ). The temperature unit can be
switched between °F and ° , and a temperature
offset can be applied to adjust the temperature
reading (see advanced controller functions on pg.8).
For setting the set temperature, see Configuring
your Machine on pg. 5.
Timer
The controller features an application timer that will
countdown and will start beeping when the timer
has reached 0. The time display is in the
minutes:seconds format, and ranges from 00:00 to
99:00. When the timer is running, the colons (:) will
flash. For setting the application timer, see the basic
operations section.

FOR USE BY QUALIFIED PERSONNEL ONLY
Adva ced Co troller Fu ctio s
Automatic Shut Off
The automatic shut off function is designed to
reduce electrical usage when the Insta heat seal
machine is idle. When active, any user input such as
key presses or starting a h
eat press cycle will reset
the timer for the automatic shut off.
The automatic shut off has a o -
adjustable timer
of 2 hours.
By default, the automatic shut off is
Setti g the Automatic Shut Off
The automatic shut off can be set to
ON
1. Press MODE to cycle to the
TIMER.
→
2. Press and hold UP and DOWN
for 3 to 5
seconds to turn the automatic shut off
or OFF.
a. ONE
beep indicates that the
automatic shut off is
OFF
b. TWO beeps indicate
that the
automatic shut off is
ON
Cha gi g the Tempera
ture Scale
1. Press MODE to cycle to the
TEMPERATURE
→
2. Press and hold UP and
DOWN
seconds to switch the temperature scale.
+ →
FOR USE BY QUALIFIED PERSONNEL ONLY
Adva ced Co troller Fu ctio s
The automatic shut off function is designed to
reduce electrical usage when the Insta heat seal
machine is idle. When active, any user input such as
eat press cycle will reset
adjustable timer
By default, the automatic shut off is
o .
ON
or OFF.
TIMER.
for 3 to 5
seconds to turn the automatic shut off
ON
beep indicates that the
OFF
.
that the
ON
.
ture Scale
TEMPERATURE
.
DOWN
for 3 to 5
seconds to switch the temperature scale.
Setti g the Temperature Offset
1.
Switch the temperature scale to Fahrenheit.
2. Let th
e platen temperature stabilize. Use a
heat-
reading tool such as a
temperature strips to find the temperature
at the center of the platen.
3. Enter the
temperature offset adjust
pressing and holding
MODE
5 seconds.
+
→
4.
XX is the current temperature offset. Press
SET and UP
to increase the offset.
Increasing the offset will increase the
display temperature by the corresponding
amount.
+
→
→
Press SET and DOWN
offset. Decreasing the offset will decrease
the display temperature by the
corresponding amount.
+
→
→
5.
hange the offset so that the display
temperature matches the temperature
measured in step 1.
6. When the des
ired temperature offset has
been reached, press and hold
SET
for 3 to 5 seconds to exit
+
NOTE:
For
the best accuracy, it is suggested
that the temperature offset adjustment
be done in the Fahrenheit scale.
8
Setti g the Temperature Offset
Switch the temperature scale to Fahrenheit.
e platen temperature stabilize. Use a
reading tool such as a
pyrometer or
temperature strips to find the temperature
at the center of the platen.
temperature offset adjust
by
MODE
and SET for 3 to
→
XX is the current temperature offset. Press
to increase the offset.
Increasing the offset will increase the
display temperature by the corresponding
→
to decrease the
offset. Decreasing the offset will decrease
the display temperature by the
corresponding amount.
→
hange the offset so that the display
temperature matches the temperature
ired temperature offset has
been reached, press and hold
MODE and
for 3 to 5 seconds to exit
.
the best accuracy, it is suggested
that the temperature offset adjustment
be done in the Fahrenheit scale.

9
FOR USE BY QUALIFIED PERSONNEL ONLY
Preve tive Mai te a ce Suggestio s
Insta heat seal machines are relatively maintenance
free. For a long, trouble-free life, the following
preventive maintenance should be followed:
1. lean the Teflon-coated upper platen
periodically with a piece of non-abrasive
cloth. Stubborn stains may be removed with
mineral spirits when the platen is cool. Take
care not to rub the Teflon coating off.
2. To prevent the substrates from becoming
soiled, periodically wipe the entire exterior
of the machine, including the platens, with
a clean rag. If necessary, use mineral spirits
for cleaning a cold machine. Since mineral
spirits are flammable, do not clean with
mineral spirits while the machine is hot.
3. Periodically lubricate the joints and pins of
the machine with a high-temperature, non-
melting grease (MPPL023).
4. Avoid directly pressing items such as
buttons, pins, snaps, or zippers that tend to
cut the silicone rubber pad or scratch the
Teflon-coated heat platen.
Ge eral Mai te a ce
It is recommended that you have the following
items available:
1. Phillips head screw driver
2. Needle nose pliers with insulated handle
3. Set of metric Allen wrenches
4. Special multi-purpose grease MPPL023
5. Grease Gun Kit MAPG010
With the above items you should be able to
accomplish most repairs.
WARNING:
Do not attempt to remove the upper
platen alone.
Replaci g the Silico e Pad
1. Make sure that the lower platen is cool.
Remove the lower platen from the machine
base.
2. Use a mild solve t such as mi eral spirits
to clean the surface of the lower platen.
3. Both the silicone pad and lower platen must
be thoroughly dry and clean (wait at least
45 minutes after using the solvent) before
starting the bonding operation.
4. Use a tube of MPP 006 adhesive to bond
the silicone rubber pad to the lower platen.
Spread a thin and even coat over the lower
platen. lear any excessive adhesive from
the side edges of the lower platen.
5. Quickly apply the silicone pad. Make sure
no air bubbles form.
6. Remove excess glue from the edges of the
platen. Flip the platen over, pad-down, and
allow it to cure for 24 hours at room
temperature.
NOTE:
Read and follow all instructions on the
adhesive package.
A putty knife or similar tool is
recommended for spreading the adhesive
evenly on the lower platen.

TRANSFORME
R
SSR
1
2
BROWN
GRN/YEL
GRN/YEL
GREEN
GREEN
BLACK
BLACK
WHITE
WHITE
P
OWER
SWITCH
WHITE
GRAY RED
TERMINAL
BLOCK
1
2
3
4
+12V
4
5
3
6
7
TIMER
INPUT
NC
RTD
HEAT PLATEN
AC
INLET
VIO
YELLOW
VIO
COM
NC
Circuit
Breaker
20A
250V
+
-
BLACK
1
2
5
6
12
11
7
SENSOR
RTD
WHITE
GRN/YEL
GREEN
BLACK
MICRO
SWITCH
12 VAC
LIMITE
R
HI TEMP
GRN/YEL
BROWN
WHITE
WHITE
WHITE
WHITE
TAN
TAN
MODEL 288 WIRING DIAGRAM

!
"
#
$!
$!
%
&
'#
'
(
)
"*
""
"#
"
"!
"%
"&
"'
"(
")
#*
#"
$#
$#
$!
$#
$#
$#
##
#
#!
#&
#'
#(
#)
$!
$!
*
"
#
!
%
&
'
(
)
!*
!"
!#
"*
$#
$#
$#
$#
$#
!
!!
!%
!&
!'
"&
$
$%
$%
'*
'"
'#
'
'!
%
'%
(*
("
"**
&%
(# (%
(&
('
'(
(
(!
"*"
"*#
"
%
((
()
)*
!'
$#
$!
$!
$#
$
$#
$#
'(
+
')
+
'&
&%
&&
&'
&(
&)
$#
%&
%'
%(
%)
&*
!'
!&
&!
&
&#
$#
$#
$!
$
&"
)
!(
!)
%*
%"
%
%#
%!
%%
$#
$#
$#
$#
$#
$!
$!
)
)"
)#
)
$!
$!
$!
#%
'#
)!
)%
)&
)'
$#
$#
)(
))
#*"',*(,""
-./01+2/3#((+45678949+9:1;-.<
FOR USE BY QUALIFIED PERSONNEL ONLY

12
FOR USE BY QUALIFIED PERSONNEL ONLY
ITEM No. PART NO. DESCRIPTION QTY
1
MH001-M04-009 S REW, PAN HEAD, M4 X 15 4
2
MH007-030 SILI ONE RUBBER FOOT 4
3
MP288-007-011 HEAT SHROUD 1
4
MP288-007-012 FIBERGLASS INSULATION 1
5
MH007-019 -RING, LEVIS PIN 4
6
MP288-007-013 LEVIS, UPPER PLATEN 1
7
MPPT046 HIGH TEMPERATURE LIMITER (230V) 1
8
MP256-003 PLASTI STANDOFF 4
9
MP288-007-013 UPPER PLATEN, 20 X 25 (230V) WITH WIRING 1
10
MH007-054 SILI ONE PAD 20 X 25 1
11
MP288-007-014 LOWER PLATEN, 20 X 25 1
12
MH256-009-001 SENSOR, RTD TEMP 2
13
MH001-M08-010 S REW, HEX HEAD, M8 x 25 6
14
MP256-006 PIN, LEVIS 1
15
MH288-001-001 S REW, HEX,M6x60 1
16
MH288-002-001 NUT, HEX M6 6
17
MP256-004 GUIDE POST 1
18
MH001-M08-013 S REW, SET, M8 x 10 1
19
MP288-007-001 LOADING BAR 2
20
MP256-009 SHAFT, LOWER PLATEN 1
21
MH001-M08-009 S REW, SO KET HEAD, M8 x 20 1
22
MP288-007-015 OVERLAY, ONTROLLER (288) 1
23
MP256-013 ONTROLLER BRA KET 1
24
MH288-003-001 WASHER, FLAT 3.2x10x0.8 4
25
MH288-002-002 NUT, HEX M3 4
26
MH006-003 ONTROLLER 1
27
MH288-001-002 S REW, PAN M3x6 4
28
MP288-004-001 SWIT H, RO KER 250V 20A 1
29
MP256-010 HOUSING 1
30
MP256-029 LEVER ARM HANDLE 2
31
MH001-M10-001 LEVER ARM HANDLE THREADED STUD 1
32
MP288-007-016 LEVER ARM 1
33
MH001-M08-005 S REW, SO KET HEAD, M8 x 28 2
34
MP288-001 BRA KET, ARM (L) 1
35
MP256-027 SAFETY LO K 1
36
MP288-007-017 AM 1
37
MP288-007-002 SPA ER, ARM 2
38
MH288-003-002 WASHER, LO K 8.3x13.6x1.6 2
39
MH002-M08-001 NUT, HEX, M8 8
40
MP288-004 PIN , SPRING 1

13
FOR USE BY QUALIFIED PERSONNEL ONLY
ITEM No. PART NO. DESCRIPTION QTY
41
MP288-005 AP PLASTI ,BLK 1
42
MP288-002 LEVER ARM BRA KET, RIGHT 1
43
MH001-M06-013 S REW, SO KET HEAD, M6 x 14 5
44
MP288-007-018 SWING AWAY ARM ASSEMBLY 1
45
MP288-007-003 BRA KET ASS'Y 299x105x40 1
46
MH288-001-003 S REW M4 22.5x22.5 4
47
MH001-M08-014 S REW, SO KET HEAD, M8 x 10 6
48
MP288-007-004 UPPER PLATE AL 255x200x15 1
49
MH007-059 -RING, LEVIS PIN (288) 2
50
MP288-007-005 TUBE, FRONT 2
51
MH001-M08-005 S REW, SO KET HEAD, M8 x 28 2
52
MH007-060 -RING, LEVIS PIN (288) 1
53
MH003-M08-004 WASHER, 8.5 x 18 x 2 6
54
MP288-007-019 TUBE, REAR 1
55
MH288-007-001 O-RING,15.8x2.4 4
56
MH288-001-004 S REW, PAN M4x10 4
57
MH001-M04-010 S REW STD P PAN HD (SP) & FLAT WASHER M4x10 3
58
MH005-003 RELAY, SOLID STATE 40A 24-280VA 1
59
MP288-008-001 POWER TRANSFORMER 1
60
MP256-014 BRA KET ASSEMBLY, ELE TRONI S 1
61
MH288-001-005 S REW, PAN M4x10 1
62
MH256-004-001 ircuit Breaker 1
63
MP288-004-002 TERMINAL BLO K, 20A,250VA 1
64
MH007-026 ABLE LAMP, POWER ORD (230V ONLY) 1
65
MP256-017 PRESSURE TURN KNOB 2
66
MP288-007-006 RANK, PRESSURE 1
67
MH003-M08-004 WASHER, 8.5 x 18 x 2 2
68
MH288-001-006 S REW, HEX 5/16-18x1 1
69
MH001-M06-011 S REW, SO KET HEAD, M6 x 20 1
70
MP256-018 SHAFT, PRESSURE RANK THREADED 1
71
MP256-022 PRESSURE HANDLE OVER 1
72
MH288-001-007 S REW, M4x6 6
73
MH288-001-008 S REW, PAN, M3x16 2
74
MP288-004-003 SWIT H MI RO 250VA 11A 1
75
MP288-007-020 LEVER ARM PIN 1
76
MH256-007-001 PLUNGER 1
78
MH288-001-009 S REW PAN, M5x10 3

14
FOR USE BY QUALIFIED PERSONNEL ONLY
ITEM No. PART NO. DESCRIPTION QTY
79
MH007-025 ABLE LAMP 1
80
MT256-003 BASE 1
81
MB256-001-001 BOLT, QUI K HANGE 1
82
MH288-001-010 S REW, PAN,M4x8 1
83
MP288-007-007 ARM ASS'Y 1
84
MH007-033 RUBBER O-RING SEAL DH75-85-4.5/6 1
85
MP256-020 ADJUSTMENT WASHER 1
86
MH002-M12-001 NUT, HEX, M12 x P1.25 x 8t 1
87
MH002-M12-002 NUT, HEX LO KING, M12 x P1.25 1
88
MH003-M13-001 WASHER, FLAT, 13.5 x 27 x 2 2
89
MP256-019 STEEL SPRING 1
90
MH001-M08-012 S REW, SO KET HEAD, M8 x 16 2
91
MP288-007-021 H-FRAME BASE 1
92
MP288-007-008 FOOT,BLK 4
93
MH007-028 OVER, TUBE END 4
94
MP288-007-009 GROMMET, SILI ON RUBBER 1
95
MH288-001-011 S REW, M3x6 2
96
MP288-004-004 A INLET 15A 250V 1
97
MB256-007-003 POWER BOX (230V ONLY) 1
98
MH007-029 RUBBER ADJUSTMENT FOOTING 2
99
MP288-007-010 PLATE, SUPPORT 1
100
MH256-001-002 S REW, SO KET HEAD 5/16-18x1"L 1
101
MP288-007-022 PLATE, SPRING 1
102
MH001-M04-010 S REW, TRUSS HEAD M4 X 6 (288) 2
103
MP288-007-023 S REW, LO KING BOLT D10X28.3 1

15
FOR USE BY QUALIFIED PERSONNEL ONLY
INSTA GRAPHIC SYSTEMS
Heat Press Limited Warranty
This limited warranty (“warranty”) is given only to the original end-user/retail purchaser
(referred to in this warranty as “Original Purchaser”) of the accompanying product and
accessories (collectively referred to in this warranty as “The Product”).
What is covered?
•“The Product” includes Machines, Parts and/or Accessories.
•Except as otherwise provided herein, Insta Graphic Systems (“Insta”) warrants that The
Product will be free from defects in materials and workmanship when used under
normal conditions.
What is the length of the Warranty Periods?
•Machines: Lifetime on the heating element, one year parts and 90 days labor from the
original purchase date (end-user).
•Additional Parts and Accessory Items: 90 days from the original purchase date.
This warranty does not cover:
•Physical damage to the Product;
•Damage caused by improper installation, improper or abnormal use, misuse, neglect or
accident (including but not limited to transporting The Product without the proper
preparation and/or packaging);
This limited warranty is VOID, if
•the Product has been altered or modified in any way (including but not limited to
attempted warranty repair without authorization from Insta and/or alteration/removal of
the serial number).
•the warranty period is expired,
•the serial number label is missing or unrecognizable,
•the defect was subject to abuse, improper use not conforming to product manual
instructions
•the defect was subject to Force Majeure, such as acts of God, flood, lightning,
earthquake, war, vandalism, theft, brownouts or sags (damage due to low voltage
disturbances)
What to do if you think your Product is eligible for warranty service: Immediately report your
model, serial number and purchase date of the equipment.
What Insta will ask you to do?
After contacting Insta you may be asked to deliver (by hand if you prefer) or send The Product
properly packaged, freight prepaid, to Insta or Insta’s service center together with your bill of

16
FOR USE BY QUALIFIED PERSONNEL ONLY
sale. A Return Authorization is required for all returned goods. Failure to obtain the RA will
result in the refusal of the shipment.
You are responsible for the cost of shipping, packing of The Product and insurance (if
you desire). You are also responsible for loss or damage to The Product in shipping.
If The Product does not operate as warranted above during the applicable warranty period,
Insta shall, at its option and expense (except for shipping cost), repair the defective product or
part, deliver to the customer an equivalent product or part to replace the defective item. All
products that are replaced will become the property of Insta.
If The Product is not covered by this warranty, you will be charged for any service and/or
replacement parts/products at Insta’s then current published rates, as well as, for the freight.
What happens when Insta elects to replace your Machine?
When a replacement Machine is authorized by Insta, Insta will send a replacement Machine
and issue a Return Authorization for the return of the Product. The Purchaser will be charged
for the new machine at the time of the shipment. Once the machine is returned and the
warranty confirmed, The Purchaser will receive a credit/refund. The replacement machine you
receive (will be covered by the balance of the limited warranty period remaining on the original
product, plus an additional thirty (30) days. You will keep the replacement machine that is sent
to you and your original machine shall become the property of Insta.
THIS WARRANTY IS GIVEN IN LIEU OF ALL OTHER WARRANTIES, WRITTEN OR ORAL,
WHETHER EXPRESSED BY AFFIRMATION, PROMISE, DESCRIPTION, DRAWING,
MODEL OR SAMPLE. ANY AND ALL WARRANTIES OTHER THAN THIS ONE, WHETHER
EXPRESSED OR IMPLIED INCLUDING IMPLIED WARRANTIES OF MERCHANTABILITY
AND FITNESS FOR A PARTICULAR PURPOSE, ARE HEREBY DISCLAIMED. INSTA
SHALL HAVE NO LIABILITY FOR DEFECTS OF ANY NATURE WHATSOEVER EXCEPT AS
PROVIDED FOR HEREIN.
This Limited Warranty (and Insta’s obligation to you) may not be changed in any way unless
you and Insta sign the same piece of paper in which we (1) refer to The Product and your bill
of sale date, (2) describe the change to this warranty and (3) agree to make that change.
Important:
We recommend that you keep all original packing materials, in the event that you need to ship
the Product.

17
FOR USE BY QUALIFIED PERSONNEL ONLY
NOTES:

18
FOR USE BY QUALIFIED PERSONNEL ONLY
NOTES:

13925 E. 166
th
St. ● erritos, A USA 90702 ● (800) 421-6971 ● Fax (562) 404-3010
Parts Orders ● (800) 426-3609 ● (562) 404-3000 Ext. 215
Technical Support ● (800) 426-3609 ● (562) 404-3000 Ext. 208
In-House Repair ● (800) 426-3609
Table of contents
Other Insta Power Tools manuals

