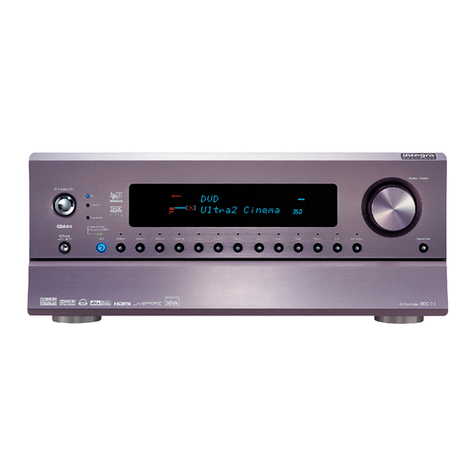
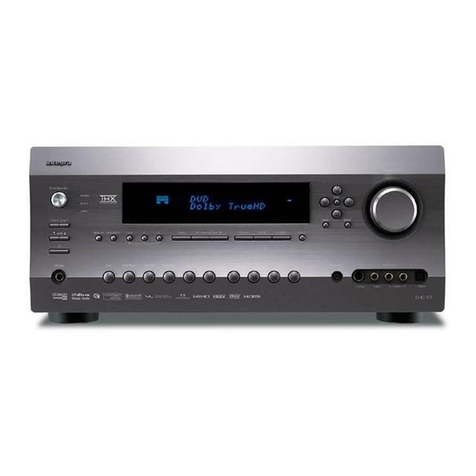
Integra RDC-7 User manual

AV Controller
MODEL RDC-7
SAFETY-RELATED COMPONENT WARNING!!
COMPONENTS IDENTIFIED BY MARK ON THE
SCHEMATIC DIAGRAM AND IN THE PARTS LIST
ARE CRITICAL FOR RISK OF FIRE AND ELEC-
TRIC SHOCK. REPLACE THESE COMPONENTS
WITH ONKYO PARTS WHOSE PARTS NUMBERS
APPEAR AS SHOWN IN THIS MANUAL.
MAKE LEAKAGE-CURRENT OR RESISTANCE
MEASUREMENTS TO DETERMINE THAT EXPO-
SED PARTS ARE ACCEPTABLY INSULATED FORM
THE SUPPLY CIRCUIT BEFORE RETURNING THE
APPLIANCE TO THE CUSTOMER.
No.3653
RDC-7
Sep,2000
Silver model
UDD, UDT
UPP,UPT
UGT
120V AC, 60Hz
220 -230V AC, 50/60Hz
230V AC, 50Hz
SPECIFICATIONS--------------------------------------------------------
SERVICE PROCEDURE
-------------------------------------------------
FRONT PANEL FACILITIES
--------------------------------------------
REMOTE CONTROLLER
-----------------------------------------------
REAR PANEL FACILITIES
------------------------------------------------
EXAMPLE OF HOW TO CONNECT YOUR EQUIPMENT
-------
CONNECTING POWER AMPLIFIERS
---------------------------------
DISASSEMBLING PROCEDURES
---------------------------------------
ASSEMBLING PROCEDURES--------------------------------------------
IC BLOCK DIAGRAMS AND DESCRIPTIONS----------------------
WIRING VIEW--------------------------------------------------------------
CHASSIS EXPLODED VIEW--------------------------------------------
CHASSIS EXPLODED VIEW PARTS LIST-----------------------------
MAIN MICROPROCESSOR CONNECTION DIAGRAM-----------
MAIN MICROPROCESSOR TERMINAL DESCRIPTION---------
SUB MICROPROCESSOR CONNECTION DIAGRAM-------------
SUB MICROPROCESSOR TERMINAL DESCRIPTION------------
PC BOARD CONNECTION VIEW---------------------------------------
BLOCK DIAGRAM--------------------------------------------------------
PRINTED CIRCUIT BOARD PARTS LIST--------------------
SCHEMATIC DIAGRAM /
PRINTED CIRCUIT BOARD VIEW-----------------
CONFIRMATION
-----------------------------------------------------------
FL TUBE VIEW--------------------------------------------------------------
PACKING VIEW--------------------------------------------------------------
2
3
4
5
6
8
10
11
12
13~30
31
33
35
37
39
41
43
45
47
49
50~94
95
96
97
TABLE OF CONTENTS

RDC-7
2
GENERAL
Power Supply AC 120 V, 60 Hz
AC 230 V, 50 Hz
AC 220 V, 50/60 Hz
Power Consumption 75 W
Dimensions (W H D) 450 196 440 mm
17-11/16" 7-11/16" 17-5/16"
Weight 16.2 kg, 35.7 lbs.
REMOTE CONTROLLER
Transmitter Infrared
Signal range Approx. 5 meters, 16 ft.
Power supply Two “AA” batteries (1.5 V 2)
Specifications and features are subject to change without
notice.
Power supply and voltage vary depending on the area in
which the unit is purchased.
CONTROLLER SECTION
Input Sensitivity and Impedance
PHONO 2.5 mV, 50 kohms
LINE (CD, TAPE 1-2, DVD,
VIDEO 1-5) 200 mV, 50 kohms
MULTICHANNEL INPUT
(FRONT L/C/R, SURROUND
L/R, SURROUND BACK L/R) 200 mV, 50 kohms
(SUBWOOFER) 36 mV, 50 kohms
COAXIAL 1-5 (DIGITAL) 0.5 Vp-p, 75 ohms
DVD, VIDEO1-5 1 Vp-p, 75 ohms
1 Vp-p, 75 ohms (Y)
0.28 Vp-p, 75 ohms (C)
COMPONENT VIDEO 1-3 1 Vp-p, 75 ohms (Y)
0.5 Vp-p, 75 ohms (PB, PR)
Output Level and Impedance
Rec out (TAPE 1-2, VIDEO 1-2) 200 mV, 2.2 kohms
Pre out(RCA) 1 V, 470 ohms
Pre out(XLR) 1 V, 470 ohms
ZONE 2 OUT 100mV, 470 ohms
VIDEO (VIDEO 1-2, MONITOR
OUT, ZONE 2 OUT) 1 Vp-p, 75 ohms
1 Vp-p, 75 ohms (Y)
0.28 Vp-p, 75 ohms (C)
COMPONENT VIDEO OUT 1 Vp-p, 75 ohms (Y)
0.5 Vp-p, 75 ohms (PB, PR)
Phono Overload
110 mV RMS at 1 kHz, 0.5% T.H.D.
Frequency Response 20 Hz to 30 kHz : 1dB
(CD in, Direct mode)
5 Hz to 100 kHz : +1dB,-3dB
(CD in, Direct mode)
RIAA Deviation: 20 to 20 kHz : 0.8 dB
Tone Control
Bass 10 dB at 100 Hz
Treble 10 dB at 10 kHz
Signal-to-Noise Ratio (Stereo)
PHONO 80 dB (IHF A, 5 mV input)
CD/TAPE 100 dB (IHF A, 0.5 V input)
TUNER SECTION
FM
Tuning Range 87.5 — 108.0 MHz (50 kHz steps)
Usable Sensitivity
Mono 11.2 dBf, 1.0 µV (75 ohms IHF)
0.9 µV (75 ohms DIN)
Stereo: 17.2 dBf, 2.0 µV (75 ohms IHF)
23 µV (75 ohms DIN)
50 dB Quieting Sensitivity
Mono 17.2 dBf, 2.0 µV (75 ohms)
Stereo 37.2 dBf, 20 µV (75 ohms)
Capture Ratio 2.0 dB
Image Rejection Ratio
USA & Canadian models 40 dB
European & Australian models
:85 dB
IF Rejection Ratio 90 dB
Signal-to-Noise Ratio
Mono 76 dB
Stereo 70 dB
Alternate Channel Attenuation 55 dB
Selectivity 50 dB (DIN)
AM Suppression Ratio 50 dB
Total Harmonic Distortion
Mono 0.2 %
Stereo 0.3 %
Frequency Response 30 Hz —15 kHz, 1.0 dB
Stereo Separation 45 dB at 1 kHz
30 dB at 100 Hz — 10 kHz
AM
Tuning Range
USA & Canadian models 530—1,710 kHz (10 kHz steps)
European & Australian models
:
522—1,611 kHz (9 kHz steps)
Asian models 531—1,602 kHz (9 kHz steps)
Usable Sensitivity 30 µV
Image Rejection Ratio 40 dB
IF Rejection Ratio 40 dB
Signal-to-Noise Ratio 40 dB
Total Harmonic Distortion 0.7 %
SPECIFICATIONS
:
:
:
:
:
:
:
:
:
:
:
:
:
:
:
:
:
:
:
:
:
:
:
:
:
:
:
:
:
:
:
:
:
:
:
:
:
:
:
:
:
:
:
:
:
:
:
:
:
:
:
:
:
:

RDC-7
3
SERVICE PROCEDURE
1. Replacing the fuses
3. Safety-check out
(Only U.S.A. model)
After correcting the original service problem perform the
follwing safety check before releasing the set to the customer
Connect the insulating-resistance tester between the plug of
power supply cord and terminal GND on the back panel.
Specifications: More than 10Mohm at 500V
REF.NO. PART NO. DESCRIPTION
NOTE : <UDD> : 120 V model only
<UDT> : Asian model only for 120V
<UPP> : European model only
<UPT> : Asian model only for 230V
<UGT> : 220V model only
This symbol located near the fuse indicates that the
fuse used is show operating type, For continued protection against
fire hazard, replace with same type fuse , For fuse rating, refer to
the marking adjest to the symbol.
Ce symbole indique que le fusible utilise est e lent.
Pour une protection permanente, n'utiliser que des fusibles de meme
type. Ce demier est indique la qu le present symbol est apposre.
This device employs a microprocessor to perform various
functions and operations. If interference generated by an external
power supply, radio wave, or other electrical souce results in accident
which causes the specified operations and functions to pperate
abnormally.
To perform a result, please follow the procesure below.
1. Turn teh Power switch to on.
2. Press and the hold down the VIDEO-1 button, then press the
STANDBY/ON button.
2. After " clear " is displayed, the preset memory and each
mode stored in the memory, such as surround, are initialized and
will return to the factory setting
3. Press the STANDBY/ON button.
4. Disconnect the power supply cord.
2.
To initialize the unit
4. Memory Preservation
This unit does not require memory preservation batteries. A built-in
memory power back-up system preserves the contents of the
memory during power failures and even when the unit is un-plugged.
The unit must be plugged in order to charge the back-up
system.
The memory preservation period after the unit has been unplugged
varies depending on climate and placement of the unit. On the
average, memory contents are protected over a period of a few
weeks after the last time the unit has been unplugged. This period
is shorter when the unit is exposed to a highly humid climate.
5. Changing the AM band step
When you change the band step, change the parts as shown below.
To 10kHz To 9kHz
R7091 Short Open
R7191 Open 10 kohms
R7276 Short Open
R7277 Short Open
R7376 Open 10kohms
R7377 Open 10 kohms
R7091
R7191
100
Q7001
MAIN MICROPROCESSOR
MAIN MICROPROCESSOR PC BOARD
NAAR-6837
From soldering side
SUB MICROPROCESSOR PC BOARD
NADIS-6832
From soldering side
Q7201
SUB MICROPROCESSOR
S7641
R7277
R7376
R7276
R7377
F9001 252163 ! 4A-UL/T-237, Fuse <UDD, UDT>
F9002 252074 ! 2A-SE-EAK, Fuse <UPP,UPT, UGT>
6. Connection of computer
When you change the program of microprocessor or control the unit
by the computer, connect the cable RS232C of straight type between
a computer and terminal RS232C on the rear panel.
12345
6789
54321
9876
To the unitTo PC
GND GND
1
2
3
7
8
9
1
2
3
7
8
9

RDC-7
4
Front panel facilities
Display
Here is an explanation of the controls and displays on the front panel of the RDC-7.
Front door
Front panel
Front panel door
Front panel display
ALDOLBY DIGIT
MPEG DTS
DOLBY
PRO LOGIC
VIDEO
213
DVD 4 5 COMPONENT
ANALO
G
DIGITAL
213
SLEEP
INPUT
Standby/On
Display DVD Video
1
Video
2
Video
3
Video
4
Video
5
Tape
1
Tape
2
AM FM Phono C D Open/Close
Zone
2
()
GRN
Rec ()
RED
Off
On
Standby
Master Volume
On
Power
AV Controller RDC-7
Phones
Clear
AV Controller
RDC-7
Digital format:
The current input source is set for
a digital format of ÒAuto.Ó
Bass level:
The current bass level is + .
Treble level:
The current treble level is - .
Front panel
Power
After plugging in the power cord into the rear panel and
wall outlet, pressing this button connects the RDC-7 to the
AC ains and turns it on.
¥
Before turning on the power, ake sure all cables are
properly connected.
¥
Turning on the RDC-7 ay cause a o entary power
surge that ight interfere with other electrical equip-
ent on the sa e circuit. If this is a proble , plug the
RDC-7 into a different electrical circuit.
Standby/On
Pressing this button while the ain power is turned on the
STANDBY indicator lights up and the front display turns off.
Pressing it again returns it to the standby state. This state
turns off the display, disables control functions, and turns
off all outputs to the ain zone (those for the re ote zone
re ain available).
On and Standby indicator
Master Volume
The MASTER VOLUME knob is used to control the volu e
for the ain zone. The volu e for the re ote zone (Zone
2) is independent.
Open/Close
Press this button to open and close the front door that
covers the lower buttons.
Display
The DISPLAY button is used to display infor ation about
the current input source signal. Each ti e you press the
display button, the screen changes to show you different
infor ation concerning the input signal.
The screen changes as follows:
Progra for at Sa pling frequency Digital input
Digital for at Bass level Treble level.
If the input source signal does not have any infor ation
for a particular screen, then that screen will be skipped.
¥
Displaying the data of the current input source
Each display is explained below.
Program
format:
Front channel Surround channel
Sampling
frequency:
Source signal 48 kHz
Sampling frequency
Digital input:
The current input source is set for
digital input at OPT1.
LFE(Low Frequency Effect)
Input Source Buttons (DVD, VIDEO 1Ð5, TAPE 1Ð
, AM, FM, PHONO, and CD) and Indicators
These buttons are used to select the input source for the
ain zone. When an input source is selected, the indica-
tor will light in blue. To select the input source for the re-
ote zone (Zone 2) or recording out (Rec Out), first press
the Zone 2 or Rec Out button, and then the desired input
source button.
Zone /Rec Indicator
For Zone 2, the indicator above the selected input
source button will light green. For recording, it will light
red.
Lower buttons in the front door
Caution
:
The front door of the AV Controller is motorized. Use the
open/close button to open or close the door. Manually
opening or closing the door, or moving the AV Controller
while holding the door, will cause the door to malfunction
or break.
Rec Out
Press the Rec Out button to output to a recording co po-
nent for recording purposes. After pressing the Rec Out
button, press one of the input source selector buttons
within 8 seconds to select the co ponent to record to.
When one is selected, the indicator above that button will
light in red. To record fro the sa e input source that you
are using (that is selected for the ain zone), press the
Rec Out button twice in succession.
Note:
The Rec Out and Zone 2 buttons use the sa e circuit and
therefore cannot be used at the sa e ti e.
When Rec Out is selected, nothing is output fro Zone 2.
Zone
The RDC-7 includes a second signal path separate fro
the ain one that can be used for a re ote zone (Zone 2)
or for aking recordings. By connecting an additional
a plifier or other video equip ent to the Zone 2 outputs,
you can output to a separate roo an input source that is
different fro that being used in the ain roo . This al-
lows you to watch one progra in one roo while so e-
body else is watching a different progra in another.
Press the Zone 2 button to enable output to the ZONE 2
outputs. After pressing the Zone 2 button, press one of the
input source selector buttons within 8 seconds to select
the input source for the re ote zone. When one is se-
lected, the indicator above that button will light in green.

RDC-7
5
Front panel facilities
Memory
This button only operates when FM or AM is selected as
the input source. This button allows you to preset fre-
quencies for stations when using the FM/AM tuner. You
can preset up to 40 stations or frequencies) to be used
with the PRESET buttons.
Menu, , , Enter, , , Exit
These buttons are used with the On Screen Display
OSD) menu. They also perform the same functions as
the OSD MENU, upper edge of ENTER button),
lower edge of ENTER button), left edge of ENTER
button), right edge of ENTER button), ENTER, and EXIT
RETURN buttons on the remote controller.
Menu: Press to bring up the OSD menu.
Exit: Press to exit the OSD menu when at the Menu
Screen, or move to one screen previous to the one
that is displayed if at any other screen.
and : When selecting items in the OSD Menu, press
these buttons to move the on-screen cursor or the
highlighted portion) upward and downward.
and : When setting parameters in the OSD menu,
press these buttons to select parameter values or
modes.
Enter: Press to display the screen for the selected item in
the OSD Menu.
Note for European models:
These buttons are also used to set programs and finish
scans when performing a PTY or TP scan with the RDS
broadcasts.
PHONES
This is a standard stereo jack for connecting stereo
headphones. The audio for the front right and left
speakers are sent to the headphone speakers. When
the headphones are plugged in, the listening mode
automatically changes to stereo and output to the
speakers is stopped.
Front panel display
Listening mode or digital input format
indicators
Multi function display
Sleep indicator
Input source format indicator
ideo display
To use the same input source for the both the main and
remote zones, press the Zone 2 button twice in succession.
Note:
The Rec Out and Zone 2 buttons use the same circuit and
therefore cannot be used at the same time.
when Zone 2 is selected, the currently selected input
source is output from the recording terminal.
Off
When not using either Rec Out or Zone 2, press that but-
ton and then press the Off button to turn off the signal.
If the Rec Out or Zone 2 signal is turned on and the con-
nected component is not turned on, the electric signal
will still be sent through the circuitry and the excess
load may cause deterioration of the audio signal.
DSP
Press these buttons to scroll through the listening modes
and set a new one for the input source you are cur-
rently listening to. For each different input signal, differ-
ent listening modes are possible.
Dimmer (other than European models)
Press to set the brightness of the front display. There are
4 settings available: normal, dark, very dark, and off.
¥The dimmer control for the front display can be per-
formed at the remote controller.
RT/PTY/TP (European models only)
This button is only available on European models. Use
this button to help tune into the Radio Data System
RDS) for FM broadcasting. RDS was developed within
the European Broadcasting Union EBU) and is avail-
able in most European countries. Each time the button
is pressed, the display changes from RT radio text) to
PTY program type) to TP traffic program) and then
back to RT again.
Tuning
Use these buttons to change the tuner frequency. The
tuner frequency is displayed in the front display and it
can be changed in 50 kHz increments for FM and 9 kHz
increments for AM. When a station is tuned into,
Ò> <Ó or Ò Ó will appear in the front display.
When FM is selected, you can hold down one of the
tuning buttons and then release it to activate the auto-
search feature. It will search for a station in the direc-
tion of the button you pressed and stop when it tunes
into one.
Preset
When AM or FM is selected as the input source, press
one of these buttons to jump to a radio station that you
preset using the MEMORY button. Pressing the right but-
ton moves from the most recently preset station to
older ones, and pressing the left button moves in the
reverse order.
FM Mode
If you are listening to an FM radio station in stereo and
the sound cuts out or there is a great deal of noise, then
press this button. The ÒMONO Ó display will appear and
the output will change to mono. Though you will not
hear the audio in stereo, this may stop the sound from
cutting out and reduce excess noise.
Remote controller
SEND/LEARN indicator
Lights red when a signal is emitted from the
remote controller.
LCD display
Displays the input and operating status.
ON
Turns on the RDC-7.
SLEEP
Sets the sleep function.
DIRECT MACRO
Programming or running a direct macro
function.
MODE buttons
Sets the remote controller into the mode for the
device corresponding to the button pressed.
DISPLAY
Changes the display.
D D SET
Brings up the DVD setup menu when the DVD
mode is selected.
CH
Selects the tuner preset stations.
EXIT
Set the new settings and return to the previous
menu screen.
RETURN
Returns to the DVD menu screen when the DVD
mode is selected.
TRACK
Selects a CD track when the CD mode is
selected.
CD/TAPE/D D/MD operation buttons
Operates other Onkyo and Integra components.
Input Selector buttons
Selects an input source.
DVD: DVD, CD:CD,T1:Tape1, T2:Tape2, TUN:AM/
FM, PH:Phono, V1:Video1, V2:Video2, V3:Video3,
V-: Use this button in conjunction with a numeric
button to select Video 1 through 5.
1-9, 0, +10
Numeric key. The +10 button changes the value
of the 10's digit.
Re-EQ
Selects the Re-EQ mode.
LATE NIGHT
Selects the late night mode.
DIMMER
Adjusts the display brightness.
STNBY
Turns the RDC-7 in standby. Be aware that
pressing the STNBY button only places the RDC-7
in standby and does not turn the power
completely off.
LIGHT
Illuminates the buttons.
MODE MACRO
Programming or running a macro function.
OSD
Brings up the OSD menu.
MENU
Displays the menu when the DVD mode is
selected.
ENTER/cursor
OL
Adjusts the volume.
TEST
Outputs a test tone for setting speaker levels.
T / CR
Used to program the signals from remote
controllers for other components. Program the
TV/VCR switching mode.
MUTING
Activate the mute function.
DISC
Selects a disc in the CD changer when the CD
mode is selected.
OPEN/CLOSE
Open and close the front door.
Listening mode buttons
Pressing these buttons to change the listening
mode directly.
Speaker output level setting buttons
Use to set the speaker output levels.
ENT
Enters numerical values and settings when either
the MD or DVD mode is selected.
OPEN/COLSEREC
AUDIO MUTING
DISCTRACK
DVD
CD
PH
TUN
T2T1
V1
STEREO
123
654
7
+10 0
ENT
89
SURROUND THX DSP
LEVEL +
CH SELRe-EQ
LEVEL Ð
DIMMERLATE NIGHT
DIRECT DSP
V2 V3 VÐ
HOME THEATER CONTROLLER
RC-418M

RDC-7
6
Rear panel facilities
Improper connection
Inserted completely
Here is an explanation of the terminals found on the
rear of the RDC-7 and how they are used. Before
connecting your audio and video components, e
sure to read this section carefully and then proceed
to the explanations on how to connect each indi-
vidual component.
¥Be sure to always refer to the instructions that came
with the component that you are connecting.
¥Do not plug in the power cord until all connections
have been made.
¥For input jacks, red connectors marked R) are used
for the right channel, white connectors marked L)
are used for the left channel, and yellow connectors
marked V) are used for video connection.
¥Insert all plugs and connectors securely. Improper
connections can result in noise, poor performance,
or damage to the equipment.
¥Do not bind audio/video connection cables with
power cords and speaker cables. Doing so may
adversely affect the picture and sound quality.
DVD
VIDEO
5
VIDEO
4
VIDEO
3
ZONE 2
MONITOR
OUT
VIDEO
1
VIDEO
2
RL
RL
C
SUBWOOFER
IR IN
MAIN ZONE 2
VIDEO S VIDEO
VIDEO S VIDEO
INPUT 2
P
B
P
R
YINPUT 3
P
B
P
R
YOUTPUT
P
B
P
R
Y
OUT
OUT
IN
IN
IN
IN
IN
IN
AC
INLET
OUT
1
2
FM
ANT.
75
AM
ANT.
C
D
GND
MULTI
CHANNEL
INPUT
RS 232
TAPE
2
TAPE
1
FRONT
3
2
1
3
2
5
4
1
I
N
I
N
I
N
I
N
OUT
OUT
L
RL
1
2
1
2
1
2
1
2
R
COMPONENT
VIDEO
INPUT 1
P
B
P
R
Y
DIGITAL
OUTPUT
(COAXIAL)
AC-3
RF
DIGITAL
INPUT
(COAXIAL)
DIGITAL
OUTPUT
(OPTICAL)
DIGITAL
INPUT
(OPTICAL)
PHONO
SURR
BACK
SURR
PRE
OUT
RIGHT CENTER SUBWOOFER
SURROUND
RIGHT SURROUND
LEFT SURROUND BACK
RIGHT SURROUND BACK
LEFT
LEFT
PRE OUT
AV CONTROLLER
MODEL NO.
RDC-7
12V TRIGGER
AB
COMPONENT VIDEO INPUT/OUTPUT
If your DVD player or other device has component
video connectors, e sure to connect them to these
component video connectors on the RDC-7. The RDC-
7 has three component video input connectors to o -
tain the color information (Y, PB, PR) directly from the
recorded DVD signal or other video component and
one component video output connector to output it
directly into the matrix decoder of the display device.
By sending the pure DVD component video signal di-
rectly, the DVD signal forgoes the extra processing that
normally would degrade the image. The result is vastly
increased image quality, with incredi ly lifelike colors
and crisp detail.
YPBPRRCA type
¥When using the digital inputs and outputs, make
sure to also connect the analog connections when-
ever possi le.
¥When using one of the optical input or output jacks,
remove the protective cap and keep it safely.
When the jack is not used, replace the protective
cap.
¥When using an optical input or output jack, always
use an optical fi er ca le.
RCA type
COAXIAL Coaxial cable
AC-3RF Coaxial cable
OPTICAL Optical fiber cable
Optical digital input terminal
An optical digital input terminal is
equipped with a protection cap.
When connecting, remove this cap.
When not using, put the cap ack
on the terminal.
Power cord
supplied)
To an AC
wall outlet
AC INLET
Plug the supplied power cord into this AC INLET and
then into the power outlet on the wall.
¥Do not use a power cord other than the one sup-
plied with the RDC-7. The power cord supplied is
designed for use with the RDC-7 and should not e
used with any other device.
¥Never have the power cord disconnected from the
RDC-7 while the other end is plugged into the wall
outlet. Doing so may cause an electric shock. Al-
ways connect y plugging into the wall outlet last
and disconnect y unplugging from the wall outlet
first.
ANTENNA
These jacks are for connecting the FM indoor antenna
and AM loop antenna that are supplied with the RDC-
7.
PRE OUT RCA type)
These jacks are for connecting power amplifiers. If the
jacks on your power amplifier are RCA type jacks, con-
nect them here. Two terminals are provided for each of
the front left, center, and right channels. The same sig-
nal is output from oth terminals 1 and 2.
DIGITAL INPUT/OUTPUT
coaxial, optical, and input-only AC-3RF)
These are the digital audio inputs and outputs. There
are 5 digital inputs with coaxial jacks, 3 with optical
jacks, and 1 AC-3RF input. The inputs accept digital
audio signals from a compact disc, LD, DVD, or other
digital source component. For digital output, there is 1
coaxial output and 1 optical output. The digital outputs
can e connected to MD recorders, CD recorders, DAT
decks, or other similar components.
MONITOR OUT
There are 2 monitor outputs and each one includes
oth composite video and S-video configurations.
When connecting two video monitors or televisions, e
aware that the OSD interface can only e used with
MONITOR OUT 1 (OSD will not e displayed on the
video monitor connected to MONITOR OUT 2).

RDC-7
7
MULTI
CHANNEL
INPUT
(Green)
(Blue)
(Red)
(Brown)
(Black)
(Yellow)
Tighten locking
screws
Front left
DVD player or M EG decoder
Front right
Center
Surround right
Surround left
Subwoofer
RDC-7 MULTI CHANNEL IN UT
(DB-25-type terminal)
DB-25 to
RCA 6-ch cable
(supplied)
Rear panel facilities
¥When using the PHONO jacks, remove the caps that
cover then and store them safely where they will not
be lost. Whenever the PHONO jacks are not in use,
replace the caps on them.
¥When connecting a CR or other video compo-
nent, make sure you connect the audio and video
leads together (i.e., both to IDEO 3).
¥With LD players that have an AC-3RF terminal, con-
nect the audio source to the audio inputs of IDEO
4 because only it supports the AC-3RF settings dur-
ing digital setup.
¥The RDC-7 is designed for use with turntables that
use moving magnet cartridges.
MULTI CHANNEL IN UT
By connecting a D D player, MPEG decoder, or other
component that has a multi channel port, you can
playback the audio with 5.1 channel or 7.1 channel
output. So, be sure to prepare a cable that can prop-
erly connect the RDC-7 to the peripheral device.
RS 232
The RS 232 port is to be used in conjunction with an ex-
ternal controller to control the operation of the RDC-7
by using an external device. The RS 232 port may also
be used in the future to update the operating software
of the RDC-7 so that it will be able to support new digi-
tal audio formats and the like as they are introduced.
GND
Use this GND terminal for connecting the ground (or
earth) wire if a turntable is connected.
AUDIO IN/OUT
These are the analog audio inputs and outputs. There
are 10 audio inputs (6 of which are linked to video in-
puts) and 4 audio outputs (2 of which are linked to
video outputs). The audio jacks are nominally labeled
for cassette tape decks, compact disc players, turn-
tables, and D D players. To the audio jacks for IDEO 1
to 5, connect the audio output from CRs, LD players,
and other video components. The audio inputs and
outputs require RCA-type connectors.
The MULTI CHANNEL INPUT is a DB-25 port and the RDC-
7 is equipped provided with a DB-25-to-RCA 6-channel
cable. When making a multi-channel connection to a
D D player or MPEG decoder, connect the DB-25 end
of the cable to the MULTI CHANNEL INPUT port on the
RDC-7 and RCA-type ends to the ends of the cables
connected to the other component. The channel col-
ors are shown below.
Front left (Blue)
Front right (Red)
Center (Green)
Surround left (Black)
Surround right (Yellow)
Subwoofer (Brown)
If the D D player or MPEG decoder that you are con-
necting to is provided with DB-25-to-DB-25 cable, then
connect that directly to the RDC-7 and do not use the
cable supplied with the RDC-7.
When connecting the cable, be sure to secure the
locking screws on the DB-25 connectors.
VIDEO IN/OUT
These are the video inputs and outputs. There are 6
video inputs and 2 video outputs and each one in-
cludes both composite video and S-video configura-
tions. Connect CRs, LD players, D D players, and
other video components to the video inputs. S-video
sources can be viewed via the S-video or composite
outputs, while composite sources can only be viewed
through the composite output.
The 2 video output channels can be used to be con-
nected to video tape recorders for making recordings.
Composite video jack
S video jack
¥When connecting a CR or other video compo-
nent, make sure you connect the audio and video
leads together (i.e., both to IDEO 3).
¥With LD players that have an AC-3RF terminal, con-
nect the video source to the video inputs of IDEO 4
because only it supports the AC-3RF settings during
digital setup.
RCA type
IR IN MAIN
If the RDC-7 is located inside a rack or cabinet that will
not allow infrared beams to reach the IR sensor, you will
need to connect a remote sensor* to this input to be
able to use the remote controller. Then install the re-
mote sensor in an unblocked location where you can
easily point the remote controller.
* An optional remote sensor kit is required.
IR IN ZONE 2
This jack allows you to connect a multiroom system kit
so that you can use the remote controller while you are
in the remote zone (Zone 2), which may be far sepa-
rated from the RDC-7.
* To be able to use the remote controller in the remote
zone (Zone 2), you must connect one of the follow-
ing (sold separately):
¥IntegraÕs Multi-Room System Kit (IR Remote Control-
ler Extension System).
¥A multiroom A/ distribution and control system
from Niles , Xantech , or the like.
ZONE 2
These are the audio and video output jacks for the re-
mote zone (Zone 2). Use these outputs to connect the
remote zone.
RE OUT (Balanced type)
These jacks are for connecting power amplifiers. If the
jacks on your power amplifier are XLR (balanced) type
jacks, connect them here. The pin assignments for
these terminals are shown below.
12V TRIGGER
This is a 12-volt output terminal so that the RDC-7 can
control other external devices. For other devices that
have an input terminal of the same kind, you can con-
nect it to this terminal with 1/8-inch mini-jack cable so
that its power is turned on when you press an input
source button. The RDC-7 is equipped with two 12-volt
trigger terminals and each supplies a current of 100
mA. When you connect to either of these terminals,
make the appropriate settings in the OSD menu.The ini-
tial settings are ÒA: OnÓ and ÒB: Off,Ó so if you are only
connecting to A, these settings will not need to be
changed.
(RI)
By connecting the connector as shown in the dia-
gram below, you can use the RC-418M remote control-
ler to operate Integra/Onkyo cassette tape decks and
compact disc players that also have Integra/OnkyoÕs
connectors. Simply connect a remote control cable
from this connector to the connector of the cas-
sette tape deck or compact disc player. An remote
control cable with a 3.5-mm (1/8-inch) miniature two-
conductor plug comes with every cassette tape deck
and compact disc player that has an connector.
¥For remote control operation, the audio connection
cables must also be connected.
¥The RC-418M remote controller does not support
turntables.
¥If the connected component has two connec-
tors, you can use either one to connect to the RDC-
7. The other one can be used to daisy chain with
another component.
¥For Integra D D or MD players, you can control
them by simply pointing the RC-418M controller di-
rectly at the component.
Ex:Integra/Onkyo
CD player
Ex:Onkyo
Cassette tape deck
RDC-7
connector
connector
These pin assignments conform to the standards made
by the Audio Engineering Society. Check the instruc-
tion manual that came with your power amplifier and
verify that the input pin assignments are compatible
with those for the RDC-7.
1. GND
Balanced cableXLR type
2. non-inverting (+)
3. inverting (-)
1. Connecting the output terminal
Match the pins and insert the terminal until you hear a
Òclick. Ó Ensure that it is secure by gently pulling it.
2. Disconnecting tha output terminal
Pull out the cable (in the direction indicated by the
arrow) while holding down the connection cable button.
ush
These outputs are activated by the Zone 2 button on
the front panel.
RR
RI
RI
RI
RI
RI
RI
RI
RI

RDC-7
8
AM
ANT.
FM
ANT.
75
MULTI
CHANNEL
INPUT
RS 232
GND
C
FRONT
RL
SURR
BACK
SURR
SUBWOOFER
1
2
1
2
1
2
1
2
PRE
OUT
DVD
VIDEO
5
VIDEO
4
VIDEO
3
ZONE 2
MONITOR
OUT
VIDEO
1
VIDEO
2
RL
RLVIDEO S VIDEO
VIDEO S VIDEO
INPUT 2
P
B
P
R
YINPU
T
P
B
Y
OUT
OUT
IN
IN
IN
IN
IN
IN
OUT
1
2
C
D
TAPE
2
TAPE
1
3
2
1
3
2
5
4
1
I
N
I
N
I
N
I
N
OUT
OUT
L
R
COMPONENT
VIDEO
INPUT 1
P
B
P
R
Y
DIGITAL
OUTPUT
(COAXIAL)
AC-3
RF
DIGITAL
INPUT
(COAXIAL)
DIGITAL
OUTPUT
(OPTICAL)
DIGITAL
INPUT
(OPTICAL)
PHONO
RIGHTRIGHT CENTER
CENTER SUBWOOFER
SURROUNDSURROUND
RIGHTRIGHT SURROUND
SURROUND
LEFTLEFT SURROUND BACK
SURROUND BACK
RIGHT
RIGHT SURROUND BACK
LEFT
LEFTLEFT
PRE OUTPRE OUT
Example of how to connect your equipment
VCR
(VIDEO 1)
TV monitor
(MO ITOR OUT 1)
Projector
(MO ITOR OUT 2)
Cable/Satellite
(Set top box, VIDEO 3)
DAT deck, CD-R,
MD recorder
(TAPE 1)
Tape deck, DAT,
MD recorder, CD-R
(TAPE 2)
CD player
(CD)
Turntable
(PHO O)
DVD player
(DVD)
LD player
(VIDEO 4)
Analog signal
Digital signal
flow
IR IN
AC
INLET
MAIN ZONE 2
T
3 P
R
OUTPUT
P
B
P
R
Y
RIGHT CENTER
SUBWOOFER
SUBWOOFER
SURROUND
RIGHT SURROUND
LEFT SURROUND BACK
RIGHT
SURROUND BACKSURROUND BACK
LEFTLEFT
LEFT
PRE OUT
AV CONTROLLER
MODEL NO. RDC-7
12V TRIGGER
AB
Default setting
Input source Digital input Component video
CD COAXIAL 1
PHONO
FM
AM
TAPE 1 OPTICAL 1
TAPE 2 OPTICAL 2
DVD OPTICAL 3
COMPONENT VIDEO 1
VIDEO 1 ---- ----
VIDEO 2 COAXIAL 2
COMPONENT VIDEO 2
VIDEO 3 COAXIAL 3
COMPONENT VIDEO 3
VIDEO 4 COAXIAL 4 ----
VIDEO 5 COAXIAL 5 ----
DVD recorder
or other digital video
recording device
---- : No setting
: No a licable
Standard connections
Here is ex lanation of how to connect the main
com onents to the RDC-7 in the standard manner.
There are many ways that any one com onent can be
connected, and it is u to you to decide which method
best fits your situation. The directions given here are
only one o tion and should only be thought of as such.
It is best to fully understand the nature of each
connector and terminal as well as each of your
com onents and their features to ascertain which
method of connection is best.
¥Be sure to always refer to the instruction manual that
came with the component that you are connecting.
¥Do not plug in the power cord until all connections
have been made.
¥For input jacks, red connectors (marked R) are used
for the right channel, white connectors (marked L)
are used for the left channel, and yellow connectors
(marked V) are used for video connection.
¥Insert all plugs and connectors securely. Improper
connections can result in noise, poor performance,
or damage to the equipment.
¥Do not bind audio connection cables with power
cords and speaker cables. Doing so may adversely
affect the sound quality.
Connecting power amplifiers:
Speaker configuration and placement:
Radio antenna:
Enjoying the RDC-7 from a remote room (Zone 2):

RDC-7
9
Example of how to connect your equipment
Connecting your audio components
Below is an example of how you can connect your
audio components to the RDC-7.
1. Connecting a turntable
Using an RCA-type audio connection cable connect
the output terminal on the turntable to the PHONO IN
jacks on the RDC-7. Make sure that you properly con-
nect the left channel to the L jack and the right chan-
nel to the R jack.
Note:
The RDC-7 is designed for use with moving magnet car-
tridges. For proper operation connect a ground (or
earth) wire to the GND terminal. For some turntables
however connecting the ground wire may cause in-
creased noise and in such a case a ground wire is not
necessary and should not be connected.
2. Connecting a compact disc player
Using an RCA-type audio connection cable connect
the output terminal on the compact disc player to the
CD IN jacks on the RDC-7. Make sure that you properly
connect the left channel to the L jack and the right
channel to the R jack.
If the compact disc player has a digital output jack as
well be sure to also connect it to either a DIGITAL INPUT
(COAXIAL) or DIGITAL INPUT (OPTICAL) jack on the
RDC-7 depending on the type of connector on the
compact disc player.
With the initial settings of the RDC-7 the CD input
source is set for digital input at the COAXIAL 1 jack. If
the digital connection is made at a different jack this
must be changed at the OSD Menu: Input Setup
Digital Setup Digital Input .
3. Connecting a cassette tape dec , MD
recorder, DAT dec , or CD recorder
Using an RCA-type audio connection cable connect
the output terminals (PLAY) of the device to the TAPE 2
IN jacks on the RDC-7 and the input terminals (REC) to
the TAPE 2 OUT jacks. Make sure that you properly con-
nect the left channel to the L jack and the right chan-
nel to the R jack.
If the device has a digital output jack as well be sure to
also connect it to either a DIGITAL INPUT (COAXIAL) or
DIGITAL INPUT (OPTICAL) jack on the RDC-7 depending
on the type of connector on the device.
With the initial settings of the RDC-7 the TAPE 2 input
source is set for digital input at the OPTICAL 2 jack. If the
digital connection is made at a different jack this must
be changed at the OSD Menu: Input Setup Digital
Setup Digital Input .
If the device also has a digital input jack it can be con-
nected to the DIGITAL OUTPUT (COAXIAL) or DIGITAL
OUTPUT (OPTICAL) jack on the RDC-7 for recording of
the signal from the input source selected at the RDC-7.
4. Connecting an MD recorder, DAT dec , or CD
recorder
Using an RCA-type audio connection cable connect
the output terminals (PLAY) of the device to the TAPE 1
IN jacks on the RDC-7 and the input terminals (REC) to
the TAPE 1 OUT jacks. Make sure that you properly con-
nect the left channel to the L jack and the right chan-
nel to the R jack.
If the device has a digital output jack as well be sure to
also connect it to either a DIGITAL INPUT (COAXIAL) or
DIGITAL INPUT (OPTICAL) jack on the RDC-7 depending
on the type of connector on the device.
With the initial settings of the RDC-7 the TAPE 1 input
source is set for digital input at the OPTICAL 1 jack. If the
digital connection is made at a different jack this must
be changed at the OSD Menu: Input Setup Digital
Setup Digital Input.
If the device also has a digital input jack it can be con-
nected to the DIGITAL OUTPUT (COAXIAL) or DIGITAL
OUTPUT (OPTICAL) jack on the RDC-7 for recording of
the signal from the input source selected at the RDC-7.
Connecting your video components
Below is an example of how you can connect your
video components to the RDC-7.
The flow of the video signals is as follows: the signal that
comes in from VIDEO IN is sent to VIDEO OUT the signal
that comes in from S-VIDEO IN is sent to S-VIDEO OUT
and VIDEO OUT and the signal that comes in from
COMPONENT VIDEO IN is sent to COMPONENT VIDEO
OUT.
If only the video connection for the MONITOR OUT is
made even if the input from each source component
is through a component video connection the picture
will not appear. If only the S-video connection for the
MONITOR OUT is made the picture will not appear.
5. Connecting a DVD player
Using an RCA-type video connection cable connect
the video output terminal (composite) on the DVD
player to the DVD VIDEO IN jack on the RDC-7. If there is
an S-video output terminal on the DVD player connect
it to the DVD S VIDEO IN jack using an S-video cable. If
the DVD player has component video outputs con-
nect them to one of the COMPONENT VIDEO INPUT
jacks.
Using an RCA-type audio connection cable connect
the audio output terminal on the DVD player to the au-
dio DVD IN jacks on the RDC-7. Make sure that you
properly connect the left channel to the L jack and the
right channel to the R jack.
If the DVD player has a digital output jack as well be
sure to also connect it to either a DIGITAL INPUT (CO-
AXIAL) or DIGITAL INPUT (OPTICAL) jack on the RDC-7
depending on the type of connector on the DVD
player.
With the initial settings of the RDC-7 the DVD input
source is set for digital input at the OPTICAL 3 jack. If the
digital connection is made at a different jack this must
be changed at the OSD Menu: Input Setup Digital
Setup Digital Input .
9. Connecting a DVD recorder or other digital
video recording device
Using an RCA-type video connection cable connect
the video output terminal (composite) on the device to
the VIDEO 2 IN jacks on the RDC-7 and video input ter-
minal to the VIDEO 1 OUT jacks. If there is an S-video
input/output terminal on the device connect it to the S
VIDEO 2 IN/OUT jack using an S-video cable. If the de-
vice has component video outputs connect them to
one of the COMPONENT VIDEO INPUT jacks.
Using an RCA-type audio connection cable connect
the audio output terminal on the device to the same
VIDEO 2 IN audio jacks on the RDC-7 and audio input
terminal to the VIDEO 1 OUT audio jacks. Make sure
that you properly connect the left channel to the L jack
and the right channel to the R jack.
If the device has a digital output jack as well be sure to
also connect it to either a DIGITAL INPUT (COAXIAL) or
DIGITAL INPUT (OPTICAL) jack on the RDC-7 depending
on the type of connector on the device.
With the initial settings of the RDC-7 the VIDEO 2 input
source is set for digital input at the COAXIAL 2 jack. If
the digital connection is made at a jack different from
the initial settings this must be changed at the OSD
Menu: Input Setup Digital Setup Digital Input.
If the device also has a digital input jack it can be con-
nected to the DIGITAL OUTPUT (COAXIAL) or DIGITAL
OUTPUT (OPTICAL) jack on the RDC-7 for recording of
the signal from the input source selected at the RDC-7.
10. Connecting a television monitor or projector
Using an RCA-type video connection cable connect
the video input terminal (composite) on the monitor to
one of the MONITOR OUT jacks on the RDC-7. If there is
an S-video input terminal on the monitor connect it to
the S VIDEO MONITOR OUT jack using an S-video cable.
If the device has component video inputs connect
them to the COMPONENT VIDEO OUTPUT jacks.
Note that the OSD Menu will not be displayed on the
monitor connected to MONITOR OUT 2. This allows you
to connect large screens or projectors to MONITOR OUT
2 and use a smaller television connected to MONITOR
OUT 1 just to make settings in the OSD Menu.
6. Connecting a LD player
Using an RCA-type video connection cable connect
the video output terminal (composite) on the LD player
to the VIDEO 4 IN jack on the RDC-7. If there is an S-
video output terminal on the LD player connect it to
the S VIDEO 4 IN jack using an S-video cable.
If the LD player has an AC-3RF output connect it to the
AC-3RF jack on the RDC-7. If this connection is made
ÒAC-3RFÓ must be set in the OSD Menu: Input Setup
Digital Setup Digital Format.
Using an RCA-type audio connection cable connect
the audio output terminal on the LD player to the audio
VIDEO 4 IN jacks on the RDC-7. Make sure that you
properly connect the left channel to the L jack and the
right channel to the R jack.
If the LD player has a digital output jack as well be sure
to also connect it to either a DIGITAL INPUT (COAXIAL)
or DIGITAL INPUT (OPTICAL) jack on the RDC-7 depend-
ing on the type of connector on the LD player.
With the initial settings of the RDC-7 the VIDEO 4 input
source is set for digital input at the COAXIAL 4 jack. If
the digital connection is made at a different jack this
must be changed at the OSD Menu: Input Setup
Digital Setup Digital Input.
7. Connecting a video cassette recorder
Using an RCA-type video connection cable connect
the video output terminal (composite) on the video
cassette recorder to the VIDEO 1 IN jacks on the RDC-7
and video input terminal to the VIDEO 1 OUT jacks. If
there is an S-video input/output terminal on the video
cassette recorder connect it to the S VIDEO 1 IN/OUT
jack using an S-video cable. If the video cassette re-
corder has component video outputs connect them
to one of the COMPONENT VIDEO INPUT jacks.
Using an RCA-type audio connection cable connect
the audio output terminal on the video cassette re-
corder to the same VIDEO 1 IN audio jacks on the RDC-
7 and audio input terminal to the VIDEO 1 OUT audio
jacks. Make sure that you properly connect the left
channel to the L jack and the right channel to the R
jack.
8. Connecting a satellite tuner or television
Using an RCA-type video connection cable connect
the video output terminal (composite) on the satellite
tuner or television to the VIDEO 3 IN jacks on the RDC-7.
If there is an S-video output terminal on the satellite
tuner or television connect it to the S VIDEO 3 IN jack
using an S-video cable. If the satellite tuner or television
has component video outputs connect them to one of
the COMPONENT VIDEO INPUT jacks.
Using an RCA-type audio connection cable connect
the audio output terminal on the satellite tuner or tele-
vision to the same VIDEO 3 IN audio jacks on the RDC-7.
Make sure that you properly connect the left channel
to the L jack and the right channel to the R jack.
If the satellite tuner or television has a digital output
jack as well be sure to also connect it to either a DIGI-
TAL INPUT (COAXIAL) or DIGITAL INPUT (OPTICAL) jack
on the RDC-7 depending on the type of connector on
the set top box or television.
With the initial settings of the RDC-7 the VIDEO 3 input
source is set for digital input at the COAXIAL 3 jack. If
the digital connection is made at a jack different from
the initial settings this must be changed at the OSD
Menu: Input Setup Digital Setup Digital Input.

RDC-7
10
AC
INLET
AM
ANT.
FM
ANT.
75
MULTI
CHANNEL
INPUT
RS232
GND
VIDEO SVIDEO
DVD
VIDEO
5
VIDEO
4
VIDEO
3
MONITOR
OUT
VIDEO
1
VIDEO
2
OUT
IN
IN
IN
IN
IN
IN
OUT
RLVIDEO SVIDEO
C
D
TAPE
2
TAPE
1
I
N
I
N
I
N
I
N
OUT
OUT
L
R
PHONO
3
2
1
3
2
5
4
1
DIGITAL
OUTPUT
(COAXIAL)
AC-3
RF
DIGITAL
INPUT
(COAXIAL)
DIGITAL
OUTPUT
(OPTICAL)
DIGITAL
INPUT
(OPTICAL)
INPUT2
P
B
P
R
YINPUT3
P
B
P
R
YOUTPUT
P
B
P
R
Y
COMPONENT
VIDEO
INPUT1
P
B
P
R
Y
1
2
IRIN
MAIN ZONE2
12VTRIGGER
AB
ZONE2
RL
OUT
C
FRONT
RL
SURR
BACK
SURR
SUBWOOFER
1
2
1
2
1
2
1
2
PRE
OUT
RIGHT CENTER SUBWOOFER
SURROUND
RIGHT SURROUND
LEFT SURROUNDBACK
RIGHT SURROUNDBACK
LEFT
LEFT
PREOUT
AV CONTROLLER
MODELNO.
RDC-7
RIGHT CENTER SUBWOOFER
SURROUND
RIGHT SURROUND
LEFT SURROUND BACK
RIGHT SURROUND BACK
LEFT
LEFT
PRE OUT
Connecting power amplifiers
Connecting power amplifiers with RCA type
connector
Connect your power amplifier to the PRE OUT jacks on
the RDC-7. f the jacks on your power amplifier are RCA
type jacks, connect them to the jacks shown in the
diagram given below. Two terminals are provided for
each of the front left, center, and right channels. The
same signal is output from both terminals 1 and 2.
Connecting power amplifiers with XLR type
connector
Connect your power amplifier to the PRE OUT jacks on
the RDC-7. f the jacks on your power amplifier are XLR
(balanced) type jacks, connect them to the jacks
shown in the diagram given below.
AC
INLET
AM
ANT.
FM
ANT.
75
MULTI
CHANNEL
INPUT
RS232
GND
VIDEO SVIDEO
DVD
VIDEO
5
VIDEO
4
VIDEO
3
MONITOR
OUT
VIDEO
1
VIDEO
2
OUT
IN
IN
IN
IN
IN
IN
OUT
RLVIDEO SVIDEO
C
D
TAPE
2
TAPE
1
I
N
I
N
I
N
I
N
OUT
OUT
L
R
PHONO
3
2
1
3
2
5
4
1
DIGITAL
OUTPUT
(COAXIAL)
AC-3
RF
DIGITAL
INPUT
(COAXIAL)
DIGITAL
OUTPUT
(OPTICAL)
DIGITAL
INPUT
(OPTICAL)
INPUT2
P
B
P
R
YINPUT3
P
B
P
R
YOUTPUT
P
B
P
R
Y
COMPONENT
VIDEO
INPUT1
P
B
P
R
Y
1
2
IRIN
MAIN ZONE2
12VTRIGGER
AB
ZONE2
RL
OUT
C
FRONT
RL
SURR
BACK
SURR
SUBWOOFER
1
2
1
2
1
2
1
2
PRE
OUT
RIGHT CENTER SUBWOOFER
SURROUND
RIGHT SURROUND
LEFT SURROUNDBACK
RIGHT SURROUNDBACK
LEFT
LEFT
PREOUT
AV CONTROLLER
MODELNO.
RDC-7
C
FRONT
RL
SURR
BACK
SURR
1
2
1
2
1
2
1
2
SUBWOOFER
PRE
OUT
Power amplifier
Front right speaker
Front left speaker
Subwoofer
Center speaker
Surround right speaker
Surround left speaker
Surround back right speaker
Surround back left speaker
RDC 7
Subwoofer
Center speaker
Surround back right
speaker
Subwoofer
Surround back left
speaker
Surround right speaker
Surround left speaker
Front right speaker
Front left speaker
Power amplifier

RDC-7
11
DISASSEMBLING PROCEDURES
Remove two screwsA holding the top cover and bracket.
Remove six screws B holding the top cover and chassis.
Remove two screws C holding the top cover and the rear panel.
Lift up the top cover and remove it.
1.Top cover 2. Front panel assembly
Remove the top cover.
Disconnect two FFCs on the sockets of P7201B and P7202A.
Remove three screws D holding the front panel and chassis
from the top side.
Remove six screws E holding the front panel and chassis
from the bottom side.
3. Bottom board
Remove four screws F holding the leg and chassis.
Remove twelve screws G holding the bottom board and chassis.
4. Rear panel
When PC board assembly are removed, remove the rear panel.
Remove the 8 screws
A
holding the rear panel and the chassis.
Remove the four special screws C.
Remove the 46 screws Dto K.
Remove the two screws N.
A
B
C
D
E
F
G
H
I
J
K
L
M
N
: ATTB+8C(BC) (Part No.838440089) x 8 Chassis
: 3TTB+6B(BC) (Part No.838440068) x 3 Tuner unit
: Special screw (This screw is included to Terminal)
x 4 Multi channel input PC board
: 3TTB+8B(BC) (Part No.838430088) x 5 Input selector PC board
: 3TTB+8B(BC) (Part No.838430088) x 4 Input/Output terminal PC board
: 3TTB+8B(BC) (Part No.838430088) x 4 Video terminal PC board
: 3TTB+8B(BC) (Part No.838430088) x 4 S Video terminal PC board
: 3TTB+8B(BC) (Part No.838430088) x 7 DSP circuit terminal PC board
: 3TTB+8B(BC) (Part No.838430088) x 8 XLR jack PC board (1)
: 3TTB+8B(BC) (Part No.838430088) x 8 XLR jack PC board (2)
: 3TTB+8B(BC) (Part No.838430088) x 2 Primary circuit PC board
: 3TTB+8B(BC) (Part No.838430088) x 4 Component video PC board
: 3TTB+8B(BC) (Part No.838430088) x 2 Cover
: 3TTB+8B(BC) (Part No.838430088) x 2 Primary circuit PC board
C
B
A
B
D
E
P7202 P7201
F
F
GG
DVD
VIDEO
5
VIDEO
4
VIDEO
3
ZONE 2
MONITOR
OUT
VIDEO
1
VIDEO
2
RL
RL
C
SUBWOOFER
IR IN
MAIN ZONE 2
VIDEO S VIDEO
VIDEO S VIDEO
INPUT 2
P
B
P
R
YINPUT 3
P
B
P
R
YOUTPUT
P
B
P
R
Y
OUT
OUT
IN
IN
IN
IN
IN
IN
AC
INLET
OUT
1
2
FM
ANT.
75
AM
ANT.
C
D
GND
MULTI
CHANNEL
INPUT
RS 232
TAPE
2
TAPE
1
FRONT
3
2
1
3
2
5
4
1
I
N
I
N
I
N
I
N
OUT
OUT
L
RL
1
2
1
2
1
2
1
2
R
COMPONENT
VIDEO
INPUT 1
P
B
P
R
Y
DIGITAL
OUTPUT
(COAXIAL)
AC-3
RF
DIGITAL
INPUT
(COAXIAL)
DIGITAL
OUTPUT
(OPTICAL)
DIGITAL
INPUT
(OPTICAL)
PHONO
SURR
BACK
SURR
PRE
OUT
RIGHT CENTER SUBWOOFER
SURROUND
RIGHT SURROUND
LEFT SURROUND BACK
RIGHT SURROUND BACK
LEFT
LEFT
PRE OUT
AV CONTROLLER
MODEL NO.
RDC-7
12V TRIGGER
AB
N
EFGH L
I
J
K
MM
A
A
A
A
C
A
B
B
D

RDC-7
12
2
3
1
4
4. Attachment of shaft assembly
Apply Floil on the groove of holders.
Hang the spring from the down side of lever.
Attach the gear A to the holder R, and insert the
shaft A to fix the gear A.
Holder R Holder L
Gear A
Groove
Attach the gear S as shown
below.
Holder R
Spring
Lever
Shaft A
Gear A
Holder L
Spring
Lever
Insert the shaft to the shaft L and the shaft R.
Turn Gear A counter clockwise
fully.
Cross
1. Insert the retainer S.
2. Turn the gearA clockwise fully.
3. Insert the headphone jack to the front panel
4. Attach the motor assembly.
5. Attach the part above on the front panel.
Turn the gear clockwise fully and insert
the PC board ass'y (NAETC-6835)
Fix the PC board ass'y by the plastic rivet.
Plastic rivet
PC board ass'y
NAETC-6833
Groove
Shaft L
Shaft
Shaft R
Gear S
Retainer W
2.6TTS+6B(BC)
Apply floil
ASSEMBLING PROCEDURES
. Attachment of door knob
When you replace the door knob assembly of lef side, cut the
two knobs below.
Cut
3. Attachment of door
Put the cushions according to the center of rib.
Inlay the door base to the door.
Put the five cushions on the door base.
Attach the stay L and stay R.
Put the spacers on the stay L and the stay R.
Cushion
Rib
3. Attachment of holders
Lever L Lever R
Apply the floil G-902S (Part No.260447) on the lever
L and the lever R.
2
3
1
4
Cushion
Stay R
Spacer
Door
Door base
Cushion
Stay L
Spacer
53
53 : 2.6TTS+6B(BC)
Floil
Gear A
Groove
Holder R
Spring
Lever
Shaft A
Gear A
Holder L
Spring
Lever
Cross
Plastic rivet
PC board ass'y
NAETC-6833
Groove

RDC-7
Pin No.
12, 25, 51
63, 75, 89
100
1, 11, 23, 38
49, 64, 77, 88
74
50
52
24
26
76
4
5
6
28
30
Pin Descriptions
Q8704 : XCS05XL 4VQ100C
20

RDC-7
21
Pin No.
36
2, 27,
54, 79
21, 48,
73, 99
80
72
30
73
Pin Descriptions

RDC-7
25
Pin Function
A0to A17 Address Inputs
DQ0to DQ7Data Inputs/Outputs
CE Chip Enable
OE Output Enable
WE Write Enable
RY/BY Ready/Busy Output
RESET Hardware Reset Pin/Temporary Sector
Unprotection
N.C. No Internal Connection
VSS Device Ground
VCC Device Power Supply
18
A0to A17
WE
OE
CE
DQ 0to DQ 7
8
RESET RY/BY
VSS
VCC
WE
CE
A0toA17
OE
Erase Voltage
Generator
DQ 0 to DQ7
State
Control
Command
Register
Program Voltage
Generator
Low VCC Detector Address
Latch X-Decoder
Y-Decoder
Cell Matrix
Y-Gating
Chip Enable
Output Enable
Logic
Data Latch
Input/Output
Buffers
STB
STB
Timer for
Program/Erase
RESET
RY/BY
Buffer RY/BY
DESCRIPTION
BLOCK DIAGRAM
Q728,Q768: MBM29LV002/004TC-910PTN (Flash memory)

RDC-7
29
Q8701 : CC1536E (MASTER CLOCK MODULE)
31
12
L1
C15
.1uF
TP1
+16VIN R11
1
C7
4.7uF
20%
16V
C6
0.047uF
16V
VCOREGEN
MIC5205BM5
U5
1
3
2
5
4
OUT
ADJ
IN
GND
EN
R20
464
1% 1/10W
R22
3.92k
1% 1/10W
C24
0.047uF
20% 16V
C21
4.7uF
20% 16V
+11VOUT
+5V VCO
R19
4.99k
1% 1/10W
C22
1.0uF
20V
C20
0.01uF
R21
4.99k
1% 1/10W
PHASEADJ
GNDA
R16
3.92k
1% 1/10W4
3
5
1
2OPA237
C13
0.022uF
C14
0.22uF
C16
.1uF
16V
+11VOUT
VCO CTL
GNDA
C25
5600pF
R17
2.21k
1% C19
.1uF
16V
CR4
BBY42 16V
0.27uH
4
3
17
85 2
6
VREF
TANK
OUT
VEE1
VEE2
AGC
VCC2
VCC1
U3
MC121480
C18
.1uF
16V
C17
4.7uF
20% 16V
C11
.01uF
R9
22
1/8W
R18
100
1% 1/8W
Q3
BFT93
VCOOUT
C12
.01uF
GNDA
+5VD
R23
18
1/2W
C9
4.7uF
20% 16V
C10
.01uF
C8
.047uF
16V
R12
464
1% 1/10W
R14
1.37k
1% 1/10W
+5V VCO
U2
1
2
3
5
4
OUT
ADJ
IN
GND
EN
11VREGEN
CR3
BAV99LT1
1
3
2
CR3
BAV99LT1
1
3
2
R13
19.1k
1% 1/10W
Q1
BSS84ZXC
Q2
BSS138ZX
R15
100k
1%
C26
.1uF
16V
5050
UP-
R10
100k
1%
DOWN
NOT ON PC BOARD
+5VD
GNDD
P1:S
P1:T
P1:U
P1:V
P1:W
P1:X
P1:Y
P1:Z
P1:AA
P1:AB
P1:AC
P1:AD
P1:AE
P1:AF
P1:AG
P1:AH
P1:AI
P1:AK
CLOCKON
LOCKOK
FSXOUT
WC IN
WC INN
FS0
FS1
FS2
O/E
+16VIN
GNDA
+11VOUT
PROGTDO
PROTCK
PROGTMS
PROGTDI
19
20
21
22
23
24
25
26
27
28
29
30
31
32
33
34
35
36
11VREGEN
VCOREGEN
1FS
WDCLK
P1:R
P1:Q
256/384FSYP1:P
P1:O
P1:N
P1:M
P1:L
P1:K
P1:J
P1:I
P1:H
P1:G
P1:F
P1:E
P1:D
P1:C
P1:B
P1:A
128/192FSY
GNDD
256FSB
128FSB
64FS
32FS
P1:P
2FS
1FS
05FS
FS4
WC INV
VCO CTL
GNDA
PHASEADJ
+5V VCO
18
17
16
15
14
13
12
11
10
9
8
7
6
5
4
3
2
1
PHADJGND
MCLKx2
MCLK
BITCLKx4
BITCLKx2
BITCLK
BITCLK:2
WDCLK
WDCLK:2
BITCLK:2
KEY
+5V VCO
R6
1.3k 1/10W
R5
1.3k 1/10W
R7
1.3k 1/10W
DOWN
UP-
5050
VCOOUT
44
43
42
41
40
39
38
37
36
35
34
I/O
I/O
I/O
VCC
INPUT/OE2(GCLK2)
INPUT/GCLRn
INPUT/OE1n
INPUT/GCLK1
GND
I/O
I/O
I/O
I/O
IVCC
I/O
I/O(TMS)
I/O
I/O
GND
I/O
I/O
I/O(TDI)
I/O
GND
I/O
I/O(TCK)
I/O
I/O
VCC
I/O
I/O
I/O(TDO)
I/O
I/O
I/O
I/O
I/O
GND
VCC
I/O
I/O
I/O
I/O
I/O
12
13
14
15
16
17
18
19
20
21
22
23
24
25
26
27
28
29
30
31
32
33
11
10
9
8
7
6
5
4
3
2
1
EPM7064STC44-10
U1
+5VD
+5VD
+5VD
(1024/1536FSBUF)
(512/736FSBUF)
+5VD
C23
1uF
25V
16V
.047uF
C1
+5VD
+5VD
R1
1.3k 1/10W
R2
1.3k 1/10W
R3
1.3k 1/10W
R4
1.3k 1/10W
R8
220k 1/10W
PROGTCK
PROGTDO
PROGTMS
PROGTDI
All resistors are thick film or metal film.
All capacitor dilelectrics are X7R.
All capacitor values are in microfarads, 50V, 10%.
All resistor values are in ohms, 1/8W, 5%.
NOTE: Unless otherwise specified.

31 32
RDC-7
RG RG RG RG RG
P7202A
P7201A P7482A P7451A
Red
Black
Red
Yellow
Paple
Yellow
Brown
White
Yellow
White
Blue
Gray
Blue
Brown
Brown
Orange
Green
Orange
NAAF-6814
P4711A
P3062B P3061B
NAAF-6862
J4722B
NAAF-6861
J4723B
NAVD-6848
P2011
P2024
P2013
P2012
NAVD-6849
P2524
P2523
P2011
P2012
P2013
NAVD-6850 JL2711B
NAPS-6863
P9012
NADG-6860
P8006A
P9012A P8005A
JL8002
JL9222B
JL9221B
NASW-6864
P9007C
NASW-6833
JL7601B P7601B
NADIS-6832
P7451B
NAETC-6835
NAETC-6836
P7452B
P7452A
P2511A
JL2711A
P2011A
P2512AP2513A
P2013AP2012A
P9212AP9312A
P7201B
P7202A
NAAF-6813
P3011B
P3012B
P3013B
P3011B
P8005 P8006
J3015B
J4273A
J4722A
P4711B
NAAF-6815
P7921B
J3015A
NAPS-6838
NAPS-6839
P9211A
P9212
P9311A
P9312
J8002B
JL9221B
JL9222B
Q9202 D9201
Q9301
Q9304
Q9322
Q9303
D9301
P705
P704
P703
P702
P701
NADG-6830
NAAR-6837
P7002AP7001A P7003A P7006A P7007A
P3002A P3001A
P4002AP4003AP4004A P4001A
P1201A
P7921A
NAETC-6834
TUNER UNIT
P9011A
P9011A
T9001
POWER
TRANSFORMER
SUBWOOFER
1
2
ZONE 2
VIDEO1
VIDEO2
VIDEO 3
VIDEO 4
VIDEO 5
DVD
RIGHTLEFTCENTERSUBWOOFER
SURROUND
BACK
LEFT
SURROUND
BACK
RIGHT
SURROUND
LEFT
SURROUND
RIGHT
FRONT
SURROUND
SURROUND
BACK
TAPE 1
TAPE 2
CD
PHONO
MULTI
CHANNEL
INPUT
RS232C
AM ANT
FM ANT
POWER
ON/OFF
AC INLET
T9002
MONITOR
ZONE2
VIDEO
1
VIDEO
5
VIDEO
4
VIDEO
3
VIDEO
2
DVD
MONITOR
ZONE2
VIDEO
1
VIDEO
5
VIDEO
4
VIDEO
3
VIDEO
2
DVD VIDEO
S VIDEO
AC-3
RF
DIGITAL
OUTPUT
DIGITAL
INPUT
(COAXIAL)
DIGITAL
INPUT
DIGITAL
OUTPUT
12V TRIGGER
AB
RIIR IN
MAIN
ZONE 2
PRE OUT
PRE OUT
COMPONENT VIDEO
INPUT 1INPUT 2INPUT 3OUTPUT
P772
P772A
Yellow
White
White
Brown
WIRING VIEW
INPUT/OUTPUT
SELECTOR PC BOARD
INPUT OUTPUT
TERMINAL PC BOARD
MULTI CHANNEL
INPUT TERMINAL
PC BOARD
DSP CIRCUIT PC BOARD
DISPLAY & SUB MICROPROCESSOR PC BOARD
CONTROL SWITCH
PC BOARD
HEADPHONE JACK
PC BOARD
DOOR MOTOR DRIVER
PC BOARD
DOOR MOTOR
PC BOARD
MAIN MICROPROCESSOR PC BOARD
CONSTANT
VOLTAGE
CIRCUIT
PC BOARD
RECTIFIER
CIRCUIT
PC BOARD
VIDEO CIRCUIT
PC BOARD
S VIDEO TERMINAL
PC BOARD
COMPONENT VIDEO
TERMINAL PC BOARD
D/A CONVERTER PC BOARD
XLR JACK PC BOARD(1)
XLR JACK PC BOARD(2)
PRIMARY CIRCUIT
PC BOARD
POWER SWITCH
PC BOARD
Phones
U10
U13
U16
U15
U2
U1
U18
U17
U3
U9
U8
U7
U6
U5
U19
U12 U11
U20
U4
U14
U22

33 34
RDC-7
RDC-7
CHASSIS EXPLODED VIEW
The special screw (Ref.No.85) is included
in the socket assembly.
97
50
86
83
83
53
9
9
9
20
16
17
72
72
9
95
49
74
80
79
48
45
76
55
54
65
64
66
69
53
68
70
18
18
70
56
46
46
26
82
81
81
81
77
71
77
77
77
26
26
9
9
96
52
51
18
58
59
U8 63
62
61
60
56
U9
U7
U5
U11
U12
U3
U1
U2
U13
U14
U4
U15
U22
U10
U6
P7201
P7202
P1201
18
18
84
3
3
18
9
19
19
19
15 78
44
39
9
9
37
38
9
9
40
39
39
40
40
U7
19
18
43
42
41
44
44
42
T9001
4
4
1
2
6
6
5
5
9
9
9
38
9
14
14
8
810
88
90
90
87
90
91
9
11
13
12
12
9
91
99
21
21
22
P2525
22
92
98
85 27
19
9
99
9
19
110
P3005
P3005a
93
87
101
90
9
9
5
P3006
3
5
5
23
U18
U17
7
25
23
F9004
F9002
F9001
U19
P772
5
38
38
U16
9
3
47
47
57
18
72
67
53
9
53
102
103
104
44

35 36
RDC-7
REF. NO.
1
2
3
4
5
6
7
8
9
10
11
12
13
14
15
16
17
18
19
20
21
22
23
25
26
27
37
38
39
40
41
42
43
44
46
47
48
49
50
51
52
53
54
55
56
57
58
59
60
61
62
63
64
65
66
67
68
69
70
71
72
PART NO.
27100319-2
28170070
27255004
27190813
29110083
28141421
28141423
27130778
838430088
27115259-1
27160462-1
838430107
27190009
27190902
27130779E
27190938
27300833
82143006
838440089
27130832-1A
27130837-1
28141095
27190369
27190470
82143010
838430068
27170309
838130088
27175317
831430088
27130780-1
28170071
260208
830440089
28198903
28141432
28125375
28125376
28148435
28183002A
28183003A
834426068
27191094A
28335065A
27180577
27191095A
27141758A
27180579
28335066A
27301943
27260364
880011
27260363
27260365A
27260366A
27270218
27301942
27141759
27141752
24804045B
28141426
DESCRIPTION
Chassis
Bushing
CS-1, Clip
KGPS-10RF, Holder
Adhesive tape 16u
t8*10*30, Cushion
t16*20*30, Cushion
Bracket P
3TTB+8B(BC), Self tapping screw
Side bracket
Heat sink S
3TTB+10S(BC), Self tapping screw
KGLS-4S, Holder
KGPS-16S, Holder
Bracket Shield
KGPS-8S, Holder
WS-2NS, Clamp
3P+6FN(BC), Pan head screw
4TTB+8C(BC), Self tapping screw
Bracket F
Bracket U
Cushion
Holder
KGLS-18S, Holder
3P+10FN(BC), Pan head screw
3TTB+6B(BC), Self tapping screw
Bottom board
TTB+8B(BC), Self tapping screw
Leg
3TTW+8B(BC), Self tapping screw
Bracket PT
Bushing
Wire tie
4TTC+8C(BC), Self tapping screw
Facet
t1.5*12*4, Cushion
End cap, SL
End cap, SR
Door base
Stay L
Stay R
2.6TTS+6B(BC), Self tapping screw
Holder L
Lever L
Spring
Holder R
Retainer SP
Spring, door
Lever R
Gear A
Shaft A
NRP-355, Plastic rivet
Shaft
Shaft L
Shaft R
Spacer
Gear
Retainer W
Retainer S
Motor
t1.5*25*5, Cushion
CHASSIS EXPLODED VIEW PARTS LIST
<UDD>
<UDT>
<UPT>
<UPP>
<UGT>
<UJJ>
NOTE: 120V model only
Asian model only for 120V
Asian model only for 230V
European model only
220V model only
Japanese model only
REF. NO.
73
74
76
77
78
79
80
81
82
83
84
86
87
88
90
91
92
93
95
96
97
98
101
102
103
104
110
F9001
F9002
F9004
P1201
P2525
P3005
P3005a
P3006
P7201
P7202
P772
P9001
T9001
PART NO.
28141430
28191883A
28325748
28325746
28325751
27268016A
27130838
28325723A
27141755
28140860
27190926
28325754
28184776A
28141422
838240089
801599
28184772
28141441
27212194
27212195
27262646
27262647
28148439
27122714C
27122715A
27122726A
27122716A
29362591
29360778
29362686
29095880
25055959
252163
252074
252164
2047152512
2047261022
25060151
87643010
27262657
2047242512
2047242512
2044110142
253301HIT
253302HIT
253303HIT
2301456A
2301457A
2301458A
2301455A
DESCRIPTION
Cushion
Clear plate
Knob AS(ST)
Knob AS(SEL)
Knob AS(POWER)
Guide (VOL AS)
Bracket, volume
Knob, door
Bracket, knob
Cushion
KGPS-18RF, Holder
Knob (VOL)AS
Top cover
t12x15x30, Cushion
4TTB+8C(NI), Self tapping screw
Special screw (HFC)
Cover
Cushion
Front panel <UDD,UDT,UPT,UGT,UJJ>
Front panel <UPP>
Plate L <UDD,UDT,UPT,UGT,UJJ>
Plate L <UPP>
Door
Rear panel <UDD,UDT>
Rear panel <UPP,UPT>
Rear panel <UGT>
Rear panel <UJJ>
Label
Label flash <UDD>
Label, door
0.515*900*900 Sheet,
NPLG-1P912 Shorted plug
4A-UL/T-237, Fuse <UDD, UDT>
2A-SE-EAK, Fuse <UPP,UPT, UGT>
5A-UL/T-237, Fuse <UJJ>
NCFC7-152512, Flexible flat cable
NCFC7-261022, Flexible flat cable
Ground terminal
W3*10F(BC), Flat washer
Shield plate
NCFC7-242512, Flexible flat cable
NCFC4-110142, Flexible flat cable
AS-UC-2, Power supply cord <UDD,UDT>
AS-CEE-3, Power supply cord <UPP,UGT,UPT>
AS-JA Power supply vord <UJJ>
NPT-1392D, Power transformer <UDD,UDT>
NPT-1392P, Power transformer <UPP,UPT>
NPT-1392G, Power transformer <UGT>
NPT-1392J, Power transformer <UJJ>
NOTE: THE COMPONENTS IDENTIFIED BY MARK ARE
CRITICAL FOR RISK OF FIRE AND ELECTRIC SHOCK.
REPLACE ONLY WITH PART NUMBER SPECIFIED.
REF. NO.
U1
U2
U3
U4
U5
U6
U7
U8
U9
U10
U11
U12
U13
U14
U15
U16
U17
U18
U19
U20
U22
PART NO.
1A871513-1F
1A871513-1G
1A871514-1F
1A871514-1G
1A871515-1F
1A871515-1G
1A871530-2
1A871532-1F
1A871532-1G
1A871532-1H
1A871532-1I
1A871533-1F
1A871533-1G
1A871533-1H
1A871533-1I
1A871534-1F
1A871534-1G
1A871534-1H
1A871534-1I
1A871535-1F
1A871535-1G
1A871535-1H
1A871535-1I
1A871536-1F
1A871536-1G
1A871536-1H
1A871536-1I
1A871537-1F
1A871537-1G
1A871537-1H
1A871538-1F
1A871538-1G
1A871538-1H
1A871539-1F
1A871539-1G
1A871539-1H
1A871548-1F
1A871548-1G
1A871549-1F
1A871549-1G
1A871550-1F
1A871550-1G
1A871560-2
1A871561-2F
1A871561-2G
1A871561-2H
1A871561-2I
1A871562-2F
1A871562-2G
1A871562-2H
1A871562-2I
1A871563-2F
1A871563-2G
1A871563-2H
1A871563-2I
1A871564-2F
1A871564-2G
1A871564-2H
1A871564-2I
240134
240135
240133
DESCRIPTION
NAAF-6813-1F, Input /output selector PC board ass'y board ass'y <UDD,UDT,UJJ>
NAAF-6813-1G, Input /output selector PC board ass'y board ass'y <UPP,UPT,UGT>
NAAF-6814-1F, Input /output terminal PC board ass'y board ass'y <UDD,UDT,UJJ>
NAAF-6814-1G, Input /output terminal PC board ass'y board ass'y <UPP,UPT,UGT>
NAAF-6815-1F, Multi channel input terminal PC board ass'y <UDD,UDT,UJJ>
NAAF-6815-1G, Multi channel input terminal PC board ass'y <UPP,UPT,UGT>
NADG-6830-2, DSP circuit PC board ass'y
NADIS-6832-1F, Display & Sub-microprocessor PC board ass'y <UDD>
NADIS-6832-1G, Display & Sub-microprocessor PC board ass'y <UPP>
NADIS-6832-1H, Display & Sub-microprocessor PC board ass'y <UPT,UDT,UGT>
NADIS-6832-1I, Display & Sub-microprocessor PC board ass'y <UJJ>
NASW-6833-1F, Operation switch PC board ass'y <UDD>
NASW-6833-1G, Operation switch PC board ass'y <UPP>
NASW-6833-1H, Operation switch PC board ass'y <UPT,UDT,UGT>
NASW-6833-1I, Operation switch PC board ass'y <UJJ>
NAETC-6834-1F, Headphone jack PC board ass'y <UDD>
NAETC-6834-1G, Headphone jack PC board ass'y <UPP>
NAETC-6834-1H, Headphone jack PC board ass'y <UPT,UDT,UGT>
NAETC-6834-1I, Headphone jack PC board ass'y <UJJ>
NAETC-6835-1F, Door motor drive PC board ass'y <UDD>
NAETC-6835-1G, Door motor drive PC board ass'y <UPP>
NAETC-6835-1H, Door motor drive PC board ass'y <UPT,UDT,UGT>
NAETC-6835-1I, Door motor drive PC board ass'y <UJJ>
NAETC-6836-1F, Door motor PC board ass'y <UDD>
NAETC-6836-1G, Door motor PC board ass'y <UPP>
NAETC-6836-1H, Door motor PC board ass'y <UPT,UDT,UGT>
NAETC-6836-1I, Door motor PC board ass'y <UJJ>
NAAR-6837-1F, Main microprocessor PC board ass'y <UDD>
NAAR-6837-1G, Main microprocessor PC board ass'y <UPP>
NAAR-6837-1H, Main microprocessor PC board ass'y <UPT,UDT,UGT,UJJ>
NAPS-6838-1F, Rectifier circuit PC board ass'y <UDD>
NAPS-6838-1G, Rectifier circuit PC board ass'y <UPP>
NAPS-6838-1H, Rectifier circuit PC board ass'y <UPT,UDT,UGT,UJJ>
NAPS-6839-1F, Constant voltage circuit PC board ass'y <UDD>
NAPS-6839-1G, Constant voltage circuit PC board ass'y <UPP>
NAPS-6839-1H, Constant voltage circuit PC board ass'y <UPT,UDT,UGT,UJJ>
NAVD-6848-1F, Video circuit PC board ass'y <UDD,UJJ>
NAVD-6848-1G, Video circuit PC board ass'y <UDT,UPP,UPT,UGT>
NAVD-6849-1F, S Video terminal PC board ass'y <UDD,UJJ>
NAVD-6849-1G, S Video terminal PC board ass'y <UDT,UPP,UPT,UGT>
NAVD-6850-1F, Component video terminal PC board ass'y <UDD,UJJ>
NAVD-6850-1G, Component video terminal PC board ass'y <UDT,UPP,UPT,UGT>
NADG-6860-2, D/A Converter circuit PC board ass'y
NAAF-6861-2F, XLR jack PC board ass'y (1) <UDD,UDT>
NAAF-6861-2G, XLR jack PC board ass'y (1) <UPP,UPT>
NAAF-6861-2H, XLR jack PC board ass'y (1) <UGT>
NAAF-6861-2I, XLR jack PC board ass'y (1) <UJJ>
NAAF-6862-2F, XLR jack PC board ass'y (2) <UDD,UDT>
NAAF-6862-2G, XLR jack PC board ass'y (2) <UPP,UPT>
NAAF-6862-2H, XLR jack PC board ass'y (2) <UGT>
NAAF-6862-2I, XLR jack PC board ass'y (2) <UJJ>
NAPS-6863-2F, Primary circuit PC board ass'y <UDD,UDT>
NAPS-6863-2G, Primary circuit PC board ass'y <UPP,UPT>
NAPS-6863-2H, Primary circuit PC board ass'y <UGT>
NAPS-6863-2I, Primary circuit PC board ass'y <UJJ>
NASW-6864-2F, Power switch PC board ass'y <UDD,UDT>
NASW-6864-2G, Power switch PC board ass'y <UPP,UPT>
NASW-6864-2H, Power switch PC board ass'y <UGT>
NASW-6864-2I, Power switch PC board ass'y <UJJ>
TFCE1U114A, Tuner unit <UDD>
TFCE1E512A, Tuner unit <UPP, UDT, UPT,UGT>
TFCE1J114A,Tuner unit <UJJ>

37 38
RDC-7
RDC-7
1
2
3
4
5
6
7
8
9
10
11
12
13
14
15
16
17
18
19
20
21
22
23
24
25
26
27
28
29
30
100
99
98
97
96
95
94
93
92
91
90
89
88
87
86
85
84
83
82
81
31
32
33
34
35
36
37
38
39
40
41
42
43
44
45
46
47
48
49
50
80
79
78
77
76
75
74
73
72
71
70
69
68
67
66
65
64
63
62
61
60
59
58
57
56
55
54
53
52
51
TUNERUNIT
+5V
+5V
X7001
16MHz OSC
Q7002
SYSTEM
RESET
POWER
FAILURE
DET
AC IN
+5V
+5V
U1
U22
U5
U16
U16
U4
U16 U7 U1,U17,18
Q4214
TC9482F
Q4216
TC9482F
16STB
15DATA
14CK
16STB
15DATA
14CK
16STB
15DATA
14CK
16STB
15DATA
14CK
Q4210
TC9482F
Q4212
TC9482F
FRONT L/R
SURROUNDL/R
SURROUNDBACKL/R
CENTER/SUBWOOFER
Q1502
BU1923F
13
15
16
13
15
16
Q4010
TC9163AF
Q4020
TC9163AF
Q3220
TC9274AF-008
Q3030
TC9163AF
Q3040
TC9164AF
INPUT SELECTOR
(VIDEO/DVD)
INPUT SELECTOR
(TAPE)
INPUT SELECTOR
(PHONO,CD)
23FUNC
21CL
22DATA
13STB
15CL
16DATA
13STB
15CL
16DATA
20CS
23CLK
22DI
20CS
23CLK
22DI
Q4320
NJU7306G
Q4326
NJU7306G
TONE CONTROL
(FRONT L/R)
TONE CONTROL
(CENTER/SUBWOOFER))
Q9501
Q9502
RL9001
FDATA
FCLK
CFSTB
TDATA
TCLK
~TCS1
~TCS2
VSS
VSS
VPDATA
VPCLK
~RESET
XOUT
VSS
XIN
VCC
VSTB
~RDSSCK
~POFF
PLLCE
RDSDATA
RDSSIG
~STEREO
~SD
DIGSO
DIGSI
DIGSCK
~INTRQ1
~INTRQ2
2NDPLLCS
2NDPLLLOCK
~AD/DIR
~SUBREQ
MAINSO
SUBSO
MAINSCK
~MAINREQ
XSTATE
ERROR
CSFLAG
~RFDIRRST
RFSYNC
~DARST
~ADRST
DFS
APGLOCK
F0
IPSTB
VCC
VREF
SUBRESET
VSS
RES1
RES2
SUBPOFF
RES4
9k/10k
ADR2915
MPOWER
DIGCS
AUTO
AUDIO
~CSSRAM
~CSFLASH
IEEEMOD1CLK
DSPMOD
IEEEMOD2
IEEEMOD1
~DSPRST1
~DSPRST2
~DACCS
~DIRCS
2NDPLLCLK
~DSPCS1
~DSPCS2
ADR3016
ADR3015
ADR3017
ADR2918
ADR2917
ADR2916
VSS
PRTCTV
VCC
~PRTCTTHM
~TRG12B
~TRG12A
POWERL
SPRL
AMUT
HPMUT
MRMUT
TUMUT
F2
F1
Q721
CS493002
DSP
Q761
CS493002
DSP
Q701
LC89055W
Q7001
M30624FGFP
MAIN MICROPROCESSOR
T9001
POWER
TRANSFORMER
12V
TRIGGER
A
B
Q3410-Q3413
ZONE MUTE
SWITCH
Q4803-Q4806
HEADPHONE
MUTE SW
AUDIO
MUTING
SWITCH
(POST PROCESSING)
38
36
35
37
80
12
24
23
Q7201 M30624F
#34 SUBREQ
#35 MAINSO
#36 MAINSI
#37 MAINSCK
#38 MAINREQ
79
78
#97 SUBRESET
#95 RES1
#94 RES2
#93 SUBOFF
#92 RES4
FRONT L
FRONT R
Q8001
PCM1704
Q8032
PCM1704
Q8031
PCM1704
Q8002
PCM1704
Q8101
AD1853JRS
Q8101
AD1853JRS
Q8101
AD1853JRS
Q8701
CC1536
22 LOCKOK
Q8776
TC9246F
REF 1
CKO 10 15 LOCK
Q8702
74HCT7007
Q8705
SM5847AF
1 DATA
2 BCLK
7 WCLK
1 DATA
2 BCLK
7 WCLK
1 DATA
2 BCLK
7 WCLK
1 DATA
2 BCLK
7 WCLK
2 MCLK
24 RST
25 L/R CLK
26 BCLK
27 SDATA
2 MCLK
24 RST
25 L/R CLK
26 BCLK
27 SDATA
2 MCLK
24 RST
25 L/R CLK
26 BCLK
27 SDATA
I/09 9
Q8704
XCS05XL
LA O 61
LA O 65
LRCLKO 62
LBO 56
RAO 57
RBO 55
LRCLKOUT 8
SCLOCKO 7
DBOUT 40
DC OUT 42
DD OUT 44
78 F0
71 F1
68 F2
#50 F0
#51 F1
#52 F2
Q8776
TC9246F
2ND PLL MI 11
LOCK 15
Q7702
QUAD 4-CH
MULTIPLEXER
A 14
XSTATE 17
ERROR 34
CSFLAG 25
QUAL1
RDATA 2
CLK16
Q131
PM4007A RESET 3
MUTO 66
Q103
AK5394VS RESET 10
CMODE 18
SCD IN 6
SCCLK 7
SCDIO/SCDOUT 19
ABOOT/INTREQ 20
CS 18
SCD IN 6
SCCLK 7
SCDIO/SCDOUT 19
ABOOT/INTREQ 20
CS 18
Q821
TC74VHC245
OCTAL BUS
TRANSCEIVER
Q822
TC74VHC245
#28DIGSCK
#26 DIGSO
Q823
TC74HCT7007
HEXBUFFER
#48DFS
#47ADRST
#43RFDIRRST
#44RFSYNC
#27DIG SI
DO 35
DI 36
#26DIGSO
APGLOCK
APOGEE MASTER
CLOCK MODULE
SURROUND L
SURROUND R
SURROUND
BACK L
SURROUND
BACK R
CENTER
SUBWOOFER
#312ND PLL CS
#322ND PLL LOCK
Q17474HC595F
8-BITSHIFT
REGISTER/LATCH
Q172 74HC151F
Q173 74HC151F
#82CSFLASH
#83CSRAM
#29 INTREQ1
#30 INTREQ2
Q727
MPD442000
STATICRAM
Q728
FLASH
MEMORY
Q767
MD442000
STATICRAM
Q768
FLASH
MEMORY
Q7701
#88 ADR2918
#81IEEE MODCLK
+5V
Q7721
TC74ACT153F
Q7723
TC74ACT153F
Q7722
TC74ACT153F
#732ND PLL CLK
S2 14
#71DSPCS2
#72 DSPCS1
#77 DSPRST2
#76 DSPRST1
RESET36
RESET36
#78IEEE MODE1
AUDIO 24
AUTO 32
#86 DIGCS
TC74HCT125FT
4-CHANNEL
MULTIPLEXER
4-CHANNEL
MULTIPLEXER
#85AUTO
#84AUDIO
OCTAL BUS
TRANSCEIVER
ELECTRONICVOLUME
ELECTRONICVOLUME
ELECTRONICVOLUME
ELECTRONICVOLUME
RDS DECODER
AUDIO SELECTOR
AUDIO SELECTOR
POWER
SWITCH
RELAY
SUB MICROPROCESSOR
INITIALIZING
D/A CONVERTER
D/A CONVERTER
D/A CONVERTER
D/A CONVERTER
D/A CONVERTER
D/A CONVERTER
D/A CONVERTER
DIGITAL FILTER
DIR
(Digital interface
receiver)
AC3 RF
DEMODULATOR
A/D CONVERTER
2ND PLL
MAIN MICROPROCESSOR CONNECTION DIAGRAM
Table of contents
Other Integra Controllers manuals

Integra
Integra Xmart FUTURA-1000 User manual

Integra
Integra WEIGH-TRAX User manual

Integra
Integra DHC-40.2 User manual

Integra
Integra PIPETBOY acu 2 User manual

Integra
Integra DHC-80.1 User manual

Integra
Integra DTC-9.8 User manual

Integra
Integra DTC-9.4 User manual

Integra
Integra PIPETBOY acu 2 User manual

Integra
Integra CALEC ST III Standard User manual

Integra
Integra DHC-80.2 User manual
Popular Controllers manuals by other brands

CentriPro
CentriPro Aquavar IPC quick start guide

Heatcraft Refrigeration Products
Heatcraft Refrigeration Products 25001501 Installation & operating instructions

Belimo
Belimo AFRB24-MFT N4H manual

GSE
GSE FC10-205EU manual

Honeywell
Honeywell M847D installation instructions

TTK
TTK FG-BBOX Installation Notice