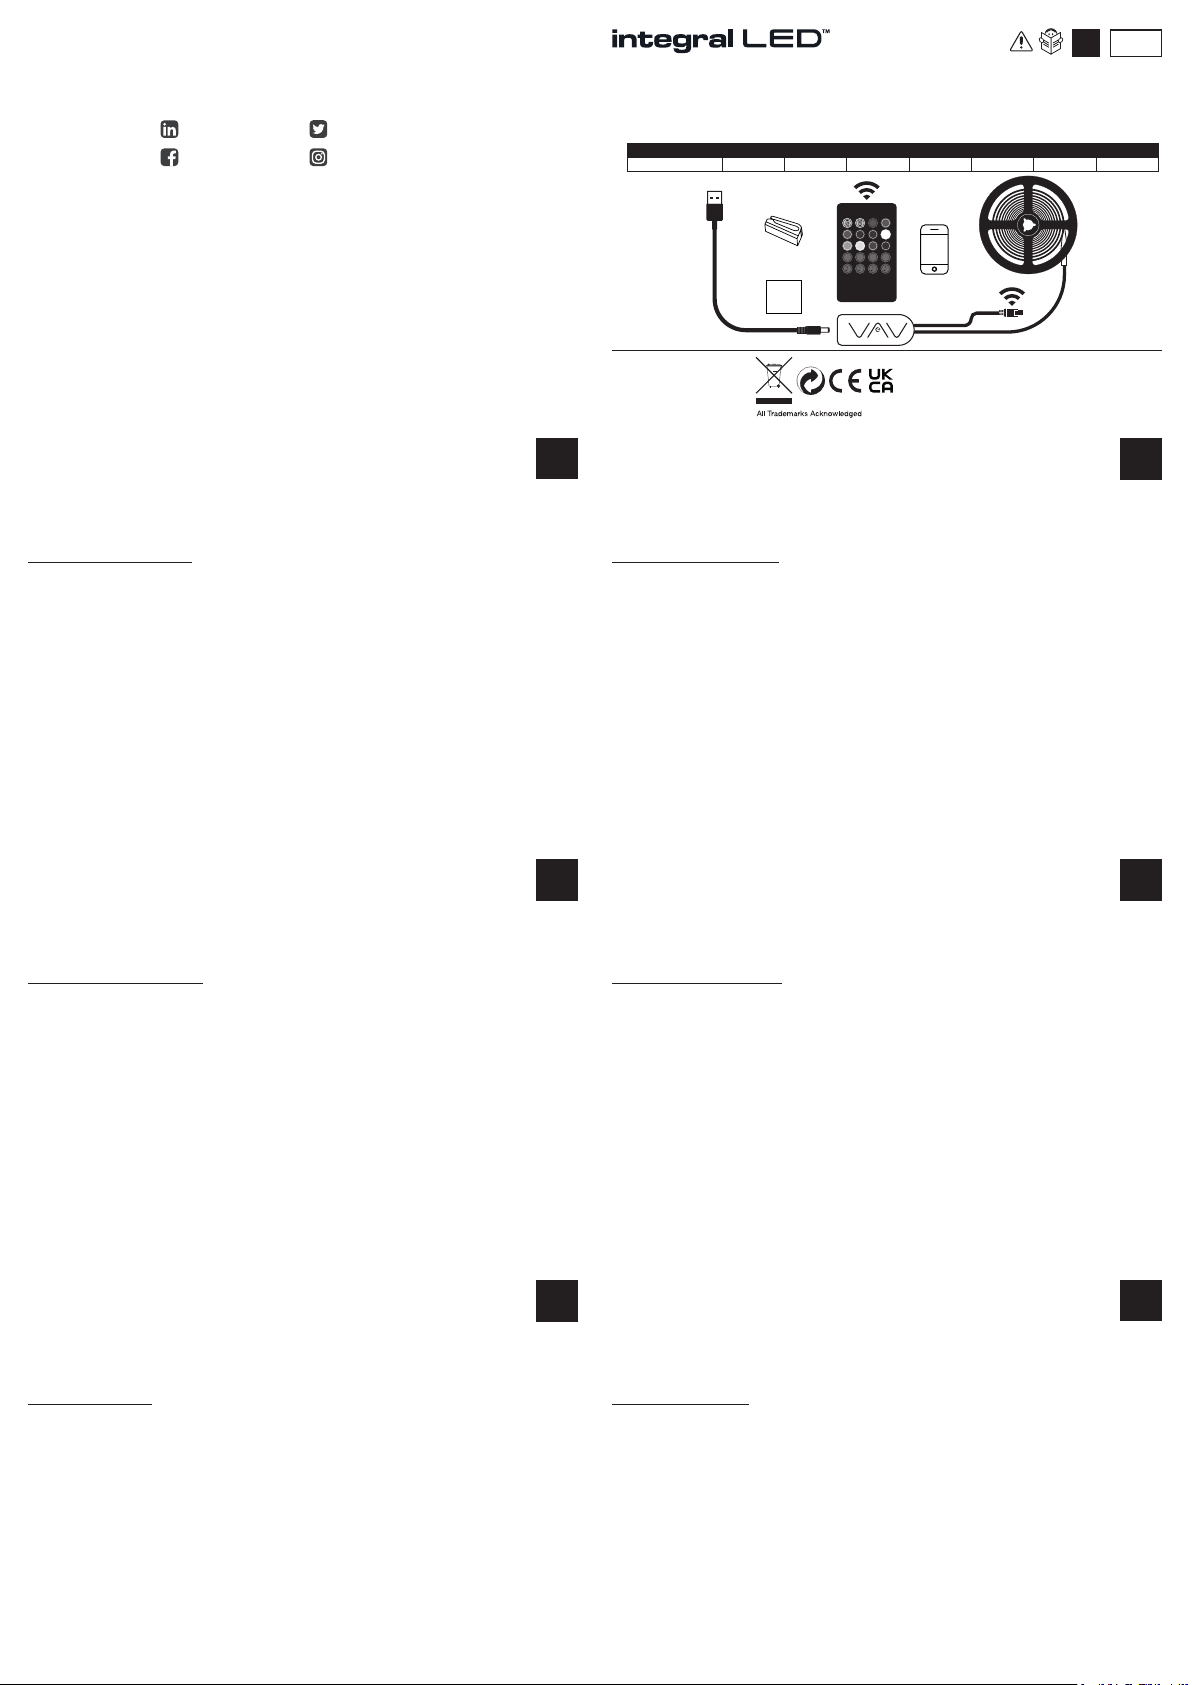
EN IP20
Product code Voltage IP Rating Length Width Colour Plug LEDs/m
ILSTRGBA166B 5V IP20 2m 10mm RGB USB 24LEDs/m
Warranty/Technical
& contact information
are all available at
www.integral-led.com
Integral LED is a division of Integral Memory plc:
Unit 6, Iron Bridge Close, Iron Bridge Business Park,
London, NW10 0UF, UK
Integral Europe BV, 2801 DG, NL
INSTALLATION INSTRUCTION
Plug & Play RGB TV INTEGRAL LED Strip with
Bluetooth app control & Music Sync (2m) - 2 Year Warranty
USB
ON OFF
BLUE WHITERED GREEN
CYAN
PURPLEORANGE YELLOW
FADE3 FADE7JUMP 3 JUMP 7
1 2 3 4
Bluetooth
App
+
x10
Alcohol
Pad
M
C
Faites une installation temporaire au préalable an de vérier le fonctionnement et l’eet
rendu. NE JAMAIS FAIRE FONCTIONNER LE BANDEAU QUAND IL EST ENROULE SUR LA
BOBINE. Vérier que l’alimentation n’est PAS BRANCHEE avant de procéder à l’installation.
Instructions d’installation :
1. Assurez-vous qu’il n’y a plus de poussières sur la surface sur laquelle le produit va être
installé et nettoyez-la avec le chion nettoyant à l’alcool fourni à cet eet.
2. Appliquez le bandeau sur la surface.
3. Appuyez avec précautions sur le bandeau pendant approximativement 10 secondes (en
évitant d’appuyer sur les puces de LED pour ne pas les endommager).
4. Si nécessaire, utilisez les clips de xations fournis (1 clip pour chaque mètre).
5. Connectez le module de réception du bandeau à la prise d’alimentation fournie.
Enlevez la pellicule à la base de la télécommande pour activer l’alimentation de la pile.
ATTENTION : UNE PILE BOUTON EST INCLUSE – TENIR ELOIGNEE DES ENFANTS!
Ce produit est destiné à une utilisation en intérieur uniquement – conservez au sec.
Ne coupez le bandeau que sur les points de coupe prévus.
• Activez le Bluetooth sur votre téléphone avant d’utiliser l’application. Les utilisateurs
d’Android™ doivent également activer la localisation. Téléchargez l’application grâce au QR
Code ou recherchez l’application Ehome Light sur Google Play ou sur l’App Store.
Nehmen Sie zunächst eine provisorische Installation vor, um die Funktion zu überprüfen.
SCHALTEN SIE DEN STREIFEN IN DER VERPACKUNGSROLLE NICHT EIN. Stellen Sie sicher,
dass der Strom NICHT angeschlossen ist, bevor Sie fortfahren.
Installationsanweisungen:
1. Entfernen Sie Staub und wischen Sie die Oberächenlinie mit dem mitgelieferten
Alkoholtupfer ab.
2. Legen Sie den Streifen auf die Oberäche.
3. Drücken Sie den Streifen vorsichtig etwa 10 Sekunden lang nach unten (vermeiden Sie es,
auf die LEDs zu drücken).
4. Benutzen Sie die mitgelieferten Klammern, falls gewünscht (1m Abstand).
5. Schließen Sie das Empfängermodul des Streifens an den mitgelieferten Stecker an.
Entfernen Sie die Lasche an der Rückseite der Fernbedienung, um die Batterie mit Strom zu
versorgen.
WARNUNG: KNOPFBATTERIE ENTHALTEN - VON KINDERN FERNHALTEN!
Nur für Innenräume geeignet - trocken halten. Schneiden Sie den Streifen nur an den
Schnittpunkten.
• Vor der Verwendung der App muss Bluetooth auf Ihrem Telefon aktiviert werden.
Android-Benutzer sollten auch die Standortbestimmung aktivieren. Laden Sie die App über
den QR-Code herunter oder suchen Sie bei Google Play/App Store nach Ehome Light.
Maak eerst een tijdelijke installatie om het eect te controleren. ZET GEEN STROOM OP DE
STRIP IN DE VERPAKKINGSSPOEL. Zorg ervoor dat de stroom NIET is aangesloten voordat
u verder gaat.
Installatie-instructies:
1. Verwijder stof en veeg de oppervlakte af met het meegeleverde alcoholdoekje.
2. Breng de strip aan op het oppervlak.
3. Druk de strip ongeveer 10 seconden voorzichtig naar beneden (druk niet op de LED’s).
4. Gebruik desgewenst de meegeleverde clips (1m uit elkaar).
5. Sluit de aansluitmodule van de strip aan op de meegeleverde stekker.
Verwijder het lipje aan de onderkant van de afstandsbediening om de batterij van stroom
te voorzien.
WAARSCHUWING: BATTERIJ INBEGREPEN, UIT DE BUURT VAN KINDEREN HOUDEN!
Alleen voor gebruik binnenshuis - Droog bewaren. Knip de strook alleen af op snijpunten.
• Schakel Bluetooth in op uw telefoon voordat u de app gebruikt. Android-gebruikers
moeten ook de Locatie functie inschakelen. Download de app via de QR-code of zoek Ehome
Light in de Google Play/App Store.
Realice una instalación provisional de antemano para vericar el efecto. NO ALIMENTE
ELECTRICAMENTE LA BANDA LED CUANDO ESTÁ EMPAQUETADA Y ENROLLADA.
Asegúrese de NO conectar a la Fuente de alimentación antes de proceder con la instalación.
Instrucciones para instalar:
1. Retire el polvo y limpie la supercie lineal con las almohadillas de alcohol.
2. Coloque la banda sobre la supercie.
3. Cuidadosamente apriete la banda unos 10 segundos aproximadamente (evite presionar
sobre los LEDs) .
4. Use las pinzas si lo desea (a 1 metro de separación).
5. Conecte el módulo receptor de la banda LED al enchufe proporcionado.
Quite la lengüeta de la parte inferior del mando para conectar la batería.
ADVERTENCIA: MANTENGA LA PILA DE BOTON SUMINISTRADA FUERA DEL ALCANCE DE
LOS NIŇOS!
Uso interior – Mantener seco. Corte la banda LED únicamente en los puntos de corte.
• Active el Bluetooth en su teléfono antes de usar la aplicación. Usuarios de Android
deberán también activar Ubicación. Descargue la aplicación con el Código QR o busque
Ehome Light on Google Play/App Store.
Eettuare prima un’installazione temporanea per vericare l’eetto. NON ALIMENTARE LA
STRISCIA NELLA BOBINA PRESENTE ALL’INTERNO DELLA CONFEZIONE. Assicurarsi che
l’alimentazione NON sia collegata prima di procedere.
Istruzioni per l’installazione:
1. Rimuovere eventuale polvere e pulire la supercie con il panno a base di alcol in
dotazione.
2. Applicare la striscia sulla supercie.
3. Eettuare una leggera pressione sulla striscia per circa 10 secondi (evitare di eettuare
pressione sugli LED).
4. Usare le clip in dotazione se necessario (distanziate 1m l’una dall’altra).
5. Connettere il modulo ricevitore della striscia alla spina in dotazione.
Rimuovere il tag di sicurezza nella parte inferiore del telecomando per alimentare la batteria
ATTENZONE: BATTERIA A BOTTONE INCLUSA, TENERE LONTANO DALLA PORTATA DEI
BAMBINI!
Solo per uso interno - mantenere asciutto. Tagliare la striscia solo nei punti di taglio.
• Abilitare il Bluetooth nel proprio telefono cellulare prima di usare l’app. Gli utenti Android
devono anche abilitare la Posizione. Scaricare l’app tramite codice QR o cercando Ehome
Light in Google Play/App Store.
Najpierw wykonaj tymczasową instalację, aby sprawdzić efekt. NIE NALEŻY ZASILAĆ
PASKA W ROLCE OPAKOWANIA. Upewnij się, że zasilanie NIE jest podłączone przed
kontynuowaniem.
Instrukcja instalacji:
1. Usuń kurz i przetrzyj linię powierzchni dostarczonym wacikiem nasączonym alkoholem.
2. Nałóż pasek na powierzchnię.
3. Ostrożnie dociśnij pasek przez około 10 sekund (unikaj naciskania na diody LED).
4. W razie potrzeby użyj dostarczonych klipsów (1m od siebie).
5. Podłącz moduł odbiorczy listwy do dostarczonej wtyczki.
Usuń zakładkę na dole pilota, aby zasilać baterię;
OSTRZEŻENIE: DOŁĄCZONA BATERIA PRZYCISKÓW TRZYMAĆ Z DALA OD DZIECI!
Tylko do użytku w pomieszczeniach – Utrzymuj w suchości. Tnij pasek tylko w punktach
cięcia.
• Włącz Bluetooth w telefonie przed użyciem aplikacji. Użytkownicy Androida muszą
również włączyć lokalizację. Pobierz aplikację za pomocą kodu QR lub wyszukaj Ehome Light
w Google Play/App Store.
FR
NL
DE
IT
PL
ES
www.integral-led.com
integral-LED
integralLED
@integralLED
@integral_LED


