manuals.online logo
Brands
  1. Home
  2. •
  3. Brands
  4. •
  5. Intermatic
  6. •
  7. Timer
  8. •
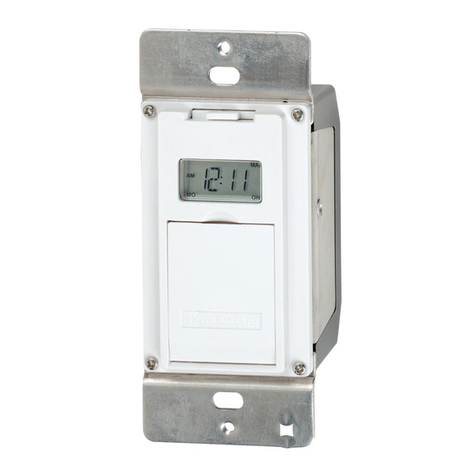
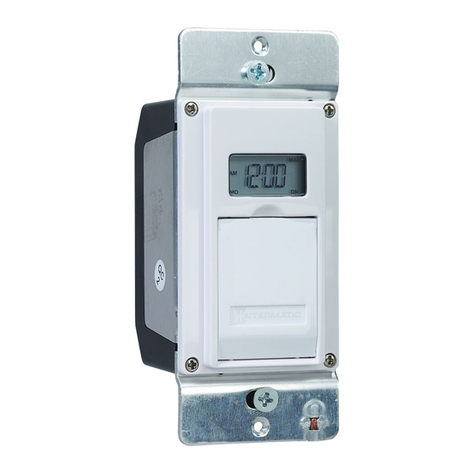
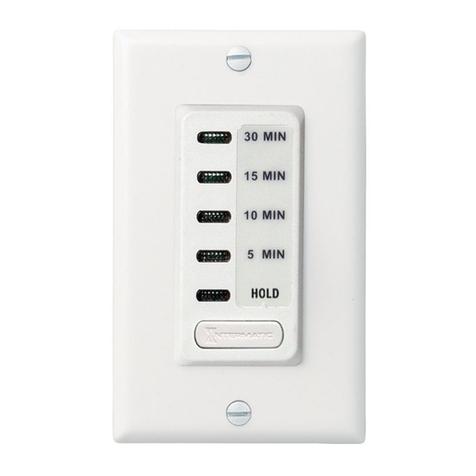
  9. Intermatic EI210W User manual

Intermatic EI210W User manual

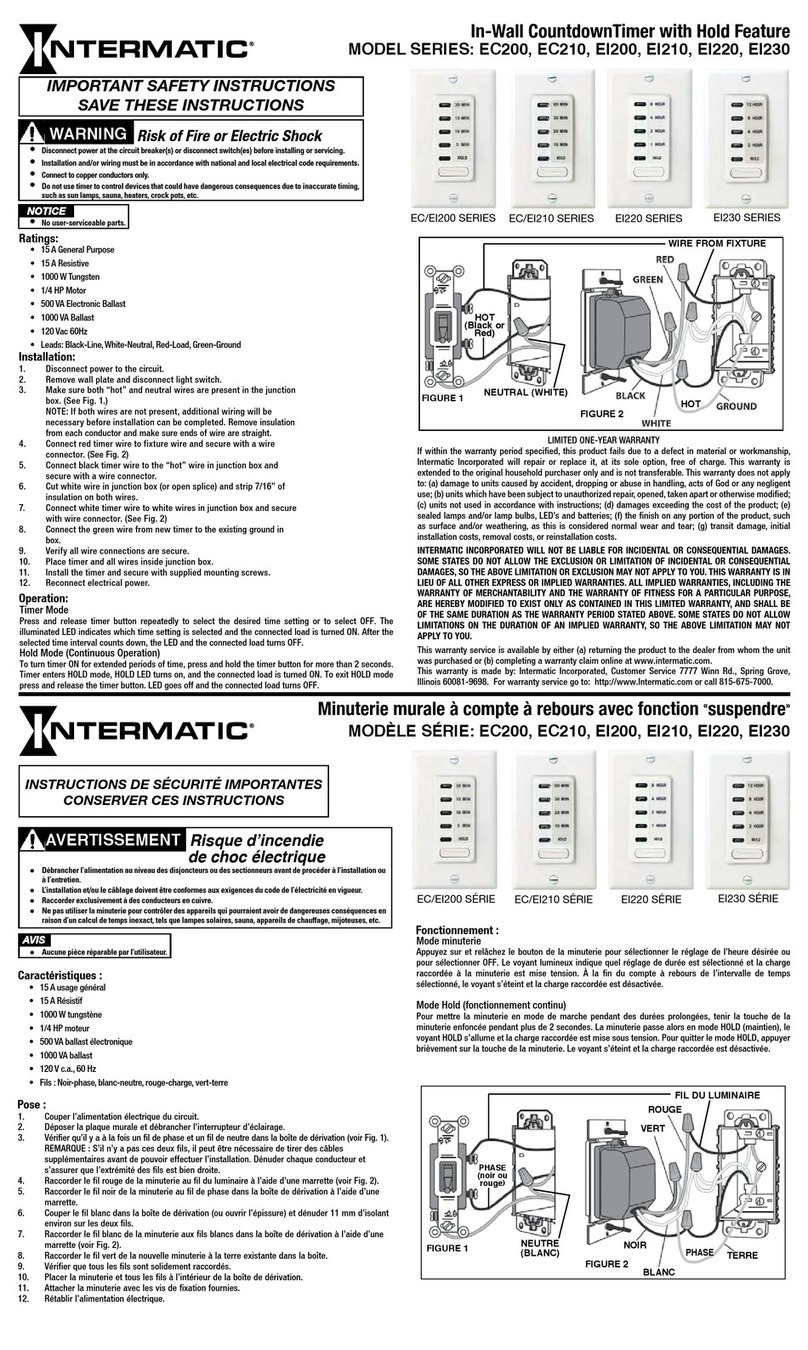
EI220 SERIES EI230 SERIES
NEUTRAL (WHITE)
HOT
(Black or
Red)
FIGURE 2
WIRE FROM FIXTURE
HOT
1. Disconnect power to the circuit.
2. Remove wall plate and disconnect light switch.
3. Make sure both “hot” and neutral wires are present in the junction
box. (See Fig. 1.)
NOTE: If both wires are not present, additional wiring will be
necessary before installation can be completed. Remove insulation
from each conductor and make sure ends of wire are straight.
4. Connect red timer wire to fixture wire and secure with a wire
connector. (See Fig. 2)
5. Connect black timer wire to the “hot” wire in junction box and
secure with a wire connector.
6. Cut white wire in junction box (or open splice) and strip 7/16” of
insulation on both wires.
7. Connect white timer wire to white wires in junction box and secure
with wire connector. (See Fig. 2)
8. Connect the green wire from new timer to the existing ground in
box.
9. Verify all wire connections are secure.
10. Place timer and all wires inside junction box.
11. Install the timer and secure with supplied mounting screws.
12. Reconnect electrical power.
•Disconnect power at the circuit breaker(s) or disconnect switch(es) before installing or servicing.
•Installation and/or wiring must be in accordance with national and local electrical code requirements.
•Connect to copper conductors only.
•Do not use timer to control devices that could have dangerous consequences due to inaccurate timing,
such as sun lamps, sauna, heaters, crock pots, etc.
•No user-serviceable parts.
Risk of Fire or Electric Shock
WARNING
NOTICE
IMPORTANT SAFETY INSTRUCTIONS
SAVE THESE INSTRUCTIONS
MODEL SERIES: EC200, EC210, EI200, EI210, EI220, EI230
• 15 A General Purpose
• 15 A Resistive
• 1000 W Tungsten
• 1/4 HP Motor
• 500 VA Electronic Ballast
• 1000 VA Ballast
• 120 Vac 60Hz
• Leads: Black-Line, White-Neutral, Red-Load, Green-Ground
Ratings:
Operation:
Installation:
LIMITED ONE-YEAR WARRANTY
If within the warranty period specified, this product fails due to a defect in material or workmanship,
Intermatic Incorporated will repair or replace it, at its sole option, free of charge. This warranty is
extended to the original household purchaser only and is not transferable. This warranty does not apply
to: (a) damage to units caused by accident, dropping or abuse in handling, acts of God or any negligent
use; (b) units which have been subject to unauthorized repair, opened, taken apart or otherwise modified;
(c) units not used in accordance with instructions; (d) damages exceeding the cost of the product; (e)
sealed lamps and/or lamp bulbs, LED’s and batteries; (f) the finish on any portion of the product, such
as surface and/or weathering, as this is considered normal wear and tear; (g) transit damage, initial
installation costs, removal costs, or reinstallation costs.
INTERMATIC INCORPORATED WILL NOT BE LIABLE FOR INCIDENTAL OR CONSEQUENTIAL DAMAGES.
SOME STATES DO NOT ALLOW THE EXCLUSION OR LIMITATION OF INCIDENTAL OR CONSEQUENTIAL
DAMAGES, SO THE ABOVE LIMITATION OR EXCLUSION MAY NOT APPLY TO YOU. THIS WARRANTY IS IN
LIEU OF ALL OTHER EXPRESS OR IMPLIED WARRANTIES. ALL IMPLIED WARRANTIES, INCLUDING THE
WARRANTY OF MERCHANTABILITY AND THE WARRANTY OF FITNESS FOR A PARTICULAR PURPOSE,
ARE HEREBY MODIFIED TO EXIST ONLY AS CONTAINED IN THIS LIMITED WARRANTY, AND SHALL BE
OF THE SAME DURATION AS THE WARRANTY PERIOD STATED ABOVE. SOME STATES DO NOT ALLOW
LIMITATIONS ON THE DURATION OF AN IMPLIED WARRANTY, SO THE ABOVE LIMITATION MAY NOT
APPLY TO YOU.
This warranty service is available by either (a) returning the product to the dealer from whom the unit
was purchased or (b) completing a warranty claim online.
This warranty is made by: Intermatic Incorporated, Customer Service.
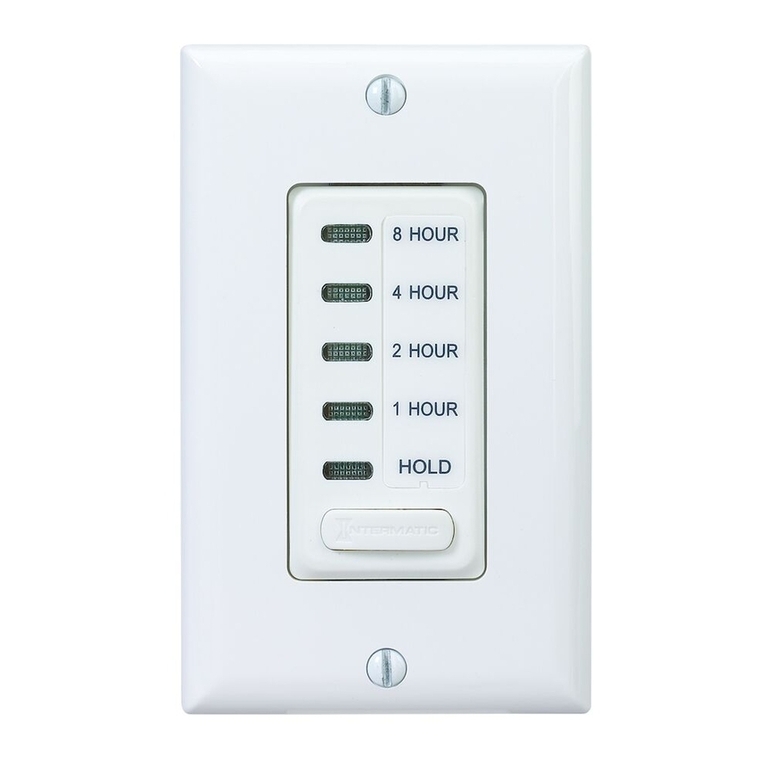
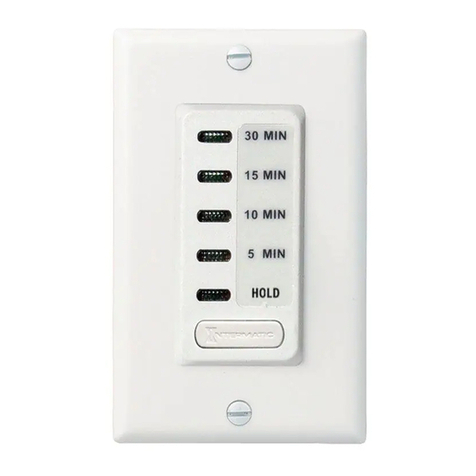
Timer Mode
Press and release timer button repeatedly to select the desired time setting or to select OFF. The
illuminated LED indicates which time setting is selected and the connected load is turned ON. After the
selected time interval counts down, the LED and the connected load turns OFF.
Hold Mode (Continuous Operation)
To turn timer ON for extended periods of time, press and hold the timer button for more than 2 seconds.
Timer enters HOLD mode, HOLD LED turns on, and the connected load is turned ON. To exit HOLD mode
press and release the timer button. LED goes off and the connected load turns OFF.
FIGURE 1
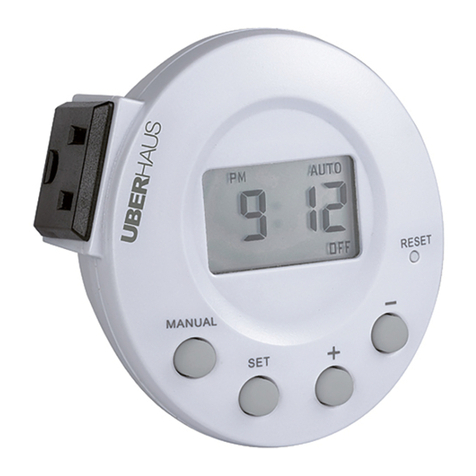
In-Wall CountdownTimer with Hold Feature
1. Couper l’alimentation électrique du circuit.
2. Déposer la plaque murale et débrancher l’interrupteur d’éclairage.
3. Vérifier qu’il y a à la fois un fil de phase et un fil de neutre dans la boîte de dérivation (voir Fig. 1).
REMARQUE: S’il n’y a pas ces deux fils, il peut être nécessaire de tirer des câbles
supplémentaires avant de pouvoir effectuer l’installation. Dénuder chaque conducteur et
s’assurer que l’extrémité des fils est bien droite.
4. Raccorder le fil rouge de la minuterie au fil du luminaire à l’aide d’une marrette (voir Fig. 2).
5. Raccorder le fil noir de la minuterie au fil de phase dans la boîte de dérivation à l’aide d’une
marrette.
6. Couper le fil blanc dans la boîte de dérivation (ou ouvrir l’épissure) et dénuder 11mm d’isolant
environ sur les deux fils.
7. Raccorder le fil blanc de la minuterie aux fils blancs dans la boîte de dérivation à l’aide d’une
marrette (voir Fig. 2).
8. Raccorder le fil vert de la nouvelle minuterie à la terre existante dans la boîte.
9. Vérifier que tous les fils sont solidement raccordés.
10. Placer la minuterie et tous les fils à l’intérieur de la boîte de dérivation.
11. Attacher la minuterie avec les vis de fixation fournies.
12. Rétablir l’alimentation électrique.
• Débrancher l’alimentation au niveau des disjoncteurs ou des sectionneurs avant de procéder à l’installation ou
à l’entretien.
• L’installation et/ou le câblage doivent être conformes aux exigences du code de l’électricité en vigueur.
• Raccorder exclusivement à des conducteurs en cuivre.
• Ne pas utiliser la minuterie pour contrôler des appareils qui pourraient avoir de dangereuses conséquences en
raison d’un calcul de temps inexact, tels que lampes solaires, sauna, appareils de chauffage, mijoteuses, etc.
• Aucune pièce réparable par l’utilisateur.
AVIS
INSTRUCTIONS DE SÉCURITÉ IMPORTANTES
CONSERVER CES INSTRUCTIONS
MODÈLE SÉRIE: EC200, EC210, EI200, EI210, EI220, EI230
• 15 A usage général
• 15 A Résistif
• 1000 W tungstène
• 1/4HP moteur
• 500 VA ballast électronique
• 1000 VA ballast
• 120 V c.a., 60Hz
• Fils: Noir-phase, blanc-neutre, rouge-charge, vert-terre
Caractéristiques :
Fonctionnement :
Pose :
Mode minuterie
Appuyez sur et relâchez le bouton de la minuterie pour sélectionner le réglage de l’heure désirée ou
pour sélectionner OFF. Le voyant lumineux indique quel réglage de durée est sélectionné et la charge
raccordée à la minuterie est mise tension. À la fin du compte à rebours de l’intervalle de temps
sélectionné, le voyant s’éteint et la charge raccordée est désactivée.
Mode Hold (fonctionnement continu)
Pour mettre la minuterie en mode de marche pendant des durées prolongées, tenir la touche de la
minuterie enfoncée pendant plus de 2 secondes. La minuterie passe alors en mode HOLD (maintien), le
voyant HOLD s’allume et la charge raccordée est mise sous tension. Pour quitter le mode HOLD, appuyer
brièvement sur la touche de la minuterie. Le voyant s’éteint et la charge raccordée est désactivée.
Minuterie murale à compte à rebours avec fonction «suspendre»
NEUTRE
(BLANC)
PHASE
(noir ou
rouge)
FIGURE 2
FIL DU LUMINAIRE
ROUGE
VERT
NOIR
BLANC
TERRE
FIGURE 1
PHASE
AVERTISSEMENT
Risque d’incendie
EC/EI210 SERIES
de choc électrique
EC/EI200 SERIES
EI220 SÉRIE EI230 SÉRIE
EC/EI210 SÉRIE
EC/EI200 SÉRIE
158--01328
NEUTRO
(BLANCO)
CON
ELECTRICIDAD
(Negro o rojo)
FIGURA 2
CABLE DESDE LA
LUMINARIA
ROJO
VERDE
NEGRO
BLANCO
TIERRA
1. Desconecte la energía hacia el circuito.
2. Retire la placa de la pared y desconecte el interruptor de luz.
3. Asegúrese de que los cabes “con electricidad” y neutros se encuentren en
la caja de empalmes. (Consulte la Fig. 1).
NOTA: Si no se encuentra ninguno de ellos, será necesario colocar cableado
adicional antes de completar la instalación. Retire el aislamiento de cada
conductor y asegúrese de que los extremos del cable estén rectos.
4. Conecte el cable rojo del temporizador al cable de la luminaria y fíjelo
con un conector de cables. (Consulte la Fig. 2).
5. Conecte el cable negro del temporizador al cable con electricidad en la
caja de empalmes y fíjelo con un conector de cables.
6. Corte el cable blanco en la caja de empalmes (o abra el empalme) y quite
1,1 cm de aislamiento en ambos cables.
7. Conecte el cable blanco del temporizador a los cables blancos de la caja
de empalmes y fíjelos con el conector de cables. (Consulte la Fig. 2).
8. Conecte el cable verde del temporizador nuevo a la conexión a tierra
existente en la caja.
9. Verifique que todos las conexiones de cables estén firmes.
10. Coloque el temporizador y todos los cables al interior de la caja de
empalmes.
11. Instale el temporizador y fíjelo con los tornillos de montaje que se
proporcionan.
12. Vuelva a conectar la energía eléctrica.
• No contiene piezas a las que le pueda realizar mantenimiento.
AVISO
INSTRUCCIONES IMPORTANTES DE SEGURIDAD
GUARDE ESTAS INSTRUCCIONES
MODELO SERIE: EC200, EC210, EI200, EI210, EI220, EI230
• 15 A propósito general
• 15 A resistivo
• 1000 W tungsteno
• Motor de 1/4 HP
• 500 VA balasto electrónico
• 1000 VA balasto
• 120 V CA, 60 Hz
• Conductores: Negro: Línea; Blanco: Neutro; Rojo: Carga; Verde:Tierra
Clasificaciones:
Funcionamiento:
Instalación:
Modo de temporizador
Presione y suelte el botón del temporizador varias veces para seleccionar el ajuste de tiempo deseado o para seleccionar
OFF. La luz LED encendida indica qué ajuste de tiempo está seleccionado y se ENCIENDE la carga conectada. Después de
que se acaba el intervalo de tiempo seleccionado, la luz LED y la carga conectada se APAGAN.
Modo de mantenimiento (funcionamiento continuo)
Para ENCENDER el temporizador por períodos de tiempo prolongados, mantenga presionado el botón del temporizador
por más de 2 segundos. El temporizador entra en el modo HOLD (Mantenimiento), se enciende la luz LED HOLD y se
ENCIENDE la carga conectada. Para salir del modo HOLD, presione y suelte el botón del temporizador. La luz LED y la
carga conectada se APAGAN.
FIGURA 1
Temporizador de pared de cuenta regresiva con función de “retención”
ADVERTENCIA Riesgo de incendio
CON
ELECTRICIDAD
GARANTÍA LIMITADA DE UN AÑO
Si dentro del período de garantía especificado este producto falla debido a un defecto de material o de mano
de obra, Intermatic Incorporated lo reparará o reemplazará, a su entera discreción, sin cargo alguno. Esta
garantía sólo se otorga al comprador original y no es transferible. Esta garantía no se aplica en los siguientes
casos: (a) daños en las unidades causados por accidentes, caídas o manejo indebido, causas de fuerza
mayor o uso negligente; (b) unidades que hayan sido sometidas a una reparación no autorizada, abiertas,
desmontadas o modificadas de alguna manera; c) unidades no utilizadas de acuerdo con las instrucciones;
(d) daños que excedan el costo del producto; (e) lámparas y/o bombillas de lámparas selladas, diodos
emisores de luz (LED) y baterías; (f) el acabado de cualquier parte del producto, como su superficie y/o
por exposición a la intemperie, ya que esto se considera un desgaste y uso normal; g) daños durante el
transporte, costos de instalación inicial, costos de remoción o costos de reinstalación.
INTERMATIC INCORPORATED NO ASUME RESPONSABILIDAD ALGUNA POR DAÑOS INCIDENTALES O
CONSECUENCIALES. ALGUNOS ESTADOS NO PERMITEN EXCLUIR O LIMITAR LOS DAÑOS INCIDENTALES
O CONSECUENCIALES, POR LO QUE LA LIMITACIÓN O EXCLUSIÓN ANTERIOR PUDIERA NO SER VÁLIDA EN
SU CASO. ESTA GARANTÍA SUSTITUYE A CUALQUIER OTRA GARANTÍA EXPRESA O IMPLÍCITA. TODAS LAS
GARANTÍAS IMPLÍCITAS, INCLUIDA LA GARANTÍA DE IDONEIDAD COMERCIAL O DE IDONEIDAD PARA UN
DETERMINADO FIN, SE MODIFICAN PARA QUEDAR INCLUIDAS ÚNICAMENTE EN LA PRESENTE GARANTÍA
LIMITADA, Y TENDRÁN LA MISMA DURACIÓN QUE EL PERIODO DE GARANTÍA MENCIONADO ANTES.
ALGUNOS ESTADOS NO PERMITEN LIMITAR LA DURACIÓN DE UNA GARANTÍA IMPLÍCITA, POR LO QUE LA
LIMITACIÓN ANTERIOR PUDIERA NO SER APLICABLE EN SU CASO.
Este servicio de garantía está disponible (a) devolviendo el producto al distribuidor donde se compró la
unidad o (b) completando un reclamo de garantía en Internet. Esta garantía es concedida por:
Intermatic Incorporated Customer Service.
GARANTIE LIMITÉE UN AN
Si, dans la période de garantie spécifiée, ce produit tombait en panne dû à un vice de matériau ou de fabrication, Intermatic Incorporated le réparera ou le changera, à sa seule discrétion, et ce gratuitement.
La présente garantie s’étend à l’acheteur final initial uniquement et n’est pas transférable. Cette garantie ne s’applique pas : (a) aux dommages au dispositif causés par un accident, une chute ou une mauvaise
manipulation, une catastrophe naturelle ou une utilisation négligente; (b) aux dispositifs soumis à des réparations non autorisées, qui ont été ouverts, démontés ou modifiés de quelconque manière; (c) aux
dispositifs qui n’ont pas été utilisés conformément aux instructions; (d) aux dommages dépassant le coût du produit; (e) aux lampes scellées et/ou aux ampoules, aux LED et aux piles; (f) à la finition de l’une des
parties du dispositif, telle que la surface ou les caractéristiques de résistance aux intempéries, ce qui est considéré comme de l’usure normale; (g) aux dommages causés par le transport, aux coûts d’installation
initiale, aux coûts de démontage ou de remontage.
INTERMATIC INCORPORATED NE POURRA ÊTRE TENUE RESPONSABLE DE DOMMAGES INDIRECTS OU CONSÉCUTIFS. CERTAINES JURIDICTIONS N’AUTORISENT PAS L’EXCLUSION OU LA LIMITATION DES
DOMMAGES INDIRECTS OU CONSÉCUTIFS. DANS CE CAS, LES LIMITES CI-DESSUS NE S’APPLIQUENT PAS. LA PRÉSENTE GARANTIE REMPLACE TOUTES LES AUTRES GARANTIES EXPRESSES OU IMPLICITES.
TOUTES LES GARANTIES IMPLICITES, NOTAMMENT GARANTIE DE QUALITÉ MARCHANDE ET GARANTIE D’ADAPTATION À UNE FIN PARTICULIÈRE, SONT MODIFIÉES AUX PRÉSENTES POUR EXISTER UNIQUEMENT
TELLES QUE COMPRISES DANS LA GARANTIE LIMITÉE, ET AURONT LA MÊME DURÉE QUE LA PÉRIODE DE GARANTIE INDIQUÉE CI-DESSUS. CERTAINES JURIDICTIONS N’AUTORISENT PAS LES LIMITES DE DURÉE
D’UNE GARANTIE IMPLICITE. DANS CE CAS, LES LIMITES CI-DESSUS NE S’APPLIQUENT PAS.
Le recours à la présente garantie se fait soit (a) par renvoi du produit au vendeur auprès duquel il a été acheté, soit (b) en remplissant le formulaire de réclamation sur le site. La présente garantie est offerte par :
Intermatic Incorporated, Customer Service.
• Desconecte la energía desde los disyuntores o desde los interruptores antes de realizar la instalación o el
mantenimiento.
• La instalación y el cableado se deben realizar de acuerdo con los requisitos del Código Eléctrico Nacional y Local.
• Conecte solo conductores de cobre.
• No use el temporizador para controlar dispositivos que pueden tener consecuencias peligrosas debido a la
inexactitud de la temporización, tales como lámparas de rayos ultravioleta, sauna, calefactores, ollas eléctricas, etc.
o descarga eléctrica
EI220 SERIE EI230 SERIE
EC/EI210 SERIE
EC/EI200 SERIE

This manual suits for next models

6

Other Intermatic Timer manuals

Intermatic HB88RC User manual

Intermatic

Intermatic HB88RC User manual

Intermatic C8815 User manual

Intermatic

Intermatic C8815 User manual

Intermatic V45471CR User manual

Intermatic

Intermatic V45471CR User manual

Intermatic SS7 Series User manual

Intermatic

Intermatic SS7 Series User manual

Intermatic CT2000 Series User manual

Intermatic

Intermatic CT2000 Series User manual

Intermatic HB1113R User manual

Intermatic

Intermatic HB1113R User manual

Intermatic HB52RC Manual

Intermatic

Intermatic HB52RC Manual

Intermatic EI400WC Guide

Intermatic

Intermatic EI400WC Guide

Intermatic EI220W-1 User manual

Intermatic

Intermatic EI220W-1 User manual

Intermatic ET616 User manual

Intermatic

Intermatic ET616 User manual

Intermatic FM2D50 Series User manual

Intermatic

Intermatic FM2D50 Series User manual

Intermatic ET2845C Manual

Intermatic

Intermatic ET2845C Manual

Intermatic ET2715C Manual

Intermatic

Intermatic ET2715C Manual

Intermatic P1131 User manual

Intermatic

Intermatic P1131 User manual

Intermatic TN311C User manual

Intermatic

Intermatic TN311C User manual

Intermatic EI40AC User manual

Intermatic

Intermatic EI40AC User manual

Intermatic DT500CH Series Guide

Intermatic

Intermatic DT500CH Series Guide

Intermatic PB300E Series Manual

Intermatic

Intermatic PB300E Series Manual

Intermatic T101 User manual

Intermatic

Intermatic T101 User manual

Intermatic C8845 Manual

Intermatic

Intermatic C8845 Manual

Intermatic V45472CR User manual

Intermatic

Intermatic V45472CR User manual

Intermatic SS7C Series User manual

Intermatic

Intermatic SS7C Series User manual

Intermatic EH10 User manual

Intermatic

Intermatic EH10 User manual

Intermatic FM1D20/50 Series Technical manual

Intermatic

Intermatic FM1D20/50 Series Technical manual

Popular Timer manuals by other brands

Uniteck UNITIMER 16.12 manual

Uniteck

Uniteck UNITIMER 16.12 manual

ESE ES-562U Operation and maintenance manual

ESE

ESE ES-562U Operation and maintenance manual

Ortech HET06-R instruction manual

Ortech

Ortech HET06-R instruction manual

claber Aqua-Home 4-6-8 user manual

claber

claber Aqua-Home 4-6-8 user manual

AVT 1995 quick start guide

AVT

AVT 1995 quick start guide

Grasslin DTMV40 Series operating instructions

Grasslin

Grasslin DTMV40 Series operating instructions

LEGRAND MicroRex D21 Plus manual

LEGRAND

LEGRAND MicroRex D21 Plus manual

Raindrip R672CT quick start

Raindrip

Raindrip R672CT quick start

Goobay 59038 user manual

Goobay

Goobay 59038 user manual

Eaton TSQW1CO quick start guide

Eaton

Eaton TSQW1CO quick start guide

Clas Ohlson TM-44 quick start guide

Clas Ohlson

Clas Ohlson TM-44 quick start guide

Draper DT2 instructions

Draper

Draper DT2 instructions

Rain Bird SST-900i Setup & operation instructions

Rain Bird

Rain Bird SST-900i Setup & operation instructions

Trumeter 7957 manual

Trumeter

Trumeter 7957 manual

TFA CONTRA instruction manual

TFA

TFA CONTRA instruction manual

Melnor 93015 User instructions

Melnor

Melnor 93015 User instructions

NuTone VS-66WH user manual

NuTone

NuTone VS-66WH user manual

american flame ESTOP1-0H manual

american flame

american flame ESTOP1-0H manual

manuals.online logo
manuals.online logoBrands
  • About & Mission
  • Contact us
  • Privacy Policy
  • Terms and Conditions

Copyright 2025 Manuals.Online. All Rights Reserved.