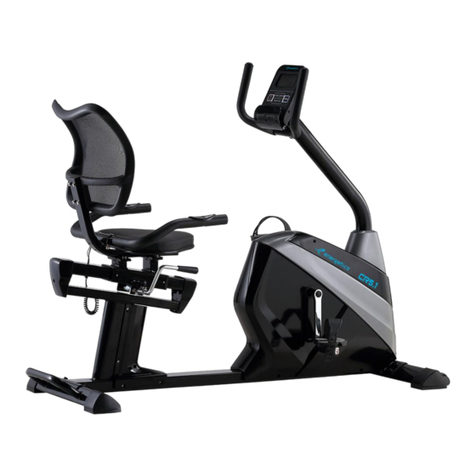
INTERSPORT B3.1 User manual

1
ENGLISH MANUAL
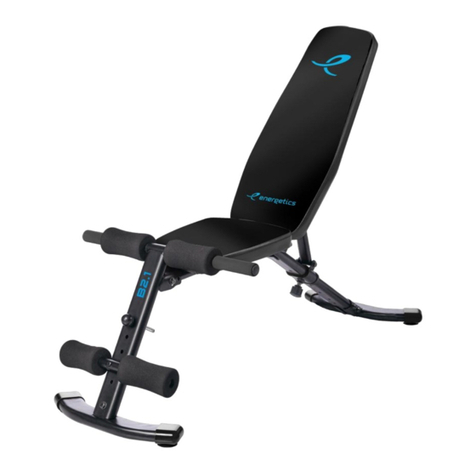
FOLDABLE WEIGHT BENCH
B3.1

2
IMPORTANT SAFETY INFORMATION
Please keep this manual in a safe place for reference.
1. It is important to read this entire manual before assembling and using the equipment. Safe and efficient use can only
be achieved if the equipment is assembled, maintained and used properly. It is your responsibility to ensure that all users
of the equipment are informed of all warnings and precautions.
2. Before starting any exercise program you should consult your doctor to determine if you have any physical or health
conditions that could create a risk to your health and safety, or prevent you from using the equipment properly. Your
doctor's advice is essential if you are taking medication that affects your heart rate, blood pressure or cholesterol level.
3. Be aware of your body's signals. Incorrect or excessive exercise can damage your health.
Stop exercising if you experience any of the following symptoms: Pain, tightness in your chest, irregular heartbeat,
extreme shortness of breath, feeling light headed, dizzy or nauseous. If you do experience any of these conditions you
should consult your doctor before continuing with your exercise program.
4. Keep children and pets away from the equipment. The equipment is designed for adult use only.
5. Use the equipment on a solid, flat level surface with a protective cover for your floor or carpet. For safety, the
equipment should have at least 0.6 meter of free space all around it.
6. Before using the equipment, check the nuts and bolts are securely tightened.
7. The safety level of the equipment can only be maintained if it is regularly examined for damage and/or wear and tear.
8. Always use the equipment as indicated. If you find any defective components whilst assembling or checking the
equipment, or if you hear any unusual noise coming from the equipment during use, stop. Do not use the equipment until
the problem has been rectified.
9. Wear suitable clothing whilst using the equipment. Avoid wearing loose clothing which may get caught in the equipment
or that may restrict or prevent movement.
10. The equipment has been tested and certified to EN957 under class H.C. Suitable for domestic, home use only.
Maximum weight of user, 100kg.
11. The equipment is not suitable for therapeutic use.
12. Care must be taken when lifting or moving the equipment so as not to injure your back. Always use proper lifting
techniques and/or use assistance.

3
EXPLODED-VIEW ASSEMBLY DRAWING

4
PART LIST
PART NO.
DESCRIPTION
QTY
1.
2.
3.
4.
5.
6.
7.
10.
11.
12.
13.
14.
15.
16.
17.
18.
19.
20.
24.
25.
26.
28.
29.
31.
32.
33.
34.
35.
37.
38.
39.
40.
41.
42.
43.
44.
46.
Rear column
Crossbeam
Foot tube
Body frame
T-Front leg
Leg extension bracket
Round tube
Seat pad
Back pad
Back cushion pipe
Little handle
Bar
Left rocker arm
Right rocking arm
Right safety hook
Left safety hook
Bell tube
Octagonal knob
Foam
Foam
Spring collar
Metal bush
Small metal bush
Outer hexagonal bolt M10*120
Carriage BoltsM8*50
Outer hexagonal bolt M10*55
Outer hexagonal bolt M10*20
Outer hexagonal bolt M10*60
Outer hexagonal bolt M6*15
Outer hexagonal bolt M6*40
Pull pin
Jam nut
Jam nut
Flat washer
Flat washer
Flat washer
Jam nut M6
2
1
1
1
1
1
2
1
1
2
2
1
1
1
1
1
2
2
4
2
3
4
4
2
4
6
4
1
4
4
2
4
7
22
8
4
2

ASSEMBLY INSTRUCTION
STEP 1
5
1. Attach Rear column (1) to the
Foot tube (3) using Carriage Bolts
M8*50 (32), Flat washer (44) and
Jam nut (40).
2. Attach Rear column (1) to the
Crossbeam (2) using Outer
hexagonal bolt M10*55 (33), Flat
washer (42) and Jam nut (41).

6
STEP 2
1. The metal bush (28) already into the Body
frame (4).
2. Attach Body frame (4) to the Crossbeam
(2) using Outer hexagonal bolt M10*55
(33), Flat washer (42), jam nut (41) and
Pull pin (39).
3. The metal bush (28) already into the T-
Front leg (5).
4. Attach T-Front leg (5) to the Body frame
(4) using Outer hexagonal bolt M10*55
(33), Flat washer (42), Jam nut (41) and
Pull pin (39).
5. Attach Leg extension bracket (6) to the
Body frame (4) Outer hexagonal bolt
M10*60 (35), Flat washer (42) and Jam
nut (41).
6. Attach Spring collar (26) on the Leg
extension bracket (6).

7
4
STEP 3
1. Slide the Back cushion pipe (12) onto
the pivot bar on the body frame (4).
2. Attach Back pad (11) to the back
cushion pipe (12) using Flat washer
(43) and Outer hexagonal bolt M6*40
(38).
3. Attach Seat pad (10) to the Body
frame (4) using Flat washer (43) and
Outer hexagonal bolt M6*15 (37).

8
6
STEP 4
1. Insert the Bar (14) into the holes in
the Rear column (1).
2. Attach Safety hook (18,17) to Rear
column (1) using Jam nut M6 (46).
3. Slide the Round tubes (7) into the
holes of the Leg extension bracket
(6). Push the foam (24) on the
Round tubes (7).

9
STEP 5
1. Attach Small metal bush (29) into the Rear
column (1).
2. Attach Rock arm (16,15) to Rear column (1)
using Outer hexagonal bolt M10*120 (31),
Flat washer (42) and Octagonal knob (20).
3. Attach Little handle (13) to the Rock arm
(16,15) using Flat washer (42) and Outer
hexagonal bolt M10*20 (34). Push the Foam
(25) on the Little handle (13).
4. Attach Bell tube (19) to the Rock arm (16,15)
using Flat washer (42) and Outer hexagonal
bolt M10*20 (34).Attach Spring collar (26) on
the Bell tube (19).

10
FOLDING INSTRUCTION
Fig.1
To fold your weight bench for storage first remove any weight bars or plates from the unit.
Remove the bar and Pull pin, then fold the bench/leg lift portion of unit up as shown in Fig.1

11
Be sure to hold the unit in an upright
position while inserting the bar
through the top holes in the rear
column and reinserting the pull pins
into the Main beam and Front leg
shown in Fig.2
Fig.2

12
EXERCISE INSTRUCTIONS
Using your BENCH will provide you with several benefits, it will improve your physical fitness, tone muscle and in conjunction with a
calorie controlled diet help you lose weight.
1.The Warm Up Phase
This stage helps get the blood flowing around the body and the muscles working properly. It will also reduce the risk of cramp and
muscle injury. It is advisable to do a few stretching exercises as shown below. Each stretch should be held for approximately 30
seconds, do not force or jerk your muscles into a stretch - if it hurts, STOP.
SIDE BENDS OUTER THIGH
FORWAR
D BENDS
INNER THIGH
CALF / ACHILLES

INTERSPORT ATHLETICS SA
18-20 SOROU
15125
MAROUSI
GREECE
+302102806019
13
3. The Cool Down Phase
This stage is to let your Cardio-vascular System and muscles wind down. This is a repeat of the warm up exercise e.g. reduce your
stride and tempo, continue for approximately 5 minutes. The stretching exercises should now be repeated, again remembering not
to force or jerk your muscles into the stretch.
As you get fitter you may need to train longer and harder. It is advisable to train at least three times a week, and if possible space
your workouts evenly throughout the week.
2. The Exercise Phase
This is the stage where you put the effort in. After regular use, the muscles in your legs will become more flexible. Work to your own pace
but it is very important to maintain a steady tempo throughout. The rate of work should be sufficient to raise your heart beat into the target
zone shown on the graph below.

14
ΠΑΓΚΟΣ ΓΥΜΝΑΣΤΙΚΗΣ
ΜΕ ΑΝΑΔΙΠΛΩΣΗ
B3.1
GREEK MANUAL

15
1..
2.
3.
4.
5.
6.
7.
8.
9.
10.
11.
12.

16

17
E
PART NO.
QTY
1.
2.
3.
4.
5.
6.
7.
10.
11.
12.
13.
14.
15.
16.
17.
18.
19.
20.
24.
25.
26.
28.
29.
31.
32.
33.
34.
35.
37.
38.
39.
40.
41.
42.
43.
44.
46.
Rear column
Crossbeam
Foot tube
Body frame
T-Front leg
Leg extension bracket
Round tube
Seat pad
Back pad
Back cushion pipe
Little handle
Bar
Left rocker arm
Right rocking arm
Right safety hook
Left safety hook
Bell tube
Octagonal knob
Foam
Foam
Spring collar
Metal bush
Small metal bush
Outer hexagonal bolt M10*120
Carriage BoltsM8*50
Outer hexagonal bolt M10*55
Outer hexagonal bolt M10*20
Outer hexagonal bolt M10*60
Outer hexagonal bolt M6*15
Outer hexagonal bolt M6*40
Pull pin
Jam nut
Jam nut
Flat washer
Flat washer
Flat washer
Jam nut M6
2
1
1
1
1
1
2
1
1
2
2
1
1
1
1
1
2
2
4
2
3
4
4
2
4
6
4
1
4
4
2
4
7
22
8
4
2

18
1.
M
2.
M10*55 (33),

19
1.
2.
M10*55
3.
4.
M10*55 (33)
5.
M
6.

20
4
BHMA 3
1.
2.
M6*40 (38).
3.
M6*15 (37).
Table of contents
Languages:
Other INTERSPORT Fitness Equipment manuals