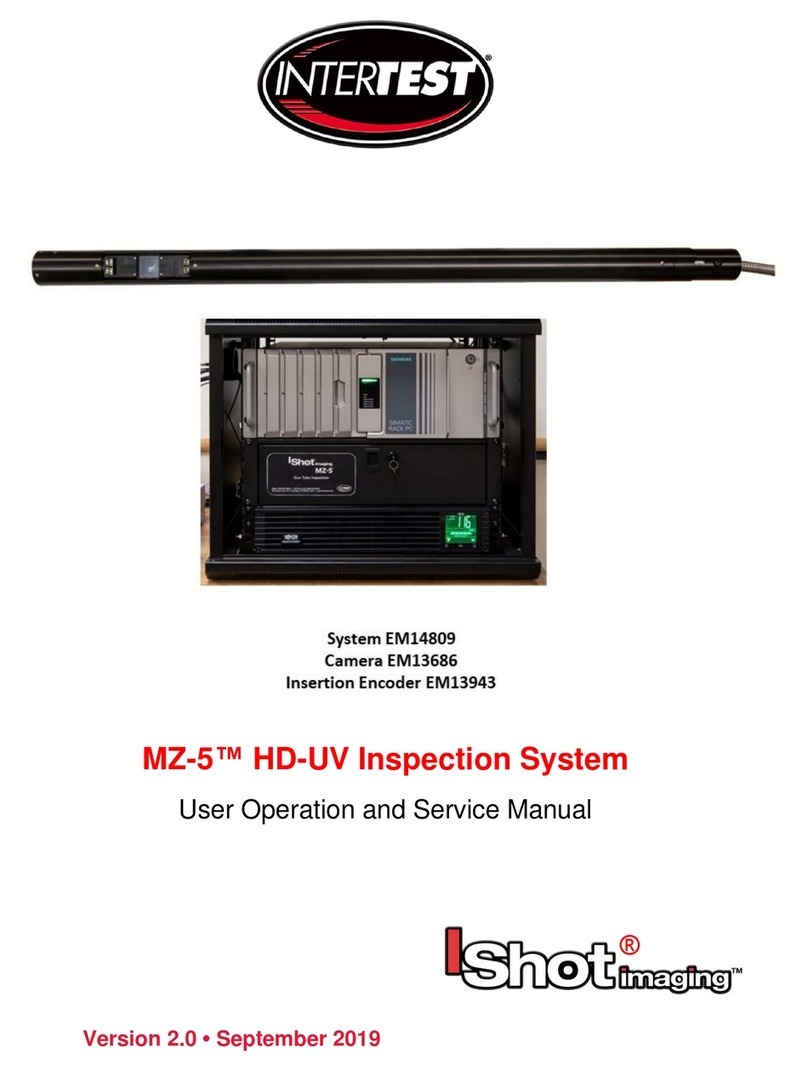
InterTest iShot imaging MZ-5 FS Operation manual

MZ-5 FS™ Inspection System
EM15201
Operation and Service Manual
Version 1.0 • December 2020
Copyright ©2020 InterTest Inc. All rights are reserved. No part of this publication may be reproduced,
stored in a retrieval system, or transmitted, in any form or by any means, electronic, mechanical,
photocopying, recording or otherwise, without the prior written permission of the publisher
®

InterTest, Inc. • 908-496-8008
MZ-5 FS™ Inspection System
EM15201 Rev A
Page 2
Version 1.0 • Nov 2020
Mandatory Customer Information
Federal Communications Commission (FCC) Statement
NOTE: This equipment has been tested and found to comply with the limits for a Class A digital device,
pursuant to Part 15 (and Parts 25 and 90) of the FCC rules. These limits are designed to provide
reasonable protection against harmful interference when equipment is operated in a commercial
environment. This equipment generates, uses, and can radiate radio frequency energy; and, if not
installed and used in accordance with the instruction manual, may cause interference to radio
communications.
Registered Trademark Information
XBlock® is a registered trademark of InterTest, Inc.
InterTest® is a registered trademark of InterTest, Inc.
iShot® is a registered trademark of InterTest, Inc.
iShot Imaging™ is a trademark of InterTest, Inc.
MZ5FS™ is a trademark of InterTest, Inc.
SeeUV® is a registered trademark of InterTest, Inc.
VIBES® is a registered trademark of InterTest, Inc.
WebViewer® is a registered trademark of InterTest, Inc.
Weld-i® is a registered trademark of InterTest, Inc.
XtendaCam® is a registered trademark of InterTest, Inc.
Contact Information
To contact us, please refer to the information below:
Corporate Headquarters
InterTest, Inc.
303 Route 94
Columbia, NJ 07832 USA
Telephone (USA and Canada): 800-535-3626
Telephone (Outside the USA and Canada): 908-496-8008
Facsimile: 908-496-8004
Visit us on the Internet
www.intertest.com
General Information via Email
info@intertest.com
IMPORTANT: If you are in possession of a printed or electronic version of this document,
be aware that it may not be the current version. To ensure that you are using the most up-
to-date version of this document, please contact the InterTest Customer Service and
Support Group.

Table of Contents
◼ .....About This Manual ...................................................................................................................... 5
Disclaimer ............................................................................................................................. 5
Purpose ................................................................................................................................ 5
◼ .....OSHA Compliance and Safety Guidelines ................................................................................... 5
◼ .....Revision Information ................................................................................................................... 6
Manual Versions ................................................................................................................... 6
◼ .....Cautionary Symbols and Symbol Terminology ............................................................................. 6
◼ .....Safety Considerations ................................................................................................................. 7
Preface ................................................................................................................................. 7
Operational, General Safety Considerations and Precautions ................................................ 7
◼ .....System Setup ............................................................................................................................. 8
Camera & Poles Case .......................................................................................................... 8
Camera & Poles Setup ......................................................................................................... 9
Attach Camera Cable Clamp ............................................................................................... 10
Install Pole Centering Rings & Cable Clamps ...................................................................... 10
Install Cable & Exit Pole Termination .................................................................................. 11
Setup Support Stands ......................................................................................................... 13
Open the Control Unit (CCU) .............................................................................................. 13
Connect Camera, Monitor & Encoder .................................................................................. 14
Connect Downtube Encoder (If Used) ................................................................................. 15
Open Storage Drawer Get Keyboard & Mouse .................................................................... 15
Power ON the System ........................................................................................................ 16
◼ .....Computer Control (Admin Level) ............................................................................................... 16
◼ .....Capture Controls ....................................................................................................................... 25
◼ .....Measurement ............................................................................................................................ 27
Reference Dimension ......................................................................................................... 27
Line .................................................................................................................................... 29
Angle .................................................................................................................................. 30
Circle .................................................................................................................................. 31
Rectangle ........................................................................................................................... 32
Forward Camera Focus Adjustment .................................................................................... 33
Accessing Saved Images / Video on NAS Drive .................................................................. 34
Chapter 4 — Specifications ................................................................................................................. 35
◼ .....Detailed System Specifications ................................................................................................. 35

InterTest, Inc. • 908-496-8008
MZ-5 FS™ Inspection System
EM15201 Rev A
Page 4
Version 1.0 • Nov 2020
Chapter 5 — Care and Maintenance ................................................................................................... 37
Chapter 6 — Components and Part Catalog ...................................................................................... 38
Chapter 7 — Service and Maintenance Records ................................................................................ 43
List of Figures
Figure 1 Camera & Poles..................................................................................................................................... 9
Figure 2 Camera Centering Rings ........................................................................................................................ 9
Figure 3 Camera Cable Clamp ...........................................................................................................................10
Figure 4 Pole Centering Rings & Cable Clips ......................................................................................................10
Figure 5 Exit Pole Termination Installation Step 1 ...............................................................................................11
Figure 6 Exit Pole Termination Installation Step 2 ...............................................................................................11
Figure 7 Exit Pole Termination Installation Step 3 ...............................................................................................12
Figure 8 Exit Pole Termination Installation Step 4 ...............................................................................................12
Figure 9 Support Stands .....................................................................................................................................13
Figure 10 Control Unit.........................................................................................................................................13
Figure 11 Hanging of Covers ..............................................................................................................................14
Figure 12 Connect Camera, Power & Monitor .....................................................................................................14
Figure 13 Downtube Encoder .............................................................................................................................15
Figure 14 Down Tube Encoder Mounting ............................................................................................................15
Figure 15 Keyboard & Mouse .............................................................................................................................16
Figure 16 Power ON Switch ................................................................................................................................16
Figure 17- Computer Start Screen & DocuView Program ....................................................................................17
Figure 18 Opening General Settings Tabs ..........................................................................................................18
Figure 19 Opening Admin Mode .........................................................................................................................18
Figure 20 General Settings .................................................................................................................................19
Figure 21 Image & Video Capture File Type........................................................................................................19
Figure 22 File Naming ........................................................................................................................................20
Figure 23 File Save Location ..............................................................................................................................20
Figure 24 Camera Control & Toggle Between Cameras ......................................................................................21
Figure 25 Camera & Lighting Control ..................................................................................................................21
Figure 26 Camera Setup.....................................................................................................................................22
Figure 27 OSD & Grid Settings ...........................................................................................................................23
Figure 28 Presets ...............................................................................................................................................23
Figure 29 Forward & Aft Sideview Lighting ..........................................................................................................24
Figure 30 On Screen Display ..............................................................................................................................24
Figure 31 General Settings .................................................................................................................................25

InterTest, Inc. • 908-496-8008
MZ-5™ FS Inspection System
EM15201 Rev A
Page 5
Version 1.0 • Nov 2020
Figure 32 Image & Video Capture .......................................................................................................................26
Figure 33 Reference Dimension..........................................................................................................................28
Figure 34 Line Measurement ..............................................................................................................................29
Figure 35 Angle Measurement ............................................................................................................................30
Figure 36 Circle Measurement ............................................................................................................................31
Figure 37 Rectangle Measurement .....................................................................................................................32
Figure 38 Forward Camera Focus Adjustment ....................................................................................................33
Figure 39 NAS Drive Access...............................................................................................................................34
List of Tables
Table A — Manual and Equipment Safety Symbols ............................................................................................. 6
Table B — Description of Cautionary Terms ........................................................................................................ 6
Table C Camera Settings....................................................................................................................................27
Chapter 1 —
Preface and General Information
About This Manual
Disclaimer
IMPORTANT: This manual contains information about the MZ-5™ FS Inspection System (MZ-5™
FS Inspection System), manufactured by InterTest, Inc. and contains information, which is
reasonable and customary for this type of equipment.
No representations or warranties are made as to the accuracy or completeness of the information
contained herein. In addition, no representations or warranties are made as to the completeness
and compliance of any test procedures, which are performed using this Equipment. Because this
manual was designed for quick reference, it is restricted in scope to the operation of the system.
Should you have questions beyond the scope of this manual, please call the InterTest Customer
Support Group.
Purpose
The intended audiences for this manual include InterTest, Inc., End Users, Field Support Personnel, Product
Evaluators, and qualified third-party personnel. It is primarily intended for personnel who are using the equipment
and those responsible for test procedures.
OSHA Compliance and Safety Guidelines
OSHA (the Occupational Safety & Health Administration of the United States Department of Labor) has
established specific standards for Personal Protective Equipment (PPE). The standards are detailed in the
document entitled General Requirements 1910.132, (Standards - 29 CFR) and should be reviewed by all
personnel prior to working on InterTest, Inc. equipment and systems. Refer to http://www.osha.gov/ for
information about steps that must be taken to protect the eyes, face, ears, hands, and other body parts from

InterTest, Inc. • 908-496-8008
MZ-5 FS™ Inspection System
EM15201 Rev A
Page 6
Version 1.0 • Nov 2020
potential harm. It is the responsibility of the technician or other service personnel to adhere to all OSHA guidelines
as they concern PPE devices and their proper use.
Revision Information
As it becomes necessary to revise this manual, InterTest will give the reasons for the revision in this section.
Revision
Description
Revised
By
Approved
By
Original
Initial Release
KB
Manual Versions
Refer to the cover page & the document footer for the manual version.
When troubleshooting a problem that may occur, InterTest Customer Service and Support Personnel may ask for
this information in order to ensure that the user is referencing a suitable version of the manual.
Cautionary Symbols and Symbol Terminology
Table A describes the various symbols that may be included in this manual and mounted on the equipment. The
severity level of a potential hazard varies. Refer to Table B for hazard level descriptions.
Table A — Manual and Equipment Safety Symbols
Symbols
Definitions
DANGER/WARNING/CAUTION: Risk of electric shock.
DANGER/WARNING/CAUTION: Refer to instruction manual.
DANGER/WARNING/CAUTION: Explosion Hazard.
DANGER/WARNING/CAUTION: Avoid exposure to water and liquids.
DANGER/WARNING/CAUTION: Avoid eye and skin exposure to UVA
Light.
Table B — Description of Cautionary Terms
Cautionary
Term
Description

InterTest, Inc. • 908-496-8008
MZ-5™ FS Inspection System
EM15201 Rev A
Page 7
Version 1.0 • Nov 2020
DANGER
Indicates the presence of an extreme hazard that will probably cause death or
severe personal injury. Hazards of this kind MUST be avoided at all cost.
WARNING
Indicates the presence of a hazard that could cause death or severe personal
injury. Hazards of this kind MUST be avoided at all cost.
CAUTION
Indicates the presence of a hazardous condition that can or will cause minor
personal injury or property damage if the hazard is not avoided. The Caution
Indication is also used for property-damage-only accidents. The Caution Indicator
may be used to warn against potential equipment damage and possible service
interruption.
Safety Considerations
Preface
This manual describes this equipment, its functions, and its use. It also describes the precautions to be taken to
ensure safe operation. Please read this manual thoroughly before attempting to operate the equipment. By doing
so, you will familiarize yourself with the equipment’s capabilities and understand its functions. After you finish
reading this manual, store it in an accessible location for future reference.
Carefully follow all warnings and instructions included in this manual and marked on the equipment.
Operational, General Safety Considerations and Precautions
Always observe the guidelines and precautions that follow.
DANGER, Risk of Electric Shock: Unplug the power cord from the wall receptacle when advised to
do so in a procedure. Be advised that the equipment must be turned off when service work is
required.
Never remove the top cover of the controller. Electrical shock hazards exist due to high internal
voltage. There are no user-serviceable parts inside the controller, except for fuses, which are
accessible via the rear panel. Refer all service to the InterTest Customer Service and Support
Group.
IMPORTANT: To ensure operator safety, read and understand this manual before using the
system. Using any piece of this equipment in a manner not specified by the manufacturer does
not protect the user from harm.
In addition, accessories listed in this manual are the only accessories considered suitable for use
with this system. Accuracy of the rotary encoder is compromised when the probe is operated at
steep angles.
To avoid injury, read and understand the associated documentation for MZ-5™ FS Inspection
System component prior to attempting operation. Direct any questions about equipment operation
to the InterTest Customer Service and Support Group at 908-496-8008 or via email to
service@intertest.com.
DANGER, Explosion Hazard: Do not use this system in explosive environments. The controller
requires adequate ventilation to prevent overheating. Do not cover or drape the controller. To
ensure adequate airflow, provide a three-inch (7.6 cm) clearance between the controller chassis
vents and any solid objects.
IMPORTANT If LED’s need servicing. Contact InterTest
IMPORTANT: Proper use of this product requires a protective earth ground path at the AC power
source. Using a two-conductor extension cord or any other device that compromises this ground
path is in violation of safe operating guidelines.

InterTest, Inc. • 908-496-8008
MZ-5 FS™ Inspection System
EM15201 Rev A
Page 8
Version 1.0 • Nov 2020
The unit should never come in direct contact with any voltage or current source. Damage to the
equipment and/or electrical shock to the operator may result.
The unit is equipped with a power supply mounted in the back of the equipment. It accepts a 3-
wire grounding type plug only. It is necessary that the equipment be grounded. The plug will only
fit into a grounding-type power outlet. This is a feature for the user’s safety. Never use an adaptor
to bypass this very important safety feature. If you cannot insert the plug into the wall outlet,
contact an electrician to replace what may be an obsolete wall outlet. Under no circumstances
should the user attempt to defeat the purpose of the grounding-type plug.
Never attempt to modify the power cord. Do not insert or unplug the power plug with wet hands.
This could result in an electrical shock. When unplugging the power plug, always grasp its plug
portion. Never pull on the power cord directly. Pulling on the power cord may expose or snap the
internal wires, which would weaken or damage the power cord and result in an electrical shock.
Do not place anything on top of the power cord. Never locate the equipment where people will
walk on the power cord or where heavy items may move over it. Never stretch or excessively bend
the power cord. Always insert the power cord’s plug completely into the socket. Failure to do so
could result in a fire or an electrical shock.
Never use power cords other than the power cords that were provided. Using improper power
cords could result in a fire or an electrical shock.
For safety reasons, the use of an extension cord is not recommended. If an extension cord must
be used with the equipment, ensure that the total amperage rating of the extension cord is equal
to or greater than 15 amperes. If an extension cord must be used, never allow other devices to
share the extension cord.
IMPORTANT: Never use the equipment in a wet or overly damp location. Exposing the equipment
to water or other liquids could result in a fire or an electrical shock.
IMPORTANT: The MZ-5™ FS Inspection System is to be used for inspecting gun tubes, Tank gun
tube, mortar tube, ship gun tube, turbine rotor bores, generator rotor bores, shaft and pipe
inspections ONLY. Improper use of this product for objects for which it is not intended or for
environments for which it is not intended will void the warranty. Warranty information can be
found starting on Page 15.
CAUTION: The UVA output is an eye and skin hazard. Do not allow close or prolonged exposure
to the UVA output of the MZ-5™ FS Inspection System. UV Eye protection is required for close or
prolonged exposure.
Note: There are two levels of operation.
1) User
2) Admin
System Setup
Camera & Poles Case
Open the Case & Remove Camera & Poles

InterTest, Inc. • 908-496-8008
MZ-5™ FS Inspection System
EM15201 Rev A
Page 9
Version 1.0 • Nov 2020
Figure 1 Camera & Poles
Camera & Poles Setup
Install the appropriate Camera Centering Rings
Figure 2 Camera Centering Rings

InterTest, Inc. • 908-496-8008
MZ-5 FS™ Inspection System
EM15201 Rev A
Page 10
Version 1.0 • Nov 2020
Attach Camera Cable Clamp
Install the Camera Cable Clamp as Shown
Figure 3 Camera Cable Clamp
Install Pole Centering Rings & Cable Clamps
Install as many rings & clips as needed
Figure 4 Pole Centering Rings & Cable Clips

InterTest, Inc. • 908-496-8008
MZ-5™ FS Inspection System
EM15201 Rev A
Page 11
Version 1.0 • Nov 2020
Install Cable & Exit Pole Termination
Install Exit Pole Termination on the Last Pole Used. See Figures 5-8
Note: Be sure to “twist” the cable, Figure 7, & hold as shown prior to closing clamp or threads may be damaged
Figure 5 Exit Pole Termination Installation Step 1
Figure 6 Exit Pole Termination Installation Step 2

InterTest, Inc. • 908-496-8008
MZ-5 FS™ Inspection System
EM15201 Rev A
Page 12
Version 1.0 • Nov 2020
Figure 7 Exit Pole Termination Installation Step 3
Figure 8 Exit Pole Termination Installation Step 4

InterTest, Inc. • 908-496-8008
MZ-5™ FS Inspection System
EM15201 Rev A
Page 13
Version 1.0 • Nov 2020
Setup Support Stands
Set up Support Stands. & adjust height as needed.
Make sure stands are level with each other & wheels are locked.
Figure 9 Support Stands
Open the Control Unit (CCU)
Note: Front Cover is not as deep as the Rear
Figure 10 Control Unit

InterTest, Inc. • 908-496-8008
MZ-5 FS™ Inspection System
EM15201 Rev A
Page 14
Version 1.0 • Nov 2020
Figure 11 Hanging of Covers
Connect Camera, Monitor & Encoder
Note: Portable monitor uses an special 3 prong adapter that plugs into the monitor Power & video Cable
Figure 12 Connect Camera, Power & Monitor

InterTest, Inc. • 908-496-8008
MZ-5™ FS Inspection System
EM15201 Rev A
Page 15
Version 1.0 • Nov 2020
Connect Downtube Encoder (If Used)
Figure 13 Downtube Encoder
Connect Downtube Encoder (If Used)
Install in Tube & Tighten Clamping Screw
Figure 14 Down Tube Encoder Mounting
Open Storage Drawer Get Keyboard & Mouse
Note: No need to open computer drawer unless accessing DVD drive. Make sure drawer screws are tight

InterTest, Inc. • 908-496-8008
MZ-5 FS™ Inspection System
EM15201 Rev A
Page 16
Version 1.0 • Nov 2020
Figure 15 Keyboard & Mouse
Power ON the System
After connecting the Monitor. (Monitor on Wheels or Portable unit)
Turn ON Keyboard & Mouse
Turn ON Main Power Switch
Turn ON the UPS
Note: Computer is set to “Turn ON” with lid closed.
Figure 16 Power ON Switch
Computer Control (Admin Level)
Refer to Figure 17

InterTest, Inc. • 908-496-8008
MZ-5™ FS Inspection System
EM15201 Rev A
Page 17
Version 1.0 • Nov 2020
1) Double Click on the Docuview Program Icon
Figure 17- Computer Start Screen & DocuView Program
Refer to Figure 18 & 19
2) Click on the Settings Tab Figure 18 & then General Settings Figure 19
a. The following Screen Shots will show how to Set up the cameras, lighting & presets
b. After selecting the camera, setting the COM ports etc. Open the “General Camera Settings” tab.
See Figure 2
i. Type in the name of the preset
ii. Set any desired flip or mirror
iii. Hit the “Save” button
iv. Repeat for both cameras
Note: The New or Update “Preset” will not show while still in Admin Mode. You must exist the program &
the update will show up.

InterTest, Inc. • 908-496-8008
MZ-5 FS™ Inspection System
EM15201 Rev A
Page 18
Version 1.0 • Nov 2020
Figure 18 Opening General Settings Tabs
Refer to Figure 19
Figure 19 Opening Admin Mode
1) Double Click on “Docuview
2) “Settings Login” will appear
3) Type in Password
a. Secret (Case sensitive)

InterTest, Inc. • 908-496-8008
MZ-5™ FS Inspection System
EM15201 Rev A
Page 19
Version 1.0 • Nov 2020
Refer to Figure 20
Figure 20 General Settings
Refer to Figure 21
Figure 21 Image & Video Capture File Type
Refer to Figure 22

InterTest, Inc. • 908-496-8008
MZ-5 FS™ Inspection System
EM15201 Rev A
Page 20
Version 1.0 • Nov 2020
3) Menus available in “General Settings”
a. File Naming
i. Date/Time
ii. Ascending
iii. Custom Preface
iv. Combination of text & numbers.
Will add four digits to the end of
The filename
Refer to Figure 23
4) Click on the “Set Directory” Button to set the save location for images & videos
a. Current “Save” location is displayed to the right of the “Set Directory” Button
b. Refer to Figure 39 for NAS Drive access
i. Set as factory default
Figure 23 File Save Location
Note:
1) JPEG Files are approx.. 19:1 Compression compared to Bitmap files
Refer to Figure 24
5) Open General, Unity, Illumination and OSD (On-Screen Display) Settings
Note: Settings are stored by the system & DO NOT need to be set each time.
Figure 22 File Naming
This manual suits for next models
1
Table of contents
Other InterTest Analytical Instrument manuals