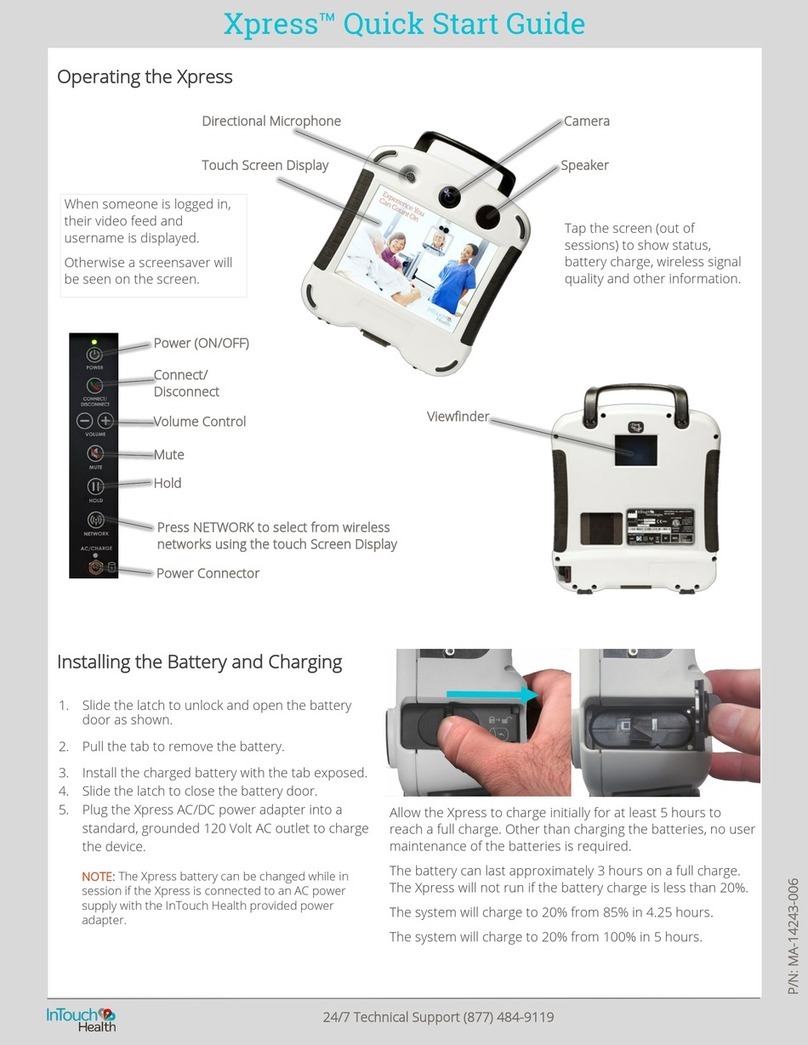
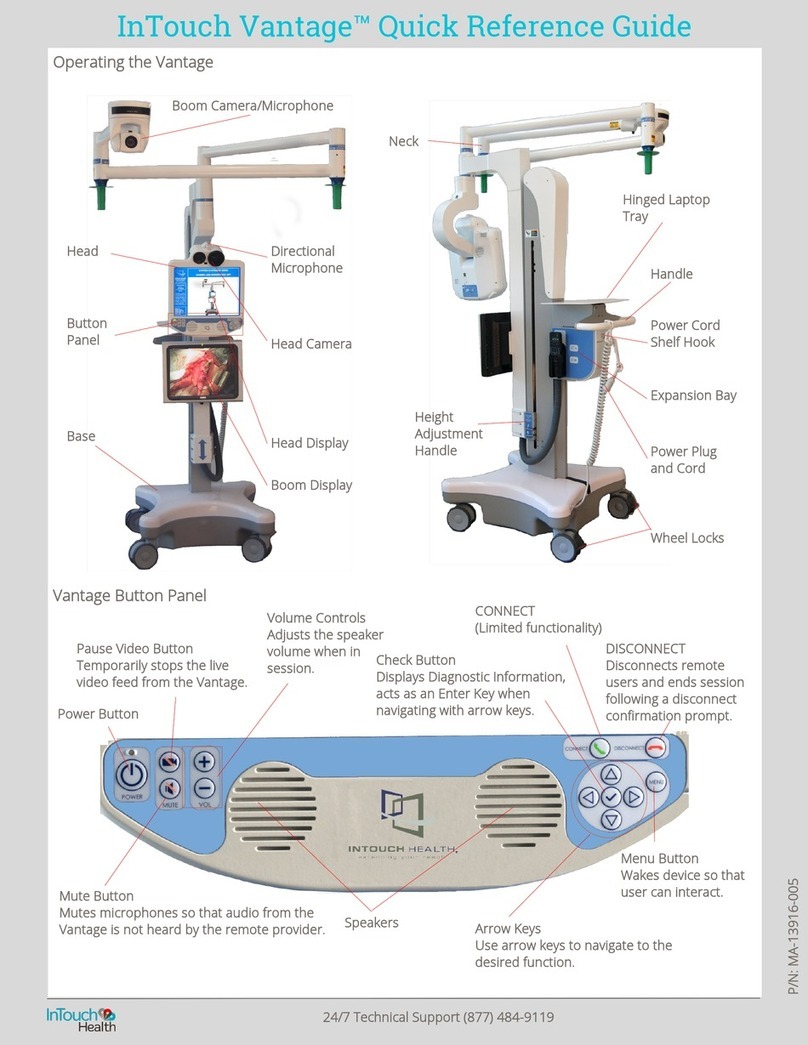
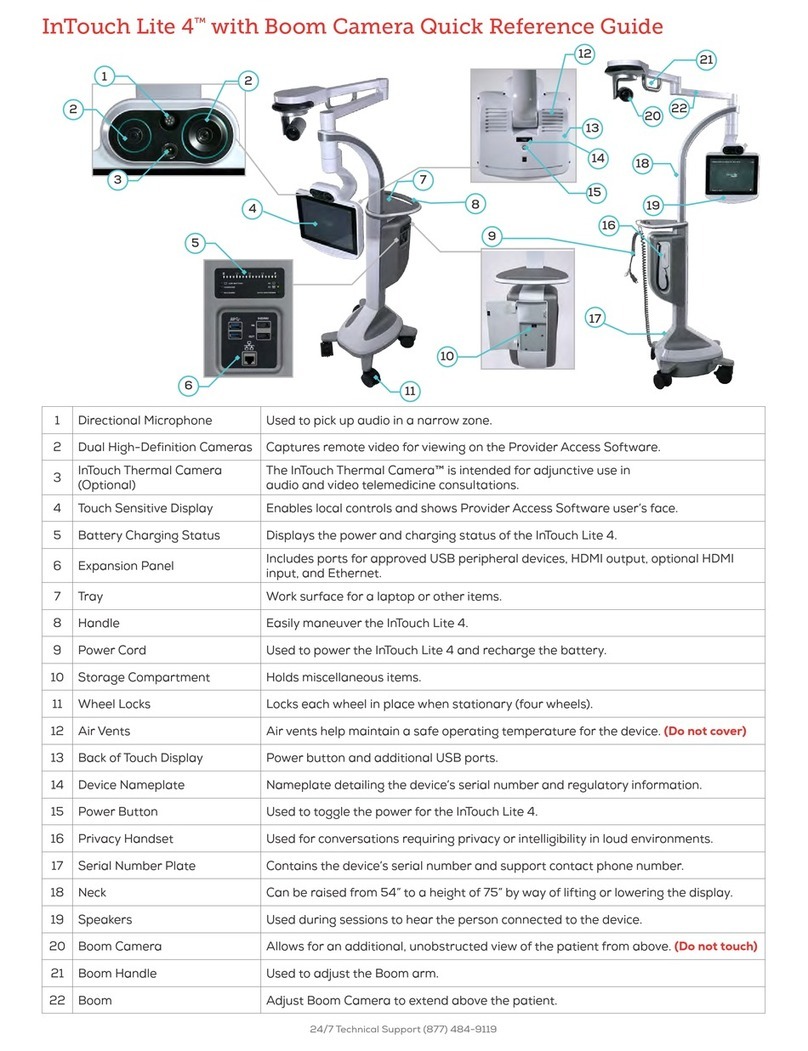
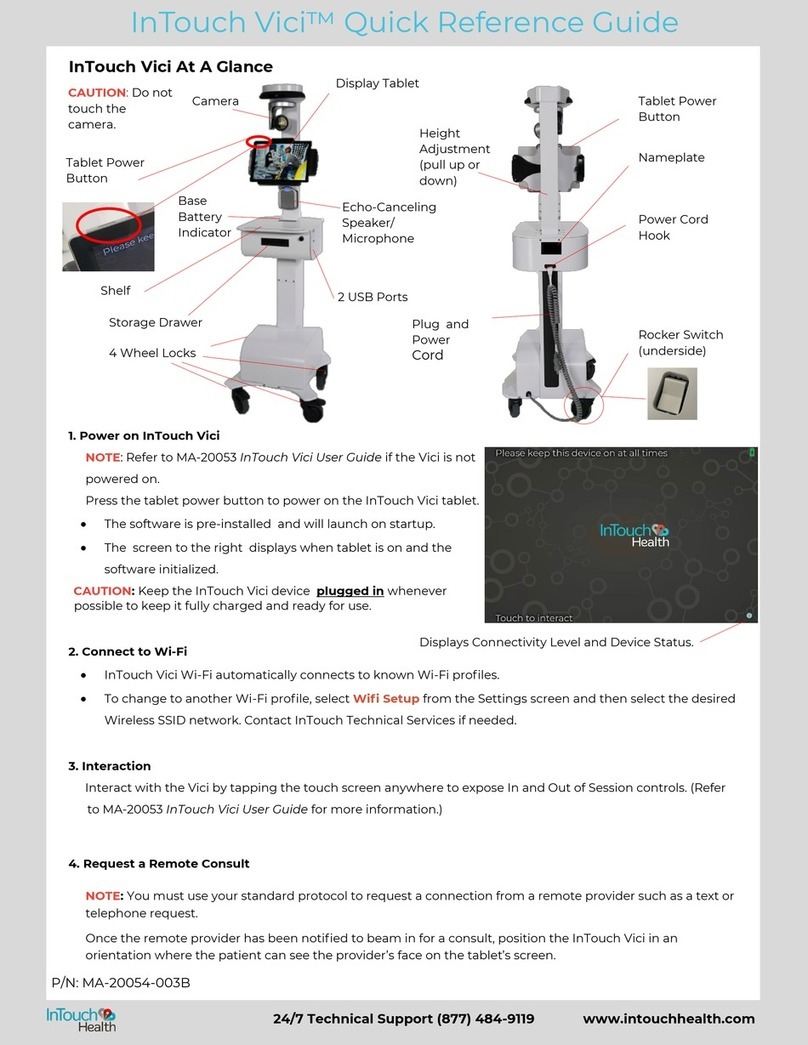
InTouch Health TV Pro User manual

InTouch TV™ Pro
Quick Start Guide
P/N: MA-20071-001

Table of Contents
What's in the Box 3
InTouch TVPro Hardware Setup 5
Example Setup of InTouch TVPro 5
InTouch TVPro Cable Installation Diagram 6
InTouch TVPro Hardware Setup Steps 7
Software Installation 8
Conduct a Test Session 13
Troubleshooting 14
Keyboard/Mouse not responding 14
Flip the TLC-300-U2S - Telycam image 14
Powering Off the InTouch TV 15
24/7 Technical Support (877) 484-9119
- 2 -

Components and
Accessories Component Accessories
InTouch TVPro - Intel
NUC
lPower Adapter
lInternational
power plug
adapters
lMounting Bracket
with 4 wall
screws and 2
chassis screws
l4 ft HDMIcable
TLC-300-U2S -
Telycam
lCeiling mounting
bracket with 2
screws
lRS232 control
cable
lRS232 to USB
adapter
lPower adapter
lGrounded USto
grounded
European
adapter
lGrounded USto
grounded
UKadapter
lUSB Cable
lRemote control
What's in the Box
- 3 -
24/7 Technical Support (877) 484-9119

Components and
Accessories Component Accessories
Duet PCS: MT202-PCS
lUSBCable
Rii Mini Wireless
Bluetooth Keyboard X1
lUSBCable
24/7 Technical Support (877) 484-9119
- 4 -

InTouch TVPro Hardware Setup
NOTES:
lBefore installing the InTouch TVPro, determine where each component is
going to be placed, considering if additional cables are needed and if any of
the components need mounting.
lMounting brackets are included with the InTouch TVPro kit for the:
oTLC-300-U2S - Telycam - for mounting on a wall
oIntel NUC - for mounting with a VESAhole pattern.
lMounting the TLC-300-U2S -
Telycam is recommended and
should be done by trained facilities
personnel before proceeding with
the installation of the InTouch
TVPro.
lThe Duet PCS: MT202-PCS should
be mounted within 6 feet of where
the patient is examined.
WARNING:Make sure all cables are clear
of walking paths and do not interfere with
patient care.
Example Setup of InTouch TVPro
- 5 -
24/7 Technical Support (877) 484-9119

InTouch TVPro Hardware Setup Steps
NOTE: InTouch Health recommends no more than 10 feet between the patient
and the TLC-300-U2S - Telycam.
Step Action
1
Connect the RS232 control cable to the RS232 port on the TLC-
300-U2S - Telycam and the USB end of the pre-attached RS232 to
USBadapter to one of the USBports on the rear of the Intel NUC.
2Connect the USBcable to the TLC-300-U2S - Telycam and the other
end of the USBcable to the USBport on the rear of the Intel NUC.
3
Connect one end of the HDMI cable into an available HDMI port on the
display and connect the other end of the HDMIcable into the Intel
NUCHDMIport.
lNote the HDMI port number for later.
4Connect the Duet PCS: MT202-PCS speakerphone to the Intel
NUCwith a USBcable
5
Connect in the TLC-300-U2S - Telycam's power supply into the back
of the camera and then into a surge protected power outlet and
remove the lens cap.
6Connect in the Intel NUC's power supply into a surge protected power
outlet.
7Power on the display connected to the InTouch TVPro.
8Power on the Intel NUCby pressing the power button ( ).
- 7 -
24/7 Technical Support (877) 484-9119

Software Installation
Be sure all hardware is connected before completing the following steps.
Step Action Image
1Turn on the television or
monitor.
2
Select the HDMI source the
InTouch TV is plugged into
on the television or monitor.
lThe InTouch TV will
begin start-up. Wait
for any software
updates to complete.
lThe InTouch TV is
initialized when you
see the three icons (
i
,
AV
and –) on the top
of the screen.
For Televisions:
lIf the InTouch
application does not
fit the screen, adjust
the screen’s aspect
ratio.
lConsult your
television’s user guide
for instructions.
Three icons:
24/7 Technical Support (877) 484-9119
- 8 -

Step Action Image
3
Slide the power switch on
the top, left edge of the
keyboard to turn on the
Bluetooth
keyboard/touchpad.
A solid green light means
the keyboard is connected.
NOTE: If the Bluetooth
keyboard/touchpad falls
asleep or loses connectivity
with the television, toggle
the on/off switch and then
press the Bluetooth button.
If you experience Bluetooth
connectivity challenges,
remove the USB receiver
dongle from the main unit
flank chamber and insert it
into an available USB port
on the .
See Troubleshooting on
page 14
4
Use the keyboard to
navigate the application
screen and connect to Wi-
Fi.
lSee the InTouch TV
Product Options User
Guide for more details
- 9 -
24/7 Technical Support (877) 484-9119

Step Action Image
5Click the (—) icon in the
upper right-hand corner of
the television.
6
Click the Wi-Fi icon on the
task bar to confirm the
InTouch TV is connected to
Wi-Fi.
lConsult your IT
department for the
Wi-Fi password.
7Click the InTouch TV icon in
the task bar to return to the
application screen.
8Click the (AV) icon in the top,
left corner to run the
Audio/Video Wizard.
9Click Begin Setup when the
Audio/Video Wizard
welcome screen appears.
24/7 Technical Support (877) 484-9119
- 10 -

Step Action Image
10
Select the USB2.0 Camera
from the camera setup
page, if not already selected.
Verify the image from the
selected camera looks
correct. If using the TLC-
300-U2S - Telycam and the
image needs flipped,
seeTroubleshooting on page
14.
Click Next.
11
Select Microphone (Phnx
MT202pcs) from the
microphone setup page, if
not already selected.
12
Speak normally to test the
microphone and to ensure
the microphone picks up
your voice. The audio bar
will fluctuate to indicate
voice detection.
Click Next.
- 11 -
24/7 Technical Support (877) 484-9119

Step Action Image
13
Select Speakers (Phnx
MT202pcs) from the
speaker setup page, if not
already selected.
Click Test Speakers to test
the audio.
Adjust the blue slider bar to
raise or lower the volume as
necessary.
Click Next.
14
Click Finish when green
checkmarks appear next to
the video, microphone, and
speaker icons.
15 Click the icon on the top,
left of the screen to confirm
connectivity to the InTouch
Telehealth Network.
16
Confirm the status is
“Ready” on the bottom, left
of the blue information
screen.
24/7 Technical Support (877) 484-9119
- 12 -

Step Action Image
17
Click the (X) icon on the top,
right corner of the blue
information screen to return
to the InTouch TV
application screen.
Conduct a Test Session
NOTE: These steps must be completed prior to granting connectivity between
the Provider Access software and this InTouch TV for clinical use.
1. Email SystemTest@intouchhealth.com for Performance Verification of the
InTouch TV installation.
2. You will be contacted shortly by InTouch Health Technical Service
personnel to complete setup and conduct a test session.
- 13 -
24/7 Technical Support (877) 484-9119

Troubleshooting
Refer to the full InTouch TV user manual for troubleshooting information.
Contact the InTouch 24/7 Technical Support team at (877) 484-9119 or visit
www.InTouchHealth.com/manuals for a PDFof the full user manual.
Keyboard/Mouse not responding
Confirm that Keyboard/Mouse is charged by turning it on and looking for green
power indicator light.
lIf the keyboard is not charged, plug in the included USB cable and charge
it.
Keyboard/Mouse not paired:
1. PairBluetooth Keyboard/MousetoCompute Stick.
2. Turn ONBluetooth Keyboard/Mouseby sliding the power switch on the
left side.
3. Minimize Viewpoint by keying the combination: Control + Shift + Spacebar
4. Navigate to Windows Bluetooth settings.
a. Return to the desktop by clicking the Minimize icon.
b. Click the Windows icon
c. Click the Settings icon.
d. Click the Devices icon.
e. Select Bluetooth from the Devices menu.
5. Press the Bluetooth icon on the keyboard.
6. Key in Bluetooth code to keyboard, and press Enter.
7. Re-maximize Viewpoint by Keying the combination: Control + Backspace.
Flip the TLC-300-U2S - Telycam image
The default settings for the TLC-300-U2S - Telycam assumes the camera will
be mounted from the ceiling. When not mounting the TLC-300-U2S - Telycam
from the ceiling, the image will need to be flipped for proper viewing from the
Provider Access Software. This can be done at anytime the image from the TLC-
300-U2S - Telycam is displayed. It is recommended that this be done when
running the AVWizard in the software setup. See Step 8 of Software Setup.
NOTE: If the TLC-300-U2S - Telycam does not respond to the remote control,
try pressing the red button on the remote to switch the remote back to
camera mode.
1. Press the menu button
lThe camera's menu will display
24/7 Technical Support (877) 484-9119
- 14 -
2. Use the down arrow button on the Telycam's remote to
navigate to PICTUREon the MAINMENU.
3. Use the right arrow to select PICTURE.
4. Scroll down to PICFLIP and use the right arrow to toggle the option from
ON to OFF.
5. Press the Menu button to close the Telycam's menu.
Powering Off the InTouch TV
There is no need to power OFF the InTouch TV if simply turning off the display.
NOTE:This process needs to be done if moving the InTouchTV to a different
display.
Using the Bluetooth keyboard/mouse:
1. Click the icon on the top, right corner to minimize the application.
2. Click the icon and select Shutdown.
lPlease select ‘Yes’ to confirm shutdown.
3. Power off the television or monitor and dissemble the components after
Windows has shut down.
lWhen shut down is complete, the blue light on the InTouch TV turns
off.
- 15 -
24/7 Technical Support (877) 484-9119
Table of contents
Other InTouch Health Medical Equipment manuals

InTouch Health
InTouch Health InTouch Lite 4 User manual

InTouch Health
InTouch Health InTouch Mini User manual

InTouch Health
InTouch Health Xpress User manual

InTouch Health
InTouch Health Vici User manual

InTouch Health
InTouch Health Vantage User manual

InTouch Health
InTouch Health InTouch Lite 4 User manual
Popular Medical Equipment manuals by other brands

CU Medical Systems
CU Medical Systems iPAD SP1 IN-USE QUICK REFERENCE GUIDE

Cardinal Health
Cardinal Health SVED 6701132 Clinician Quick Reference Guide

ResMed
ResMed ELITE S8 Clinician manual

Stryker
Stryker EPIC II Maintenance manual

Villa
Villa ARCOVIS 3000 S Technical manual

Dräger Medical
Dräger Medical Babytherm 8000 WB Instructions for use