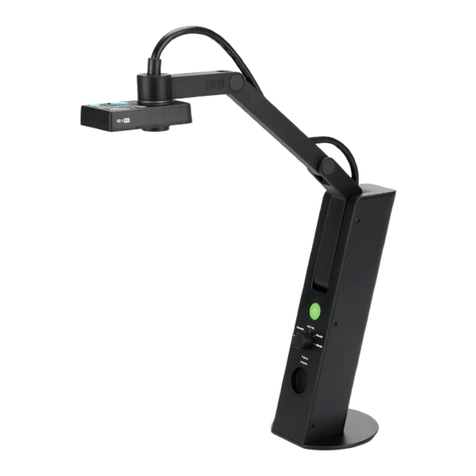
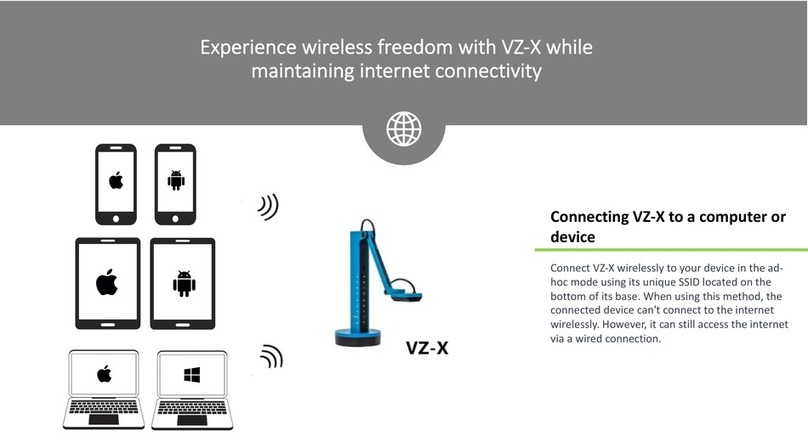
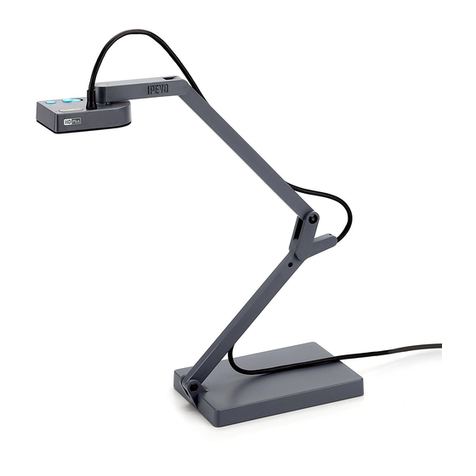
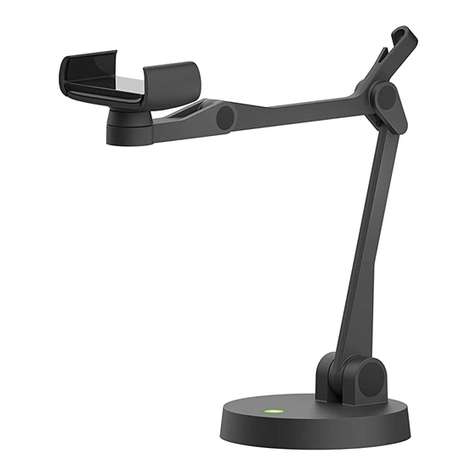
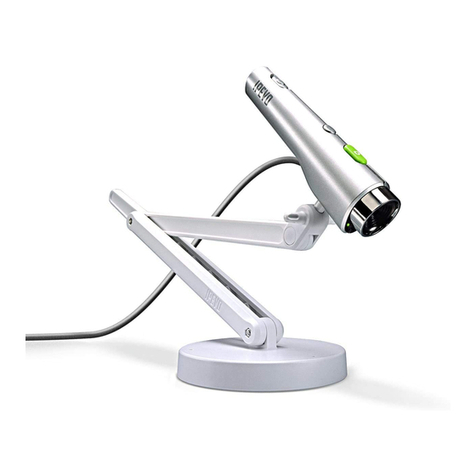
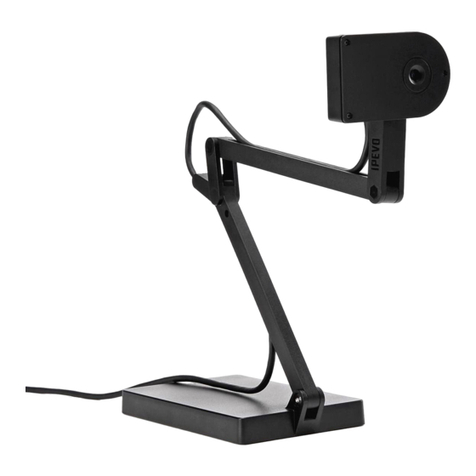
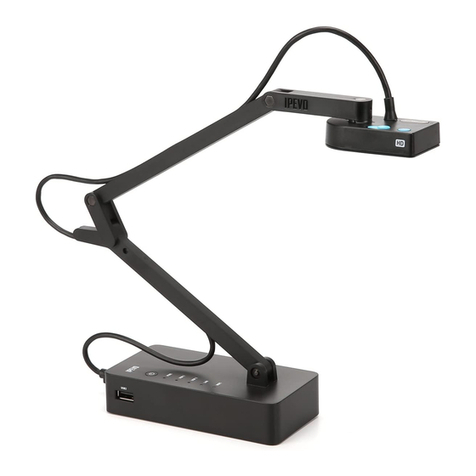
Ipevo iZiggi HD User manual

iZiggi
iZiggi
Wireless Document Camera
User Manual

Table of Contents
Package Contents........................................................................... 1
Basics............................................................................................ 1
Getting to know your iZiggi-HD..................................................... 2
Setting up your iZiggi-HD ............................................................. 4
Using iZiggi-HD with IPEVO software ............................................ 6
Accessing iZiggi-HD’s Settings...................................................... 8
Connecting to the Internet with iZiggi-HD..................................... 9
Save images on Whiteboard App to your USB Drive ..................... 10
Using iZiggi-HD for Data Sharing..................................................11
Setting up password protection for iZiggi-HD Live View and WiFi..11
Customizing Login Information..................................................... 12
Understanding the LED indicators................................................ 12
Using iZiggi-HD Directly on Your Computer.................................. 13
Using Apple TV Airplay ................................................................ 13
FAQ ............................................................................................. 14
Troubleshooting........................................................................... 15

1
Package Contents
Basics
The iZiggi-HD Wireless Document Camera captures live images with
wireless convenience so you can do even more in the classroom or at the
office:
t A Wireless Document Camera for iPad.
t Stream documents, pictures, devices and 3D objects from iZiggi-HD to
PC or Mac via Wi-Fi. A wireless Document Camera that no longer tied
up to your PC or Mac.*
t Annotate and emphasize teaching material on iPad by drawing directly
on the live feed with the free IPEVO Whiteboard app.
t Take advantage of iZiggi-HD’s dual USB ports. Stream live images from
the doc cam while sharing access to files on any connected USB storage
device.
*Please note:
In order to generate smooth live feed from iZiggi-HD, please preserve sufficient
bandwidth and system resource for iZiggi-HD. We recommend that iZiggi-HD be used
with only one device at a time. Connecting multiple devices may overload the
bandwidth and system, causing the live image to lag or freeze.
Carry case
User Manual1.2m USB extension cable
iZiggi-HD
wireless document camera
Power adapter
*Power Adapter plug may vary depending on region.
Anti-glare shield1.8m Micro-USB charging cable
iZiggi-HD
PC or Mac
iPad
Carry case
User Manual1.2m USB extension cable
iZiggi-HD
wireless document camera
Power adapter
*Power Adapter plug may vary depending on region.
Anti-glare shield1.8m Micro-USB charging cable
iZiggi-HD
PC or Mac
iPad

2
Notice:
iZiggi-HD’s built-in microphone is only functional when connected to computer via
USB. When using iZiggi-HD wirelessly, only video is transmitted, but not audio.
Getting to know your iZiggi-HD
iZiggi-HD is made of two parts - USB Document Camera and Wireless Base.
iZiggi-HD captures a variety of subjects, including standard letter-sized
documents, devices like smartphones and iPad. Captured high-definition
live video image is then streamed on to IPEVO Whiteboard or Presenter
software via Wi-Fi connection.
A. USB Document Camera
Focus button
Multi-Jointed Stand
to position the camera
USB Document Camera
Wireless Base
Autofocus switch
LED
Microphone
Exposure toggle
Focus button
Multi-Jointed Stand
to position the camera
USB Document Camera
Wireless Base
Autofocus switch
LED
Microphone
Exposure toggle
t Focus button: will bring the subject into sharp focus after a few
seconds.
t Autofocus switch: may be set to Single (S) or Continuous (C).
t Exposure toggle: provides on-the-fly exposure customization.
t LED: if iZiggi-HD is on and providing an image, this LED will turn white.
t Microphone: iZiggi-HD comes with a built-in microphone which is
located on the underside of the camera body next to the lens. The
microphone is on when iZiggi-HD is on. This is useful for video
conferencing and more.
Camera Elements

3
t LED indicators: Lights indicate various states pertaining to battery
power, attached USB devices, and Internet connection. For more
information, see Page 12.
t Power button: Press once to turn on iZiggi-HD. Another press will
power off the device.
t USB ports: Two USB ports for the iZiggi-HD camera and for a USB
storage drive, if desired.
Note: Connecting two USB drives is supported, but not two IPEVO USB
document cameras.
t LAN port: Plug in an ethernet cable (not included) to connect to your
existing Internet network.
Note: When connecting in this manner, please set iZiggi-HD's wireless
connection to “Off (Ethernet Cable)” in the “Internet Connection” setting.
See Page 9.
t Reset button: Press with a pin or paper clip to reset the device,
including SSID and password.
t Micro USB port: Connect the Micro-USB cable to power iZiggi-HD and
to charge the battery.
B. Wireless Base
Getting to know your iZiggi-HD (cont’d)
Whiteboard
www.ipevo.com/presenter
Download and install from
Presenter
Plug In
Plug In
Connect Adapter to iZiggi-HD
Power Button
LED Indicators
USB Port 2
USB Port 1
Micro USB Port
LAN Port
Reset
Focus button
Multi-Jointed Stand
to position the camera
USB Document Camera
Wireless Base
Autofocus switch
LED
Microphone
Exposure toggle
Positioning the iZiggi-HD
Focus button
Multi-Jointed Stand
to position the camera
USB Document Camera
Wireless Base
Autofocus switch
LED
Microphone
Exposure toggle
Additionally, the camera head can swivel with 270° of freedom to customize
your orientation.
The multi-jointed, weighted stand allows to quickly and easily change the
height and position of the camera to suit your subject.

4
Setting up your iZiggi-HD
A. Charge iZiggi-HD
B. Download and install software
Please charge iZiggi-HD and make sure sufficient battery power is available
before using the camera or performing other setup steps.
With free IPEVO software, iZiggi-HD can be used on iPad, PC or Mac. Please
find the download location for your desired platform below:
1. Connect the Micro-USB cable to the power adapter and plug the power
adapter into an outlet. Connect the other end of the Micro-USB cable to
the Micro-USB port on iZiggi-HD.
2. When iZiggi-HD is charging, the “PWR” LED will turn red. This light will
go off once iZiggi-HD is fully charged by performing step 1. Note that
iZiggi-HD is ready for use when power adapter is connected, regardless
of the battery power status.
Battery Tips:
t It takes approximately 3 hours to fully recharge iZiggi-HD on an empty
battery. This assumes iZiggi-HD is powered off during recharge.
t It will take significantly longer to fully recharge if iZiggi-HD is in use
while charging.
t iZiggi-HD can be used on battery power for about 3 hours when fully
charged.
t When the "PWR" LED blinks orange, iZiggi-HD is low on battery and
needs to be charged.
t iZiggi-HD can also be charged using a standard USB port on your
computer. Please note that it will take significantly longer to charge via
this method, since a USB port provides less power output.
PC or Mac
iPad
IPEVO Presenter can be downloaded at: www.ipevo.com/presenter
Search for “IPEVO Whiteboard” in the App store to download and install
Whiteboard for free.
Whiteboard
www.ipevo.com/presenter
Download and install from
Presenter
Plug In
Plug In
Connect Adapter to iZiggi-HD
Power Button
LED Indicators
USB Port 2
USB Port 1
Micro USB Port
LAN Port
Reset
Whiteboard
www.ipevo.com/presenter
Download and install from
Presenter
Plug In
Plug In
Connect Adapter to iZiggi-HD
Power Button
LED Indicators
USB Port 2
USB Port 1
Micro USB Port
LAN Port
Reset
Whiteboard
www.ipevo.com/presenter
Download and install from
Presenter
Plug In
Plug In
Connect Adapter to iZiggi-HD
Power Button
LED Indicators
USB Port 2
USB Port 1
Micro USB Port
LAN Port
Reset

5
iPad (for Mac or PC, see Page 6)
D. Pair iZiggi-HD via Wi-Fi and start streaming
1. Tap “Settings” on your iPad and select “Wi-Fi.” Browse the available
connections and connect to iZiggi-HD’s SSID. The unique SSID can be
found on the label located on the bottom of the device.
2. Launch IPEVO Whiteboard. Follow the onscreen guide that appears to
access iZiggi-HD’s features. These features are also explained on the
next page.
C. Turn on iZiggi-HD and connect the doc cam’s USB cable
1. Press the power button to turn on iZiggi-HD. The “PWR” LED should
be green. If it is blinking orange or red, see section A on Page 4. The
“WIFI” LED should blink orange and then turn green as well.
2. Connect the iZiggi-HD camera’s USB cable to the USB port on the base.
Setting up your iZiggi-HD(cont’d)
Plug-In to Base
Wi-Fi
9:04 AM 34%
iPad
Settings
Airplane Mode
Wi-Fi
Bluetooth
Notification Center
Control Center
Off
iZiggi_8888 iZiggi_8888
Choose a Network...
Apple Network ad1d70
Apple Network ad
Wi-Fi
Bottom of iZiggi-HD
SSID
MAC Address
Serial Number
SSID:
iZiggi_XXXX
MAC Address:
0123456789ab
25123B01234
iPad
Settings
Caution:
On first time connection, it will take about 1 minute to link iPad and iZiggi-HD. Please
make sure the appears on the top left corner of iPad before launching IPEVO
Whiteboard.

6
1. Ensure IPEVO Presenter is installed. See Section B, Page 4.
2. Browse your available wireless networks and connect to iZiggi-HD’s
SSID. The unique SSID can be found on the label located on the bottom
of the device.
1. Launch IPEVO Whiteboard
2. If iPad is connected with iZiggi-HD’s WiFi network, Live View should
automatically appear on IPEVO Whiteboard. If not, please refer to
sections C and D on page 5.
3. Launch IPEVO Presenter and start using iZiggi-HD. For more function
and setting of IPEVO Presenter, please refer to the next section.
Setting up your iZiggi-HD(cont’d)
Bottom of iZiggi-HD
SSID
MAC Address
Serial Number
SSID:
iZiggi_XXXX
MAC Address:
0123456789ab
25123B01234
Mac or PC(for iPad, see Page 5)
9:04 AM
34%
IPEVO_NB
Wi-Fi: Searching for Internet
Apple Network ad1d70
Apple Network 70
CS
iZiggi_8888
Using iZiggi-HD with IPEVO software
Live View
Change
Camera Resolution
Change
Camera Exposure
Focus
Reload
t Live View: View the live feed (real-time video) from your document
camera. Tapping this icon brings up a network list. Tapping iZiggi-HD’s
SSID in this list will bring up the settings page for iZiggi-HD.
t Resolution: Tap to change the image resolution. Higher resolutions
convey more image information at the possible cost of lower frame rate
(frames per second).
t Exposure: Tap to increase or decrease exposure, i.e. how bright or dark
the image is.
t Focus: Re-focus the camera. Tapping Focus will result in a sharp image
after a few seconds.
t Reload: Refresh the live video feed.
iPad: Using iZiggi-HD with IPEVO Whiteboard
IPEVO Whiteboard plays live video stream from iZiggi-HD and enables
drawing and annotation to be added on the Live View. Follow these steps to
connect IPEVO Whiteboard and iZiggi-HD:

7
Mac and PC: Using iZiggi-HD with IPEVO Presenter
iZiggi-HD can also be viewd on Mac or PC using IPEVO Presenter.
Please download and launch IPEVO Presenter, follow these steps to
switch to iZiggi-HD’s Live View:
On Mac OS
1. Click on IPEVO Presenter on menu bar.
2. Click “Preferences”
3. Click “Select Video device” and select iZiggi-HD’s SSID.
On Windows OS
1. Click the Wrench icon on top right of IPEVO Presenter.
2. Under ”General” tab, check “Wireless Device”
3. Select iZiggi-HD from the drop down menu if not already selected.
Live View
Change
Camera Resolution
Change
Camera Exposure
Focus
Reload
1.
3.
2.
1.
2.
3.
Wi-Fi
34%
8888
Live View
Change
Camera Resolution
Change
Camera Exposure
Focus
Reload
1.
3.
2.
1.
2.
3.
Wi-Fi
34%
8888
Using iZiggi-HD with IPEVO software (cont’d)
Please note:
Only one iZiggi-HD or other IPEVO document camera can be used with IPEVO
Presenter or Whiteboard at a time.
CAUTION: When viewing the live feed, please do not repeatedly plug and unplug the
document camera’s USB cable. This may cause iZiggi-HD to suffer a system error.

8
Enter IP address
2.
1. Live View
Accessing iZiggi-HD’s Settings
On iPad
On Mac or PC
Visiting the Settings page will allow you to view Live View using your
browser, connect iZiggi-HD to the Internet, manage connected USB storage
devices, customizing login information, setup password protection, and
change advanced Internet settings. To do so, ensure your device is
connected to iZiggi-HD, then perform the following steps. More details
about settings options can be found on Pages 9 through 12.
Launch IPEVO Whiteboard. Tap the Wireless icon. Select the arrow icon in
the extended menu that appears.
1. Launch your browser and connect to the IP address of iZiggi-HD by
typing it into the address bar. The default for this IP address is 10.10.10.1.
2. Enter the login password, which by default is “admin”.
Enter IP address
2.
1. Live View
Enter IP address
2.
1. Live View

9
Generally, your iPad/Computer can access the internet via your Wi-Fi router.
Follow these simple steps to do so.
Connecting to the Internet with iZiggi-HD
Because your computer connects to iZiggi-HD via Wi-Fi, you are
disconnected from the Internet when using iZiggi-HD. However, you can
regain your Internet connection by connecting iZiggi-HD to your existing
Wi-Fi network. Once iZiggi-HD is connected to the Internet, your iPad, PC or
Mac (connected to iZiggi-HD) is also linked to the internet.
With IPEVO iZiggi-HD,
You can view the “Live View” from your iPad/Computer in the real time.
Plus, you can connect to the Internet by linking iZiggi-HD to the Wi-Fi
network you already use
1. Please make sure your iPad, Mac or PC is connected to iZiggi-HD. To
connect iZiggi-HD, please follow the steps starting on Page 5.
2. Tap the “Internet Connection” tab on the iZiggi-HD settings page (see
Pages 8 for accessing settings).
Please note:
If you are not returned to the iZiggi-HD settings page after the 100 second countdown,
please reconnect your device to iZiggi-HD by going to Settings > Wi-Fi > iZiggi_xxxx
(with “xxxx” being the unique SSID).
iZiggi-HD is unable to determine if your password is correct or if you have
successfully connected to your network. If you are unable to access the Internet after
restart, please check if the password is entered correctly and try again. The password
is case sensitive.
iZiggi-HD only supports a Wi-Fi network at 2.4GHz. 5GHz Wi-Fi is not supported.
3. Under “Wireless Connection,” select “On.” [If a wired connection is
preferred, select “Off (Ethernet Cable)” and plug an ethernet cable (not
included) into the LAN port.]
4. A list of available Wi-Fi networks will appear. Select your network.
5. Enter the password for your network and click OK. The password is case
sensitive.
6. A pop-up window will appear. Please click “Restart” to restart iZiggi-HD
and complete the process, or click “Later” to manually restart iZiggi-HD
later. iZiggi-HD will connect to your network within 100 seconds. Your
device is now connected to the Internet through iZiggi-HD.

10
Save images on Whiteboard App to your USB Drive
On IPEVO Whiteboard, you can also import images from your USB storage
connected to iZiggi-HD for presentation.
Follow these steps to import images from USB storage:
Snapshot
8888
1.
2.
8888
1. Tap the icon on IPEVO Whiteboard.
2. Select image from iZiggi_xxxx
3. Select the USB storage and locate your image.
4. Tap the + icon on top right hand corner.
1. Tap on IPEVO Whiteboard.
2. Select “iZiggi_XXXX” under “Sent to external storage”
3. “Upload completed” will pop up once the image is successfully saved.
iZiggi-HD’s two USB ports allow you to connect an USB storage while
viewing the Live View wirelessly on iPad. Using the snapshot function ,
you can save the drawing and annotation on IPEVO Whiteboard to the USB
storage connected on iZiggi-HD.
Follow these steps to save images to USB storage:

11
To prevent unwanted access of your Live View and any storage drive files,
secure your iZiggi-HD Wi-Fi network by adding a password using the
Wireless Password function.
By default, iZiggi-HD's Live View and Wireless Disk are not password
protected. Any device connected to iZiggi-HD's network can access Live
View and files in Wireless Disk.
Setting up password protection for iZiggi-HD Live View and Wi-Fi
1. To set a wireless password, access the iZiggi-HD Settings page (see
Pages 8).
2. Select Wireless Password. The iZiggi-HD network name (SSID) and
network password can be changed here. Select OK when done.
Using iZiggi-HD for Data Sharing
iZiggi-HD's two USB ports allow you to connect USB storage drives
containing video, music, photo and other files to view and share via your
browser.
To take advantage of this feature, simply connect a USB storage drive to
either USB port on iZiggi-HD's base. The corresponding USB LED will light
up once properly connected.Launch your internet browser and access the
Settings Page of iZiggi-HD. Please refer to page 8 for accessing the Settings
Page. On Setting Page, click Wireless Disk to access and manage the USB
storage drive's data.
Caution:
1. To avoid data corruption, please power off iZiggi-HD before safely removing any
connected USB storage drives.
2. Please preserve sufficient bandwidth and system resource for iZiggi-HD to run
Wireless Disk smoothly. It may be required to unplug the USB Camera from the base
prior to multiple simultaneous accesses of Wireless Disk. Failing to preserve sufficient
bandwidth or resource may result in data upload or download error.

12
Customizing Login Information
Understanding the LED indicators
You can set a new password for accessing the settings page. You can also
add an additional 8 guest users to iZiggi-HD. Guest users will have access
to connected USB storage drives (if any) and Live View, but will not have
access to Internet Connection, Admin Password, Wireless Password, or
Advanced Settings.
iZiggi-HD has 5 LED indicators on the top of its base. Different colors (solid
and blinking) indicate various states.
1. To set your Admin Password, access the iZiggi-HD Settings page (see
Page 8).
2. Select Admin Password. The Admin account name cannot be changed,
but the password can be changed and guest names and passwords can
be added and deleted.
1. PWR — Power and battery level
Green: iZiggi-HD is powered on and the battery is charged. A green light
also tells you that charging is complete.
Orange: iZiggi-HD is powered on and the battery is charging.
Blinking Orange: iZiggi-HD is powered on but the battery is running low.
You should connect the power adapter immediately.
Red: iZiggi-HD is powered off and charging.
2. USB 1 and USB 2 — Corresponds to the two USB ports on iZiggi-HD’s
base. If a USB device is connected, such as iZiggi-HD’s camera or a
storage drive, the appropriate LED will turn green. Once the device is
removed, the LED will turn off.
3. LAN — Indicates an ethernet cable (wired) connection. The LAN LED
turns green when an ethernet cable is connected and turns off once the
cable is removed.
4. WIFI — Indicates current Wi-Fi (wireless) status
Orange to Green: The system is starting up. Please allow time for the
connection to resolve.
Blinking Orange: The system is shutting down.
Green: Wi-Fi is ready.
Blinking Green: Wi-Fi data is transferring.
Note: To delete guest users, empty the Account and Password fields for that user and
click OK.
iZiggi-HD
Extension cable
PC or Mac
iPad Apple TV
TV
Charging Time Usage Time Remaining
1hr
2hr 2hr
1hr
iZiggi-HD

13
Using iZiggi-HD Directly on Your Computer
Using Apple TV Airplay
In addition to connecting iZiggi-HD’s camera to its base for Wi-Fi
applications, you can also connect the camera directly to your computer’s
USB port. The live image can be viewed and presented with IPEVO
Presenter software in this way.
You can use iPad and Apple TV Airplay to wirelessly project live action
(real-time video and annotation) from IPEVO Whiteboard onto the big
screen.
Follow these steps to project live action from iZiggi-HD using Apple TV
Airplay:
1. You can connect iZiggi-HD Camera’s USB cord directly to your computer
to use it as an USB camera. Included extension cable provides extra
length if needed.
2. Launch the IPEVO Presenter software. A screen containing a live video
image from your iZiggi-HD should appear. The iZiggi-HD is now ready
to use.
1. Connect your Apple TV device to iZiggi-HD. Navigate to Settings > Wi-Fi.
2. A list of available wireless networks will appear. Select iZiggi-HD’s
network and enter the password if required.
iZiggi-HD
Extension cable
PC or Mac
iPad Apple TV
TV
Charging Time Usage Time Remaining
1hr
2hr 2hr
1hr
iZiggi-HD
iZiggi-HD
Extension cable
PC or Mac
iPad Apple TV
TV
Charging Time Usage Time Remaining
1hr
2hr 2hr
1hr
iZiggi-HD
3. Turn on the Airplay mode in Apple TV.
4. Swipe up from the bottom of your screen to access Control Center. Tap
AirPlay.
Note: Airplay is only available when both iPad and Apple TV are
connected to iZiggi-HD.
5. Turn on the Mirror switch to enable Mirror mode.
6. Launch IPEVO Whiteboard on your iPad. Now Apple TV, iZiggi-HD, and
your iPad are communicating. Changes you make in Whiteboard will be
reflected on Apple TV and its screen.

14
iZiggi-HD
Extension cable
PC or Mac
iPad Apple TV
TV
Charging Time Usage Time Remaining
1hr
2hr 2hr
1hr
iZiggi-HD
FAQ
t What can I do if I forgot my SSID or admin password?
You can reset the SSID and password by resetting iZiggi-HD to its default
settings. To do so, press the reset button with a pin or paper clip. The
“WIFI” LED will blink orange, indicating iZiggi-HD is resetting. Reset is
complete once the “WIFI” LED turns green. You can then connect and
log in to iZiggi-HD using the default information. The default SSID and
password can be found on the label at the bottom of iZiggi-HD.
t Can I view iZiggi-HD over Wi-Fi with multiple devices?
Due to bandwidth and system limitations, we recommend using only
one device at a time to display iZiggi-HD’s Live View. Using 2 or more
devices displaying iZiggi-HD Live View may result in laggy or freezed
video due to insufficient bandwidth or system resources.
t I am looking for more advanced Internet settings. Where can I find that
on iZiggi-HD?
Access the iZiggi-HD settings page (refer to Pages 8). You can find the
Advanced Settings in the lower left-hand corner. These settings include
additional Internet settings for iZiggi-HD.
t I need to use static IP for all devices on my network. What do I do?
Follow the steps on Pages 8 to access your iZiggi-HD settings. Select
“Advanced Settings.” From there, go to Wired Network Setting > Mode >
Fixed IP Address.
Enter the IP Address, Subnet Mask, Default Gateway and other settings
in their respective fields, and click OK.
t How long does it take to fully charge iZiggi-HD? How long can I use
iZiggi-HD if it is not fully charged?
If iZiggi-HD’s battery is depleted, it takes about 3 hours to fully recharge
iZiggi-HD. For the battery life of iZiggi-HD under different states please
refer to the chart below.
t Can I watch Live View of iZiggi-HD through an internet browser?
Yes, you can. But different browsers process the Live View of iZiggi-HD
differently and may result in various compatibility issues. It is
recommended to use Live View on IPEVO Presenter or IPEVO Whiteboard
for the best Live View experience.
t Can I connect two USB document cameras to iZiggi-HD base and use
them both at the same time?
No, iZiggi-HD can only be connected to one USB Document Camera at
a time. Connecting both USB ports to USB Cameras will cause system
error, nor would Live View work.

15
Federal Communication Commission Interference Statement
This equipment has been tested and found to comply with the limits for a
Class B digital device, pursuant to Part 15 of the FCC Rules. These limits are
designed to provide reasonable protection against harmful interference in a
residential installation.
This equipment generates, uses and can radiate radio frequency energy
and, if not installed and used in accordance with the instructions, may
cause harmful interference to radio communications. However, there is no
guarantee that interference will not occur in a particular installation. If this
equipment does cause harmful interference to radio or television
reception, which can be determined by turning the equipment off and on,
the user is encouraged to try to correct the interference by one of the
following measures:
t Reorient or relocate the receiving antenna.
t Increase the separation between the equipment and receiver.
t Connect the equipment into an outlet on a circuit different from that to
which the receiver is connected.
t Consult the dealer or an experienced radio/TV technician for help.
FCC Caution
To assure continued compliance, any changes or modifications not expressly
approved by the party responsible for compliance could void the user’s authority to
operate this equipment. (Example - use only shielded interface cables when
connecting to computer or peripheral devices).
Troubleshooting
t I am not able to see a live image from iZiggi-HD on IPEVO Whiteboard
or Presenter.
tMake sure the camera is connected to the USB port of iZiggi-HD’s
base.
tMake sure your device is connected to iZiggi-HD via Wi-Fi. Follow
the steps starting on Page 5.
tShut down the device and restart.
tUnplug the camera and then reconnect its USB cable to the base.
tPlease check if the WiFi icon appears on the top left corner of iPad.
When it does, exit and re-launch IPEVO Whiteboard.
t I cannot connect to iZiggi-HD.
tUse a pin or paper clip to press the Reset button on iZiggi-HD to
reset the device. Try connecting again after the reset.
tIf a reset does not resolve the problem, please contact IPEVO
customer service.
t I am unable to connect iZiggi-HD to my existing network.
tPlease ensure the password you’re entering is the correct one.
tContact your Internet administrator for assistance.
t iZiggi-HD cannot find my Wi-Fi network.
tGo to the Internet Connection page (see Page 9) and click the
“Refresh Network List” button. See if your network name appears.
tShut down the device and restart. Search for your network after
restarting.
tMake sure your Wi-Fi router is set to 2.4GHz. iZiggi-HD does not
support Wi-Fi on 5GHz.
t The Live View of iZiggi-HD is unstable, laggy, or choppy.
tMake sure your device is within the effective range of iZiggi-HD. Your
device should stay within 10m (33ft) of iZiggi-HD.
tCheck to see if multiple devices are viewing iZiggi-HD. If so, please
have only one device using the Live View of iZiggi-HD. Or, consider
lowering the resolution setting.
tRestart iZiggi-HD and check the Live View again.
t iZiggi-HD does not turn off.
tPlease press and hold the power button for 5 seconds to force a
shutdown of iZiggi-HD.

16
Federal Communication Commission Interference Statement (cont’d)
FCC Radiation Exposure Statement
This equipment complies with FCC RF radiation exposure limits set forth for an
uncontrolled environment. This equipment should be installed and operated with a
minimum distance of 20 centimeters between the radiator and your body.
This transmitter must not be co-located or operating in conjunction with any other
antenna or transmitter.
The antennas used for this transmitter must be installed to provide a separation
distance of at least 20 cm from all persons and must not be co-located or operating
in conjunction with any other antenna or transmitter.
Model: iZiggi-HD/FCC ID: WKP-CDVW-01IP
This device complies with Part 15 of the FCC Rules. Operation is subject to the
following two conditions:
(1) This device may not cause harmful interference, and (2) This device must accept
any interference received, including interference that may cause undesired operation.

Customer Service (USA)
Email: cs@ipevo.com
Tel: +1-408-490-3085
© 2014 IPEVO inc. All rights reserved. IPEVO, iZiggi-HD, the IPEVO logo and other
IPEVO marks are owned by IPEVO inc. and may be registered. All other trademarks
are the property of their respective owners.
Customer Service (International)
Email: service@ipevo.com
Tel: +886-2-5550-8686
Table of contents
Other Ipevo Document Camera manuals

Ipevo
Ipevo VZ-R User manual

Ipevo
Ipevo Ziggi-HD Plus User manual

Ipevo
Ipevo VZ-1HD User manual

Ipevo
Ipevo Ziggi HD User manual

Ipevo
Ipevo V4K User manual

Ipevo
Ipevo VZ-X User manual

Ipevo
Ipevo iZiggi-HD User manual

Ipevo
Ipevo VZ-1 HD User manual

Ipevo
Ipevo Ziggi-HD Plus User manual

Ipevo
Ipevo Ziggi User manual