Copyright 2018 Iron Bow Technologies
Contents
Table of Figures ..........................................................................................................................................4
Introduction ................................................................................................................................................. 4
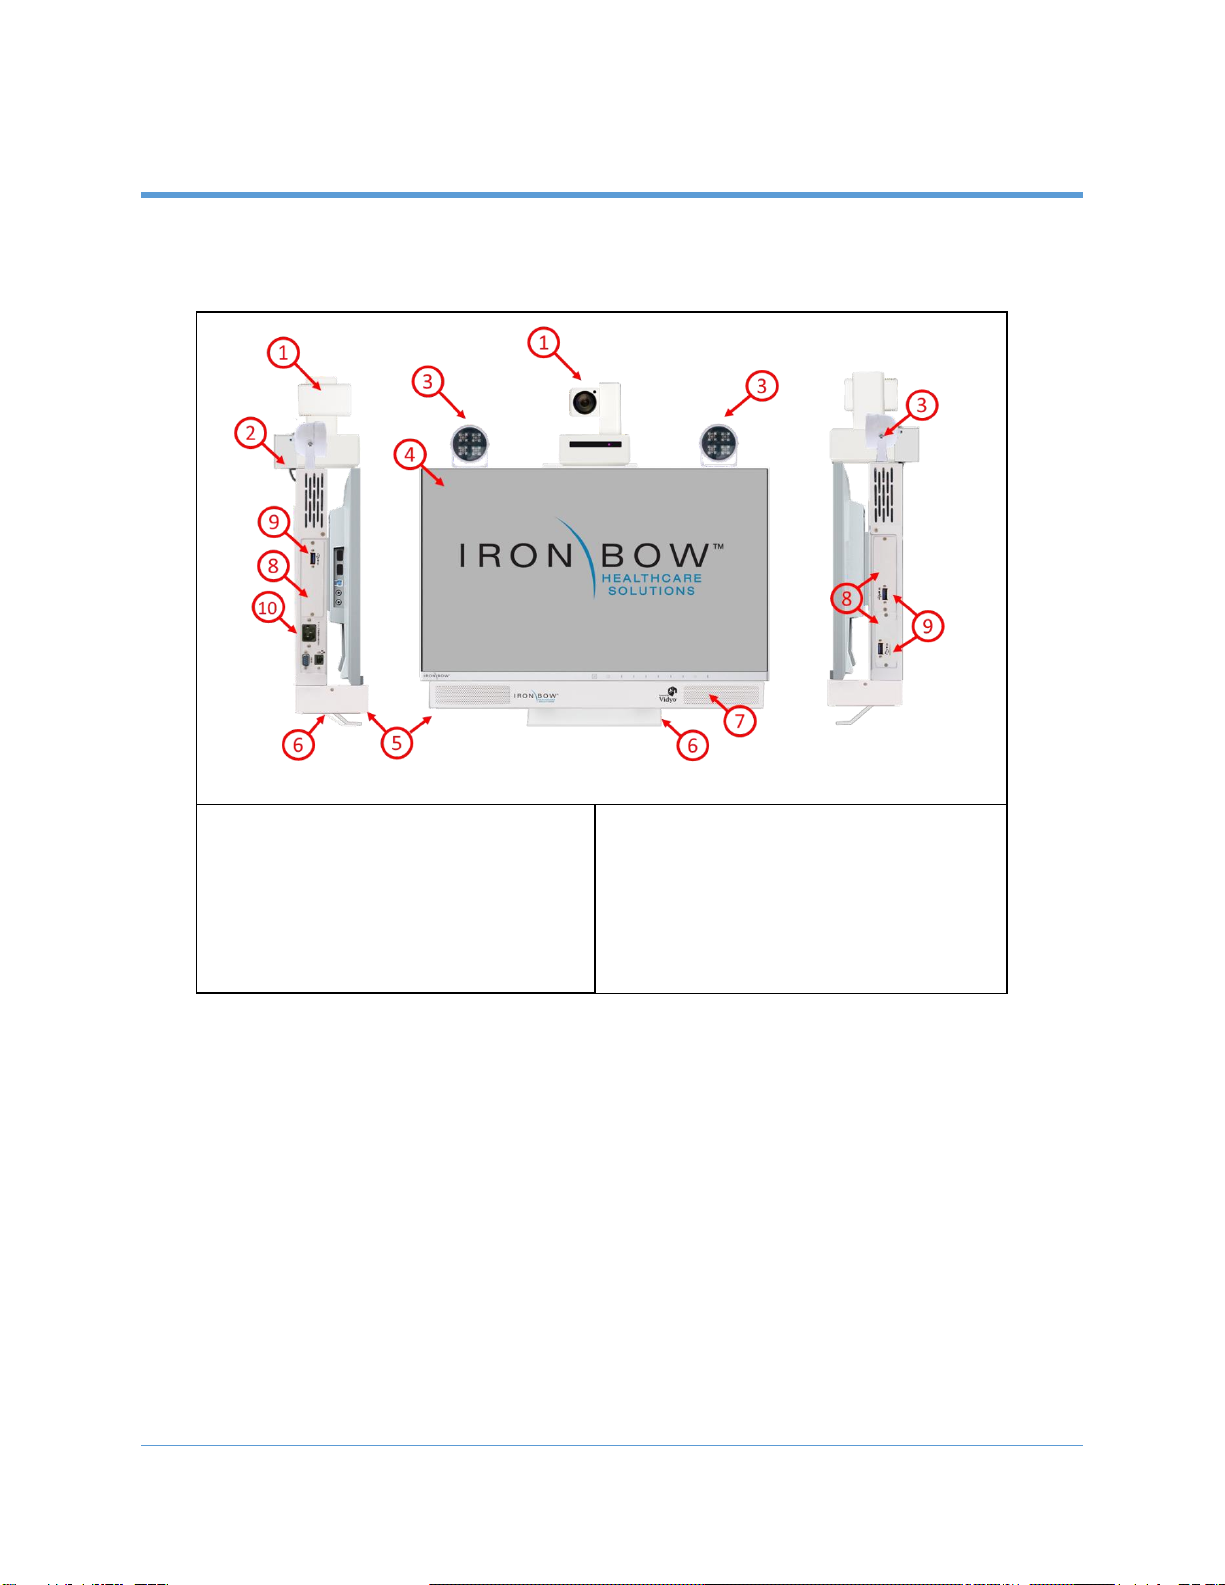
System Description.....................................................................................................................................6
System Installation................................................................................................................................................ 7
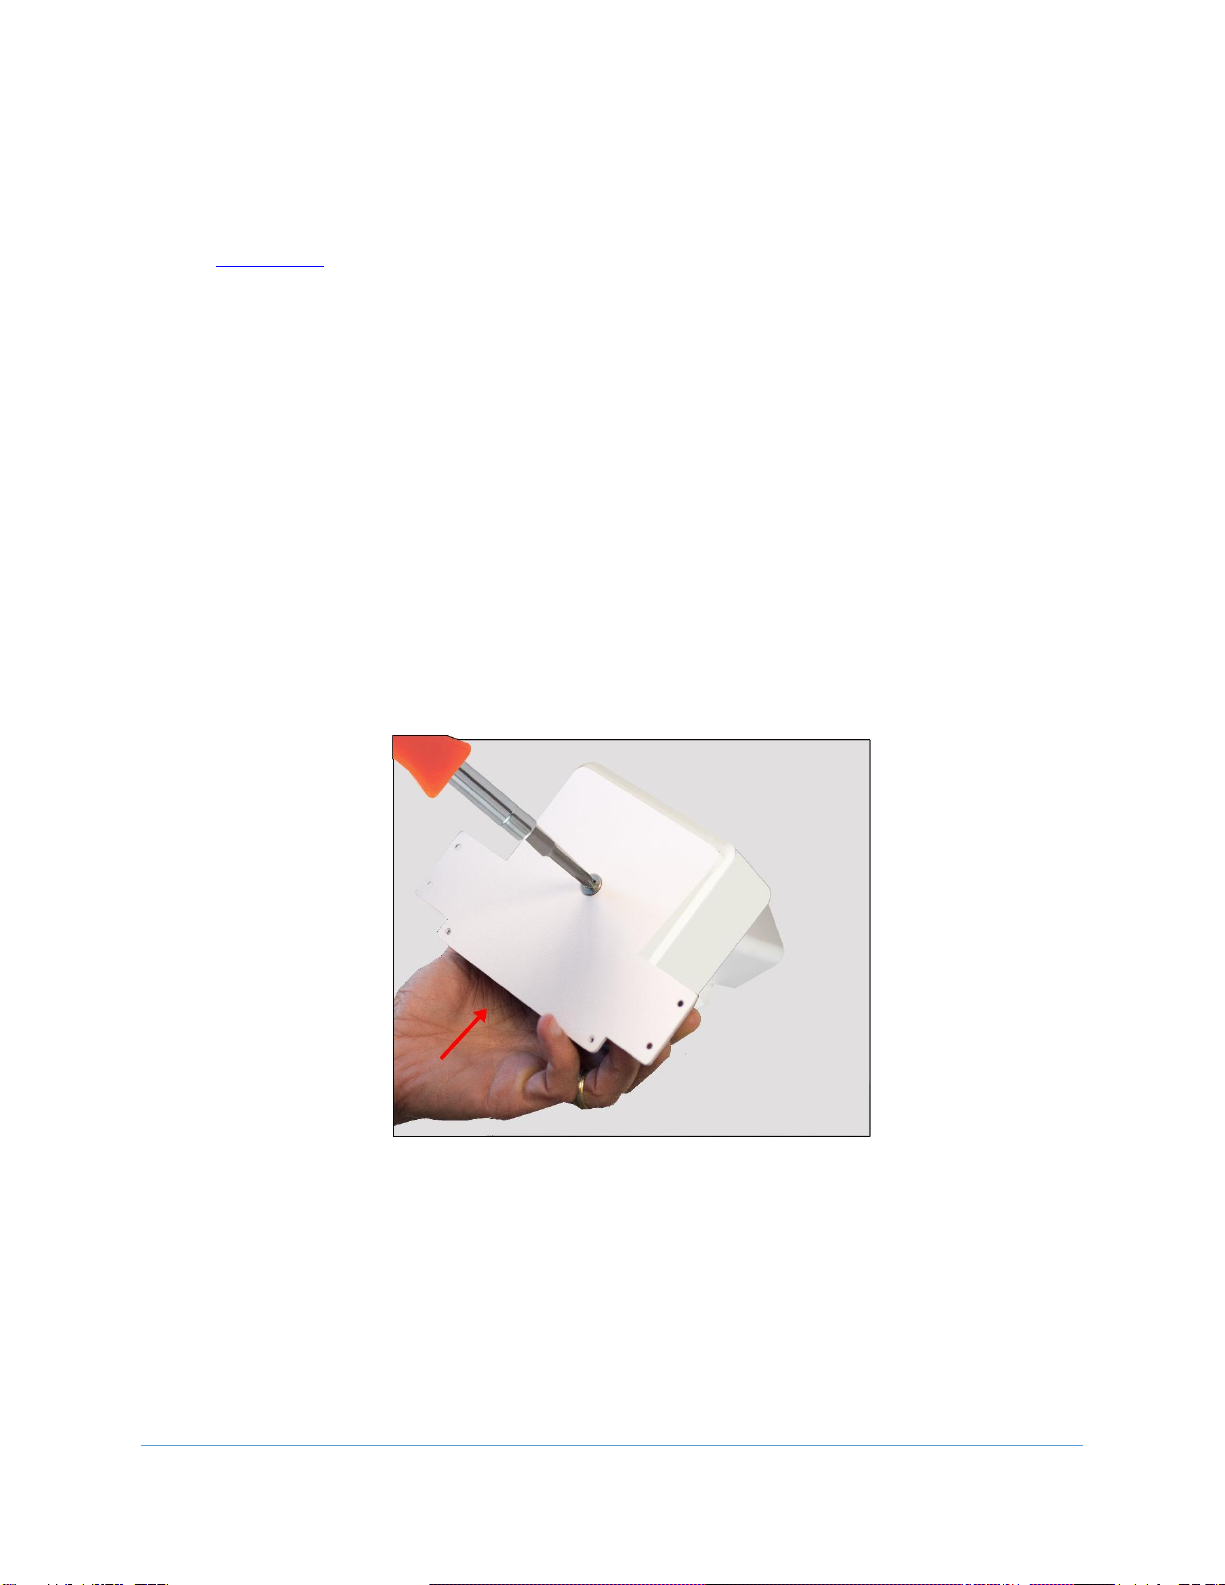
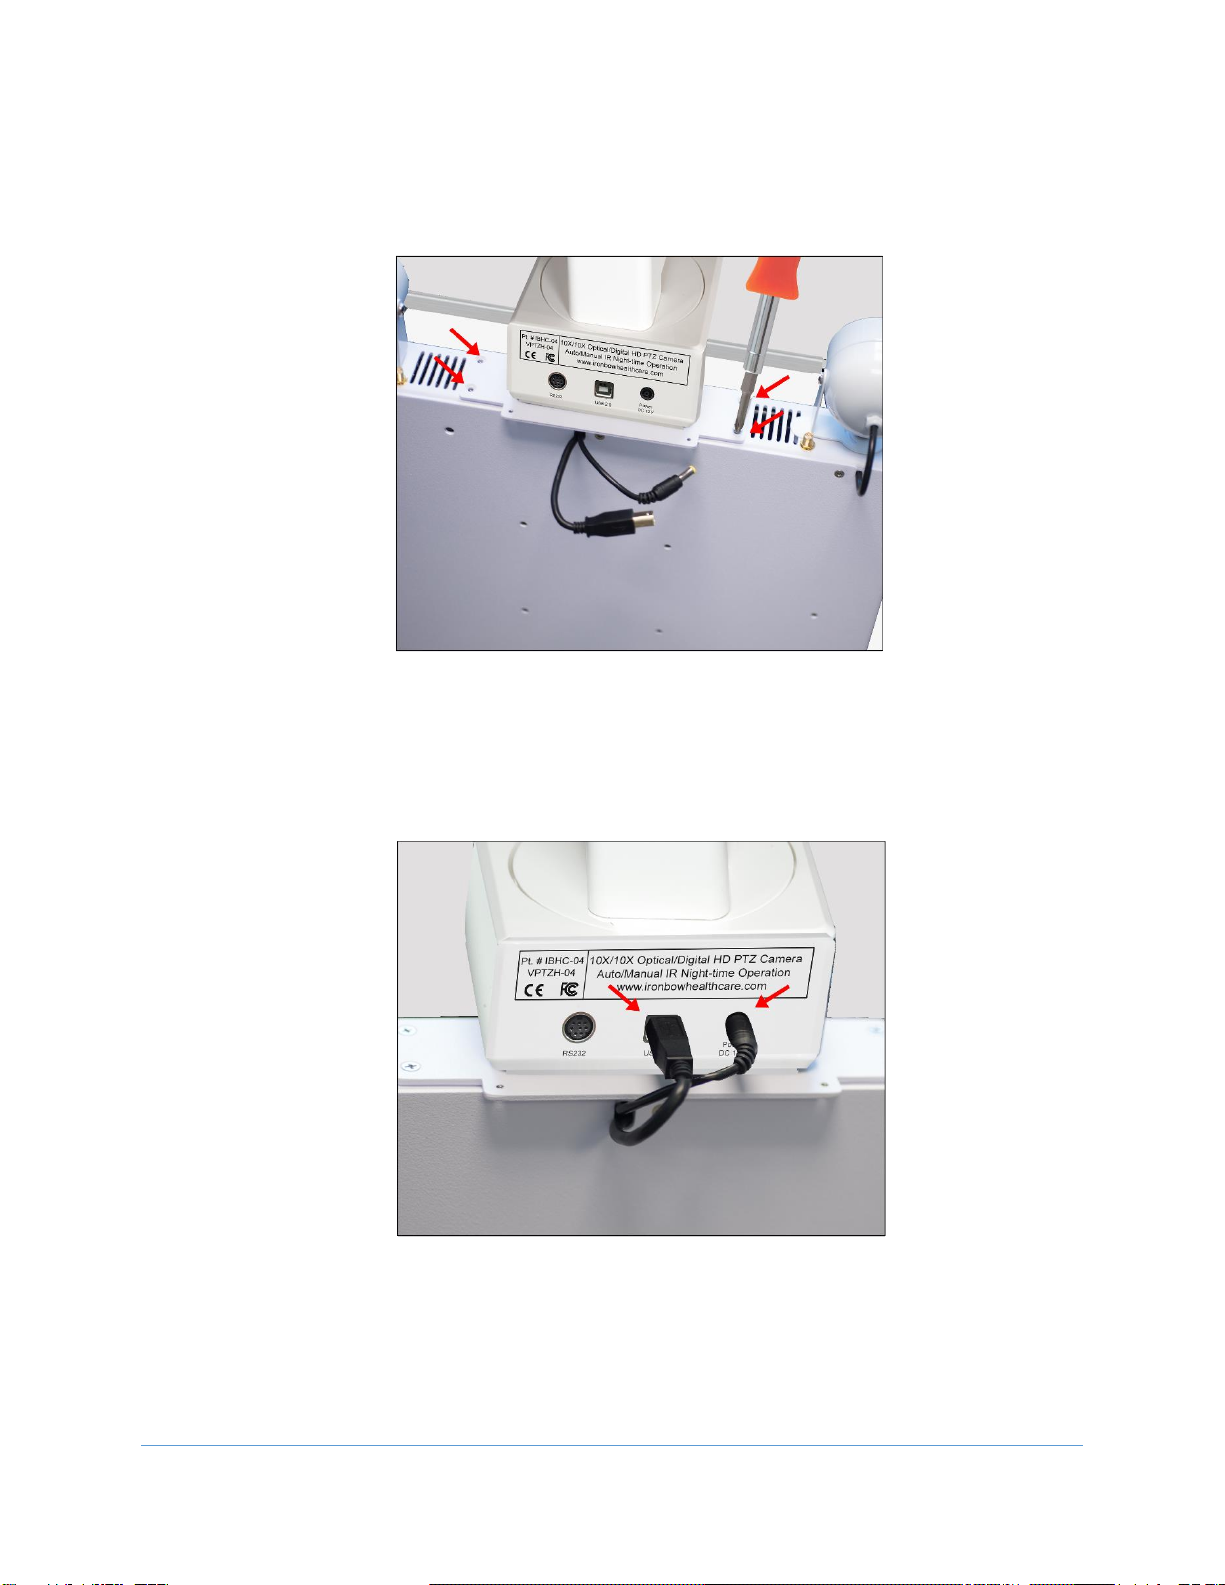
Installing the Camera....................................................................................................................................... 7
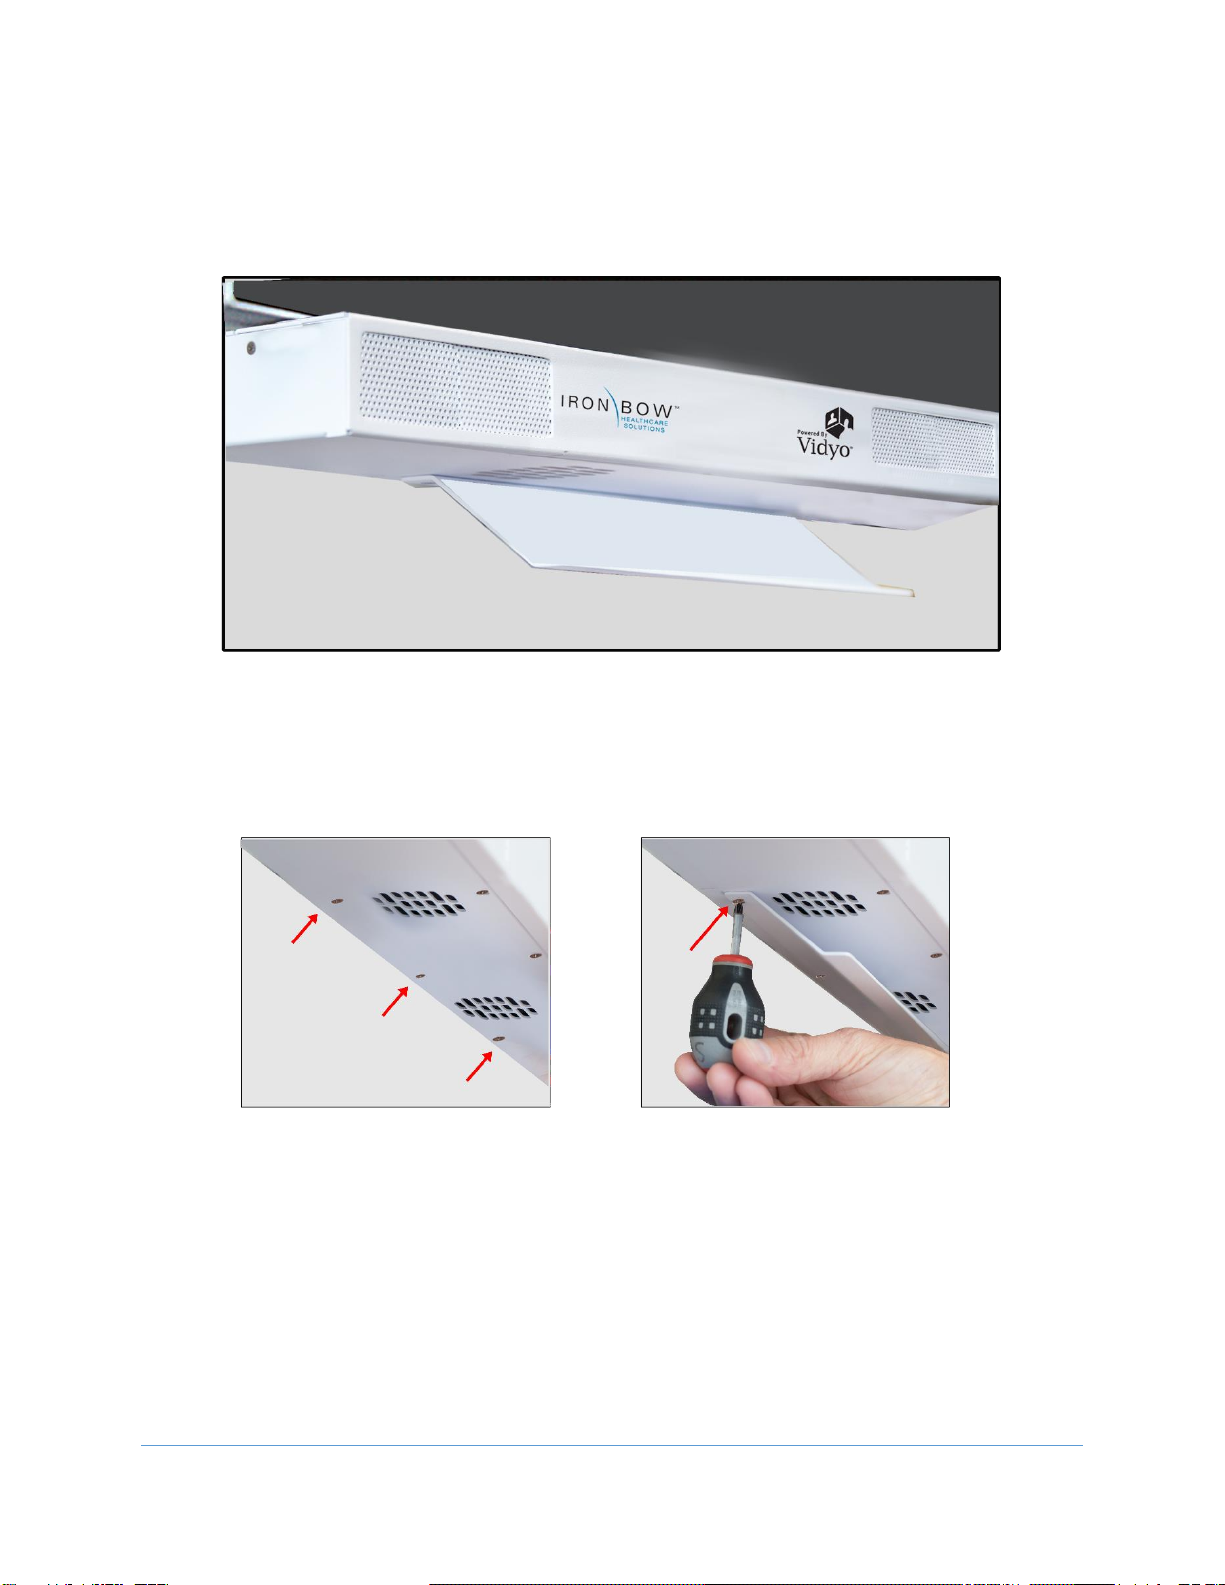
Sound Deflector............................................................................................................................................. 10
Installing the Sound Deflector....................................................................................................................... 10
Connections................................................................................................................................................... 11
HDMI/PC Option Module .............................................................................................................................. 12
Wi-Fi Network Operation .............................................................................................................................. 13
Installing the Wi-Fi Antennas ........................................................................................................................ 13
Getting Started ..........................................................................................................................................14
Powering On and Off .......................................................................................................................................... 14
Powering On the vCLINiC............................................................................................................................... 14
Waking Up the vCLINiC.................................................................................................................................. 14
Powering Off the vCLINiC .............................................................................................................................. 14
Restarting the vCLINiC................................................................................................................................... 14
Connecting to the Network ................................................................................................................................ 15
Managing Calls..........................................................................................................................................15
Answering a Call.................................................................................................................................................. 15
Ignoring a Call ..................................................................................................................................................... 16
Ending a Call........................................................................................................................................................ 16
Placing a Call ....................................................................................................................................................... 16
Managing Video Settings .........................................................................................................................17
Enabling and Disabling Video Privacy Mode....................................................................................................... 17
Enabling and Disabling Self-View Mode ............................................................................................................. 17
Zooming Camera In and Out............................................................................................................................... 18
Panning and Tilting Camera................................................................................................................................ 18
Managing Audio Settings.........................................................................................................................19
Enabling and Disabling Microphone Mute Mode............................................................................................... 19
Adjusting Speaker Volume.................................................................................................................................. 19
Sharing Content from Connected Devices.............................................................................................20
Sharing Content from an External PC ................................................................................................................. 20
CLINiC Administration..............................................................................................................................21
Accessing the Vidyo Admin Settings ................................................................................................................... 21
Mandatory CLINiC Settings ................................................................................................................................. 21
Enable/Disable Auto Answer .............................................................................................................................. 22
Change Sleep Settings......................................................................................................................................... 22
Add Contacts....................................................................................................................................................... 23
Appendix: Mounting Information ............................................................................................................25