Ironton 46694 User manual

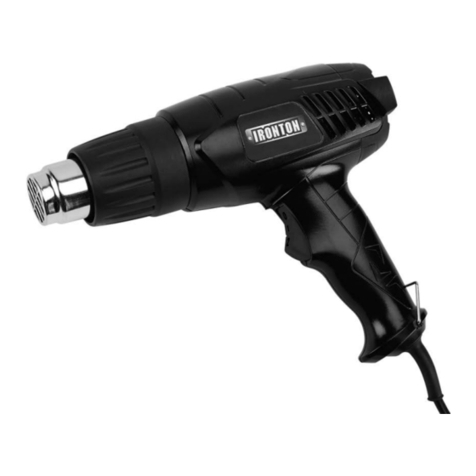
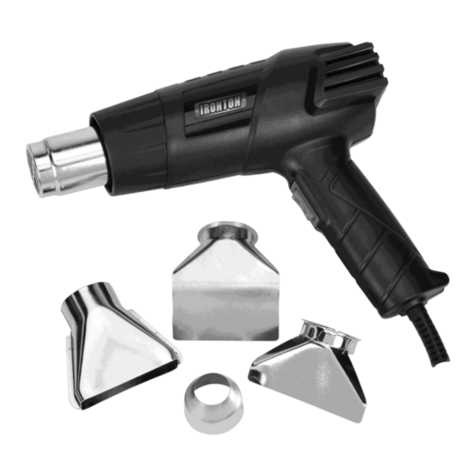
DUAL TEMP 9-PIECE HEAT GUN KIT
OWNER’S MANUAL
WARNING:
Read carefully and understand all ASSEMBLY AND OPERATION
INSTRUCTIONS before operating. Failure to follow the safety rules and other
basic safety precautions may result in serious personal injury.
Item#: 46694

Page of 14
2
Thank you very much for choosing an IRONTON product! For future reference, please complete
the owner’s record below:
Model: _______________ Purchase Date: _______________
Save the receipt, warranty and these instructions. It is important that you read the entire manual
to become familiar with this product before you begin using it.
This machine is designed for certain applications only. The distributor cannot be responsible for
issues arising from modification. We strongly recommend this machine not be modified and/or
used for any application other than that for which it was designed. If you have any questions
relative to a particular application, DO NOT use the machine until you have first contacted the
distributor to determine if it can or should be performed on the product.
For technical questions please call 1-800-222-5381.
INTENDED USE
This Dual Temperature Heat Gun Kit has the power and versatility to tackle the most difficult heat
gun tasks. The air reduction nozzle concentrates heat for stripping paint, softening caulk,
speed-drying epoxy and other applications. The deflector nozzle protects glass while the reflector
nozzle speeds thawing of frozen pipes.
SPECIFICATIONS
Item #: 46694
Input: 120V~, 60 Hz, 12.5 Amp
Output: 1000/1500 Watts
Air Temperature: 750/1000 degrees F
Air Volume: 14/19.4 cu. Ft. / min.
Net Weight: 3.3 Lbs.
Kit Includes: Heat Gun, All purpose scraper, 3 Specialty Scrapers with Handle, 2 deflector
nozzles, 1 reflector nozzle, Air reduction nozzle, and Carrying Case.
GENERAL SAFETY RULES
WARNING:Read and understand all instructions. Failure to follow all instructions listed
below, may result in electric shock, fire and/or serious personal injury.
SAVE THESE INSTRUCTIONS
WORK AREA
Keep your work area clean and well lit. Cluttered benches and dark areas invite accidents.
Do not operate power tools in explosive atmospheres, such as in the presence of flammable
liquids, gases, or dust. Power tools create sparks, which may ignite the dust or fumes.
Keep bystanders, children, and visitors away while operating a power tool. Distractions can
cause you to lose control.

Page of 14
3
ELECTRICAL SAFETY
Double insulated tools are equipped with a polarized plug (one blade is wider than the other).
This plug will fit in a polarized outlet only one way. If the plug does not fit fully in the outlet,
reverse the plug. If it still does not fit, contact a qualified electrician to install a polarized
outlet. Do not change the plug in any way. Double insulation eliminates the need for the
three wire grounded power supply system.
Avoid body contact with grounded surfaces such as pipes, radiators, ranges and
refrigerators. There is an increased risk of electric shock if your body is grounded.
Do not expose power tools to rain or wet conditions. Do not use near standing water. Water
entering a power tool will increase the risk of electric shock.
Do not abuse the cord. Never use the cord to carry the tools or pull the plug from an outlet.
Keep cord away from heat, oil, sharp edges or moving parts. Replace damaged cords
immediately. Damaged cords increase the risk of electric shock.
When operating a power tool outside, use an outdoor extension cord marked “W-A” or “W”.
These cords are rated for outdoor use and reduce the risk of electric shock.
PERSONAL SAFETY
Stay alert, watch what you are doing and use common sense when operating a power tool.
Do not use tool while tired or under the influence of drugs, alcohol, or medication. A moment
of inattention while operating power tools may result in serious personal injury.
Dress properly. Do not wear loose clothing or jewelry. Contain long hair. Keep your hair,
clothing, and gloves away from moving parts. Loose clothes, jewelry, or long hair can be caught
in moving parts.
Avoid accidental starting. Be sure switch is off before plugging in. Carrying tools with your
finger on the switch or plugging in tools that have the switch on invites accidents.
Remove adjusting keys or wrenches before turning the tool on. A wrench or a key that is left
attached to a rotating part of the tool may result in personal injury.
Do not overreach. Keep proper footing and balance at all times. Proper footing and balance
enables better control of the tool in unexpected situations.
Use safety equipment. Always wear eye protection. Dust mask, non-skid safety shoes, hard hat,
or hearing protection must be used for appropriate conditions. Ordinary eye or sun glasses are NOT
eye protection.

Page of 14
4
TOOL USE AND CARE
Use clamps or other practical way to secure and support the workpiece to a stable platform.
Holding the work by hand or against your body is unstable and may lead to loss of control.
Do not force the tool. Use correct tool for your application. The correct tool will do the job better
and safer at the rate for which it is designed.
Do not use tool if switch does not turn it on or off. Any tool that cannot be controlled with the
switch is dangerous and must be repaired.
Disconnect the plug from the power source before making any adjustments, changing
accessories, or storing the tool. Such preventive safety measures reduce the risk of starting the
tool accidentally.
Store idle tools out of reach of children and other untrained persons. Tools are dangerous in
the hands of untrained users.
Maintain tools with care. Keep cutting tools sharp and clean. Properly maintained tools with
sharp cutting edges are less likely to bind and are easier to control.
Check for misalignment or binding of moving parts, breakage of parts, and any other
condition that may affect the tools operation. If damaged, have the tool serviced before using.
Many accidents are caused by poorly maintained tools.
Use only accessories that are recommended by the manufacturer for your model.
Accessories that may be suitable for one tool, may become hazardous when used on another tool.
SERVICE
Tool service must be performed only by qualified repair personnel. Service or maintenance
performed by unqualified personnel could result in a risk of injury.
When servicing a tool, use only identical replacement parts. Follow instructions in the
Maintenance section of this manual. Use of unauthorized parts or failure to follow Maintenance
instructions may create a risk of electric shock or injury.
SPECIFIC SAFETY RULES – HEAT GUNS
WARNING:DO NOT let comfort or familiarity with the product, gained from repeated use,
replace strict adherence to heat gun safety rules. If you use this tool unsafely or incorrectly,
you can suffer serious personal injury and/or cause serious property damage.
Do not direct the heat gun airflow at clothing, hair or other body parts. Do not use as a hair
dryer. Heat guns can generate temperatures of 750°F or more of flameless heat. Contact with the
nozzle or air stream may cause serious burns.

Page of 14
5
Inspect and know your work area. Check your work area for hidden spaces before applying heat
(behind walls, ceilings, floors, soffits and other panels) that may contain flammable materials which
may ignite when using the heat gun. It may not be readily apparent if these materials ignite and could
result in serious personal injury and property damage. Avoid excessive heating which may ignite the
work area or material behind it by continuous movement of the heat gun over the work area.
Keep a fire extinguisher near the work area. Heat guns are capable of igniting flammable
materials in or around the work area.
Do not use near flammable liquids or in explosive atmospheres containing fumes, gases, or
dust. Flameless heat from the heat gun may ignite the dust or fumes. All materials or debris that
may be ignited should be removed from the work area.
Shield materials around the heated work area to prevent property damage or fire.
Always hold the heat gun by its handle. Do not touch the nozzle, accessory tips, allow them
to contact flammable material or store the heat gun until the nozzle has cooled to room
temperature. The metal nozzle may require 20 minutes or more to cool adequately before it can be
touched. Contacting the heated nozzle or accessory tips can cause personal injury. While cooling,
the heat gun should be placed in a clear area away from combustible materials while cooling to
prevent flammable materials from igniting.
When not hand held, place the heat gun on a stable, level surface using non-combustible
support pads or support stand so the nozzle is directed upwards, away from the supporting
surface. The cord should be positioned so that it won’t cause the heat gun to fall over or contact the
hot nozzle.
Do not leave the heat gun unattended while running or while cooling down.
Do not cut off airflow from the heat gun by placing nozzle too close to the workpiece. Do not
obstruct airflow through the intake vents. Restricting heat gun airflow may cause overheating.
Store indoors in a dry, high location out of reach by children and untrained persons. Do not
expose the stored heat gun to moisture. Heat guns are dangerous in the hands of untrained persons.
Do not use the heat gun in rain, moisture or submerge in water. Exposing the heat gun element
to water or other liquids may cause an electrical shock hazard.
Do not direct heat gun airflow onto glass; the glass may crack resulting in property damage
or personal injury..
PAINT STRIPPING SAFETY INSTRUCTIONS
WARNING:Use extreme care when stripping paint. Peelings, residue and vapors
of paint may contain lead, which is poisonous. Any pre-1977 paint may contain lead and paint

Page of 14
6
applied to homes prior to 1950 is likely to contain lead. Once deposited on surfaces, hand to mouth
contact can result in the ingestion of lead. Exposure to even low levels of lead can cause
irreversible brain and nervous system damage; young and unborn children are particularly
vulnerable. Before beginning any paint removal process you should determine whether the paint
you are removing contains lead. This can be done by your local health department or by a
professional who uses a paint analyzer to check the lead content of the paint to be removed.
LEAD-BASED PAINT SHOULD ONLY BE REMOVED BY A PROFESSIONAL AND MUST NOT
BE REMOVED USING A HEAT GUN.
1. Move the work piece outdoors. If this is not possible, open windows and place an exhaust
fan in a window. Be sure the fan is moving air from inside to outside. Proper ventilation reduces
the risk of inhaling fumes or dust created by using the heat gun.
2. Remove or cover any household items in the area such as carpets, rugs, furniture,
clothing, cooking utensils and air ducts.
3. Place drop cloths in the work area to catch any paint chips or peelings. Wear protective
clothing such as extra work shirts, overalls and hats.
4. Wear a dust respirator mask or a dual filter (dust and fume) respirator mask, which has
been approved by the Occupational Safety and Health Administration (OSHA), the
National Institute of Safety and Health (NIOSH), or the United States Bureau of Mines.
These masks and replaceable filters are readily available at major hardware stores. Be sure the
mask fits. Beards and facial hair may keep masks from sealing properly. Change filters often.
DISPOSABLE PAPER MASKS ARE NOT ADEQUATE.
5. Work one room at a time. Furnishings should be removed or placed in the center of the room
and covered. Work areas should be sealed off from the rest of the dwelling by sealing
doorways with drop cloths.
6. Keep the work environment clean. Keep food and drinks away from the work area. Wash
hands, arms, face and rinse mouth before eating and drinking. Do not smoke, or chew gum or
tobacco in the work area. Paint scrapings and dust created from removing paint may contain
chemicals that are hazardous.
7. Children, pregnant or potentially pregnant women and nursing mothers should not be
present in the work area until the work is done and all clean up is complete.
8. Use caution when operating the heat gun. Keep the heat gun moving to prevent creating
excessively high temperatures. Excessive heat can cause paint and other materials to burn
and cause fumes, which may be inhaled by the operator.
9. Clean up all removed paint and dust by wet mopping the floors. Use a wet cloth to clean
all walls, sills and any other surface where paint scrapings or dust have accumulated. DO NOT
SWEEP, DRY DUST OR VACUUM. Use a high phosphate detergent, trisodium phosphate
(TSP), or a trisodium phosphate substitute to clean and mop the work area.
Page of 14
7
10. Properly dispose of paint scrapings. Following each work session put the paint chips,
scrapings, and debris in a double plastic bag. Close it with tape or twist ties and dispose of
properly.
11. Remove protective clothing and work shoes in the work area to avoid transferring dust to
other parts of the building. Wash work clothes separately. Wipe shoes off with a wet rag
that is then washed with the work clothes. Wash hair and body thoroughly with soap and water.
OPERATING INSTRUCTIONS
INTRODUCTION
Your Heat Gun is a high-quality, general purpose heat gun. Its high power and air flow ratings
enable you to perform more heating jobs faster and more efficiently whenever fast, consistent and
portable heat is needed.
This heat gun’s dual heat range and airflow settings quickly provide heated air to accomplish
numerous plumbing, electrical, woodworking, remodeling, craft and metalworking tasks. Examples
of typical uses for your heat gun alone or with the included accessory nozzles and scrapers are:
•Heating liquids and solids
•Thawing frozen pipes, coils, gutters, and downspouts
•Soldering copper plumbing pipe fittings
•Bending and forming plastics
•Activating adhesives and curing epoxies
•Shrinking shrinkable tubing and packaging shrink wrap
•Removal of vinyl and linoleum floor tile
•Drying paints and varnish
•Drying wood or creating decorative wood scorching
•Loosening “frozen” nuts and bolts
•Caulking and putty removal
•Stripping paint
•Softening various materials
OPERATION
WARNING:To reduce the risk of injury, wear safety goggles or glasses with
side shields.
WARNING:Be aware that material behind or in between exposed surfaces
may ignite.
WARNING:To reduce the risk of burns and/or fire, keep the tool moving at all
times over the material you are heating.
This product is a dual temperature control heat gun and uses a 3-position rocker type switch.
Moved to the center position, marked “0”, the heat gun is turned OFF. Depress the lower switch
portion completely, marked “l”, for the “Low” temperature range. Depress the upper switch portion
completely, marked “ll”, for the “High” temperature range.

Page of 14
8
1. Plug the heat gun into a properly rated outlet.
2. If using an accessory nozzle tip, install the desired accessory nozzle tip by sliding it onto the
nose of the heat gun.
3. Depress completely the upper or lower portion of the rocker switch to obtain the desired heat
range. It is suggested that you start in the lower heat range when beginning an operation and
then move to the higher temperature range if needed.
4. To turn the heat gun off after use, move the switch to the center position, “0”.
5. Allow the heat gun nozzle to cool by suspending the gun from the hanger wire located at the
base of the gun handle, away from combustible material. Cooling may also be accomplished by
moving the hanger wire located at the base of the gun handle rearward until it locks into the
built-in indented stops. Then rest the gun on the rear air intake housing and the flat portion of the
hanger wire with the gun’s nozzle pointing upward.
The correct amount of heat used for each application depends on the selected heat range, material
being worked, the distance of the nozzle from the work surface and length of time that heat is applied
to the work surface.
We recommend that you experiment with a piece of scrap material before performing an operation.
Carefully approach the work until you determine the proper combination of heat range, distance from
the work surface and duration of heat application.
Always maintain heat gun movement over the work surface using a gentle back and forth movement
while applying heat unless you find that a concentrated application of heat best delivers the desired
results for a particular operation.
TYPICAL APPLICATIONS
WARNING:Reduce the risk of heat damage and personal injury, shield combustible
materials and areas adjacent to the workpiece. Protect yourself from hot paint scrapings
and dust.
Stripping paint
1. Fit the wide “deflector” accessory tip onto the heat gun nozzle. This tip will spread the heat over
a wider surface area, speeding paint removal. The “deflector” tip will also help protect window
glass from cracking due to thermal shock when removing paint near the glass.
2. Turn the heat gun on, starting in the “Low” heat setting and hold it about 1” from the painted
surface being stripped. The best combination of distance, heat range, and speed of stripping
will be determined by experience.
3. Work small areas, moving the gun slowly over the surface. When the paint begins to blister and
bubble, move the gun steadily across the surface while scraping off the loosened paint behind

Page of 14
9
the heat gun. Use a scraper that best matches the work surface shape and width of the paint
loosened by the heat gun’s path. Preheating the scraper as you are heating the painted surface
will increase the speed of paint stripping.
4. Do not burn or heat the paint for too long since this will make the paint more difficult to remove.
For working in confined areas, away from glass, remove the wide deflector tip.
5. When the job is completed, move the rocker switch to “OFF” and properly position the heat gun
to cool, away from combustible material.
Shrinking tubing
Shrink tubing is most often used in place of “electrical” tape to hold joined wires in position and
provide insulation. When exposed to adequate heat, the tubing shrinks to the diameter and shape
of the wire it covers.
Slide the tubing over the wire to be insulated; hold the wire with one hand away from the hot air
stream and hold the heat gun in the other hand. Move the tubing from side to side through the
heated airflow until the tubing has shrunk. If the wire must be held with both hands, position the
heat gun with the nozzle pointed upward by resting the heat gun on the hanger wire and the rear gun
housing. Then pass the tubing covered wire from side to side through the hot airflow until the wire
shrinks to the desired diameter. Remove the wire from the airflow and move the rocker switch to
the “OFF” position.
Removing caulking and putty
Experimentation and experience will help develop a proper technique, heat setting and accessory
nozzle tip usage. When removing putty or caulking near windows, use the deflector tip to protect
and prevent cracking the glass. Move the heat gun over the caulking or putty until it softens, then
use the appropriately shaped scraper or putty knife to remove the material.
Removing floor tile
Direct the heated air at an edge or corner of the tile to be removed. Move the heat gun in a back
and forth motion over the chosen area. This will soften the adhesive backing near the tile’s edge
enabling it to be pried upwards with a putty knife or other suitable prying tool. With the bottom of the
tile exposed heat can be applied to both surfaces making the removal process much quicker to
accomplish.
Bending and forming plastics
Experimentation with a piece of scrap material will help develop a proper technique for bending and
forming plastics. You’ll require a fixture for holding the piece of plastic to be bent. This fixture not
only holds the material but will aid you in establishing the “bend” line across the entire length of the
material. Move the heat gun back and forth along the entire length of “bend” line until the plastic
softens, then bend the plastic to the desired position. Excessive heating may cause the plastic to
melt or cause unacceptable distortion.
Shrinking packaging wrap
Enclose and seal the product in the shrink wrap and then poke a small hole in the wrap to allow

Page of 14
10
trapped air to escape. Move the heat gun back and forth across the package until the shrink wrap
has evenly shrunk.
Loosening nuts and bolts
Point the hot air flow onto the nut or bolt you want to loosen. The heat will cause metal to expand and
the amount of heat exposure required to loosen the part will vary due to the type of metal and its
thickness. When the part has been heated sufficiently, stop the heating process. Using the proper
type and size wrench, loosen the nut or bolt.
Soldering copper pipe fittings
Do not attempt soldering copper pipe and pipe fittings intended for use without first investing the
required time to practice and master this plumbing skill. Only after successfully joining and then
testing the joints for strength and leakage should you attempt performing this operation.
1. Attach the soldering or the reflector accessory tip to the heat gun nozzle.
2. Deburr the pipe and fitting using a file of sandpaper. Then clean the inside of the fitting and the
exterior portion of the pipe to be fitted using a wire brush, sandpaper, or steel wool.
3. Coat the clean exterior portion of pipe and the fitting’s interior with flux. Then slide the fitting over
the pipe with a twisting motion and ensure the fitting is aligned properly.
4. Slip the accessory nozzle around the joint to be soldered. Using the high temperature setting
on the heat gun, heat the joint.
5. When the flux bubbles and the copper becomes slightly lighter in color, apply the solder wire to
the perimeter of the joint and reposition the heat gun so excess solder does not drip into it.
Remove the heat gun when the solder begins to evenly flow into and around the joint. Then
wipe around the still hot joint with a damp rag to remove excess solder and flux.
6. If the joint’s fitting is connecting more then one piece of pipe, all the pipe ends going into the
common fitting and fitting’s internal surfaces should be properly prepared and connected
together. Then all the joints should be soldered in a single operation. (When soldering a new
connection into a fitting already containing a finished pipe joint, you risk melting the previously
soldered joint and creating an eventual leak or failed joint.)
Soldering copper pipe fittings is commonly referred to as “sweating”. The solder joins and seals the
pipe to fitting via capillary action which draws, or “sweats”, the molten solder into the gap between
the pipe and fitting surfaces, creating a strong and leak free seal.
Defrosting frozen pipes
Attach the reflector tip to the heat gun nozzle. Slip the accessory nozzle tip around the frozen pipe
and move the heat gun back and forth, working inwards from the edge to the center until the part is
defrosted or thawed.
CAUTION:Do not attempt to defrost PVC, CPVC, or other plastic pipe with a heat gun.

Page of 14
11
CAUTION:Water pipes are often difficult to distinguish from gas pipes! Before
attempting to defrost metal pipe with a heat gun, confirm the pipe is a water line and not a
gas pipe.
CAUTION:Copper pipes are joined with solder containing tin which melts at about 392°F.
Exercise extreme caution when defrosting near pipe fittings that you don’t exceed solder’s
melting point or a leak may result, possibly causing property damage.

Page of 14
12
KNOWING YOUR HEAT GUN
1. Air Nozzle
2. Motor Housing
3. Trigger Switch
4. Hanger Wire
1
3
4
2

Page of 14
13
DIAGRAM AND PARTS LIST
Part #
Description
Part #
Description
1,2,3,6,24
Screw
15
Fan
4
Hanger
16
Vibration-proof piece
5
Plastic tube
17
Plastic input ventilator
7
Steel tube
18
Capacitor
8
Outlet ventilator
19
Terminal block
9
Six layer micanite
20
Cord grip
10
Heating element
21
Power cord guard
11
Inductance
22
Power cord
12
Single-phase rectifier
23
Switch
13
D.C. motor
25,26
Plastic housing
14
Thermal link
For replacement parts and technical questions, please call 1-800-222-5381.

Page of 14
14
Two-Year Warranty
This product is warranted free from defects in material and workmanship for 2 years after
date of purchase. This limited warranty does not cover normal wear and tear or damage from
neglect or accident. The original purchaser is covered by this warranty and it is not
transferable. Please return the tool to store location of purchase along with your receipt, and
you will receive a new tool or a refund.
WARNING
Some dust created by power sanding, sawing, grinding, drilling, and other construction activities contains
chemicals known to the State of California to cause cancer, birth defects or other reproductive harm.
Some examples of these chemicals are:
• lead from lead-based paints,
• crystalline silica from bricks and cement and other masonry products, and
• arsenic and chromium from chemically treated lumber.
Your risk from these exposures varies, depending on how often you do this type of work. To reduce your
exposure to these chemicals: work in a well-ventilated area, and work with approved safety equipment,
such as those dust masks that are specially designed to filter out microscopic particles.
Distributed by
Northern Tool + Equipment Co., Inc.
Burnsville, Minnesota 55306
NorthernTool.com
Made in China
Table of contents
Other Ironton Power Tools manuals

Ironton
Ironton 46127 User manual

Ironton
Ironton 61581 User manual

Ironton
Ironton 46257 User manual

Ironton
Ironton 46177 User manual

Ironton
Ironton 45981 User manual

Ironton
Ironton 61587 User manual

Ironton
Ironton 61478 User manual

Ironton
Ironton 45986 User manual

Ironton
Ironton 57521 User manual

Ironton
Ironton 61476 User manual