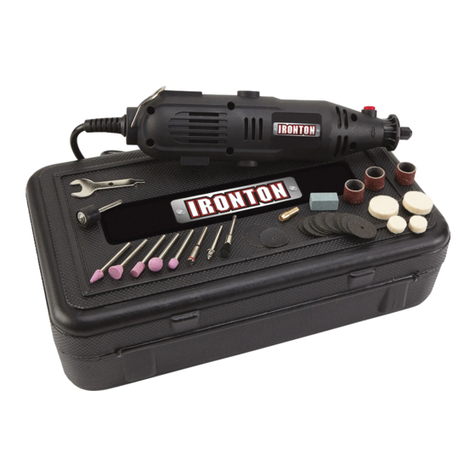
Ironton 45981 User manual

35-PC. ROTARY TOOL KIT
OWNER’S MANUAL
WARNING:
Read carefully and understand all ASSEMBLY AND OPERATION
INSTRUCTIONS before operating. Failure to follow the safety rules and other
basic safety precautions may result in serious personal injury.
Item# 45981

Page of 9
2
Thank you very much for choosing an Ironton product! For future reference, please complete the
owner’s record below:
Model: _______________ Purchase Date: _______________
Save the receipt, warranty and these instructions. It is important that you read the entire manual to
become familiar with this product before you begin using it.
This machine is designed for certain applications only. The distributor cannot be responsible for
issues arising from modification. We strongly recommend this machine not be modified and/or used
for any application other than that for which it was designed. If you have any questions relative to a
particular application, DO NOT use the machine until you have first contacted the distributor to
determine if it can or should be performed on the product.
For technical questions please call 1-800-222-5381.
INTENDED USE:
The Rotary Tool has been designed with the hobbyist in mind. It is ideal for intricate work or creative
projects and supports a variety of applications including engraving, grinding, cleaning, polishing,
sanding, cutting, carving and drilling. It is intended for do-it-yourself (DIY) applications only and is
not designed for industrial or commercial applications.
TECHNICAL SPECIFICATIONS:
Motor: 135W
Input: 120V ~ 60Hz
No load speed: 10,000 – 32,000 rpm
Collet chuck capacity: 1/8in.
GENERAL SAFETY RULES
WARNING: Read and understand all instructions. Failure to follow all instructions listed
below may result in serious injury.
CAUTION: Do not allow persons to operate or assemble this Rotary Tool until they
have read this manual and have developed a thorough understanding of how the Rotary Tool
works.
WARNING: The warnings, cautions, and instructions discussed in this instruction
manual cannot cover all possible conditions or situations that could occur. It must be
understood by the operator that common sense and caution are factors that cannot be built into this
product, but must be supplied by the operator.

Page of 9
3
SAVE THESE INSTRUCTIONS
WORK AREA SAFETY
•Keep work area clean, free of clutter and well lit. Cluttered and dark work areas can cause
accidents.
•Do not use your tool where there is a risk of causing a fire or an explosion; e.g. in the
presence of flammable liquids, gasses, or dust. Power tools create sparks, which may ignite the
dust or fumes.
•Keep children and bystanders away while operating a power tool. Distractions can cause you
to lose control, so visitors should remain at a safe distance from the work area.
•Be aware of all power lines, electrical circuits, water pipes and other mechanical hazards in
your work area, particularly those hazards below the work surface hidden from the operator’s
view that may be unintentionally contacted and may cause personal harm or property damage.
•Be alert of your surroundings. Using power tools in confined work areas may put you
dangerously close to cutting tools and rotating parts.
ELECTRICAL SAFETY
•WARNING: Always check to ensure the power supply corresponds to the voltage on
the rating plate.
•Do not abuse the cord. Never carry a portable tool by its power cord, or yank tool or extension
cords from the receptacle. Keep power and extension cords away from heat, oil, sharp edges or
moving parts. Replace damaged cords immediately. Damaged cords may cause a fire and
increase the risk of electric shock.
•Grounded tools must be plugged into an outlet properly installed and grounded in accordance
with all codes and ordinances.Never remove the grounding prong or modify the plug in any way.
Do not use any adapter plugs. Check with a qualified electrician if you are in doubt as to
whether the outlet is properly grounded.
•Double insulated tools are equipped with a polarized plug (one blade is wider than the other).
This plug will fit in a polarized outlet only one way. If the plug does not fit fully in the outlet,
reverse the plug. If it still doesn’t fit, contact a qualified electrician to install a polarized outlet. Do
not change the plug in any way.
•Avoid body contact with grounded surfaces such as pipes, radiators, ranges, and refrigerators.
There is an increased risk of electric shock if your body is grounded.
•When operating a power tool outside, use an outdoor extension cord marked “W-A” or “W.”
These cords are rated for outdoor use and reduce the risk of electric shock.
•Extension Cord Use:
A. Use only ‘Listed’ extension cords. If used outdoors, they must be marked “For Outdoor
Use.” Those cords having 3-prong grounding type plugs and mating receptacles are to be
used with grounded tools.
B. Replace damaged or worn cords immediately.
C. Check the nameplate rating of your tool. Use of improper size or gauge of extension cord
may cause unsafe or inefficient operation of your tool. Be sure your extension cord is rated
to allow sufficient current flow to the motor. For the proper wire gauge for your tool, see
chart.

Page of 9
4
CHART FOR MINIMUM WIRE SIZE OF EXTENSION CORD:
Nameplate AMPS
CORD LENGTH
25’
50’
100’
150’
0-6
18 AWG
16 AWG
16 AWG
14 AWG
6-10
18 AWG
16 AWG
14 AWG
12 AWG
10-12
16 AWG
16 AWG
14 AWG
12 AWG
12-16
14 AWG
12 AWG
(NOT RECOMMENDED)
If in doubt, use larger cord.
Be sure to check voltage requirements of the tool to your incoming power source.
•Do not expose power tools to rain or wet conditions. Water entering a power tool will increase
the risk of electric shock.
•Do not let your fingers touch the terminals of plug when installing to or removing from the
outlet.
•Ground fault circuit interrupters. If work area is not equipped with a permanently installed
Ground Fault Circuit Interrupter outlet (GFCI), use a plug-in GFCI between power tool or
extension cord and power receptacle.
PERSONAL SAFETY
•Stay alert, watch what you are doing and use common sense when operating the Rotary
Tool. Do not use the Rotary Tool while you are tired or under the influence of drugs, alcohol
or medication. A moment of inattention while operating the Rotary Tool may result in serious
personal injury.
•Dress properly. Do not wear loose clothing, dangling objects, or jewelry. Keep your hair,
clothing and gloves away from moving parts. Loose clothes, jewelry or long hair can be
caught in moving parts. Air vents often cover moving parts and should be avoided.
•Use safety apparel and equipment. Use ANSI-approved safety goggles or safety glasses
with side shields, or when needed, a face shield. Use as dust mask in dusty work conditions.
This applies to all persons in the work area. Also use non-skid safety shoes, hardhat, gloves,
dust collection systems, and hearing protection when appropriate.
•Do not overreach. Keep proper footing and balance at all times.
•Remove adjusting keys or wrenches before connecting to the power supply or turning on
the tool. A wrench or key that is left attached to a rotating part of the tool may result in
personal injury.
ROTARY TOOL USE AND CARE
•Do not modify the Rotary Tool in any way. Unauthorized modification may impair the
function and/or safety and could affect the life of the equipment. There are specific
applications for which Rotary Tool was designed.
•Always check for damaged or worn out parts before using the Rotary Tool.Broken parts
will affect the Rotary Tool operation. Replace or repair damaged or worn parts immediately.
•Store idle Rotary Tool. When Rotary Tool is not in use, store it in a secure place out of the
reach of children. Inspect it for good working condition prior to storage and before reuse.
•Do not use accessories (such as grinding discs) with a maximum rated speed below
32,000 rpm.
•Always wear eye, ear and breathing protection.
•Do not apply too much pressure when grinding, cutting, etc.
•Keep your hands well clear of the cutting devices.
•Do not use the included accessories on other rotary tools with a no load speed more
than 32,000 rpm.

Page of 9
5
OPERATION:
1. Spring chuck
2. Securing ring
3. Spindle lock
4. Carbon brush cap
5. Speed dial
6. On/Off switch
7. Manual stand
OPERATING INSTRUCTIONS
Fitting the accessories to the tool (Figure 1)
1. Switch off the tool and disconnect from the main power supply before fitting accessories.
2. Push the spindle lock and hold. Rotate the spring chuck so that it locks into place.
3. While the spindle lock is engaged, use the spanner wrench (supplied) to loosen the spring chuck.
(Do not remove the spring chuck).
4. Fit the required accessory firmly through the spring chuck and into the collet. Ensure it is a firm fit.
Note: There are two collets with this tool. Always ensure that the axle diameter of the
accessory being used is the same as the collet diameter.
5. Push the spindle lock and hold.
6. While the spindle lock is engaged, use the supplied spanner to tighten the spring chuck.

Page of 9
6
Assembling abrasive discs and grinding stones to accessory shaft 1 (Figure 2)
1. Mount the selected disc onto the accessory shaft 1 as illustrated. Ensure the two washers are
correctly placed.
2. Do not over-tighten the screw.
Assembling abrasive bands to accessory shaft 2 (Figure 3)
1. Slide the abrasive band over the rubber section of the accessory shaft 2.
2. Ensure the abrasive band fits straight and evenly over the rubber portion of the shaft.
Assembling polishing felts to accessory shaft 3 (Figure 4)
1. Screw the polishing felt onto the tip of the accessory shaft 3.
2. The tip of the shaft should not protrude through the felt. Do not cover-screw the felt.
WARNING: Always use ANSI approved eyewear prior to turning on the tool.
Switching On/Off (Figure 5)
1. Hold the tool firmly and ensure your fingers are well away from moving parts.
2. Switch on by pressing the on/off switch to the “ I ” position.
3. Switch off by pressing the on/off switch to the “ O” position.
Variable speed control (Figure 6)
1. To adjust the speed, move the speed dial forwards or backwards.
2. The greater the number displayed, the faster the speed.
Note: The speeds quoted are for guidance purposes only.
Important! Working on a high load while operating at low speed can cause motor burnout.
OVERLOAD
The motor of this tool may be damaged if overloaded. Manual pressure on this tool will not result in
faster operation. Forcing the tool will only result in reduced efficiency and could cause motor
burnout, substandard work, shorter tool life and possible injury.

Page of 9
7
Avoiding Motor Damage: If you are running the tool continuously at low speed, it’s important to
occasionally take the tool off load. Running the tool off load at full speed for approximately one
minute creates a cooling airflow for the motor.
MAINTENANCE
•Maintain your Rotary Tool. It is recommended that the general condition of any Rotary Tool be
examined before it is used. Keep your Rotary Tool in good repair by adopting a program of
conscientious repair and maintenance. Have necessary repairs made by qualified service
personnel.
•Cleaning
1. Keep the ventilation vents of the tool clean at all times, if possible, prevent foreign matter
from entering the vents.
2. After each use, blow air through the tool housing to ensure it is free from all dust particles
which may build up. Build up of dust particles may cause the tool to overheat and fail.
3. If the enclosure of the tool requires cleaning do not use solvents but a moist soft cloth
only. Never let any liquid get inside the tool; never immerse any part of the tool into a liquid.
•CAUTION: Do not use cleaning agents to clean the plastic parts of the tool. A mild detergent on
a damp cloth is recommended. Water must never come into contact with the tool.
•Repairs
1. Only an authorized electrician or service technician should replace the cord set or
effect other repairs. If the cord set is damaged or worn, have it repaired or replaced
by an authorized electrician or service technician.
2. When the brushes are worn, the tool may not work. Have new brushes fitted by
an authorized electrician or service technician.
Carbon brushes
When the carbon brushes wear out the tool will spark and/or stop.
Discontinue use as soon as this happens. They should be
replaced prior to recommencing use of the tool. Carbon brushes
are a wearing component of the tool and therefore not covered
under warranty. Continuing to use the tool when carbon brushes
need to be replaced may cause permanent damage to the tool.
Carbon brushes will wear out after many uses but when the
carbon brushes need to be replaced take the tool to an electrician
or a service technician for a quick and low cost replacement.
Always replace both carbon brushes at the same time.
ACCESSORIES CONTENTS
1 x mandrel for felt wheels 1 x nylon brush
1 x mandrel for sanding bands 3 x sanding bands
1 x whet stone 3 x sanding paper
1 x spanner 4 x felt wheels
5 x grinding stones

Page of 9
8
Part list
Part#
Description
Part#
Description
1
Collet nut
12
Speed control switch
2
Collet
13
Screw
3
Base
14
Screw
4
Bearing
15
Right body
5
Rotor
16
Spindle lock button
6
Stator
17
Spring piece
7
Carbon brush
18
Fan
8
Left body
19
Cap body
9
Switch
20
Cord sleeve
10
Trimming circuit board
21
Cord
11
Lock board
22
Plug
For replacement parts and technical questions, please call 1-800-222-5381.

Page of 9
9
WARNING
Some dust created by power sanding, sawing, grinding, drilling, and other construction activities contains
chemicals known to the State of California to cause cancer, birth defects or other reproductive harm.
Some examples of these chemicals are:
• lead from lead-based paints,
• crystalline silica from bricks and cement and other masonry products, and
• arsenic and chromium from chemically treated lumber.
Your risk from these exposures varies, depending on how often you do this type of work. To reduce your
exposure to these chemicals: work in a well-ventilated area, and work with approved safety equipment,
such as those dust masks that are specially designed to filter out microscopic particles.
Distributed by
Northern Tool + Equipment Co., Inc.
Burnsville, Minnesota 55306
NorthernTool.com
Made in China
Table of contents
Other Ironton Power Tools manuals

Ironton
Ironton 57518 User manual

Ironton
Ironton 45986 User manual

Ironton
Ironton 61581 User manual

Ironton
Ironton 57524 User manual

Ironton
Ironton 61455 User manual

Ironton
Ironton 57520 User manual

Ironton
Ironton 49381 User manual

Ironton
Ironton 46127 User manual

Ironton
Ironton 46257 User manual

Ironton
Ironton 61482 User manual