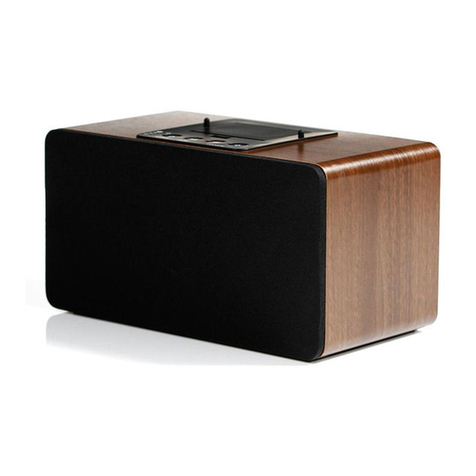
iWantit IHFUSBN13 User manual

IHFUSBN13
wireless micro HiFi with
NFC one-touch pairing
instruction manual
IHFUSBN13_IB.indd 1 14/06/2013 14:41

Contents
safety warnings................................................................................................................................. 4
unpacking .......................................................................................................................................... 6
product overview ............................................................................................................................. 7
main unit ....................................................................................................................................................................... 7
remote control handset ........................................................................................................................................... 9
remove the insulating strip from the remote control.................................................................................10
remote control battery replacement ................................................................................................................10
handling the battery...............................................................................................................................................10
remote control operation range.........................................................................................................................10
getting started ................................................................................................................................ 11
extend the aerial.......................................................................................................................................................11
connect the mains power .....................................................................................................................................11
switching on for the rst time...................................................................................................... 12
setting the time ........................................................................................................................................................12
basic operation ............................................................................................................................... 13
standby control.........................................................................................................................................................13
selecting a source.....................................................................................................................................................13
altering the volume.................................................................................................................................................13
altering the tone.......................................................................................................................................................13
FM radio............................................................................................................................................ 14
selecting FM...............................................................................................................................................................14
programming a radio station...............................................................................................................................14
storing a station in the memory .........................................................................................................................14
recalling a stored station.......................................................................................................................................14
playing a CD.....................................................................................................................................15
loading a CD...............................................................................................................................................................15
playing a CD...............................................................................................................................................................15
random and repeat modes...................................................................................................................................15
program play .............................................................................................................................................................16
Bluetooth® and NFC operation .................................................................................................... 17
Bluetooth operation................................................................................................................................................17
NFC operation ...........................................................................................................................................................18
Connecting an NFC device with one already connected ..........................................................................18
the line in input............................................................................................................................... 19
the USB charging connection ...................................................................................................... 19
IHFUSBN13_IB.indd 2 14/06/2013 14:41

maintenance.................................................................................................................................... 20
handling discs ...........................................................................................................................................................20
cleaning discs ............................................................................................................................................................20
storing discs ...............................................................................................................................................................20
hints and tips................................................................................................................................... 21
specications................................................................................................................................... 22
IHFUSBN13_IB.indd 3 14/06/2013 14:41

4
• Read all the instructions carefully
before using the unit and keep them
for future reference.
• Retain the manual. If you pass the unit
onto a third party make sure to include
this manual.
• Check that the voltage marked on
the rating label matches your mains
voltage.
Damage
• Please inspect the unit for damage
after unpacking.
• Do not continue to operate the unit if
you are in any doubt about it working
normally, or if it is damaged in any way
- switch o, withdraw the mains plug
and consult your dealer.
Location of Unit
• The unit must be placed on a at
stable surface and should not be
subjected to vibrations.
• Do not place the unit on sloped or
unstable surfaces as the unit may fall
o or tip over.
• The mains socket must be located
near the unit and should be easily
accessible.
Temperature
• Avoid extreme degrees of
temperature, either hot or cold. Place
the unit well away from heat sources
such as radiators or gas/electric res.
• Avoid exposure to direct sunlight and
other sources of heat.
Naked Flames
• Never place any type of candle or
naked ame on the top of or near
the unit.
Moisture
• To reduce the risk of re, electric shock
or product damage, do not expose
this unit to rain, moisture, dripping
or splashing. No objects lled with
liquids, such as vases, should be
placed on the unit.
• If you spill any liquid into the unit,
it can cause serious damage. Switch
it o at the mains immediately.
Withdraw the mains adaptor and
consult your dealer.
Ventilation
• To prevent the risk of electric shock or
re hazard due to overheating, ensure
that curtains and other materials do
not obstruct the ventilation vents.
• Do not install or place this unit in
a bookcase, built-in cabinet or in
another conned space. Ensure the
unit is well ventilated.
Safety
• Always disconnect the unit from the
mains supply before connecting/
disconnecting other devices or
moving the unit.
• Unplug the unit from the mains socket
during a lightning storm.
Mains Adapter
• The mains adapter continues to draw
electricity from the mains supply
when plugged in the mains socket.
In the interests of safety and to avoid
unnecessary energy consumption,
never leave the adapter plugged in the
mains socket for long periods of time.
• The mains adaptor is the means of
disconnecting the unit from the mains
supply. The adaptor must be readily
accessible and capable of being
unplugged at all times.
Mains Adapter Cable
• Make sure the unit is not resting on
top of the mains adapter cable, as the
weight of the unit may damage the
cable and create a safety hazard.
Interference
• Do not place the unit on or near
appliances which may cause
electromagnetic interference. If you
do, it may adversely aect the
operating performance of the unit,
and cause distorted sound.
safety warnings
IHFUSBN13_IB.indd 4 14/06/2013 14:41

5
Supervision
• Children should be supervised to
ensure that they do not play with
the unit.
• Never let anyone especially children
push anything into the holes, slots or
any other openings in the case - this
could result in a fatal electric shock.
Service
• To reduce the risk of electric shock,
do not remove screws. The unit does
not contain any user-serviceable parts.
Please leave all maintenance work to
qualied personnel.
• Do not open any xed covers as this
may expose dangerous voltages.
The lightning ash with arrowhead symbol, within an
equilateral triangle, is intended to alert the user to the
presence of uninsulated“dangerous voltage”within the
unit’s enclosure that may be of sucient magnitude to
constitute a risk of electric shock.
The exclamation point within an equilateral triangle is
intended to alert the user to the presence of important
operating and maintenance (servicing) instructions in
the manual accompanying the unit.
Maintenance
• Ensure you unplug the unit from the
power supply before cleaning.
• Do not use any type of abrasive pad
or abrasive cleaning solutions as these
may damage the unit’s surface.
• Do not use liquids to clean the unit.
CAUTION
RISK OF ELECTRIC SHOCK
DO NOT OPEN
IHFUSBN13_IB.indd 5 14/06/2013 14:41

6
Thank you
for purchasing your new iWantit wireless micro HiFi with NFC one-touch pairing.
We recommend that you spend some time reading this instruction manual in order
that you fully understand all the operational features it oers. You will also nd
some hints and tips to help you resolve any issues.
Read all the safety instructions carefully before use and keep this instruction
manual for future reference.
unpacking
Remove all packaging from the unit. Retain the packaging. If you dispose of it please do so
according to local regulations.
The following items are included:
The Main Unit Remote Control x 1
AC Adapter x1
If items are missing, or damaged please contact Partmaster (UK only).
Tel 0844 800 3456 for assistance
IHFUSBN13_IB.indd 6 14/06/2013 14:41

7
product overview
main unit
Front view
1. LEFT SPEAKER
2. USB SOCKET
For charging external devices only.
3. NFC CONTACT PAD
For communication with NFC devices.
4. Remote Control Sensor
5. DISPLAY SCREEN
6. RIGHT SPEAKER
7. CD COMPARTMENT DRAWER
8. CD DOOR OPEN Button
Press to open the CD door.
9. FM AERIAL Cable
10. 9V DC POWER INPUT Socket
11. LINE IN Socket
Audio input for an external device.
8 7
1 2 3 45 6
911
10
Rear view
IHFUSBN13_IB.indd 7 14/06/2013 14:41

8
Top view
1. STANDBY/ON Button
Switches the unit on/o.
2. SOURCE Button
Selects Bluetooth/FM/CD/Aux (line in) inputs.
3. VOLUME –
Decreases volume level.
4. VOLUME + Button
Increases volume level.
5. MODE/MEM.SET/PROGRAM Button
FM Mode: Use to store a station in the memory.
CD Mode: During Play use to set Repeat or Random play.
From Stop Mode use to set Program play.
6. CD DOOR OPEN Button
7. CLOCK SET/MEM. RECALL Button
Standby Mode: Press to set the clock.
FM Mode: Press to recall a stored station.
8. TUNE/SKIP Button
FM Mode: Press to tune down the band.
CD Mode: Press once to repeat the current track.
Press again to select a previous track.
9. TUNE/SKIP Button
FM Mode: Press to tune up the band.
CD Mode: Press to select the next track.
10. STOP Button
Press to stop CD playback.
11. PLAY/PAUSE Button
Press to play/pause a CD.
1 2 3 4 5 6 7 98 10 11
IHFUSBN13_IB.indd 8 14/06/2013 14:41

9
remote control handset
1. STANDBY
Switches the unit on/o.
2. TUNE +/SKIP +
FM: Tunes down the band.
CD: Selects next track.
3. SOURCE
Selects Bluetooth/FM/CD/Aux (line in) mode.
4. PLAY/PAUSE
Plays/pauses a CD.
5. VOL –
Decreases volume level.
6. TUNE –/SKIP –
FM: Tunes down the band.
CD: Repeats current track.
Press twice to select previous track.
7. REPEAT
Repeats one or all CD tracks.
8. MEM RECALL
Recalls a stored FM station.
9. M –
Selects a preset FM station
in descending order.
10. EQ
Select a sound EQ mode.
11. PROG.
Program CD playlist.
12. MUTE
Mutes the sound.
13. STOP
Stops CD play.
14. VOL +
Increases volume level.
15. RANDOM
Plays tracks on a CD in random order.
16. M +
Selects a preset FM station
in ascending order.
17. CL.ADJ
Sets clock (in Standby mode).
1
2
3
4
5
6
7
8
9
10
11
12
13
14
15
16
17
IHFUSBN13_IB.indd 9 14/06/2013 14:41

10
handling the battery
• Improper or incorrect use of batteries may cause corrosion or battery leakage, which
could cause re, personal injury or damage to property.
• Install the battery correctly following the polarity (+ and -) indications on the rear of the
remote control.
• Only use the battery type indicated in this manual (CR2025).
• Do not dispose of the used battery as domestic waste. Dispose of it in accordance with
local regulations.
• Small button cell batteries such as the one used in the remote control are easily
swallowed by young children and this is dangerous. Keep loose button cells away from
young children and make sure that the battery holder tray is secure in the remote
control. Seek medical advice if you believe a cell has been swallowed.
remote control operation range
Point the handset directly at the infrared receiving window of the unit. The handset
must be no more than 3 metres from the player and at an angle of no more than 30º for
reliable operation.
remote control battery replacement
If the remote control behaves erratically or fails to operate the battery should be replaced.
1. Press the catch at the side of the battery compartment and slide open
the battery cage.
2. Remove the old battery and dispose of it safely.
3. Place a new battery (CR2025 lithium battery) in the cage observing the
polarity as shown and slide the cage back until it clicks shut.
remove the insulating strip from the remote control
Remove the insulating plastic strip from the battery if
the remote control is being used for the rst time. It is
located at the bottom rear side of the remote control.
1 2 3
Note: If handset operation is erratic in bright sunlight, relocate the unit
to a shady location.
IHFUSBN13_IB.indd 10 14/06/2013 14:41

11
getting started
extend the aerial
Unwrap and extend the FM aerial fully. In use you may have to move the aerial and/or the
unit around to obtain the best reception.
connect the mains power
This unit is designed only to operate with the supplied AC adapter. Connecting the unit
to any other power source may damage it.
1. Unwind the AC adapter cable to its full length.
2. Plug the connector at the end of the cable to the DC IN Socket on the back of the unit.
3. Plug the AC adapter into a mains socket and switch the socket on.
4. The unit is now connected and ready to use.
5. To switch the unit o completely, unplug the mains adapter from the mains socket.
IHFUSBN13_IB.indd 11 14/06/2013 14:41

12
switching on for the rst time
setting the time
When the unit is rst connected to the mains supply it will
enter Standby mode and the clock will ash.
You should now set the time.
Example: Set the time at 4:30 pm (16:30)
1. Press and hold CLOCK SET/MEM RECALL on the control panel
or press and hold CL.ADJ. on the remote control.
The hours will start ashing.
2. Press either TUNE/SKIP button on the control panel or remote
control to set the hours.
3. Press CLOCK SET/MEM RECALL on the control panel or press
CL.ADJ. on the remote control
The minutes will start ashing.
4. Press either TUNE/SKIP button on the control panel or remote
control to set the minutes.
5. Press CLOCK SET/MEM RECALL on the control panel or
press CL.ADJ. on the remote control to store the time in
the memory.
The clock is a 24 hour clock.
The unit must be in standby mode before you adjust the clock.
IHFUSBN13_IB.indd 12 14/06/2013 14:41

13
basic operation
standby control
• Press STANDBY/ON on the control panel or STANDBY on the remote control
to switch the unit on.
• Press the button again switch the unit to standby mode.
selecting a source
1. Switch the unit on.
2. Press the SOURCE button on the control panel or the remote control to cycle through
the input sources:
bt (Bluetooth mode) FM Radio CD AUX
altering the volume
Press the VOL +/- buttons on the remote control or the VOLUME +/-
buttons on the control panel to alter the volume.
• The volume range is 00-30. When you adjust the volume the
new level is briey displayed on the screen.
Muting the volume
1. Press the MUTE button on the remote control to mute the volume.
The volume level ashes continuously on the screen.
2. Press the MUTE button again to restore the volume.
(Changing the source or altering the volume will also restore the volume).
altering the tone
Repeatedly press the EQ button on the remote control to adjust the sound quality.
Select from one of the 5 preset equalizer settings:
POP
JAZZCLASSIC ROCK
FLAT
In Bluetooth or CD mode, if there is no available source (no bluetooth device
or no CD in the tray), the unit will revert to Standby after a few minutes.
If you set the unit to Standby after you have been listening at a high volume
when the unit next powers on it will come on at this high level !
IHFUSBN13_IB.indd 13 14/06/2013 14:41

14
FM radio
selecting FM
Press SOURCE on the control panel or SOURCE on the remote
control to select FM.
programming a radio station
Manual Tuning: Press a TUNE/SKIP button on the remote control or the control panel.
The radio will scan up/down the band in 100kHz steps.
Auto Tuning: Press and hold a TUNE/SKIP button.
The unit will scan up/down the band. When a usable station is detected the scan will stop
and the station will play .
storing a station in the memory
Up to 20 radio stations can be stored in the memory.
Manual Preset Storage
1. Tune the desired station.
2. Press the MODE/MEM SET/PROGRAM button on the control
panel or the MEM RECALL button on the remote control.
The display will ash the rst available preset location.
3. Accept this location or press TUNE/SKIP on the control panel
or M+/M– on the remote control to select an alternative.
4. Press the MODE/MEM SET/PROGRAM button on the control
panel or the MEM RECALL button on the remote control
to store the station.
5. Repeat steps 1 to 4 to store more radio stations in the memory.
Automatic Preset Storage
1. Press the MODE/MEM SET/PROGRAM button on the control panel or the MEM
RECALL button on the remote control.
2. Press the PLAY/PAUSE button on the control panel or the remote control.
The unit will tune automatically, storing stations in the memory. When all 20 preset
locations are lled (or when the band has been scanned if fewer than 20 stations are
available) the scan will stop and the rst station found will play.
recalling a stored station
• From the control panel: Press and hold CLOCK SET/MEM RECALL until the wanted
preset number appears. Release the button to play the station.
• From the remote control: Press and hold either the M+ or M– button until the
wanted preset number appears. Release the button to play the station.
When you use auto-tuning only stations with strong signals are detected.
Weaker stations should be tuned manually
IHFUSBN13_IB.indd 14 14/06/2013 14:41

15
Press the SOURCE button to select CD mode. “–––” shows on
the display.
loading a CD
1. Press the DOOR OPEN Button.
The CD door will open slowly – do not force it open.
2. Hold the unit steady and place a CD on the centre spindle
with the printed side facing out. Press the CD disc gently
into place. DO NOT USE FORCE.
3. Carefully push the CD door shut until it clicks into place.
playing a CD
Press PLAY/PAUSE to start a CD playing. Press it again to pause
playback. The play icon on the display ashes.
To stop a CD during play
Press the STOP button. The play icon disappears. The track and
time display restores. When play is resumed, it will start playing
from Track 1 and the Play icon lights.
To play a selected track from stop mode:
1. Press a TUNE/SKIP button on the control panel or handset
to select the track.
2. Press PLAY/PAUSE to play the CD from the selected track.
Changing tracks during play
Press a TUNE/SKIP button repeatedly to play from the desired track.
To go back to the start of a track during play
Press TUNE/SKIP (Control Panel) or TUNE-/SKIP- (handset)once.
To search for a particular passage during play
Hold a TUNE/SKIP button to locate the passage. Release the button
to resume play.
random and repeat modes
Random and repeat can only be selected during play and cannot be combined.
Selecting repeat and random modes from the control panel
• Press the MODE/MEM SET/PROGRAM button to cycle the play mode:
REPEAT ONE TRACK REPEAT ALL TRACKS RANDOM PLAY NORMAL PLAY
Selecting repeat and random modes from the remote control
• Press the REPEAT button to select REPEAT 1 REPEAT ALL REPEAT OFF:
• Press the RANDOM button to select Random Play ON/OFF
playing a CD
IHFUSBN13_IB.indd 15 14/06/2013 14:41

16
program play
You can program up to 20 tracks. Ensure a CD is not playing before setting a program.
Setting a program
1. Press MODE/MEM SET/PROGRAM on the control panel or
the PROGRAM button on the remote control.
The ‘PROGRAM’ indicator lights. The display ashes “P01”.
2. Press a TUNE/SKIP button to select the track.
3. Press MODE/MEM SET/PROGRAM on the control panel or
press the PROGRAM button on the remote control to store
the selection.
The display ashes“P02”.
4. Repeat steps 2 to 3 to select more tracks, up to a maximum
of 20.
To play a program
Press the PLAY/PAUSE button. The program will play once and
then stop.
• When a program is in play the PROG icon displays.
• In ‘Program’ mode, if you stop the CD the PROG icon displays
to tell you that the program is still retained in the memory.
To replay the program
Press the PLAY/PAUSE button.
To erase the program
Press the STOP button twice.
• Switching to another source or opening and closing the CD door will stop the CD and
erase any program contents.
• Setting the unit to Standby will also stop the CD and erase any program contents.
IHFUSBN13_IB.indd 16 14/06/2013 14:41

17
Bluetooth operation
Before using your unit in Bluetooth mode it must be paired and connected to a suitable
Bluetooth source. This may be a mobile phone or Bluetooth equipped laptop etc.
Pairing with a Bluetooth device
1. Switch the unit on.
2. Press the SOURCE button to select “bt” (Bluetooth) mode.
3. Activate Bluetooth on the source.
In the Bluetooth menu of the source, there should be an option to search for Bluetooth
devices. Select this option.
The source will now scan for other Bluetooth devices and should nd the unit,
identied as “IHFUSBN13”.
4. Choose to pair with this device.
Pairing should be automatic, but if the device features Bluetooth technology earlier
than V2.0, you will be asked for a password. If so, enter“0000”.
“bt” on the display will stop ashing if the connection is successful.
5. Select and play the audio le using the controls on your Bluetooth device.
During play
• Press the VOLUME +/- buttons to alter the volume.
• Press PLAY/PAUSE to pause and restart play.
• Press / TUNE/SKIP to skip to previous/next track.
When you have nished
1. Press PLAY/PAUSE to stop play.
2. Unpair (disconnect) the Bluetooth device from the unit by using the unpairing
procedure on your Bluetooth device.
After unpairing, you can set the unit to Standby if you wish.
Bluetooth® and NFC operation
If you are trying to pair your HiFi to a mobile device and your mobile device
shows the message‘ failed to connect and password is incorrect’, then switch
the unit o at the mains switch, wait 1 minute then switch the unit back on.
Try pairing again using bluetooth or NFC modes.
IHFUSBN13_IB.indd 17 14/06/2013 14:41

18
NFC operation
NFC is a one touch way of pairing your NFC device via Bluetooth to your speaker.
Before starting you will need to establish if your device features this technology and locate
it’s NFC sender - consult your provider if you are in any doubt.
Connecting
1. The unit must be in STANDBY or BLUETOOTH modes for an NFC
device to be able to connect.
2. Place your mobile device within 10mm of the unit’s NFC sensor.
3. When the unit senses your mobile device it will come out of
standby and enter“bt” mode. The Bluetooth function on your
mobile device will be turned on and will pair with the unit
automatically. The unit plays a sound to indicate that
it is connected.
4. Select and play the audio le though your mobile device.
Playing
• Press the VOLUME +/-buttons on the unit to alter the volume.
• Press PLAY/PAUSE on the unit to pause and restart play.
• Press / TUNE/SKIP to skip to previous/next track.
When you have nished
1. Press PLAY/PAUSE to stop play.
2. Place your mobile device within 10mm of the unit’s NFC sensor area.
The unit will now disconnect from your mobile device, the Bluetooth mode on your
HiFi will remain on.
Make sure your HiFi is not already paired with a Bluetooth device.
If it is, you will need to unpair it before using NFC.
Connecting an NFC device with one already connected
You can only connect one NFC device at a time. If an NFC device is already connected, the
connected device must be disconnected before you can connect another NFC device. This
is to prevent some from changing the music you are playing without your permission.
1. In the Bluetooth settings of the connected device select disconnect. The Bluetooth
device will now disconnect.
2. While the HiFi is in Bluetooth mode touch the other NFC device against the NFC
sensor, the device will now connect.
If its the rst time the NFC device has been used you will your HiFi you will be
asked if you want to connect. Conrm you want to connect.
IHFUSBN13_IB.indd 18 14/06/2013 14:41

19
Connecting
1. Make sure the unit is disconnected at the mains socket.
2. Connect a 3.5mm AUX-IN cable (not supplied) from the headphone or line output
of the source to the LINE IN socket on the back panel.
3. Connect the mains plug and switch the mains socket on. The unit will enter
standby mode.
Playing
Press SOURCE repeatedly until “AU”(Auxiliary Input Mode) is displayed.
Select the music from your source and set it to play. You may need to
adjust the volume levels on the auxiliary device and HiFi.
the USB charging connection
The USB connector on the front of the device is only for charging mobile phones and
personal stereos. It provides 5VDC at a charging current of up to 1000mA (1 A).
Connect the USB charging cable from your mobile device to the USB connector of the unit
and your mobile device will start charging.
the line in input
You can play your personal music player or other audio unit through your unit by
connecting the headphone or Line output to the Line Input socket at the back of the unit.
ONLY use the USB charging socket on the device to charge small mobile
devices. NEVER use this socket for any other purpose.
IHFUSBN13_IB.indd 19 14/06/2013 14:41

20
maintenance
handling discs
• Do not touch the playback side of the disc.
• Do not attach paper or tape to the disc.
cleaning discs
• Fingerprints and dust on the disc cause sound deterioration. Wipe the disc from the
centre outwards with a soft cloth. Always keep the disc clean.
• If you cannot wipe o the dust with a soft cloth, wipe the disc lightly with a slightly
moistened soft cloth and nish with a dry cloth.
• Do not use any type of solvent such as thinner, benzine, commercially available cleaners
or antistatic spray. They may damage the disc.
storing discs
• Do not store discs in places subjected to direct sunlight or near heat sources.
• Do not store discs in places subjected to moisture and dust such as a bathroom or near
a humidier.
• Storing discs vertically in a case, stacking discs or placing objects on discs outside
of their cases may cause warping.
Playback side
IHFUSBN13_IB.indd 20 14/06/2013 14:41
Table of contents
Other iWantit Docking Station manuals

iWantit
iWantit iPHUDK11 User manual

iWantit
iWantit ISDK13 User manual

iWantit
iWantit iMOO11 User manual

iWantit
iWantit iPOD1010 User manual

iWantit
iWantit iPHWAV10 User manual

iWantit
iWantit iW300 User manual

iWantit
iWantit iPHBABY10 User manual

iWantit
iWantit iPH1212 User manual

iWantit
iWantit iHDDK11 User manual

iWantit
iWantit iPHUDK10 User manual