6 7
1 2 3 4 5 6 7 8 9 10 11
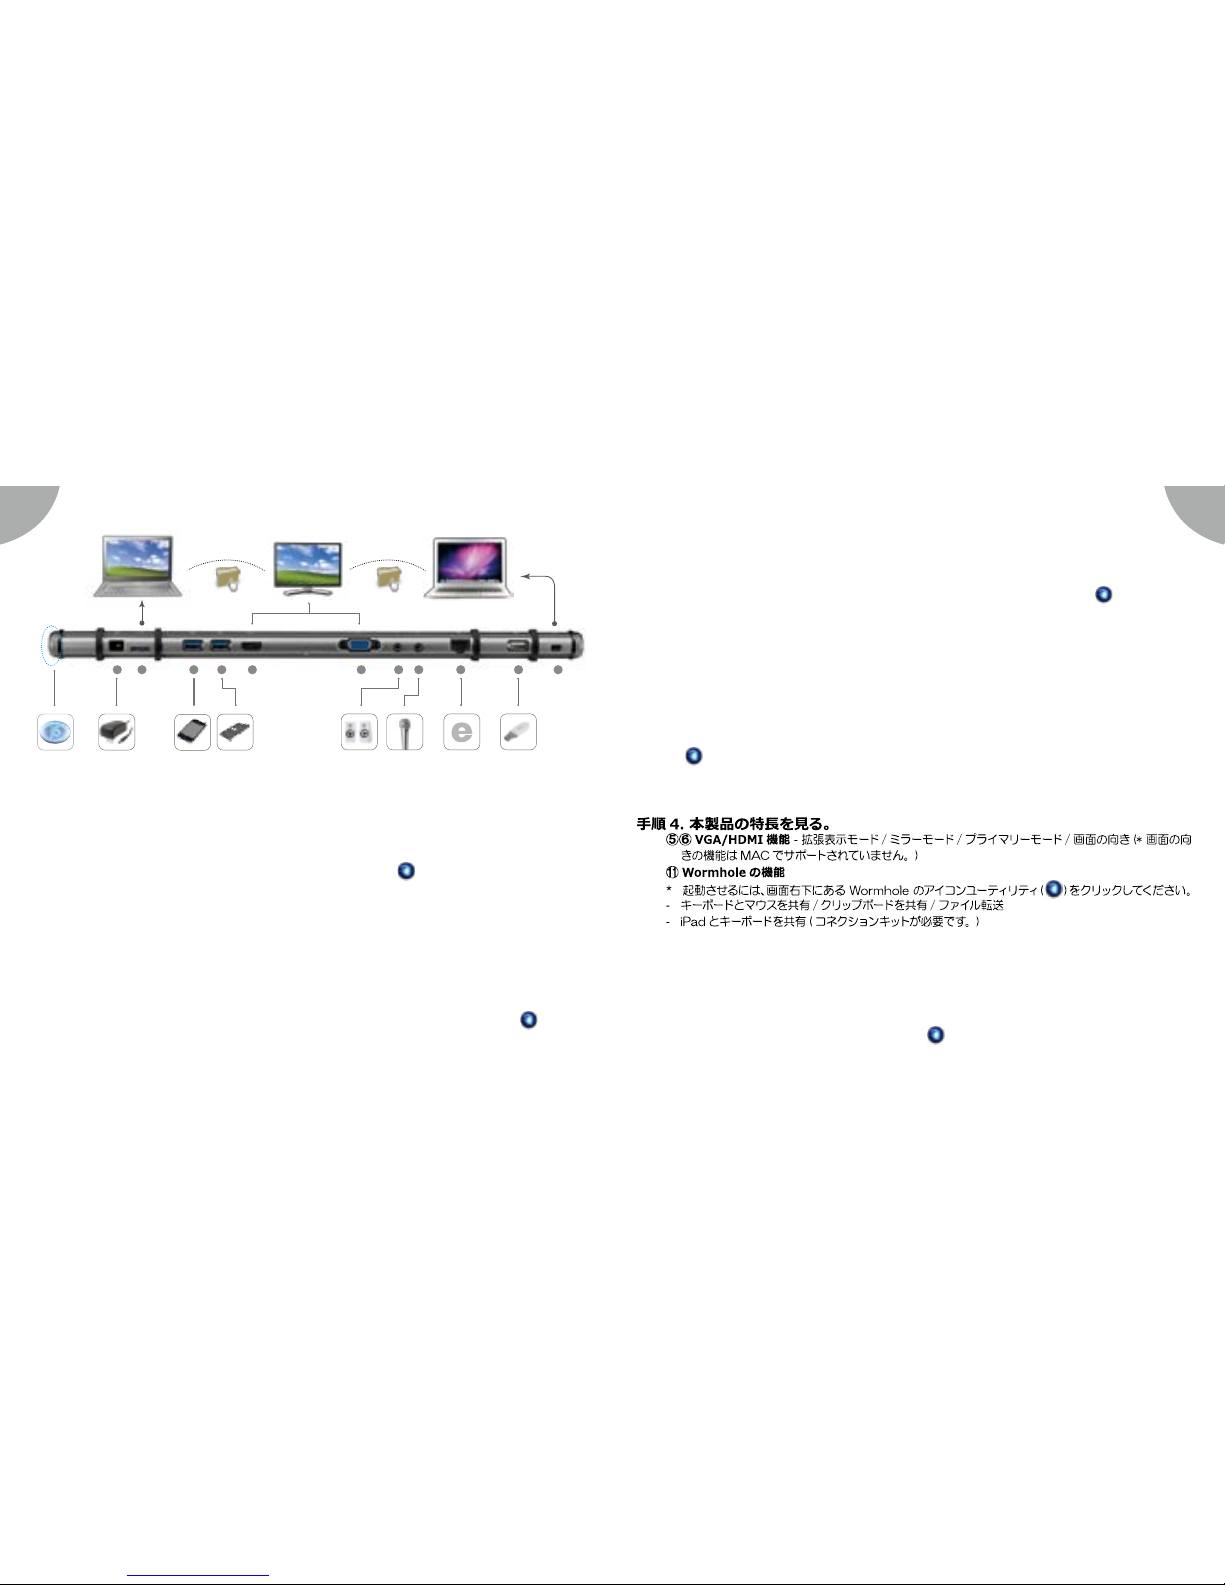
VGAHDMIHOST
Step 2. Device Hardware Installation
1. Plug the Power Adapter to Port ①, For best results j5create strongly recommends you use
the 5V power adapter included with your device.
2. Connect USB 3.0 Cable Micro-B connector to Port ②, type A to host laptop.
3. Push the “j5” power button , The red indicator light lets you know when the incorrect power
adapter is plugged in.
4. Connect USB 2.0 Cable Micro-B connector to Port ⑪, and Type-A connector to the USB
port of the second computer. To Start the Wormhole Switch Function.
Paso 2. Instalación Del Hardware Del Dispositivo
1. Conecte el adaptador de corriente al puerto ①, Para obtener los mejores resultados
j5create recomienda encarecidamente que utilice el adaptador de alimentación de 5V
incluido con el dispositivo.
2. Conecte el cable con conector USB 3.0 Micro-B al conector del puerto ②, tipo A y luego al
portátil antrión.
3. Presione el botón de encendido de la “j5”, La luz roja del indicador le permite saber cuando
el adaptador de alimentación incorrecta está enchufado.
4. Conecte el conector Micro-B del cable USB 2.0 al Puerto ⑪ y el conector tipo A al puerto
USB del segundo ordenador. Para iniciar la función Wormhole Switch, consulte la
instalación de Wormhole
Schritt 2. Installation Von Gerätehardware
1.
Schließen Sie den Netzadapter an Anschluss ① an, Für beste Ergebnisse empehlt dringend
j5create Sie das 5V-Netzadapter mit Ihrem Gerät verwenden.
2. Schließen Sie den Micro-B-Stecker des USB 3.0-Kabels an Anschluss ②und den Typ-A
Stecker an das Laptop an.
3. Drücken Sie auf die Ein/Aus-Taste “j5”, Die rote Kontrollleuchte zeigt an, wenn das falsche
Netzteil eingesteckt ist.
4. Schließen Sie den Micro-B Stecker des USB 2.0 Kabels an Port ⑪an, sowie den Typ A
Stecker an den USB Port des zweiten Computers. Um die Wormhole Switch Funktion zu
aktivieren, lesen Sie bitte Installieren bei Wormhole.
Étape 2. Installation Du Matériel Dispositif
1. Branchez l'adaptateur sur le Port ①, Pour de meilleurs résultats j5create recommande
fortement que vous utilisez l'adaptateur d'alimentation de 5V inclus avec votre appareil.
2. Connectez le connecteur du câble USB 3.0 Micro-B au Port ②, connecteur de Type-A à
l'ordinateur portable hôte
3. Appuyez sur le bouton d'alimentation « j5 », Le voyant rouge vous permet de savoir quand
l'adaptateur d'alimentation incorrecte est branché.
4. Raccordez le connecteur Micro-B du câble USB 2.0 au Port ⑪, et le connecteur de Type-A
au port USB du deuxième ordinateur. Pour démarrer la fonction Wormhole Switch, veuillez
vous référer à l'installation pour Wormhole
步驟 2. 硬體安裝
1. 連接電源充電器至 ①號埠,請務必使用產品附的 5V 電源適配器。
2. 連接 USB 3.0 線的 Micro-B 端至 ②號埠,連接 Type-A 端至電腦
3. 壓按開啟“j5” 電源,當燈號顯示為紅色時,表示使用不正確的電源適配器。
4. USB 2.0 線的 Micro-B 頭至⑪號埠,另外一端 Type-A 頭至第二台電腦的 USB 埠 。安裝 Wormhole
Switch 功能,參考 Wormhole 安裝流程
** 添付されている AC アダプターが不良であったり、他の AC アダプターを使って不具合が出た場合
は、パワーボタンの LED が赤色に点灯します。JUD500 に同梱されている AC アダプターを必ず
ご使用いただきますようお願いいたします。
Step
2
Step
2