Jabra Ellipse User manual

User Guide
ELLIPSE
Ellipse manual final 5/26/99 9:55 AM Page 1

Components
A. Base Unit
30Headset/Handset Selector
I. Transmit Adjustment
II. Telephone Compatibility Adjustment
4On-line Indicator
5Battery Recharging Indicator
B. Headset Stand
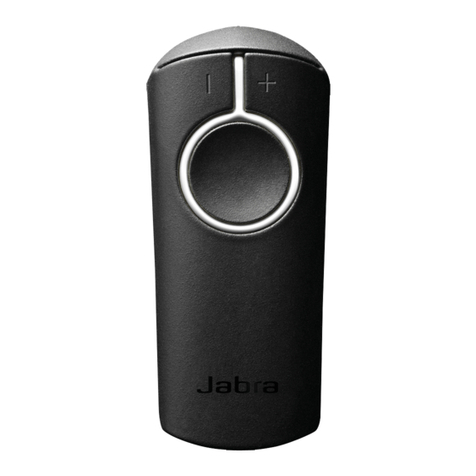
C. Remote Unit
III. On-line Indicator
Volume Control Button
6Mute Button
IV. Hook Switch Activation Button
D. Base stand
E. AC Power Adapter
F. Remote Unit Battery and Belt Clip
V. Shirt Clip
H. Modular Connector Cord
E.D.
B C.
G.
F.
III.
V.
IV.
II.
I.
A.
Ellipse manual final 5/26/99 9:55 AM Page 2

3
Assemb ling the base unit and connecting
to the telephone
1 ) Disconnect handset cord from telephone andconnect to port
marked with the
0
icon at the bottom of base unit. Connect
oneend of modular connector cord to handset port and the
other end to the bottom of base unit marked with icon
1.
Connect the AC Power Adapter to theport marked with icon
2
at the bottom of base unit,and then to the power outlet.
Turn on power (seeFigure 1).
2) Mount base unit by aligning thetabs extending from the
bottom of the base unit with the corresponding slots on the
stand. Turn clockwise until secure. The 3 cords should extend
from the back of the base unit. Align the center tab of the
headset stand with the port on either side of the base unit.
Slide the ends of the headset stand over until it locks into
place(see Figure 2).
3) Align the tab at the bottom ofthe batterywith the notch on
the back of the remote unit. Push the battery flush against the
remote until it clicks into place. (see Figure 3).
4) Connect headset to bottom of remote unit. Insert remote unit
into base unit.Either side may be used. The battery charge
indicator marked with icon
5
on base unit will light up.
This will be referred to as the front of thebase unit (see
Figure 4). Fully charge remote for 3 hours before using.
Figure 2
Figure 1
Figure 3
Figure 4
Ellipse manual final 5/26/99 9:55 AM Page 3

4
Figure 6
II.
III.
I.
Checking the system
1) Put in headset mode by pressing the headset/handset selector on top of base unit
(press only once).The on-line indicator marked with icon
4
on front of baseunit
will light up. After 5-45 seconds, the on-line indicator on the top of remote unit
will start to flash (base unit searches for open transmission channel first time only).
The system is now working. If the on-line indicator doesnot flash, recheck
assembly (see Figure5).
Charging the battery
The nickel-metal-hydride battery (NiMH) for the remote unit is not charged when
delivered.To change, place remote unit with battery in base unit for at least 3 hours
before making the adjustments below (see Figure 6).
2) I+II. Make sure the headset/handset selector marked with icon
30
on top of base
unit is in the headset position. The switch is in headset position when the on-
line indicator marked with icon
4
on the front of the base unit lightsup and
the on-lineindicator on the top of the remote unit is flashing. If the lights are
off, the switchis in handset position. Press the handset/headset buttononce to
activate the headset.
III. Make sure the mute function on the remote is off. If the muteis on, you will
hear a double beep in your headset every 3 seconds. Turnoff by pressing the
mute button on the remote unit marked with icon
6
once.
IV. If your telephone has volume control, set the volume to mid-range.
Setting telephone compatibility and transmit adjustments
Step 1: Adjusting to your telephone
1) Put your headset on,lift thehandset from the telephone and listen for a dial tonein
your headset.
2) If there is no dial tone, adjust the telephone compatibility switch marked A-G on
the rear of base unit. Move from A to G until the dial tone is clear. If thedial tone is
just as clear in position A as in G, leave switch in position A (see Figure 7).
Figure 7
Figure 5
Ellipse manual final 5/26/99 9:55 AM Page 4

5
Figure 8
Step 2: Adjusting the transmit sound level
To adjust transmit (microphone) sound level, you must make a call.
1) Change from headset to handset position by pressing the headset/handset switch
marked with icon
30
on top of base unit once. Call someone using your handset
and ask for help evaluating the sound level of your voice. Adjust the switch marked
1-8 on the rear of the base unit as follows:
Adjust position from 1 to 8 (1 softest, 8 loudest) byfirst talking in thehandset
and then in the headset for eachposition. When the person hears no
difference when youtalk into the handset or headset,you have the correct
setting. If the best setting is 7 or 8, move the A-G switchto position G (see
Figure 8).
Telephone compatibility guide
For optimal performance the Ellipse must be adjusted to the telephone it is connected to.
The table shows the setup with the adjustment of the2 different setup functions.
Manufacturer System Phone Set Phone Type
AT&T (Lucent) Definity 7100, 7300, 7400, Series Electret
Merlin BTN, BIS, & 7000 Series Electret
ISDN 6500, 7500 Series Electret
1A2 2500 Series Carbon
Merlin Legend MLX Series Electret
Consumer Products Traditional & Feature Electret
Comdial Executech, Impact All Sets Electret
Mitel SX Series All Supersets Electret
NEC Electra D-Term Series 2, 3, E Electret
Executone Encore All Sets Carbon
ITT/Alcatel 501, 601 2500 & 2800 Series Carbon
Toshiba Strata SE & DK EKT 2101-3102, 6010-6025 Carbon
Siemens Rolm ETS Series Carbon
Ellipse manual final 5/26/99 9:55 AM Page 5

6
Using with a headset
1) Make sure the headset/handset switch on top of the base unit is in the headset
position (see Figure 6, I + II). Put on headset, pick up handset, and answer the
phone or make a call.
2) To end the call, put down handset.
3) When you answer or make a call using the headset, the on-line indicator on
the base unit startsflashing. This means the base unit is communicating with
the remote unit (see Figure 9).
4) To move away from your desk during the call, remove the remote unit from the
base unit — and clip it to your belt or put in your pocket. You can now move
freely up to 150 feet away from the base unit. If you move out of transmission
range, Ellipse lets you know by means of a double beep in your headset every
10 seconds.
Using with a handset
1) Make sure the headset/handset switch on top of the base unit is in the handset
position (see Figure 6, I + II).
2) Pickup handset to answer phone or make a call as usual.
3) To end call, put down the handset.
Using the pocket and belt clips
1) The remote unit ships with the pocket clip installed. To use, slide the wire clip
behind the fabric of your pocket.
2) To use the belt clip, the wire pocket clip must be removed. While holding the
remote face down, gently pull the wire clip from both sides (see Figure 10).
3) Slide the belt clip onto the back of the remote until it clicks into place (see
Figure 11).
Figure 9
Figure 10
Figure 11
Ellipse manual final 5/26/99 9:55 AM Page 6

7
Figure 12
Figure 13
Figure 14
Adjusting the v olume
To turn up or reduce the sound level in your headset, press successively on the
volume control button +/- marked with theicon on the front of the remote unit
(see Figure 12).
Muting the micr ophone
To talk without the other party hearing you, press the mute button marked with the
icon
6
on the front of the remote unit. When the microphone is muted, you will
hear a double beep in your headset every 3 seconds. When the mute function is on,
you can still hear the other party (see Figure 13).
Recharging the battery
To ensure optimum battery life, place the remote unit in the base unit when not in
use. The recharging indicator on the base unit marked with the icon
5
automatically lights up while the battery is in the base. It takes 3 hours to fully
rechargethe battery. A fully charged battery provides 12 hours of talktime. If battery
power gets too low, you’ll hear a beep in your headset every 10 seconds (see
Figure 14).
An optional second battery can charge in the base unit while the remote unit isin use,
thus providing additional talktime.To replace the battery,depressthe button on the back
of the battery and pull.
Ellipse manual final 5/26/99 9:55 AM Page 7

Troubleshooting
• Buzzing may occur with some telephone models. Place the base unit and your telephoneas far away from each other as possible.
• Avoid exposing to water and other liquids.
Accessories
• To prolongoperating time from 12to 24 hours, an additional battery can be purchased.
• An Ellipse hook switch device is available. The hookswitch enables you toanswer calls without returning to your desk to lift the
handset from your telephone.
Batteries
NiMH (nickel-metal-hydride), 3,6 V 500 mAH.
Capacitywhen fully charged and on-line: min. 12 hours continuoususe, without recharging
Capacity when fully charged and off-line: min. 80 hours without recharging.
Recharging: max. 3 hours to completely recharge a discharged battery. The battery will recharge until fully charged. The battery cannot be
overcharged.
The remote unit is equipped with a rechargeableNiMH battery (nickel-metal-hydride). If the battery is recharged when not in use, and
never completelydischarged, it should have alifetimeof about 2 years. Please dispose ofbatteriesin an environmentally friendly matter.
8
Ellipse manual final 5/26/99 9:55 AM Page 8

9
Ellipse manual final 5/26/99 9:55 AM Page 9

10
Cautionar y Notes to Computer Users
When using any headset with a computer, care should be taken in dry or low humidity environments to protect the user from
electrostatic discharge from the monitor (CRT). Computer monitors can induce a substantial electrostatic charge when turned onor off, or
when there is a power failure, and the resulting electrostatic dischargecan be passed throughthe headset to ground.
A user in close proximity to or touching the computer may feela common “shock” sensation, similar to touching a doorknob after
walking across a carpet, causingno harm to the user. Thisdischarge is entirely due to the computer monitor; the headset is merely the
shortest path to ground.
To minimize the possibility of electrostatic discharge through the headset,youcan:
• Use a grounded screen in front of the monitor.
• Use static dissipative wrist straps.
• Increase the relative humidity in the room to 60% or more.
• Install static dissipative carpets or floor coverings (anti-staticsprays can be helpful).
• Removethe headset before turning the computer on or off.
GN Netcom, Inc. headsetsmeet all OSHA, UL,FCC and CSAstandards.
FCC Notice to Users
Upon request only, you must notify your telephoneutility company (telco) of your intention to install or permanently remove an FCC
Part 68 registered deviceor system. Include the FCC Registration Number and the Ringer Equivalence Number (REN) located on the
amplifier label.
The telco has the right to make changes to their network, which may affect the operation of your equipment, provided you are given
adequate advance written notice to permitcorrectoperation.
The user must place the base unit 2” (5 cm) or more from any personnel in order to comply with FCC RF exposure requirements.
Warranty
GN Netcom, Inc. warrants these products against all defects in material andworkmanship for a period of one year from the date of
original purchase. The conditions of this warranty andour responsibilities under this warranty are as follows:
• The warranty islimited to the original purchaser.
• The warranty is void if the serial number, datecodelabel or product labelis removed, or ifthe product has been subject to physical
Ellipse manual final 5/26/99 9:55 AM Page 10

11
abuse, improper installation, modification, or repair by unauthorized third parties.
• The responsibility of GN Netcom, Inc. under this warranty shall be limited to the repair or replacement of the product at the sole
discretion of GN Netcom, Inc.
• Any implied warrantyon GN Netcom, Inc. products is limited to one year from the date of purchase on all parts, including the
cords and connectors. Specifically exempt from warranty are limited-lifeconsumable components subjectto normal wear and tear,
such as microphone windscreens, ear cushions, ear tips, decorative finishes, batteries, and other accessories. GN Netcom, Inc.is not
liable for any incidental or consequential damages arising from the use or misuse of any GN Netcom, Inc.product.
• A copy of your receipt or other proof of purchase is required. Without proof of purchase,your warranty is defined as beginning on
the date of manufacture as labeled on the product.
• This warranty givesyou specificlegalrights and you may haveother rightswhich vary from state to state.
Unless otherwise instructed in the User Guide, the user may not, under any circumstances, attempt any service, adjustments or repairs on
this unit, whether in or out of warranty. It must be returned to the factory or authorized service agency for all such work.
To Obtain Ser vice
For customer service and technical support, call GN Netcom, Inc. at 1-800-826-4656.
Ifit becomes necessary to senda unit in for repair, it is not necessary to call for a Return Material Authorization (RMA) number, as one
will beassigned uponreceipt of the packageat thefactory.
Ship the product in a suitable shipping container, fully insured and with the shipping charges prepaid. Include the following with the
product:
• Your name, company name, address and telephone number.
• A description of the problem.
• A copy ofthe receipt or other proof of purchase (without proof of purchase, your warranty will bedefined as beginning onthedate
ofmanufacture as labeledonthe product).
Or, for out of warranty products:
• A purchase order which authorizes repair.
In warranty products are warranted for one year fromthe repair date or for the remainder of the original warranty period, whichever is
longer. Out of warranty products will be repaired or replaced at the prevailing charge and carry a oneyear warranty from repair date.
GN Netcom, Inc. will not assume any responsibility for any loss or damage incurred in shipping. Anyrepair work on GN Netcom, Inc.
products by unauthorized third parties voids any existing GN Netcom, Inc. warranty.
ShipTo:
GN Netcom,Inc. • 77 Northeastern Boulevard • Nashua, NH 03062 •1-800-826-4656
Ellipse manual final 5/26/99 9:55 AM Page 11

77 Northeastern Blvd. • Nashua, NH03062 USA
1-800-826-4656 • www.gnnetcom.com
406894
Printed in USA June 1999
Ellipse manual final 5/26/99 9:55 AM Page 12
Other manuals for Ellipse
4
Table of contents
Other Jabra Headset manuals

Jabra
Jabra GN 5140 User manual

Jabra
Jabra GN9330e - USB - Headset User manual

Jabra
Jabra LINK 14201-33 Quick start guide

Jabra
Jabra BT4051 User manual

Jabra
Jabra EASYGO Reference guide

Jabra
Jabra GN 8000 MPA User manual

Jabra
Jabra Pro 930 Mono User manual

Jabra
Jabra Pro 9460 User manual

Jabra
Jabra HALO BT650s User manual

Jabra
Jabra MOVE WIRELESS Specification sheet

Jabra
Jabra GN9350e Safety guide

Jabra
Jabra GN9120 Flex User manual

Jabra
Jabra BTE6 User manual

Jabra
Jabra Pro 9450 Mono User manual

Jabra
Jabra PRO 925 Operator's manual

Jabra
Jabra CLIPPER Reference guide

Jabra
Jabra STREET2 User manual

Jabra
Jabra Elite 2 User manual

Jabra
Jabra GO 660 User manual

Jabra
Jabra BT 125 User manual