manuals.online logo
Brands
  1. Home
  2. •
  3. Brands
  4. •
  5. Jamara
  6. •
  7. Motorized Toy Car
  8. •
  9. Jamara New Holland 6V User manual

Jamara New Holland 6V User manual

Other manuals for New Holland 6V

1

This manual suits for next models

1

Other Jamara Motorized Toy Car manuals

Jamara 405191 User manual

Jamara

Jamara 405191 User manual

Jamara Ford GT 2,4GHz User manual

Jamara

Jamara Ford GT 2,4GHz User manual

Jamara BMW i8 User manual

Jamara

Jamara BMW i8 User manual

Jamara TIGER User manual

Jamara

Jamara TIGER User manual

Jamara Ferrari FXX K Evo User manual

Jamara

Jamara Ferrari FXX K Evo User manual

Jamara Jeep Wrangler JL 2,4GHz User manual

Jamara

Jamara Jeep Wrangler JL 2,4GHz User manual

Jamara Strong Bull 460795 User manual

Jamara

Jamara Strong Bull 460795 User manual

Jamara 410028 User manual

Jamara

Jamara 410028 User manual

Jamara Lextron EP User manual

Jamara

Jamara Lextron EP User manual

Jamara Strabenwalze 2,4 GHz User manual

Jamara

Jamara Strabenwalze 2,4 GHz User manual

Jamara BMW i8 2,4GHz User manual

Jamara

Jamara BMW i8 2,4GHz User manual

Jamara J-Matic 404920 User manual

Jamara

Jamara J-Matic 404920 User manual

Jamara Ride-on Motorrad BMW S1000RR User manual

Jamara

Jamara Ride-on Motorrad BMW S1000RR User manual

Jamara 460914 User manual

Jamara

Jamara 460914 User manual

Jamara McLaren P1 2,4GHz User manual

Jamara

Jamara McLaren P1 2,4GHz User manual

Jamara Ramor 41 0034 User manual

Jamara

Jamara Ramor 41 0034 User manual

Jamara Ferrari SF90 Stradale User manual

Jamara

Jamara Ferrari SF90 Stradale User manual

Jamara Lamborghini Huracan LP610-4 2,4GHz User manual

Jamara

Jamara Lamborghini Huracan LP610-4 2,4GHz User manual

Jamara Jeep Willys MB Army User manual

Jamara

Jamara Jeep Willys MB Army User manual

Jamara Dakar 053290 EP User manual

Jamara

Jamara Dakar 053290 EP User manual

Jamara Cocoon EP RTR 2,4 GHz User manual

Jamara

Jamara Cocoon EP RTR 2,4 GHz User manual

Jamara Vulcano EP RTR 2,4 GHz User manual

Jamara

Jamara Vulcano EP RTR 2,4 GHz User manual

Jamara VW Beetle 2,4GHz User manual

Jamara

Jamara VW Beetle 2,4GHz User manual

Jamara Ride on BMW M6 GT3 User manual

Jamara

Jamara Ride on BMW M6 GT3 User manual

Popular Motorized Toy Car manuals by other brands

Reely Dune Fighter 3S operating instructions

Reely

Reely Dune Fighter 3S operating instructions

REVELL 1970 Chevelle SS 454 manual

REVELL

REVELL 1970 Chevelle SS 454 manual

Team Losi Micro Rally Car Operation guide

Team Losi

Team Losi Micro Rally Car Operation guide

Eduard Humber Scout Car Mk.I exterior quick start guide

Eduard

Eduard Humber Scout Car Mk.I exterior quick start guide

REVELL 68 CHEVY CHEVELLE SS 396 manual

REVELL

REVELL 68 CHEVY CHEVELLE SS 396 manual

Schumacher Pro Cat instruction manual

Schumacher

Schumacher Pro Cat instruction manual

Tamiya TT-01 TYPE E instruction manual

Tamiya

Tamiya TT-01 TYPE E instruction manual

Eduard Krupp Protze 6x4 1/48 quick start guide

Eduard

Eduard Krupp Protze 6x4 1/48 quick start guide

New Bright 61072UEP quick start guide

New Bright

New Bright 61072UEP quick start guide

Team Durango DEX410v5 manual

Team Durango

Team Durango DEX410v5 manual

PLAYMOBIL 9536 manual

PLAYMOBIL

PLAYMOBIL 9536 manual

Atomic BZ3 instruction manual

Atomic

Atomic BZ3 instruction manual

Aiyaplay 370-290V00 user manual

Aiyaplay

Aiyaplay 370-290V00 user manual

ZEROTRIBE Zetricks ZT1144 instruction manual

ZEROTRIBE

ZEROTRIBE Zetricks ZT1144 instruction manual

INJUSA 412 Assembly instructions

INJUSA

INJUSA 412 Assembly instructions

Maverick MSC-30BR-WP instruction manual

Maverick

Maverick MSC-30BR-WP instruction manual

Land of B. Rollin' Riders quick start guide

Land of B.

Land of B. Rollin' Riders quick start guide

TLR 22SCT 2.0 user manual

TLR

TLR 22SCT 2.0 user manual

manuals.online logo
manuals.online logoBrands
  • About & Mission
  • Contact us
  • Privacy Policy
  • Terms and Conditions

Copyright 2025 Manuals.Online. All Rights Reserved.

44/22
Ride on Traktor mit Anhänger
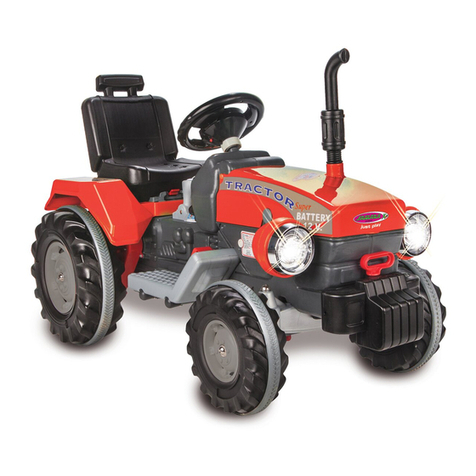
New Holland 6V
No. 460482
max. kg
25
DE - Geeignet für Kinder ab 24 Monate.
•Entfernen Sie vor dem Spielbetrieb alle Schutzfolien von sämtlichen Teilen
• Dieses Gerät ist nicht dafür bestimmt, durch Personen (einschließlich Kinder) mit
eingeschränkten physischen, sensorischen oder geistigen Fähigkeiten oder mangels
Erfahrung und/oder mangels Wissen benutzt zu werden.
•Max. Gewicht: < 25 kg
Vor der Montage
•Die Montage darf nur von einem Erwachsenen vorgenommen werden.
Halten Sie während der Montage Kinder fern.
•Bewahren Sie das Werkzeug außerhalb der Reichweite von Kindern auf.
•Für die Montage benötigen Sie folgende Werkzeuge (nicht enthalten):
Kreuzschlitzschraubendreher
GB - Suitable for children over 24 months.
• 
•This product is not intended for use by individuals (including children) with reduced
physical, sensory or mental capabilities or lack of experience and / or knowledge.
•Maximum weight: < 25 kg
Before assembly
•Adult required for assembly. Keep children away while assembling.
•Keep the tool out of the reach of children.
• Tools (not included) needed for assembly: screwdriver.
FR - Produit à utiliser par les enfants de plus de 24 mois.
• 
• Ce dispositif n‘est pas destiné à être utilisé par des personnes (y compris les enfants)
dont les capacités physiques, sensorielles ou mentales ou manque d‘expérience et /
ou les connais sances pour être.
•Poids max. < 25 kg
Avant le montage
• 󰀨
enfants lors de l’assemblage
•Gardez l‘outil hors de portée des enfants
• Pour l’assemblage vous avez besoin du matériel suivant (pas contenu dans le kit):
tournevis cruciforme.
IT - Adatto ai bambini dal 24 di mesi.
•Prima di giocare, rimuovere tutte le pellicole protettive presenti su tutte le parti .
•Questo prodotto non è destinato ad essere utilizzato da persone (bambini compresi) con
 
esperienza e/o di conoscenza.
•Peso massimo: < 25 kg
Prima del montaggio
•
montaggio.
•Tenere il attrezzo fuori dalla portata dei bambini.
• Per il montaggio sono necessari i seguenti attrezzi (no incluso): Cacciavite.
ES - Apto para niños mayores de 24 meses.
•Antes de jugar, quite todas las películas protectoras de todas las partes
•Es producto no es para personas (incluidos niños) con discapacidad física, mental y
sensonriais. O ninguna experiencia ni conocimiento.
•Edad mínima: 2 años
Antes del montaje
•El Montaje debe ser realizado por un adulto. Mantener los niños alejado durante el
montaje.
•Mantenga la herramienta fuera del alcance de los niños.
• Para el montaje se necesitan las siguientes herramientas (no incluido): Destornillador.
CZ - Vhodné pro děti ve věku od 24 měsíců.
• 
• 
 
znalostmi,
• 
Před montáží
• 
 
• 
•
 
PL - Odpowiednie dla dzieci od 24 miesięcy.
• 
• 
 
 
 
•Maks. waga: < 25 kg
Przed montażem
• 
 
• 
• 
 
NL - Geschikt voor kinderen vanaf 24 maanden.
•Voordat het wordt gespeld, moet de beschermfolie van alle onderdelen worden
verwijderd.
•Dit toestel is niet bestemd voor gebruik door personen (inclusief kinderen) met beperkte
fysische, sensorische, cognitieve, onbekwame vaardigheden
•Max. gewicht: < 25 kg
Vóór de installatie
•De installatie mag enkel door een volwassene worden uitgevoerd.
Tijdens de installatie mogen de kinderen niet in de buurt van het speelgoed verblijven.
•Houd het gereedschap buiten het bereik van kinderen.
•Het bij de installatie vereiste gereedschap (niet meegeleverd):
Kruiskopschroevendraaier
SK - Vhodné pre deti od 24 mesiacov.
• 
• 
 
 
• 
Pred montážou
• 
 
• 
• 
 
DE - Gebrauchsanleitung
GB - Instruction
FR - Notice
IT - Istruzione
ES - Instrucción
CZ - Návod k použití
PL - Instrukcja użytkowania
NL - Gebruiksaanwijzing
SK - Návod na použitie
DE - Allgemeine Hinweise
JAMARA e.K. übernimmt keine Haftung für Schäden, die an dem Produkt selbst oder durch dieses
entstehen, sofern diese auf falsche Bedienung oder Handhabungsfehler zurückzuführen sind. Der
Kunde allein trägt die volle Verantwortung für die richtige Bedienung und Handhabung; dies umfasst
insbesondere die Montage, den Ladevorgang, die Verwendung bis hin zur Wahl des Einsatzberei-
ches. Bitte beachten Sie hierzu die Bedienungs- und Gebrauchsanleitung, diese enthält wichtige

GB - General information
JAMARA e.K. is not liable for any damage caused to the product itself or through this, provided this
is due to improper operation or handling errors. The Customer alone bears the full responsibility for
the proper use and handling, including without limitation, the assembly, the charging process, the
use and choice of the operation area. Please refer to the operating and user instructions, it contains
important information and warnings.
FR - Remarques générales
La société JAMARA e.K. n’est pas responsable de dommages, que ce soit au niveau du modèle
ou causé par celui-ci, résultant d’une utilisation non appropriée. Seul le client est responsable con-
cernant la mise en oeuvre et l’utilisation conforme du matériel; cela va de l’assemblage, en passant
par la charge des accus et allant jusqu’au domaine d’utilisation. Pour cela, veillez lire attentivement
la notice d’assemblage et d’utilisation, celle-ci contient d’importantes informations ainsi que les con-
signes de sécurités.
IT - Informazioni generali
JAMARA e.K. non e´responsabile per danni, sostenute al prodotto stesso o attraverso questo, do-
vuti ad una gestione non corretta del articolo. Solo il cliente si assume la piena responsabilità per
la manutenzione e l´utilizzo corretto dello stesso; questo include il montaggio, la ricarica, l´utilizzo,

contengono informazioni e avvertimenti molto importanti.
ES - Información general
JAMARA e.K. no se hace responsable de los daños causados al producto en sí o por medio de
esto, a menos que esto se debe al mal funcionamiento o errores de manejo. El cliente solo tiene la
responsabilidad completa para el uso y manejo adecuado, incluyendo, sin limitaciones, el montaje,


CZ - Vyloučení odpovědnosti

   

              


PL - Wykluczenie odpowiedzialności

-

           


NL - Uitsluiting van de aansprakelijkheid
-
bruik ervan indien deze schade voortvloeit van onjuiste bediening of foutief gebruik van het product.
De klant zelf is uitsluitend aansprakelijk voor de correcte bediening en juist gebruik van het product:
het omvat met name de montage, het ladingproces, het gebruik en de keuze van het toepassings-
gebied. Wij vragen gaarne kennis te nemen van de bedienings- en gebruiksaanwijzing die cruciale
gegevens en waarschuwing omvat.
SK - Vylúčenie zodpovednosti
Firma JAMARA e.K.

-

         
upozornenia.
2
DE - Konformitätserklärung
Hiermit erklärt JAMARA e.K., dass die Produkte‚ „Traktor mit Anhänger New Holland,
No. 460482“ den Richtlinien 2014/30/EU, 2014/35/EU, 2011/65/EU und 2009/48/EG
entsprechen.
-
se verfügbar: www.jamara-shop.com/Konformitaet
GB - Certicate of Conformity
Hereby JAMARA e.K. declares that the products „Traktor mit Anhänger New Holland 6 V,
No. 460482“ comply with Directives 2014/30/EU, 2014/35/EU, 2011/65/EU and
2009/48/EC.
              
address: www.jamara-shop.com/Conformity
FR - Déclaration de conformité
Par la présente, JAMARA e.K. déclare que les produits „Traktor mit Anhänger New Holland
6 V, No. 460482“ sont conformes aux Directives 2014/30/UE, 2014/35/UE, 2011/65/UE et
2009/48/CE.
Le texte intégral de la déclaration de conformité CE est disponible via l‘adresse suivante
www.jamara-shop.com/Conformity
IT - Dichiarazione di conformità
Con la presente JAMARA e.K. dichiara che i prodotti „Traktor mit Anhänger New Holland
6 V, No. 460482“ sono conformi alle Direttive 2014/30/UE, 2014/35/UE, 2011/65/UE e
2009/48/CE.

www.jamara-shop.com/Conformity
ES - Declaración de conformidad
Por la presente JAMARA e.K. declara que los productos „Traktor mit Anhänger New Hol-
land 6 V, No. 460482“ cumplen con las Directivas 2014/30/UE, 2014/35/UE, 2014/53/UE,
2011/65/UE y 2009/48/CE.
-
 www.jamara-shop.com/Conformity
CZ - Prohlášení o shodě
          
Holland 6 V, No. 460482“   
2011/65/EU a 2009/48/ES.
:
www.jamara-shop.com/Conformity
PL - Deklaracja zgodności
-
land, No. 460482“ jest zgodny z dyrektywami 2014/30/UE, 2014/35/UE, 2011/65/UE oraz
2009/48/WE
          -
towym: www.jamara-shop.com/Conformity
NL - Conformiteitsverklaring
-
land, No. 460482“ aan de richtlijnen 2014/30/EU, 2014/35/EU, 2011/65/EU a 2009/48/ES
voldoen.
De volledige tekst van de EU-conformiteitsverklaring is beschikbaar op het volgende inter-
netadres: www.jamara-shop.com/Conformity
SK - Vyhlásenie o zhode
       „Traktor mit Anhänger New Holland,
No. 460482“ je v súlade so smernicami 2014/30/EU, 2014/35/EU, 2011/65/EU a 2009/48/ES.

www.jamara-shop.com/Conformity
DE - Lesen Sie die komplette Bedienungsanleitung und Sicherheitshinweise sorgfältig
durch bevor Sie das Modell in Betrieb nehmen.
GB -Read the complete instructions and security instructions carefully before using the
model.
FR -Veuillez lire attentivement et entièrement la notice et les consignes de sécurités
avant tout utilisation de ce produit!
IT -
sicurezza prima di usare il modello.
ES -Lea atentamente la instruccion completa y seguridad antes de poner el modelo en
funcionamiento
CZ -
pokyny.
PL -
  
NL -Lees zorgvuldig de volledige handleiding en de veiligheidsinstructie voordat het
model wordt gestart.
SK -
  
DE - 
  
aus den Augen.
GB -To prevent accidents and injuries, DO NOT leave your Child unattended during
operation of the vehicle. Never let your Child out of your sight while the driving a
vehicle .
FR -
conduire sans surveillance. Ne laissez pas votre enfant conduire le model hors de
votre vue.
IT -
veicolo. Non lasciate il suo bambino durante la guida del Modello fuori dalla sua
vista.
ES -Para evitar accidentes y lesiones NUNCA deje su niño desantendido a operar el
vehículo. No deje su niño mienteras conduce con el vehículo de su vista.
CZ - 
  
PL -
bez nadzoru. Nie spuszczaj dziecka z oczu podczas jazdy modelem.
NL -
toezicht besturen. Verlies het kind nooit uit het oog wanneer het aan het spelen
met een model is.
SK -
  
DE - 󰀨
gefährlichen Stellen gefahren werden. Betreiben Sie das Modell nur an Orten wie
z. B. private Parkplätze, Privatgrundstücke oder an sonstigen ungefährlichen
Plätzen. Achten Sie darauf, das keine Menschen oder Tiere gefährdet sind.
GB - DO NOT use the vehicle on public roads or places or other dangerous locations.
  
other safe locations. Make sure that no person or animal is endangered.
FR -
bliques, des pentes ou autres endroits dangereux. Manoeuvrez le véhicule que dans
des endroits tels que des parkings ou terrains privés ou autre emplacement pas
dangereux. Assurez-vous qu’aucune personne ou animal soient menacés.
IT -È proibito guidare il modello su strade pubbliche, aere pubbliche, in discesa o altri
luoghi pericolosi. Usare il modello solo in posti come parcheggio privato, terreno
privato oppure luoghi non pericolosi. Fare attenzion e di non mettere in pericolo viti
umane oppure animali.
ES -No usar el modelo en las vías pública o sitios, declive o sitios peligrosos. Usar el
modelo solo en puestos como aparcamiento privados, terreno privado o otros sitios
no peligrosos. Asegúrese, de no poner en riesgo personas o animales.
CZ - 
 
  
  
PL 
  
  
  
NL 
plaatsen worden gebruikt. Het is enkel toegestaan het model op plaatsen zoals
privéparkeerterreinen, privépercelen of andere beveiligde plekken te gebruiken.
  
SK 
  
  
  
DE - Das Modell hält nach dem loslassen des Gaspedals, auf einer waagrechten Fläche
selbstständig an. Das Fahrzeug besitzt keine zusätzliche Bremse, oder
Feststellbremse. Betreiben Sie das Fahrzeug deshalb nicht an Steigungen oder
Gefällen und sichern Sie es beim Abstellen gegen selbstständiges Wegrollen.
GB - The model stops after releasing the accelerator, independently on a horizontal
surface. The vehicle has no brake or parking brake. Do not operate the vehicle uphill
or downhill, and secure it when parking.
FR -Après avoir lâché la pédale des gaz (radiocommande), le modèle s’arrête par
lui-même sur une surface horizontale. La voiture n’est pas équipée de freins ou frein
à main. De ce fait n’utilisez pas ce modèle aux endroits pentus, ascendant ou
descendant, et assurez-vous que une fois votre voiture parquée, celle-ci ne peut pas
roulée par elle-même.
IT -
su una un´area piana. La vettura non è dotata né di freno manuale né freno di
sicurezza. Non usare il modello in salita oppure discesa, si rischia di perdere e/o
  
muoversi o scivolare mentre è fermo.
ES -
frenos separados. No usar el modelo en subidas o declive, riesgo de perder o dañar
el modelo. Asegurarse de que el vehículo no se mueve.
CZ - 
  
 
  
PL - 
poziomie powierzchnia. Model nie posiada dodatkowego hamulca ani hamulca
  
  
NL - Nadat de voet van het pedaal wordt genomen, stopt het model automatisch op een
horizontaal oppervlak. Het model is voorzien van geen aanvullende remmen of
parkeerrem. Het voertuig mag dus niet op hellingen worden gebruikt en moet het
tijdens het parkeren tegen wegrollen worden beveiligd.
SK - 
  
  
  
No Brake
3
DE - ACHTUNG
Für ein sicheres Fahren stellen Sie zunächst sicher, dass Kinder zusätzlich die
folgenden Regeln begreifen und befolgen:
 
- Niemals andere Kinder mitnehmen. (nur für 1 Person geeignet)
 
- Niemals ohne Schuhe fahren.
- Niemals bei Dunkelheit fahren.
- Mit Schutzausrüstung zu benutzen.
 Hände, Haare, lose Kleidung und Gegenstände von drehenden Teile entfernt halten.
Das Modell nicht in Räumen oder Hallen mit hoher Luftfeuchtigkeit (z.B. Garagen), im
Regen oder auf nassen Flächen betreiben, es besteht die Gefahr von Fehlfunktionen
oder Schäden an Elektronik und Gehäuse.
Das Modell ist nicht wasserdicht und nicht spritzwassergeschützt. Betreiben Sie es nur
 
sonstige verschmutzte Untergründe geeignet.
GB - DANGER
For safe driving, you should make sure that your Child understand and adheres to the
following rules:
- Always sit tight, do not get up during the ride.
- Never take additional Children for a ride. (The vehicle is only suitable for 1 person)
- Hold tight.
- Never drive without shoes.
- Never drive in the dark.
- To be used with protective equipment.
 Keep hands, hair, loose clothing and any other item away from any rotating parts.
The Model should not be used in rooms or halls with high humidity, in the
rain or on wet surfaces. Risk of malfunction or damage to electronics and housing.
The model is not water- or splash-proof. Only operate on asphalted surfaces (such as
paving stones). The model is not suitable to be operated in grass or loose soil.
FR - ATTENTION
 
et les respectera:
- Toujours s’asseoir correctement, ne pas se lever pendant l’utilisation du véhicule.
- Ne jamais emmener d’autres enfants. (que pour une personne)
- Toujours bien se tenir.
- Ne jamais rouler sans chaussures.
- Ne jamais rouler la nuit.
- A utiliser avec un équipement de protection.
 
Ne pas faire fonctionner le modèle dans des salles ou locaus à forte humidité, sous la
pluie ou des surfaces mouillées sinon il y a le risque de dysfonctionnement ou de
dommage pour l’électronique et la carapace.
Ce modèle n‘est pas étanche et non protégé contre les aspersions. Fonctionne
uniquement sur des surfaces asphaltées ( par ex. Pavés). Ce modèle ne convient pas
pour une circualti on sur les prairies ou d´autres surfaces, sols poluées.
IT - ATTENZIONE
Per una guida sicura si dovrebbe fare in modo che il bambino comprende e segue
queste regole:
- Sempre stare seduto, non alzarsi mentre la guida.
 
- Sempre tenersi bene.
- Non guidare mai senza scarpe.
- Non guidare mai al buio.
- Da utilizzare con dispositivi di protezione.
Tenete mani, capelli e parti svolazzanti lontane da parti rotabili.
Non usare il modello in ambiente umido, sotto la pioggia oppure aeree
bagnate. Rischio di malfunzionamento e danni.
 
 
 
ES - ATENCIÓN
Para una conducion segura debe asegurarse de que los niños entienden y obedezcan
a las siguintes reglas:
- Siempre estar asentado, no levantar mientre se conduce.
 
- Siempre tener bien.
- Nunca conduzca sin zapatos.
- Nunca conducir en la oscuridad
  
 
No usar el modelo en habitaciones o salas con alta humedad, en la lluvia o en
 
 
 
 
 
CZ - POZOR
 
 
 
  
  
- Nikdy nejezdíme bez bot.
 
  
 
 
 
 
 
 
 
PL - UWAGA!
 
 
- Siadamy zawsze stabilnie, nie wstajemy podczas jazdy.
 
1 osoba).
 
 
 
 
 
 
 
elektroniki i obudowy.
 
tylko na nawierzchniach asfaltowych (np. na kostkach brukowych). Model nie nadaje
 
NL - LET OP!
 
ze worden nageleefd:
- Blijf altijd rustig zitten, sta niet op tijdens het rijden.
- Neem nooit andere kinderen mee. (het model is geschikt voor slechts één persoon)
- Houd altijd vast.
- Rijd nooit zonder schoenen.
- Rijd nooit in het donker.
 
 
regen of op natte oppervlakken omdat het gevaar bestaat dat het model niet juist zal
werken of dat de elektronica of de behuizing schade oploopt.
 
l op asfaltoppervlakken (bv. op straatsteen). Het model is niet geschikt voor gebruik
op weilanden of andere vervuilde oppervlakken.
SK - Upozornenie!
 
 
 
 
 
 
- Nikdy nejazdíme po zotmení.
 
 
 
elektroniky a karosérie.
 
 
 
4
DE
Lieferumfang:
• Modell
• Fahrakku
• Ladegerät 230 V
• Montagewerkzeug
• Ersatzwärmesicherung
• Anleitung
GB
Box content:
• Model
• Battery pack
• Charger 230 V
• Assembly tool
• Spare heat fuse
 
FR
Contenu du kit:
• Modèle
• Accu de propulsion
• Chargeur 230 V
• Outil de montage
• Fusible de chaleur de rechange
• Notice
IT
Contenuto del kit:
• Modello
• Pacco batteria
• Caricatore 230 V
• Strumento di montaggio
• Fusibile cilindrico di ricambio
 
ES
Contenido del kit:
• Modelo
• Batería
• Cargador 230 V
• Herramienta de montaje
• Fusibile cilíndrico de repuesto
 
CZ
Obsah balení:
• Model
• Baterie
 
 
 
 
PL
Zawartość pudełka:
• Model
• Paczka baterii
 
 
 
 
NL
Inhoud doos:
• Model
• Batterijpakket
• Oplader 230 V
• Montagegereedschap
• Vervangende thermische zekering
 
SK
Obsah balenia:
• Model
• Balenie batérií
 
 
 
 
DE - Achtung!
Der Bausatz in unmontiertem Zustand darf nicht in die Hände von Kleinkindern ge-
langen, da dieser verschluckbare Kleinteile enthält. Die Montage sollte ausschließ-
lich von einem Erwachsenen durchgeführt werden.
GB - Attention!
Keep the not mounted kit away from small children as it contains swallowable parts.
It must be assembled or checked by adult to make sure the car is assembled on the
right way before playing.
FR - Attention!
Le kit à l’état non assemblé ne doit en aucun cas être à la portée des enfants, puisqu’il
contient des pièces susceptibles d’être avalées. L´assemblage doit impérativement
être e󰀨ectué par un adulte.
IT - Attenzione!
Il Kit in stato non montato, non deve cadere nelle mani di bambini piccoli, in quanto
contiene piccole parti che si possono inghiottire. Il montaggio deve essere e󰀨ettuato
solo da un adulto.
ES - ¡Atención!
El Kit en el estado no montado, no debe caer en las manos de los niños pequeños,
ya que contiene piezas pequeñas que pueden ser tragadas. El montaje sólo debe ser
realizado por un adulto.
CZ - Upozornění!
Nesestavený model mějte z dosahu malých dětí, obsahuje malé části, které lze spol-
knout. Sestavení a kontrola by měla být provedena dospělou osobou, aby byl
automobil sestaven správným způsobem.
PL - Uwaga!
Zestaw w stanie niezmontowanym nie może dostać się do rąk małych dzieci,
ponieważ zawiera małe części, które mogą zostać połknięte. Montaż powinien być
wykonywany wyłącznie przez osobę dorosłą.
NL - Let op!
De bouwdoos mag in niet-gemonteerde staat niet in handen van kleine kinderen val-
len, aangezien deze kleine onderdelen bevat die kunnen worden ingeslikt. Montage
mag alleen door een volwassene worden uitgevoerd.
SK - Pozor!
Súprava sa v nezmontovanom stave nesmie dostať do rúk malým deťom, pretože
obsahuje malé časti, ktoré môžu prehltnúť. Montáž môže vykonávať len dospelá
osoba.
DE - Benutzung unter unmittelbarer Aufsicht von Erwachsenen!
Das Modell zu steuern erfordert ein gewisses Mindestmaß an Geschick und
Vorsicht. Machen Sie sich deshalb unbedingt vor dem Betreiben des Modells mit
seinen Eigenschaften und seiner Steuerung vertraut. Das Modell hat ein hohes
Eigengewicht. Dadurch besteht ein erhöhtes Schadens und Verletzungsrisiko im
Falle eines Kontrollverlustes. Vermeiden Sie jegliche absichtliche oder
  
die Gefährdung von Personen.
GB - Only use in direct supervision of an adult!
To control the vehicle a minimum skill level and caution is needed. Make sure you
are familiar with the operation of the model and its characteristics. The model is
heavy. This is an increased risk of injury and damage in the event of loss of
control. Avoid any kind of intentional or unintentional collisions with objects or
hazards to persons.
FR - Utiliser uniquement sous la surveillance d’un adulte!
Le pilotage du modèle demande une certaine dose d’adresse et de prudence. De
ce fait familiarisez-vous avec le modèle , surtout au niveau des caractéristiques et
ses commandes avant toute utilisation. Le modèle a un poids propre élevé. De
ce fait le risque de dommages ou de blessures est élevé dans le cas d’une perte
  
véhicules, objets ou personnes.
IT - Utilizzare solo sotto la diretta sorveglianza di un adulto!
Per manovrare il modello è indispensabile una certa abilità e cautela.
Consigliamo in questo caso di „conoscere“ prima il modello e le sue
              
abbastanza elevato. Per mezzo di ciò è aumentato il rischio di danno e lesioni in
caso di una perdita del controllo. Evitare qualsiasi forma d‘impatti con oggetti e/o
messa in pericolo di persone.
ES - Usado bajo la supervisión directa de un adulto!
Maniobrar el modelo requieres un cierto nivel mínimo de habilidad y prudencia.
Se recomienda en este caso de “conocer” primero el modelo y su características
de conduccion y la emisora. El modelo tiene un peso bastante alto, por eso se
aumenta el riesgo de daños y lesiones en el caso de una pérdida de control.
Evitar cualquier tipo de impacto con objetos y/o peligro de personas.
CZ - Použití jen pod dohledem dospělé osoby!
  
  
  
           
  
PL - Stosować pod bezpośrednim nadzorem osoby dorosłej!
  
  
  
           
  
  
NL - Gebruik onder direct toezicht van een volwassene!
Het besturen van het model vereist een bepaald minimum aan vaardigheden en
voorzorgsmaatregelen. Daarom is het nodig voor het gebruik van het model
kennis met zijn met de functies en het stuursysteem te nemen. Het model wordt
door zijn hoge eigen gewicht gekenmerkt. Dit kenmerk verhoogt het risico op
schade en letsel bij verloren controle. Vermijd elke, opzettelijke of onopzettelijke
botsing of aanrijding tegen voorwerpen of enige vorm van het in gevaar brengen
van andere personen.
SK - Používajte pod priamym dohľadom dospelej osoby!
           
             
  
           
  
  
5
1
Karosserie
Vehicle body
Carrosserie
Carrozzeria
Carrocería
Karoserie

Lichaam
Telo
2
Rad (170 x 66)
Wheel (170 x 66)
Roue (170 x 66)
Ruota (170 x 66)
Rueda (170 x 66)
Kolo (170 x 66)

Wiel (170 x 66)
Koleso (170 x 66)
3
Hinterrad (200 x 76)
Rear wheel (200 x 76)
Roue d‘arrière (200 x 76)
Ruote posteriore (200 x 76)
Ruedas posterior (200 x 76)
(200 x 76)
(200 x 76)
Achterwiel (200 x 76)
(200 x 76)
4
Getriebe
Transmission
Entraînement
Trasmissione
Engranaje


Versnellingsbak
Prevodovka
5
U-Scheibe Ø 10 mm
Washer Ø 10 mm
Rondelles Ø 10 mm
Rondella Ø 10 mm
Arandela Ø 10 mm

Ø 10 mm
Sluitring Ø 10 mm
Ø 10 mm
6
Mutter
Nut
Ecrou
Dado
Tuerca
Matice

Moer
Matica
7
Radkappen
Wheel cap
Protection de roue
Copriruota
Llanta
Poklice na kolo

Wieldop
Kryt kolesa
8
Hinterachse
Rear axle
Axe d‘arrière
Asse posteriore
Eje tasero


Achteras

9
Lenkrad
Steering wheel
Volant directionnel
Sterzo
Volante
Volant
Kierownica
Stuurwiel
Volant
10

Machine screw M5 x 40
Vis à machine M5 x 40
Macchina a vite M5 x 40



Kaaskopschroef M5 x 40
Skrutka so syrovou hlavou M5 x 40
11
Mutter Ø 5 mm
Nut Ø 5 mm
Ecrou Ø 5 mm
Dado Ø 5 mm
Tuerca Ø 5 mm
Matice Ø 5 mm

Moer Ø 5 mm
Matica Ø 5 mm
12
Sitz
Seat
Siège
Sedile
Asiento
Sedadlo
Siedzenie
Seat
Sídlo
13
Schraube Ø 4 X 10 mm
Screw Ø 4 X 10 mm
Vis Ø 4 X 10 mm
Vite Ø 4 X 10 mm
Tornillo Ø 4 X 10 mm
Šroub Ø 4 X 10 mm

Schroef Ø 4 X 10 mm
Skrutka Ø 4 X 10 mm
14
󰀨
Exhaust pipe
Tuyau d‘échappement
Tubo di scarico
Tubo de escape

Rura wydechowa
Uitlaatpijp

15
Schraube Ø 4 X 12 mm
Screw Ø 4 X 12 mm
Vis Ø 4 X 12 mm
Vite Ø 4 X 12 mm
Tornillo Ø 4 X 12 mm
Šroub Ø 4 x 12 mm

Schroef Ø 4 X 12 mm
Skrutka Ø 4 X 12 mm
16
Deichsel
Trailer rod
Tige de remorque
Asta del rimorchio
Varilla de remolque

Dyszel
Dissel

17
Hänger
Trailer
Remorque
Rimorchio
Remolque

Przyczepa
Aanhangwagen
Príves
18
Kupplungsbolzen
Coupling pin
Goupille d‘accouplement
Perno di accoppiamento
Perno de acoplamiento


Koppelingsbout
Spojovacia skrutka
19
Radachse (Anhänger)
Wheel axle (Trailer)
Essieu de roue (remorque)
Asse delle ruote (rimorchio)
Eje de la rueda (remolque)


Wielas (Aanhangwagen)

20
Distanzhülse
Distance sleeve
Manchon d‘espacement
Manicotti distanziatori
Manguitos espaciadores

Tuleja dystansowa
Afstandshuls

21
Schraubenschlüssel
Spanner
Clé plate
Chiave inglese
Llave inglesa

Spanner
Moersleutel
Spanner
22
Ladegerät
Charger
Chargeur
Caricatore
Cargador


Lader

DE - Teile
GB - Parts
FR - Pièces
IT - Parti
ES - Partes
CZ - Části
PL - Części
NL - Onderdelen
SK - Časti
6
1
3
5
7
2
4
6
8
2
5
5
5
6
8
7
55
5
6
6
a
c
4
11
13
13
14
12
10
9
33
7
7
b
7
910
11 12
13
14
19
205
5
2
18
A
B
C
D
16
67
16
15
Nur mit Ladegerät 6V, Art.-Nr. 404743 verwenden.
Only use with 6V charger, Ord. No. 404743
Utiliser uniquement avec chargeur 6V, Réf. 404743
Utilizzare solo con caricatore 6V, Cod. 404743
Usar solo con cargador 6V, Ref. 404743
Používejte pouze s nabíječkou 6V, Číslo položky 404743
Tylko z ładowarką 6V, poz. 404743 stosowanie.
Alleen met oplader 6V, artikelnr. 404743 gebruiken.
Len s nabíjačkou 6V, položka č. 404743 použitie.
8
DE
1. Montage der Vorderräder
Für die Montage der Vorderräder entfernen Sie alle Teile von der Vorderachse. Schieben Sie
eine Unterlegscheibe (5) auf die Vorderachse und stecken Sie ein Vorderrad (2) auf. Schieben
 
Drücken Sie nun eine Radkappe auf das Rad bis es hörbar einrastet.
Wiederholen Sie diesen Vorgang um das andere Vorderrad zu montieren.
2. Montage der Hinterachse
Stecken Sie eine Unterlagscheibe (5) auf die länger Seite der Hinterachse (8) und schieben
die Achse von links durch die Karosserie (1).
3. Montage von Getriebe und Antriebsrad
Das Getriebe (4) wird von rechts auf die Hinterachse gesteckt. Verbinden Sie den Getriebe-
stecker mit der Karosserie. Stecken Sie das Antriebsrad (3) auf die Achse und passen Sie es
dem Getriebe an. Sie erkennen das Antriebsrad an der Erhöhung, die in die hintere Antriebs-
 
 
nun eine Radkappe auf das Rad bis es hörbar einrastet.
4. Montage Hinterrad
Schieben Sie eine Unterlegscheibe (5) auf die Hinterachse und stecken Sie das zweite Hinter-
 
 
Tipp:  
Mutter auf der anderen Seite des Modells zu halten. Achten Sie darauf, dass sie die
Mutter nicht überdrehen.
Drücken Sie nun eine Radkappe auf das Rad bis es hörbar einrastet.
5. Montage vom Lenkrad
 
 
Mutter Ø5 (11).
6. Akku Anschluss
Verbinden Sie alle Steckverbindungen wie abgebildet. Verbinden Sie nur ineinander passende
Steckverbindungen und achten Sie darauf nichts zu verpolen. Vergewissern Sie sich, dass
das rote Kabel (Plus) und das schwarze Kabel (Minus) mit den jeweiligen gleichfarbigen
Anschlüssen verbunden sind. Schalten Sie das Fahrzeug ein, indem Sie den roten Knopf
rechts am Armaturenbrett betätigen.
7. Montage des Sitzes
Positionieren Sie den Sitz (12) auf die Karosserie und schrauben ihn mit der Ø 4 x 10
Schrauben (13) fest.
8. Montage der Auspuffattrappe
 󰀨
von unten mit einer Ø 4 X 12 mm Schraube fest.
9. Montage der Achse (Anhänger)
Drehen Sie den Kipper um und führen Sie die Radachse (19) durch das Loch im Kipper.
Schieben Sie eine Unterlegscheibe (5) und eine Distanzhülse (20) auf die Radachse. Stecken
Sie ein Rad (2) auf und sichern dieses mit einer Unterlegscheibe (5) und einer Mutter (6).
Drücken Sie nun eine Radkappe auf das Rad bis es hörbar einrastet.
Tipp:  
Mutter auf der anderen Seite des Anhängers zu halten. Achten Sie darauf, dass sie die
Mutter nicht überdrehen.
Wiederholen Sie diesen Vorgang um das andere Rad zu montieren.
10. Montage der Deichsel
Legen Sie die Deichsel (16) in die Nut am Kipper (17) ein. Richten Sie die Löcher an der
Deichsel mit den Löchern am Kipper aus und sichern Sie diese mit zwei Ø 4 x 12
Schrauben(15). Drehen Sie den Anhänger um.
11. Verbinden des Anhängers mit dem Traktor
Stecken Sie das Ende der Deichsel (16) in die Anhängerkupplung am Traktor. Richten Sie
Deichsel so aus, dass der Kupplungsbolzen (18) durch die Löcher passt.
12. Funktionen
A Einschalten
Mit dem ON/OFF-Schalter wird das Modell ein bzw. ausgeschaltet.
B Schaltknopf:
Vorwärts: Stellen Sie den „Forward-Backward“ Knopf in die „Forward“ Position.
Drücken Sie das Gaspedal (D) damit das Modell vorwärts fährt.
Stopp: Das Modell stoppt sobald der Fuß vom Gaspedal (D) gehoben wird.
Stellen Sie den „Forward-Backward“ Knopf in die Neutralstellung.
Rückwärts: Stellen Sie den „Forward-Backward“ Knopf in die „Backward“ Position.
Drücken Sie das Gaspedal (D) damit das Modell rückwärts fährt.
Das Fahrzeug muss zu einem Stillstand kommen sobald die Fahrtrichtung geändert
werden soll. Ansonsten könnte das Getriebe und/ oder der Motor beschädigt
werden.
C Sound
Für die Sound-Wiedergabe drücken.
DGaspedal
Drücken Sie das Gaspedal damit das Modell fährt.
Nehmen Sie den Fuß vom Gaspedal stopp das Modell.
13. Ladevorgang
  
  
  
  
Warnung!
• Das Ladegerät ist kein Spielzeug.
Verwenden Sie ausschließlich das mitgelieferte Ladegerät.
• Der Akku darf nur durch einen Erwachsenen oder unter dessen Aufsicht geladen werden.
• Die Anschlussklemmen dürfen nicht kurzgeschlossen werden.
• Das Ladegerät muss regelmäßig auf Schäden an Kabel, Stecker, Gehäuse und anderen
Teilen überprüft werden. Bei festgestellten Schäden darf das Ladegerät so lange nicht
benutzt werden, bis die Schäden repariert sind.
• Lassen Sie dem Modell nach jedem Einsatz genügend Zeit um abzukühlen bevor Sie es
wieder in Betrieb nehmen. Beim Verwenden eines etwaigen Tauschakkus muss zwischen
jedem Akkuwechsel mindestens eine Abkühlphase von 15 Minuten eingehalten werden
bis das Modell wieder betrieben wird. Bei Überhitzung kann Beschädigung der Elektronik
oder Brandgefahr die Folge sein.
• Trennen Sie immer unmittelbar nach Beenden des Ladevorgangs das Modell vom
Ladegerät. Trennen Sie das Ladegerät immer unmittelbar nach Abstecken des
Modells von der Spannungsversorgung. Ein eingesteckt lassen des Modells bzw. des
Ladegeräts nach Beenden des Ladevorgangs kann zu Beschädigungen am Modell,
Ladegerät oder der Spannungsversorgung führen (Brandgefahr).
• Verwenden Sie das Ladegerät nur in trockenen Räumen.
14. Wärmesicherung
Wenn das Modell nicht funktioniert oder geladen werden kann, überprüfen Sie die Sicherung.
 
austauschen. Eine Ersatzsicherung ist im Lieferumfang enthalten.
Problem Ursache Lösung
Der Akku lässt sich nicht mehr laden Ladegerät oder Akku defekt. Ladegerät und Akku prüfen.
Akku lässt sich nicht mehr laden obwohl Akku und Ladegerät in Ordnung
sind.
Ladebuchse defekt. Ladebuchse prüfen bzw. tauschen.
Die Fahrzeit ist sehr gering Der Akku wurde tiefenentladen oder ist verschlissen. Neuen Akku verwenden und Tiefenentladung vermeiden.
keine Funktion Akku ist nicht oder falsch angeschlossen Akku anschließen (siehe Anleitung)
Ein Aus Schalter defekt Schalter prüfen bzw. tauschen.
Lässt sich einschalten aber fährt nicht Motorkabel falsch oder nicht angeschlossen. Motorkabel prüfen und anschließen (siehe Anleitung).
Lässt sich einschalten aber fährt nicht, bzw. nur in eine Richtung Gas- oder Richtungsschalter defekt. Schalter prüfen bzw. tauschen.
 Richtungsschalter defekt. Schalter prüfen bzw. tauschen.
Die aktive Sicherung löst aus und schaltet für einige Sekunden das Gerät
ab. Man hört zu Anfangs ein einmaliges Klicken
Überlastung oder elektr. Kurzschluss. Nicht überlasten bzw. Gerät überprüfen lassen.
Fahrzeug hat sehr hohen Verschleiß an Schaltern Schmutz und Feuchtigkeit beschädigen die Schalter. Nicht in Feuchtigkeit oder Schmutz wie Wiesen, Kies, Sand etc.
fahren.
Die Gummireifen lösen sich an den Rädern Auf zu heißem Untergrund oder in Schmutz gefahren. Reifen wechseln und heiße Untergründe und Schmutz vermeiden.
9
GB
1. Attach the front wheels
Remove all parts from the front axle. Slide a Ø10 washer (5) onto the front axle and slide a
front wheel (2) onto the axle. Slide a Ø10 washer (5) onto the front axle. Tighten a lock nut (6)
to the end of the front axle with a spanner. „Snap“ the wheel cap to the wheel. Repeat the
above procedure to assemble the other front wheel.
2. Attach rear axle
Slide a Ø10 washer (5) onto the rear axle (8) from the longer end and insert the rear axle
through the hole in the vehicle body (1) from the left side.
3. Attach the gear box and driving wheel
Slide the gear box (4) onto the right rear axle from the right side. Keep the connector and the
 
 
  Slide a Ø10
washer (5) onto the rear axle and tighten a lock nut (6) to the end of the rear axle with a
spanner (21).
4. Assembly the rear wheel
Slide a washer (5) onto the rear axle and slide the normal wheel (3) onto the axle. Slide the
Ø10 Washer (5) onto the rear axle. Tighten a lock nut (6) to the end of the rear axle with a
spanner (21).
Tip: An extra spanner has been provided to hold the lock nut on the other side of the rear
axle while tightening the lock nut on the other side. DO NOT over tighten.
“Snap” a wheel cover to the each rear wheel.
5. Attach the steering wheel
Place the steering wheel (9) over the steering column, protruding from the middle of the
steering wheel base. Align the holes on each side of steering wheel with the holes at the end
of the steering column. Fasten a nut on the opposite end of the screw to secure the steering
wheel to the steering column.
6. Mounting the battery
 
take care not to reverse polarity. Make sure that the red cable (plus) and the black cable
(minus) are connected to the respective connectors of the same colour.
7. Attach the seat
 
into the vehicle body with a screwdriver.
8. Attach the exhaust
Fit a exhaust pipe (14) into the hole on the right side of the vehicle body. Tighten a Ø 4 X 12
 
9. Attach the axle (trailer)
 
Slide a Ø10 washer (5) and a bushing (20) onto the trailer axle. Slide a normal wheel (2) onto
the trailer axle. Slide a Ø10 washer (5) and tighten a lock nut (6) on the end of the trailer axle
with a spanner (21) Repeat the procedure 2 - 6 to assemble the other trailer wheel.
Tip: An extra spanner has been provided to hold the lock nut on the other side of the trailer
while tightening the lock nut on the other side. DO NOT over tighten.
“Snap” a wheel cover to the each trailer wheel.
10. Attach the trailer rod
 
with a screwdriver. Turn the trailer assembly upright.
11. Connecting the Trailer and the Tractor

vehicle body with the hole at the end on the trailer rod and insert the bolt (18).
12. Functions
A ON/O󰀨 switch
With the ON / OFF switch you start the vehicle
B Shift Lever:
Forward: Press the “Forward-backward switch” on the “Forward” position.
Press the “Foot pedal” (D), the model drives forward.
Stop: The model will brake automatically, when your child’s foot remove from the
“Foot pedal”. Press the “Forward-backward switch” in the middle.
Reverse: Press the “Forward-backward switch” on the “Backward” position.
Press the “Foot pedal” (D), the model drives backward.
Always stop vehicle when changing the direction to avoid damage the gears and
motor.
C Sound buttons
Press für sound playing
DFoot pedal
To move the car, press the pedal down.
To brake or slow down, release pressure from the pedal
13. Charging your vehicle
 
 
 
 
Warning!
• The charger is not a toy. Only use the charger supplied.
• The battery may only be charged by or under the supervision of an adult.
• The terminals must not be short-circuited.
• The charger must be checked regularly for damage to the cable, plug, housing and other
parts. If any damage is found, the charger must not be used until the damage has been
repaired.
• Let the model cool o suciently after each use before putting it back into operation.
When using an additional batteries let it cool o for minimum 15 minutes until the
model is operated again. Overheating can damage the electronics or may result in re.
• Always disconnect the model from the charger immediately after charging. Always
disconnect the charger from the power supply immediately after disconnecting the
model. Inserting the rechargeable model or charger after charging will result in damage
tothe model, charger or the power supply (re hazard).
• Use the charger only in dry rooms.
14. Fuse
 
 
fuse package. The fuse is under seat.
Problem Source Solution
The battery can no longer be charged Carger or battery defective. Check charger and battery
The battery can no longer be charged although the battery and charger
are OK.
Charging socket defective Check or replace the charging socket.
The journey time is very short. The battery has been deep discharged or is worn out. Use a new battery and avoid deep discharge.
No function Battery is not or incorrectly connected. Connect the battery (see instructions)
ON/OFF switch defective. Check or replace switch.
Can be switched on but does not drive. Motor cable incorrectly connected or not connected. Check and connect motor cable (see instructions).
Can be switched on but does notmove, or only direction. Gas or direction switch defective. Check or replace switch.
Can be switched on but only travels in one direction Directional switch defective. Check or replace switch.
󰀨
hear a single click at the beginning
Oberload or electrical short circuit. Do not overload or have the until checked.
Vehicle has very high wear on switches. Dirt and moisture damage the switches. Do not drive in moisture or dirt such as meadows, gavel, sand, etc.
The rubber tyres come loose on the wheels Ridden on too hot a surface or in dirt. Change tyres and avoid hot surfaces and dirt.
10
FR
1. Montage des roues avant
Pour monter les roues avant, il faut enlever toutes les pièces de l‘essieu avant. Engagez une
rondelle (5) sur l’axe avant. Poser une roue (2) et pousser une rondelle (5) sur l’axe. Fixer
l’ensemble avec un écrou (6). Engagez le carénage de roue (7) jusqu’à ce qu’il soit sécurisé.
Répétez pour monter les marches de l‘autre roue.
2. Assemblage de l’axe arrière
Mettez en place la rondelle (5) sur l’axe arrière (8). Passez l’axe arrière par le trou arrière de la
carrosserie (1).
3. Montage des moteur de propulsion et pignon d‘entraînement
Le moteur de propulsion (1) est engagé sur l’axe arrière en partant de la droite.(12).
Connecter la prise de propulsion à la carrosserie. Fixez le pignon d’entraînement (3) sur l’axe
arrière. La roue arrière sont reconnaissables à l‘élévation qui s‘adapte à l‘unité d‘entraînement
arrière Adaptez-le au système d’entrainement. De l’extérieur placez une rondelle (5) sur l’axe
ainsi qu’un ecrou (6) pour sécuriser l’ensemble et serrez l’écrou avec la clé (21). Engagez le
carénage de roue (7) jusqu’à ce qu’il soit sécurisé.
4. Montage de la roue arrière
 
 
Conseil: Une clé supplémentaire a été fournie dans le cadre de la livraison pour
    
trop serrer l‘écrou.
Répétez ce processus pour installer l‘autre roue.
Engagez le carénage de roue (7) jusqu’à ce qu’il soit sécurisé.
5. Montage du volant
Placez le volant (9) sur l‘axe directionnel. Cetrezn le trou du volant avec le trou dans l’axe
directionnel. Revissez la vis (10) et l’écrou (11) après l’avoir passé dans le trou.
6. Connexion de la batterie
Branchez tous les connecteurs comme indiqué. Ne branchez que des connecteurs qui
s‘emboîtent l‘un dans l‘autre et veillez à ne pas inverser la polarité. Assurez-vous que le câble
rouge (+) et le câble noir (-) sont connectés aux connecteurs respectifs de la même couleur.
7. Montage du siège
Positionner le siège (12) sur la carrosserie et visser le siège avec vis Ø 4 x 10 (13).
8. Montage du mannequin d‘échappement
 
Ø 4 X 12 mm.
9. Montage de l‘essieu (remorque)
Retournez la benne basculante et insérez l‘axe de roue (19) dans le trou de la benne. Faites
glisser une rondelle (5) et une douille d‘écartement (20) sur l‘axe de la roue. Mettez une roue
 
moyeu sur la roue jusqu‘à ce qu‘il s‘enclenche de manière audible.
Conseil: Une clé supplémentaire a été fournie dans le cadre de la livraison pour
    
trop serrer l‘écrou.
Répétez ce processus pour installer l‘autre roue.
10. Montage du timon
Placez le timon (16) dans la rainure de la benne basculante (17). Alignez les trous du timon
 
Retournez la remorque.
11. Relier la remorque au tracteur

Alignez la barre d‘attelage de manière à ce que la goupille d‘attelage (18) passe dans les
trous.
12. Fonctions
A Interrupteur Marche / Arrêt:
  
B Bouton du changement:
En avant: Placez le commutateur „avant-arrière“ en position „avant“. Appuyez sur la
    
Stop: La voiture s’arrête dès que vous lâchez la pédale des gaz (D). Placez le
commutateur „avant-arrière“ en position „Stop“.
En arrière: Placez le commutateur „avant-arrière“ en position „arrière“. Appuyez sur la
    
La voiture doit s’arrêter pour pouvoir changer de sens de marche. Dans le cas
contraire il est possible d’endommager l’entraînement et/ou le moteur.
C Sound
Für die Sound-Wiedergabe drücken.
DPédale des gaz:

La voiture s’arrête dès que vous lâchez la pédale des gaz.
13. Ladevorgang
 󰀨
 
 
 
Avertissement !
● Le chargeur n‘est pas un jouet. Utilisez uniquement le chargeur fourni avec la batterie.
● La batterie ne doit être chargée que par un adulte ou sous sa surveillance.
● Les bornes de connexion ne doivent pas être court-circuitées.
● Le chargeur doit être contrôlé régulièrement pour vérifier que le câble, la fiche, le boîtier
et les autres pièces ne sont pas endommagés. Si des dommages sont constatés, le
chargeur ne doit pas être utilisé jusqu‘à ce que les dommages soient réparés.
● Après chaque utilisation, avant de remettre le
modèle en marche, laissez-le susamment le temps de refroidir. Laissez une phase
de 15 minutes de refroidissement lorsque vous utilisez une batterie de rechange pour
redémarrer le modèle de nouveau. En cas de surchaue, les composants
électroniques peuvent être endommagés ou un risque d´incendie peut survenir.
● Débranchez toujours après chaque arrêt la modèle du chargeur. Débranchez aussi
toujours le chargeur immédiatemment après avoir débranché la modèle de
l´alimentation. Laissez brancher la chargeur ou la modèle peuvent causer des
dommages à la modèle, à votzre chargeur ou câble d´alimentation (risque d´incendie).
● Utilisez le chargeur uniquement dans des pièces sèches.
14. Fusible
 
trouverez sous le siège. Si le fusible est défectueux, vous devrez le remplacer. Un fusible de
remplacement est inclus dans la livraison.
Problème Origine Sollution
La batterie ne peut plus être chargée Chargeur ou batterie défectueux. 
La batterie ne peut plus être chargée bien que la batterie et le chargeur
soient en bon état.
Prise de charge défectueuse. 
 La batterie a été profondément déchargée ou est usée. Utilisez une batterie neuve et évitez les décharges profondes.
Pas de fonction La batterie n‘est pas ou mal connectée Connectez la batterie (voir instructions)
 
Peut être mis en marche mais ne conduit pas Le câble du moteur est mal connecté ou n‘est pas
connecté.

Peut être mis en marche mais ne bouge pas, ou seulement dans une di-
rection.
 
Peut être mis en marche mais ne se déplace que dans une seule direction Le commutateur directionnel est défectueux. 
Le fusible actif saute et éteint l‘appareil pendant quelques secondes. Vous
entendrez un seul clic au début
Surcharge ou court-circuit électrique. 
Le véhicule présente une usure très importante des interrupteurs La saleté et l‘humidité endommagent les interrupteurs. Ne pas conduire dans l‘humidité ou la saleté comme les prairies,
le gravier, le sable, etc.
Les pneus en caoutchouc se détachent des roues. Monté sur une surface trop chaude ou dans la saleté Changez les pneus et évitez les surfaces chaudes et la saleté.