manuals.online logo
Brands
  1. Home
  2. •
  3. Brands
  4. •
  5. Jamara
  6. •
  7. Motorized Toy Car
  8. •
  9. Jamara Rupter 2,4 GHz User manual

Jamara Rupter 2,4 GHz User manual

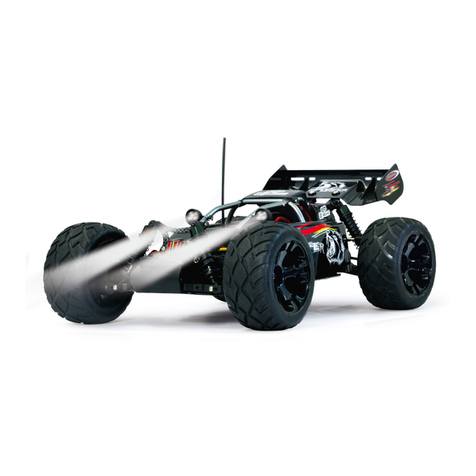
No. 410009, Rupter
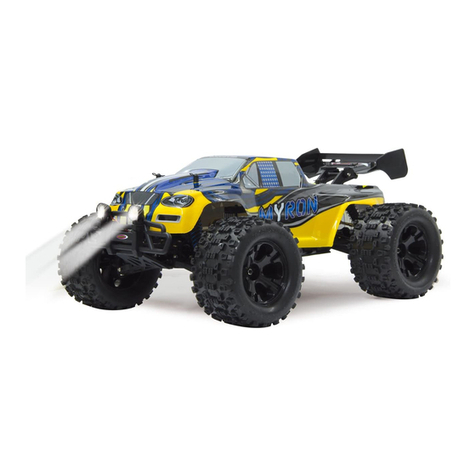
No. 410010, Cubic
Rupter | Cubic
2,4 GHz
27/20
DE - Konformitätserklärung
Hiermit erklärt JAMARA e.K., dass sich das Modell‚ “Rupter, No. 410009, Cubic, No.
410010“ in Übereinstimmung mit den grundlegenden Anforderungen und den ande-
ren relevanten Vorschriften der Richtlinien 2014/53/EU, 2011/65/EU und 2009/48/EG
bendet.
Weitere Informationen nden Sie auch unter: www.jamara-shop.com/Konformitaet
GB - Certicate of Conformity
JAMARA e.K. hereby declares that the model “Rupter, No. 410009, Cubic, No. 410010“ follow the
regulations and requirements as well as any ther relivant directives of the EEC directive 2014/53/EU,
2011/65/EU and 2009/48/EC.
Further information can also be found at: www.jamara-shop.com/Conformity
FR - Déclaration de conformité
Par la présente, la société Jamara e.K. déclare que ce modèle “Rupter, No. 410009, Cubic, No.
410010“ est conforme en tous points avec les textes de la directive de l’union européenne sous les
directives 2014/53/EU, 2011/65/EU et 2009/48/CE.
Vos pourrez également trouver des informations sur notre site Internet:
www.jamara-shop.com/Conformity
IT - Dichiarazione di conformita’
Jamara e. K. dichiara qui di seguito che il modello “Rupter, No. 410009, Cubic, No. 410010“ è in li-
nea con le norme ed altre rilevanti disposizioni comunitarie 2014/53/EU, 2011/65/EU e 2009/48/CE.
Piu informazioni: www.jamara-shop.com/Conformity
ES - Declaración de conformidad
Por medio de la presente, la empresa Jamara e. K. declara que el modelo “Rupter, No. 410009,
Cubic, No. 410010“ de conformidad con los requisitos esenciales y otras disposiciones pertinentes
de la Directiva 2014/53/EU, 2011/65/EU y 2009/48/CE se encuentra.
Encontrará más información en: www.jamara-shop.com/Conformity
CZ - Prohlášení o shodě
Společnost JAMARA e.K. tímto prohlašuje, že Produkt, „Rupter, No. 410009, Cubic, No. 410010„
odpovídá směrnicím 2014/53/EU, 2011/65/EU a 2009/48/ES.
Úplné znění EU prohlášení o shodě je k dispozici na následující internetové adrese:
www.jamara-shop.com/Conformity
DE - Gebrauchsanleitung
GB - Instruction
FR - Notice
IT - Istruzione
ES - Instrucción
CZ - Návod k použití
DE - Allgemeine Hinweise
Jamara e. K. übernimmt keine Haftung für Schäden, die an dem Produkt selbst oder durch dieses
entstehen, sofern diese auf falsche Bedienung oder Handhabungsfehler zurückzuführen sind. Der
Kunde allein trägt die volle Verantwortung für die richtige Bedienung und Handhabung; dies umfasst
insbesondere die Montage, den Ladevorgang, die Verwendung bis hin zur Wahl des Einsatzberei-
ches. Bitte beachten Sie hierzu die Bedienungs- und Gebrauchsanleitung, diese enthält wichtige
Informationen und Warnhinweise.
GB - General information
Jamara e.K. is not liable for any damage caused to the product itself or through this, provided this
is due to improper operation or handling errors. The Customer alone bears the full responsibility for
the proper use and handling, including without limitation, the assembly, the charging process, the
use and choice of the operation area. Please refer to the operating and user instructions, it contains
important information and warnings.
FR - Remarques générales
La société Jamara e. K. n’est pas responsable de dommages, que ce soit au niveau du modèle ou
causé par celui-ci, résultant d’une utilisation non appropriée. Seul le client est responsable con-
cernant la mise en oeuvre et l’utilisation conforme du matériel; cela va de l’assemblage, en passant
par la charge des accus et allant jusqu’au domaine d’utilisation. Pour cela, veillez lire attentivement
la notice d’assemblage et d’utilisation, celle-ci contient d’importantes informations ainsi que les con-
signes de sécurités.
IT - Informazioni generali
Jamara e. K. non e´responsabile per danni, sostenute al prodotto stesso o attraverso questo, dovuti
ad una gestione non corretta del articolo. Solo il cliente si assume la piena responsabilità per la
manutenzione e l´utilizzo corretto dello stesso; questo include il montaggio, la ricarica, l´utilizzo,
no alla scelta della aerea di applicazione. Si prega di notare e rispettare le istruzioni d´uso, questi
contengono informazioni e avvertimenti molto importanti.
ES - Información general
Jamara K. no se hace responsable de los daños causados al producto en sí o por medio de esto,
a menos que esto se debe al mal funcionamiento o errores de manejo. El cliente solo tiene la re-
sponsabilidad completa para el uso y manejo adecuado, incluyendo, sin limitaciones, el montaje,
el proceso de carga, el uso de hasta la elección de la zona de aplicación. Por favor, consulte las
instrucciones de uso y funcionamiento, contiene información y avisos importantes.
CZ - Obecné informace
Jamara e.K. a její distributoři nebo prodejci nenesou žádnou odpovědnost za jakékoliv poškození
produktu (modelu) nebo zranění osob špatným použitím nebo nesprávným zacházením. Zákazník
nese plnou odpovědnost za správné používání produktu bez omezení, včetně nabíjení produktu,
řízení, sestavení, výběru adekvátní plochy pro používání apod. Před prvním použítím produktu si
prosím pečlivě pročtěte návod k použití, který obsahuje kromě jiného důležitá upozornění a
varování.
DE - Geeignet für Kinder ab 6 Jahren.
Achtung: Für Kinder unter 36 Monaten nicht geeignet. ERSTICKUNGSGEFAHR.
Enthält verschluckbare Kleinteile. Von Kleinkindern unbedingt fernhalten.
Dieses Modell ist nicht dafür bestimmt, durch Personen (einschließlich
Kinder) mit eingeschränkten physischen, sensorischen oder geistigen
Fähigkeiten oder mangels Erfahrung und/oder mangels Wissen benutzt zu
werden, es sei denn, sie werden durch eine für ihre Sicherheit zuständige
Person beaufsichtigt, wie das Gerät zu benutzen ist.
GB - Suitable for children over 6 years.
Warning: Not suitable for children under 36 months. RISK OF SUFFOCATION!
Contains small parts which can be swallowed.
Keep away necessarily from children.
This device is not intended for use by individuals (Including children) with
reduced physical sensory, mental abilities, lack of experience and / or
knowledge, unless they are supervised in how the device is to be used.
FR - Adapté pour des enfants à partir de 6 ans.
Attention: Ne convient pas aux enfants de moins de 36 mois.
DANGER D‘ETOUFFEMENT!
Contient de petites pièces facilement avalables.
Garder lion nécessairement enfants.
Cet appareil n’a pas été conçu pour être utilisé par des personnes (également
des enfants) présentant des défaillances physiques, sensitives ou mentales,
cela s’applique aussi aux personnes n’ayant pas ou peu d’expériences
hormis si celle-ci est accompagnée par une personne responsable et
concernant la manipulation de cet appareil.
IT - Consigliato per bambini superiori ai 6 anni!
Attenzione: Non adattato ai bambini inferioti ai 36 mesi.
PERICOLO DI SOFFOCAMENTO! Contiene pezzi piccoli.
Tenere lontano assolutamente dei bambini.
Questo prodotto non è destinato a essere utilizzato da persone (bambini
compresi) con capacità siche limitate, con limitazioni sensoriali o mentali
oppure mancanza di esperienza e/o di conoscenza. A meno che, siano
sorvegliate da una persona respon sabile della loro sicurezza su come usare
il prodotto in modo corretto.
ES - Apto para niños mayores de 6 años.
Atención: No es recomendable para los niños menores de 36 meses.
RIESGO DE ASFIXIA! Contiene piezas pequeñas.
Mantenga necesariamente lejosde los niños.
Este dispositivo no debe ser utilizado por personas(incluidos niños) con
discapacidad física, habilidades sensoriales o mentales o la falta de
experiencia y / o conocimientos, porque son responsables de su propia
seguridad persona de supervisión sobre cómo se utiliza el dispositivo. O la
persona que son supervisados en cómo usar.
CZ - Určeno pro děti od 6 let.
VAROVÁNÍ: Nevhodné pro děti do 36 měsíců. NEBEZPEČÍ UDUŠENÍ!
Obsahuje malé části. Bezpodmínečně udržujte z dosahu malých dětí.
Tento přístroj není určen k tomu, aby jej užívali osoby s omezenými fyzickými,
smyslovými či duševními schopnostmi (včetně dětí) a nedostatečnými
zkušenostmi a/nebo znalostmi, pokud nejsou pod dozorem příslušné osoby,
která dbá o jejich bezpečnost a sdělí instrukce, jak přístroj používat.
DE - Bitte lesen Sie die komplette Bedienungsanleitung und Sicherheitshinweise
sorgfältig durch bevor Sie das Modell in Betrieb nehmen.
Achtung! Warnhinweise / Sicherheitshinweise unbedingt komplett lesen.
Diese dienen Ihrer Sicherheit und können Unfälle / Verletzungen vermeiden.
GB - Read the complete instructions and security instructions carefully before using
the model.
Caution! Please fully and carefully read warnings/ safety instructions. These
are for our own security and can avoid accidents/injuries.
FR - Veuillez lire attentivement et entièrement la notice et les consignes de sécurités
avant tout utilisation de ce produit!
Attention! La mise en garde et les consignes de sécurités sont à lire
entièrement pour votre sécurité et éviter tout accidents et blessures.
IT - Vi preghiamo di leggere attentamente la istruzione completa e Istruzioni per la
sicurezza prima di usare il modello.
Attenzione! Leggere completamente le avvertenze / istruzioni di sicurezza,
questi sono per la vostra sicurezza può prevenire incidenti / infortuni.
ES - Lea atentamente la instruccion completa y seguridad antes de poner el modelo
en funcionamiento
Atención! Leer completamente las notas de advertencia / instrucciones de
seguridad estos son para su seguridad y puede evitar accidentes / lesiones
CZ - Před použitím tohoto modelu si pečlivě přečtěte návod k použití a bezpečnostní
upozornění.
Upozornění! Varování / bezpečnostní pokyny musí být přečteny v plném
rozsahu! Slouží vaší bezpečnosti a mohou zabránit nehodám / zraněním.
Frequency bands: 2,4 GHz | Frequency range: 2405MHz - 24874 MHz | EIRP: < 1 mW (max. power transmitted)
2
DE
Achtung!
Vor dem Betrieb: Erst das Modell und dann den Sender einschalten.
● Beim gleichzeitigen Betrieb mehrerer Fahrzeuge immer zuerst ein Fahrzeug und dann den
dazu gehörenden Sender einschalten. Dann das nächste Fahrzeug und den dazu gehören-
den Sender usw. Nicht mehrere Fahrzeuge oder Sender zum gleichen Zeitpunkt einschal-
ten da sonst mehrere Fahrzeuge auf den selben Sender reagieren könnten.
Bei Beendigung: Erst das Modell und dann den Sender ausschalten.
● Betreiben Sie Ihr Modell niemals in Distanzen die außerhalb Ihrer Sichtweite liegen. Sowohl
die max. Sichtweite als auch die max. Reichweite Ihres Modells hängen von vielen Faktoren
wie Witterung, Einsatzort und vorhandenen Störfrequenzen ab. Führen Sie deshalb vor
jedem Einsatz mit einer zweiten Person, die das Modell während des Tests sicher xiert
hält, einen Reichweitentest durch und prüfen Sie auch wie sich das Modell während des
Betriebs bei einem Signalausfall wie z.B. bei leeren Senderbatterien oder ausgeschaltetem
bzw. ausgefallenem Sender verhält.
GB
Attention!
Before operating: Switch the model on rst then the transmitter.
● In case several models are used at the same time rst switch on the model and then the
appropriate transmitter. Do not switch on several models or transmitters at the same time
as multiple models could react to the same transmitter.
When nished: First switch off the model then the transmitter.
● Never operate your model beyond sight. Both the maximum visibility as well as the max.
range of your model will depend on many factors such as weather, location and interfering
frequencies. Therefore, before each use perform a range test with a second person
securely holding the model and also check how the model reacts if there is a signal failure
e.g. when empty transmitter batteries are installed.
FR
Attention!
Avant l’utilisation: Allumez en premier modèle puis seulement votre l’émetteur.
● Au cas où plusieurs engins sont en même en usage, il faudra toujours activer d’abord
l’engin et ensuite l’émetteur convenable. Puis un autre engin et l’émetteur convenable et
ainsi de suite. Ne pas activer plusieurs véhicules ou plusieurs émetteurs en même temps
puisque plus d’un véhicule pourront réagir à la commande d’un émetteur.
Après utilisation: Arrêtez le modèle en premier puis votre radiocommande.
● N’utilisez jamais le modèle à une distance hors de votre visibilité. La visibilité maximale
ainsi que la portée maximale dépendent de plusieurs facteurs tels que le temps, le lieu
d’utilisation et les présentes fréquences perturbatrices. Pour cela, avant chaque usage,
veuillez effectuer un test de visibilité et de portée avec une deuxième personne qui tient le
modèle xé et vériez les réactions du modèle en usage en cas de pertes de signal due par
exemple à des piles usées ou à un émetteur éteint.
IT
Attenzione!
Prima dell‘uso: Accendete prima il modello e poi la trasmittente.
● Usando vari veicoli simultaneo sempre un veicolo e poi accendere la radio associata. Poi
il veicolo successivo e la radio associate, ecc. Non accendere più veicoli o radio
contemporaneamente, altrimenti i vari veicoli possono rispondere alla stessa radio.
Dopo l‘uso: Spegnere prima il modello e poi la trasmittente.
● Non utilizzare il suo modello fuori della distanzia di vista. Sia la visibilità come la portata
massima del vostro modello dipendono da molti fattori, come il tempo, disturbo di
frequenza e il luogo di utilizzo. Eseguire un test prima di ogni utilizzo del modello con una
seconda persona che tiene ssato il modello. Con questa procedura potete testare come
reagisce il modello durante la perdita del segnale causato per esempio da una batterie
scarica oppure la radio spenta.
ES
¡Atención!
Antes del uso: Encender primero el modelo, y después la emisora.
● El uso de varios vehículos simultáneo siempre un vehículo y despues encender la emisora
asociada. A continuación, el siguiente vehículo y la emisora asociada, etc. No encender
más vehículos o emisoras al mismo tiempo, de lo contrario los varios vehículos podrían
responder a la misma emisora.
Después del uso: Apagar primero el modelo, y después la emisora.
● No utilizar su modelo fuera de la distancias de visibilidad. Tanto la visibilidad como la
capacidad máxima de su modelo depende de muchos factores, tales como el tiempo,
frecuencia de interferencia y el lugar de utilización. Realice una prueba antes de cada uso
del modelo con una segunda persona que fija el modelo. Con este procedimiento se puede
comprobar cómo el modelo reacciona durante la pérdida de señal causada por ejemplo por
una batería descargada o la emisora apagada.
CZ
Upozornění!
Před prvním spuštěním: Nejdříve zapněte model potom dálkový ovladač.
● Nikdy nepoužívejte více modelů najednou, protože by mohly reagovat na jeden dálkový
ovladač najednou. Vždy používejte model a dálkový ovladač, kteří k sobě patří.
Po skončení: Nejdříve vypněte model a potom dálkový ovladač.
● Vždy mějte model v dohledu. Maximální viditelnost a vzdálenost modelu bude vždy
ovlivněna dalšími faktory, jako jsou počasí, lokalita, rušení ostatními frekvencemi. Proto
před každým použitím proveďte kontrolu spojení dálkového ovladače a modelu, případně
vyzkoušejte do jaké vzdálenosti signál dosáhne, jestli model reaguje, jestli je správně
sestaven apod. Zkontrolujte také, že máte nabité baterie jak v dálkovém ovladači tak v
modelu.
DE
Bezeichnung der Komponenten
Fernsteuerung:
1. Antenne
2. Lenkrad
3. Power LED
4. Gashebel
5. Ein/Aus Schalter
6. Batteriefach
Auto:
A Ausrichtungshebel
Sollte das Modell nach rechts bzw. links ziehen, können Sie
dies mit dem Regler an der Unterseite des Modells fein-
justieren.
B EIN/AUS Schalter
C Batteriefach
GB
Component Description
Transmitter:
1. Antenna
2. Steering wheel
3. Indicator light
4. Throttle Lever
5. On/Off Switch
6 Batterie box
Car:
A Trim Lever
The directional guide on the bottom of the model can be used
to adjust the models straightlinerunning performance.
B On/Off Switch
C Battery cover
FR
Désignations des diff. pièces
Radiocommande:
1. Antenne
2. Volant directionnel
3. Power LED
4. Commande des gaz
5. Interrupteur On/Off
6. Support de batterie
Voiture:
A Levier directionnel:
Si votre modéle devait tourner à droite ou à gauche
d‘elle-même,vous pouvez compenser cela grâce au bouton
de réglage sous la modéle.
B Interrupteur On/Off
C Compartiment pour piles
IT
Denominazione dei componenti
Telecomando:
1. Antenna
2. Volante
3. Power LED
4. Leva del gas
5. Interruttore ON/OFF,
6. Compartimento batteria
Macchina:
A Leva:
Se il modello con lo sterzo al centro non va diritto potrete
regolare la sua traiettoria con il regolatore ubicato sotto il
modello.
B Interruttore ON/OFF
C Compartimento batteria
ES
Descripción de las difer. partes
Emisora:
1. Antena:
2. Volante
3. Power LED
4. Pedal Pulso
5. On/Off interruptor
6. Compartimento de la batería
Coche:
A Alineado:
Si el modelo va en derecha o izquierda, puedes ajustar el
modelo,
B Interruptor On/Off
C Compartimento de la batería
CZ
Komponenty
Funkce
1. Anténa
2. Kolečko zatáčení
3. Kontrolka
4. Páčka plynu
5. Přepínač ON/OFF
6. Prostor pro baterie
Model:
A . Trim páčka:
Směrové vodítko na spodní straně modelu lze použít k
nastavení výkonu modelů s lineární funkcí.
B. On/Off přepínač
C. Krytka bateriového prostoru
2
1
5
3
4
6
A B C
3
12 3
1x 9V
DE
Einlegen der Batterie in den Sender
1. Lösen Sie die Schraube am Batteriefach. Nehmen Sie den
Batteriefachdeckel ab.
2. Legen Sie einen 9 V Batterieblock ein, achten Sie auf die
richtige Polung.
3. Setzen Sie den Batteriefachdeckel wieder ein und verschrau-
ben ihn sorgfältig.
GB
Placing the battery in the transmitter
1. Undo the screws on the battery hatch and remove it.
2. Fit the 9 V battery, observe the correct polarity.
3. Replace the battery hatch and carefully replace the screws.
FR
Mise en place des pile
1. Desserrer la vis du compartiment de box de piles. Retirez le
couvercle de la batterie.
2. Mettez en place respectivement une pile 9 V, respectez la
polarité.
3. Remplacer le couvercle du compartiment et vissez
soigneusement.
IT
Montaggio delle pile
1. Svitate la vita del scomparto batterie. Togliere il coperchio del
scomparto batterie.
2. Inserire la batteria 9 V nella giusta posizione, facendo
attenzione ai poli.
3. Rimettere il coperchio del scomparto batterie ed avvitarlo con
attenzione.
ES
Colocar pilas a la emisora
1. Aoje el tornillo del compartimiento de la batería. Retire la
tapa del compartimiento de la batería.
2. Coloque una pila 9 V, respetando la polaridad.
3. Coloque la batería en el compartimiento y tornillos con
cuidado.
CZ
Vložení baterií
1. Odšroubujte kryt bateriového prostoru..
2. Vložte 9 V baterii se správnou polaritou.
3. Přišroubujte kryt bateriového prostoru.
DE
Batteriehinweis:
Nicht wiederauadbare Batterien dürfen nicht aufgeladen werden!
Nicht öffnen!
Nicht ins Feuer werfen!
Alte und neue Batterien nicht mischen!
Keine alkalischen, Standard-(Kohlenstoff-Zink) oder wiederauadbare Batterien mischen!
Auadbare Batterien sind aus dem Spielzeug herauszunehmen, bevor sie geladen werden!
Auadbare Batterien dürfen nur unter Aufsicht Erwachsener geladen werden!
Die Anschlussklemmen dürfen nicht kurzgeschlossen werden!
GB
Battery warning:
Non-rechargeable batteries are not to be recharged!
Do not open!
Do not dispose of in re!
Do not mix old and new batteries!
Do not mix alkaline batteries, standard (carbon-zinc) or rechargeable batteries!
Rechargeable batteries are to be removed from the toy before being charged!
Rechargeable batteries are only to be charged under adult supervision!
The supply terminals are not to be short-circuited!
FR
Informations concernant l‘accumulateur:
Les batteries non rechargeables ne doivent pas être rechargées!
Ne pas ouvrir!
Ne pas jeter au feu!
Ne pas utiliser des piles neuves et usées à la fois!
Ne pas utiliser en même temps des piles alcalines, standard (zinc-charbon) et des
accumulateurs!
Les piles rechargeables doivent être retirées du jouet!
Les batteries rechargeables ne peuvent être rechargées que sous la surveillance d‘un adulte!
Les connexions ne doivent pas être court-circuitées!
IT
Informazioni relative alle pile:
Le batterie non ricaricabili non devono essere caricate!
Non aprire!
Non gettare nel fuoco!
Non usare contemporaneamente pile nuove e pile usate!
Non usare contemporaneamente pile alcaline, standard (zinco-carbone) e ricaricabili!
Le batterie ricaricabili devono essere rimosse dal giocattolo!
Le batterie ricaricabili possono essere ricaricate solo sotto la supervisione di un adulto!
I morsetti di collegamento don devono essere cortocircuitati!
ES
Advertencia sobre las baterías:
Las baterías no recargables no se pueden cargar!
No abrir!
No arrojar al fuego!
No mezcle baterías nueva y viejas!
No mezcle baterías alcalinas, estándar (carbono-zinc) o baterías recargables!
Las baterías recargables deben retirarse del juguete!
Las baterías recargables sólo pueden cargarse bajo la supervisión de un adulto!
Los conectores de conexión no deben estar en cortocircuito!
CZ
Informace ohledně akumulátoru:
Nenabíjejte jednorázové baterie!
Neotvírejte!
Nevhazujte do ohně!
Nedávejte dohromady staré a nové baterie.
Nedávejte dohromady alkalické a standardní (carbon-zinc) nebo nabíjecí baterie.
Před nabíjením vyjměte nabíjecí baterie z hračky!
Nabíjecí baterie lze nabíjet pouze pod dohledem dospělé osoby!
Nezkratujte připojovací svorky!
A
C
B
DE
Laden des Fahrakkus
A Akkupack
B Computer
C USB-Ladekabel
Nehmen Sie den Akku aus dem Modell. Stecken Sie den
USB-Stecker des Ladekabels in die USB-Buchse ihres PC‘s.
Verbinden Sie den Akku mit dem USB-Ladekabel. Während dem
Ladevorgang blinkt die LED am Ladekabel. Ist der Akku vollgela-
den leuchtet die LED dauerhaft.
Die Ladezeit beträgt bei entladenem Akku ca. 3 - 4 Stunden.
GB
Charging the battery pack
A Batterypack
B Computer
C USB charging lead
Take out the battery from the model. Insert the USB charging
cable into the USB charging port of the your computer. Connect
the battery with the USB charging cable. During charging the
LED is ashing on the charging cable. If the battery is fully char-
ged the LED will light up permanently.
The charging time by completely discharged battery pack about
3 - 4 hours.
FR
Charge de l‘accu de propulsion
A Pack d‘accu
B Ordinateur
C Câble de recharge USB
Retirez la batterie du modèle.Insérez la che USB du câble de
chargement dans le port USB de votre PC. Connecter la batterie
avec le câble de recharge USB. Pendant la charge, une lumi-
ère LED clignote sur le câble de charge. Lorsque la batterie est
complètement chargée, la lumière LED restera allumée en per-
manence.
Pour un accu complètement déchargé, le temps de charge est
entre 3 - 4 heures.
IT
Carica delle batterie
A Batteria
B Computer
C Cavo di ricarica USB
Togliere la batteria dal modello.Inserire il cavo di ricarica USB
nella porta USB di ricarica del vostro computer. Collegare la bat-
teria con il cavo di ricarica USB. Durante la ricarica il LED lam-
peggia sul cavo di ricarica. Quando la batteria è completamente
carica, il LED si accende in modo permanente.
Il tempo medio di ricarica della batteria (se completamente sca-
rica) è di 3 - 4 ore.
ES
Carga de la batería
A Battería
B Ordenador
C Cable de carga USB
Retire la batería del modelo. Inserte el cable de carga USB
en el puerto de carga USB en su computadora. Conectar la ba-
tería con el cable de la carga del USB. Durante la carga el LED
parpadea en el cable de carga. Cuando la batería está completa-
mente cargada, el LED se ilumina de forma permanente.
El tiempo de carga, para una battería totalmente descargada,
oscilará entre 3 - 4 horas.
CZ
Charging the battery pack
A Batterypack
B Computer
C USB charging lead
Take out the battery from the model. Insert the USB charging
cable into the USB charging port of the your computer. Connect
the battery with the USB charging cable. During charging the
LED is ashing on the charging cable. If the battery is fully char-
ged the LED will light up permanently.
The charging time by completely discharged battery pack about
3 - 4 hours.
4
DE - Achtung!
Trennen Sie immer unmittelbar nach Beenden des Ladevorgangs den
Akku vom Ladegerät. Trennen Sie das Ladegerät immer unmittelbar nach
Abstecken des Akkus von der Spannungsversorgung. Ein eingesteckt
lassen des Akkus bzw. des Ladegeräts nach Beenden des Ladevorgangs
kann zu Beschädigungen an Akku, Ladegerät oder der Spannungsversor-
gung führen (Brandgefahr).
GB - Danger.
Always disconnect the battery from the charger immediately after char-
ging. Always disconnect the charger from the power supply immediate-
ly after disconnecting the battery. Inserting the rechargeable battery or
charger after charging will result in damage to the battery, charger or the
power supply (re hazard).
FR - Attention!
Débranchez toujours après chaque arrêt la batterie du chargeur. Débran-
chez aussi toujours le chargeur immédiatemment après avoir débranché
la batterie de l´alimentation. Laissez brancher la chargeur ou la batterie
peuvent causer des dommages à la batterie, à votzre chargeur ou câble
d´alimentation (risque d´incendie).
IT - Attenzione!
Dopo ogni carica e importante di: Scollegare sempre subito la batteria dal
caricatore ed il caricatore dalla rete elettrica. Se dopo la carica si lascia
collegato l’uno o l’altro può causare danni alla batteria, al caricatore o
addirittura alla rete elettrica (pericolo di incendio).
ES - ¡Atención!
Después de cada carga es importante de: Desconectar siempre la batería
del cargador y el cargador de la fuente de alimentación. Si después de la
carga se deja conectado a uno o otra puede causar daños a la batería,
cargador o a la fuente de alimentación (peligro de incendio).
CZ - Upozornění!
Ihned po dokončení nabíjení odpojte model od nabíječky. Ihned po
odpojení modelu odpojte nabíječku od zdroje napájení. Pokud po
dokončení model nebo nabíječka nebudou odpojeny, může to způsobit
poškození modelu, nabíječky nebo napájení (nebezpečí požáru).
1 2 3
DE - Einsetzen des Fahrakkus
1. Lösen Sie die Schraube am Akkufach. Nehmen Sie den
Akkufachdeckel ab.
2. Klemmen Sie den 6 V Akkupack an und legen ihn in das
Akkufach ein (achten Sie auf die richtige Polung, rot +,
schwarz -).
3. Setzen Sie den Akkufachdeckel wieder ein und ver-
schrauben ihn sorgfältig.
GB - Install the battery pack
1. Undo the screws on the battery hatch and remove it.
2. Connect the 1 x 6 V battery pack as shown (observe the
correct polarity, red +, black -) and place it in the battery
compartment.
3. Replace the battery hatch and carefully replace the screws.
FR - Mise en place de l‘accu
1. Desserrer la vis du compartiment de box de piles. Retirez le
couvercle de la batterie.
2. Connectez l‘accu 6 V de propulsion (respectez la polarité,
rouge +, noir -), placez celui-ci dans le modèle.
3. Remplacer le couvercle du compartiment et vissez
soigneusement.
IT - Montaggio della batteria
1. Svitate la vita del scomparto batterie. Togliere il coperchio del
scomparto batterie.
2. Collegare la batteria 6 V (facendo attenzione ai poli, rosso +,
nero -).
3. Rimettere il coperchio del scomparto batterie ed avvitarlo con
attenzione.
ES - Instalación de la batería
1. Aije el tornillo del compartimiento del la batería. Retire la
tapa del compartimiento de la batería.
2. Conecte de la batería 6 V (respetando la polaridad, rojo +,
negro -).
3. Coloque la batería en el compartimiento y tornillos con
cuidado.
CZ - Vložení baterií
1. Odšroubujte kryt bateriového prostoru..
2. Připojte baterii 1 x 6 V, jak je znázorněno na obrázku
(dodržujte správná polarita, červená +, černá -) a vložte ji do
baterie přihrádka.
3. Přišroubujte kryt bateriového prostoru.
12
DE
1. Vorwärts/rückwärts
Drücken Sie den Gashebel nach vorne oder zurück, wird
das Modell vorwärts bzw. rückwärts fahren.
2. Links bzw. Rechts abbiegen
Mit dem Lenkrad wird die Fahrtrichtung gesteuert. Durch
drehen des Lenkrads nach links oder rechts, lenkt Ihr Modell
nach links oder rechts.
GB
1. Forward / Reverse
Push the throttle stick forward or backward, the model will
drive forward or backward.
2. Left or right turn
When the throttle control car, and turned the steering wheel,
can control the car left/right turn.
FR
1. Marche avant/arriére
Poussez le levier du gaz vers l‘avant ou vers l’arrière et le
modèle fera une marche avant ou une marche arriére.
2. Tourner à droite ou à gauche
A l’aide du volant vous déterminez la direction que votre
modèle va prendre. En tournant le volant de direction
vers à gauche ou à droite, votre modèle ira à gauche ou à
droite.
IT
1. Avanti/indietro
Spingere l‘acceleratore in avanti o indietro e il modello
andrà avanti o indietro.
2. Girare a sinistra o destra
Con il volante si controlla la direzione. Se si gira il volante a
sinistra o a destra, il modello gira a sinistra o a destra.
ES
1. Adelante/Atás
Primer la palanca de gas hacia adelante o hacia atrás, el
modelo seguirá adelante o hacia atrás.
2. Giro a la izquierda o derecha
Con el volante se controla la dirección. Cuando gira usted el
volante a la izquierda o a la derecha, el modelo conduce a
la izquierda o a la derecha.
CZ
1. Dopředu / Dozadu
Posuňte páčku na ovladači dopředu nebo dozadu a model
pojede dopředu nebo dozadu.
2. Zatočení doleva nebo doprava
Pokud s modelem jedete pomocí páčky plynu a posunete
kolečko zatáčení, můžete zatočit doleva nebo doprava.
Q
Q
DE
Allgemeine Hinweise
Schalten Sie zu erst das Fahrzeug an und dann den Sender. Wenn das Fahrzeug
anhält, beginnt langsamer zu werden oder träger zu reagieren ist der Akku leer.
Fahren Sie in diesem Fall nicht weiter und schalten Sie das Fahrzeug aus da der
Akku sonst tiefen entladen wird und Schaden nimmt.
GB
General information
First, turn the vehicle on and then the transmitter. When the vehicle stops, starts
to get slower or responds are slow, the battery will be nearly empty. In this case
do not continue driving and switch off the vehicle as otherwise there is danger of
deep discharging the battery, which leads to damages.
FR
Indications générales
D’abord mettez la véhicule en marche et après commutez l’émetteur. L’accu est
vide quand le véhicule s’arrête, commence à rouler plus lentement ou s’alanguit.
Dans ce cas arrêtez le véhicule et l’éteignez ; autrement l’accu sera déchargé
profondément et il subit des dégâts.
IT
Note generali
Accendere primail il veicolo e poi la radio. Quando il veicolo si ferma, inizia a ral-
lentare o risponde lentamente ai comandi, e neccessario di ricaricare la batteria.
In questo caso consigliamo di spegnere il veicolo, perche evitare che la batteria si
sottoscarica, questo causa un danneggiamento alla batteria.
ES
Notas generales
Encender primero el vehículo y luego la emisora. Cuando el vehículo se detiene,
empieza a disminuir la velocidad o responde lento a los comandos, quiere decir
que la betería esta vacía. En este caso no continuar y apagar el vehículo, porque
la batería se sobredescarga y se puede dañar.
CZ
Obecná informace
Nejprve zapněte vozidlo a poté vysílač. Když se vozidlo zastaví, začne se zpo-
malovat nebo reakce jsou pomalé, baterie bude téměř vybitá. V takovém případě
nepokračujte v jízdě a nevypínejte vozidlo, jinak hrozí nebezpečí vybití baterie,
což může vést k poškození.
5
DE - Achtung!
Sofern Ihr Modell einen Ein/Aus-Schalter besitzt, schalten Sie das Modell immer
unmittelbar nach jedem Einsatz aus. Besitzt Ihr Modell einen herausnehmbaren
Akku bzw. eine trennbare Steckverbindung zum Akku, sollte unmittelbar nach
jedem Einsatz der Akku vom Modell getrennt werden. Durch versehentliches
eingeschaltet lassen oder Akku angesteckt lassen kann der Akku tiefenentladen
werden. Durch Tiefenentladung verliert der Akku an Leistung bzw. kann so stark
beschädigt werden, dass ein Laden bzw. Entladen nicht mehr möglich ist bzw.
der Akku beim Lade- oder Entladevorgang selbstentzünden kann (Brandgefahr).
Versuchen Sie niemals tiefenentladene Akkus zu Laden bzw. zu Entladen. Die
Spannung des Akkus sollte niemals unter 3,3 Volt fallen um eine Tiefenentladung
zu vermeiden. Der vollständig geladene Akku hat eine Spannung von ca. 7,1 Volt.
Nach dem Gebrauch sollte der intakte Akku umgehend nach einer Abkühlphase
von min. 10 Minuten aber spätestens nach 12h vollgeladen werden um eine an-
schließende Tiefenentladung durch Selbstentladung zu vermeiden. Bei längerem
Nichtbenutzen des Akkus bzw. Einlagerung sollte der Akku min. alle 3 Monate
auf Spannung (min. 6,2 Volt) bzw. Beschädigung überprüft und gegebenenfalls
aufgeladen bzw. entsorgt werden.
GB - Danger!
If your model has an on/ off switch, always turn off the model immediately after
each use. If your model has a removable battery or a disconnectable connector
to the battery, the battery should be disconnected from the model immediately
after each use. The battery can be deep-discharged by accidentally turning it on
or by leaving the battery plugged in. By deep discharge the battery it loses power,
can be damaged so much that charging or discharging is no longer possible and
the battery can ignite itself during charging or discharging (re hazard). Never
attempt to charge or discharge deep-discharge batteries. The voltage of the bat-
tery should never be under 3,3 volt to avoid a deep discharge. The fully charged
battery has a voltage of 7,1 volt. After usage, the intact battery has to be fully
charged after a cooling phase of at least 10 min but not longer than 12 hrs. This is
to avoid a deep discharge caused by a self-discharge. When not using or storing
the battery it has to be checked at least every three months for voltage (min. 6,2
volt) or damage and if necessary charged or disposed.
FR - Attention!
Attention: dans la mesure où votre modèle dispose d´un interupteur marche /
arrêt, eteignez votre modèle aprés chaque utilisation. Si votre modèle dispo-
se d´une batterie amovible et un connecteur séparable pour la batterie, après
chaque utilisation la batterie doit être déconnectée du modèle immédiatement.
La batterie peut-être totalement déchargée si celui-ci reste allumé lors du char-
gement et peut être contaminé. Une décharge profonde peut entrainer une perte
de la puissance de la batterie et peut ainsi endommagé celle-ci, une charge ou
décharge est plus possible lorsque la batterie est en charge ou peut entainer
une combustion spontanné ( risque d´incendie). Ne tentez jamais de décharger
profondément les batteries à charger ou à décharger. La tension de la batterie
ne doit jamais être sous 3,3Volt pour éviter une décharge profonde. La batterie
complètement chargée a une tension d‘environ 7,1 Volt. Après utilisation, la batte-
rie intacte doit immédiatement être complètement chargées après une phase de
refroidissement de min. 10 minutes, mais au plus tard au bout de 12 heures pour
éviter une décharge profonde travers l’auto-décharge. En cas d‘inutilisation de la
batterie ou du stockage, est nécessaire de vérier ou rechargés la batterie tous
les 3 mois, tension (6,2volts min.). En cas de dommages disposer correctement.
IT - Attenzione!
Se il suo modello ha un interruttore On/Off e importante spegnere il modello di-
rettamente dopo ogni utilizzo. Se il modello ha una batteria rimovibile oppure un
connettore alla batteria, si deve scollegare subito dopo ogni utilizzo dal modello.
Se la batteria rimane accesa oppure rimane collegata essa si può scaricare. Una
volta andata in sotto carica la batteria perde potenza o può essere gravemente
danneggiata. In questo caso la batteria non si lascia più caricare o scaricare ed
esiste il pericolo d’in ammazione (pericolo di incendio). Non provi mai a caricare
o scaricare delle batteria sotto carice. La tensione della batteria non deve mai
essere sotto 3,3 Volt per evitare la scariche profonda.La batteria completamente
carica ha una tensione di circa 7,1Volt. Dopo l‘uso, la batteria intatta deve essere
immediatamente completamente caricata, dopo una fase di raffreddamento di
min 10 minuti ma al più tardi dopo 12 ore, per prevenire la scarica profonda attra-
verso l‘auto-scarica. Se la batteria non viene usata oppure messa in stoccaggio è
necessario controllare o ricaricata la batteria ogni 3 mesi, tensione (volt6,2 min.).
In caso di danneggiamento della batteria smaltire correttamente.
ES - ¡Atención!
Si su modelo tiene un interruptor On/Off es importante apagar el modelo direc-
tamente después de cada uso. Si el modelo tiene una batería extraible o un
conector en la batería, se debe desconectar inmediatamente después de cada
uso del modelo. Si se deja encendida la batería o conectada, la batería se puede
descargar. Una vez que está descargada la batería pierde la potencía o se puede
dañar grave. En este caso la batería ya no puede ser cargada o descargada y
hay un peligro de in amación (peligro de incendio). Nunca intentar de cargar o
descargar baterías descargadas profundamente. La tensione della batteria non
deve mai essere sotto 3,3 Volt per evitare la scariche profonda. La batteria com-
pletamente carica ha una tensione di circa 6,5Volt. Dopo l‘uso, la batteria intatta
deve essere immediatamente completamente caricata, dopo una fase di raffred-
damento di min 10 minuti ma al più tardi dopo 12 ore, per prevenire la scarica
profonda attraverso l‘auto-scarica. Se la batteria non viene usata oppure messa
in stoccaggio è necessario controllare o ricaricata la batteria ogni 3 mesi, tensione
(volt 6,2 min.). In caso di danneggiamento della batteria smaltire correttamente.
CZ - Pozor!
Je třeba ho po každém použití vypnout. Po každém použití je nutné odpojit aku-
mulátor od modelu. Pokud model náhodou zůstane zapnutý nebo pokud akumu-
látor nebude odpojen od modelu, akumulátor se zcela vybije. Úplné vybití aku-
mulátoru způsobí, že akumulátor ztrácí svůj výkon a může se poškodit do takové
míry, že nabíjení nebo vybíjení akumulátoru nebude možné, nebo během proce-
su nabíjení nebo vybíjení se samovolně vznítí (nebezpečí vzniku požáru). Nikdy
nenabíjejte nebo nevybíjejte zcela vybité akumulátory. Aby nedošlo k hlubokému
vybití akumulátoru, nesmí jeho napětí nikdy klesnout pod 3,3 V. Plně nabitý aku-
mulátor má 7,1 V Aby se zabránilo úplnému vybití, po každém použití nechejte
akumulátor nabít do plně nabitého stavu. Plné nabití by měla probíhat po čekací
době cca. 10 minut po použití a nejpozději do 12 hodin od momentu použití.
Pokud akumulátor nebude nepoužívaný delší dobu, je třeba ho zkontrolovat
nejméně každé 3 měsíce ohledně správného napětí (min. 6,2 V) a možných
poškození.
No. 412051
Fernsteuerung
Transmitter
Radiocommande
Trasmittente
Emisora
Ovladač
No. 412278
Akku
Battery
Accu
Batteria
Batería
Baterie
No. 412150
Ladegerät USB
Charger USB
Chargeur USB
Caricatore USB
Cargador USB
Nabíjecí USB kabel
DE - Ersatzteile
GB - Spare parts
FR - Pièces détachées
IT - Pezzi di ricambio
ES - Lista de repuestos
CZ - Náhradní díly
6
DE - Halten Sie Ihre Hände von beweglichen
Teilen fern.
GB - Keep hands away from moving parts.
FR - Garder vos mains hors de portées des
pièces mobiles.
IT - Tenere le mani lontane dalle parti in
movimento.
ES - Mantenga las manos alejadas de las
piezas móviles.
CZ - Držte se v bezpečné vzdálenosti od
pohybujících se částí modelu.
DE - Benutzung nur unter unmittelbarer
Aufsicht von Erwachsenen.
GB - Use only under direct supervision of
an adult!
FR - Utiliser uniquement sous la surveillance
d’un adulte!
IT - Utilizzare solo sotto la diretta
sorveglianza di un adulto!
ES - Usado bajo la supervisión directa de
un adulto!
CZ - Použití jen pod přímýmdozorem
dospělých.
DE - Sind die Batterien leer, wechseln Sie
sie aus.
GB - The batteries are nearly, replace the
batteries.
FR - Si ce les piles sont vides, changez
ceux-ci.
IT - Controllare il stato delle batterie,
potrebbero essere scariche.
ES - Las pilas estarán agotadas, sustituya las
pilas por otras nuevas.
CZ - Pokud jsou baterie prázdné, vyměňte je.
DE - Auf Polarität achten!
GB - Pay attention to the polarity!
FR - Prêter attention aux la polarité!
IT - Prestare attenzione alla polarità!
ES - Preste atención a la polaridad!
CZ - Dbejte na polaritu!
DE - Auf die Frequenzen in Ihrem Umfeld
achten!
GB - Pay attention to the frequencies in your
environment!
FR - Faites attention aux fréquences dans
votre environnement!
IT - Prestare attenzione alle frequenze nel
proprio ambiente!
ES - Preste atención a las frecuencias en
su entorno!
CZ - Dávejte pozor na frekvence ve
Vašem okolí!
DE - Betreiben Sie das Modell nicht bei
Regen, Schnee, Nässe oder Sand.
GB - Do not drive in rain, snow, wetness or
sand.
FR - Ne pas conduire sous la pluie, la neige,
humidité ou sable.
IT - Non guidare sotto la pioggia, neve,
umidità o sabbia.
ES - No conduzca bajo la lluvia, la nieve,
humedad o arena.
CZ - Nepoužívejte model za deště, sněhu,
mokra nebo v písku.
DE - Nicht auf befahrenen Straßen und
Plätzen fahren.
GB - Never drive on roads or areas used by
real vehicles.
FR - Ne roulez jamais sur la voie publique ou
des endroits fréquentés.
IT - Non giocare sulle strade comuni.
ES - No utilice en calles o plazas transitadas.
CZ - Nejezděte na rušných ulicích a místech.
DE - Fahren Sie nie außerhalb der Reichweite
Ihrer Fernsteuerung.
GB - Never run out of the reach of you
remote control.
FR - Laissez jamais celle-ci sortir de la portée
de votre émetteur.
IT - Non utilizzare il modello fuori la portata
della trasmittente.
ES - No conduzca más allá del alcance de su
emisora.
CZ - Vždy mějte model v dohledu a nedovolte,
aby došlo ke ztrátě signálu.
DE - Nicht direkter Sonnenbestrahlung oder
Wärme aussetzen.
GB - Do not leave in very strong sunlight.
FR - N‘exposez jamais votre modèle
directement aux rayons du soleil.
IT - Non disporre il modello sotto il sole
oppure nel caldo.
ES - No exonga el modelo a los rayos solares
directos o fuentes de calor.
CZ - Pryč od přímého slunečního záření nebo
tepla vystavit.
DE - Verschmutzungen mit einem feuchten
Tuch entfernen.
GB - Clean by using a damp cloth.
FR - Essuyez la boue avec un tissu humide.
IT - l‘inquinamento possono essere rimossi
con un panno umido.
ES - Polución se puede eliminar con un paño
húmedo.
CZ - Znečištění odstraňujte vlhkým hadříkem.
DE - Batterien/Akku niemals im Modell lagern.
GB - Store batteries/battery packs separately
when not in use.
FR - La piles/accu ne doit jamais être stockée
dans la modèle.
IT - Conservare le batterie/accumulatore
separatamente quando non sono in uso.
ES - Sacar siempre las batería/acumulador y
guárdarlo por separado.
CZ - Baterie/Akumulátory nikdy neskladujte v
modelu.
DE - Sicherheitsmaßnahmen
GB - Safety Notes
FR - Consignes de sécurités
IT - Precauzioni
ES - Recomendaciones de seguridad
CZ - Bezpečnostní opatření
X X X X
X
X

7
DE - Entsorgungshinweise
Batterien und Akkumulatoren dürfen nicht im Hausmüll entsorgt werden sondern müs-
sen getrennt entsorgt werden. Sie sind verpichtet, Altbatterien der fachgerechten
Entsorgung (getrennte Sammlung) zuzuführen. Nach Gebrauch können Sie Batterien
unentgeltlich im Handelsgeschäft zurückgeben. Nachdem Batterien Stoffe enthalten,
die reizend wirken, Allergien auslösen können oder hochreaktiv sind, ist die getrennte
Sammlung und ordnungsgemäße Verwertung wichtig für die Umwelt und Ihre Gesundheit. Sofern
die Batterien unterhalb der durchgestrichenen Abfalltonne auf Rädern mit einem chemischen Zei-
chen Hg, Cd oder Pb gekennzeichnet ist, bedeutet dies, dass diese mehr als 0,0005 % Quecksilber
(Hg), mehr als 0,002 % Cadmium (Cd) oder mehr als 0,004 % Blei (Pb) enthält.
GB - Disposal restrictions
Batteries and accumulators must not be disposed of in domestic waste. You are obliged to dispose
of batteries (seperate collection) appropriately. After use you can return batteries free of charge to
the retail store. As batteries contain substances that can be irritant, can cause allergy and are highly
reactive, separate collections and proper recycling is important to the environment and to your
health. If the batteries are marked with a chemical symbol Hg, Cd or Pb below the crossed-out waste
bin on wheels it refers to that more than 0.0005% of mercury (Hg), more than 0.002% of cadmium
(Cd) or more than 0.004% Lead (Pb) is included.
FR - Consignes de recyclage
Les piles et les accumulateurs ne doivent strictement pas être jetés avec les ordures ménagères,
mais doivent être jetés séparément. Vous êtes tenues de déposer vos piles usagés dans les cen-
tres communaux de collecte (collecte sélective). Après tout utilisation, vous avez la possibilité de
retourner vos piles gratuitement chez des commerçants. Dès lors que les piles contiennent des
substances qui peuvent causés des irritations et pouvant provoquer des allergies, il est recom-
mandé d´effectuer la collecte et le recyclage comme recommandé, ce qui est très important pour
l´environnement et votre santé. Dans la mesure où vous visualiser un symbole de poubelle avec
roulettes et une croix, mis en évidence avec un symbole chimique Hg, Cd ou Pb, cela signie que
ces piles contiennent plus de 0,0005% de mercure (Hg), plus de plus de 0,002% de cadmium
(Cd),ou plus de 0,004% de plomb (Pb).
IT - Istruzioni per lo smaltimento
Batterie e gli accumulatori non devono essere smaltiti nei riuti domestici, ma devono essere smal
titi separatamente. Siete obbligati di eseguire lo smaltimento professionale delle batterie vecchie
(raccolta differenziata). È possibile restituire le batterie dopo l’uso gratuitamente nelle attività com-
merciali. Dato che le batterie contengono delle sostanze, che provocano irritazione, possono cau-
sare allergie o sono altamente reattivi, la raccolta differenziata e il riciclaggio sono importanti per
l’ambiente e la sua salute. Se le batterie, a disotto del “bidone a ruote cancellato” sono segnati con
un simbolo chimico Hg, Cd o Pb, signica che questi contengono più di 0,0005 % Mercurio (Hg), più
di 0,002 % Cadmio (Cd) o piu di 0,004 % Piombo (Pb).
ES - Notas sobre el reciclado
Baterías y acumuladores no deben desecharse en la basura doméstica, pero se deben desechar
de forma separada. Usted está obligado, a realizar la eliminación profesional de las baterías viejas
(recogida selectiva). Es posible devolver las baterías después de su uso de forma gratuita en las
actividades comerciales. Dado que las baterías contienen sustancias que causan irritación, pueden
causar alergias o son altamente reactivos, la recogida selectiva y el reciclaje son importantes para
el ambiente y su salud. Si las baterías, por debajo del “bidón con ruedas borrado” están marcados
con un símbolo químico, Hg, Cd o Pb, signica que contiene más de un 0,0005 % de Mercurio (Hg),
más de 0,002 % de Cadmio (Cd) o más de 0,004 % de Plomo (Pb).
CZ - Informace týkající se likvidace
Baterie a akumulátory se nesmí vyhazovat spolu s komunálním odpadem, ale je nutné je likvido-
vat zvlášť. Uživatel je povinen likvidovat použité baterie v souladu s předpisy (samostatný sběr
odpadů). Po použití je možné baterie zdarma odevzdat v obchodě. Baterie obsahují látky, které
působí dráždivě, mohou způsobit alergické reakce a jsou velmi reaktivní, proto je samostatný sběr
a využití v souladu s předpisy velmi důležité pro životní prostředí a Vaše zdraví. Pokud baterie, pod
přeškrtnutým odpadkovým košem na kolečkách, jsou označeny chemickým symbolem Hg, Cd nebo
Pb, to znamená, že obsahují více než 0,0005% rtuti (Hg), více než 0,002% kadmia (Cd) nebo více,
než 0,004 % olova.
DE - Entsorgungshinweise
Elektrogeräte dürfen nicht im Hausmüll entsorgt werden, sondern müssen getrennt
entsorgt werden. Sie sind verpichtet, die Batterien – wenn möglich – herauszuneh-
men und das Elektroaltgerät bei den kommunalen Sammelstellen abzugeben. Sollten
sich personenbezogene Daten auf dem Elektroaltgerät benden, müssen diese von
Ihnen selbst entfernt werden.
GB - Disposal restrictions
Electrical appliances must not be disposed of in domestic waste and must be disposed of separately.
You are obliged to take out the batteries, if possible, and to dispose of the electrical equipment at
the communal collection points. Should personal data be stored on the electrical appliance you must
remove them by yourself.
FR - Consignes de recyclage
Les appareils électriques ne doivent strictement pas être jetés dans les ordures ménagères, mais
doivent être jetés séparément. Vous êtes tenues – dans la possibilité – de déposer vos piles et
appareils électriques dans les centres communaux de collectes. Si des informations personnelles
sont présents sur les appareils électriques, celles-ci doivent être retirés par vous-même avant tout
élimination du produit.
IT - Istruzioni per lo smaltimento
Apparecchi elettrici non devono essere smaltiti nei riuti domestici, ma devono essere smaltiti se-
paratamente. Siete obbligati di rimuovere le batterie e portare l´apparecchi elettrici vecchi ai punti di
raccolta comunali. Qualora ci sono dati personali sul apparecchio elettrico, devono essere rimossi
da voi stessi.
ES - Notas sobre el reciclado
Aparatos eléctricos no pueden desecharse en la basura doméstica, pero se deben desechar de
forma separada. Usted está obligado, a quitar las baterías y llevar los aparatos eléctricos viejos en
los puntos de recogida comunales. En caso de que hay datos personales en el aparato eléctrico se
deben remover de usted mismo
CZ - Informace týkající se likvidace
Elektrická zařízení se nesmí vyhazovat spolu s komunálním odpadem, ale musí být likvidována
zvlášť. Uživatel je povinen - pokud je to možné - odstranit baterii a odevzdat elektrické zařízení
do sběru odpadů. Pokud se na zařízení nacházejí osobní údaje, ty je nutné odstranit samostatně.
DE - Servicehändler
GB - Service centre
FR - Revendeur de service
IT - Centro assistenza
ES - Servicio asistencia
CZ - Servisní centrum
Reitter Modellbau Versand
Patricia Reitter
Degerfeldstrasse 11
72461 Albstadt
Tel 07432 9802700
Fax 07432 2009594
Mail [email protected]
Web www.modellbauversand.de
Bay-Tec
Martin Schaaf
Am Bahndamm 6
86650 Wemding
Tel 07151 5002192
Fax 07151 5002193
Mail [email protected]
Web www.bay-tec.de
Modellbau Zentral
Peter Hofer
Bresteneggstrasse 2
CH-6460 Altdorf
Tel +41 79 429 62 25
Fax +41 41 870 02 13
Mail [email protected]
Web www.modellbau-zentral.ch
PenTec s.r.o.
distributor Jamara for Czech Republic and Slobakia
Veleslavínská 30/19
CZ -162 00 Praha 6
Tel +420 235 364 664
Mobil. +420 739 075 380
Mail servis@topdrony.cz
Web www.topdrony.cz
DE DE CH
CH
JAMARA e.K.
Manuel Natterer
Am Lauerbühl 5
DE-88317 Aichstetten
Tel +49 (0) 75 65/94 12-0
Fax +49 (0) 75 65/94 12-23
Mail [email protected]
Web www.jamara.com EU
Fordern Sie noch Heute den aktuellen Hauptkatalog mit
unserem gesamten Warensortiment an.
Name _______________________________
Vorname _______________________________
Straße _______________________________
Wohnort _______________________________
Telefon _______________________________
E-mail _______________________________
Bitte senden Sie den Katalog für mich an folgenden
Fachhändler:
Ihr Fachhändler
_______________________________________________
_______________________________________________
_______________________________________________
_______________________________________________
Der Katalog wird mit der nächsten Bestellung des Händ-
lers auf Ihren Namen mitgeliefert.
Order the current catalogue with our complete
assortment of modelling goods today.
Name _______________________________
First name _______________________________
Street _______________________________
City _______________________________
Phone _______________________________
E-mail _______________________________
Please send the catalogue to the following specialist
dealer:
Your dealer
_______________________________________________
_______________________________________________
_______________________________________________
_______________________________________________
We will include a catalogue for your attention with the
next order placed by your dealer.
Gutschein Coupon
Irrtum und technische Änderungen vorbehalten. Copyright JAMARA e.K. 2020
Kopie und Nachdruck, auch auszugsweise, nur mit Genehmigung von JAMARA e. K.
All rights reserved. Copyright JAMARA e.K. 2020
Copying or reproduction in whole or part, only with the expressed permission of JAMARA e.K.
JAMARA e.K.
Inh. Manuel Natterer
Am Lauerbühl 5 - DE-88317 Aichstetten
Tel. +49 (0) 75 65/94 12-0 - Fax +49 (0) 75 65/94 12-23
[email protected] ●www.jamara.com
Service - Tel. +49 (0) 75 65/94 12-777
kundenservice@ jamara.com

This manual suits for next models

3

Other Jamara Motorized Toy Car manuals

Jamara Q7 Standard User manual

Jamara

Jamara Q7 Standard User manual

Jamara Strong Bull 460795 User manual

Jamara

Jamara Strong Bull 460795 User manual

Jamara Mercedes-Benz Actros 2,4 GHz User manual

Jamara

Jamara Mercedes-Benz Actros 2,4 GHz User manual

Jamara Jeep Wrangler Rubicon 2,4 GHz User manual

Jamara

Jamara Jeep Wrangler Rubicon 2,4 GHz User manual

Jamara BMW i8 User manual

Jamara

Jamara BMW i8 User manual

Jamara LiPon BL User manual

Jamara

Jamara LiPon BL User manual

Jamara Mercedes-Benz Arocs User manual

Jamara

Jamara Mercedes-Benz Arocs User manual

Jamara Mercedes-AMG GT3 transformable 2,4GHz User manual

Jamara

Jamara Mercedes-AMG GT3 transformable 2,4GHz User manual

Jamara Shiro EP User manual

Jamara

Jamara Shiro EP User manual

Jamara BMW i8 2,4GHz User manual

Jamara

Jamara BMW i8 2,4GHz User manual

Jamara Liebherr R 936 Destruction-Set 2,4 GHz User manual

Jamara

Jamara Liebherr R 936 Destruction-Set 2,4 GHz User manual

Jamara Dakar EP 2,4 GHz User manual

Jamara

Jamara Dakar EP 2,4 GHz User manual

Jamara Ferrari 488 GTB 2,4GHz User manual

Jamara

Jamara Ferrari 488 GTB 2,4GHz User manual

Jamara Rupter User manual

Jamara

Jamara Rupter User manual

Jamara 405057 User manual

Jamara

Jamara 405057 User manual

Jamara Land Rover User manual

Jamara

Jamara Land Rover User manual

Jamara 405168 User manual

Jamara

Jamara 405168 User manual

Jamara Power Drag User manual

Jamara

Jamara Power Drag User manual

Jamara Ford GT 2,4GHz User manual

Jamara

Jamara Ford GT 2,4GHz User manual

Jamara Ride on Mercedes AMG G63 User manual

Jamara

Jamara Ride on Mercedes AMG G63 User manual

Jamara 405191 User manual

Jamara

Jamara 405191 User manual

Jamara VW Beetle 2,4GHz UV Photochromic Series User manual

Jamara

Jamara VW Beetle 2,4GHz UV Photochromic Series User manual

Jamara Ferrari FXX K Evo 2,4GHz User manual

Jamara

Jamara Ferrari FXX K Evo 2,4GHz User manual

Jamara X2-CRT BL User manual

Jamara

Jamara X2-CRT BL User manual

Popular Motorized Toy Car manuals by other brands

Reflex RX505 Build instructions

Reflex

Reflex RX505 Build instructions

Hobby-Wing Xerun V10 G2 user manual

Hobby-Wing

Hobby-Wing Xerun V10 G2 user manual

Team Losi 8IGHT instruction manual

Team Losi

Team Losi 8IGHT instruction manual

Power Wheels POWER WHEELS P5064 owner's manual

Power Wheels

Power Wheels POWER WHEELS P5064 owner's manual

Carson Virus Rocket 120 Important information

Carson

Carson Virus Rocket 120 Important information

DF-models Sport Cross II manual

DF-models

DF-models Sport Cross II manual

Pepita SmileGAME SG-1199 manual

Pepita

Pepita SmileGAME SG-1199 manual

PLAYKIN S-QUAD instruction manual

PLAYKIN

PLAYKIN S-QUAD instruction manual

Duratrax Vendetta Assembly and operation manual

Duratrax

Duratrax Vendetta Assembly and operation manual

Fenix Mistral 2-0 instruction manual

Fenix

Fenix Mistral 2-0 instruction manual

ECX Torment ECX4000S instruction manual

ECX

ECX Torment ECX4000S instruction manual

Vintage Air 1968 CUTLASS manual

Vintage Air

Vintage Air 1968 CUTLASS manual

Kool Karz Playground KKMB-009 owner's manual

Kool Karz Playground

Kool Karz Playground KKMB-009 owner's manual

Serpent SRX8 GT TQ instruction manual

Serpent

Serpent SRX8 GT TQ instruction manual

Power Wheels HGD19 owner's manual

Power Wheels

Power Wheels HGD19 owner's manual

Horizon Hobby Losi Super BAJA REY 2.0 RTR instruction manual

Horizon Hobby

Horizon Hobby Losi Super BAJA REY 2.0 RTR instruction manual

MN Model MN-86KS Products Installation Instructions

MN Model

MN Model MN-86KS Products Installation Instructions

Mattel Tyco R/C H6958-0920 user manual

Mattel

Mattel Tyco R/C H6958-0920 user manual

manuals.online logo
manuals.online logoBrands
  • About & Mission
  • Contact us
  • Privacy Policy
  • Terms and Conditions

Copyright 2025 Manuals.Online. All Rights Reserved.