manuals.online logo
Brands
  1. Home
  2. •
  3. Brands
  4. •
  5. Jamara
  6. •
  7. Toy
  8. •
  9. Jamara 03 8320 User manual

Jamara 03 8320 User manual

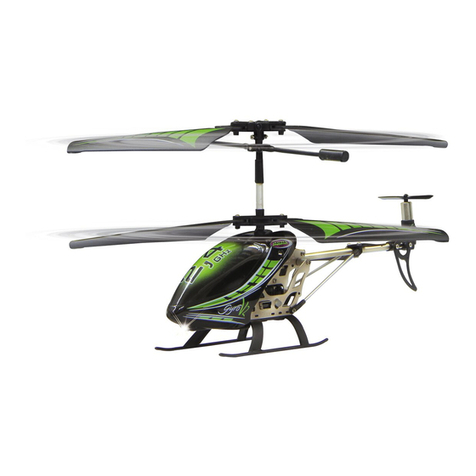
Poky 2,4 GHz
TURBO
Axis
Achsen
K
m/h
30
TURBO
LED
DE - Allgemeine Hinweise
Jamara e. K. übernimmt keine Haftung für Schäden, die an dem Produkt selbst oder durch dieses entstehen, sofern die-
se auf falsche Bedienung oder Handhabungsfehler zurückzuführen sind. Der Kunde allein trägt die volle Verantwortung
für die richtige Bedienung und Handhabung; dies umfasst insbesondere die Montage, den Ladevorgang, die Verwen-
dung bis hin zur Wahl des Einsatzbereiches. Bitte beachten Sie hierzu die Bedienungs- und Gebrauchsanleitung, diese
enthält wichtige Informationen und Warnhinweise.
GB - General information
Jamara e.K. is not liable for any damage caused to the product itself or through this, provided this is due to improper
operation or handling errors. The Customer alone bears the full responsibility for the proper use and handling, including
without limitation, the assembly, the charging process, the use and choice of the operation area. Please refer to the
operating and user instructions, it contains important information and warnings.
FR - Remarques générales
La société Jamara e. K. n’est pas responsable de dommages, que ce soit au niveau du modèle ou causé par celui-ci,
résultant d’une utilisation non appropriée. Seul le client est responsable concernant la mise en oeuvre et l’utilisation con-
forme du matériel; cela va de l’assemblage, en passant par la charge des accus et allant jusqu’au domaine d’utilisation.
Pour cela, veillez lire attentivement la notice d’assemblage et d’utilisation, celle-ci contient d’importantes informations
ainsi que les consignes de sécurités.
IT - Informazioni generali
Jamara e. K. non e´responsabile per danni, sostenute al prodotto stesso o attraverso questo, dovuti ad una gestione
non corretta del articolo. Solo il cliente si assume la piena responsabilità per la manutenzione e l´utilizzo corretto dello
stesso; questo include il montaggio, la ricarica, l´utilizzo, no alla scelta della aerea di applicazione. Si prega di notare e
rispettare le istruzioni d´uso, questi contengono informazioni e avvertimenti molto importanti.
ES - Información general
Jamara K. no se hace responsable de los daños causados al producto en sí o por medio de esto, a menos que esto
se debe al mal funcionamiento o errores de manejo. El cliente solo tiene la responsabilidad completa para el uso y
manejo adecuado, incluyendo, sin limitaciones, el montaje, el proceso de carga, el uso de hasta la elección de la zona
de aplicación. Por favor, consulte las instrucciones de uso y funcionamiento, contiene información y avisos importantes.
DE - Konformitätserklärung
Hiermit erklärt JAMARA e.K., dass das Modell‚ „Poky 2,4 GHZ, No. 038320“ in Übereinstimmung mit den grundlegenden
Anforderungen und den anderen relevanten Vorschriften der Richtlinien 1999/5/EG, 2011/65/EU bendet.
Weitere Informationen nden Sie auch unter: www.jamara-shop.com/Konformitaet
GB - Certicate of Conformity
JAMARA e.K. hereby declares that „Poky 2,4 GHZ, No. 038320“ follow the regulations and requirements as well as any
ther relivant directives of the EEC directive 1999/5/EC and 2011/65/EU.
Further information can also be found at: www.jamara-shop.com/Conformity
FR - Déclaration de conformité
Par la présente, la société Jamara e.K. déclare que ce modèle “Poky 2,4 GHZ, No. 038320“ est conforme en tous points
avec les textes de la directive de l’union européenne sous les directives 1999/5/CE, 2011/65/EU.
Vos pourrez également trouver des informations sur notre site Internet: www.jamara-shop.com/Conformite
IT - Dichiarazione di conformita’
Jamara e. K. dichiara qui di seguito che il modello „Poky 2,4 GHZ, No. 038320“ è in linea con le norme ed altre rilevanti
disposizioni comunitarie 1999/5/CE, 2011/65/EU.
Piu informazioni: www.jamara-shop.com/Conformita
ES - Declaración de conformidad
Por medio de la presente, la empresa Jamara e. K. declara que el modelo „Poky 2,4 GHZ, No. 038320“ de conformidad
con los requisitos esenciales y otras disposiciones pertinentes de la Directiva 1999/5/CE, 2011/65/EU se encuentra.
Encontrará más información en: www.jamara-shop.com/Conformidad
DE - Entsorgungshinweise
Bitte sorgen Sie für eine fachgerechte, den gesetzlichen Vorschriften entsprechende Entsorgung der
Batterien und/oder der Akkus. Bitte werfen Sie nur entladene Akkus in die Sammelboxen beim Handel
oder den Kommunen.
GB - Disposal restrictions
Please care for a environmental correct and legal way of disposing the batteries and/or accus. Please,
only throw away empty battery packs into the collect-boxes in your local shops or commune.
FR - Consignes de recyclage
Veuillez respecter les consignes de recyclage des accus et/ou piles. Veuillez ne jeter que des piles/accus vides dans
les bacs de ramassages que vous trouverez dans différents commerces ou au centre de recyclage de votre commune.
IT - Disposizioni per l‘eliminazione nel Rispetto dell‘ ambiente
Non disperdete le batterie nell‘ ambiente ma gettatele, una volta scaricate, negli appositi contenitori. Possono consi-
derarsi scariche quando il motore smette di girare. Se dovete eliminare dei componenti elettronici, eliminateli. Nelle
apposite discariche.
ES - Notas sobre el reciclado
Respete la normativa vigente sobre la eliminación de residuos, especialmente sobre baterías y pilas. Lleve a reciclar
las baterías solo si están descargadas
DE - Dieses ferngesteuerte Modell ist kein Spielzeug!
Geeignet für Personen ab 14 Jahren.
Achtung: Kinder unter 36 Monaten unbedingt fernhalten. ERSTICKUNGSGEFAHR!
Enthält verschluckbare Kleinteile.
GB - This model is not a toy!
Not suitable for people under 14 year.
Warning: Keep away necessarily children under 36 months. RISK OF SUFFACATION!
Contains small parts which can be swallowed.
FR - Ce modèle réduit n‘est pas un jouet!
N‘est pas adapté pour les personnes de moins de 14 ans.
Attention: Garder loin nécessairement enfants de moins de 36 mois. DANGER D‘ETOUFFEMENT!
Contient de petites pièces facilement avalables.
IT - Questo modello non é un giocattolo!
Sconsiliato per persone inferiori di 14 anni.
Attenzione: Tenere lontano assolutamente i bambini inferiori ai 36 mesi. PERICOLO DI AFFOGAMENTO!
Contiene pezzi piccoli.
ES - Este modelo no es un juguete!
No apropriado para menores de 14 años.
Atención: Mantenga necesariamente lejos de niños menores de 36 meses. ASFIXIA!
Contiene piezas pequeñas.
DE
Achtung!
Vor dem Betrieb:
Erst das Modell und dann den Sender
einschalten.
Bei Beendigung:
Erst das Modell und dann den Sender
ausschalten.
GB
Attention!
Before operating:
Switch the model on rst then the
transmitter.
When nisished:
First switch off the model then the
transmitter.
FR
Attention!
Avant l’utilisation:
Allumez en premier modèle puis seule-
ment votre l’émetteur.
Après utilisation:
Arrêtez le modèle en premier puis votre
radiocommande.
IT
Attenzione!
Prima dell‘uso:
Accendete prima il modello e poi la
trasmittente.
Dopo l‘uso:
Spegnere prima il modello e poi la
trasmittente.
ES
¡Atención!
Antes del uso:
Encender primero el modelo, y después
la emisora.
Después del uso:
Apagar primero el modelo, y después
la emisora.
DE - Modell
1. Rotorblätter vorne (weiß)
2. Rotorblätter hinten (schwarz)
3. Ladeanschluß
4. Ein-/Ausschalter
GB - Model
1. Front rotor blades (white)
2. Rear rotor blades (black)
3. Charging port
4. On-Off Switch
FR - Modéle
1. Pales du rotor avant(blanc)
2. Pales du rotor arrière (noir)
3. Port de charge
4. Interrupteur On/Off
IT - Modello
1. Pale des rotore anteriore (bianco)
2. Pale del rotore dietro (nero)
3. Porta di ricarica
4. Interruttore ON/OFF
ES - Modelo
1. Palas rotor delante (blanco)
2. Palas rotor atrás (negro)
3. Puerto de carga
4. Interruptor On/Off
1
2
3 4
No. 03 8320
DE - Gebrauchsanleitung
GB - Instruction
FR - Notice
IT - Istruzione
ES - Instrucciones
2
DE
Inbetriebnahme und Binden
Der Empfänger in Ihrem Modell ist mit ei-
ner Einschalt-Sicherheitsfunktion versehen.
Das garantiert, dass das Modell nur bindet
wenn es ein gültiges Sendersignal erhält.
Die korrekte Vorgehensweise ist wie folgt:
Schalten Sie das Modell ein. Dabei sollte
das Modell auf einer ebenen Fläche stehen,
damit sich das Gyrosystem während des
Bindens initialisieren kann. Die LEDs an
den jeweiligen Enden beginnen zu blinken.
Stellen Sie den Gashebel auf die unterste
Position (kein Gas) und schalten Sie den
Sender ein.
Zum initialisieren schieben Sie den Gas-
hebel ganz nach oben und wieder zurück.
Während des Fluges blinken die grünen
vorderen LED´s um Ihnen die Flugrichtung
anzuzeigen. Wenn im Flug zusätzlich die
roten LED´s blinken signalisiert Ihnen das
Modell das der Akku leer ist und geladen
werden muss.
Für den Transport sind die Steuerhebel
ausgesteckt und stecken im Sendergehäu-
se. Vor der Inbetriebnahme entnehmen Sie
die Steuerhebel aus dem Sendergehäuse.
Stecken Sie die Steuerhebel erst nach dem
Schließen des Sendergehäuses ein.
GB
Start to y and binding
Your RC model is tted with a Power-On
failsafe. This is designed to ensure that
the helicopter’s motor will not start unless it
detects a suitable radio-control signal. The
correct Start-Up sequence is as follows:
Switch on the model and place this on a
spacious at ground, at this time avoid
moving the helicopter so the radio and gyro
system can initialize. The LED on the mo-
del blinks.
Make sure that the throttle stick are at the
bottom (no throttle is given) and turn on the
transmitter.
For instalation put the gas pedal to the top
and back. During ight the front green LEDs
will light up for direction. Once the red LEDs
light up the model is indicating that the bat-
tery pack needs charging.
For transport reasons the control sticks are
unplugged and plugged in the transmitter
casing. Before ying, remove the control
sticks from the transmitter casing. Only
plug-in the control sticks after closing the
transmitter casing.
FR
Synchroniser le modèle avec l‘émetteur.
Le récepteur de votre modèle est équipé
d‘une fonction de sécurité. Cela garantit
que le modèle se connecte uniquement si
les signaux de l’ émetteur sont valides. La
procédure à suivre est la suivante:
Allumez le modèle. Pendant l’opération
le modèle devra se situer sur une surface
plane de sorte que le gyroscope puisse
s’initialiser pendant la synchronisation. Les
lumières LED à la n des branches com-
mencent à clignoter.
Poussez la manette des gaz jusqu’ à la po-
sition la plus basse (pas de gaz). Allumez
le récepteur.
Pour l’initialisation, poussez le manche des
gaz complètement en avant puis retour:
Pendant le vol les LEDs vertes de devant
clignotent pour vous montrer la direction de
vol. Quand les LEDs rouges clignotent en
vol le modèle vous signale que l’accu est
vide et doit être chargé.
Pour le transport les leviers de comman-
de sont enlevés et mis dans la boite de
l’émetteur. Avant de la mise en marche en-
levez les leviers de commande de la boite
de l’émetteur. Veuillez mettre les leviers ap-
rès avoir fermé la boite de l’émetteur.
IT
Avvio + binding del trasmettitore al mo-
dello
La ricevente del modello è dotato di una
funzionalità di accensione di sicurezza.
Questo garantisce, che il modello reagisce
solo quando riceve un segnale valido dal
trasmettitore. La procedura corretta è la
seguente:
Il modello si accende. In questo caso, il
modello dovrebbe essere su una supercie
piana in modo che il giroscopio può inizia-
lizzarsi correttamente. I LED del modello
cominciano a lampeggiare.
Portare l‘acceleratore nella posizione più
bassa (gas a zero). Accendere il trasmit-
tente
Per inizializzare premere la leva del gas
no sopra e tutto il tragitto indietro: Durante
il volo, il LED anteriore verde lampeggiano
per mostrarla la direzione di volo. Se in volo
anche i LED´s rossi lampeggiano le segnala
che la batteria del modello e scarica é deve
essere ricaricata.
Per il trasporto sono scollegati le leve di
controllo che sono collegate nella custodia
della radio. Prima della messa in funzione,
togliere la leva di controllo della custodia
della radio. Collegare la leva di controllo
solo dopo aver chiuso la custodia della
radio.
ES
El primer uso + Enlazar la emisora con
el modelo
El receptor de su modelo está provisto de
una función de seguridad de encendido. De
esta forma garantiza, que el modelo sola-
mente se enlaza, cuando recibe una señal
de transmisión correcta. La forma correcta
de comenzar es la siguiente:
Encienda el modelo.In questo caso, il mo-
dello dovrebbe essere su una supercie
piana in modo che il giroscopio può inizializ-
zarsi correttamente. Los LEDs comienzan a
parpadear.
Baje el stick del acelerador del todo (ningu-
na aceleración). Encienda la emisora.
Para iniciar, presione la palanca de gas
hacia arriba y nueve mente hacia atrás: Du-
rante el vuelo, el LED frontal verde parpa-
dean para mostrarle la dirección de vuelo.
Si en el vuelo además los LED´s rojos par-
padea, el modelo le señala que la batería
esta vacia y se debe cargar.
Para motivos de trasporte, las palancas de
control estan desenchufados y estan en-
chufados en la caja de emisora. Antes de
la puesta en marcha, quite la palanca de
control desde la caja de emisora. Ponga la
palanca de control solo despues de cerrar
la caja de emisora.
DE - Sender
Um die Batterien einzulegen müssen Sie
zuerst den Halteclip entfernen. Er ist nur an
2 Haltenasen eingeklemmt und kann leicht
entfernt werden. Nach dem Batterien ein-
gelegt wurden (auf Polarität achten), muss
dieser Halteclip wieder angebracht werden
um die Batterien an Ihrem Platz zu halten.
Ladevorgang am Sender
Die Fernsteuerung und das Modell müssen
ausgeschaltet sein. Die Ladestation an der
Fernsteuerung leicht nach oben ziehen und
das Modell auf die Ladestation stecken. -
Während des Ladevorgangs leuchtet die
Lade-LED. Wenn die Lade-LED erlischt, ist
der Ladevorgang abgeschlossen.
Nach etwa 40 - 60 min. ist der Ladevorgang
abgeschlossen, die Flugzeit bei vollgelade-
nen Akku beträgt ca. 5 - 10 Min.
Achtung:
Sollte die Lade-LED nicht leuchten ist
das Modell entweder schon vollgeladen
oder der Kontakt zur Ladestation unter-
brochen. Sollte letzteres der Fall sein be-
wegen Sie das Modell während es an der
Ladestation hängt etwas hin und her bis
die LED leuchtet.
GB - Transmitter
To insert the batteries, you have to remove
the holding clip rst. It is clamped only at
two retaining lugs and can be easily remo-
ved. After the batteries are inserted (obser-
ve the polarity). the retaining clip must be
retted to keep the batteries at its place.
Charging on the transmitter
The radio control and modell must be swit-
ched off. Move the charging station on the
remote control upward. Plug-in the model
onto the loading station of the remote con-
trol. The Charge-LED will light up during
charge. When the LED will light off the char-
ging process is completed.
The charging process should take approx.
40 - 60 min. and should give you approx.
5 - 10 min. ying time.
Attention:
In case the charging LED does not light
up, then the model is either fully charged
or the contact to the charging station is
interrupted. In case of an interruption,
move the model once attached to the
charging station for the LED to light up.
FR - Radiocommande
Pour pouvoir mettre les piles, il faut d’abord
enlever le clip. Il est xé avec deux supports
nez et l’enlèvement est très simple. Après
avoir mis les piles (respectant la polarité), le
clip doit être xé.
Processus de charge au travers de
l’émetteur
La radiocommande et votre modèle doivent
être éteints. Tirez la station de charge de la
radiocommande un peu vers le haut et met-
tez le modèle sur la station de charge de la
radiocommande.
La charge est complète après environ 40 -
60 minutes et la durée de vol est de l‘ordre
de 5 - 10 minutes.
Attention :
Quand la LED de chargement n’éclaire
pas, le modèle est chargé entièrement
ou le contact à la station de charge est
coupé. Au cas cité dernier veuillez agi-
ter le modèle pendant il est connecté
avec la station de charge jusqu’à la LED
s’allume.
IT - Trasmittente
Per inserire le batterie deve rimuovere le
clip. E incastrato solo a due linguette e puó
essere facilmente rimorso. Dopo che le bat-
terie sono state inserite (rispettando la po-
larità), si deve rimontare il supporto clip per
mantenere le batterie al suo posto.
Ricarica tramite trasmittente
Il radiocomando e il modello devono esse-
re spenti. Tirare la stazione di ricarica alla
radio leggermente verso sopra e collegare
il modello nella stazione di ricarica della
radio. Il LED sul trasmettitore si accende
durante la carica. Appena completata la
carica, il LED si spegne.
La ricarica é completata in 40 - 60 min‘ e la
durata del volo é mediamente di 5 - 10 min.
Attenzione:
Se il LED di ricarica non brilla può essere
che il modello e già completamente cari-
cato o il contatto alla stazione di ricarica
è interrotto. Qualora quest’ultimo sia il
caso, deve muovere il modello mentre e
collegato alla stazione di ricarica un po’
in avanti e indietro no a quando il LED
si accende.
ES - Emisora
Para inserir las baterías hay que quitar el
clip. Esta engrapado en dos soportes y se
puede quitar fácilmente. Después de poner
las baterías (respetando la polaridad), este
clip debe ser reajustado para mantener las
baterías en su lugar.
Carga en la emisora
El mando a distancia y el modelo deben
estar apagados. Asegúrese de que tanto la
emisora y el modelo están apagados. Tire la
estacíon de carga en la emisora ligermente
hacia arriba y conectar el modelo en la es-
tación de cargar de la emisora.
El proceso de carga es de unos 40 - 60 min.
minutos y permitirá un rango de vuelo de
entre 5 - 10 min.
Atención:
Si el LED de carga no brilla puede ser
que el modelo esta ya completamente
cargado o el contacto con la estación de
carga se interrumpe. Si este es el caso
tienen que mover el modelo mientras
esta conectado en la estación de carga
un poco hacia atrás y adelante hasta que
el LED se ilumina.
DE - Flugübungen
Bevor Sie iegen informieren Sie sich zu-
erst über seine Steuerfunktionen und führen
einige Übungen durch. Platzieren Sie das
Model mit der Hinterseite zu Ihnen zeigend
(schwarzen Rotorblätter) auf einer ebenen
Fläche. Üben Sie zuerst den Schwebeug
mit dem Gasknüppel zu kontrollieren. An-
schließend versuchen Sie die Position des
Models mit Hilfe des rechten Steuerknüp-
pels zu verändern (vorwärts, rückwärts und
seitwärts) und gegebenenfalls abzufangen.
Zuletzt sollten Sie das Drehen des Models
um die eigene Achse mit dem linken Steu-
erknüppel üben. Wenn Sie die Grundfunk-
tionen des Models beherrschen können
Sie sich an Ihren ersten kontrollierten Flug
machen.
GB - Practice simulation ight
Before ying with the model check rst
about its control functions and perform
some exercises. Place the model with the
back facing to you (the black blades) on a
at surface. Practice only to hover with the
throttle control. Then, you try to change the
position of the model using the right stick
(forward, backward, sideways) and possibly
correct the ight. At last, you should practice
turning the model around its own axis with
the left stick. If you are into the basic func-
tions of the model you can perform your rst
controlled ight.
FR - Voler dans la pratique
Avant de faire voler le modèle, informez
vous de toutes ses fonctions de contrôle et
faîtes quelques essais. Placez le modèle
sur une surface platte, placez vous derriè-
re le modèle(les hélices noires). Essayez
de le faire planer avec la manette des gaz.
Ensuite essayez de changer la position du
modèle à l’aide de la manette droite (mar-
che avant, marche arrière, sur les cotés). Si
vous contrôlez toutes les fonctions de base
du modèle vous pouvez faire les premiers
vols.
IT - La pratica
Prima di volare il modello, consigliamo fare
conoscenza con tutte le funzioni di controllo
e di effettuare i primi voli di test. Posizionare
il modello su una super cie piatta, davanti
al pilota. Le eliche del modello devono es-
sere in posizione posteriore. Per primo, pro-
vare ad alzare il modello in volo, e tenerlo
“fermo” in volo. Poi provare a cambiare la
posizione del modello utilizzando la levetta
destra (per farlo andare in avanti/indietro e
destra/sinistra). Appena imparato le funzioni
di base, procedere ad effettuare i primi voli.
ES - Volando en la práctica
Antes de volar con el modelo, se recomi-
enda conocer todas la funciones de control
y hacer el primero vuelo de prueba. Posi-
cionar el modelo en una supercie plana,
en frente del pilota (las palas negras ). Las
palas del modelo deben estar en la posición
trasera. En primo lugar, pruebe a desp-
egar el modelo en vuelo, y tener jo en el
vuelo. A continuación, intente a cambiar
la posición del modelo usando la palanca
derecha (para que vas hacia adelante/atrás
y izquierda/derecha). Cuando se ha apren-
dido las funciones básico, proceda con los
primero vuelos.
white forward white forward
21 3 4
DE - Trimmen
Lassen Sie das Modell ruhig auf einer Stelle
schweben und beobachten Sie die Verän-
derungen beim betätigen der jeweiligen
Trimmtasten.
GB - Trimming
Let the model hover in one spot and watch
the changes in the respective by pressing
the trimm buttons.
FR - Trimmer
Laissez planer le modèle à une certaine
hauteur et observez les changements
quand vous actionnez les régulateurs du
trimmage
IT - Trim
Fare volare il modello ad una certa altezza
e osservare i cambiamenti quando si preme
i regolatori dei trim.
ES - Trim del modelo
Flotar tranquilamente el modelo y observar
los cambios mientras pulses el regulador
de trim.
white
right
left
white
forward
backward
white forward
DE
1. Turbo-Taste
Das Modell verfügt über 3 Ge-
schwindigkeiten. Um die Ge-
schwindigkeit zu wechseln drü-
cken Sie kurz die Turbotaste an
der Senderrückseite.
2. Flipmodus
Drücken Sie die Flip-Taste und
lassen Sie sie wieder los. An-
schließend wählen Sie mit dem
rechten Steuerknüppel in welche
Richtung das Modell den Flip aus-
führen soll.
GB
1. Turbo button
The model has 3 speed options.
To change in-between the speed
options, press the Turbo button
on the backside of the transmitter.
2. Flip mode
To execute a ip, press the ip
button once. Once the ip button
is pressed, move the right con-
trol stick in the direction the Flip
should be performed.
FR-
1. Touche Turbo
Pour changer la vitesse appuyez
en peu de temps la touche Turbo
au verso de l’émetteur.
2. Mode Flip
Pour faire un Flip appuyez sur
la touche Flip et la lâchez direc-
tement. Ensuite vous choisissez
avec le levier de commande droi-
te dans quelle direction le modèle
doit faire le Flip.
IT
1. Pulsante Turbo
Il modello ha 3 velocità. Per
cambiare la velocità premere e
lasciare il pulsante Turbo sul retro
della radio.
2. Modalità Flip
Per eseguire un ip, premere il
tasto Flip e lasciarlo. Subito dopo
scegliere con la leva di controllo
destra in quale direzione il model-
lo deve eseguire il Flip
ES
1. Botón Turbo
El modelo tiene 3 velocidades.
Para cambiar la velocidad, pre-
sione el botón turbo en la parte
posterior de la emisora.
2. Modo Flip
Para realizar un Flip pulse el
botón Flip y déjalo. Inmediata-
mente después elija con la pa-
lanca de control derecha en cual
dirección el modelo tiene que
hacer el Flip.
21
-
-+
+
3
DE
Austauschen der Rotorblätter
Sollte ein Rotorblatt gewechselt
werden, muss darauf geachtet
werden das richtige Blatt an den
richtigen Rotor zu montieren.
Die weißen Rotorblätter gehören
nach vorne und die schwarzen
Rotorblätter gehören nach hinten.
Achten Sie auch darauf welches
Blatt Links und welches Blatt
Rechts montiert wird! Orientieren
Sie sich dabei an der Abbildung.
Bei falsch montierten Rotor-
blättern wird das Modell un-
kontrollierbar sein! Zum Tausch
der Blätter ziehen Sie das Blatt
vorsichtig ab und drücken Sie das
neue Blatt wieder vorsichtig auf .
GB
Changing the main blades
If you have to change a main
blade you have to pay attention
of the rotor position of each main
blade.
The white coloured main blades
are meant to the front and the
black ones are meant for the rear.
Also pay attention of the left and
right mounting position of the
blades! Take an Example on the
picture.
If you mount the main blades in
wrong position the model will
get out of control! To change
the main blades drop out the
main blade carefully and press
the main blade back again.
FR
Echange des pales de rotor
Quand une pale de rotor doit être
remplacée, il faut prendre soin
de monter la bonne pale au rotor
correct.
Les pales de rotor blanc doivent
être montées devant et ces noir
pales de rotors en arrière. Faites
attention quelle pale sera montée
à gauche et laquelle à droite !
Veuillez regardez attentivement
l’image.
Le modèle sera ingérable en
cas des pales de rotor sont
montées mal! Pour échanger les
pales enlevez la pale tout en dou-
ceur. Apposez la nouvelle pale
timidement.
IT
Sostituzione de la pala rotore
Se deve cambiare una pala del
rotore, si deve assicurare di
montare la pala al rotore corretto.
Questa pala bianco e per avanti
e questa pala nero e per dietro.
Assicurarsi quale pala viene mon-
tata a destra e quale a sinistra!
Orientarsi all’immagine.
Se si montano le pale del rotore
non correttamente, il modello
sarà incontrollabile! Per sosti-
tuire le pale tirare la pala con at-
tenzione e premere la nuova pala.
ES
Sustitución de la pala del rotor
Si tiene que cambiar una pala de
rotor, debe asegurarse de que
montar la pala en el rotor cor-
recto. Esta blanco palas de rotor
son para adelante y esta palas de
rotor negro son para atrás.
Asegúrese qual pala vien monta-
da a la izquierda y qual pala en la
derecha! Orientarse a la imagen.
Al montar las palas del rotor
de forma incorrectamente, el
modelo será incontrolable!
Para cambiar las palas tire la pala
con cauta. Presione la nueva pala
con cauta.
white
black
DE - Hinweise zur Kalibrierung
der 6 Achsen Gyroelektronik
Falls sich das Modell in Folge
einer Kollision oder eines extrem
hektischen Flugmanövers unge-
wöhnlich verhält, in eine unge-
wünschte Richtung driftet, ohne
sich austrimmen zu lassen, oder
die Trimmung nicht abspeichert,
gehen Sie bitte wie folgt vor.
1. Schalten Sie das Modell und
den Sender aus.
2. Halten Sie während Sie den
Sender einschalten den linken
Knüppel nach links unten und
den rechten Knüppel nach rechts
oben gleichzeitig ca. 4 Sekunden
gedrückt.
3. Schalten Sie den Sender wie-
der aus.
4. Schalten Sie nun zuerst den
Sender und anschließend das
Modell ein. Geben Sie einmal
kurz Gas. Anschließend sollte das
Modell sich ganz normal austrim-
men lassen und die Trimmung
wieder abspeichern.
GB - Manual for calibrating the
6 axis gyro electronic
If the model shows unusual be-
havior as a result of a collision or
extremely hectic ight maneuvers
and always drifts in an unexpec-
ted direction without allowing you
to trimm out the copter please
proceed as follows.
1. Turn off the model and the
transmitter.
2. During switching on the
transmitter keep holding the
left stick to the bottom left and the
right stick to the upper right simul-
taneously for about 4 seconds.
3. Turn the transmitter off.
4. Now switch on the transmitter
rst and then the model. Use
throttle up and down once. Then
the model should be able to y
stable and save the trimming
again.
FR - Information sur calibrage
de l‘axe du 6 gyroscope
Si le modèle se comporte anor-
malement en raison d‘une colli-
sion ou d‘une manœuvre de vol
très mouvementé, par exemple le
modèle se dirige dans une direc-
tion non souhaitée sans pouvoir
le régler, nous recommandons les
étapes suivantes:
1. Éteignez le modèle et
l‘émetteur.
2. Prenez l‘émetteur: Allumez
l‘émetteur en poussant le stick
gauche en bas à gauche et le
stick droit en bas à droite, pen-
dant environ quatre secondes.
3. Éteignez l‘émetteur.
4. Allumez le modèle, puis
l‘émetteur. Poussez la manette de
gas vers l‘avant et vers l‘arrière.
Maintenant, le modèle peut être
reglé de nouveau.
IT - Informazione relativa alla
regolazione dei modelli con 6
assi Gyro:
Se il modello si comporta in modo
anomalo a causa di una collisione
o di un errato setting dei pulsanti
Trim, se in volo tende a muover-
si da solo in una direzione non
voluta, consigliamo la seguente
procedura:
1. Spegnere il modello e il tras-
mettitore.
2. Accendere il trasmettitore te-
nendo contestualmente entrambe
le leve di comando (leva sinistra
della trasmittente in basso verso
sinistra e leva destra della tras-
mittente in basso verso destra).
L’operazione deve essere fatta in
totale sincronia e tale posizione
deve essere mantenuta per alme-
no 4 secondi.
3. Spegnete il trasmettitore.
4. Accendete prima la trasmit-
tente e poi il modello. Spingere
la leva del gas in avanti e indietro.
Dopo il modello si può trimare
normalmente e memorizza il nuo-
vo Trim.
ES - Información relativa a la
regulación de 6 ejes Gyro:
Si el modelo se comporta de for-
ma anormal debido a una colisión
o un ajuste incorrecto de los boto-
nes Trim, si en vuelo tiende a mo-
verse por sí solo en una dirección
no deseada, le recomendamos
los siguientes pasos:
1. Apague el modelo y la emisora.
2. Encienda la emisora, mientras
que mantengas al mismo tiempo
las dos palancas de control (pa-
lanca izquierda de la emisora de
abajo a la izquierda y la palnca
derecha en la emisora en la parte
inferior derecha). La operación
debe realizarse en total sincronía
y esta posición debe mantenerse
durante al menos 4 segundos.
3. Apague la emisora.
4. Encender primero la emiso-
ra, y después el modelo. Dar
un poco de gas. Posteriormente
el modelo se puede trimar nor-
malente y guardar el nuevo Trim.
DE
Problembehebung und Lösungen
Die Empfangselektronik blinkt.
1. Das Modell empfängt kein Signal.
- Überprüfen Sie ob das Modell gebun-
den ist und der Sender eingeschaltet
ist.
Das Modell reagiert nicht.
1. Sie sind ausser Reichweite.
- Verringern Sie die Distanz zum Modell
2. Die Senderbatterien sind zu schwach.
- Erneuern Sie die Senderbatterien.
Die Rotoren machen ungewöhnliche
Geräusche.
1. Ein Rotorblatt ist beschädigt.
- Wechseln Sie das Rotorblatt.
Nach dem Blatt-Tausch iegt das Modell
nicht richtig.
1. Die Blätter sind falsch montiert.
- Montieren Sie die Blätter richtig.
Nach dem Laden hebt das Modell nicht
ab.
1. Akku oder Ladegerät sind defekt.
- Akku oder Ladegerät ersetzen.
2. Der Akku ist nicht voll aufgeladen.
- Laden Sie den Akku immer vollständig
auf.
Die LED´S blinken und das Modell hat
keine Leistung.
1. Der Akku ist leer.
- Laden Sie den Akku.
GB
Problems and solutions
The LED on the receiver is blinking.
1. The receiver don´t recieve a signal.
- Check the binding of the model and
make sure that the transmitter is
turned on.
The model don´t recognize.
1. You are out of reach.
- Decrease the distance to the model.
2. The transmitter batterys are to low.
- Put new batterys into the transmitter.
The rotor is making strange noises.
1. The rotor blade is damaged.
- Replace the rotor.
After changing the blades the model
don´t ies properly.
1. The blades are not installed properly.
- Install the blades properly
The model don´t rise up after charging.
1. Battery or charger are damaged.
- Replace battery or charger.
2. The battery was not charged enough.
- Always charge the battery till it is full #
charged.
The LED´s are blinking and the model
don´t have the full power.
1. The battery is empty.
- Recharge the battery.
FR
Problèmes possibles et solutions
L‘électronique récepteur clignote.
1. Le modèle ne reçoit pas de sig
nal
- Vériez si le modèle est connecté et
l‘émetteur est mis en marche.
Le Modèle ne réagit pas.
1. Vous êtes hors d‘atteinte
- Diminuez la distance au modèle
2. Les piles de l‘émetteur sont trop faibles
- Renouvelez les piles de l‘émetteur.
Les rotors font des bruits inhabituels.
1. Un rotor est abîmé.
- Remplacez la pale.
Après l‘échange de pale le modèle ne
vole pas correctement.
1. Les pales sont montées mal.
- Montez les pales correctement.
Le modèle ne décolle pas.
1. L‘accu ou le chargeur sont en panne.
- Remplacez l‘accu ou le chargeur.
2. L‘accu n‘est pas chargé complètement.
- Chargez l‘accu toujours totalement.
Les LED‘s clignotent et le modèle n‘a
aucune puissance.
1. L‘accu est vide.
- Chargez l‘accu.
IT
Soluzione del problema
La ricevente elettronica lampeggia.
1. Il modello non riceve alcun segnale
- Vericare se il modello e stato fatto il
binding e la radio sia accesa.
Il modello non risponde.
1. Siete fuori della autonomia.
- Ridurre la distanza dal modello.
2. Le batterie della radio sono deboli.
- Cambiare le batterie della radio.
I rotori fanno rumori insoliti
1. Una pala e danneggiate.
- Cambiare la pala.
Dopo aver cambiato la pala, il modello
non vola correttamente.
1. Le pale sono montate non
correttamente.
- Montare le pale correttamente.
Dopo la carica, il modello non decolla.
1. Batteria o caricatore sono difettosi.
- Sostituire la batteria o caricatore
2. La batteria non e completamente
caricata.
- Caricare la batteria sempre
completamente
I LEDs lampeggiano e il modello non ha
potenza.
1. La batteria e vuota.
- Caricare la batteria.
ES
Solución de problemas y soluciones
La electrónica receptor parpadea.
1. El modelo no recibe ninguna senal.
- Comprobar si el modelo está echo el
binding y la emisora encendida.
El modelo no responde.
1. Usted está fuera de su alcance.
- Reduzca la distancia en su modelo.
2. La baterías son débiles.
- Reemplace las baterías de la emisora.
Los rotores hacen ruidos inusuales.
1. Una pala de rotor está dañada.
- Cambiar la pala.
Después de sustituir la pala, el modelo
no vuela correctamente.
1. Las palas no estan montado bien.
- Montar las palas correctamente.
Después de la carga, el modelo no esta
despegando.
1. Batería o el cargador estan defectuoso.
- Cambiar la batería o el cargador.
2. La batería no esta cargada completa-
mente. Cargar la batería siempre com-
pletamente.
Los LEDs parpadean y el modelo no ti-
ene fuerza.
1. La batería está vacía.
- Cargar la batería.
DE - Ersatzteile GB - Spare parts FR - Pièces détachées IT - Pezzi di ricambio ES - Lista de repuestos
No. 03 8325
Rotorblätter
Rotorblades
Rotor principal
Pale principali
Rotores
No. 03 8326
Akku
Battery
Accu
Batteria
Baterìa
No. 03 8327
Sender (ohne Modell)
Transmitter (without model)
Emetteur (sans modèle)
Trasmittente (senza modello)
Emisora (sin modelo)
No. 03 8328
Steuerknüppel
Joystick
Levier de commande
Leva di contollo
Palanca de control
DE - Sicherheitshinweise
• Bitte lesen Sie die Bedienungsanleitung und Sicherheitshinweise sorgfältig durch bevor Sie das Modell in
Betrieb nehmen.
• Dieses Gerät ist nicht dafür bestimmt, durch Personen (einschließlich Kinder) mit eingeschränkten physischen, sen-
sorischen oder geistigen Fähigkeiten oder mangels Erfahrung und/oder mangels Wissen benutzt zu werden, es sei
denn, sie werden durch eine für ihre Sicherheit zuständige Person beaufsichtigt oder erhielten Anweisungen, wie das
Gerät zu benutzen ist.
• Der Benutzer ist im vollem Umfang für den richtigen Umgang mit dem Modell verantwortlich.
• Achtung: Gefahr von Augenverletzungen! Halten Sie einen Sicherheitsabstand von 1 - 2 Meter um sich oder andere
vor Verletzungen zu schützen.
• Jegliche Manipulation an der Struktur des Modells ist nicht erlaubt und führt zum sofortigen Verlust der Gewährleis-
tung.
• Fliegen Sie in keiner Umgebung mit mehr als +45°C und weniger als 10°C.
• Setzen Sie das Modell keiner direkten Sonneneinstrahlung, hoher Luftfeuchtigkeit oder Staubeinwirkung aus.
• Achten Sie darauf, dass manche Teile am Modell heiß werden können.
Betrieb
• Das Modell nicht aus großen Höhen fallen oder abstürzen lassen. Dies kann die Flugeigenschaften und die Lebens-
zeit des Modells beeinträchtigen.
• Aus Gründen der Sicherheit und um zufriedenstellende Flugergebnisse zu erzielen, ist auf einen ausreichend großen
freien Raum (ca. 6 x 5 x 2,5 m) zu achten. Dabei muss der Raum frei von Hindernissen (Lampen, losen Gegenstän-
den, etc.) sein. Außerdem sollte kein Luftzug vorhanden sein.
• Setzen Sie Outdoor-Modelle nur bei gutem Wetter ein. Bei Regen, Sturm oder gar Gewitter dürfen Sie diese Modelle
nicht betreiben.
• Um Unfälle zu vermeiden, iegen Sie das Modell nie in der Nähe von Personen, Tieren oder sonstigen Hindernissen.
Hände, Haare und lose Kleidung vom Rotor entfernt halten. Nicht in die Rotoren greifen!
• Suchen Sie ein Fluggelände, das den gesetzlichen Voraussetzungen entspricht und frei von Hindernissen wie Bäu-
men, Häusern usw. ist.
• Benutzen Sie das Fluggerät niemals in der Nähe von Flughäfen, Bahnanlagen oder Straßen. Halten Sie immer
ausreichend Abstand von den gefahrenträchtigen und besonders geschützten Bereichen.
• Betreiben Sie Ihr Modell nicht in der Nähe von Funkstationen, Hochspannungsleitungen, Transformatorkästen oder
ähnlichem! Diese Einrichtungen können Funkstörungen verursachen!
• Achtung! In einigen Ländern ist es vorgeschrieben für den Betrieb eines Modells eine spezielle Modellhalterhaft-
pichtversicherung abzuschließen. Informationen hierzu bekommen Sie bei den Modellsportverbänden oder bei
einer Versicherung.
Akkusicherheitshinweise
Durch die hohe Energiedichte (bis zu 150Wh/kg) sind die Zellen nicht ungefährlich und bedürfen einer besonderen
Sorgfalt! Die Firma JAMARA schließt daher ausdrücklich jegliche Haftung für Schäden aus, die durch den fehlerhaften
Umgang mit den Lithium-Polymer-Zellen entstehen.
• Bei unsachgemäßer Verwendung des Akkus besteht Brand- oder Verätzungsgefahr.
• Überladen, zu hohe Ströme, oder Tiefentladen zerstört die Zelle.
• Vor mechanischer Belastung (Quetschen, Drücken, Biegen, Bohren) schützen.
• Akkus keinesfalls öffnen oder aufschneiden, nicht ins Feuer werfen, von Kindern fernhalten.
• Behandeln Sie beschädigte oder auslaufende Akkus mit äußerster Vorsicht. Es können Verletzungen oder Schäden
am Gerät entstehen.
• Akkus auf keinen Fall kurzschließen und immer auf die richtige Polung achten
• Akkus vor Hitzeeinwirkung über 65°C schützen, fern von heißen Teilen (z. B. Auspuff) montieren.
• Vor der Lagerung (z. B. im Winter) die Akkus laden - nicht im entladenen und nicht im vollgeladenen Zustand lagern!
Bei längerer Lagerzeit sollte der Ladezustand gelegentlich kontrolliert werden.
• Der Inhalt der Zelle ist schädlich für Haut und Auge.
• Nach Hautkontakt mit viel Wasser abspülen und benetzte Kleidung ablegen.
• Nach Augenkontakt mit viel Wasser abspülen und einen Arzt konsultieren.
Sollte die Zelle sich überhitzen, aufblähen, rauchen oder brennen, darf dieses nicht mehr berührt werden. Hal-
ten Sie Sicherheitsabstand und stellen Sie geeignete Löschmittel bereit (kein Wasser Explosionsgefahr, gut
trockener Sand, Feuerlöscher, Löschdecken, Salzwasser).
Irrtum und technische Änderungen vorbehalten. Copyright JAMARA e.K. 2015
Kopie und Nachdruck, auch auszugsweise, nur mit Genehmigung von JAMARA e. K.
All rights reserved. Copyright JAMARA e.K. 2015
Copying or reproduction in whole or part, only with the expressed permission of JAMARA e.K.
JAMARA e.K.
Inh. Manuel Natterer
Am Lauerbühl 5 - DE-88317 Aichstetten
Tel. +49 (0) 75 65/94 12-0 - Fax +49 (0) 75 65/94 12-23
[email protected] ●www.jamara.com
Service - Tel. +49 (0) 75 65/94 12-66
kundenservice@ jamara.com
GB - Security instructions
• Read the instructions and security instructions carefully before using the model.
• This product is not intended for use by individuals (including children) with reduced physical, sensory or mental
capabilities or lack of experience and / or knowledge, unless they are supervised by a person responsible for their
safety and is able to give instructions about how the product should be used. Children should be supervised to ensure
that they do not play with the product.
• The User is fully responsible for the correct use of the model.
• Warning: Risk of eye injury! Keep a safe distance of 1 - 2 meters to yourself or others to protect against injury.
• The model should not be changed in any way, doing so will invalidate the guarantee.
• Do not y in temperatures above + 45° C or below 10° C.
• Protect the model from strong sunlight, moisture and dust.
• Be aware that some parts of the model may get hot.
Operating
• Do not let the model fall or crash from high height. This may affect the ight characteristics and lifetime of your model.
• To ensure safety and for best results, the model may only be own in a large open room (~ 6 x 5 x 2,5 m), free of
obstacles such as lights or furniture. In addition, no draft should be available.
• It must be observed that neither persons or animals or other obstacles are within the operating enviroment.
Keep hands, hair and loose clothing away from the rotor, not reach into the rotors.
• The Outdoor-model can only be own in good weather. Do not y in wind, rain or thunder storms.
• Find a place to y which complies with any laws, and is free from obstacles such as trees, houses and / or other
obstacles.
• Never use the model near an airport, railway or roads. Always keep a safe distance from potentially hazardous and
specially protected areas.
• Do not operate your model near radio stations, power lines, transformer boxes or similar facilities! This can result in
radio interference, causing loss of control over the model.
• Attention! In some countries it is a legal requirement to carry third party indemnity insurance when operating a radio
controlled model. Please ask your local dealer, governing body or your insurance company for details.
Safety precausions for battery
Because of the high power compactivity (up to 150 Wh/kg) the cells are quite dangerous and need special care! The
company Jamara excludes explicitly, all types of liability for damages, that can occure when using the Lithium-Polymer-
Cells indequate.
• When using the battery incorrect there is a risk of getting re or acid-injuries.
• Overcharging, too high power, or discharging at low level destroys the cell.
• Protect from mechanical stress (squeezing, pushing, bending, drilling).
• Never open or cut open, do not throw into re, keep away from children.
• Handle damaged or leaking battery with care. Injuries or damages to the product can occure.
• Under no circumstance short-circuit the device and always watch out for correct polarity.
• Protect batteries from heat above 65 °C , mount away from hot objects (for example exhaust pipe).
• Before storing batteries (for example in the winter) charge the battery. Do not store in fully charged or in non charged
state!
• If stored over a longer period of time, observe the power level occasionally.
• The contents of the cell is harmfull for skin and eye.
• If the content comes into contact with skin, clean with plenty of water and take off moisted clothes.
• If the content comes into contact with the eyes, clean with plenty of water and consult a doctor.
If the cell overheats, swells, burns or smoke is coming from it, do not touch it under any circumstances. Keep
away in a safe distance and prepare adequate extinguishing agents such (No water explosion, well dry sand,
re extinguishers, re blanket, salt water).
FR - Consignes de sécurités
• Veillez lire attentivement la notice et sécurités d’utilisation avant d’utiliser!
• Ce dispositif n‘est pas destiné à être utilisé par des personnes (y compris les enfants) dont les capacités physiques,
sensorielles ou mentales ou manque d‘expérience et / ou les connaissances pour être, sauf s‘ils sont surveillés par
une personne responsable de leur sécurité ou reçu des instructions sur la façon dont l‘appareil doit être utilisé. Les
enfants doivent être surveillés pour s‘assurer qu‘ils ne jouent pas avec l‘appareil.t.
• L’utilisateur prend la responsabilité entière du correct maniement du modèle.
• Attention: Risque de blessures à l‘oeil! Distance de sécurité d‘au moins 1 à 2 mètres à eux-mêmes ou d‘autres
protègent contre les blessures.
• Manipulez les éléments endommagés avec énormément de précautions. Des brûlures acides ou des dommages sur
l‘appareil. Sont à craindre.
• Ne volez pas si l‘air ambiant fait plus de +45°C ou moins de 10°C.
• N‘exposez jamais votre modèle directement dans les rayons du soleil, ne l‘utilisez pas par temps avec humidité
relative élevée ou dans un endroit plein de poussière.
• Attention, certaines pièces de votre modèle peuvent chauffer.
Mise en marche
• Ne pas laisser tomber le modèle de hauteurs élevées; ceci pourrait limiter les qualité de vol et la durée de vie du
modèle.
• Pour des raisons de sécurités et an de proter pleinement du plaisir en vol, veillez à toujours utiliser votre modèle
dans un endroit ayant sufsamment de place (~ 6 x 5 x 2,5 m) pour évoluer. Pour cela il est conseillé d‘avoir le moins
d‘obstacles possibles (lampes, bibelots,…) pouvant être fatal pour votre modèle. Uniquement utiliser à l‘intérieur, à
l‘abri des courants d‘air.
• Aucune personne, aucun animal ou outre obstracle ne dolvent se trouter dans l‘espace de fonctionnement de
modèle. Gardez les mains, cheveux et vêtement à bonne distance des parties en rotations, pas la main dans les
rotors.
• N’utilisez votre modèle outdoor que par temps ensoleillé. Surtout pas s’il pleut, s’il y a beaucoup de vent ou lors d’un
orage.
• Choisissez un terrain répondant aux exigences des textes de lois en vigueur pour faire évoluer votre modèle et libre
de tout obstacle comme par exemple arbres ou maisons etc.
• N‘utilisez jamais votre modèle volant dans les environs d‘un aérodrome ou aéroport, installations de chemins de fer
ou de routes. Gardez toujours une distance sufsante par rapport au zones de dangers ou protégées.
• N’utilisez jamais votre modèle dans les environs de stations d’émissions, lignes à haute tensions, transformateurs ou
équi valent! Ces installations peuvent provoquer des perturbations et entraîner la perte du contrôle de votre modèle
ou même du modèle lui-même!
• Attention ! Dans quelques pays il est nécessaire de souscrire à une assurance spéciale si vous souhaitez utiliser
des modèles réduits. Pour avoir plus d‘informations à ce sujet, veillez vous adresser au club de modèles réduits le
plus proche ou un organisme d‘assurance.
Consignes de sécurité de la accu
De part leur énorme densité énergétique (jusqu‘à 150Wh/Kg), les éléments Lithium ne sont pas sans dangers et né-
cessitent un soin accu! De ce fait, la société Jamara décline toute garantie pour les dégâts qui peuvent résulter d‘une
utilisation non conforme des éléments Lithium.
• Une utilisation non conforme peut déclencher un incendie ou des brûlures acides. Surcharge, des courants trop
élevés ou une trop grande décharge détruisent les éléments.
• Protégez les éléments contre des chocs mécaniques (pincement, pression, torsion, perçage).
• N‘ouvrez ou ne découpez en aucun cas les accus, ne les jetez pas dans le feu, et tenez les à bonne distance des
enfants.
• Manipulez les éléments endommagés avec énormément de précautions. Des brûlures acides ou des dommages sur
l‘appareil. Sont à craindre.
• Ne court-circuitez en aucun cas les accus et veillez à toujours respecter la bonne polarité.
• Protégé les accus d‘une température au-dessus de 65°C et eloignez ceux-ci de corps chauffants (par ex.: pots
d‘échappements).
• Chargez les accus avant stockage (par ex. : en hivers). Ceux-ci ne doivent pas être ni dans un état déchargé ni
pleinement chargé.
• Si vous souhaitez prolonger le temps de stockage, vériez régulièrement l‘état de charge.
• Le contenu des éléments est très dangereux pour les yeux.
• Après un contact avec la peau, rincez la zone avec beaucoup d‘eau et enlevez les vêtements touchés.
• Après un contact avec les yeux, rincez avec beaucoup d‘eau et consultez un médecin.
Si les éléments venaient à surchauffer, goner ou prendre feu, il ne surtout plus les toucher. Tenez-vous à
bonne distance de celles-ci et cherchez un extincteur adapté (Pas l‘eau (risque d’explosion), ainsi le sable sec,
extincteur, l‘eau salée).
IT - Istruzioni per la sicurezza
• Vi preghiamo di leggere attentamente le istruzioni e Istruzioni per la sicurezza prima di
usare il modello.
• Questo prodotto non è destinato ad essere utilizzato da persone (bambini compresi) con capacità
siche limitate, con limitazioni sensoriale o mentali oppure mancanza di esperienza e/o di
conoscenza. A meno che siano sorvegliate da una persona responsabile della loro sicurezza o
ricevano istruzioni su come usare il prodotto in modo corretto. Bambini devono essere
supervisionati per assicurare che non giocano con l’apparecchio.
• L’utente é responsabile in pieno per il corretto utilizzo del modello.
• Attenzione: Rischio di lesioni agli occhi! Distanza di sicurezza di 1 - 2 metri per sé o per altri protezione contro
eventuali lesioni. Vola il modello mai in prossimità di persone.
• Ogni modica alle parti di un kit ne annulleranno la garanzia.
• Fon volate con temperature superiori a 45°C.
• Non usate il modello in ambienti troppo umidi, polverosi o troppo soleggiati.
• Che alcune parti del modello può essere caldo il volo
Utilisation
• Non lasciate che il modello precipita di una grande altezza. Questo può inuenzare le caratteristiche di volo e la
durata del modello.
• Fate volare il vostro modello lontano da ostacoli ed in uno spazio (~ 6 x 5 x 2,5 m) abbastanza grande da evitare che
il modello possa scontrarsi con ostacoli che lo danneggerebbero. Utilizzare esclusivamente in ambiente interno privo
di correnti d‘aria.
• Nel luogo di funzionamento non devono essere presenti persone o animali né ostacoli di alcun tipo.
Tenete mani, capelli e parti svolazzanti lontane dalle pale in rotazione, non toccare i rotori.
• Volate sempre in aree libere legalmente autorizzate, lontane da case, alberi e/o altri ostacoli.
• Non utilizzare mai l´unita di volo nelle vicinanze di aeroporti, ferrovie o stazioni ferroviarie e strade. Mantenere
sempre una distanza di sicurezza adeguata dalle zone potenzialmente pericolose o di alta protezione.
• Non usate il modello nelle vicinanze di stazione radio, linea di alta tensione, casse di trasformazione oppure simile.
Queste installazioni causano disturbi frequenza che portano alla perdita del controllo no alla perdita del modello!
• Attenzione! In molti Paesi l‘ impiego di modelli radiocomandati richiede una assicurazione obbligatoria. Informatevi
perciò presso il vostro assicuratore o presso il vostro negoziante di ducia.
Sicurezza della batteria
Dovuto al grande carico energetico (no a 150 KW/h le batterie Litio non vanno sottovalutate e prese alla leggera, ma
richiedono una particolare cura. Per questo JAMARA e.K. declina ogni responsabilità sull‘ impiego di queste batterie e
dai danni che potrebbero derivare dal loro utilizzo.
• Un uso non appropiato di queste batterie può provocare incendi. E relative ustioni.
• I sovraccarichi ad alta intensità o le scariche profonde possono danneggiarle.
• Evitate le sollecitazioni meccaniche ( schiacciare, piegare, forare.)
• Non aprite, non gettate nel fuoco e non lasciate vicino ai bambini
• Manipolate con molta attenzione le batterie danneggiate o con perdita di liquido. Potreste
risultarne feriti.
• Non cortocircuitatele e vericate sempre che la polarità sia corretta.
• Vericate che non sorpassino mai i 65°C e non montatele vicino a fonti di calore ( tubi di scarico
dei motori o simili)
• Prima di metterle via per una sosta nel loro impiego, caricatele solo a metà. Non conservatele mai
a pieno carico. Durante il periodo di conservazione controllatele periodicamente.
• Il liquido contenuto nelle batterie é dannoso per la pelle e per gli occhi. In caso di contatto con gli
occhi, lavate abbondantemente con acqua e consultate il medico
• In caso di contatto con la pelle, lavate con acqua e togliete immediatamente i vestiti che si siano
In caso che il pacco batterie si dovrebbe riscaldare troppo rapidamente, gonarsi, fumare o prendere fuco non
la prendete nelle mani e non toccatela. Mantenete und distanza di sicurezza e in caso di incendio, spegnarla
con polvere antifuoco oppure con sabbia (No, acqua, pericolo di esplosione, sabbia asciutta, estintore, coperta
anti incendio, acqua di mare).
ES - Seguridad
• Lea atentamente las instrucciones y seguridad antes de poner el modelo en funcionamiento!
• Es producto no es para personas (incluidos niños) con discapacidad física, mental y sensonriais. O ninguna
experiencia ni conocimiento, a menos que vayan acompañados de un responsable o recibir instrucciones ¿Cómo se
debe usar. Los niños deben ser supervisados para asegurarse de que no te metas con el producto.
• El usario es responsable en su totalidad para el uso correcto del modelo.
• Precaución: peligro de lesiones en los ojos! Distancia de seguridad mínima de 1-2 metros a sí mismos oa otros
protegen contra lesiones.
• Se prohíbe cualquier modicación de la estructura del modelo ya que anulará la garantía inmediatamente.
• Nunca vuele en entornos donde la temperatura sea superior a +45° o inferior a 10°C.
No exponga el modelo a los rayos solares directos, a altos índices de humedad o entornos muy polvorientos.
• No olvide que muchas piezas del modelo pueden calentarse.
Operación
• No deje que el modelo cae desde una gran altura. Este puede afectar a las características de vuelo y la duración del
modelo.
• Para garantizar la seguridad, se debe volar en las divisiones (~ 6 x 5 x 2,5 m) amplias y sin obstáculos, como
lámparas y muebles. Use el modelo sólo en un interior sin corriente de aire.
• En el entorno de funcionamiento no deben haber personas, animales ni otros obstáculos. Mantenga las manos y el
cabello lejos del rotor, no introduzca las manos en los rotores.
• Utilice el modelo outdoor solo cuando las condiciones atmosféricas sean Buenas. No debería utilizar el modelo si
llueve, hay tormentas o se prevén malas condiciones atmosféricas.
• Busque un espacio abierto, que cumpla con la normativa vigente, y libre de obstáculos como árboles, edicios y / o
otros obstáculos.
• Nunca utilizar el aparato de vuelo cerca de los aeropuertos, ferrocarriles o carreteras. Mantenga siempre una
distancia segura de las áreas potencialmente peligrosas y especialmente protegida.
• Nunca utilizar el aparato de vuelo cerca de los aeropuertos, ferrocarriles o carreteras. Mantenga siempre una distan-
cia segura de las áreas potencialmente peligrosas y especialmente protegida.
• ¡Atención! En algunos países es imprescindible suscribir una póliza de seguros especial con cobertura para la
práctica del aeromodelismo. Encontrará más información sobre esto en su club local o contactando con una
aseguradora.
Seguridad de la batería
¡Debido a su densidad energética (hasta 150Kw/Kg.), los elementos no son inofensivos y necesitan de unos cuidados
mínimos!. La empresa Jamara e. K., de manera explicita, declina cualquier responsabilidad sobre los daños causado o
derivados, por un manejo erróneo de las baterías Litio.
• Una utilización inapropiada conlleva riesgo de lesiones y/o incendios.
• Los elementos se dañarán por sobrecargas, corrientes muy altas, o descargas profundas.
• Proteja las baterías de golpes, dobleces, perforaciones, tensiones, etc.
• Bajo ningún concepto las abra o corte, no las arroje al fuego, manténgalas lejos del alcance de los niños.
• Si están oxidadas o pierden electrolitos, manéjelas con mucho cuidado. Pueden estropear el dispositivo o causarle
lesiones.
• Nunca las cortocircuite, respetando en todo momento la polaridad.
• No permita que se calienten a más de 65ºC, aléjelas de partes calientes (P. Ej., la salida del escape).
• Cárguelas antes de guardarlas (p.ej., en invierno= - ¡No las guarde descargada ni tampoco a plena carga!
Controle regularmente el nivel de carga durante los periodos de almacenamiento prolongados.
• El contenido de los elementos es dañino para la piel y los ojos.
• Si entra en contacto con la piel, lávese con agua y quítese la ropa usada.
• En contacto con los ojos, enjuáguese con abundante agua y visite al médico.
En caso de sobrecalentamiento de la batería, o cuando se ina, humea o empieza a quemarse, ya no debe
tocarse de ningún modo. Por favor manténga una distancia de seguridad y ponga a disposición agentes para
extinción adecuados (No hay peligro de explosión en el agua, arena seca, extintores, mantas, agua salada).

Other Jamara Toy manuals

Jamara FLYBARLESS Sole V3 FBL 2,4 GHz User manual

Jamara

Jamara FLYBARLESS Sole V3 FBL 2,4 GHz User manual

Jamara Grand User manual

Jamara

Jamara Grand User manual

Jamara Bow Pro User manual

Jamara

Jamara Bow Pro User manual

Jamara Ferrari LaFerrari User manual

Jamara

Jamara Ferrari LaFerrari User manual

Jamara P-47 Thunderbolt User manual

Jamara

Jamara P-47 Thunderbolt User manual

Jamara Spirit User manual

Jamara

Jamara Spirit User manual

Jamara Shooter User manual

Jamara

Jamara Shooter User manual

Jamara Bob Gallop User manual

Jamara

Jamara Bob Gallop User manual

Jamara Starlet 006140 User manual

Jamara

Jamara Starlet 006140 User manual

Jamara Ferrari 488 User manual

Jamara

Jamara Ferrari 488 User manual

Jamara Lucky User manual

Jamara

Jamara Lucky User manual

Jamara Audi R8 LMS User manual

Jamara

Jamara Audi R8 LMS User manual

Jamara E-Rix 450 User manual

Jamara

Jamara E-Rix 450 User manual

Jamara Impulse Battle Station User manual

Jamara

Jamara Impulse Battle Station User manual

Jamara Yak 54 EPP Master User manual

Jamara

Jamara Yak 54 EPP Master User manual

Jamara Pfeil & Bogen Set Bow Pro User manual

Jamara

Jamara Pfeil & Bogen Set Bow Pro User manual

Jamara 460955 User manual

Jamara

Jamara 460955 User manual

Jamara Spycopter 500 User manual

Jamara

Jamara Spycopter 500 User manual

Jamara largos XXL User manual

Jamara

Jamara largos XXL User manual

Jamara 413108 User manual

Jamara

Jamara 413108 User manual

Jamara Spider User manual

Jamara

Jamara Spider User manual

Jamara Happy Slide User manual

Jamara

Jamara Happy Slide User manual

Jamara 405235 User manual

Jamara

Jamara 405235 User manual

Jamara 460565 User manual

Jamara

Jamara 460565 User manual

Popular Toy manuals by other brands

Align Trex 150 SFC RH15E01XT instruction manual

Align

Align Trex 150 SFC RH15E01XT instruction manual

Mattel P8944 instructions

Mattel

Mattel P8944 instructions

Hasbro Spiderman Street Spider Motorcycle... instruction manual

Hasbro

Hasbro Spiderman Street Spider Motorcycle... instruction manual

marklin 37257 instruction manual

marklin

marklin 37257 instruction manual

Smoby 7600410401 quick start guide

Smoby

Smoby 7600410401 quick start guide

Faller 190066-2 manual

Faller

Faller 190066-2 manual

battat BT2525Z quick start guide

battat

battat BT2525Z quick start guide

Mega Bloks Monster High GHOULIA YELPS manual

Mega Bloks

Mega Bloks Monster High GHOULIA YELPS manual

Eduard P-40N exterior manual

Eduard

Eduard P-40N exterior manual

Halfords W313 instruction manual

Halfords

Halfords W313 instruction manual

Tiger Electronics Star Wars Darth Maul Electronic Binoculars with listening... instructions

Tiger Electronics

Tiger Electronics Star Wars Darth Maul Electronic Binoculars with listening... instructions

Viessmann 1371 POST Operation manual

Viessmann

Viessmann 1371 POST Operation manual

marklin 7286 user guide

marklin

marklin 7286 user guide

Fisher-Price Soothe Baby with Lullabies and Ocean Sounds Instructions for use

Fisher-Price

Fisher-Price Soothe Baby with Lullabies and Ocean Sounds Instructions for use

Hobbico Heli-Max 200FP V-Cam instruction manual

Hobbico

Hobbico Heli-Max 200FP V-Cam instruction manual

Tomy THOMAS & FRIENDS 4750 Assembly instructions

Tomy

Tomy THOMAS & FRIENDS 4750 Assembly instructions

Fei Bao L-39 Assembly manual

Fei Bao

Fei Bao L-39 Assembly manual

Mattel HOT WHEELS FORMULA CIRCUIT instructions

Mattel

Mattel HOT WHEELS FORMULA CIRCUIT instructions

manuals.online logo
manuals.online logoBrands
  • About & Mission
  • Contact us
  • Privacy Policy
  • Terms and Conditions

Copyright 2025 Manuals.Online. All Rights Reserved.