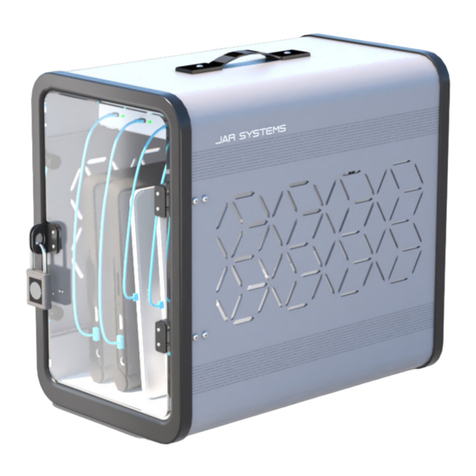
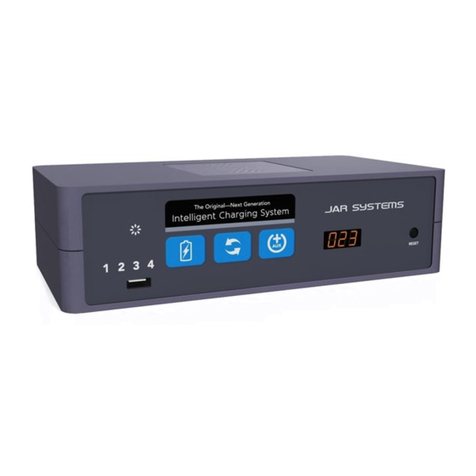
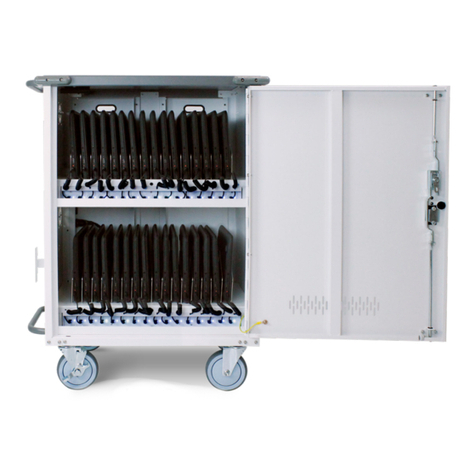
JAR Systems PB-80C24 User manual

User Manual | PB-80C24
Intelligent Charging System

Included
Charge ButtonPowerIcon
Manage Button
AUX Button
LEDDisplay Reset Button
USB Port
ChargingPortLEDs
Display Tour
Front
Back
Auxiliary OutletPower Connector Charging Ports
To Begin Charging:
OR

Quick Start Guide
To Begin Charging:
•Connect to Power
•Select Charging Mode...
Best used if all devices are powered
off and connected at the same time.
Power is discontinued when batteries
reach full charge to conserve energy.
Best used if all or some devices are
left on or are returned at different
times. Charging continues until it is
manually stopped.
OR
NOTE: The charging system should always be in MANAGE mode
in order to charge iPads and devices that remain in sleep mode.
MANAGE MODECHARGE MODE

Basic Functions
Charge Button
Pressing the CHARGE button will start charge mode. This is best used
when all devices are powered down and returned to the cart at the
same time. Charging will automatically stop when all batteries are
100% charged. You can also stop charging at any time by pressing
the CHARGE button a second time.
Manage Button
Pressing MANAGE button will start manage mode and turn on the
auxiliary power. This mode will continuously monitor and distribute
power until manually stopped. This mode is best used if some of the
devices may be left on when connected or if devices are connected
at different times. Press the button again to stop manage mode.
Auxiliary Power Button
Controls power to any peripherals that are plugged into the
AUX power strip in the back of the cart. If the AUX devices must
be operational during charging then the system must be in
manage mode. Be aware that this may lengthen charging time.
Charging Port LEDs
Indicates which sections of the cart are active. The charging unit
controls this automatically, ensuring that all devices inside are
charged in the fastest, most efficient way possible. When all four
quadrant LEDs are solid green, charging is complete.
Power Icon
Indicates when the cart is connected to power and is ready.
Reset Button
The Intelligent Charging System is protected with its own circuit
breaker. If it encounters misuse such as plugging in unsupported
devices or if there is a power surge, the circuit will trip and the
reset button will pop out. To reset the cart simply press it back in.
Please first ensure that everything is plugged in properly and that
only supported devices are connected before resetting.
0–59%
60–89% 90–100%

How to Set Automatic Manage Mode
First, enter the configuration mode:
The AUX button must be held down for at least four seconds. This
must be done immediately after power-up. To indicate we are in
configuration mode, a beep will be heard (A), the power icon will
change from solid blue to flashing orange. The LED display will
also display the current version number of the firmware.
While in this mode the default power mode can be changed.
To do so, press and hold the AUX button again until the beep is
heard, while still holding the AUX button, press and release the
manage button (B). The power icon will now flash very fast and the
LED display will show the current configuration mode. The display
will show one of the following:
1. oFF This indicates the auto power-up modes are off.
2. AC This indicates that the auto charge is enabled on power-up
3. A6 This indicates that the auto manage is enabled on power-up
Now each time the manage button is pressed, the display will cycle
through the three settings. Once the desired mode is reached,
press and hold the charge button until the beep is heard (C). The
power icon will now be flashing a the original slow rate and the
LED display will show CF6. This indicates the system has returned
to the main configuration state and the power-up configuration
has been saved.
To exit the configuration mode:
Press and hold both the AUX and charge buttons (D). The unit
will now return to normal operation. The power icon will return
to a solid blue.
4s
Setting an Automatic Start Up Mode
Automatic Manage Mode
The Intelligent Charging System can be set to automatically start up in manage mode when the
system is plugged in. In manage mode the devices will be charged automatically as they are
connected to the charging system without having to press the charge button.
+
A
B
C
D
4s

Installation
Integrating With a Cart
The Intelligent Charging System can be integrated with nearly any cart that meets the following
conditions. The power strips in the cart (up to four) must be able to be disconnected from the
timer/switch that is currently in the cart so that they can be diverted to connect directly with
the Intelligent Charging System. An existing auxiliary power strip may also be connected to the
appropriately labeled outlet on the Intelligent Charging System or an extra power strip may be
added for this purpose.
MountedInsideoftheCart Mounted on Top of the Cart
Installation Specifications
Installation procedures for the Intelligent Charging System vary depending on the environment
it is being used in. For help or ideas for installation, contact JAR Systems directly. To utilize
the included mounting bracket you will need four #6 (.1380) pan head self-drilling tapping screws
type CSD, cross-recess. The length required must be determined by the surface that it is to be
secured to. Be sure to leave enough space for the cables to extend from the back (at least 3.5”).
Always install the Intelligent Charging System in a ventilated space.
6.5”
2.5”
9.6”5”
2.6”

x4
Wiring Setup
Capacity
The Intelligent Charging System accommodates up to four power
strips with up to 16 outlets on each (E) as well as one auxiliary
power strip for peripheral devices. The charging outlets on the
back of the unit are labeled 1–4 corresponding to the numbered
LED indicators on the front of the unit. This allows the user to view
the charging status of each power strip.
To wire devices for charging:
1. Plug in one or more power strips into the charging outlets in
the back of the unit (F).
2. Plug the devices’ manufacturer-supplied charging adapters
into the power strip(s).
3. Plug the charging system’s main power cable into the power
connector in the back of the unit. Connect to the wall outlet
when ready to begin charging.
For help with integrating the Intelligent Charging System:
Disconnect from power before connecting or disconnecting any cables.
F
E
Using the System with a Network Switch
A network switch can be used with the Intelligent Charging System by connecting it to the
auxiliary outlet. Pressing the MANAGE button once prepares all connected devices for remote
management. The system will keep the devices charged when they are turned on for management
via Wake-on-LAN. If the devices are not fully charged, wait 2–3 hours before starting remote
management. Press the MANAGE button a second time to stop manage mode and discontinue
power to the auxiliary outlet.

This warranty does not cover, and JAR Systems,
LLC will not be responsible for, any damages
due to loss of use of the product, or any
other costs or expenses incurred by you or
anyone else who uses the product, whether
due to defects, breach of contract, negligence,
strict liability or otherwise. JAR Systems is not
liable for any indirect, special, incidental or
consequential damages related to the product
or this warranty. Some states do not allow
exclusions or limitations on consequential or
incidental damages, so these limitations or
exclusions may not apply.
This warranty gives you specific legal rights
and you may also have other rights that vary
from state to state. This warranty is governed
by the laws of Florida, excluding its conflict of
laws principles, unless your state requires that
its law be used.
Warranty
This product comes with a five-year warranty that
covers any defects in material or workmanship
and extends to the original consumer of the
product only. JAR Systems LLC will replace the
product with a new or refurbished product,
repair the product, send replacement parts, or
refund the purchase price of the product, at JAR
Systems LLC’s discretion. This warranty does
not cover accidental damage, unreasonable
use, neglect, tampering or other causes not
arising from defects in material or workmanship.
Any implied warranties last only as long as the
warranty periods listed above except where
state law does not allow limitations on how
long an implied warranty lasts. This includes
but is not limited to the implied warranties or
merchantability and fitness. JAR Systems LLC’s
responsibility is limited to the actions listed
above and nothing else.
Maintenance and Warnings
• TocleananddisinfecttheIntelligentCharging
System wipe the surface with a non-abrasive
cloth and rubbing alcohol.
• Keepawayfrommoisture.Donotplaceany
objects filled with liquids near the charging
system. As with any electronic system, take
care not to spill liquids into the unit.
• Donotattempttodismantleoropen.
• Donotoperateinextremetemperatures.
• Wiringandinstallationoftheunitshouldbe
done only by an adult.
• Donotplugunsupporteditemsintothe
charging system.
• Donotattempttomakemodicationstothe
system.Doingsowillvoidanywarranties.
• Donotobstructanyventilationopenings.
Visit JAR-Systems.com/Support for instructional videos and more.
Table of contents
Other JAR Systems Batteries Charger manuals

JAR Systems
JAR Systems CS-1610 User manual

JAR Systems
JAR Systems ELEVATE MC-6 Series Use and care manual

JAR Systems
JAR Systems ADAPT6-USBC User manual

JAR Systems
JAR Systems CS-1610 User manual

JAR Systems
JAR Systems Adapt4 User manual

JAR Systems
JAR Systems ELEVATE MC-6 Series User manual

JAR Systems
JAR Systems PB-80C24 User manual

JAR Systems
JAR Systems Flex-Share CSE-1615 User manual

JAR Systems
JAR Systems PB-80C24H User manual

JAR Systems
JAR Systems Adapt4 User manual