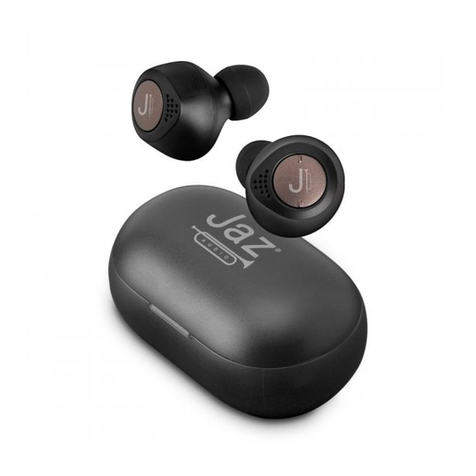
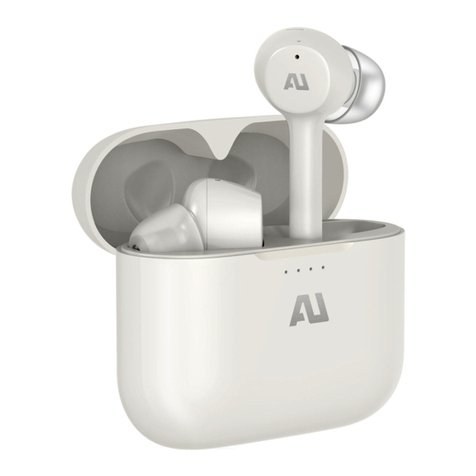
Jaz audio TWIN TWS SIMPHONY User manual

TEJZEARSYMPHTWSBTK
Wireless Stereo Earphones
TWS

SPECIFICATION
Wireless: V 5.0
Sensivity: 98dB
Working Range: 10 mt
Speaker power: 2mW
Radio frequency: 2.4GHz
Impedance:16Ω
Frequency:20Hz - 20kHz
Distortion: <5%
Battery earbuds: 50mAh
Charging case: 450mAh
Playing time:3 hours
Working time: 3 hours
Charge time: 2 hours
Stand by time:80 hours
Multifunction button
start recharge (power o) / stop recharge Micro-USB port
FRONT
BACK

UK User Manual 4
IT Manuale di istruzioni 6
F Mode d’emploi 8
D Bedienungsanleitung 10
ES Manual de instrucciones 12
P Manual de instruções 14
NL Gebruikershandleiding 16
RUS Руководство по эксплуатации 18
PL Instrukcja obsługi 20
TR Kullanim kilavuzu 22
GR Εγχειρίδιο χρήστη 24
AR 26
CZ Uživatelský manuál 28
SK Používateľská príručka 30
For other informations please contact us at
Distortion: <5%
Battery earbuds: 50mAh
Charging case: 450mAh
Playing time:3 hours
Working time: 3 hours
Charge time: 2 hours
Stand by time:80 hours

4
Recharging the base
Using a USB charging cable insert one end into the micro USB port
and then connect the other to the USB port of a computer or a travel
battery charger.
The base’s LED charging light flashes red during the charging phase
and turns solid red once charging is complete.
When fully charged, by pressing the power button on the base once
the LED lights up in blue.
Charging the earphones
Plug the headphones into the bottom then press the power button
at the base. The LED on the headphones will turn red, then become
blue once they are fully charged, before turning o altogether after
a few minutes.
Initial pairing (only required when pairing for the first time)
Press both MLF buttons on the earphones until the LEDs flash red
and blue.
Now, keep the MLF button on the right earphone pressed for about
3-4 seconds.
Wait a few seconds for both eaphones to connect to each other. Once
a connection is established, the LED on the right earphone will flash
red and blue, while the one on the left earphone will stop flashing.
Open your smartphone’s Bluetooth settings and select “JAZ
SYMPHONY”.
Switching on and associating both earphones
- Press and hold down the multi-function buttons (MLF) of the
earphones at the same time, until both the LEDs flash alternately
Blue / Red, and then let go.
- Wait a few seconds for the two earphones to associate with each
other. When the connection is made between them, only the LED on
the left earpiece will continue to flash alternately Red / Blue. Now
activate the Bluetooth on your phone --> and the pair of earphones
will be listed as the only device, searching for and selecting MINI
TWS LIGHT.
- Once the pair of earphones is connected to the smartphone, the LED
of both flashes Blue only --> meaning that the pair of earphones
and smartphone have been successfully associated!
Connection of a single ear piece (Left or Right)
- Press and hold down the multi-function button (MLF) on the
headset for a few seconds, until the LED starts blinking Blue / Red
alternately, then let go.
- Activate the phone’s Bluetooth --> search and select MINI TWS
LIGHT.
UK INSTRUCTION MANUAL

5
- Once the ear piece is connected to the smartphone, the LED will
flash only in Blue --> meaning the ear piece and smartphone have
been successfully associated!
IMPORTANT: having associated the ear piece for the first time, for
subsequent associations to the same smartphone simply activate
the ear piece(s) and, by activating the Bluetooth on the smartphone,
the earphones will be recognised and connect to the smartphone
automatically.
Mode of operation
When using a pair of earphones, the functions described below are
activated by pressing the MLF button on either of the two earphones.
Answer call: press key once quickly.
End call: press key once quickly to hang up.
Reject call: press button for about 2 seconds.
Last number re-call: press button twice quickly.
Play / Pause: press button once quickly.
Next track: press button for about 2 seconds.
NOTE: ONLY ONE EARPHONE WORKS WHEN MAKING CALLS
Shutdown
A - Press and hold the MLF button on the headset or both earphones
until the LED flashes red for 2 seconds and you will hear “Power
OFF”.
B - Insert the earphones into the charging base and press the
charging button on the front of the base. The earphones will turn
o automatically and start charging.
Safety precautions
- Read, follow and save these instructions, paying attention to all
warnings.
- Stop using the product immediately if it causes discomfort or pain.
During use it is recommended to keep the volume at a level that is
not harmful to your ears and allows you to hear noises around you.
Don’t have the volume up high!
- Store the appliance away from heat, moisture and dust.
- Do not use abrasive detergents to clean the earphones.
- Do not use near water devices (faucets, fountains, swimming pools,
washing machines, etc.) and do not allow the earphones to come
into contact with sharp objects.
- Keep away from WIFI, router or other high frequency transmission
equipment to prevent interruption of signal reception.
- Using the earphones while driving can distract you and increase the
likelihood of accidents.
- Battery life may vary depending on mode of use.
- Use within its range of activity (10m),preferably free from obstacles
along the route of connection to the connected device.
- Keep out of reach of children.

6
Ricarica della base
Utilizzare un cavo USB per la ricarica da inserire nella porta micro USB
e collegare poi ad un computer o ad un caricatore di batteria da viaggio.
Il LED di ricarica della base lampeggia in Rosso durante la fase di
ricarica e diventa Rosso fisso una volta completata la carica.
Da già carica, premendo una sola volta il pulsante di accensione della
base, il LED si accende in Blu.
Ricarica degli auricolari
Inserire gli auricolari nella base, poi premer il pulsante di accensione
della base. Il LED degli auricolari si accende in rosso, poi diventa blu a
ricarica completa, poi dopo alcuni minuti si spegne.
Prima associazione (passaggio da eettuare solo per la prima
associazione)
Premere entrambi i tasti MLF sugli auricolari fino a che i LED non
lampeggeranno rosso e blu.
a questo punto tenere premuto per circa 3-4 secondi il tasto MLF
dell’auricolare destro.
Attendere qualche secondo anché entrambi gli auricolari si
connettano tra loro. Una volta stabilita la connessione, il LED
dell’auricolare destro lampeggerà rosso e blu, mentre quello
dell’auricolare sinistro smetterà di lampeggiare.
aprire le impostazioni bluetooth dello smartphone e selezionare “JAZ
SYMPHONY”.
Accensione e associazione di entrambi gli auricolari
- Tenere premuti i tasti multifunzione (MLF) degli auricolari
contemporaneamente, fino a quando il LED di entrambi lampeggia
alternativamente Blu/Rosso, quindi non tenere più premuti i tasti.
- Attendere qualche secondo che i due auricolari si connettano tra loro.
A connessione avvenuta tra loro, solo il LED dell’auricolare sinistro
continua a lampeggiare alternativamente Rosso/Blu; quindi attivare
il Bluetooth del telefono --> sarà possibile individuare la coppia di
auricolari come unico dispositivo, cercando e selezionando MINI TWS
LIGHT.
- Una volta connessa la coppia di auricolari allo smartphone, il LED
di entrambi lampeggia solo in Blu --> associazione tra coppia di
auricolari e smartphone avvenuta correttamente!
Connessione di un solo auricolare (Sx oppure Dx)
- Tenere premuto il tasto multifunzione (MLF) sull’auricolare per
qualche secondo , fino a quando il LED inizia a lampeggiare
alternativamente Blu/Rosso, quindi non tenere più premuto il tasto.
- Attivare il Bluetooth del telefono --> cercare e selezionare MINI TWS
LIGHT.
- Una volta connesso l’auricolare allo smartphone, il LED lampeggia
solo in Blu --> associazione tra auricolare e smartphone avvenuta
correttamente!
IT MANUALE D’USO
7
IMPORTANTE: dopo aver eettuato la connessione la prima volta, per le
successive connessioni con lo stesso smartphone basterà eettuare la
procedura di attivazione degli auricolari e, attivando il Bluetooth sullo
smartphone, gli auricolari verranno automaticamente riconosciuti e si
connetteranno allo smartphone.
Funzionamento degli auricolari
Quando si utilizzano gli auricolari in coppia, le funzioni di seguito
descritte verranno attivate utilizzando indierentemente solo il tasto
MLF di uno dei due auricolari.
Rispondere a una chiamata: premere velocemente il tasto una volta.
Terminare una chiamata: premere velocemente il tasto una volta per
riagganciare.
Rifiutare una chiamata: tenere premuto per circa 2 secondi il tasto.
Richiamare l’ultimo numero: premere velocemente 2 volte il tasto.
Play / Pause: premere velocemente una volta il tasto.
Canzone successiva: tenere premuto per circa 2 secondi il tasto.
NOTA BENE: DURANTE LA CHIAMATA FUNZIONERÀ SOLO UN AURICOLARE
Spegnimento
A - Tenere premuto il tasto MLF sull’auricolare o su entrambi gli
auricolari fino a quando il LED lampeggia in rosso per 2 secondi e
si udirà “Power OFF”.
B – Inserire gli auricolari nella basetta di ricarica e premere il tasto
di ricarica sul fronte della basetta. Gli auricolari si spegneranno
automaticamente e inizieranno la ricarica.
Precauzioni di sicurezza
- Leggere, seguire e conservare queste istruzioni, prestando attenzione
a tutte le avvertenze.
- Sospendere l’utilizzo del prodotto immediatamente se procura disagio
o dolore. Durante l’uso si raccomanda di mantenere il volume ad un
livello che non sia dannoso per le vostre orecchie e che vi permetta di
udire i rumori circostanti. Non utilizzare un elevato volume!
- Conservare l’apparecchio lontano da fonti di calore, umidità e polvere.
- Non usare detergenti abrasivi per pulire gli auricolari.
- Non usare vicino ad apparati idrici (rubinetti, fontane, piscine, lavatrici
etc) e non consentire che gli auricolari vengano a contatto con oggetti
appuntiti.
- Tenere lontano da WIFI, router o altre apparecchiature di trasmissione
ad alta frequenza per impedire l’interruzione della ricezione del
segnale.
- Usare gli auricolari durante la guida può distrarvi ed aumentare la
probabilità di incidenti.
- La durata delle batterie può variare in funzione del modo di utilizzo.
- Usare all’interno del suo raggio d’azione (10m), preferibilmente in
assenza di ostacoli lungo il percorso di collegamento con il dispositivo
connesso.
- Tenere fuori dalla portata dei bambini.

8
Recharge de la base
Utiliser un câble USB de recharge à insérer dans le port micro USB puis
se connecter à un ordinateur ou à un chargeur de batterie de voyage.
La LED de charge de la base clignote en rouge durant la recharge et
devient rouge fixe une fois la recharge terminée.
Une fois chargée, appuyer une fois sur le bouton d’allumage de la base,
la LED devient bleue.
Recharge des écouteurs
Placer les écouteurs dans le boîtier, puis appuyer sur la touche
permettant de l’allumer. Le voyant LED des écouteurs s’allume en
rouge, puis devient bleu une fois la recharge terminée et s’éteint au
bout de quelques minutes.
Première association (passage à eectuer seulement lors de la
première association).
Appuyer sur les deux touches MLF sur les oreillettes jusqu’à ce que
les LED clignotent en rouge et bleu.
À ce moment-là, garder appuyée la touche MLF de l’oreillette droite
pendant 3-4 secondes
Attendre quelques secondes afin que les deux oreillettes
s’interconnectent. Une fois la connexion établie, la LED de l’oreillette
droite clignotera en rouge et bleu tandis que celle de l’oreillette
gauche cessera de clignoter.
Ouvrir l’installation Bluetooth du smartphone et sélectionner “JAZZ
SYMPHONY”.
Allumage et association des deux écouteurs
- Maintenir les touches multifonction (MLF) des deux écouteurs
enfoncées, jusqu’à ce que les LED clignotent en rouge et bleu puis
relâcher les touches.
- Attendre quelques secondes que les écouteurs se connectent entre
eux. Une fois la connexion établie, seule la LED de l’écouteur gauche
continue de clignoter en rouge et bleu ; activer alors le Bluetooth du
téléphone --> il est possible d’identifier la paire d’écouteurs comme
dispositif unique en recherchant et sélectionnant MINI TWS LIGHT.
- Une fois la paire d’écouteurs connectée au téléphone, les LED ne
clignotent plus qu’en bleu --> l’association entre la paire d’écouteurs
et le smartphone est réussie !
Connexion d’un seul écouteur (Droit ou Gauche)
- Maintenir la touche multifonction (MLF) de l’écouteur enfoncée
quelques secondes, jusqu’à ce que la LED se mette à clignoter en
rouge et bleu puis relâcher la touche.
- Activer le Bluetooth du téléphone --> rechercher et sélectionner MINI
TWS LIGHT.
- Une fois l’écouteur connecté au smartphone, la LED ne clignote plus
qu’en bleu --> L’association entre l’écouteur et le smartphone est
réussie !
FR NOTICE D’UTILISATION

9
IMPORTANT : après avoir établi la connexion la première fois, il sura pour
les connexions suivantes avec le même smartphone d’eectuer la procédure
d’activation des écouteurs et, une fois le Bluetooth activé sur le smartphone,
les écouteurs seront automatiquement reconnus et se connecteront au
smartphone.
Fonctionnement des écouteurs
Lorsque les écouteurs sont utilisés par paire, les fonctions décrites ci-
dessous seront activées en utilisant indiéremment l’une ou l’autre des
touches MLF des écouteurs.
Répondre à un appel : appuyer une fois rapidement sur la touche.
Mettre fin à un appel : appuyer une fois rapidement sur la touche pour
raccrocher.
Refuser un appel : maintenir la touche enfoncée pendant environ 2 secondes.
Rappeler le dernier numéro : appuyer deux fois rapidement sur la touche.
Play / Pause : appuyer une fois rapidement sur la touche.
Chanson suivante : maintenir la touche enfoncée pendant environ 2
secondes.
NOTE : UN SEUL ÉCOUTEUR FONCTIONNE PENDANT L’APPEL.
Éteindre
A – Maintenir la touche MLF enfoncée de l’écouteur ou des deux écouteurs
jusqu’à ce que la LED clignote en rouge pendant 2 secondes et que
l’annonce “Power OFF” soit émise.
B – Insérer les écouteurs sur la base de chargement et appuyer sur le
bouton de recharge situé à l’avant de la base. Les écouteurs s’éteindront
automatiquement et commenceront la recharge.
Consignes de sécurité
-
Lisez, suivez et conservez ces instructions, en prêtant attention à tous les
avertissements.
-
Cesser immédiatement d’utiliser le produit s’il cause de l’inconfort ou de
la douleur.
Pendant l’utilisation, il est recommandé de maintenir le volume à un niveau
qui ne nuit pas à vos oreilles et qui vous permet d’entendre les bruits
environnants. N’utilisez pas un volume élevé !
-
Rangez l’appareil à l’abri de la chaleur, de l’humidité et de la poussière.
-
N’utilisez pas de détergents abrasifs pour nettoyer vos écouteurs.
-
N’utilisez pas d’appareils à proximité de l’eau (robinets, fontaines, piscines,
machines à laver, etc.) et ne laissez pas vos écouteurs entrer en contact avec
des objets pointus.
Tenir à l’écart du WIFI, des routeurs ou de tout autre équipement de transmission
à haute fréquence pour éviter toute interruption de la réception du signal.
-
L’utilisation d’écouteurs au volant peut vous distraire et augmenter le risque
d’accident.
-
La durée de vie de la pile peut varier en fonction de la façon dont vous l’utilisez.
-
Utiliser dans sa portée (10 m), de préférence en l’absence d’obstacles le long de
la voie de connexion à l’appareil connecté.
-
Tenir hors de portée des enfants.

10
Laden der Basisstation
Verwenden Sie ein USB-Ladekabel, das Sie in den Mikro-USB-
Anschluss einstecken. Schließen Sie das Kabel im Anschluss an einen
Computer oder ein Reiseladegerät an.
Das Ladekontroll-LED blinkt während der Ladephase rot und leuchtet
nach Beendigung des Ladevorgangs durchgehend rot.
Wenn das Gerät geladen ist, leuchtet das LED durch einmaliges
Drücken des Netzschalters an der Basis blau.
Laden der Kopfhörer
Setzen Sie die Ohrhörer in die Basisstation ein und betätigen Sie dann
den Einschalter der Basis. Die LED der Ohrhörer leuchtet zuerst rot,
wird nach vollständiger Aufladung blau und erlischt schließlich nach
einigen Minuten.
Erste Verbindung (nur für die erste Verbindung durchzuführen)
Drücken Sie beide MLF-Tasten am Ohrhörer, bis die LEDs rot und blau
blinken.
Halten Sie an diesem Punkt die MLF-Taste am rechten Ohrhörer ca. 3-4
Sekunden lang gedrückt.
Warten Sie einige Sekunden, bis beide Ohrmuscheln miteinander
verbunden sind. Sobald die Verbindung hergestellt ist, blinkt die LED
des rechten Ohrstücks rot und blau, während die LED des linken
Ohrhörers aufhört zu blinken.
Önen Sie die Bluetooth-Einstellungen Ihres Smartphones und wählen
Sie “JAZ SYMPHONY”.
Einschalten und Verbinden beider Kopfhörer
- Drücken und halten Sie gleichzeitig die Multifunktionstasten (MLF)
der Kopfhörer, bis beide LEDs abwechselnd blau und rot blinken.
Lassen Sie die Taste los.
- Warten Sie einige Sekunden, bis die beiden Kopfhörer miteinander
verbunden sind.
Wenn die Verbindung hergestellt wird, blinkt nur die LED am linken
Ohrhörer abwechselnd rot/blau; Aktivieren Sie dann die Bluetooth-
Funktion des Telefons --> Es ist möglich, das Ohrhörerpaar als
einziges Gerät zu identifizieren, indem Sie MINI TWS LIGHT suchen
und auswählen.
- Sobald das Ohrhörerpaar mit dem Smartphone verbunden ist,
blinkt das LED an beiden Hörern Blau --> Die Verbindung zwischen
Ohrhörerpaar und Smartphone ist erfolgreich!
Verbinden von nur einem Ohrhörer (Rechts oder links)
- Drücken und halten Sie die Multifunktionstaste (MLF) am Headset für
einige Sekunden, bis die LED abwechselnd blau und rot zu blinken
beginnt. Lassen Sie die Taste los.
- Schalten Sie die Bluetooth-Funktion des Telefons ein --> Suchen und
wählen Sie MINI TWS LIGHT.
D GEBRAUCHSANLEITUNG

11
- Sobald das Headset mit dem Smartphone verbunden ist, blinkt das
LED Blau --> Die Verbindung zwischen Headset und Smartphone war
erfolgreich!
WICHTIG: Nachdem Sie die Verbindung zum ersten Mal erfolgreich
hergestellt haben, führen Sie bei späteren Verbindungen mit demselben
Smartphone die Aktivierung der Ohrhörer durch. Wenn Sie Bluetooth auf
dem Smartphone aktivieren, werden die Ohrhörer automatisch erkannt
und mit dem Smartphone verbunden.
Funktionen der Kopfhörer
Bei Verwendung eines Kopfhörers werden die unten beschriebenen
Funktionen nur mit der MLF-Taste eines der beiden Ohrhörer aktiviert.
Annehmen eines Anrufs: Drücken Sie einmal kurz die Taste.
Beenden eines Anrufs: Drücken Sie einmal kurz die Taste, um
aufzulegen.
Anruf ablehnen: Taste ca. 2 Sekunden lang drücken.
Anrufen der letzten Nummer: Drücken Sie die Taste zweimal schnell.
Play / Pause: Drücken Sie die Taste einmal schnell.
Nächster Titel: Drücken Sie die Taste für ca. 2 Sekunden.
HINWEIS: WÄHREND EINES ANRUFES FUNKTIONIERT NUR EIN HEADSET
Ausschalten
A - Halten Sie die MLF-Taste am Headset oder an beiden Ohrhörern
gedrückt, bis die LED 2 Sekunden lang rot blinkt und Sie „Power OFF“
hören.
B - Stecken Sie die Kopfhörer in die Ladestation und drücken Sie den
Ladeknopf an der Vorderseite der Basisstation. Die Kopfhörer
schalten sich automatisch aus und beginnen mit dem Aufladen.
Sicherheitsmaßnahmen
-
Lesen, befolgen und bewahren Sie diese Anweisungen unter Beachtung
aller Warnhinweise auf.
-
Unterbrechen Sie die Verwendung des Produkts sofort, wenn es
Unbehagen oder Schmerzen verursacht. Es wird empfohlen, die
Lautstärke auf einem Niveau zu halten, das nicht schädlich für die
Ohren ist und das es Ihnen erlaubt, die Umgebungsgeräusche zu hören.
Keine hohe Lautstärke verwenden!
-
Halten Sie das Gerät von Hitze, Feuchtigkeit und Staub fern.
-
Verwenden Sie keine scheuernden Reinigungsmittel zur Reinigung der
Ohrhörer.
-
Nicht in der Nähe von Wassergeräten (Wasserhähne, Brunnen,
Schwimmbäder, Waschmaschinen usw.) verwenden und die Ohrhörer
nicht mit scharfen Gegenständen in Berührung kommen lassen.
-
Halten Sie sich von WIFI, Routern oder anderen
Hochfrequenzübertragungsgeräten fern, um eine Unterbrechung des
Signalempfangs zu vermeiden.
-
Die Verwendung von Ohrhörern während der Fahrt kann Sie ablenken
und die Wahrscheinlichkeit eines Unfalls erhöhen.
-
Die Batterielebensdauer kann je nach Verwendungsart variieren.
-
Einsatz in Reichweite (10m), vorzugsweise ohne Hindernisse entlang
des Verbindungsweges zum angeschlossenen Gerät.
-
Außerhalb der Reichweite von Kindern aufbewahrt.

12
Cómo cargar la base
Conecta un cable USB al puerto micro USB y a un ordenador o a un
cargador portátil.
El LED de carga de la base parpadeará de color rojo mientras está
cargando,y se volverá rojo fijo cuando esté completamente cargada.
Una vez cargada, al pulsar una vez el botón de encendido de la base,
el LED se iluminará de color azul.
Cómo cargar la base
Inserta los auriculares en la base y, a continuación, pulsa el botón
de encendido de la base. El LED de los auriculares se iluminará
en rojo y se volverá azul cuando estén completamente cargados,
apagándose al cabo de unos minutos.
Primer emparejamiento (solo realizar la primera vez que se
emparejan)
Pulsa ambos botones MLF en los auriculares hasta que los LEDs
parpadeen en rojo y azul.
ahora mantén pulsado el botón MLF del auricular derecho durante
unos 3-4 segundos.
Espera unos segundos a que se conecten ambos auriculares entre
sí. Una vez establecida la conexión, el LED del auricular derecho
parpadeará en rojo y azul, mientras que el LED del auricular
izquierdo dejará de parpadear.
abre la configuración de Bluetooth de tu smartphone y selecciona
“JAZ SYMPHONY”.
Encendido y emparejamiento de ambos auriculares
-Mantén pulsado el botón multifunción (MLF) de ambos auriculares
al mismo tiempo hasta que el LED parpadee alternativamente de
color azul y rojo, y a continuación deja de pulsar el botón.
-Espera unos segundos hasta que los dos auriculares se conecten.
Después del emparejamiento, solo el LED del auricular izquierdo
seguirá parpadeando alternativamente de color azul y rojo; activa
el Bluetooth del teléfono --> podrás encontrar ambos auriculares
como un solo dispositivo, buscando y seleccionando MINI TWS
LIGHT.
-Una vez que ambos auriculares estén conectados al smartphone,el
LED de ambos parpadeará de color azul --> ¡el emparejamiento de
los auriculares y el smartphone se habrá realizado correctamente!
Conexión de un solo auricular (izquierdo o derecho)
-Mantén pulsado el botón multifunción (MLF) del auricular unos
segundos hasta que el LED empiece a parpadear alternativamente
de color azul y rojo, y a continuación deja de pulsar el botón.
-Activa el Bluetooth del teléfono --> busca y selecciona MINI TWS
LIGHT.
ES MANUAL DE INSTRUCCIONES

13
-Una vez esté conectado el auricular al smartphone, el LED parpadeará
de color azul --> ¡el emparejamiento del auricular y el smartphone se
habrá realizado correctamente!
IMPORTANTE: tras realizar la primera conexión, para las posteriores
conexiones con el mismo smartphone, simplemente enciende los
auriculares y, al activar el Bluetooth en el smartphone, el auricular lo
reconocerá automáticamente y se conectará.
Funcionamiento de los auriculares
Cuando se estén utilizando ambos auriculares a la vez, las funciones que
se indican a continuación se pueden activar pulsando el botón MLF de
cualquiera de los dos auriculares.
Responder a una llamada: pulsa rápidamente el botón una vez.
Finalizar una llamada: pulsa rápidamente el botón una vez para colgar.
Rechazar una llamada: mantén pulsado el botón durante unos 2
segundos.
Volver a llamar al último número: pulsa rápidamente 2 veces el botón.
Play / Pause: pulsa rápidamente el botón una vez.
Siguiente canción: mantén pulsado el botón durante unos 2 segundos.
NOTA: DURANTE LA LLAMADA FUNCIONARÁ SOLO UN AURICULAR
Apagado
A - Mantén pulsado el botón MLF del auricular o auriculares hasta que
el LED parpadee de color rojo durante 2 segundos y se escuche el
mensaje “Power OFF”.
B - Introduce los auriculares en la base de carga y pulsa el botón de
carga situado en la parte delantera de la base. Los auriculares se
apagarán automáticamente y empezarán a cargarse.
Precauciones de seguridad
- Lee, sigue y conserva estas instrucciones, prestando especial atención
a todas las advertencias.
- Deja de utilizar el producto inmediatamente si te causa molestias o
dolor.
Durante su uso se recomienda mantener el volumen a un nivel que
no resulte perjudicial para los oídos y te permita oír los sonidos a tu
alrededor. ¡No utilice los auriculares a un volumen alto!
- Guarda los auriculares lejos del calor, la humedad y el polvo.
- No utilices productos abrasivos para limpiar los auriculares.
- No utilices los auriculares cerca de lugares con agua (grifos, fuentes,
piscinas, lavadoras, etc.) y no dejes que éstos entren en contacto con
objetos punzantes.
- Mantenlos alejados de redes WiFi, routers u otros equipos de
transmisión de alta frecuencia para evitar problemas de interrupción
de la recepción de la señal.
- El uso de auriculares mientras conduces puede causar distracciones y
aumentar la probabilidad de sufrir un accidente.
- La duración de la batería puede variar dependiendo del modo de uso
de los auriculares.
- Úsalos dentro de su radio de alcance (10 m), preferiblemente sin
obstáculos entre los auriculares y el dispositivo conectado.
- Mantenlos fuera del alcance de los niños.

14
Recarga da base
Utilizar um cabo USB para a recarga inserindo-o na porta micro USB e
conetando-o a um computador ou a uma bateria de viagem.
O indicador LED de recarga da base pisca em vermelho durante a fase de
recarga, e passa a vermelho fixo uma vez que a carga esteja completa.
Se já estiver carregada, o indicador LED acender-se-á em cor azul
pressionando o botão de ligar a base apenas uma vez.
Recarga dos auriculares
Inserir os auriculares na base, em seguida pressionar a tecla de conexão
da base. O LED dos auriculares acende-se em cor vermelha, tornando-se
azul quando a carga estiver completa, e depois de alguns minutos desliga-
se.
Primeiro emparelhamento (passo a efetuar apenas para o primeiro
emparelhamento)
Pressionar simultaneamente ambas as teclas MLF dos auriculares até que
o LED deixe de piscar em vermelho e azul.
neste ponto manter pressionada a tecla MLF do auricular direito durante
cerca de 3–4 segundos.
Esperar alguns segundos até que ambos os auriculares se conectem entre
si. Depois de estabelecida a conexão, o LED do auricular direito começará a
piscar em vermelho e azul, enquanto o LED do auricular esquerdo deixará
de piscar.
abrir as definições bluetooth do smartphone e selecionar “JAZ SYMPHONY”.
Conexão e emparelhamento de ambos os auriculares
- Pressionar as teclas multifunções (MLF) dos auriculares
simultâneamente, até que os indicadores LED de ambos os auriculares
comecem a piscar alternativamente em azul/vermelho, neste momento
deixar de pressionar as teclas.
- Aguardar uns segundos até que os auriculares de conetem entre
si. Quando estiverem conetados entre si, apenas o indicador LED do
auricular esquerdo continuará a piscar alternativamente em azul/
vermelho; ativar então o Bluetooth do telefone --> será possível utilizar
o par de auriculares como dispositivo único, procurando e selecionando
a opção MINI TWS LIGHT.
- Uma vez que esteja conetado o par de auriculares ao smartphone, os
indicadores LED de ambos os auriculares começarão a piscar apenas em
azul --> o emparelhamento entre o par de auriculares e o smartphone foi
efetuado corretamente!
Conexão de apenas um auricular (Ex ou Dx)
- Pressionar a tecla multifunções (MLF) do auricular durante uns segundos,
até que o indicador LED comece a piscar alternativamente em azul/
vermelho, nesse momento deixar de pressionar a tecla.
- Ativar o Bluetooth do telefone --> procurar e selecionar MINI TWS LIGHT.
- Uma vez que esteja conetado o auricular ao smartphone, o indicador
LED começará a piscar apenas em azul --> o emparelhamento entre o
auricular e o smartphone foi efetuado corretamente!
P MANUAL DE UTILIZAÇÃO

15
IMPORTANTE: depois de efetuar pela primeira vez a conexão, para as
seguintes conexões com o mesmo smartphone será suficiente efetuar
o procedimento de ativação dos auriculares, e, ativando o Bluetooth no
smartphone, os auriculares serão imediatamente reconhecidos e conetar-
se-ão ao smartphone.
Funcionamento dos auriculares
Quando se utilizam os auriculares em par, as seguintes funções serão ativadas
utilizando de forma indiferenciada qualquer das teclas MLF de qualquer dos
auriculares.
Atender uma chamada: pressionar rapidamente a tecla uma vez.
Terminar uma chamada: pressionar rapidamente a tecla uma vez para
desligar.
Rejeitar uma chamada: pressionar a tecla durante 2 segundos.
Telefonar para o último número: pressionar a tecla 2 vezes rapidamente.
Play / Pause: pressionar a tecla 1 vez rapidamente.
Próxima música: pressionar a tecla durante aproximadamente 2 segundos.
TENHA EM ATENÃO: DURANTE A CHAMADA FUNCIONARÁ
APENAS UM DOS AURICULARES
Desligar
A – Pressionar a tecla MLF do auricular ou de ambos os auriculares
simultaneamente até que o indicador LED se acenda de forma intermitente
em cor vermelha durante 2 segundos, e em seguida se escutará “Power
OFF”.
B – Inserir os auriculares na base de recarga e pressionar a tecla de recarga
na parte frontal da base. Os auriculares desligar-se-ão automáticamente
e iniciarão a recarga.
Precauções de segurança
-
Ler, seguir e conservar estas instruções, prestando atenção a todas as
advertências.
-
Em caso de dor ou desconforto, suspender imediatamente a utilização do
produto.
Durante a utilização dos dispositivos, é recomendável manter o volume a um
nível que não provoque danos aos ouvidos e que permita escutar os ruidos à
sua volta. Não utilize o aparelho com um volume elevado!
-
Manter o aparelho afastado de fontes de calor, humidade e pó.
-
Não utilizar detergentes abrasivos para limpar os auriculares.
-
Não utilizar próximo de aparelhos que utilizem água (torneiras, fontes,
piscinas, máquinas de lavar, etc) e evitar o contato dos auriculares com
objetos afiados.
-
Manter afastado de emissores WIFI, routers ou otros aparelhos de
transmissão de alta frequencia para evitar interferências na receção do sinal.
-
Utilizar os auriculares durante a condução pode distraí-lo e aumentar a
probabilidade de acidentes.
-
A duração da bateria pode variar consoante a forma de utilização do aparelho.
-
Utilizar dentro do raio de ação (10m), preferivelmente em zonas onde não
existam obstáculos ao longo do percurso de emparelhamento com o
dispositivo conetado.
-
Manter fora do alcance das crianças.

16
Basisstation opladen
Gebruik een USB oplaadkabel die in de micro-USB-poort moet worden
geplaatst en maak vervolgens verbinding met een computer of een
reisacculader. De oplaad LED knippert rood tijdens het opladen en wordt
permanent rood als het opladen is voltooid. Als al is opgeladen, druk
eenmaal op de aan / uit knop op het basisstation, de LED gaat blauw
branden.
Headset opladen
Plaats de hoofdtelefoon in het basisstation en druk vervolgens op
de aan-knop van het basisstation. Op de hoofdtelefoon gaat een rood
lampje branden, wat blauw wordt als het opladen voltooid is en dan na
enkele minuten uitgaat.
Eerste koppeling (alleen uit te voeren bij de eerste koppeling)
Druk op beide MLF knoppen van de headset totdat de LED’s niet meer
rood en blauw knipperen.
Houdt op dit moment de MLF knop op de rechter headset nu ongeveer
3-4 seconden ingedrukt.
Wacht een paar seconden totdat beide headsets met elkaar verbonden
zijn. Zodra de verbinding tot stand is gebracht, knippert de LED van
de rechter headset rood en blauw, terwijl de linker headset stopt met
knipperen.
Open de bluetooth instellingen van uw smartphone en selecteer “JAZ
SYMPHONY”.
Inschakelen en koppelen van headset paar
- Druk tegelijkertijd op de multifunctionele knoppen (MLF) van de
headset totdat beide LED’s afwisselend blauw / rood knipperen en
houd de knoppen dan niet meer ingedrukt.
- Wacht een paar seconden totdat de twee headsets met elkaar zijn
verbonden. Na het koppelen, knippert alleen de LED op het linkeroor
gedeelte afwisselend rood / blauw; activeer vervolgens de Bluetooth
van de telefoon --> het zal mogelijk zijn om het headset paar te
identificeren als het enige apparaat, zoek en selecteer MINI TWS LICHT.
- Zodra de headset is verbonden met de smartphone knippert de LED
van beide alleen blauw --> koppeling tussen het headset paar en
smartphone is geslaagd!
Verbinden van een enkelzijdige headset (links of rechts)
- Houd de multifunctionele knop (MLF) op de headset een paar seconden
ingedrukt totdat de LED afwisselend blauw / rood knippert, en houd de
knop dan niet meer ingedrukt.
- Activeer de Bluetooth van de smartphone --> zoek en selecteer MINI
TWS LICHT.
- Zodra de headset is verbonden met de smartphone knippert de LED
alleen blauw --> koppeling tussen headset en smartphone is geslaagd!
NL HANDLEIDING

17
BELANGRIJK: na het maken van de verbinding voor de eerste keer, is het voor
de navolgende verbindingen met dezelfde smartphone voldoende om gewoon
de activeringsprocedure van de headset uit te voeren en de Bluetooth op de
smartphone te activeren, de headset zal automatisch worden herkend en maakt
verbinding met de smartphone.
Bediening headset
Als u een headset paar gebruikt, worden de hieronder beschreven functies
geactiveerd met alleen de MLF-knop van een van beide headsets.
Een oproep beantwoorden: druk eenmaal snel op de knop.
Een oproep beëindigen: druk eenmaal snel op de knop om op te hangen.
Een oproep weigeren: druk ongeveer 2 seconden op de knop.
Het laatste nummer terugbellen: druk twee keer snel op de knop.
Play / pauze: druk eenmaal snel op de knop.
Volgend nummer: houd de knop ongeveer 2 seconden ingedrukt.
OPMERKING: TIJDENS DE OPROEP ZAL ALLEEN EEN
HOOFDTELEFOON WERKEN
Uitschakelen
A - Houd de MLF-knop op beide headsets ingedrukt totdat de LED’s gedurende 2
seconden rood knipperen en u “Power OFF” hoort.
B - Plaats de headset in het oplaadstation en druk op de oplaadknop aan de
voorkant van het oplaadstation. De headset wordt automatisch uitgeschakeld en
begint met opladen.
Uitschakelen
- Houd de MLF-knop op beide headsets gedurende 5 seconden ingedrukt totdat
de LED’s gedurende 2 seconden rood knipperen en u “POWER OFF” hoort.
- Uitschakelen gebeurt automatisch wanneer de headset / headset paar zich
langer dan 5 minuten van de smartphone bevindt.
- Plaats de headset in het oplaadstation en druk op de oplaadknop aan de
achterkant van het oplaadstation. De headset wordt uitgeschakeld en begint
met opladen.
Veiligheidsmaatregelen
- Lees, volg en bewaar deze instructies, let op alle waarschuwingen.
- Stop onmiddellijk met het gebruik van het product als het ongemak of pijn
veroorzaakt.
Tijdens gebruik wordt het aanbevolen om het volume op een niveau te houden
dat niet schadelijk voor uw oren is en waarmee u omgevingsgeluiden nog kunt
horen. Gebruik geen hoog volume!
- Houd de headset uit de buurt van hitte, vocht en stof.
- Gebruik geen schurende schoonmaakmiddelen om de headset te reinigen.
- Headset niet gebruiken in de buurt van watervoorzieningen (kranen, fonteinen,
zwembaden, wasmachines, enz.) en zorg ervoor dat de headset niet in
aanraking komt met scherpe voorwerpen.
- Blijf uit de buurt van WIFI, router of andere hoogfrequente zendapparatuur om
onderbreking van de signaalontvangst te voorkomen.
- Het gebruik van de headset tijdens het rijden kan u afleiden en de kans op
ongelukken vergroten.
- De levensduur van de batterij kan variëren, afhankelijk van de gebruiksmodus.
- Gebruik binnen het bereik (10 m), bij voorkeur zonder obstakels langs het
verbindingstraject met het verbonden apparaat.
- Buiten het bereik van kinderen houden.

18
Подзарядка базы
Используйте USB-кабель для подзарядки, который необходимо вставить
в порт микро-USB, а затем подключить к компьютеру или зарядному
устройству для путешествий.
Светодиод подзарядки базы мигает красным во время фазы зарядки и
становится фиксированного красного цвета, когда зарядка завершена.
Когда подзарядка будет завершена, при нажатии кнопки питания на базе
один раз, светодиод загорится синим цветом.
Подзарядка наушников
Вставьте наушники в гнездо на базе, а затем нажмите кнопку питания
на базе. Индикатор гарнитуры загорается красным, после завершения
зарядки становится синим, а затем через несколько минут он
выключается.
Первое соединение (выполняется только для первого соединения)
Нажмите обе многофункциональные кнопки на наушниках, светодиодный
индикатор загорится красным и синим.
В этот момент удерживайте нажатой многофункциональную кнопку на
правом наушнике 3-4 секунды.
Подождите несколько секунд, пока оба наушника не соединятся друг
с другом. Как только соединение будет установлено, светодиодный
индикатор правого наушника начнет мигать красным и синим, а
светодиодный индикатор левого наушника перестанет мигать.
Откройте настройки bluetooth вашего смартфона и выберите“JAZ
SYMPHONY”.
Включение и подсоединение обоих наушников
- Одновременно нажмите и удерживайте многофункциональные кнопки
(MLF) наушников, пока оба светодиода не начнут мигать попеременно
синим/красным цветом, после этого отпустите кнопки.
- Подождите несколько секунд, чтобы два наушника соединились друг с
другом.
Когда они соединятся, только светодиод на левом наушнике будет
продолжать мигать попеременно красным/синим цветом; затем
активируйте Bluetooth телефона --> можно будет идентифицировать
пару наушников как единое устройство, путем поиска и выбора MINI
TWS LIGHT.
- После подключения пары наушников к смартфону, оба светодиодных
индикатора будут гореть только синим цветом --> соединение между
двумя наушниками и смартфонами выполнено правильно!
Подключение одной гарнитуры (левая или правая)
- Нажмите и удерживайте многофункциональную кнопку (MLF) на га
рнитуре в течение нескольких секунд, пока светодиод не начнет
попеременно мигать синим/красным, после этого отпустите.
- Активируйте Bluetooth телефона --> найдите и выберите MINI TWS LIGHT.
- Когда минигарнитура будет подключена к смартфону, светодиод начнет
мигать только синим цветом --> соединение между гарнитурой и
смартфоном выполнено успешно!
RUS РУКОВОДСТВО ПО ЭКСПЛУАТАЦИИ

19
ВАЖНО: после подключения в первый раз, для последующих соединений
с одним и тем же смартфоном, просто выполните процедуру активации
гарнитуры и, активируйте Bluetooth на вашем смартфоне, наушники будут
автоматически распознаваться и подключаться к смартфону.
Работа наушников
При использовании пары наушников функции, описанные ниже, будут
активированы с использованием клавиши MLF только одного из двух
наушников.
Ответ на вызов: быстро нажмите один раз кнопку.
Завершить вызов: нажмите быстро один раз кнопку, чтобы завершить
вызов.
Отклонить вызов: удерживайте кнопку нажатой в течение примерно 2
секунд.
Вызов последнего номера: нажмите быстро дважды кнопку.
Воспроизведение/Пауза: нажмите быстро один раз кнопку.
Следующая песня: удерживайте кнопку нажатой в течение примерно 2
секунд.
ПРИМЕЧАНИЕ: ВО ВРЕМЯ ВЫЗОВА РАБОТАЕТ ТОЛЬКО ГАРНИТУРА
Выключение
A - Нажмите и удерживайте кнопку MLF на гарнитуре или обоих наушниках,
пока светодиод не начнет мигать красным в течение 2 секунд, и вы
услышите «Power OFF» (Выключение).
B - Вставьте наушники в подзарядную базу и нажмите кнопку зарядки на
передней панели базы. Наушники выключатся автоматически и начнется
подзарядка.
Меры предосторожности
-
Прочитайте, следуйте и соблюдайте эти инструкции, обращая внимание на
все предупреждения.
-
Немедленно прекратите использование продукта, если он вызывает
дискомфорт или боль.
-
Во время использования рекомендуется поддерживать громкость на
уровне, который не является вредным для ваших ушей, и позволяет
слышать окружающие звуки. Не используйте на большой громкости!
-
Храните устройство вдали от тепла, влаги и пыли.
-
Не используйте абразивные чистящие средства для очищения наушников.
-
Не используйте вблизи водных устройств (краны, фонтаны, бассейны,
стиральные машины и т. д.). И не допускайте контакта наушников с
острыми предметами.
-
Храните вдали от WIFI, роутера или другого высокочастотного
передающего оборудования, чтобы предотвратить прерывание приема
сигнала.
-
Использование наушников во время вождения может отвлечь вас и
увеличить вероятность несчастных случаев.
-
Срок службы батареи может варьироваться в зависимости от режима
использования.
-
Используйте в пределах диапазона действия (10 м), предпочтительно в
условиях отсутствия препятствий вдоль пути соединения с подключенным
устройством.
-
Храните в недоступном для детей месте.

20
Ładowanie bazy
Do ładowania należy użyć kabla USB, podłączając go do portu microUSB.
Następnie podłącz go do komputera lub do podróżnej ładowarki.
LED ładowania bazy w trakcie ładowania będzie migał na czerwono,
natomiast po całkowitym naładowaniu bazy będzie stale świecił się na
czerwono.
Jeśli baza jest naładowania, przy jednokrotnym naciśnięciu włącznika
zasilania bazy, LED zaświeci się na niebiesko.
Ładowanie słuchawek
Włóż słuchawki do bazy, a następnie naciśnij włącznik zasilania bazy.
LED słuchawek zaświeci się na czerwono. Po całkowitym naładowaniu
zmieni kolor na niebieski, a następnie wyłączy się po upływie kilku minut.
Pierwsze parowanie (należy wykonać tę procedurę tylko w przypadku
pierwszego parowania)
Przyciśnij oba przyciski MLF na słuchawkach, aż do chwili, kiedy Ledy
zaczną migać na czerwono i niebiesko.
Wtedy, przyciśnij i przytrzymaj przez około 3-4 sekundy przycisk MLF
na prawej słuchawce.
Odczekaj kilka sekund, aż do obie słuchawki się połączą. Po nawiązaniu
połączenia, LED prawej słuchawki będzie migał na czerwono i niebiesko,
podczas gdy LED lewej słuchawki przestanie migać.
Wejdź do ustawień bluetooth smartfona i wybierz „JAZ SYMPHONY”.
Włączanie i parowanie obu słuchawek
- Naciśnij jednocześnie przyciski wielofunkcyjne (MLF) słuchawek
i przytrzymaj je, aż do momentu, kiedy LED-y znajdujące się na obu
słuchawkach zaczną migać naprzemiennie na niebiesko i czerwono.
Wtedy możesz zwolnić przyciski.
- Odczekaj kilka sekund, aby słuchawki sparowały się pomiędzy sobą.
Po sparowaniu jedynie LED lewej słuchawki będzie migał
naprzemiennie na czerwono i niebiesko. Następnie należy aktywować
Bluetooth w telefonie --> wybierz w telefonie MINI TWS LIGHT, aby para
słuchawek została aktywowana jako jedno urządzenie.
- Po podłączeniu pary słuchawek do smartfona LED-y obu słuchawek
będą migały na niebiesko --> połączenie smartfona z parą słuchawek
zakończyło się pomyślnie!
Podłączenie tylko jednej słuchawki (lewej lub prawej)
- Naciśnij przycisk wielofunkcyjny(MLF) słuchawki iprzytrzymaj go przez
kilka sekund, aż do momentu, kiedy LED zacznie migać naprzemiennie
na niebiesko i czerwono. Wtedy możesz zwolnić przycisk.
- Aktywuj Bluetooth w telefonie --> wyszukaj i wybierz MINI TWS LIGHT.
- Po podłączeniu słuchawki do smartfona LED będzie migał na niebiesko
--> parowanie smartfona ze słuchawką zakończyło się pomyślnie!
PL INSTRUKCJA OBSŁUGI
This manual suits for next models
1
Table of contents
Languages:
Other Jaz audio Headphones manuals

Jaz audio
Jaz audio TEJZEARSWING2BT User manual

Jaz audio
Jaz audio Note TWS User manual

Jaz audio
Jaz audio TEJZEARSPIRIBTK User manual

Jaz audio
Jaz audio Hard Bop User manual

Jaz audio
Jaz audio TEJZEARUPBEATTWSK User manual

Jaz audio
Jaz audio Chicago User manual

Jaz audio
Jaz audio TEJZEARRAGTIMEBTK User manual

Jaz audio
Jaz audio Twin TWS Free User manual