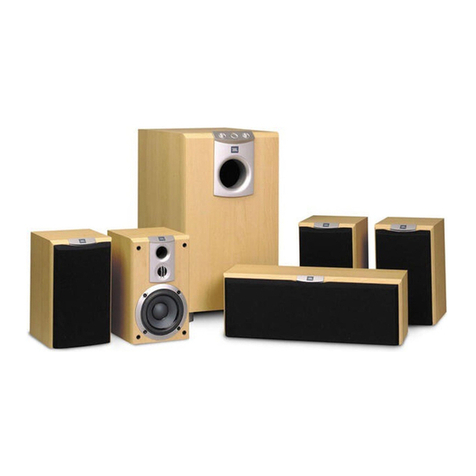
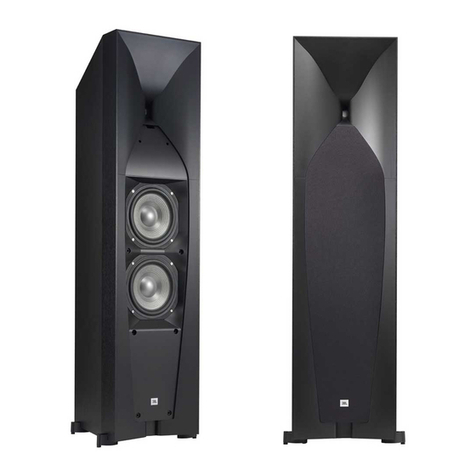
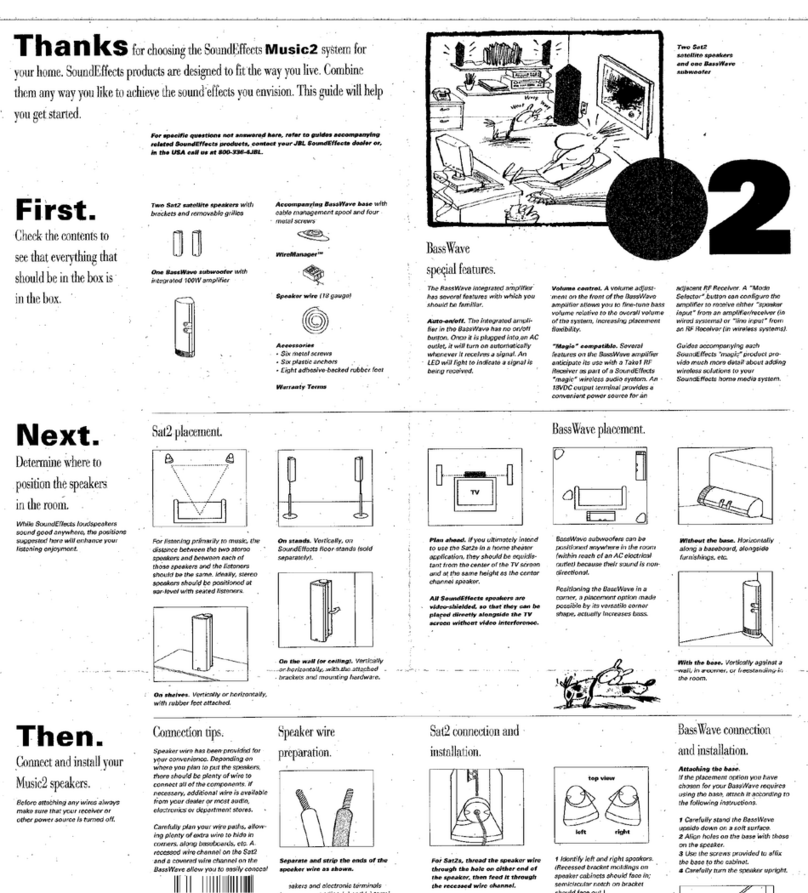
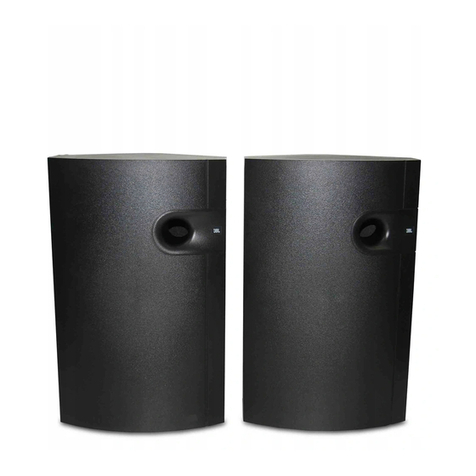
JBL Simply Cinema ESC340 User manual

Simple setup guide
Bedienungs- und Installationsanleitung
Simple guide d’installation
Guía básica de configuración
Eenvoudige installatiehandleiding
Semplice guida d’installazione
ort brugsvejledning
Asennus- ja äyttöohje
Manual de Instruções
TM
®
ESC340

TM
®
ESC340
Simple
setup guide
Thank youfor choosing JBL. For over 50 years, JBL has been
involved in every aspect of music and film recording and reproduction,
from live performances to monitoring the recordings you play in your
home, car or office.
We’re confident that the JBL system you have chosen ill provide every
note of enjoyment that you expected – and that hen you think about
purchasing additional audio equipment for your home, car or office,
you ill once again choose JBL.
JBL Consumer Products

-3-
The ESC340 offers t o unique
user-convenience features:
Automatic Turn-On/Shut-Do n
and Automatic Digital-Input
Selection.
The Automatic Turn-On feature
ill turn the ESC340 on as soon
as a source connected to its
digital inputs (such as DVD, CD
player ith digital output, or
any other device featuring a
coaxial or optical digital output)
is s itched on, or as soon as the
unit connected to its last-used
analog input starts outputting
sound.
When using digital inputs, the
Automatic Turn-On can be
activated by turning on either
one of the connected digital
sources such as a DVD player or
a CD player ith digital output.
When using analog inputs (TV or
AUX), Automatic Turn-On is
available only for the device
that as last listened to before
the ESC340 shut do n. In order
to listen to the other device, the
ESC340 input needs to be
manually selected by using the
Input button on the product and
on the remote, hich, in turn,
disables the Automatic Digital-
Input Selector until the ESC340
is shut do n.
The Automatic Turn-Off shuts
the unit do n five minutes after
all sources connected to its
digital inputs are po ered do n
and the device connected to its
selected analog input stops
playing.
The Automatic Digital-Input
Selector automatically selects
the source connected to its
digital inputs hen that source
is po ered on. Upon po er
do n of this digital unit, if no
other source is on, the ESC340
ill s itch itself off after five
minutes. If the analog source
that as selected prior to the
digital source turning on is still
playing, the ESC340 ill s itch
back to that other source. Once
a digital source is po ered on
and selected as an input,
turning on a device connected
to the other digital input ill
not s itch the input until the
selected digital device is first
po ered off.
These t o features can only be
used if the customer does not
manually turn the ESC340 on or
off, and does not manually
select an input source. Once
either of these selections is
made manually, the automatic
features are disabled as follo s:
1. If the ESC340 is turned off
manually, it ill not turn back
on automatically for at least five
minutes. During these five
minutes, it can be turned on
either from the front panel or
via the remote control.
2. Once an input source is
selected manually, the
Automatic Source-Selection
feature ill remain disabled
until the ESC340 shuts do n.
3. Once any one of the t o
devices connected to the ESC340
digital inputs is po ered on and
its input is selected by the
ESC340, the device connected to
the other digital input of the
ESC340 cannot be automatically
selected until the already-
selected digital device is
po ered do n.
Important Note
Automatic On/O and Automatic Digital-Input Selection

-4-
• Complete, self-po ered DTS,
Dolby* Digital surround
processor ith four satellite
speakers, a center channel
loudspeaker, sub oofer,
remote control, and all
amplification built-in.
(Just Add TV!)
• Dolby Digital, DTS, Dolby Pro
Logic*, including Phantom
and 3-Stereo, and Stereo
listening modes.
• Automatic Turn-On and Turn-
Off.
• Automatic Source S itching
for the digital inputs.
• T o digital (one optical and
one coaxial) inputs and t o
analog inputs.
• 2-Way video-shielded micro-
satellites ith titanium-
laminate t eeters and
common voicing for all five
channels, and an 8-inch,
long-thro , floor-firing
sub oofer.
• Late Night compression for
nighttime listening ithout
unexpected and objectionably
loud passages.
• All amplification and controls
are mounted in the
sub oofer, eliminating the
need for a separate control
unit.
• Remote controllable via
outboard remote eye that can
be mounted ith the center
channel or separately, so that
the sub oofer can be hidden
a ay.
Features
4 satellites and a center channel
loudspeaker.
“Smart” po ered
sub oofer/controller.
included
JBL
”
error free“ speaker cables.
Extension cable XC300 available
in 10-foot lengths in either
hite or black.
Foot for horizontal placement of
center speaker. Versatile remote
sensor and double-sided tape
provided.
Remote control.
Bass
Treble
Delay Level
0 dB Test
Adjustment
Late Night
Power
Mute
Surround
Mode
In ut
–+
–+
–+
Volume
Digital coax input cable and
analog RCA input cable.

-5-
About Dolby Digital
The ESC340 features Dolby
Digital (also unofficially kno n
as AC-3) multichannel signal
processing, a system developed
by Dolby Laboratories.
Dolby Digital, unlike “matrixed”
systems (such as Dolby Pro
Logic) that derive multichannel
sound from a t o-channel
source, is capable of delivering
information for one sub oofer
and five full-range channels as
discrete and individual channels
in digital AC-3 data format from
sources such as a DVD player.
The result is clear and accurate
digital sound to each speaker,
along ith availability of stereo-
surround effects (Dolby Pro
Logic features mono surrounds).
Dolby Digital is capable of
delivering several different
formats of surround sound, the
most robust one being the 5.1-
channel mode, hich provides
separate signals for five
satellite speakers as ell as for
a sub oofer. The ESC340
features a “5.1-Ch” indicator
that illuminates hen a Dolby
Digital 5.1-channel encoded
signal is present. Dolby Digital
can also provide other AC-3
digital multichannel signals, as
ell as 2-channel signals, hich
can be decoded via Dolby Pro
Logic processing into
multichannel surround sound.
About DTS
DIGITAL SURROUND
THE FINEST 5 .1 SURROUND
SOUND TECHNOLOGY ON THE
MARKET TODAY!
An amazing ne technology for
surround-sound entertainment,
DTS Digital Surround is an
encode/decode system that
delivers six channels (5.1) of
master-quality,20-bit audio.
In the encoding process, the
DTS algorithm encrypts six
channels of 20-bit digital audio
imformation in the space
previously allotted for ouly t o
channels of 16-bit linear PCM.
Then during playback, the DTS
decoder reconstructs the
original six channels of 20-bit
digital audio.
Each of these six channels is
audibly superior to the 16-bit
linear PCM audio found on
conventional compact discs.
• Wall-mount brackets and floor
stands available separately
for the satellites.
• Credit-card-type, full-
function remote control.
• JBL “error free” speaker
cables simplify connection
and eliminate possibility of
out-of-phase iring.
• Center foot for horizontal
placement of the center
channel.
• Rotatable JBL logos to allo
for vertical or horizontal
placement of the satellites.

-6-
On shelves. On the all. Optional bracket,
WB300 or WB300WHT ( hite).
Mounting Options
On optional stands, FS300
or FS300WHT ( hite).
Subwoo er
Surround Speakers
5-6ft.
(150-180cm)
Front and Surrounds Speakers
one. Speaker Placement
Satellites
0-60cm
Mounting Remote Sensor to Center Speaker.
Place remote sensor at bottom
of center speaker.
Insert support leg through
remote sensor and into
speaker.
Center speaker.
The remote sensor may be placed any here using the supplied double-sided tape.

-7-
two. Speaker, Source, and Remote-Sensor Connectors
(rear panel o subwoo er)
Speaker and Amplifier Connection
Dashed lines indicate that
wire is not incl ded
Extension cables, XC300, available in
10-foot lengths from yo r JBL dealer.
Left Front
TV
A dio O tp t
OPTICAL
Right Left
Center
Right Front
Remote Sensor
COAXIAL
TV
AUX
COAXIAL
OPTICAL
Right S rro nd
Left S rro nd
FRONT
SPEAKERS
SURROUND
SPEAKERS
RIGHT
CENTER
LEFT
RIGHT
LEFT
AC POWER
ON / STANDBY
OFF
REMOTE SENSOR
INPUT
RIGHT
AUX
(Additional A dio So rce)
A dio O tp t
Right Left
ANALOG
INPUTS
DIGITAL
INPUTS
Digital So rce A
DVD or CD
Digital O tp t
Digital So rce B
DVD or CD
Digital O tp t
LEFT

-8-
three. Operation
Master On/O Switch
To operate unit, place this s itch
in the On/Standby position. The
system ill go into standby hen
no signal has been received and
hen no unit connected to any of
its t o digital inputs has been on
for approximately five minutes.
Rear-Panel Control
Remote-Control-Battery Installation.
+
+
+
Push small tab to ards
battery slot and pull battery
dra er out.
Remove old battery. Insert ne battery ith “+”
side up, and slide battery
dra er back into remote.

-9-
Bass
Treble
Delay Level
0 dB Test
Ad ustment
Late Night
Power
Mute
Surround
Mode
Input
–+
–+
–+
Volume
8
10
11
12
13
5
4
9
7
3
2
1
6
Volume
Surround Mode
Input Mute
STANDBY
ON
SUB
LVL
DLY
RSRFCLFLS
AUX
PCM
3 - St Late NightPhantom
Digital ProLogic
Surround
DIG. OPT DIG. COAX TV
31
32
33
2
6
5
4
18
16
15
14
22
23 24 25
19 21 26 17
27
28 29 30
20
Remote and Front-Panel Controls and Indicators
Front Panel
Remote Control
1. Power
This button, located only on the
remote control, allo s the user
to manually turn on or off the
ESC340. Please note that the
ESC340 features Automatic Turn-
On/Off, and the po er s itch is
not normally used unless it is
necessary to override this
automatic feature, or in case the
analog input to be used is not
the last one that as used and
so Automatic Turn-On is not
available for that input. Please
read the details regarding
Automatic Turn-On/Off on page
3 of this manual, and keep in
mind that the ESC340 automatic
turn-on feature ill be disabled
for five minutes if the ESC340 is
shut do n manually. The ESC340
can also be po ered on by using
the Input button (4) on the
front panel of the sub oofer or
on the remote control. Please
note that if input selection is
done by pressing the Input
button, the Automatic Digital
Input Selection of the ESC340
ill be disabled until the ESC340
shuts do n.
When the ESC340 is plugged into
a orking electrical outlet and
its master s itch on the back
panel is set to On/Standby, the
Standby (32) indicator ill
illuminate. The ON (31) indicator
ill light as soon as the ESC340
is turned on either automatically
or via the pressing of the Po er
or Input buttons.
2. Mute
From either the front panel or
the remote control, press (Mute)
to lo er the volume completely.
The mute symbol indicator (33)
ill illuminate. When you press
either of the mute buttons
again, the volume ill return to
its previous setting.
Note: The mute function can
also be turned off by pressing
either of the volume buttons on
the front panel or the remote
control.
3. Late Night
This feature is available for
Dolby Digital only. It compresses
the inherently dynamic digital
sound so that the quiet and loud
passages are not quite as
different in sound levels as they
ordinarily are. This feature
allo s the user to atch movies
and listen to dialogue at toned-
do n levels so as not to disturb
others by the loud sound effects
that may be present. The Late
Night indicator (26) illuminates
hen this feature is active.

-10-
4. Input
This control is available on both
the front panel and the remote
control. It allo s manual selec-
tion hen the user repeatedly
presses and releases the button
for any of the ESC340’s four
inputs. The ESC340 features an
Automatic Digital Input Selec-
tion feature that automatically
s itches the ESC340 to the
source connected to one of its
t o digital inputs as soon as
that device is po ered on.
Please read the section on page
3 to thoroughly familiarize
yourself ith the conveniences
and conditions of using the
Automatic Digital Input
Selection feature. The Input
s itch is also used hen the
source connected to the
ESC340’s analog input is not the
analog source that as listened
to the last time the ESC340 as
on (and hence the Automatic
Turn-On feature is not
available). The Input s itch also
turns on the ESC340 hen
pressed (see item 1 earlier in
this section). Whenever a
specific input is selected either
manually or automatically, its
indicator (14, 15, 16 or 17) on
the ESC340’s unit’s front panel
ill be illuminated.
5. Surround Mode
Pressing and releasing this
button allo s the selection of
different listening modes.
Surround (18), Phantom (19)
and 3-Stereo (20) are available
listening options for Dolby Pro
Logic. Stereo (21) bypasses the
surround processing and out-
puts sound through the right-
and left-front speakers only.
In Surround mode, all five
satellites and the sub oofer ill
play. In Phantom mode, all
speakers except the center
channel ill play. In 3-Stereo,
all speakers except for the t o
surround speakers ill be active.
6. Volume
Press (∧) on the remote control
or the front panel to raise the
system’s volume. Press (∨) on
the remote control or the front
panel to lo er the system’s
volume. The volume setting is
indicated on the status-bar
indicator (27).
7. 0 dB
Press this button to reset the
Center, Surround, Balance,
Treble and Bass controls to their
default positions.
8. Test
Press this button to activate the
Test Tone mode (see Test Tone
section).
9. Delay
The relative timing of sounds
coming from the center and/or
surround speakers compared to
the front-left and front-right
speakers can be adjusted. The
first press of this button allo s
adjustment of the center
channel, all the ay from the
default setting of 0 ms (milli-
seconds), hich means no delay
(all status bars off), to a
maximum of 5 ms (5 status bars
on). The indicators C (28) and
DLY (30) ill be on. The second
press of the Delay button allo s
adjustments of the surround
speakers; indicators LS (28) and
RS (28) and DLY (30) ill be on.
The delay can be adjusted from
zero (all status bars off) to
15 ms (all status bars on) in
DTS and Dolby Digital and from
15 ms (all status bars off) to 30
ms (all status bars on) in Dolby
Pro Logic (there is an inherent
and fixed 15 ms of delay added
in the “matrixed” Dolby Pro
Logic to re-create the proper
surround effect). The center and
surround adjustments can be
done in either DTS, Dolby
Digital or Dolby Pro Logic
“matrixed” modes. There are no
separate delay adjustments for
the individual modes of
operation. During adjustments,
the audio mutes momentarily
every time the Adjustment +/–
button (11) is pressed. Please
note that the status-bar
indicator (27) ill not display
unless Adjustment +/– buttons
are pressed. Also, hile the
status-bar indicator (27) is on,
channel indicators (28) and DLY
(30) ill not be displayed. And,
if adjust-
ments are done in a mode here
a certain channel is not
available, the adjustment step
for that channel is skipped. For
example, in Phantom mode, the
center-channel delay cannot be
adjusted since Phantom does
not have a center channel. In
Stereo, neither the center nor
the surround delay can be
adjusted since Stereo does not
feature surround speakers or a
center speaker. A third press of
the Delay button ill exit the
ESC340 from its delay-
adjustment mode.
10. Level
The relative level of sounds
coming from each of the
ESC340’s speakers can be ad-
justed hile listening to
program material on the
ESC340. Repeated pressing and
releasing of the Level button
allo s access to each channel.
The display ill indicate LVL
(29), and the channel indicators
(28) LF (Left Front), C (Center),
RF (Right Front), LS (Left
Surround), RS (Right Surround)
and SUB (sub oofer) ill
illuminate to indicate the active
speaker. The level for the
-11-
selected channel can then be
changed using the Adjustment
+/– buttons (11). Levels set in
one mode ill stay valid for all
other modes and are not inde-
pendent. Please note that the
status-bar indicator (27) ill
not display unless Adjustment
+/– buttons are pressed. And,
hile the status-bar indicator
(27) is on, channel indicators
(28) and LVL (29) ill not be
displayed. Also, if adjustments
are done in a mode here a
certain channel is not available,
the adjustment step for that
channel is skipped. For examp-
le, in Phantom mode the center-
channel level cannot be ad-
justed since Phantom does not
have a center channel. In
stereo, neither the center nor
the surround levels can be
adjusted since Stereo does not
feature surround speakers or a
center speaker.
A seventh press of the Level
button ill exit the ESC340 from
its level-adjustment mode.
11. Adjustment
These buttons are used in
conjunction ith Test (8), Delay
(9), and Level (10) to increase
or decrease a setting.
12. Bass
Press (+) to increase the level of
lo -frequency information.
Press (–) to decrease the level
of lo -frequency information.
13. Treble
Press (+) to increase the level of
high-frequency information.
Press (–) to decrease the level
of high-frequency information.
14–17. Input
One of these four indicators ill
illuminate, depending on hich
input is selected.
18–21. Surround
One of these ill illuminate,
depending on hich surround
mode is chosen.
22. Dolby Digital
Indicates the presence of a
Dolby Digital-encoded AC-3
digital signal.
23. DTS
Indicates the presence of DTS
encoded digital signal.
24. Dolby Pro Logic
Illuminates hen Dolby Pro
Logic decoding of a 2-channel
signal is taking place. This
indicator may be on by itself
( hen analog inputs are used),
in conjunction ith Dolby
Digital ( hen using a digital
input here the AC-3 format
signal contains t o channels
and needs to be decoded into
multichannel) or together ith
PCM ( hen using a digital input
here 2-channel PCM-format
data is being decoded into
multichannel).
25. PCM
Illuminates hen the signal
supplied through the selected
digital input is in PCM format.
26. Late Night
Illuminates hen the Late Night
compression is selected.
27. Status-Bar Indicator
These LEDS sho the relative
setting of volume, bass, treble,
speaker level and speaker delay.
28. Speaker Indicator
Identifies the speaker that’s
being adjusted. LS is Left
Surround, LF is Left Front, C is
Center, RF is Right Front, RS is
Right Surround, and SUB is
Sub oofer.
29. Level
Illuminates hen the ESC340 is
in speaker-level adjustment
mode.
30. Delay
Illuminates hen the ESC340 is
in speaker-delay adjustment
mode.
31. On
Indicates that the ESC340 is
fully po ered up.
32. Standby
Indicates that the ESC340 is
plugged into an active all
outlet and the master s itch on
the back panel is in On/Standby
position, but the unit is not
po ered on.
33. Mute
Illuminates hen the mute
function is activated (the
ESC340 ill be on but ill not
produce any sound).

-12-
LED Bar Indicators illuminate in
response to adjustments in
volume, delay, level, bass and
treble controls.
Status-Bar Indicators
Increase Decrease
Volume, Level, Delay
0dB
0dB
Increase Decrease
Bass, Treble

-13-
Surround
Use this mode for films recorded
using Dolby Digital or Dolby Pro
Logic Surround.
Phantom
This mode creates surround
sound from stereo recordings.
The center channel is not used
and the surround channels have
a 20-ms delay.
3-Stereo Mode
Use this mode to play back Pro
Logic-encoded films hen you
do not ant the surround
channels to play.
Stereo
This mode plays a recording in
traditional t o-channel stereo.
Surround Modes
The Test Tone is used to
calibrate the volume settings of
each of the speakers in the
ESC340. It is dependent on the
room here the system is set up
and the relative distances and
positions of each speaker to the
listening position. In all modes,
a static-like noise ill be heard
cycling, in order: left front,
center, right front, right
surround, left surround,
sub oofer. In modes other than
Dolby Digital, the sound from
the t o surrounds ill be
coming at the same time, since
the surrounds in all available
modes, except in Dolby Digital,
are in mono. When the Test
Tone is heard coming from a
specific channel, pressing the
Adjustment +/– (11) buttons
ill increase or decrease the
level of sound coming from that
channel. The display status-bar
indicator (27) provides visual
indication of the adjustment as
the adjustment is being made.
The default adjustment level of
0 dB is indicated by five status-
bar indicators illuminated.
If adjustments are done in a
mode here a certain channel is
not available, the adjustment
step for that channel is skipped.
For example, in Phantom mode,
the center-channel level cannot
be adjusted since Phantom does
not have a center channel. In
stereo, neither the center nor
the surround levels can be
adjusted since Stereo does not
feature surround speakers or a
center speaker.
Using the remote control,
adjust each channel’s levels
until the volume of all the
speakers is the same during the
test. To make sure all channels
are properly adjusted, do the
test t ice, once in Dolby Digital
or DTS (Dolby Digital or DTS is
automatically selected hen the
ESC340 is connected to a DVD
player playing Dolby Digital-
encoded or DTS-encoded
material) and once again in
Dolby Pro Logic.
Note: The Test Tone is used to
calibrate the system to
reproduce all program materials
at the correct relative levels, as
as determined by the re-
cording engineers. When
listening to actual surround-
encoded program material, the
volume level of the surround
channels is generally lo er than
that of the front channels. In
fact, virtually all of the dialogue
and a substantial number of the
effects in a movie are re-
produced through the center
channel.
Test Tone

-14-
I there is no sound rom any
o the speakers:
• Make sure the sub oofer is
plugged into an active AC
all outlet.
• Make sure the Master Po er
S itch, located on the rear of
the sub oofer, is in the
On/Standby position.
• Make sure there is a source –
for example, a DVD Player, CD
Player, VCR or television –
hooked up to one of the four
input jacks.
• Make sure that the program
material is playing.
• Recheck the hookup
connections, referring to the
Speaker Connections section.
I there is no sound rom the
surround speakers or
sound is very low:
• Check all connections
bet een processor/amplifier
and each of the speakers.
• Raise the surround volume
from the remote control (see
Operation section).
• Make sure the TV sho or
movie you are atching is
recorded in surround, try the
Phantom or Simulated
Surround mode.
• Increase the surround-
speakers’ level, using the
level-adjustment instructions
found earlier in this manual.
I there is no sound rom the
center speaker:
• Make sure that the processor
is in the Surround or
3-Stereo mode. If it is in
Phantom or Stereo mode, the
center speaker ill not play.
• Increase the level of the
center channel, using the
level-adjustment instructions
earlier in this manual.
• Check the connections
bet een the sub oofer and
the center speaker.
I you have low bass output:
• Experiment ith placement
of the sub oofer. Remember,
place the sub oofer in a
corner to get maximum bass
output from the system.
• Increase the sub oofer level,
using the level-adjustment
instructions found earlier in
this manual.
• Increase the level of bass,
using the remote control.
Troubleshooting

-15-
Speci ications
ESC340 System
Power Output
Satellites:
35 Watts x 5 @ 0.1% THD
Sub oofer:
100 Watts x 1 @ 1% THD
Signal-to-Noise Ratio
80 dBA
Input Impedance
(analog inputs)
20k Ohms
Input Sensitivity
(analog inputs)
400mV
Auto Turn-On Sensitivity
(analog inputs)
2mV
Frequency Response (–6 dB)
35Hz – 20kHz
Dimensions (H x W x D)
Satellites (each):
111 x 81 x 92mm
Sub oofer:
384 x 330 x 368mm
Occasional refinements may
be made to existing products
ithout notice, but ill al ays
meet or exceed original
specifications unless other ise
stated.

JBL Consumer Products
250 Cross ays Park Drive, Woodbury, NY 11797
8500 Balboa Boulevard, Northridge, CA 91329
1-800-336-4JBL (4525) (USA only)
International: 2, route de Tours, 72500 Château-du-Loir, France
.jbl.com
©2000 JBL, Incorporated. JBL and Simply Cinema are
registered trademarks of JBL, Incorporated.
*Trademarks of Dolby Laboratories.
Part No. ESC340 OM
CAUTION:
TO REDUCE THE RISK OF ELECTRIC SHOCK, DO NOT REMOVE
COVER (OR BACK). NO USER-SERVICEABLE PARTS INSIDE. REFER
SERVICING TO QUALIFIED SERVICE PERSONNEL.
WARNING:
TO REDUCE THE RISK OF FIRE OR ELECTRIC SHOCK,
DO NOT EXPOSE THIS APPLIANCE TO RAIN OR MOISTURE.
Handle the Power Cord Gently
•To disconnect the plug from the AC outlet, pull on the plug itself,
not on the cord. Pulling the cord may break the wire.
• Disconnect the plug from the AC outlet whenever the unit is to be
left unused for an extended period of time.
• Do not place furniture or other heavy ob ects on the cord, and
avoid dropping heavy ob ects on it. Also, do not make a knot
in the cord; this can damage it and cause a fire hazard.
The lightning flash with arrowhead
symbol, within an equalateral triangle,
is intended to alert the user to the
presence of uninsulated “dangerous voltage”
within the product’s enclosure that may be of
sufficient magnitude to constitute a risk of
electric shock to persons.
The exclamation point within an
equilateral triangle is intended to
alert the user to the presence of
important operating and maintenance
(servicing) instructions in the literature
accompanying the appliance.
CAUTION
RISK OF ELECTRIC SHOCK
DO NOT OPEN

TM
®
ESC340
Bedienungs-
und
Installations-
anleitung
Vielen Dank, daß Sie sich für JBL entschieden haben! Seit
über 50 Jahren befasst sich JBL mit allen Aspekten von M sik nd Film,
seit es n n A fnahme oder Wiedergabe, vom Live-Konzert bis hin z
A fnahmen, die Sie Z ha se spielen, im A to oder bei der Arbeit.
Wir sind sicher, daß das JBL-Prod kt Ihrer Wahl Ihren m sikalischen
Erwart ngen bis z r letzten Note entspricht. Und sollten Sie eines
Tages an z sätzliche La tsprecher für Ihr Wohnzimmer oder Ihr A to
denken, werden Sie sich sicher wieder für JBL entscheiden.

-3-
Das Heimkinosystem ESC340
bietet zwei einzigartige
Bedien ngserleichter ngen:
a tomatisches Ein/A sschalten
nd a tomatische Wahl eines
Digitaleingangs.
Die Einschalta tomatik setzt das
ESC340 in Betrieb, sobald eine
an einen der Digitaleingänge
angeschlossene Signalq elle
(beliebige Geräte mit digitalem
A sgang nd Koaxial- oder
Lichtleiteranschl ß, z m Bei-
spiel DVD- oder CD-Spieler)
eingeschaltet wird oder sobald
die am z letzt ben tzten Analog-
eingang angeschlossene Signal-
q elle ein Tonsignal abgibt.
Bei N tz ng der Digitaleingänge
reagiert die Einschalta tomatik
a f das Einschalten einer
beliebigen angeschlossenen
digitalen Signalq elle, z. B.
eines DVD- oder CD-Spielers mit
Digitala sgang. Bei N tz ng der
Analogeingänge (TV oder AUX)
reagiert die Einschalta tomatik
n r a f das Gerät, das vor dem
A sschalten des ESC340 als
letztes als Signalq elle gen tzt
w rde; für die Wiedergabe vom
jeweils anderen Gerät müssen
Sie den Eingang des ESC340
man ell d rch Betätig ng der
Taste Inp t (am S bwoofer oder
an der Fernbedien ng) mschal-
ten. Dad rch wird gleichzeitig
die Digitaleingangs-Wahla to-
matik bis z m Abschalten des
ESC340 deaktiviert.
Die A sschalta tomatik schaltet
das ESC340 nach einer Wartezeit
von fünf Min ten a s, wenn alle
an die digitalen Eingänge
angeschlossenen Signalq ellen
abgeschaltet sind nd die am
gewählten Analogeingang
angeschlossene Q elle kein
Signal mehr abgibt.
Die Digitaleingangs-Wahl-
a tomatik schaltet a tomatisch
a f diejenige der Signalq ellen,
die an die Digitaleingänge
angeschlossen sind, die als erste
eingeschaltet wird. Sobald diese
abgeschaltet nd keine andere
eingeschaltet wird, schaltet sich
das ESC340 nach einer Wartezeit
von fünf Min ten a s.
Falls die vor dem Einschalten der
digitalen Signalq elle gewählte
analoge Signalq elle jedoch
spielt, schaltet das ESC340 a f
diese analoge Q elle z rück,
statt sich a sz schalten.
Nachdem eine digitale Signal-
q elle einmal eingeschaltet nd
gewählt worden ist, bewirkt das
Einschalten einer anderen
Digitalq elle erst dann eine
a tomatische Umschalt ng,
wenn die erste Digitalq elle
a sgeschaltet wird.
Die Ein/A sschalta tomatik
kann n r gen tzt werden, wenn
Sie das ESC340 nicht man ell
ein- oder a sschalten nd a ch
die Wahl eines Eingangs nicht
man ell vornehmen. Ist eine
solche man elle A swahl
erfolgt, arbeiten die A tomatik-
f nktionen n r noch einge-
schränkt nach folgenden Regeln:
1. Wenn das ESC340 man ell
a sgeschaltet w rde, wird die
Schalta tomatik erst fünf
Min ten nach Abschalten der
Signalq elle aktiv. Während
dieser Zeit kann es jedoch
man ell mit Hilfe der Bedien-
elemente an der Gerätevorder-
seite oder per Fernbedien ng
eingeschaltet werden.
2. Nachdem eine Signalq elle
man ell gewählt w rde, steht
die Digitaleingangs-Wahla to-
matik bis z m nächsten Abschal-
ten des ESC340 nicht z r
Verfüg ng.
3. Nachdem eine der beiden am
ESC340 angeschlossenen digi-
talen Signalq ellen eingeschal-
tet w rde nd die Digital-
eingangs-Wahla tomatik
dara fhin a f diese mgeschal-
tet hat, reagiert sie bis z m
nächsten A sschalten dieser
Signalq elle nicht mehr a f die
jeweils andere.
Important Note
Automatic On Off and Automatic Digital-Input Selection

-4-
• Aktives komplettsystem mit
integriertem DTS- nd Dolby*
Digital-Decoder, bestehend
a s vier Satelliten- nd einem
Center-La tsprecher sowie
einem S bwoofer nd einer
Fernbedien ng (n r der Fern-
seher fehlt noch!).
• Betriebsmodi: Dolby Digital ,
DTS (AC-3®, 5+1 Kanäle),
Dolby ProLogic®
(einschließlich Phantom- nd
3-Kanal-Stereo), normales
Stereo.
• A tomatisches Ein- nd
A sschalten
• A tomatische Wahl des
Digitaleingangs
• Zwei digitale (1x Lichtleiter,
1x Koaxial) nd zwei analoge
Eingänge
• 2-Weg-Kleinsatelliten mit
Titanlaminat-Hochtönern,
Videoabschirm ng nd
identischer Abstimm ng für
alle 5 Kanäle; ein 8-Zoll-
S bwoofer mit großem
Membranh b, z m F ßboden
hin abstrahlend
• Nachtmod s mit Unter-
drück ng plötzlicher la ter
Passagen
• Alle Verstärker nd Bedie-
n ngsorgane sind im
S bwoofer-Gehä se nter-
gebracht, so daß ein sepa-
rates Ste ergerät entfällt.
• Fernbedien ng über einen
separaten Sensor, der am
Center-La tsprecher oder frei
montiert werden kann; somit
kann der S bwoofer a ßer
Sicht plaziert werden.
Eigenschaften
Vier Satelliten- nd ein Center-
La tsprecher.
Vollaktiver S bwoofer/Controller
Lieferumfang
JBL-La tsprecher Kabel mit
verpol ngssicheren Spezial-
steckern. Verlänger ngskabel
XC300 (2 x 3 m) in verfügbar.
Standf ß für die horizontale
Plazier ng des Center-La t-
sprechers inkl sive beweglichem
Infrarotsensor nd beidseitig
klebendem Band.
Fernbedien ng
Bass
Treble
Delay Level
0 dB Test
Adjustment
Late Night
Power
Mute
Surround
Mode
In ut
–+
–+
–+
Volume
Kabel für digitale Eingänge mit
Koaxialstecker; Kabel für
analoge Eingänge mit RCA-
Stecker

-5-
Was ist Dolby Digital
Das Heimkino ESC340 kann ein
digitales Mehrkanalsignal nach
Dolby Digital-Standard
(inoffiziell a ch AC-3 genannt)
verarbeiten; dieser Standard
w rde von den Dolby
Laboratories entwickelt.
Im Gegensatz z Matrix-
systemen wie etwa Dolby
ProLogic, die den Mehrkanalton
d rch geschickte Dekodier ng
a s n r zwei echten Kanälen
erze gen, arbeitet Dolby Digital
mit einem S bwoofer- nd fünf
Breitbandkanälen, alle völlig
getrennt nd im digitalen AC-3-
Format. Solche Signale werden
z m Beispiel von DVD-Spielern
geliefert. Das Ergebnis ist ein
sa beres Tonsignal mit digitaler
Präzision für jeden einzelnen
La tsprecher, z sätzlich mit der
Möglichkeit von Stereo-
S rro nd-Effekten (Dolby
ProLogic liefert Mono-S rro nd-
Effekte).
Dolby Digital kann S rro nd-
Klang in mehreren nter-
schiedlichen Modi liefern. Der
effektvollste davon ist der 5.1-
Kanal-Mod s, in dem separate
Signale für fünf Satelliten-
la tsprecher nd einen
S bwoofer erze gt werden. Das
ESC340 besitzt eine 5.1-Ch-LED,
die a fle chtet, wenn ein im
Dolby Digital 5.1-Kanal-Format
kodiertes Signal anliegt. Dolby
Digital kann aber a ch andere
AC-3-Mehrkanalsignale liefern,
a ßerdem 2-Kanalsignale, die
per Dolby ProLogic-Verfahren in
Mehrkanal-S rro nd-Klang
mgesetzt werden.
Was ist DTS
DIGITAL SURROUND
DIE ZUR ZEIT BESTE
5.1-SURROUND-TECHNOLOGIE
AUF DEM MARKT!
Diese ne e S rro nd-Techno-
logie erze gt a s entsprechend
codiertem Material (Film bzw.
M sik-CD m ss mit dem DTS-
Logo versehen sein) sechs (5.1)
voneinander nabhängige,
digitale Tonkanäle in hervor-
ragender Q alität (20 Bit A f-
lös ng).
Während der Codier ng kompri-
miert der leist ngsstarke DTS-
Algorithm s die Information
von sechs 20-Bit-A dio-Kanälen
so stark, dass sie den gleichen
Speicherra m belegt wie ein
konventionelles 20-Bit-Stereo-
PCM-Signal (A dio-CD).
Dabei ist die Klangq alität jedes
einzelnen dieser Tonkanäle
höher als die einer konvetio-
nellen A dio-CD. Dies liegt
daran, weil die A flös ng bei
DTS mit 20 Bit Datenbreite
höher liegt als bei der A dio-CD
mit n r 16 Bit Datenbreite.
• Wandhalter ngen nd Boden-
ständer für die Satelliten als
Z behör erhältlich
• Fernbedien ng im
Kreditkartenformat für
sämtliche F nktionen
• JBL-La tsprecherkabel mit
Spezialsteckern für einfachen
Anschl ß nd z r Vermeid ng
der Möglichkeit, daß
versehentlich Adern
verta scht werden
• La tsprecherf ß z m waage-
rechten A fstellen des
Center-La tsprechers
• Drehbare JBL-Logos für
waagerechte oder senkrechte
Plazier ng der Satelliten
Other manuals for Simply Cinema ESC340
1
Table of contents
Languages:
Other JBL Speakers System manuals

JBL
JBL P36AW User manual

JBL
JBL AC195 User manual

JBL
JBL SPEAKER PLACEMENT P25 User manual

JBL
JBL CONTROL X User manual

JBL
JBL PRX600 series User manual

JBL
JBL CRUISE User manual

JBL
JBL 800 ARRAY User manual

JBL
JBL Northridge N24AWII User manual

JBL
JBL On Air Control 2.4G User manual

JBL
JBL CONTROL X User manual