Jensen QiCR-50 User manual

Dual Alarm Clock Radio with Wireless Charging
MODEL: QiCR-5
USER MANUAL
PLEASE READ THIS USER MANUAL COMPLETELY BEFORE OPERATING
THIS UNIT AND RETAIN THIS BOOKLET FOR FUTURE REFERENCE

E-1
WARNING
TO PREVENT FIRE OR SHOCK HAZARD, DO NOT USE THIS PLUG WITH AN
EXTENSION CORD, RECEPTACLE OR OTHER OUTLET UNLESS THE BLADES
CAN BE
FULLY INSERTED TO PREVENT BLADE EXPOSURE. TO PREVENT
FIRE OR SHOCK
HAZARD, DO NOT EXPOSE THIS APPLIANCE TO RAIN OR
MOISTURE.
The Rat ng plate s located at the bottom enclosure of the apparatus
IMPORTANT SAFETY INSTRUCTIONS
1. Read these nstruct ons.
2. Keep these nstruct ons.
3. Heed all warn ngs.
4. Follow all nstruct ons.
5. Do not use th s apparatus near water.
6. Clean only w th dry cloth.
7. Do not block any vent lat on open ngs. Install n accordance w th the
manufacturer’s nstruct ons.
8. Do not nstall near any heat sources such as rad ators, heat reg sters, stoves, or
other apparatus ( nclud ng ampl f ers) that product heat.
9. AC adaptor s used as d sconnect dev ce and t should rema n read ly operable
dur ng ntended use. In order to d sconnect the apparatus from the ma ns
completely, the AC adaptor should be d sconnected form the ma ns socket
outlet completely.
10. Only use attachments/accessor es spec f ed by the manufacturer.
11.
Use only w th a cart, stand, tr pod, bracket, or table
recommended by the manufacturer, or sold w th the product.
When a cart s used, use caut on when mov ng the cart/apparatus
comb nat on to avo d njury from t p-over.
12. Unplug th s apparatus dur ng l ghtn ng storms or when unused for
a long per ods of t me.
13. Refer all serv c ng to qual f ed serv ce personnel. Serv c ng s requ red when the
apparatus has been damaged n any way, such as power-supply cord or plug s
damaged, l qu d has been sp lled or objects have fallen nto the apparatus, the
apparatus has been exposed to ra n or mo sture, does not operate normally, or
has been dropped.
14. Th s appl ance shall not be exposed to dr pp ng or splash ng water and that no
object f lled w th l qu ds such as vases shall be placed on the apparatus.
15. Do not overload wall outlet. Use only power source as nd cated.
16. Use replacement part as spec f ed by the manufacturer.

E-2
17. Upon complet on of any serv ce or repa rs to th s product, ask the serv ce
techn c an to perform safety checks.
18. Power Sources - Th s product should be operated only from the type of power
source nd cated on the mark ng label. If you are not sure of the type of power
supply to your home, consult your product dealer or local power company. For
products ntended to operate from battery power, or other sources, refer to the
operat ng nstruct on.
19. Object and L qu d Entry - Never push objects of any k nd nto th s product
through open ngs as they may touch dangerous voltage po nts or short-out parts
that could result n a f re or electr c shock. Never sp ll l qu d of any k nd on the
product.
20. Damage Requ r ng Serv ce - Unplug th s product from the wall outlet and refer
serv c ng to qual f ed serv ce personnel under the follow ng cond t ons:
a) When the power-supply cord or plug s damaged,
b) If l qu d has been sp lled, or objects have fallen nto the product,
c) If the product has been exposed to ra n or water,
d) If the product does not operate normally by follow ng the operat ng
nstruct ons. Adjust only those controls that are covered by the operat ng
nstruct ons as an mproper adjustment of other controls may result n
damage and w ll often requ re extens ve work by a qual f ed techn c an to
restore the product to ts normal operat on.
e) If the product has been dropped or damaged n any way, and
f) When the product exh b ts a d st nct change n performance - th s nd cates a
need for serv ce.
21. Battery shall not be exposed to excess ve heat such as sunsh ne, f re or the l ke.
22. M n mum d stances of 10 cm around the apparatus for suff c ent vent lat on.
23. The vent lat on should not be mpeded by cover ng the vent lat on open ngs w th
tems, such as newspapers, table-cloths, curta ns, etc.
24. No naked flame sources, such as l ghted candles, should be placed on the
apparatus.
25. The use of apparatus n moderate cl mates.
26. Attent on should be drawn to the env ronmental aspects of battery d sposal
SAVE THESE INSTRUCTIONS

E-3
COMPLIANCE WITH FCC REGULATIONS
FCC ID KHKQI1110A
Th s dev ce compl es w th Part 15 of the FCC Rules. Operat on s subject to the
follow ng two cond t ons:
(1) Th s dev ce may not cause harmful nterference, and
(2) Th s dev ce must accept any nterference rece ved, nclud ng nterference that
may cause undes red operat on.
Th s equ pment has been tested and found to comply w th the l m ts for a class B
d g tal dev ce, pursuant to Part 15 of the FCC Rules. These l m ts are des gned to
prov de reasonable protect on aga nst harmful nterference n a res dent al
nstallat on. Th s equ pment generates uses and can rad ate rad o frequency energy
and, f not nstalled and used n accordance w th the nstruct ons, may cause harmful
nterference to rad o commun cat ons. However, there s no guarantee that
nterference w ll not occur n a part cular nstallat on. If th s equ pment does cause
harmful nterference to rad o or telev s on recept on, wh ch can be determ ned by
turn ng the equ pment off and on, the user s encouraged to try to correct the
nterference by one or more of the follow ng measures:
- Reor ent or relocate the rece v ng antenna.
- Increase the separat on between the equ pment and rece ver.
- Connect the equ pment nto an outlet on a c rcu t d fferent from that to wh ch the
rece ver s connected.
- Consult the dealer or an exper enced rad o/TV techn c an for help.
CAUTION:
Changes or mod f cat ons not expressly approved by the party
respons ble for compl ance could vo d the user’s author ty to operate the equ pment.
PROTECT YOUR FURNITURE!!
Th s system s equ pped w th non-sk d rubber ‘feet’ to prevent the product from
mov ng when you operate the controls. These ‘feet’ are made from non-m grat ng
rubber mater al spec ally formulated to avo d leav ng any marks or sta ns on your
furn ture. However certa n types of o l based furn ture pol shes, wood preservat ves,
or clean ng sprays may cause the rubber ‘feet’ to soften and leave marks or a rubber
res due on the furn ture.
To prevent any damage to your furn ture we strongly recommend that you purchase
small self-adhes ve felt pads, ava lable at hardware stores and home mprovement
centers everywhere, and apply these pads to the bottom of the rubber ‘feet’ before
you place the product on f ne wooden furn ture.

E-4
DEAR JENSEN CUSTOMER
Select ng f ne aud o equ pment such as the un t you've just purchased s only the
start of your mus cal enjoyment. Now t's t me to cons der how you can max m ze the
fun and exc tement your equ pment offers. Th s manufacturer and the Electron c
Industr es Assoc at on's Consumer Electron cs Group want you to get the most out
of your equ pment by play ng t at a safe level. One that lets the sound come through
loud and clear w thout annoy ng blar ng or d stort on and, most mportantly, w thout
affect ng your sens t ve hear ng.
Sound can be dece v ng. Over t me your hear ng "comfort level" adapts to h gher
volumes of sound. So what sounds "normal" can actually be loud and harmful to
your hear ng. Guard aga nst th s by sett ng your equ pment at a safe level BEFORE
your hear ng adapts.
To establish a safe level:
•
Start your volume control at a low sett ng.
•
Slowly ncrease the sound unt l you can hear t comfortably and clearly, and
w thout d stort on.
Once you have established a comfortable sound level:
•
Set the d al and leave t there.
Tak ng a m nute to do th s now w ll help to prevent hear ng damage or loss n the
future. After all, we want you l sten ng for a l fet me.
We Want You Listening For a Lifetime
Used w sely, your new sound equ pment w ll prov de a
l fet me of fun and enjoyment. S nce hear ng damage
from loud no se s often undetectable unt l t s too
late, th s manufacturer and the Electron c Industr es
Assoc at on's Consumer Electron cs Group
recommend you avo d prolonged exposure to
excess ve no se.
Customer's Record:
The ser al number of th s product s found on ts bottom. You should note the ser al
number of th s un t n the space prov ded as a permanent record of your purchase to
a d n dent f cat on n the event of theft of loss.
Model Number: QiCR-5
Serial Number:

E-5
LOCATION OF CONTROLS

E-6
1 WIRELESS CHARGING PAD 12 AUX IN INDICATOR
2 / MEM / M + BUTTON 13 ALARM 2 INDICATOR
(wake to alarm)
3 HOUR / BUTTON 14 ALARM 2 INDICATOR
(wake to rad o)
4 MIN / BUTTON 15 CHARGING INDICATOR
5 DIMMER/SNOOZE/SLEEP BUTTON 16 LED DISPLAY
6 / BUTTON 17 SPEAKER
7 /
BUTTON 18 FM ANTENNA
8 / MODE BUTTON 19 AUX-IN JACK
9 PM INDICATOR 20 DC IN JACK
10
ALARM 1 INDICATOR
(wake to alarm)
21 USB CHARGING PORT
11
ALARM 1 INDICATOR
(wake to rad o)
22 BATTERY COMPARTMENT
(ON THE BOTTOM)

E-7
POWER SOURCE (AC ADAPTOR ONLY)
The Q CR-50 operates w th an external AC-DC adaptor w th output DC 5V 2.1A
.
The un t s also equ pped w th a battery back-up system for the clock that s powered
by 2 x AAA batter es (Not ncluded).
POWER CONNECTION
1. Connect the cord of the power adaptor to the DC IN JACK (#20) of the Q CR-50.
2. Connect the plug of the power adaptor to a wall socket.
The Q CR-50 s powered and n standby mode when you see the d splay s
sw tched on.
Battery Back-up system
•
The rad o s equ pped w th a battery back-up system. It requ res 2 x AAA
batter es (Not ncluded).
•
Open the battery door on the bottom of the un t. Insert the batter es nto the
BATTERY COMPARTMENT (#22) and make sure the pos t ve and negat ve (+ or
-) s des of the batter es are n contact w th the correspond ng term nals n the
BATTERY COMPARTMENT (#22). Replace the battery door.
•
If a power cut occurs, the rad o automat cally sw tches to the battery power
supply and keeps the clock and t mer sett ngs.
•
When replac ng the battery, do not d sconnect the power adaptor. Otherw se, all
clock and alarm sett ngs w ll be lost.
CAUTIONS:
1. Do not m x old and new batter es.
2. Only use good qual ty/name brand batter es.
3. Do not m x alkal ne, standard (carbon-z nc) or rechargeable (n ckel-cadm um)
batter es.
4. If the un t s not go ng to be used for an extended per od of t me, please remove
the batter es. Us ng old, leak ng or cheaply made batter es can cause damage
to the un t and may vo d the warranty.
5. Do not d spose of batter es n f re, batter es may explode or leak.
6. Batter es shall not be exposed to excess ve heat such as sunsh ne, f re or the
l ke.
7. Replace all the batter es at the same t me, no matter exhausted or not, every 2
years at the same t me to avo d poss ble battery leakage.
8. Do not try to recharge batter es not ntended to be recharged; they can
overheat, rupture and leak. (Follow battery manufacturer's d rect ons).
9. Only an adult should replace the batter es.

E-8
SETTING THE CLOCK TIME
In order for the clock to funct on properly
,
the clock must be set before us ng t for
the f rst t me. The d splay w ll be flash ng when you plug the un t n for the f rst t me.
If the d splay s not flash ng, and the un t s n standby mode, press and hold the
/ MEM / M + BUTTON (#2) unt l the clock d splay beg ns to flash.
To set the t me, follow the steps below:
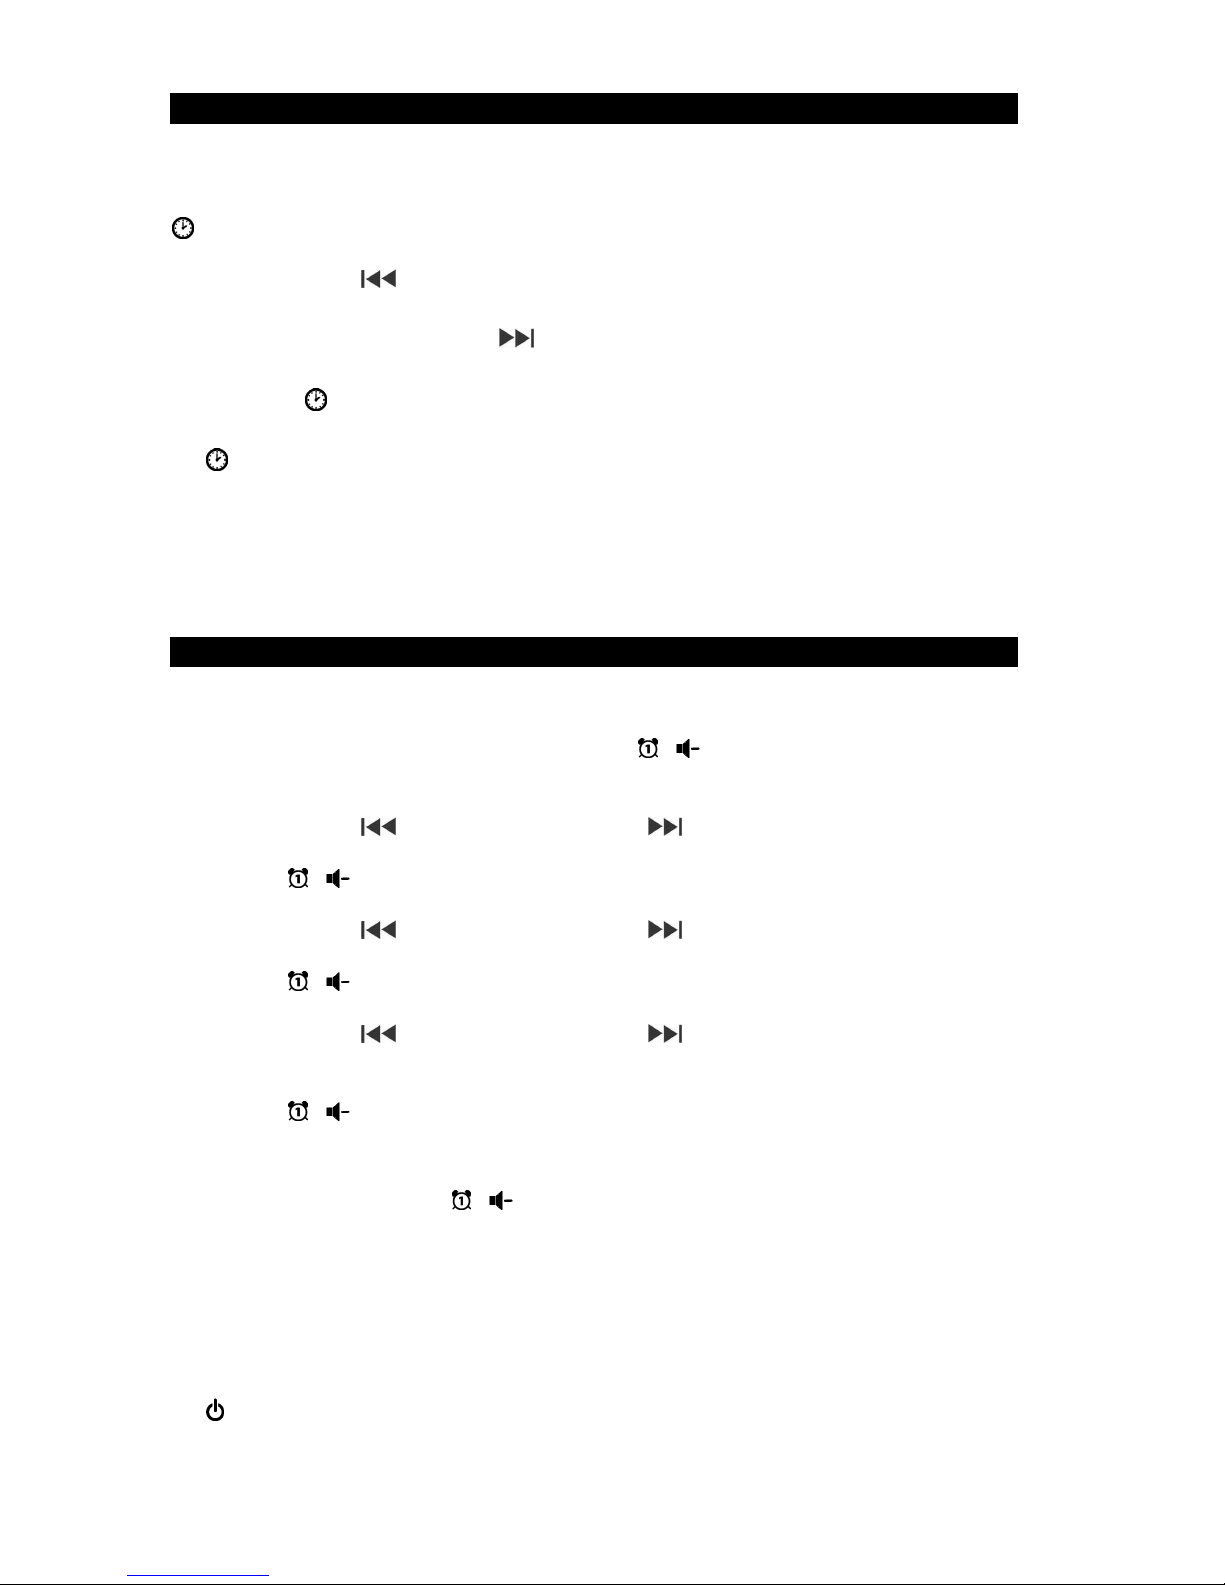
1. Tap the HOUR/ BUTTON (#3) repeatedly to set the correct hour. Press and
hold the button to ncrease the t me faster.
2. After hour s set, tap the MIN/ BUTTON (#4) repeatedly to set the correct
m nutes. Press and hold the button to ncrease the t me faster.
3. Press the / MEM / M + BUTTON (#2) to conf rm the t me. The un t w ll
automat cally save the sett ng and ex t the t me set mode f you do not tap the
/ MEM / M + BUTTON (#2) w th n 5 seconds.
Note:
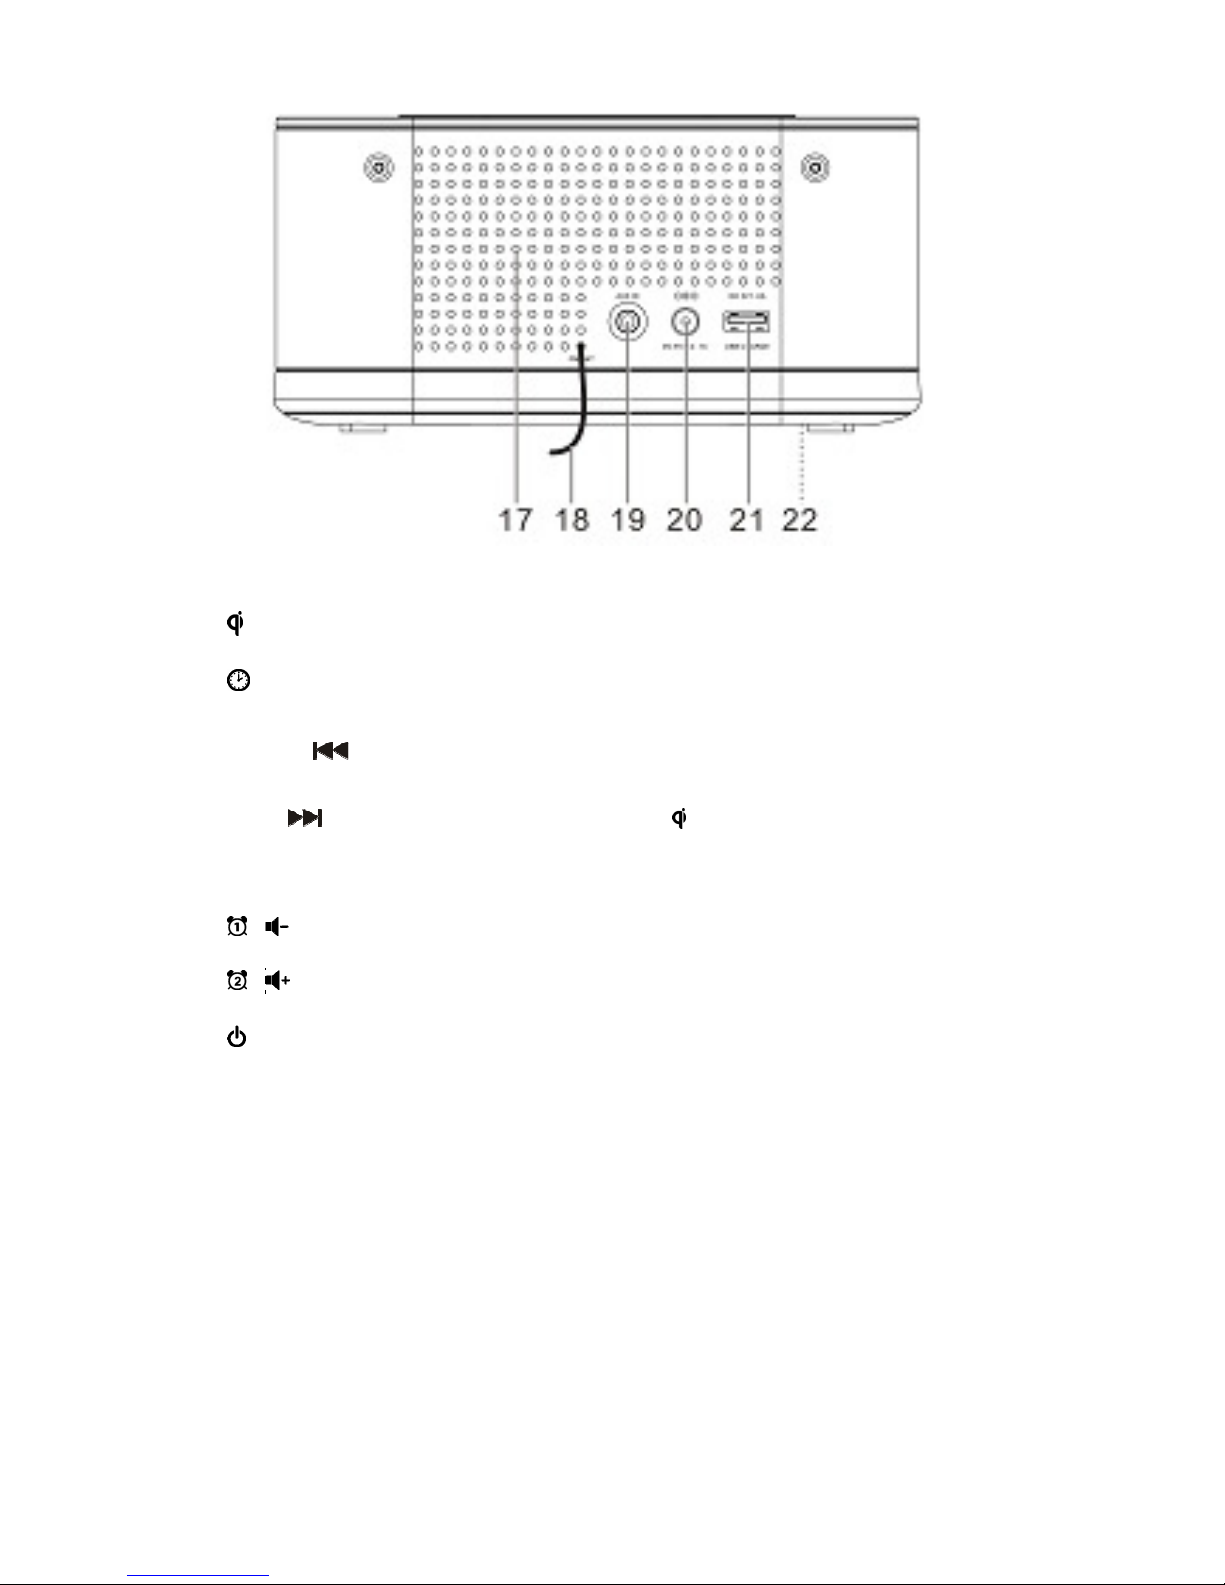
Make sure the hour s set so that AM or PM s correctly d splayed. There s a
PM INDICATOR (#9) located n the upper left corner of the LED DISPLAY
(#16). If the PM INDICATOR (#9) s show ng on the LED DISPLAY (#16), the
d splayed t me s “PM”. If the PM INDICATOR (#9) s not show ng on the LED
DISPLAY (#16), the t me d splayed s “AM”.
ALARM OPERATION
The Q CR-50 features a dual alarm clock.
To set the Alarms:
1. Wh le n standby mode, press and hold the / BUTTON (#6) to enter the
ALARM 1 t me sett ng mode.
2. The alarm t me d splay w ll flash.
3. Tap the HOUR/ BUTTON (#3) AND MIN/ BUTTON (#4) repeatedly unt l
the correct alarm t me s d splayed.
4. Tap the / BUTTON (#6) to conf rm. ALARM 1 INDICATOR (wake to alarm)
(#10) or Alarm 1 INDICATOR (wake to rad o) (#11) w ll flash.
5. Tap the HOUR/ BUTTON (#3) AND MIN/ BUTTON (#4) repeatedly to
select the alarm sound source.
6. Tap the / BUTTON (#6) to conf rm. Alarm frequency w ll flash on the LED
DISPLAY (#16).
7. Tap the HOUR/ BUTTON (#3) AND MIN/ BUTTON (#4) repeatedly to
select an alarm frequency (1-5 = Monday to Fr day, 1-7 = Everyday, 6-7 =
Saturday & Sunday).
8. Tap the / BUTTON (#6) to conf rm.
9. ALARM 2 sett ng procedures are same as ALARM 1.
Setting Wake to Alarm, Radio or Off
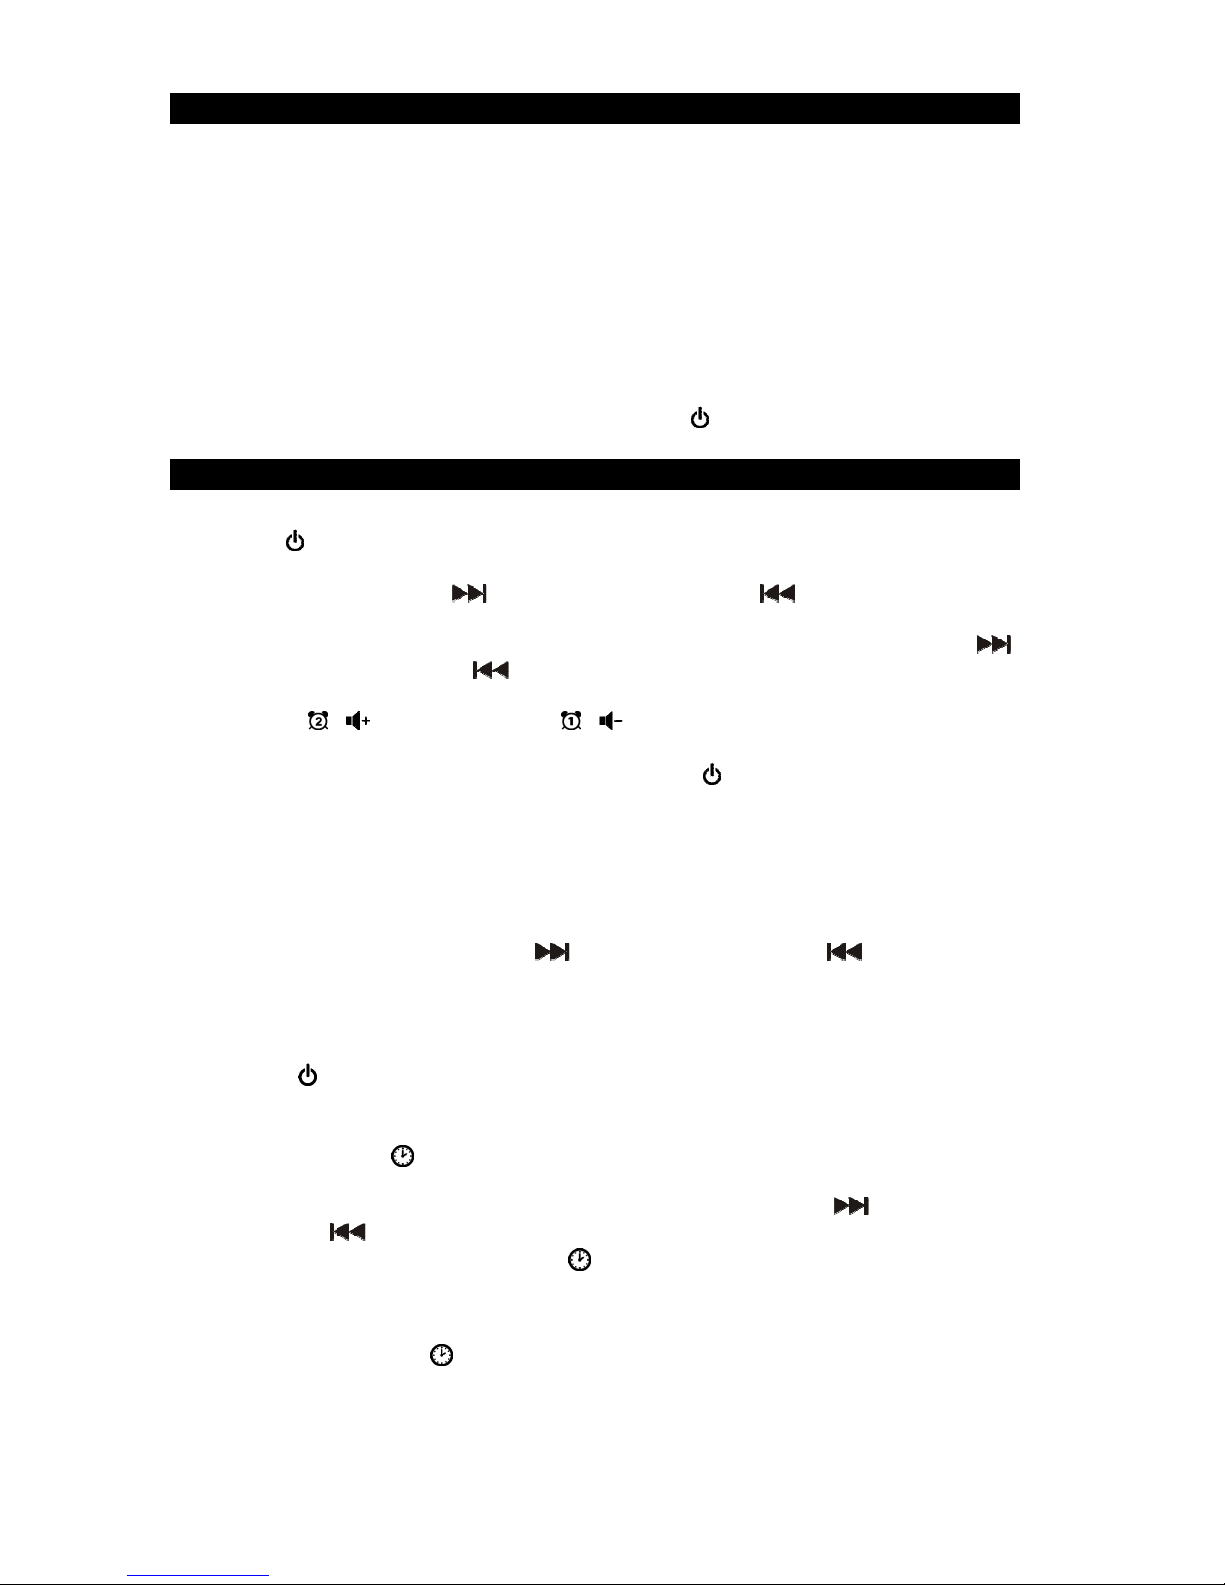
1. In standby mode, tap the / BUTTON (#6) repeatedly to set alarm 1.
a. Wake to Alarm, Alarm 1 INDICATOR (wake to alarm) (#10) w ll l ght up.
b. Wake to Rad o, Alarm 1 INDICATOR (wake to rad o) (#11) w ll l ght up.
c. ALARM 1 Off, both WAKE to ALARM & RADIO Ind cators l ght off.
Note: dur ng the above sett ng, the alarm t me s shown on the LED d splay (#16).
2. ALARM 2 wake to ALARM, Rad o or Off sett ng procedures s same as ALARM 1.
3. When alarm sounds, the correspond ng alarm nd cators w ll flash.
4. The alarm w ll cont nue to sound for one hour unless stopped by press ng the
/ MODE BUTTON (#8).
5. The set alarm t mes w ll sound aga n at the same t me the follow ng day.
Note: If ALARM 1 and ALARM 2 are set to the same t me, only ALARM 2 w ll sound.

E-9
SNOOZE FUNCTION
When the alarm sounds, tap the DIMMER/SNOOZE/SLEEP BUTTON (#5) to
temporar ly turn off the alarm and act vate the snooze funct on, the alarm w ll stop
and sound aga n 9 m nutes later. If you tap the DIMMER/SNOOZE/SLEEP BUTTON
(#5) aga n, the alarm w ll temporar ly turn off aga n and sound aga n n 9 m nutes
and so on. The alarm sound w ll turn off after one hour.
NOTES :
•
To temporar ly s lence the alarm, press the DIMMER/SNOOZE/SLEEP BUTTON
(#5). The alarm w ll sound aga n when the snooze per od (9 m nutes) exp res.
•
The correspond ng Alarm 1 or Alarm 2 nd cator (alarm or rad o) flashes on the
d splay dur ng the snooze per od.
•
To cancel the snooze per od and the alarm, press / MODE BUTTON (#8).
RADIO OPERATION
Listening to the radio
1. Tap the
/ MODE BUTTON (#8
) repeatedly to Turn On the un t and select Rad o
mode, frequency w ll show on the
LED DISPLAY (#16)
.
2. Press and hold the
MIN / BUTTON
(#4) OR
HOUR / BUTTON
(#3) to
search for the next / prev ous ava lable stat on.
3. If the recept on s poor, try Manual Tun ng to f ne-tune the stat on. Tap the
MIN /
BUTTON
(#4) OR
HOUR / BUTTON
(#3) br efly to manually tune through the
frequency band.
4. Adjust the
/ BUTTON
(#7) and
/ BUTTON
(#6) to obta n the des red
sound level.
5. When you have f n shed l sten ng, press and hold / MODE BUTTON (#8
)
to
turn the rad o off.
NOTES:
•
The LED DISPLAY (#16) w ll automat cally sw tch back to show ng the t me after
a few seconds.
•
When l sten ng to the rad o, you can check the frequency of the stat on you are
l sten ng to by tapp ng the
MIN / BUTTON (#4) OR HOUR / BUTTON (#3).
The un t w ll automat cally change back to the t me after a few seconds.
Setting the Radio Station Presets
The un t allows you to store up to 10 stat ons for easy recall at any t me.
1. Press the / MODE BUTTON (#8
)
repeatedly to turn on the un t and select Rad o
Mode.
2. Tune to the rad o stat on you want to store n memory.
3. Press and hold the / MEM / M + BUTTON (#2). The preset channel number
“P01” w ll be flash ng on the LED DISPLAY (#16).
4. To change the preset channel number locat on, press the MIN / BUTTON
(#4)
OR
HOUR / BUTTON
(#3)
to step through the preset locat ons.
5. To conf rm the preset locat on, press / MEM / M + BUTTON (#2).
6. To store another stat on presets, repeat steps 2-5 above.
RECALLING A PRESET STATION
In Rad o mode, press the / MEM / M + BUTTON (#2) repeatedly to select the
preset channel.
TIPS FOR BEST RADIO RECEPTION
FM - If FM recept on s weak, fully extend the w re antenna and vary the pos t on and
locat on of the antenna unt l you f nd the strongest s gnal.

E-10
AUX IN OPERATION
You can play other mus c sources ( Pod, MP3 or other d g tal aud o players) through
the speakers of the Q CR-50 by connect ng the AUX IN JACK (#19) to your external
player’s aud o out jack or headphone jack.
1. Plug one end of an aud o cable (not ncluded) nto the AUX IN JACK (#19) and the
other end of the cable to the headphone jack of your d g tal aud o player.
2. Tap / MODE BUTTON (#8) repeatedly to select AUX mode.
3. AUX w ll show on the LED DISPLAY (#16).
4. Turn on and start play ng the external dev ce you plugged nto the AUX IN JACK
(#19).
5. Slowly adjust both the volume controls of your Q CR-50 and the external dev ce
unt l you reach a comfortable l sten ng level.
Notes:
•
If you connect the Q CR-50 to the L ne-Out Jack on your external dev ce, you
only need to adjust the volume control of your Q CR-50. If you connect to the
Headphone Jack of your external dev ce, you may need to adjust both the
volume controls of your external dev ce and the Q CR-50 to obta n the des rable
l sten ng level.
•
Remember to turn off the Q CR-50 when you have f n shed l sten ng. Don't forget
to sw tch off the power of your external aud o dev ce as well.
SLEEP OPERATION
The sleep t mer turns off the un t automat cally after a des gnated t me has elapsed.
1. In Rad o or AUX mode, tap the DIMMER/SNOOZE/SLEEP BUTTON (#5) to turn
on the sleep funct on.
2. Repeatedly tap the DIMMER/SNOOZE/SLEEP BUTTON (#5) to select the sleep
t mer 10 – 20 – 30 - 40 – 50 – 60 - 70 – 80 – 90 – 00 ( n m nutes). The un t w ll
play for the selected length of t me then turn off automat cally.
3. To cancel the sleep t mer, repeatedly tap the DIMMER/SNOOZE/SLEEP
BUTTON (#5) unt l the t mer shows 00.
4. To turn the un t “Off” before the selected length of t me, press and hold the
/ MODE BUTTON (#8) at any t me.
Note:
Tap the DIMMER/SNOOZE/SLEEP BUTTON (#5) once to check the
rema n ng sleep t me.
DIMMER OPERATION
In Off mode, tap the DIMMER/SNOOZE/SLEEP BUTTON (#5) repeatedly to select
the br ghtness sett ngs of the d splay (H gh, Low or Off).
Note: If the d splay s set to OFF, tap any button except for the
DIMMER/SNOOZE/SLEEP BUTTON (#5), to momentar ly turn the d splay
ON for 5 seconds.

E-11
Qi WIRELESS CHARGING
You can charge your Q compat ble phones w relessly us ng the WIRELESS
CHARGING PAD (#1) located on top of the un t.
Place your Q compat ble dev ce (back s de down) on the WIRELESS CHARGING
PAD (#1). The CHARGING INDICATOR (#15) w ll l ght.
CAUTION:
•
Remove your phone from any metal or magnet c protect ve case before plac ng t
on the Charg ng Pad. Do not place any metal objects or magnet c-str ped dev ces
on Charg ng Pad. Do ng so could damage the object or th s un t.
•
Q compat ble phones w th metall c f n shes w ll charge normally.
USB CHARGING
If your phone doesn’t feature w reless charg ng, you can st ll charge your phone w th
th s un t by a connect ng a USB charg ng cable (not ncluded) to the USB Charg ng
Port (dc 5v 1a) located on the back of the un t.
1. Plug the standard end of a USB charg ng cable (not ncluded) nto the USB
CHARGE PORT (#21) located on the back of the Q CR-50. Plug the other end of
the cable nto the dev ce you w sh to charge.
2. Observe the battery charge nd cator on your dev ce to make sure the charg ng
process starts normally.
3. Unplug the charg ng cable when your dev ce s fully charged.
WARNING!
The USB port located on the back of the Q CR-50 s only des gned for charg ng a
smart phone or portable dev ce and does not support data transfer or connect on
to a computer.
Don’t connect another USB charger to the USB charg ng port on the Q CR-50.
Th s may damage the charg ng c rcu ts on both dev ces and vo d the warranty.
CARE AND MAINTENANCE
•
Clean the rad o w th a soft damp cloth and let all parts dry completely after
clean ng.
•
Do not use any aggress ve cleaners, brushes w th nylon br stles, sharp or
metall c clean ng utens ls, kn ves, hard scrapers and the l ke. They could damage
the surfaces of the rad o.
•
Do not mmerse the rad o n water and do not let water gett ng nto the hous ng of
the rad o.
•
Unplug the power adaptor and clean the rad o before storage.
•
Always store the rad o n a dry and clean place.
SPECIFICATIONS
Power: AC Adaptor:
Input AC 100-240V ~
Output: DC 5V 2.1A
Backup batter es: 2 x AAA batter es (not ncluded)
Frequency Range: FM 87.5 – 108 MHz

E-12
TROUBLESHOOTING GUIDE
If you exper ence d ff cult es n the use of th s clock rad o, please check the follow ng
or call 1-800-777-5331 for Customer Serv ce and support
.
SYMPTOM POSSIBLE CAUSE POSSIBLE SOLUTION
Power does not
come on
Power adaptor connect unstable
Reconnect adaptor
No sound
VOLUME control at m n mum
pos t on.
Increase Volume
No se or sound
d storted on FM
broadcast
- Stat on not tuned properly
- Antenna s not extended
- Retune Broadcast stat on
- Fully extend the antenna
USB charg ng s not
work ng
USB cable s damaged or
nterm ttent
Reconnect the cable aga n
or try another charg ng
cable.
No w reless charg ng Your Q dev ce s not properly
placed on the charg ng pad
Repos t on your Q dev ce
At Spectra, env ronmental and soc al respons b l ty s a
core value of our bus ness. We are ded cated to
cont nuous mplementat on of respons ble n t at ves
w th an a m to conserve and ma nta n the env ronment
through respons ble recycl ng.
Please v s t us at http://www.spectra ntl.com/green.htm for more nformat on on
Spectra’s green n t at ves or to f nd a recycler n your area.

E-13
9 DAY LIMITED WARRANTY AND SERVICE
VALID IN THE U.S.A. ONLY
SPECTRA MERCHANDISING INTERNATIONAL, INC. warrants th s un t to be free from
defect ve mater als or factory workmansh p for a per od of 90 days from the date of or g nal
customer purchase and prov ded the product s ut l zed w th n the U.S.A. Th s warranty s
not ass gnable or transferable. Our obl gat on under th s warranty s the repa r or
replacement of the defect ve un t or any part thereof, except batter es, when t s returned to
the SPECTRA Serv ce Department, accompan ed by proof of the date of or g nal consumer
purchase, such as a dupl cate copy of a sales rece pt.
You must pay all sh pp ng charges requ red to sh p the product to SPECTRA for warranty
serv ce. If the product s repa red or replaced under warranty, the return charges w ll be at
SPECTRA’s expense. There are no other express warrant es other than those stated
here n.
Th s warranty s val d only n accordance w th the cond t ons set forth below:
1. The warranty appl es to the SPECTRA product only wh le:
a. It rema ns n the possess on of the or g nal purchaser and proof of purchase s
demonstrated.
b. It has not been subjected to acc dent, m suse, abuse, mproper serv ce, usage
outs de the descr pt ons and warn ngs covered w th n the user manual or non-
SPECTRA approved mod f cat ons.
c. Cla ms are made w th n the warranty per od.
2. Th s warranty does not cover damage or equ pment fa lure caused by electr cal w r ng
not n compl ance w th electr cal codes or SPECTRA user manual spec f cat ons, or
fa lure to prov de reasonable care and necessary ma ntenance as outl ned n the user
manual.
3. Warranty of all SPECTRA products appl es to res dent al use only and s vo d when
products are used n a nonres dent al env ronment or nstalled outs de the Un ted States.
Th s warranty g ves you spec f c legal r ghts, and you may also have other r ghts wh ch vary
from state to state. TO OBTAIN SERVICE please remove all batter es ( f any) and pack the
un t carefully and send t fre ght prepa d to SPECTRA at the address shown below. IF THE
UNIT IS RETURNED WITHIN THE WARRANTY PERIOD shown above, please nclude a
proof of purchase (dated cash reg ster rece pt) so that we may establ sh your el g b l ty for
warranty serv ce and repa r of the un t w thout cost. Also nclude a note w th a descr pt on
expla n ng how the un t s defect ve. A customer serv ce representat ve may need to contact
you regard ng the status of your repa r, so please nclude your name, address, phone
number and ema l address to exped te the process.
IF THE UNIT IS OUTSIDE THE WARRANTY PERIOD, please nclude a check for $2 . to
cover the cost of repa r, handl ng and return postage. All out of warranty returns must be
sent prepa d.
It s recommended that you contact SPECTRA f rst at 1-800-777-5331 or by ema l at
custserv@spectra ntl.com for updated nformat on on the un t requ r ng serv ce. In some
cases, the model you have may be d scont nued, and SPECTRA reserves the r ght to offer
alternat ve opt ons for repa r or replacement.
SPECTRA MERCHANDISING INTERNATIONAL, INC.
4230 North Normandy Avenue, Ch cago, IL60634, USA. 1-800-777-5331
To reg ster your product, v s t the l nk on the webs te below to enter your nformat on.
http://www.spectra ntl.com/wform.htm
0818 Pr nted n Ch na
Table of contents
Other Jensen Clock Radio manuals

Jensen
Jensen JCR-208 User manual

Jensen
Jensen JCR-315 User manual

Jensen
Jensen JCR-228 User manual

Jensen
Jensen JBS-215 User manual

Jensen
Jensen JCR-255 User manual

Jensen
Jensen JCR-235 User manual

Jensen
Jensen JCR-260 User manual

Jensen
Jensen JCR-212 User manual

Jensen
Jensen JCR-210 User manual

Jensen
Jensen JCR-275A User manual

Jensen
Jensen JEP-150 User manual

Jensen
Jensen MR-720 User manual

Jensen
Jensen JCR-540 User manual

Jensen
Jensen JCR-175 User manual

Jensen
Jensen JBD-100A User manual

Jensen
Jensen JEP-725 User manual

Jensen
Jensen JWM-160 User manual

Jensen
Jensen JCR-206 User manual

Jensen
Jensen SAB-55B User manual

Jensen
Jensen JCR-225 User manual