manuals.online logo
Brands
  1. Home
  2. •
  3. Brands
  4. •
  5. Jet
  6. •
  7. Saw
  8. •
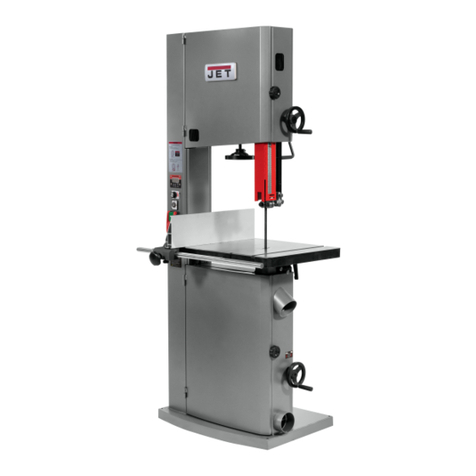
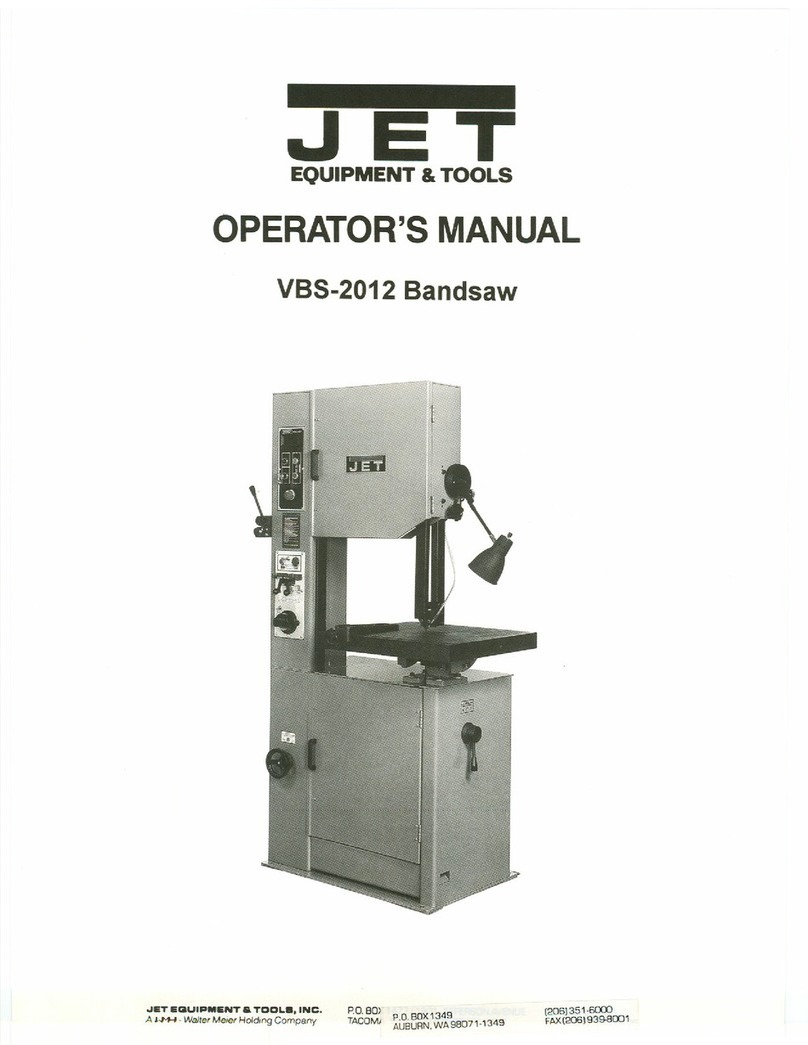
  9. Jet VBS-1408 User manual

Jet VBS-1408 User manual

.JET
EQUIPMENT & TOOLS
OPERATOR'SMANUAL
VBS-1408/1610 Metalworking Bandsaw
(VBS-1610 shown)
P.O.BDX1349
AUBURN,WA98071-1349
.JETEQUIPMENT a TOOLS.INC.
A WMH -Walter Meier Holding Company [20BJ351-8a:D
FAX(206) 939-8001
No. M-414485 2/97
Important Information
1YEAR
LIMITED WARRANTY JET offers a one year limited
warranty on this product
REPLACEMENT PARTS
Replacement partsfor this tool are availabledirectlyform JET Equipment& Tools.
To placean order, call 1-800-274-6848. Pleasehavethe followinginformationready:
1. Visa, MasterCard,or DiscoverCard number
2. Expirationdate
3. Part number listedwithin this manual
4. Shippingaddress other than a Post Office box.
REPLACEMENT PART WARRANTY
JET Equipment & Tools makesevery effort to assure that parts meet high quality and durability standards
and warrants to the original retail consumer/purchaserof our parts that each such part(s) to be free from
defects in materials and workmanshipfor a periodof thirty (30) days from the date of purchase.
PROOF OF PURCHASE
Please retainyour dated sales receiptas proofof purchaseto validatethe warranty period.
LIMITED TOOL AND EQUIPMENT WARRANTY
JET makes every effort to assure that its products meet high quality and durability standards and warrants to the
original retail consumer/purchaser of our products that each product be free from defects in materials and
workmanship as follows: 1 YEAR LIMITED WARRANTY ON THIS JET PRODUCT. Warranty does not apply to
defects due directly or indirectly to misuse, abuse, negligence or accidents, repairs or alterations outside our
facilities or to a lack of maintenance. JET LIMITS ALL IMPLIED WARRANTIES TO THE PERIOD SPECIFIED
ABOVE FROMTHE DATE THE PRODUCTWAS PURCHASEDAT RETAIL. EXCEPT AS STATED HEREIN, ANY
IMPLIED WARRANTIES OR MECHANTABILITY AND FITNESS ARE EXCLUDED. SOME STATES DO NOT
ALLOW LIMITATIONS ON HOW LONG THE IMPLIED WARRANTY LASTS, SO THE ABOVE LIMITATION MAY
NOT APPLY TO YOU. JET SHALL IN NO EVENT BE LIABLE FOR DEATH, INJURIES TO PERSONS OR
PROPERY OR FOR INCIDENTAL, CONTINGENT,SPECIAL OR CONSEQUENTIAL DAMAGES ARISING FROM
THE USE OF OUR PRODUCTS. SOME STATES DO NOT ALLOW THE EXCLUSION OR LIMITATION OF
INCIDENTALOR CONSEQUENTIALDAMAGES,SOTHE ABOVE LIMITATIONOR EXCLUSION MAY NOTAPPLY
TO YOU. To take advantage of this warranty, the product or part must be returned for examination, postage
prepaid, to an authorized service station designated by our Auburn office. Proof of purchase date and an
explanation of the complaint must accompany the merchandise. If our inspection discloses a defect, JET will either
repair or replace the product or refund the purchase price, if we cannot readily and quickly provide a repair or
replacement, if you are willing to accept such refund. JET will return repaired product or replacement at JET's
expense, but if it is determined there is no defect, or that the defect resulted from causes not within the scope of
JET's warranty, then the user must bear the cost of storing and returning the product. This warranty gives you
specific legal rights, and you have other rightswhich varyfrom stateto state.
JET Equipment &Tools. P.O. Box 1349,Auburn, WA98071-1349. (206)351-6000
&, WARNING
.Read and understand the entire .Replacewarning labels if they become
instruction manual before operating obscuredor removed.
machine. .Make certain the motor switch is in the OFF
.This manual is intended to familiarize positionbeforeconnectingthe machineto
you with the technical aspects of this the power supply.
bandsaw. It is not, norwas it intended
to be, a training manual. .Giveyourworkundividedaftention.
Lookingaround,carryingona
.This machine is designed and intended conversation,and"horse-play" are careless
for use by properly trained and acts that can result in serious injury.
experienced personnel only. If you are
not familiar with the proper safe use of a.Keepvisitors a safe distance from the work
bandsaw, do not use this machine until area.
proper training and knowledge has been
obtained. .Use recommendedaccessories; improper
accessories may be hazardous.
.Always wear approved safety glasses/face
shields while using this machine. .Makea habitof checking to see that keys
andadjustingwrenchesareremoved
.Make certain the machine is properly beforeturningon the machine.
grounded. .Never attemptany operation or adjustment
.Before operating the machine,removetie, if the procedure is not understood.
rings,watches, otherjewelry, and roll up
sleeves above the elbows. Removeall .Keepfingers away from the bladewhile in
loose clothing and confine long hair. Do operation.
not wear gloves. .Keep beltguard in place and in working
.Keepthe floor around the machineclean order.
and free of scrap material, oil and grease. .Never force the cutting action.
.Keep machineguards in place at all times
whenthemachineisinuse. Ifremovedfor .Do notattempt to adjust or remove tools
maintenance purposes, use extreme during operation.
caution and replacethe guards
immediately. .Always keep the blade sharp.
.Do not over reach. Maintaina balanced .Always use identicalreplacement parts
stance at all times so thatyou do not fall or when servicing.
lean against bladesor other moving parts. .Readand understandall warnings posted
.Make all machine adjustmentsor on the machine.
maintenancewith the machine unplugged
from the power source. .Failureto complywith all of these warnings
may cause serious injury.
.Use the right tool. Don't force a tool or
attachment to do ajob which it was not
designed for.
Specifications: VBS-1408
Stock Number .414483
Blade Speed (SFPM) 82-330
Maximum Capacity:
Height 8"
Throat 14"
Table Size 20" x 20"
Table Tilt:
Front and Back ... ... ......... ....,.... ...8°
Left 12°
Right 15°
Welder Capacity 1/2"
Blade Length(approx.) 114"
BladeWidth (max.) ... ...... ...... ... .................. ... 1/2"
Overall Height .68-1/2"
Table Heightat 90° 39"
Floor Space Required 34" x 24"
Motor 1HP, 1Ph
115/230V,prewired 115V
NetWeight (approx.) 580 Ibs.
ShippingWeight (approx.) 685 Ibs.
Specifications: VBS-1610
Stock Number .414485
Blade Speed (SFPM). .82-330 (low)
...... ... ...... ...... ...... ......... 985-3950 (high)
Maximum Capacity:
Height 10"
Throat ...15-1/2''''
Table Size 22" x 24"
Table Tilt:
Front and Back.. ... ... ...... ... ...... ...... 8°
Left ... ......... ... ...... ...... ...... ... , 12°
Right 15°
Welder Capacity 5/8"
Blade Length (approx.) ..." .." , 123-1/2"
BladeWidth (max.) ... ...... ...... ...... .................. ..,.. 5/8"
Overall Height .72-1/2"
Table Height at 90° 40"
Floor Space Required 37" x 28"
Motor 2HP, 3Ph
230/460V, prewired230V
NetWeight (approx.) 900 Ibs.
ShippingWeight (approx.) 1015 Ibs.
The specifications in this manual are given as general informationand are not binding. JET Equipment
and Tools reserves the right to effect,at any timeandwithout prior notice,changes or alterations to parts,
fittings, and accessory equipmentdeemed necessaryfor any reasonwhatsoever.
Uncrating and Clean-Up
1. Finish uncratingthe bandsaw. Contactyour
distributor if any damage has occurred during
shipping.
2. Remove any preservative with keroseneor
diesel oil. Do not use gasoline, paint thinner, or
any cellulose-based product. These will damage
painted surfaces.
3. Removetwo hex cap screws from left side of the
vertical column. Attach shear assembly(A, Fig.
1) to column by inserting hex cap screws.
Installation
1. Remove three nuts and washers holdingthe
bandsaw to the shipping crate bottom.
2. Usingthe lifting ring, liftthe bandsaw into it's
permanent location. For best performance,the
bandsaw should be boltedto the floor aftera
level position has beenfound.
3. Using a square, adjust the table 90 degrees to
the blade both front to back and side to side.
Loosen the hex cap screws belowthe tableto
move it and tighten to hold the table in place. If
necessary, adju'stthe pointers to zero should
they read different once the table is
perpendicular to the blade in both directions.
4. To level the machine, place a machinist'slevel
on the table and observe in both directions.
5. Use metal shims under the appropriate hold
down screw. Tighten screw and recheckfor
level.
6. Adjust with additional shims, as required,until
the table is level when all mountingscrews (or
nuts) are tight.
A
Figure 1
Electrical Connections
The VBS-1408 bandsawis ratedat 115/230Vand
comes from the factory prewired 115V.
The VBS-1610 bandsawis ratedat 230/460Vand
comes from the factory prewired230V.
To switch to from 115Vto 230V (or230Vto 460V)
operation, follow the wiring diagram foundon the
inside cover of the motorjunction box.
The bandsaw must be grounded. A qualified
electrician can make the proper electrical
connections and confirm the power on site is
compatible with the saw.
Before hooking up to the power source, makesure
the switch is in the off position.
Controls
t~
.B
!
~
."-C
~/J
Note: Pictures usedfor illustrationsshowthe VBS-
1610. The descriptions and functionsare the same
for the VBS-1408, exceptwhere noted.
Variable Speed HandWheel (A, Fig. 2) - located
belowwork table on rightside of machine base.
Turn clockwise to increase speedand counter-
clockwise to decrease speed. Caution: Do not turn
handlewhile machine is stopped. Adjustspeedonly
when machine is running.
Upper Blade Guide Lock Knob (B, Fig.2) - located
on right side of upper arm. Turn counter-clockwise
to loosen and clockwiseto tighten. A
Work Lamp Switch (C, Fig. 2) - on top of lamp
shade; turns lamp on and off.
Main Motor Start Switch (0, Fig. 2) - located on
upper front column. Depress to start bandsaw.
Main Motor Stop Switch (E, Fig. 2) - located on
upper front column. Depress to stop bandsaw.
Figure 2
-- -- -
_u n- - _n_nn-
Gear Shift Lever (A, Fig. 3 - VBS-1610 only)-
located on the right side of the base underthe table.
Move the lever towardthe front of the machineto
engage the low range setting. Movethe lever toward
the rear to engage the high range setting. Change
gears only when the power is off. Turn variable
speed handwheelwhile changingspeed rangesto
help the gears engage.
Grinder Toggle Switch (B, Fig. 3) - locatedon
bladewelder panelfound on columnfront. Flip
switch up to start grinder;flip down to stop grinder.
Weld Button (C, Fig. 3) - locatedon bladewelder
panelfound on column front. Depressand holdto
start welding. Shuts off automaticallywhen weld is
done. Releasewhen weld is completed.
Anneal Button (D, Fig. 3) - located on blade welder
panel found on column front. Depress and hold to
anneal blade, release to stop.
Blade Clamp Pressure Knob (E, Fig. 3) - located
on bladewelder panelfound on columnfront. Turn
counter-clockwise to bring blade clampscloser
together and clockwise to separate.
Blade Clamps (F, Fig. 3) - locatedon bladewelder
panelfound on column front. DOWN positionallows
insertion of blade into clamp. UP positionlocks
blade.
Blade Tension Handwheel (G, Fig. 3) - locatedon
underside of upper frame. Turn clockwiseto tension
blade;counter-clockwise to releasetension on blade.
Shear Lever (H, Fig. 3) - locatedon uppercolumn.
UP position allows insertion of blade end into shear.
Pull lever DOWNto cut blade.
Blade Tension Indicator (I, Fig. 3- VBS-1610only)
-located under the idlerwheel housingwith the
calibration scale visable from the rearof the
machine. Indicates blade tension relativeto the
width of the blade being used.
Table Tilt Mechanism - located under work table.
To tilt table left or right, loosen two hex cap screws
(A, Figure 4) at rear of mechanism. To level table
front to back, loosen four hex cap screws (A, Fig. 5)
on either side of mechanism.
-
H
Figure 3
Figure 4
Figure 5
Adjustments
WARNING
Blade Tensioning
1. Raise upper blade guide by looseninglock knob
(A, Fig. 6) and lifting blade guide handle (B, Fig.
6) to it's highest position.
2. Apply finger pressureto the blade. Travelfrom
vertical should be approximately3/8" eachway.
3. To tighten blade, turn handwheel (C, Fig. 6)
clockwise.
4. To loosen blade, turn handwheelcounter-
clockwise.
5. Use the blade tension indicator(0, Fig.6 - VBS-
1610 only) as reference only. Bladeshould be
tensioned usingthe finger pressuremethod.
Blade Tracking Alignment (VBS-1408)
Bladetracking has been adjusted at the factory. Run
the bandsawand observe the bladeon thewheels.
The blade should run next to but not againstthe
flange at the rear. If adjustment is necessary:
1. Slightly loosen all four hex cap screws (A, Fig. 7)
found at the rear of the machine at the top.
2. Tighten two top set screws (8, Fig.7) slightlyto
shift blade toward the front. Conversely,tighten
two set screws (C, Fig. 7) to shift blade toward
the rear. Once blade istracking properly,slightly
tighten other two set screws and then tighten all
four hex cap screws.
Blade Tracking Alignment (VBS-1610)
1. Open the idler wheel door and observe the
positionof the bladeon the wheel.
2. Turn the Idler wheel adjustment knob(A, Fig. 8)
clockwise or counter-clockwise untilthe blade
runs next to, but not against, thewheel flange.
Figure 6
Figure 7
Figure 8
.....................
A
B
!'
~O "
.
A
-. 10
..L. u
J
n-- _n--- n n __n_n-_n-----
Blade Guide Adjustment
Blade guide adjustment has been set at the factory.
Should adjustment be necessary:
1. Loosenthe upper bladeguide lockknob, raise
the guide assemblyto halfway betweentable
and head,then tighten lock knob.
2. Loosentwo set screws (A, Fig. 9) and adjust
guide so that blade guides are in back of the saw
teeth. Blade guides must be adjustedfar
enough backto clear saw bladeevenduring the
cutting operationwhen the blade isdeflected
toward the rear.
3. Tighten two set screws (A, Fig. 9).
4. Open the upper access door and rotatethe
bladewheel by hand untilthe weld portionof the
blade is between the two fingers.
5. Loosen two hex cap screws (B, Fig. 9) and
adjust each finger toward the blade. They
should nottouch the blade. Adjustfor .010"
clearance on either side.
6. Tighten two hex cap screws (B, Fig. 9) once
proper adjustment has been made. Besure that
adjustment for air nozzle has not changedand it
directs the flow of air to the cut.
7. Adjust lower blade guide inthe same manner.
See Fig. 10.
8. Even properly adjusted bladeguideswill show
wear after continual use. Re-adjustas
necessary.
Figure 9
Figure 10
Top Guide Adjustment
Always position the top guide to within an 1/8"of the
top surface of the workpiece. This minimizes
exposure of the operator's handsto the saw blade.
Changing Saw Blades
1. Disconnect saw from the power source.
2. Move the upper bladeguide to its highest
position and lock in place.
3. Open bothwheel doors. Turn the tension
adjustment knob counter-clockwiseto loosen
tension on the blade.
4. Removethe bladefrom bothwheels and
maneuver it around the blade guardon the
column and protectiveshield on the upperblade
guide.
5. Install new blade by maneuveringaround blade
guard on the column and protectiveshieldon the
upper bladeguide.
6. Place it between the fingers of both blade guides
and onto bothwheels. Positionnextto both
wheel flanges. Make sure teeth pointdown
toward the table.
7. Retentionthe saw blade byturningtensionhand
wheel. Rotatethe wheel by handand makesure
the blade is properly seated inthe bladeguides.
Blade guideswill haveto be adjusted if the
replacement blade is a differenttype and width.
8. Turn on the saw and check bladetracking.
Adjust tracking if necessary.
Blade Selection
Proper blade selection is just as important to band
saw operation as is blade speed and material feed.
Proper blade selection will impact blade life,
straightness of cut, cut finish, and efficiency of
operation. Excess blade breakage, stripping of
teeth, and waviness of cut are some of the results of
improper blade selection.
Blades are classified by material composition, tooth
shape, pitch of teeth, and type of set, gage of the
band material, and kerf of the set (width of cut).
- ----
Material Composition
Carbon Steel - low cost, for use with non-ferrous
materials, wood, and plastics.
High Speed Steel - resists heat generated by dry
cutting. Used for ferrous metalsand are more
expensive than carbon steel blades.
Alloy Steel - tough and wear resistant,cuts faster
with longer blade life. Usedon hard materials. More
expensive than carbon or highspeed steel.
Carbide Tipped - for cutting unusual materials such
as uranium, titanium, or beryllium. Very expensive.
Tooth Shape
Note: When cutting thin materials, the rule for blade
pitch is to have a minimum of two teeth engaging the
material being cut at all times.
Standard Tooth - generally usedto cutferrous
metals, hard bronze, hard brass, and thin metals.
Skip Tooth - have better chip clearance (larger
gullet) and are used on softer, non-ferrous materials
such as aluminium, copper, magnesium,andsoft
brass.
Hook Tooth - providesa chip breakerand has less
tendency to gum up in softer materials. Used inthe
same materials as skip tooth but can be fed faster
than standard or skip tooth blades.
Set Type
Straight Set - used for free cutting non-ferrous
materials; Le., aluminum, magnesium,plastics,and
wood.
Wavy Set - used on materials of varying thickness
(pipe, tubing, and structural shapes).
Raker Set - used in large cuts on thick plate and bar
stock where finish of cut is not as important as
speed.
Gage
Blade gage is the thickness of material the blade
from which the blade is produced. The thicker the
material, the stronger the blade will be.
Kerf
Kerf is the width of a cut. Kerfwill vary accordingto
set of bladeteeth.
Blade Width
The thinner the blade, the tighter the minimumradius
of cut will be. Always use the widest blade possible
for thejob.
General rulesfor bladeselection:
.Select coarser pitch blades for thicker or softer
material.
.Selectfiner pitch bladesfor thinner or harder
material.
.Use fine pitch blades to obtain a smooth finish.
.Use coarse pitch blades to obtain faster cutting
speeds (thick material).
.To prevent premature bladewear, use the
fastest practical speed.
.Adjust the feed rate to ensure continuous
cutting action.
.Run the bandsaw with the blade centered in the
upper and lower guides and the guide fingers
adjusted as close as possible without touching
the blade or weld joint.
Using the Blade Welder
Blade Shear and Blade Preparation
1. The bladeshould be cut to the longestlength
that machine will accept.
2. Put the handle in the upright position.
3. Place the blade against the back of the square
cutting guide of the shear.
4. Bring the handle down firmly to cut blade.
5. Use the blade grinder to assure the blade ends
are flat, square, and smooth.
6. With fine pitched blades,one or moreteeth from
each side will have to be removedby grindingso
that the cross section of the weld area is
uniform.
Welder Preparation
1. Clean the welder jaws and the lowerjaw
inserts.
Welding
1. Turn pressure switch (A, Fig. 11)to the zero
position.
2. Join blade ends together and locateunion inthe
center between two electrodes.
3. Set pressure switch (A, Fig. 11) to blade width
according to the scale.
4. Press weld button (B, Fig. 11). Do notrelease
until the weld has been completed.
Position of Cut Ael.tlve
to The Gullet of the
Teeth -Tooth G'ound Mee Consumed
1/2 To~oth ~~Off ~~BY Welding.
LULJ ---LJJU- --L::JrL:J
Position of Cut Ael.tlve 4 Pitch
:::~e:e GUII~ the 1-1/2 Teeth G'oUnd A'ee Con,umed
3/4 TOnnoth ~ ~ ~ !:"ay Welding.
:', ---1_11 lLJ - - -n-r:1
Po,'t'on of Cut Is In 6 Pitch
The Cen.., of the
Gullet. 2 Teeth Gmund A,ee Consumed
1TOO~O:_~~ : 10<ByWelding.
LJJlLJLJjLLJ --01[]
~':.s~~."3~'?e~to~~~"i;ve- BPitch
Teeth 2.1/2 Teeth G,ound Mee Co"sumed
1-1/4T~/4Teeth :-:1MOff ~Weld;ng.
LiJ~ - - --COLLJ - - UlLJ
10 Pitch
Follow these cutting and grinding instructions and the teeth wiJI be uniformly
spaced after the weld.
BA
Figure 11
CLEAN BLADE ENDS
WHICH CONTACT WELDER JAWS.
AEMOVE DIRT, 01 L. SCALE
AND OXIDE. " / GRIND OFF TEETH
~/\ WITHIN WELDING AREA
GAIND HEAE
./
.y
/
/
f'
f:
c
If snips are used
to cut blade,
grind ends squ.'e
as shown.
Points to remember in preparing the blade for welding
Annealing
1. Release the welded blade and clamp it again
between the front edge of the twojaws.
2. Annealing procedurewill depend on bladetype:
Carbon Steel Blades
1. Press and jog the annealing switch button until
the weld is a "dull cherry" to "cherry red" color.
2. Allow the bladeto cool slowly by decreasingthe
jogging frequency. GOOO WELD
~'NCORRECT TOOTH SPACING
WELD NOT IN CENTER OF GULLET TOOTH WHICH WAS NOT
-, ~REMOVED HAS JAMMED IN WELD,
Carbon Steel Hard Back Blades
1. Heat the blade slowly untilthe weld becomesa
deep blue color.
WEAK, INCOMPLETE WELD
(BLOW.OUT HOLESI
2. Continue to heat by jogging the anneal button
until the width of the bluecolor is one-halfthe
length of the band exposed betweenthejaws.
3. Do not overheat or the temperof the bandwill be
damaged. Caution - Do not heat beyondthe
"blue" stage. If the band beginsto show any red
color, it is too hot. Coolquickly by releasingthe
anneal button.
!(~
;
:
I;',:.
;~
:;~1
:".T DISTANCE BETWEEN JAWS
.'.
'.
,.
~"
.',
,'..
Bi-Metal Blades Correct annealing of Carbon Steel Hard
Back Blades
1. Heat the blade slowly byjogging the annealing
switch button untilthe weldjust beginsto emit
light (dull redcolor). The desire color may not
always be visible in normal room light- always
shade the weld area with your hand.
2. Cool the weld quickly by releasingthe annealing
button.
3. Followthis procedure beforeand after grinding
bimetal blades.
Blade Grinding
After annealing,the blademust be groundto remove
excess metal or flash from the weld. With the teeth
facing out, grind theweld carefully. Do not hitthe
teeth, grind deeper than theweld, burn,or overheat
the weld area. Be sure to removeflash from the
back edge of the blade. Any flash or "stub"teeth
which project beyondthe normal set or heightof the
other teeth must be groundoft.
Secondary Annealing
Anneal the weld 2-3 times again aftergrinding.
Welder Clean-Up
It is important that the welderjaws be keptclean at
all times. The jaws and inserts must be wiped or
scraped clean after every weld. Doingthiswill
ensure betterwelds by:
1. Holdingproper alignment.
2. Preventing flash from becomingembeddedin
the blade.
3. Preventing shorts or poor electrical contact.
Lubrication Schedule
.Upper Blade Guide Shaft -lightly grease
weekly. Clean after every day's use.
.Speed Change Handle -grease monthly with
a light film on teeth and threads.
.Variable Pulley - grease fitting using a light
weight grease found on end of pulley shaft.
.Blade Tension Screw - grease monthly.
Good Grinding, Bad Grinding,
IJ,.. 1}r\
}I \ c=.r=::::J
3;?
5140 5100
P3-1
~4150
9300 ~G6201
/~
04030
401 \
9500
9590 79310
7430
VBS- 1408
6810
6161
6071
/6120
9290~ \~.
~(f 6070
Parts List for the VBS-1408 Bandsaw
Index Part
No. No. Description Size Qty.
1010 ....vBS1408-1010 , Work Table 1
1020 VBS14-102 Table SupportFrame 1
1030 1030 Table Bracket(right) 1
1040 1040 Table Bracket (left) 1
1060 TS-0680061 Washer 1/2 2
1070 1070 Tube Screw 4
1090 1090 Table SupportHousing 1
1100 1100 Guide SupportHousing 1
1310 VBS16-131 BladeGuide Support 2
1320 VBS1220A-132 BladeGuide 2
1330 VBS16-133 BladeStopper :2
1350 1350 BladeGuide PosL 1
1360 1360 Guide PostHousing 1
1361 1361 Guide Post Spring 1
1370 1370 BladeGuide (left) 1
1380 1380 BladeGuide (right) " 1
1390 1390 Post HoldingPin 1
VBS1610-BS BladeGuideAssembly Complete 1
1910 1910 Bushing(re:VBS1610-BS) 4
1920 1920 Lift(re:VBS1610-BS) , 1
1930 1930 BladeShaft (re:VBS161O-BS) 1
1940 1940 Vaned Iron Plate(re:VBS1610-BS) 2
1950 1950 Lower Blade(re:VBS161O-BS) 2
1960 1960 UpperBlade(re:VBS1610-BS) 1
1970 1970 Joint Plate- Left (re:VBS1610-BS) 1
1980 1980 Chain Joint- Right(re:VBS1610-BS) 1
1990 1990 HandleBar (re:VBS1610-BS) 1
2000 VBS14-009 DriveMotor 1
2010 VBS1408-2010 Motor Pulley 1
2020 2020 MotorSuspensionArm 2
2130 2130 ReducerPulley 8" 1
2300 2300 Speed Reducer 1
3010 VBS1408-3010 LowerWheel 1
3020 VBS14-302... RubberTire 2
3030 VBS1408-3030 Taper Sleeve.. 1
3040 VBS1408-3040 Wheel Lock Nut 1
3050 VBS1408-3050 UpperWheel 1
3060 VBS1408-3060 UpperWheel Lock 1
3070 3070 UpperWheel Nut 1
3080 3080 Slide BlockHousing 1
3090 VBS14-309 Slide BlockSeaL 2
3100 3100 Slide BlockGuide 2
3110 3110 UpperWheel Slide 1
3120 VBS1408-3120 Wheel Shaft , , 1
3121 3121 ......... Spring ... ...... ............ ... ... ... 1
3150 3150 Washer 1
vBS1610-AP Air PumpAssembly Complete 1
4010 4010 Air PumpHousing(re:VBS1610-AP) 1
4020 4020 PumpCover (re: VBS1610-AP) 1
4030 4030 PumpShaft (re:VBS1610-AP) 1
4040 4040 Air PumpPulley 1
4050 4050 Air PumpVein 4
4140 4140 Air Outlet (re:VBS161O-AP) 1
4150 4150 Air Inlet(re:VBS1610-AP)""'"'''''''''''''''''''''''' 1
4170 4170 Air Nozzle 1
4180 4180 Air NozzleClip 1
4190 4190 Air Tube 1
5000 VBS1408-5000 Main Body ... 1
5100 VBS1408-5100 RearDoor 1
5120 VBS1408-5120 Lower Door.. .. 1
5140 VBS1408-5140 UpperDoor 1
6010 VBS14-601 LimitSwitch 2
6011 6011 Insulator 1
6020 6020 Guide Block "'''''''''''''''''''''''''''''''' 1
6021 6021 SpringBracket 1
6030 6030 GuideCasting 1
6040 6040 Housing 1
6050 6050 StationaryJaw 1
6051 6051 Insulator 1
6052 6052 InsulatorTube 3
6053 6053 InsulatorWasher 3
6054 6054 Spacer 3
6060 6060 EccentricShaft. 2
6070 6070 Clamp Lever(right) 1
6071 6071 Clamp Lever(left) 1
6100 6100 ClampSupport(right) 1
6101 6101 ClampSupport (left) 1
6110 6110 ClampPlate(right) ... 1
6111 6111 ClampPlate(left) 1
6120 6120 Cam 2
6130 6130 MovingJaw 1
6150 6150 Weld Button 1
6160 6160 MicroSwitch 1
6161 6161 Bracket 1
6170 VBS16-617 PressureAdjust Knob 1
6180 VBS16-618 ...... Shaft ...... ....... 1
6200 VBS16-620 Cam.. 1
6210 VBS16-621 Weld TensionArm 1
6211 6211 Bushing 1
6220 6220 Spring(short)"'"'''''''''''''''''''''''''''''''''''''''''''''' 1
6230 6230 Spring(long) 1
6240 VBS14-624 Transformer .. 1
6241 6241 ... ...... """ MountingBracket .................. ...1
6250 VBS16-625 Switch... 1
6260 VBS14-626 Grinder Motor 1
6270 6270 Spacer 1
6280 ....JWG12-628 GrinderWheel 1
6281 TS-0680021 Washer 1/4 1
6282 TS-1540041 Hex Nut 6MM 1
6290 vBS16-629 GrinderGuard 1
6291 6291 GrinderCover 1
6330 6330 Welder Nameplate 1
6340 6340 InstructionLabel 1
6350 6350 Grinder Label 1
6420 ....6420 AnnealSwitch , 1
6745 6745 VoltageReducer 1
6799 6799 ...... ...Wiring Plate ... 1
VBS1610-WL Work LampAssembly Complete 1
6810 6810 Shield(re: VBS1610-WL) 1
6820 6820 Jointer (re:VBS161O-WL) 1
6830 6830 Brass Nut (reVBS1610-WL) 1
6840 6840 LampArm (re:VBS1610-WL) 1
6850 6850 Arm Jointer (re: VBS1610-WL) 1
6860 6860 Arm Tube (re: VBS161O-WL) 2
6870 6870 Tube Holder(re:VBS1610-WL) 1
6880 6880 Arm Nut (re:VBS161O-WL) 4
6890 6890 Tube Locker(re: VBS161O-WL) 2
6900 6900 :ArmHousingAdjuster(re:VBS1610-WL) 1
6910 6910 HousingAdjust Screw(re:VBS1610-WL) 1
6920 6920 LampArm Housing(re:VBS1610-WL) 1
6930 6930 .. Holder(re:VBS161O-WL) 1
6931 6931 Holder(re:VBS1610-WL) 1
6940 6940 Hex Nut (re: VBS1610-WL) 1
6950 6950 LampSocket(re:VBS1610-WL) 1
7400 VBS16-7400 SpeedChangeShaft 1
7410 VBS16-7410 ShaftBlock 1
7420 VBS16-7420 Speed IndicatingShaft 1
7430 VBS16-7430 Gear ShaftArm 1
7440 7440 IndicateGear ShaftArm 1
7450 VBS16-7450 SpeedShaft Housing 1
7451 VBS16-7451 " WasherTube 1
7460 VBS16-7460 PulleyShaftArm 1
VBS1610-VP Variable PulleyAssembly Complete 1
7470 7470 Variable PulleyShaft * 1
7490 VB$16-7490 PulleyShaft Housing* 1
7500 VBS16-7500 lnner Pulley* 1
7510 VBS16-7510 MiddlePulley* " 1
7520 VBS16-7520 Outer Pulley* 1
8111 8111A NamePlate.. ... 1
8741 8741 Tilt Indicator(L&R) 1
8771 8771 Tilt Indicator(F&R) 1
9015 9015 "GuidePostBlock 1
9030 9030 HandWheel 1
9031 9031 HandWheel 1
9040 9040 Brass HandWheel (re:VBS1610-WL) 1
9210 9210 HandleKnob "2
9230 9230 HandWheel Knob 1
9290 VBS14-609 ... Knob.... , 2
9300 9300 UpperDoor Hinge 2
9310 9310 Hinge 4
9500 9500 SpringPlate :."'"'''''''''''''''''''''''''' 4
9590 9590 HandleArm :3
9600 9600 ChipStopper .. 1
9720 9720 Pointer 1

Other manuals for VBS-1408

1

This manual suits for next models

1

Other Jet Saw manuals

Jet HVBS-56M Service manual

Jet

Jet HVBS-56M Service manual

Jet JBTS-10MJS User manual

Jet

Jet JBTS-10MJS User manual

Jet HBS-916W Service manual

Jet

Jet HBS-916W Service manual

Jet JWSS-22B User manual

Jet

Jet JWSS-22B User manual

Jet JHBS916 User manual

Jet

Jet JHBS916 User manual

Jet HVBS-56M User manual

Jet

Jet HVBS-56M User manual

Jet J-7060 User manual

Jet

Jet J-7060 User manual

Jet JWBS-9X User manual

Jet

Jet JWBS-9X User manual

Jet 15" Scroll Saw User manual

Jet

Jet 15" Scroll Saw User manual

Jet JTAS-10XL30-1DX User manual

Jet

Jet JTAS-10XL30-1DX User manual

Jet JBC-355 User manual

Jet

Jet JBC-355 User manual

Jet PROMAC 349V User manual

Jet

Jet PROMAC 349V User manual

Jet CS-275 Service manual

Jet

Jet CS-275 Service manual

Jet 708315BTA Service manual

Jet

Jet 708315BTA Service manual

Jet Elite EVBS-20 Service manual

Jet

Jet Elite EVBS-20 Service manual

Jet JWBS-24 User manual

Jet

Jet JWBS-24 User manual

Jet HVBS-712K User manual

Jet

Jet HVBS-712K User manual

Jet JWBS-14DX Service manual

Jet

Jet JWBS-14DX Service manual

Jet JTS-600X User manual

Jet

Jet JTS-600X User manual

Jet HBS-56S User manual

Jet

Jet HBS-56S User manual

Jet HVBS-710G Service manual

Jet

Jet HVBS-710G Service manual

Jet VSF-14-1 Service manual

Jet

Jet VSF-14-1 Service manual

Jet VBS-18MW User manual

Jet

Jet VBS-18MW User manual

Jet JWBS-14Q User manual

Jet

Jet JWBS-14Q User manual

Popular Saw manuals by other brands

Makita SJ401 instruction manual

Makita

Makita SJ401 instruction manual

MK Diamond Products MK-101 Owners manual, parts list & operating instructions

MK Diamond Products

MK Diamond Products MK-101 Owners manual, parts list & operating instructions

Clipper C13E owner's manual

Clipper

Clipper C13E owner's manual

Grizzly G1128 instruction manual

Grizzly

Grizzly G1128 instruction manual

GMC TS1800 instruction manual

GMC

GMC TS1800 instruction manual

Incra TS II owner's manual

Incra

Incra TS II owner's manual

Shop fox W1715 owner's manual

Shop fox

Shop fox W1715 owner's manual

Central Machinery 93012 Assembly and operating instructions

Central Machinery

Central Machinery 93012 Assembly and operating instructions

Zipper Mowers ZI-KGS210DS user manual

Zipper Mowers

Zipper Mowers ZI-KGS210DS user manual

MK Diamond Products 157721X Owner's manual and parts list

MK Diamond Products

MK Diamond Products 157721X Owner's manual and parts list

Asada 380SP instruction manual

Asada

Asada 380SP instruction manual

Hilti WSR 36-A Original operating instructions

Hilti

Hilti WSR 36-A Original operating instructions

Makita 5603R instruction manual

Makita

Makita 5603R instruction manual

EINHELL KGST 250 Profi operating instructions

EINHELL

EINHELL KGST 250 Profi operating instructions

Makita 2712 instruction manual

Makita

Makita 2712 instruction manual

Makita CIRCULAR SAW 5005BA instruction manual

Makita

Makita CIRCULAR SAW 5005BA instruction manual

DISCO DAD522 installation manual

DISCO

DISCO DAD522 installation manual

MK Diamond Products MK-5009G Owner's manual & operating instructions

MK Diamond Products

MK Diamond Products MK-5009G Owner's manual & operating instructions

manuals.online logo
manuals.online logoBrands
  • About & Mission
  • Contact us
  • Privacy Policy
  • Terms and Conditions

Copyright 2025 Manuals.Online. All Rights Reserved.