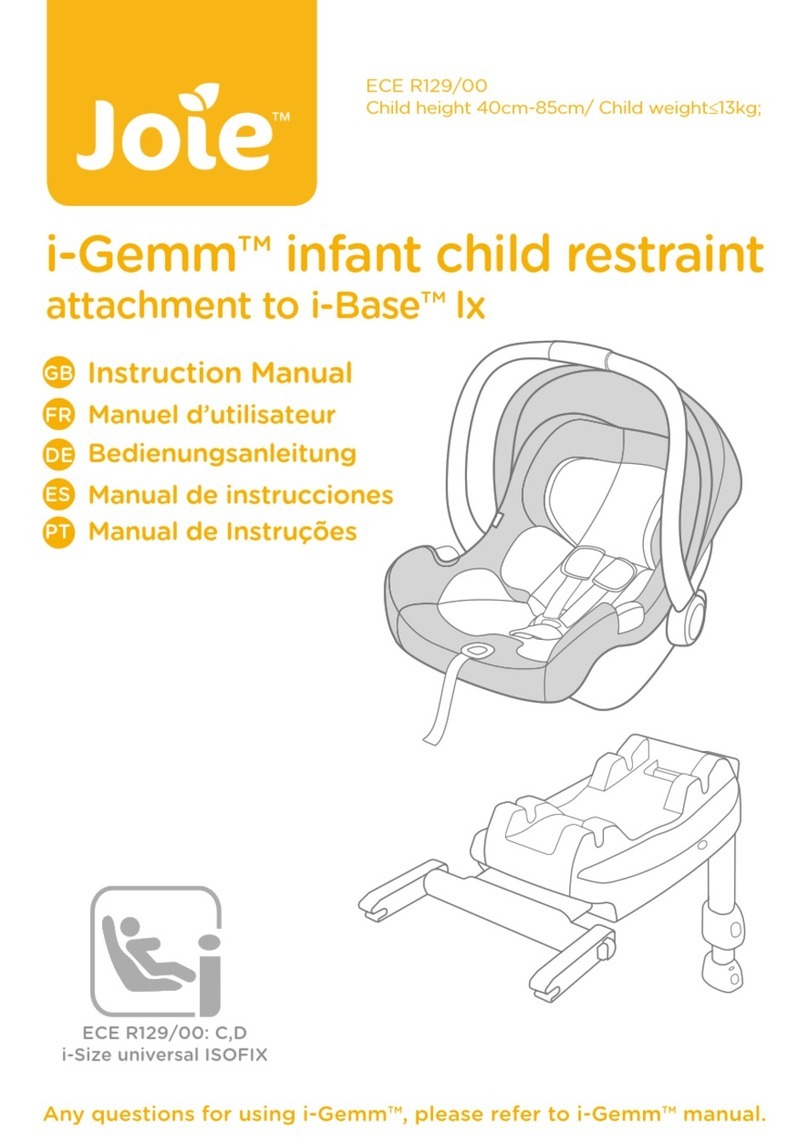
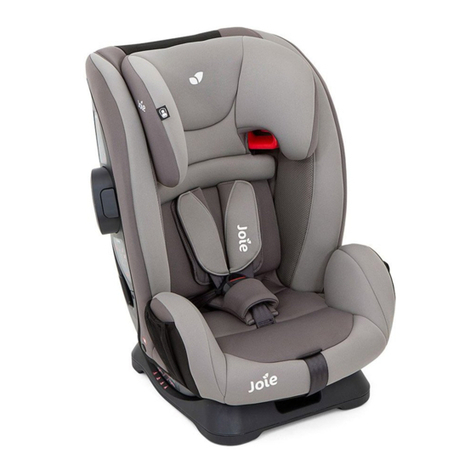
Jole spin 360 GT User manual

spin 360TM GT
child restraint
ECE R44.04: A,C,D
ECE R44.04: ISOFIX
ECE R44.04: Group 0+/1(0–18kg)
HU Használati utasítás

1
Welcome to Joie™
Congratulations on becoming part of the Joie family! We are so excited
to be part of your journey with your little one. While traveling with the
Joie spin 360TM GT child restraint you are using a high quality, fully certi-
fied safety Group 0+/1 child restraint. Please carefully read this manual
and follow each step to ensure a comfortable ride and best protection
for your child.
If vehicle is equipped with ISOFIX, the vehicle lower anchor points
may be visible at the vehicle seat crease. See your vehicle owner’s
manual for exact locations, anchor identification, and requirements
for use.
To use this child restraint with the ISOFIX connections according to
the UN ECE R44.04 Regulation, the child shouldweigh under 18kg
(approximately 4 years old or under).
Base
Please read all the instructions in this manual before installing and us-
ing the product.
! IMPORTANT: KEEP FOR FUTURE REFERENCE.
PLEASE READ CAREFULLY.
Please keep the instruction manual in the
storage compartment at the bottom of
the base as right figure.
For warranty information, please visit our
website at joiebaby.com
Parts List
Fig. 1 Head Support
Fig. 2 Seat Pad
Fig. 3 Buckle
Fig. 4 Adjustment Webbing
Fig. 5 Recline Adjustment
Button
Fig. 6 Load Leg
Fig. 7 Load Leg Indicator
Fig. 8 Load Leg Adjustment
Button
Fig. 9 Rotating Button
Fig. 10 Safe Rotation Guard™
Fig. 11 Shoulder Strap
Fig. 12 Infant Insert
Fig. 13 Head Support
Adjustment Lever
Fig. 14 Side Impact Shield
Fig. 15 ISOFIX Connector
Fig. 16 ISOFIX Adjuster
Button
Fig. 17 ISOFIX Guides
Please make sure there are no missing parts. Please contact the
retailer if anything is missing.
GB
1
2
3
4
9
8
11
15
13
5
6
716
17
12
14
10

3 4
WARNING
!NO child restraint can guarantee full protection from
injury in an accident. However, proper use of this
child restraint will reduce the risk of serious injury or
death to your child.
!The child should weight under 18kg (approximately 4
years old or under).
!Any support-leg should be in contact with the vehicle
floor and any straps restraining the child should be
adjusted to the child’s body. The straps should not be
twisted.
!DO NOT use forward facing mode before the child’s
weight exceeds 9kg. Keep your child rearward facing
as long as possible as rearward facing is the safest
position.
!DO NOT install or use this child restraint without
following the instructions and warnings in this manual
or you may put your child at serious risk of injury or
death.
!DO NOT make any modifications to this child restraint
or use it along with component parts from other
manufacturers.
!DO NOT use this child restraint if it is damaged or has
missing parts.
WARNING
!DO NOT have your child in large/oversized clothes
when using this enhanced child restraint in baby or
toddler mode, because this may prevent your child
from being properly and securely fastened by the
shoulder harness straps and the crotch strap be-
tween the thighs.
!When using this child restraint in rear facing or
forward facing mode, the harness must be used
correctly, and make sure the lap belt is not above the
child’s pelvis portion.
!DO NOT leave this child restraint unsecured in your
vehicle because an unsecured child restraint can be
thrown around and may injure occupants in a sharp
turn, sudden stop, or collision. Remove it if not in
regular use.
!NEVER leave your child unattended with this child
restraint.
!Please do not use this child restraint if the child
restraint has dropped from a significant height, hit
the ground at a considerable speed, or has visible
signs of damage. We are not responsible to replace
if the child restraint has been damaged under these
abnormal conditions. A new child restraint will need
to be purchased when any of the aforementioned
conditions occurs.

5 6
WARNING
!NEVER install this child restraint on any vehicle seat
equipped with safety airbags when used in rear
facing mode.
!NEVER use a second-hand child restraint or a child
restraint whose history you do not know because
they may have structural damage that endangers
your child’s safety.
!Please keep this child restraint away from sunlight,
otherwise it may be too hot for the child’s skin.
!DO NOT use this child restraint as a regular chair as it
tends to fall down and could injure the child.
!DO NOT use this child restraint without the soft
goods.
!The soft goods should not be replaced with any
besides the ones recommended by the manufacturer,
because the soft goods constitute an integral part of
the child restraint performance.
!DO NOT put anything other than the recommended
soft goods in this child restraint.
WARNING
!DO NOT put unsecured items in the vehicle because
they can be thrown around and may injure occupants
in a sharp turn, sudden stop, or collision.
!Do not place other items on top of the child restraint
if it is in the car boot to prevent damage.
!Do not allow the child restraint harness or buckles to
become trapped or caught in the vehicle seat or
door.
!DO NOT continue to use this child restraint after it
has suffered any violent crash. Replace immediately
as there may be invisible structural damage from the
crash.
!Remove this child restraint from the vehicle seat
when it is not in use for a long period of time.
!To avoid suffocation, remove plastic bag and
packaging materials before using this product. The
plastic bag and packaging materials should then be
kept away from babies and children.
!Consult the retailer for issues concerning mainte-
nance, repair and part replacement.

7 8
WARNING
!Do not place any objects in the load leg area in front
of your base.
!DO NOT carry this child restraint with a child in it.
!Frequently check the ISOFIX guides for dirt and clean
them if necessary. Reliability can be effected by
ingress of dirt, dust, food particles etc.
!DO NOT use any load bearing contact points other
than those described in the instructions and marked
on the child restraint.
!Correct Installation is only permitted by use of the
ISOFIX connectors.
!DO NOT install this child restraint under the following
conditions:
1. Vehicle seats with lap belt or 3-point-belt.
2. Vehicle seats facing sideways or rearward with
respect to the running direction of the vehicle.
3. Vehicle seats movable during installation.
Emergency
In case of emergency or accidents, it is most important to have your
child taken care of with first aid and medical treatment immediately.
Product Information
1.According to the UN ECE R44.04 Regulation, the child restraint with
Base is a Semi-Universal ISOFIX Class A,C,D Child Restraint.
2.If in doubt please consult the child restraint manufacturer or the
retailer.
For Installation with ISOFIX System
This is an ISOFIX CHILD RESTRAINT SYSTEM. It is approved to UN
ECE regulation 44, 04 series of amendments for general use in vehicles
fitted with ISOFIX anchorages systems.
It will fit vehicles with positions approved as ISOFIX positions (as
detailed in the vehicle handbook), depending on the category of the
child restraint and of the fixture. If in doubt, consult either the infant
child restraint manufacturer or vehicle manufacturer.
The ISOFIX size class for which this device is intended is A,C,D.
Suitable for Child weighing under 18kg
Mass Group Group 0+/1
Materials Plastics, metal, fabrics
Patent No. Patents pending

910
Concerns on Installation
1
24
3
57
6
1
24
3
57
6
1
2
3
A
I
R
B
A
G
2
1
see images 1- 2
Child's
Weight
Installation
ModeInstallationReference
Age
Recline
Position
<18kg
9 -18kg
Rear
facing
mode
Forward
facing
mode
1 year
to
4 years
Position
1-5
Position
1-5
ECE R44.04
Approx
Approx
birth
to
4 years
Choose the Installation Mode
Installing the Base
3
see images 3- 12
! After placing the base on the vehicle
seat, pull the load leg downward to
floor.

11 12
41!After attaching the ISOFIX, pull the
load leg downward to floor. When
the load leg indicator shows green,
the load leg is installed correctly.
!Squeeze the load leg releasing
button, then adjust the load leg
length. 7
!The load leg has 12 positions.
When the load leg indicator shows
red this means the load leg is in the
wrong position. 8
!Make sure the load leg is in full
contact with the vehicle floor pan.
Red means it is installed
incorrectly. 8
!Check to make sure the base is
securely installed by pulling on
both ISOFIX connectors.
!The ISOFIX connectors must be
attached and locked onto the
ISOFIX anchor points. 9-1
!The load leg must be installed
correctly with green indicator. 9-2
Please refer to rear facing mode and
recline positions mode in the later
sections to use the child restraint.
7
8
9
1
2
! Insert ISOFIX guides to assist with
installation. 4-1
! There are 10 adjustable positions for
ISOFIX. Press the ISOFIX adjuster
button to extend the ISOFIX. 5
! The ISOFIX connectors can be
extended for easier installation.
Press the ISOFIX adjustment
buttons 5-1 then pull the ISOFIX
connectors completely out of the
base 5-2. After successfully
installing the ISOFIX connectors,
press the ISOFIX adjustment
buttons again while pushing the
seat back against the vehicle
backrest.
! Make sure that both ISOFIX
connectors are securely attached to
their ISOFIX anchor points. The
colors of the indicators on both
ISOFIX connectors should be
completely green. 6-1
5
1
2
1
6
2

13 14
11
1
2
12
Removing the base
To remove from the vehicle press
the ISOFIX adjuster button 10 -1 and
pull the base back from the seat.
10 -2
Then press and release the
ISOFIX-connectors from the
vehicle’s ISOFIX. 11
To prevent damage during transit,
press the ISOFIX adjuster button
12 -1 and fold the connector
completely. 12 -2
see images 13 - 14
Squeeze the recline adjustment
button 13 , to adjust the child
restraint to the proper position. The
recline angles are shown as 14
Recline Adjustment
14
13
Please recheck the load leg position
after reclining.
There are 5 recline positions for rear
facing mode and 5 recline positions
for forward facing mode.
10
1
2
1
2
Use Side Impact Shield
15
16
1
2
see images 15 - 16
!Ensure the side impact protection
shield is locked in the open
position for maximum side impact
safety.
1. The side impact can be manually
opened as shown on 15 .
2. The side impact shield opposite
the vehicle door can be closed to
allow more seating space, if
needed. The side closest to the
vehicle exterior should always be
in the open position. 16

15 16
see images 17 - 19
1. Please adjust the head support
and check if the shoulder
harnesses are at the correct
height according to 17
!When used rear facing, the
shoulder harness height must be
even with child’s shoulders. 17
!When used forward facing, the
shoulder harness height must be
even with child’s shoulders. 17
2. Squeeze the head support
adjustment lever 18 , meanwhile
pull up or push down on the head
support until it snaps into one of
the 6 positions. The head support
positions are shown as 19 .
18
1
2
19
Using in the Rear Facing Mode
(Rearward Facing Mode/for Child under 18kg
/infant - 4 years old)
Seat installation
see images 3- 9
!Please install the child restraint on
the rear vehicle seat and then put
the child in the child restraint.
Preparation for use
see images 20 - 23
1. Press the ISOFIX adjuster button
20 -1 and pull the base back from
the vehicle seat.
2. Press the rotating button to rotate
for easier side loading/unloading
of the child. 21 &22
!The ISOFIX connectors must be
attached and locked onto the
ISOFIX anchor points. 23 -1
!The load leg must be installed
correctly with green indicator.
23 -2
21
23
2
1
20
1
2
22
Height Adjustment
for Head Support and Shoulder Harnesses
17

17 18
5. Place the child into the child restraint and pass both arms through
the harnesses.
!After the child is seated, recheck whether the shoulder harnesses
are at the proper height.
6. Engage the buckle. Please refer to 28
Securing Child
1. Press the webbing adjustment
button 24 -1, while pulling out the
shoulder harnesses to the proper
length. 24 -2
2. Unlock the buckle of the
harnesses by pressing the red
button. 25
3. Fix the buckles on each side of
the seat to make placing the child
more comfortable. 26
4. Please use the infant insert for the
best protection of the child. 27
25
27
26
28
24
2
1
1
2
We recommend using the full
infant insert while the baby
is 0-6 months or until they
outgrow the insert. The infant
insert increases side impact
protection.
Detach the snaps on
the head support to
remove the head
portion of the insert.
Remove the head support
portion of the infant
insert when the child’s
head no longer fits
comfortably.
Remove the body
portion of the infant
insert when the infant’s
shoulders no longer fit
comfortably.
Remove the infant insert
cushion by detaching the
snaps to allow more space
when the infant does not
fit comfortably. The
cushion
can be used separately
without being attached to
the insert to bolster the
infant's back for more
comfort.

19 20
7. Pull down the adjustment
webbing and adjust it to the
proper length to make sure your
child is properly secured. 29
!Make sure that the belt is
tightened tightly. Slack reduces
the protective effect of the child
restraint system!
29
Using in the Forward Facing Mode
(Forward Facing Mode/for Child between
9-18kg / 1 -4 years old)
34
2
1
1. Press the Safe Rotation Guard
button on the same side when
rotating the seat to the forward
facing position (child weight
exceeds 9 kg). 31
2. Press the rotating button to rotate
for easier side loading/unloading
of the child, then rotate forwards
to desired direction. 32 &33
!The ISOFIX connectors must be
attached and locked onto the
ISOFIX anchor points. 34 -1
!The load leg must be installed
correctly with green indicator.
34 -2
30
1
2
32
33
31
see images 3- 9
!Please install the child restraint on
the vehicle seat, and then put the
child in the child restraint.
see images 30 - 38
1. Press the ISOFIX adjuster button
30 -1 and pull the base back from
the vehicle seat. 30 -2

21 22
Securing Child
After the child is placed into the seat,
check whether the Shoulder Harness
Straps are at proper height.
1. Press the webbing adjustment
button, while pulling out the
shoulder harnesses to the proper
length. 35
2. Unlock the buckle of the harnesses
by pressing the red button. 36
3. Fix the buckles on the both sides
of seat to make placing the child in
forward facing mode more
convenient. 37
4. When installing the child restraint in
the forward facing mode, do not use
the infant insert.
5. Place the child into the child
restraint and pass both arms
through the harnesses. Engage
the buckle.
35
36
37
!After the child is seated, recheck
whether the shoulder harnesses
are at the proper height.
6. Pull down the adjustment webbing
and adjust it to the proper length to
make sure your child is properly
secured.38
!Make sure the space between the
child and the Shoulder Harness
Straps is about the thickness of
one hand.
7. If steps 35 &38 &37 are taken when
arriving at your destination whilst
removing the child, then the
harness will be positioned so that
it is out of the way and ready for
loading upon your return to the
vehicle.
38
see images 39 - 46
Press the red button to disengage the
buckle. 39
Follow steps 40 - 46 to detach soft
goods.
To re-attach the soft goods please
repeat the above steps in the reverse
step.
Detach Soft Goods
goods
39

23 24
41
42
44 45
46
! After removing the wedge from the insert please store it somewhere
that the child cannot access it.
! Please wash the seat cover and inner padding with cold water under
30°C.
! Do not iron the soft goods.
! Do not bleach or dry clean the soft goods.
! Do not use undiluted detergents gasoline or other organic solvent to
wash the child restraint or base. It may cause damage to the child
restraint.
! Do not wring out the seat cover and inner padding to dry. It may
leave the seat cover and inner padding with wrinkles.
! Please hang dry the seat cover and inner padding in the shade.
! Please remove the child restraint and base from the vehicle seat if
not in use for a long period of time. Put the child restraint in a cool,
dry place where your child cannot access it.
! Do not tamper with the harness connectors during cleaning.
Care and Maintenance
goods
40
43

25
1
2
3
4
9
8
11
15
13
5
6
716
17
12
14
10
Willkommen bei Joie™
Wir begrüßen Sie als ein weiteres Mitglied der Joie-Fami-
lie! Wir freuen uns sehr, Ihr kleines Kind auf Reisen zu be-
gleiten. Wenn Sie mit dem Spin 360TM GT von Joie unter-
wegs sind, verwenden Sie ein hochwertiges, komplett
sicherheitszertifiziertes Kinderrückhaltesystem der Gruppe
0+/1. Bitte lesen Sie diese Anleitung sorgfältig durch und beachten
die einzelnen Schritte zur Gewährleistung einer komfortablen Fahrt
und optimalen Sicherheit für Ihr Kind.
Falls das Fahrzeug mit einer ISOFIX-Vorrichtung ausgestattet ist, sind
die unteren Verankerungspunkte möglicherweise in der Fahrzeugsitz-
falte sichtbar. Die exakten Positionen, Verankerungsidentifikation und
Nutzungsanforderungen entnehmen Sie bitte der Bedienungsanlei-
tung Ihres Fahrzeugs.
Zur Nutzung dieses Kinderrückhaltesystems mit den ISOFIX-Befesti-
gungen entsprechend der Regelung UN ECE R44.04 sollte das Kind
weniger als 18 kg wiegen (bis ca. 4 Jahre).
Basis
Bitte lesen Sie vor Installation und Nutzung des Produktes alle An-
weisungen in dieser Anleitung.
! WICHTIG: FÜR KÜNFTIGE BEZUGNAHME
AUFBEWAHREN. BITTE SORGFÄLTIG DURCH-
LESEN.
Bitte bewahren Sie diese Anleitung wie rechts
abgebildet im Aufbewahrungsfach an der Un-
terseite der Basis auf.
Garantieinformationen finden Sie auf unserer
Website unter joiebaby.com
Teileliste
Fig. 1.1 Kopfstütze
Fig. 1.2 Sitzpolster
Fig. 1.3 Gurtschnalle
Fig. 1.4 Verstellband zur
Anpassung der
Gurtlänge
Fig. 1.5 Taste zur
Neigungsverstellung
Fig. 1.6 Stützfuß
Fig. 1.7 Stützfußindikator
Fig. 1.8 Taste Stützfußeinstellung
Fig. 1.9 Taste zum Drehen des
Sitzes
Fig. 1.10 Taste zur Entriegelung
der Rotation
Fig. 1.11 Schultergurtpolster
Fig. 1.12 Neugeboreneneinlage
Fig. 1.13 Einstellhebel für die
Kopfstütze
Fig. 1.14 Seitenaufprallschutz
Fig. 1.15 ISOFIX Konnektoren
Fig. 1.16 Knopf zur ISOFIX
Tiefenverstellung
Fig. 1.17 ISOFIX
Führungshülsen
Vergewissern Sie sich bitte, dass nichts fehlt. Bitte wenden Sie
sich an den Händler, falls etwas fehlen sollte.
DE

27 28
Warnhinweise
!KEIN Kinderrückhaltesystem kann kompletten Schutz
vor Verletzungen bei einem Unfall garantieren. Den-
noch reduziert der ordnungsgemäße Einsatz dieses
Kinderrückhaltesystems die Gefahr ernsthafter oder
tödlicher Verletzungen Ihres Kindes.
!Das Kind sollte weniger als 18 kg wiegen (bis zu einem
Alter von ca. 4 Jahren).
!Achten Sie darauf, dass sich die Rückhaltegurte Ihres
Kindes NICHT verdrehen, sondern so flach wie
möglich anliegen.
!Den vowärts gerichteten Modus ERST benutzen, wenn
das Kind mehr als 9 kg wiegt. Setzen Sie Ihr Kind so
lange wie möglich mit dem Rücken zur Fahrtrichtung,
denn dies ist die sicherste Sitzposition.
!Installieren oder verwenden Sie dieses Kinderrück-
haltesystem NICHT, ohne die Anweisungen und
Warnhinweise in dieser Anleitung zu befolgen; andern-
falls drohen Ihrem Kind ernsthafte oder gar tödliche
Verletzungen.
!Sie dürfen dieses Kinderrückhaltesystem NICHT modi-
fizieren oder zusammen mit Einzelteilen anderer
Hersteller verwenden.
!Verwenden Sie dieses Kinderrückhaltesystem NICHT,
falls es beschädigt ist oder Teile fehlen.
Warnhinweise
!Stellen Sie sicher, dass Ihr Kind beim Einsatz dieses
Kinderrückhaltesystems angemessen gekleidet ist
(insbesondere keine übermäßig dicke oder gepol-
sterte Kleidung); andernfalls kann Ihr Kind NICHT
zuverlässig gesichert werden! Verwenden Sie bei
niedrigen Temperaturen bevorzugt eine Decke, mit
der Sie das bereits angegurtete Kind zudecken.
!Beim Einsatz dieses Kinderrückhaltesystems muss
der Gurt sowohl im vorwärts gerichteten als auch im
rückwärts gerichteten Modus richtig eingestellt
werden werden; stellen Sie sicher, dass sich der
Beckengurt nicht oberhalb des Beckens Ihres Kindes
befindet.
!Lassen Sie dieses Kinderrückhaltesystem NICHT
ungesichert in Ihrem Fahrzeug, da ein ungesichertes
Kinderrückhaltesystem bei scharfen Kurven, plötzli-
chem Abbremsen oder Unfällen umher geschleudert
werden und Insassen verletzen könnte. Entfernen Sie
es bei unregelmäßiger Verwendung.
!Lassen Sie Ihr Kind NIE unbeaufsichtigt in diesem
Kinderrückhaltesystem sitzen.

29 30
Warnhinweise
!Sollte Ihr Kindersitz Schäden aufgrund von Eigenver-
schulden (z.B. Bodenaufprall aus großer Höhe und/
oder mit hoher Geschwindigkeit, etc.) aufweisen,
empfehlen wir Ihnen das Produkt nicht weiter zu
verwenden und im Sinne der Sicherheit durch ein
Neues zu ersetzen. Es können Defekte in der Materi-
alstruktur - beispielsweise feinste Haarrisse - entste-
hen, die mit freien Auge nicht sichtbar sind und
dennoch die Schutzwirkung des Kindersitzes im Falle
eines Unfalls signifikant beeinträchtigen. Bei unsa-
chgemäßer Produktnutzung (siehe zuvor genannte
Szenarien) sind wir als Hersteller nicht verpflichtet,
das beschädigte Produkt kostenlos zu ersetzen.
!Installieren Sie dieses Kinderrückhaltesystem NIE-
MALS rückwärts gerichtet auf einem Fahrzeugsitz mit
Sicherheits-Airbag.
!Verwenden Sie NIEMALS ein gebrauchtes Kinder-
rückhaltesystem oder ein Kinderrückhaltesystem,
dessen Vergangenheit Sie nicht kennen; möglicher-
weise weist es strukturelle Schäden auf, die Ihr Kind
gefährden können.
!Bitte platzieren Sie dieses Kinderrückhaltesystem
nicht im direkten Sonnenlicht; andernfalls kann es zu
heiß für die Haut Ihres Kindes werden.
Warnhinweise
!Verwenden Sie dieses Kinderrückhaltesystem NICHT
als reguläre Sitzgelegenheit, da er dazu neigt, um-
zukippen, was Verletzungen des Kindes verursachen
könnte.
!Verwenden Sie dieses Kinderrückhaltesystem NICHT
ohne die Textilteile.
!Die Textilteile sollten ausschließlich durch die vom
Hersteller empfohlenen Teile ersetzt werden, da sie
ein integraler Bestandteil der Leistung des Kinder-
rückhaltesystems sind.
!Geben Sie NICHTS außer den empfohlenen Textil-
teilen in dieses Kinderrückhaltesystem.
!Platzieren Sie KEINE ungesicherten Gegenstände im
Fahrzeug, da sie in einer scharfen Kurve, bei plötzli-
chem Abbremsen oder Unfällen umher geschleudert
werden und Personen verletzen könnten.
!Legen Sie zur Vermeidung von Schäden nichts auf
dem Kinderrückhaltesystem ab, wenn es sich im
Kofferraum befindet.
!Die Gurte oder Verschlüsse des Kinderrückhaltesys-
tems dürfen nicht im Fahrzeugsitz oder in der Fah-
rzeugtür eingeklemmt werden oder sich darin verfan-
gen.

31 32
Warnhinweise
!Verwenden Sie dieses Kinderrückhaltesystem NICHT
weiter, nachdem es in einen Unfall verwickelt war.
Ersetzen Sie es sofort, da es durch den Unfall mögli-
cherweise unsichtbare strukturelle Schäden aufweist.
!Entfernen Sie dieses Kinderrückhaltesystem vom
Fahrzeugsitz, wenn es längere Zeit nicht verwendet
wird.
!Entfernen Sie zur Vermeidung von Erstickungsgefahr
Kunststoffbeutel und Verpackungsmaterial vor
Einsatz dieses Produktes. Halten Sie Kunststoffbeu-
tel und restliches Verpackungsmaterial von Säuglin-
gen und Kindern fern.
!Wenden Sie sich bei Fragen zu Pflege, Reparatur und
Ersatzteilen an den Händler.
!Dieses Kinderrückhaltesystem darf NICHT
getragen werden, wenn sich ein Kind darin
befindet.
!Platzieren Sie keine Gegenstände im
Standbeinbereich vor Ihrer Basis.
Warnhinweise
!Untersuchen Sie die ISOFIX-Führungen regelmäßig
auf Verschmutzung und reinigen Sie sie bei Bedarf.
Die Zuverlässigkeit des Systems kann durch Eindrin-
gen von Schmutz, Staub, Lebensmittelresten usw.
beeinträchtigt werden.
!NUR die in der Anleitung beschriebenen und am
Kinderrückhaltesystem markierten Last tragenden
Kontaktpunkte verwenden.
!Eine sachgemäße Installation ist nur durch Verwend-
ung der ISOFIX-Befestigungen gewährleistet.
!nstallieren Sie dieses Kinderrückhaltesystem NICHT
unter den folgenden Umständen:
1. Fahrzeugsitze mit Becken- oder 3-Punkt-Gurt.
2. In Bezug auf die Fahrtrichtung des Fahrzeugs
zurSeite oder nach hinten gewandte Sitze.
3. Fahrzeugsitze, die sich während der Installation
bewegen.

33 34
Notfall
Bei einem Notfall oder Unfall ist es besonders wichtig, dass bei Ihrem
Kind umgehend Erste Hilfe geleistet und es medizinisch versorgt
werden.
Produktdaten
1. Entsprechend der Regelung UN ECE R44.04 ist das
Kinderrückhaltesystem mit Basis ein semiuniverselles
Kinderrückhaltesystem der ISOFIX-Klasse A, C, D.
2. Bitte wenden Sie sich im Zweifelsfall an den Hersteller oder Händler
des Kinderrückhaltesystems.
Installation mit ISOFIX-System
Dies ist ein ISOFIX-Kinderrückhaltesystem. Es ist gemäß UN ECE
Regelung 44/04 zur allgemeinen Nutzung in Fahrzeugen mit ISOFIX-
Verankerungssystemen zugelassen.
Es passt in Fahrzeuge mit Positionen gemäß ISOFIX-Vorgaben (siehe
Fahrzeughandbuch); je nach Kategorie des Kinderrückhaltesystems
und der Befestigung. Bitte wenden Sie sich im Zweifelsfall an
den Hersteller des Rückhaltesystems für Kleinkinder oder an den
Fahrzeughersteller. ISOFIX-Größenklasse, für die dieses Produkt
vorgesehen ist: A ,C, D.
Geeignet für Kind mit einem Gewicht von unter 18 kg
Gewichtsgruppe Gruppe 0+/1
Materialien Kunststoff, Metall, Stoffe
Patent-Nr. Patente angemeldet
Bei der Installation zu beachten
1
24
3
57
6
1
24
3
57
6
1
2
3
A
I
R
B
A
G
2
1
Siehe Abbildung 1- 2

35 36
9 -18kg
Position
1-5
Position
1-5
ECE R44.04
Gewicht des
Kindes
Installations-
modus
Installation Referen-
zalter
Neigung-
sposition
Rückwärts-
gerichteter
Modus
Vorwärts-
gerichteter
Modus
Von Geburt
bis 4 Jahre
ca. 1 Jahr -
4 Jahre
<18kg
Auswahl des Installationsmodus
Basis installieren
3
Siehe Abbildung 3- 12
! Ziehen Sie den Stützfuß vollständig
bis zum Boden aus, nachdem Sie
die Basis auf den Fahrzeugsitz
gestellt haben.
41
1
6
5
1
2
! Befestigen Sie die ISOFIX-
Führungshülsen an den ISOFIX-
Verankerungspunkten. Die
ISOFIX-Führungshülsen können die
Oberfläche des Fahrzeugsitzes vor
Verschleiß schützen. Sie dienen
auch als Führung für die ISOFIX-
Konnektoren.
! Die ISOFIX-Konnektoren sind
10-fach in der Tiefe verstellbar.
Drücken Sie den Knopf zur ISOFIX
Tiefenverstellung 5für die
korrekte Justierung des Kindersitzes
im Fahrzeug.
! Zur einfacheren Installation der
Isofix-Konnektoren können Sie
diese verlängern. Betätigen Sie
hierzu den Knopf zur ISOFIX-
Tiefenverstellung 5-1 und ziehen
5-2 Sie die ISOFIX-Konnektoren
vollständig aus der Basis heraus.
Nach erfolgreicher Installation der
ISOFIX-Konnektoren 6-1
betätigen Sie erneut den Knopf zur
ISOFIX-Tiefenverstellung und
schieben den Sitz zurück gegen die
Fahrzeugrückenlehne. 6-2
! Bitte beachten Sie zur Nutzung des
Kinderrückhaltesystems die später
folgenden Abschnitte zum
rückwärts gerichteten Modus und
zu den Ruhepositionen.
2

37 38
!Ziehen Sie nach der ISOFIX-
Befestigung den Stützfuß nach
unten zum Boden aus. Wenn die
Standbeinanzeige grün wird, ist es
richtig installiert.
!Zur korrekten Einstellung des
Stützfußes, drücken Sie am unteren
Ende des Fußes gleichzeitig die
beiden Entriegelungsknöpfe 7und
passen Sie diesen den
fahrzeugseitigen Gegebenheiten an.
!Der Stützfuß hat 12 Positionen.
Wenn die Stützfußanzeige rot ist,
befindet sich das Stützfuß in der
falschen Position. 8
!Stellen Sie sicher, dass der Stützfuß
vollen Kontakt mit dem
Fahrzeugboden hat. Ist der Indikator
ROT, müssen Sie die Stützfuß-
Position nochmals korrigieren, bis
der Indikator auf GRÜN wechselt. 8
!Vergewissern Sie sich, dass die
Basis sicher befestigt ist, indem Sie
an beiden ISOFIX-Konnektoren
ziehen.
!Die ISOFIX-Konnektoren müssen an
den ISOFIX-Verankerungspunkten
befestigt und verriegelt werden. 9
-1
!Der Stützfuß muss richtig installiert
sein. Dies kann mit Hilfe der
Farbanzeige am Stützfuß überprüft
werden. Ist diese GRÜN, ist der
Stützfuß richtig installiert. 9-2
7
8
9
1
2
11
1
2
12
Basis entfernen
Um den Kindersitz aus Ihrem
Fahrzeug zu entfernen, drücken Sie
den Knopf zur ISOFIX
Tiefenverstellung 10 -1 und ziehen
Sie die Basisstation nach vorne von
der Fahrzeugrückenlehne weg 10 -2
Anschließend drücken und lösen Sie
die ISOFIX-Konnektoren von den
ISOFIX-Verankerungspunkten des
Fahrzeugs. 11
Um Transportschäden vorzubeugen,
drücken Sie den Knopf zur ISOFIX
Tiefenverstellung 12 -1 und fahren
Sie die ISOFIX-Konnektoren
vollständig ein. 12 -2
Siehe Abbildung 13 - 14
Drücken Sie die Taste zur
Neigungsverstellung 13 , und passen
Sie das Kinderrückhaltesystem auf
eine geeignete Position an. Die
Neigungswinkel werden in Abb 14
gezeigt
Sitzeinstellung (Neigung)
13
10
1
2
1
2
Table of contents
Languages:
Other Jole Automobile Accessories manuals
Popular Automobile Accessories manuals by other brands

Whelen Engineering Company
Whelen Engineering Company Mirror-Beam installation manual

Scosche
Scosche motorMOUTH IIBTAXM quick start

Prorack
Prorack K446W Fitting Instructions for Basic Carrier

Thule
Thule Evolution 672 installation instructions

Camcar
Camcar 40054 AL Mounting instructions

Whelen Engineering Company
Whelen Engineering Company SAK18 installation guide

Kenwood
Kenwood CMOS-320 instruction manual

BESEN
BESEN BS20 BA-11kW-APP user guide

Whelen Engineering Company
Whelen Engineering Company LED Mirror-Beam MBTC98 Series installation guide

Connects2
Connects2 CAN-Connect CANHBJP1 manual

SSBC
SSBC A117 installation instructions

RBP
RBP RBP-1510B-RX3 installation instructions