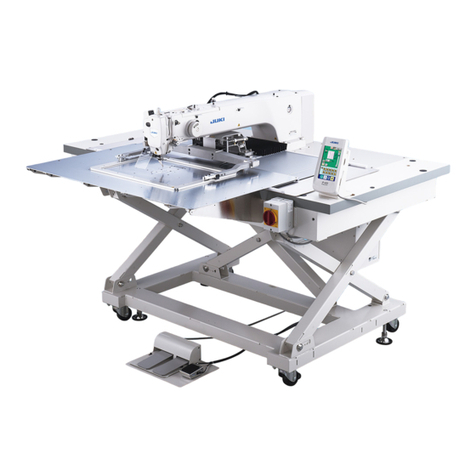
JUKI ASN-690 User manual

i
ENGLISH
ASN-690
INSTRUCTION MANUAL

i
CONTENTS
1. CONFIGURATION OF THE MACHINE ...................................................... 1
2. SPECIFICATIONS....................................................................................... 2
3. INSTALLATION........................................................................................... 3
3-1. Removing packing materials ............................................................................................................3
3-2. Securing the machine........................................................................................................................ 3
3-3. Installing the dust collector ..............................................................................................................4
3-4. Installing the stacker .........................................................................................................................5
3-5. Installing the stacker cloth guide .....................................................................................................6
3-6. Installing the cloth plate and the cloth guide unit ..........................................................................7
3-7. Installing the thread stand ................................................................................................................8
3-8. Installing the regulator ......................................................................................................................8
3-9. Connecting the air coupler................................................................................................................ 9
3-10. Connecting the starting pedal for the machine............................................................................. 9
3-11. Joining the sub-table (only for the long table type).................................................................... 10
3-12. Connecting the power plug........................................................................................................... 12
3-13. Installing the cloth receiving board (KM-5) (optional) ................................................................13
3-14. Installing the 3-pedal unit (PK-79) (optional)...............................................................................14
4. PREPARATION......................................................................................... 15
4-1. Caution before operation ................................................................................................................15
4-2. Lubrication........................................................................................................................................ 15
4-3. Threading the machine.................................................................................................................... 16
4-4. Adjusting the pressure of the presser foot and removing the presser foot............................... 17
4-5. Adjusting the stitch length..............................................................................................................17
4-6. Differential feed mechanism ...........................................................................................................18
5. OPERATION ............................................................................................. 19
5-1. Sewing procedure ............................................................................................................................19
5-2. Explanation of the operation panel ................................................................................................22
5-3. Description of the pedals and the switches on the machine head .............................................23
5-4. List of functions to be set ...............................................................................................................24
5-5. Details of selected functions ..........................................................................................................25
5-6. Other settings................................................................................................................................... 28
5-7. Initialization of the setting data ......................................................................................................28
6. ADJUSTMENT .......................................................................................... 29
6-1. Stacker support board adjustment................................................................................................. 29
6-2. Adjusting the position of the thread trimmer presser ..................................................................30
6-3. Adjusting the air blow......................................................................................................................30
6-4. Adjusting the edge guide ................................................................................................................31
6-5. Adjusting the cloth guide ................................................................................................................32
6-6. Regulator adjustment ......................................................................................................................32
6-7. Adjusting the cloth chip suction force...........................................................................................33
6-8. Adjusting the sensors......................................................................................................................34

ii
7. MAINTENANCE........................................................................................ 37
7-1. Adjusting the knife...........................................................................................................................37
7-2. Cleaning the machine head............................................................................................................. 37
7-3. Checking the cartridge lter and replacing it................................................................................ 38
7-4. Changing the machine oil ...............................................................................................................38
7-5. Changing needles ............................................................................................................................39
7-6. Drainage of lter regulator ..............................................................................................................39
7-7. Cautions for the compressed air supply (source of supply air) facility .....................................40
7-8. Dust collector box............................................................................................................................ 41
7-9. Cleaning the sensor......................................................................................................................... 41
7-10. Consumable parts to be replaced ................................................................................................42
7-11. Replacing the fuse .........................................................................................................................43
7-12. Adjusting the belt tension .............................................................................................................44
7-13. Destination of connection for input/output connectors.............................................................45
7-14. Error codes .....................................................................................................................................46
7-15. Error code list................................................................................................................................. 47

– 1 –
1. CONFIGURATION OF THE MACHINE
The machine consists of the following 18 sections and units :
AMain body structural mechanism section
(table stand, machine support and sewing table
covers)
BStacker unit
CSub-table
DCloth plate
ESewing machine head
FCloth guide
GControl box
HSewing machine motor
IStart switch for the stacker
JStacker cloth guide
KSide cutter
LDust collector
MPneumatic controller
NPower switch
OStarting pedal for the sewing machine
PThread trimmer presser
QCloth feeding air blow
RPause switch
A
B
C
D
O
E
G
N
Q
H
J
K
M
L
F
I
R
P

– 2 –
2. SPECIFICATIONS
1 Machine head MO-6904S 1-needle overlock machine
2 Sewing speed Max. 8,000 sti/min※1
3 Stitch system JIS E13 (USA standard : 504)
4 Stitch length 0.8 to 4mm
5 Overedging width 4.0mm (E), 4.8mm (F), 5.6mm (G)
6 Needle ORGAN DC x 27 #9 to #14 (Standard : #11)
7 Thread Spun thread #60 (recommended)
8 Chain-off thread
cutter
Pneumatic side cutter
9 Presser foot lift Max. 7 mm (for the machine provided with AK-139)
10 Differential feed
ratio
Gathering 1 : 2 (max. 1 : 4), stretching 1 : 0.7 (max. 1 : 0.6)
11 Sewing specica-
tions
A Cutting curve
B Material size
C Number of plies of material
... In-curve R200 or more
... Out-curve R300 or more
... 400 mm or less (width), 650 mm or more (length)
… Limited to one
12 Number of
pieces that can
be stacked
70 (slacks)
13 Power consump-
tion
590VA or less (operating rate 50 %)
14 Pneumatic pres-
sure
0.5MPa
15 Air consumption 250dm3/min(ANR)
16 Lubricating oil JUKI MACHINE OIL 18
17 Dimensions Type Width Length Height
Short table type 790mm 575mm
(875mm※2 )
880mm
Long table type 1500mm
(1800mm※2 )
790mm 880mm
18 Mass of the ma-
chine
Short table type : 110kg
Long table type : 160kg
19 Noise Declaration
- Equivalent continuous emission sound pressure level (LpA) at the workstation :
A-weighted value of 90.5 dB; (Includes KpA = 2.5 dB); according to ISO 10821- C.6.3
-ISO 11204 GR2 at 8,000 sti/min.
- Sound power level (LWA) ;
A-weighted value of 94.0 dB; (Includes KpA = 2.5 dB); according to ISO 10821- C.6.3
-ISO 11204 GR2 at 8,000 sti/min.
※1 "sti/min" is an abbreviation for "stitches per minute."
※2 Machine dimensions including the stacker

– 3 –
3. INSTALLATION
3-1. Removing packing materials
Remove the string which secures
the power cable.
Remove the tape which secures
the cloth plate.
Remove the string which secures
the hose.
3-2. Securing the machine
1
CAUTION :
To avoid possible personal injuries, be sure to move the machine to a level and stable place and lock
casters 1.

– 4 –
3-3. Installing the dust collector
1) Plug the lings blowing hose 2and the chain-
off thread blowing hose 3into the dust collec-
tion box 1.
2) Install lter 4so that it completely covers the
top of the box.
Install the dust collection box 1to the rear of the
main unit, as shown in the gure.
(Conguration position differs depending upon speci-
cation.)
Short table type
Long table type
When dumping dust from the dust collec-
tion box, also clean up lter 4.
Conrm that the hose mounting bracket 5
is completely tightened (the same for other
mounting hardware). Note that the noise
mufer 6is optional.
1
5
6
1
2
3
4
5
If the dust collector is not securely in-
stalled, blown-out dust or lint can get in
eyes, resulting in personal injury.

– 5 –
3-4. Installing the stacker
1) Install the stacker unit on the base with screws
1and washers 2(at two locations each).
2) Adjust adjusting bolt 3to make the support rod
of the stacker parallel to the installing plane.
3) Connect air tube 4to joint 5and air tube 6to
joint 7in numerical order.
12
3
7
5
6
4
CAUTION :
Be sure to carry out installation of the stacker by two or more workers in order to protect against
accidents caused by the stacker unit when it accidentally falls.

– 6 –
3-5. Installing the stacker cloth guide
Installing stacker cloth guide 1on the guide base
with hand screw 2and washer 3.
1
3
2
Material feeding direction
4
Adjust the orientation of the cloth guide according to
the clamping position at the stacker unit 4.
1

– 7 –
3-6. Installing the cloth plate and the cloth guide unit
1) Place the cloth plate on the sewing machine
table.
2) Put the slots (at two locations) in the cloth guide
unit as illustrated in the gure over two studs 1
(at two locations) of the cloth plate over. Fix the
studs 1with washer 3and thumb screws 2.
3) Connect air tube 4to joint 5.
Installing position
1
Cloth plate
5
4
Cloth guide unit
2
2
3
3

– 8 –
3-7. Installing the thread stand
Insert the thread stand into the hole in table 1with
a washer placed between them and x with the nut
and washers from under the table as illustrated in
the gure at left.
1
Washer
Washer
Spring washer
Nut
3-8. Installing the regulator
Fix regulator 1on mounting plate 2with screws 3
(at two locations).
Connect φ8 air tube 4to joint 5.
2
1
3
4
5

– 9 –
3-10. Connecting the starting pedal for the machine
Connector 2of starting pedal 1to junction connec-
tor 4coming from control box 3.
3-9. Connecting the air coupler
Connect the air coupler 1supplied with the unit as
an accessory rstly to air hose 2, secondly to cou-
pler 3on the main body side.
Make sure that the pressure gauge of the
regulator reads 0.5 MPa.
213
1
2
4
3

– 10 –
3-11. Joining the sub-table (only for the long table type)
Butting the sub-table and the main-body table with no clearance provided between them, x clips 1(at three
locations) with thumbscrews 2. Lock casters 3(at four locations) to secure the sub-table.
1
3
Sub-table
Main-body table
2
4
CAUTION :
Connect the sub-table to the main-body table taking care not to allow your ngers caught between
them.
A difference in height between the top face of the main-body table and that of the sub-table may be observed
on some installation site.
If such a difference is observed, adjust so that the tables are same in height with spacers 4for adjusting the
height of the clips. (Three spacers are supplied.)
・If the sub-table is lower than the main-body table :
Add the supplied spacer(s) appropriately.
・If the sub-table is higher than the main-body table :
Remove spacer 4and change with a thinner one.

– 11 –
To adjust the height of the main-body table, loosen screws 5that secure the casters (at six locations) to
adjust the height of the main-body table to that of the sub-table and tighten the screws 5.
To adjust the height of the sub-table, loosen screws 5that secure the casters (at six locations) to adjust the
height of the sub-table to that of the main-body table and tighten the screws 5.
5
5
5
Sub-table
Main-body table
If the difference in height between the sub-table and the main-body table cannot be eliminated with spacer 4,
adjust the height of the main-body table (or the height of the sub-table).
5
To protect against possible personal injury or death, be sure to connect the tables while supporting
the machine by four or more workers.

– 12 –
Connection of the power plug to the power depends on the specications of the product. Adjust the power
plug to the power specications to connect.
This product performs operation by the single-phase connection for 3-phase 380/400/415V.
[Caution when changing the power source of the high voltage optional transformer]
When using high voltage optional transformer 1with
the input voltage of 400V or 415V, it is necessary to
replace input power source cord 2of high voltage
optional transformer 1. Change power source input
cord 2(sky blue) that is connected to 380V to the
connection of 400V or 415V.
The high voltage optional transformer 1is installed
on the underside of the wooden table.
To change over the power supply, remove transform-
er box 3.
1
2
3-12. Connecting the power plug
1 In case of the product of single-phase, 200 to 240V specications (CE specications) :
Connect the sky-blue and brown wires of the power cord to the power terminal (AC200 to 240V) and the
yellow/green wire to the ground (earth) terminal respectively.
3 In case of the product of 3-phase, 200 to 240V specications :
Connect the red, white and black wires of the power cord to the power terminal (AC200 to 240V) and the
yellow/green wire to the ground (earth) terminal respectively.
4In case of the product with the optional high voltage transformer :
Connect the black wires (3 pieces) of the power cord to the power terminal (AC380 to 415V) and the yel-
low/green wire to the ground (earth) terminal respectively.
It is possible to connect to 380/400/415V by setting of the input tap of transformer (standard setting at
the time of delivery : 380V).
2 In case of the product of single-phase, 200 to 240V specications (other than CE specications) :
Connect the black and white wires of the power cord to the power terminal (AC 200 to 240V), and the
yellow/green wire to the ground (earth) terminal respectively.
3
CAUTION :
To prevent possible accidents caused by leakage or dielectric strength, an appropriate power plug
shall be installed by a person who has an expert knowledge of electricity. Be sure to connect the
power plug to the receptacle that is well grounded.
To prevent accidents, perform the work af-
ter leaving the sewing machine alone more
than 4 minutes in the state that the power
switch is turned OFF and the power cord
is drawn out.

– 13 –
3-13. Installing the cloth receiving board (KM-5) (optional)
1) Fix support rods 2on cloth holding table 1with wood screws 3and washers 4(at four locations
each).
2) Fix the cloth holding table mounted with the support rods on the sub-table with screws 5.
The cloth holding table can be adjusted to four different heights using the xing holes in the support
rod.
1
3
2
4
5
5

– 14 –
3-14. Installing the 3-pedal unit (PK-79) (optional)
Connect the connector of the pedal to the junction
connector coming from the control box.
The gure shows differential feed switch 1, pause
switch 2and high-/low-speed changeover switch 3
from left to right.
1Differential feed
switch
As long as this switch is held depressed, the differential feed function works.
2Pause switch As long as this switch is held depressed, the pause function works. The machine returns
to the normal operation (running) by releasing the switch.
3High-/low-speed
changeover switch
Changeover from the high-speed to low-speed can be done only by a depress on this
switch.
The machine returns to the normal operation (running) by releasing the switch.
1 2 3

– 15 –
4. PREPARATION
4-1. Caution before operation
1) Remove oil cap 1.
2) Pour JUKI MACHINE OIL 18 into the oil reser-
voir.
3) Supply oil until the pointer bar almost reaches
the upper red marker line when oil gauge 2is
observed from the side.
If the oil amount pointer bar exceeds the
red marker line, the oil quantity becomes
excessive resulting in oil leakage. Be
sure to stop adding the oil before the red
marker line is reached.
1
22
4-2. Lubrication
CAUTION :
To protect against possible personal injury due to abrupt start of the machine, be sure to start the fol-
lowing work after turning the power off and ascertaining that the motor is at rest.
• Before you put the machine into operation for the rst time, be sure to thoroughly clean it.
• Check to be sure that the voltage has been correctly set.
• Make sure that the power plug is connected properly.
• Never use the machine under a voltage that is different from the specication.
• Lubrication to chain-off thread trimming device
Remove screw 1from the top end of the oil
hose at the rear section of the machine. The
upper limit of the oil quantity is at the top of the
pipe holder.
Oil consumption differs depending on the condi-
tion of use. The oil quantity should be checked
on a daily basis.
As a guide, lubricate the chain-off thread trim-
mer at the following intervals :
· Once a day for the continuous use
· Normally once every three to four days
Lubricant inlet
Pipe holder
Cloth plate side cover
Knife plate (asm.)
The chain-off thread trimmer has not been
factory-oiled at the time of delivery.
JUKI MACHINE OIL 18 should be used for
lubrication.
CAUTION :
To avoid possible malfunctions and damage of the machine, check the following items.
1

– 16 –
To thread the machine head, remove the cloth plate
in advance.
4-3. Threading the machine
When using an untwisted thread such as
wooly nylon thread or weak thread, do
not wind it round the intermediate thread
guide.
★How to remove the cloth plate
Remove the cloth plate by holding the cloth plate
guide base.
Do not touch the curve sensor (optional)
mounted on the cloth plate.
★How to thread the needle thread silicon oil
tank
When the needle cooler is used. Pass the thread
under the center pawl.
When the needle cooler is not used. Pass the thread
above the center pawl.

– 17 –
1
2
4
3
1) Adjust the pressure of the presser foot by loos-
ening rst nut 4and turning presser foot adjust
screw 1.
When the adjust screw is turned clockwise, the
pressure will increase. When it is turned coun-
terclockwise, the pressure will decrease.
After the adjustment, be sure to turn nut 4with-
out fail.
2) To open presser foot 2sidewayd, raise the
needle to the highest position of its stroke and
lower presser bar lifting lever 3.
1) Slowly turn the handwheel as you keep depress-
ing pushbutton 1, and you will nd a point at
which the pushbutton goes in farther.
2) With the above condition maintained, align the
desired scale mark on the handwheel with mark
2on the belt cover.
3) Reset the pushbutton 1after setting the dial.
1
2
4-5. Adjusting the stitch length
CAUTION :
To protect against possible personal injury due to abrupt start of the machine, be sure to start the fol-
lowing work after turning the power off and ascertaining that the motor is at rest.
To carry out adjustment, remove the cloth
plate in advance.
4-4. Adjusting the pressure of the presser foot and removing the presser foot
Table of contents
Other JUKI Sewing Machine manuals

JUKI
JUKI LK-1901AN User manual

JUKI
JUKI LH-3126F Installation guide

JUKI
JUKI HZL-E71 User manual

JUKI
JUKI MO-2404 User manual

JUKI
JUKI HZL-35Z User manual

JUKI
JUKI LU-562 User manual

JUKI
JUKI HZL-E61 User manual

JUKI
JUKI DU-1181N User manual

JUKI
JUKI AMB-289/IP-420 User manual

JUKI
JUKI AMS-221EN-HS3020/7200 User manual

JUKI
JUKI DU-140 User manual

JUKI
JUKI AK-154 User manual

JUKI
JUKI MO-734DE User manual

JUKI
JUKI LU-1560N User manual

JUKI
JUKI PLC-2700 Series User manual

JUKI
JUKI HZL-G220 User manual

JUKI
JUKI IT-100 User manual

JUKI
JUKI MF-7500 Series User manual

JUKI
JUKI HZL-60 User manual

JUKI
JUKI DDL-9000A Quick start guide