How
to
Adjust
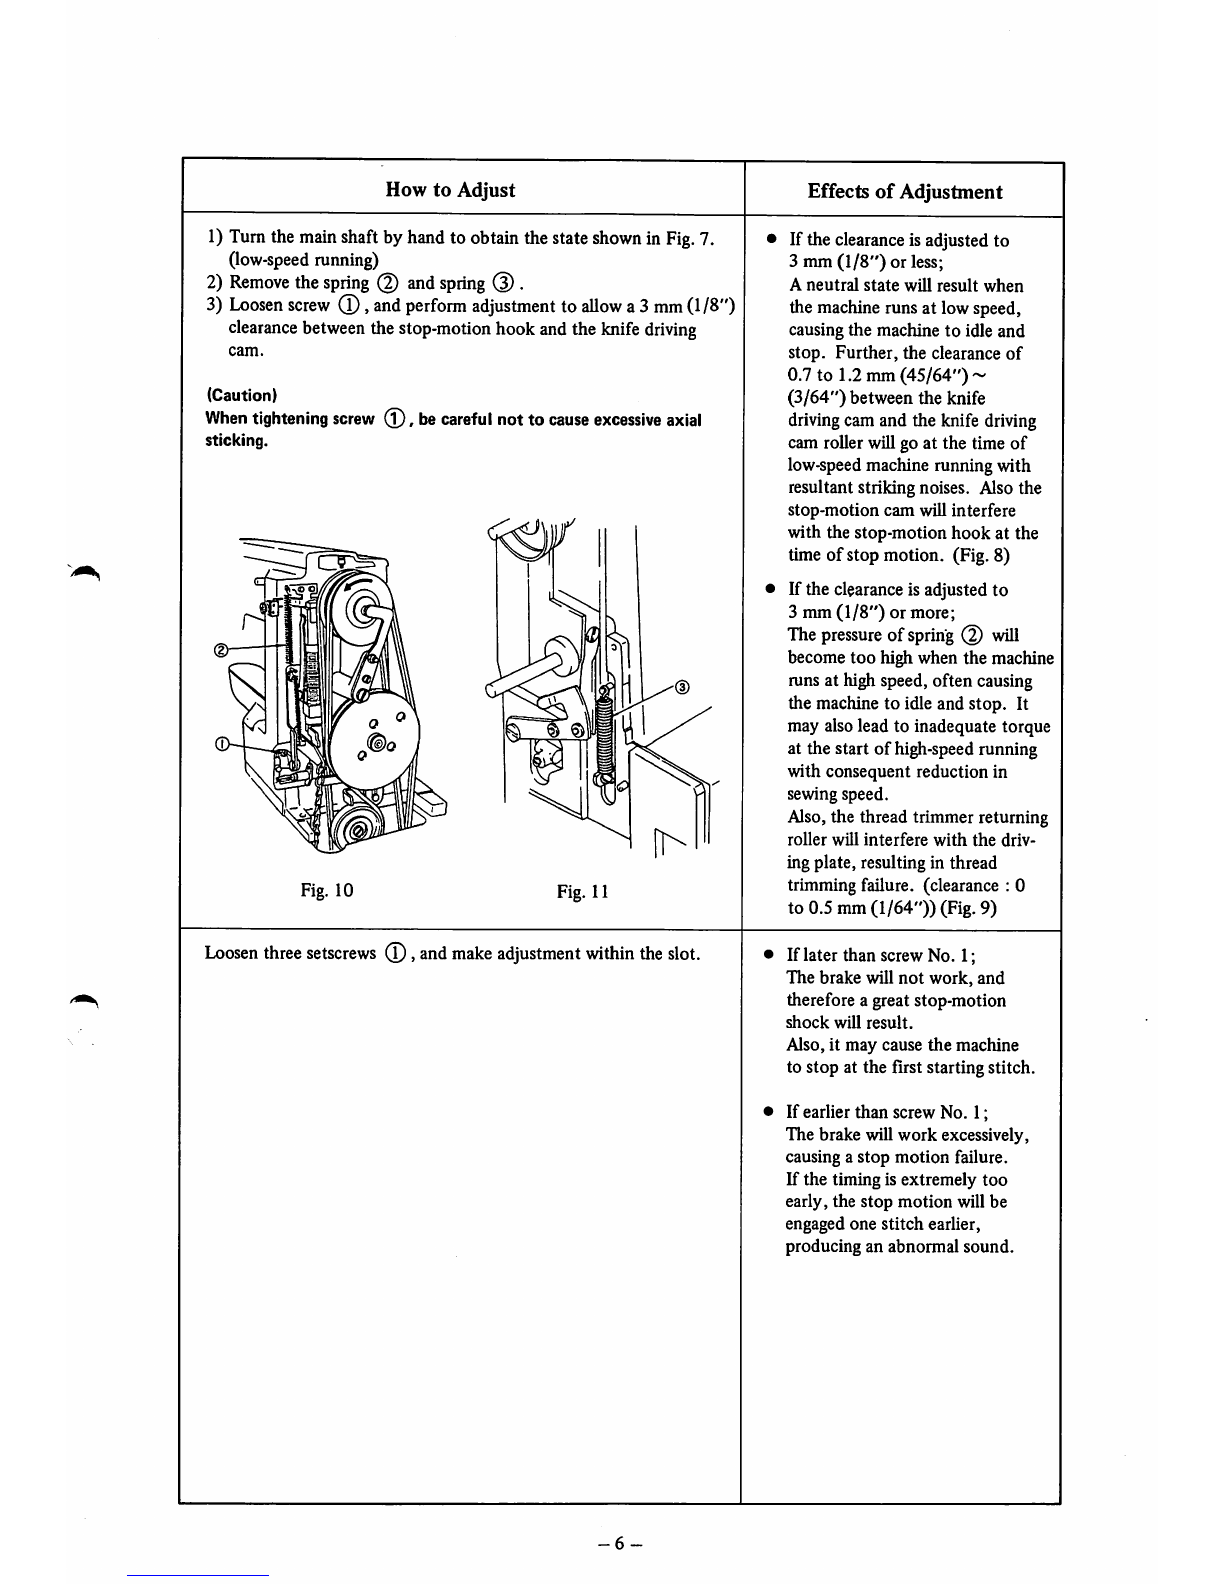
1)
Turn
the
main
shaftbyhandto obtainthestate
shown
in
Fig.
7.
(low-speed running)
2)
Remove
the
spring
(2)
and
spring
(D .
3)
Loosen
screw
(T),
and
perform
adjustment
to
allow
a3
mm
(1/8")
clearance
between
thestop-motion hookandthe
knife
driving
cam.
(Caution)
When
tightening
screw
(l),
be
careful
not to
cause
excessive
axial
sticking.
Fig. 10 Fig. 11
Loosen
three
setscrews
(D,
and
make
adjustment
within
the
slot.
-6
Effects
of
Adjustment
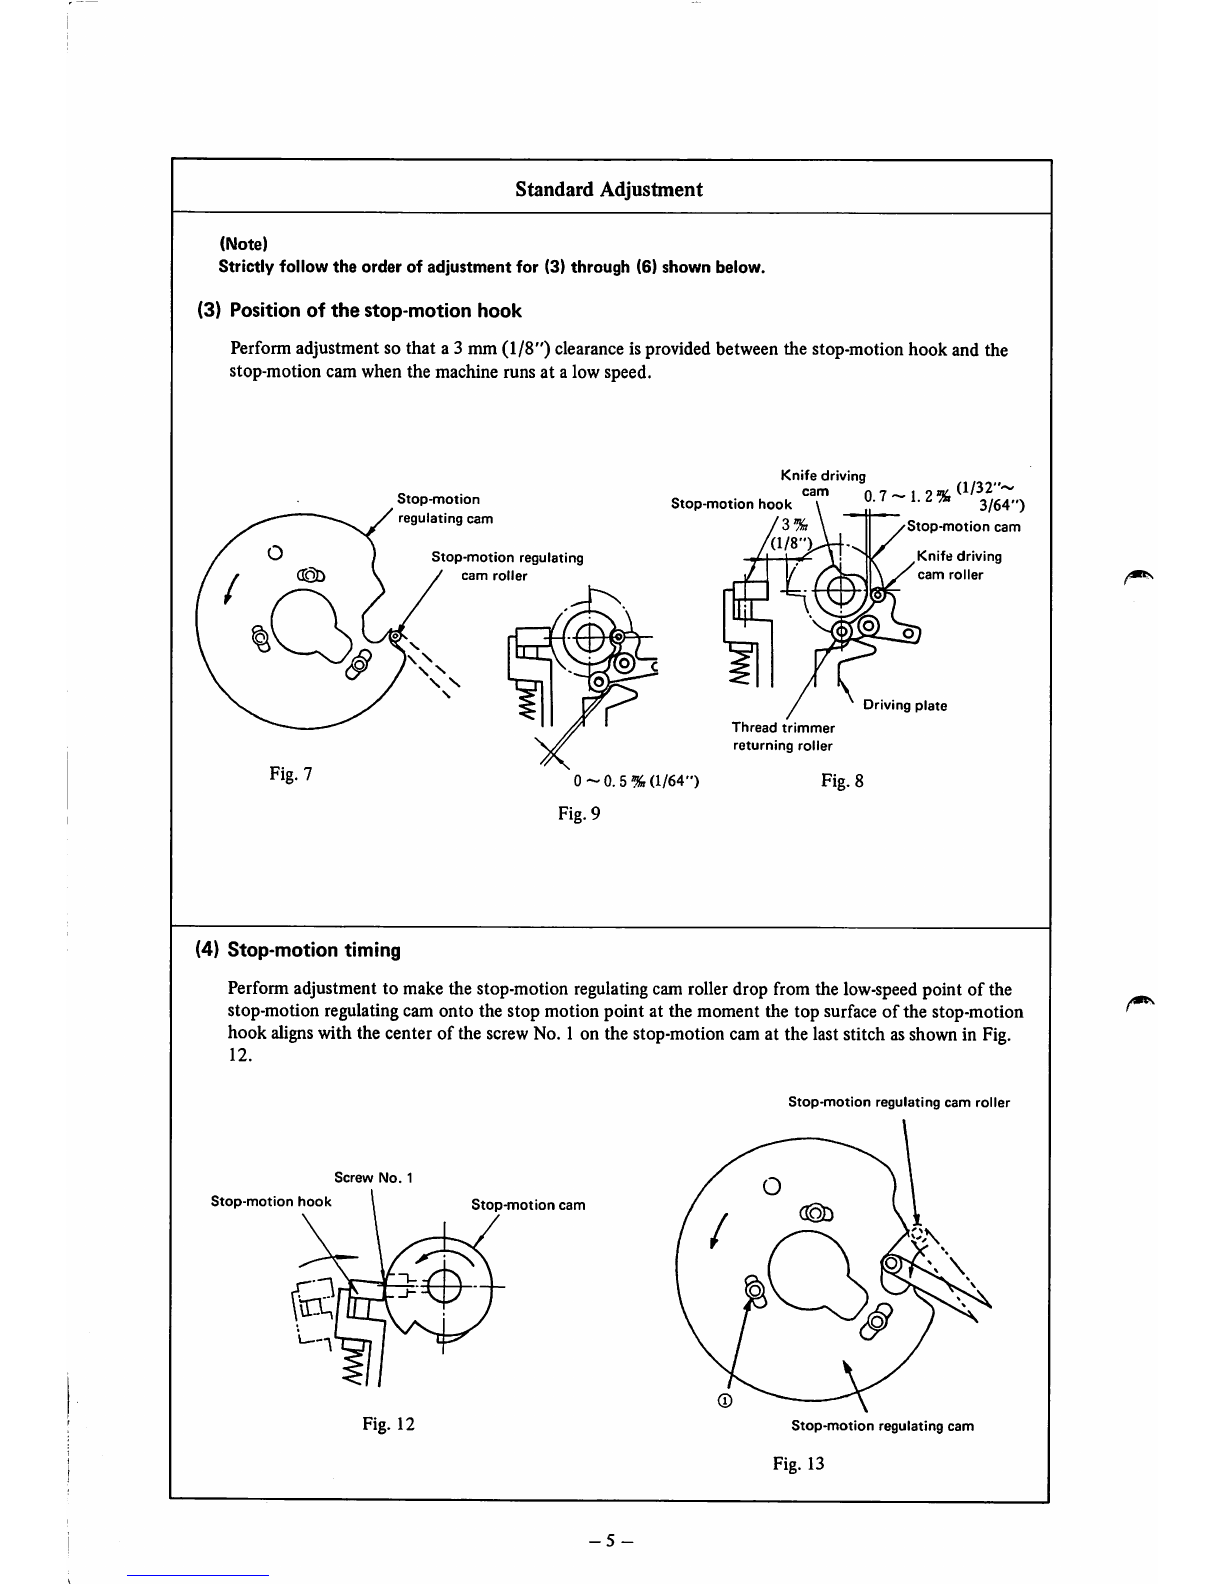
If the clearanceis adjusted to
3 mm (1/8") or less;
A
neutral
state
will
result
when
the machine runs at low speed,
causing the machine to idle and
stop.
Further,
the clearance
of
0.7 to 1.2 mm (45/64") ~
(3/64")
between the knife
drivingcam and the knife driving
cam roller willgo at the time of
low-speedmachine running with
resultant striking noises. Also the
stop-motion
cam
will interfere
with the stop-motion
hook
at the
time of stop motion. (Fig. 8)
If the clearanceis adjusted to
3 mm
(1/8")
or more;
The pressure of spring will
become too high when the machine
mns at high speed, often causing
the machine to idle and stop. It
may alsolead to inadequate torque
at the start of high-speedrunning
with consequent reduction in
sewing speed.
Also,the thread trimmer returning
roller
will
interfere
with
the
driv
ing plate, resulting in thread
trimming failure, (clearance : 0
to 0.5 mm
(1/64"))
(Fig. 9)
• If later than screw No. 1;
The brake will
not
work,
and
therefore a great stop-motion
shock
will
result.
Also, it may cause
the
machine
to stop at the first starting stitch.
• If earlier than screw No. 1;
The brake will work excessively,
causing a
stop
motion
failure.
If the timing is extremely
too
early, the stop motion will be
engaged one stitch earlier,
producing an abnormal sound.