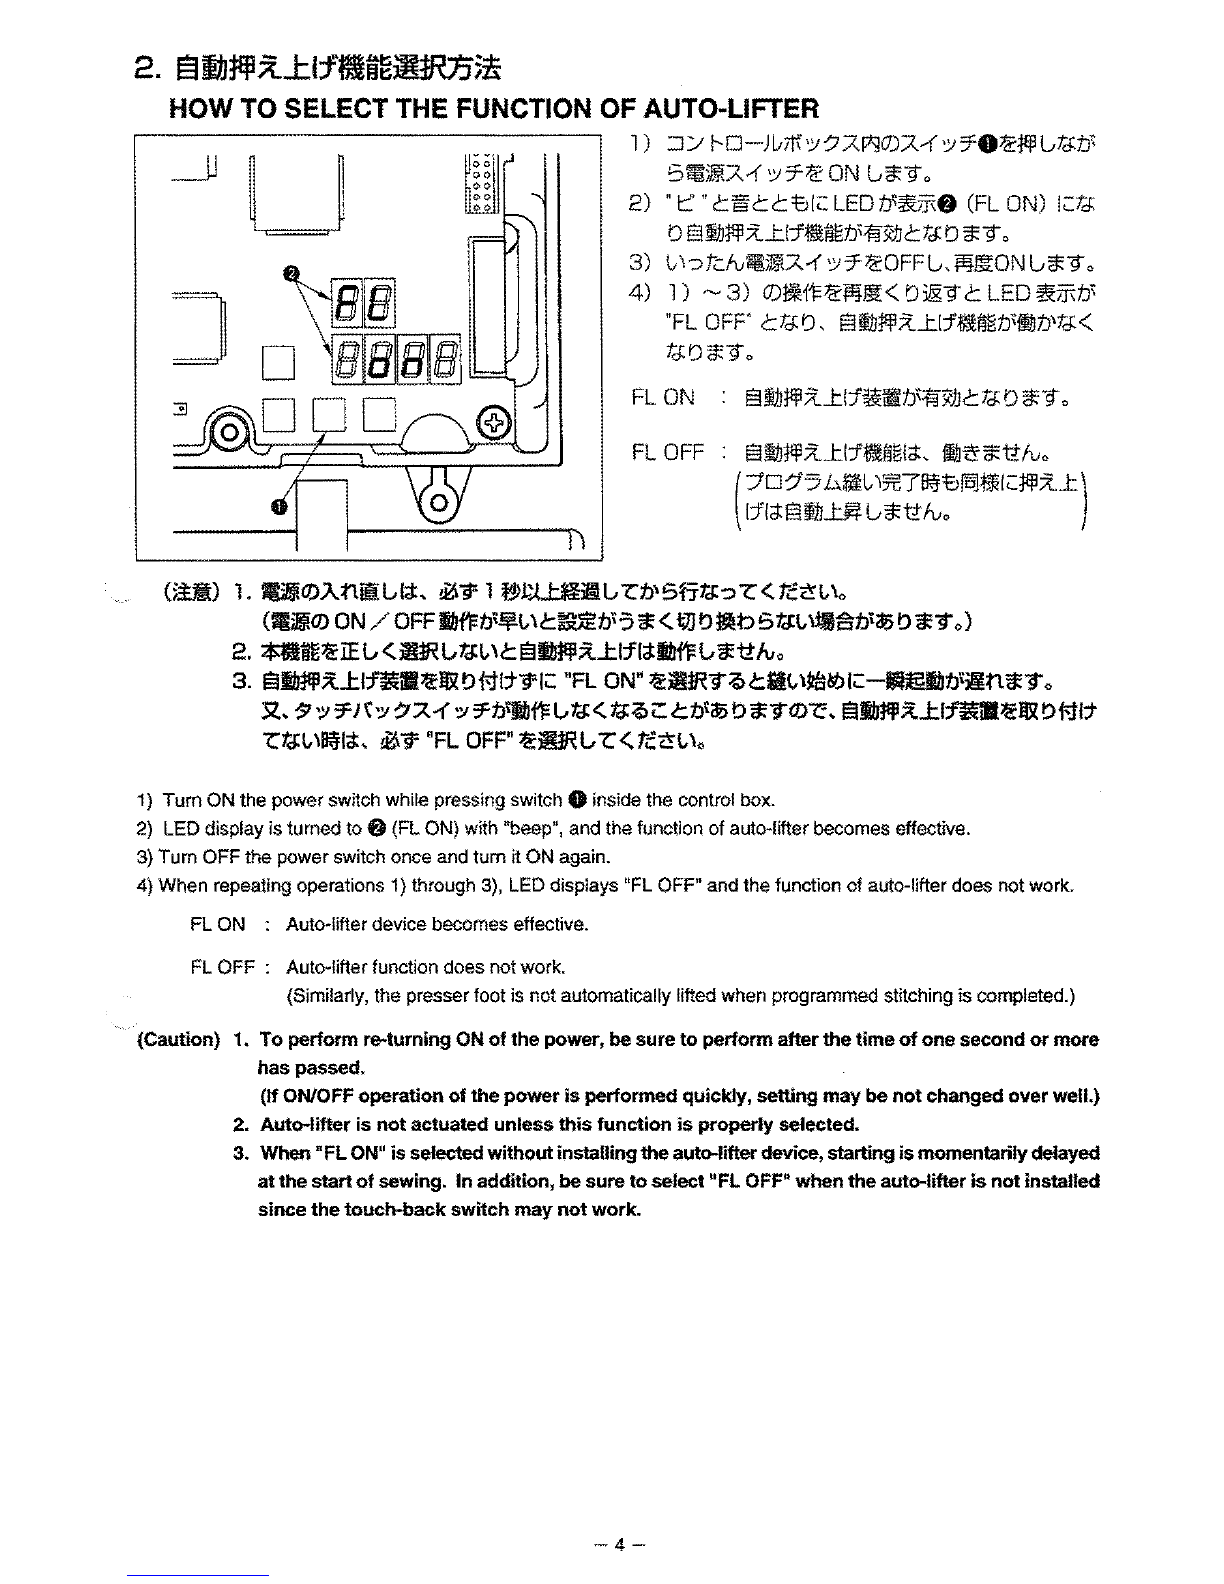
2.
13~J.J1tll5t...tttMii~mRJJ5n
HOW
TO
SELECT THE FUNCTION OF AUTO-LIFTER
u
J
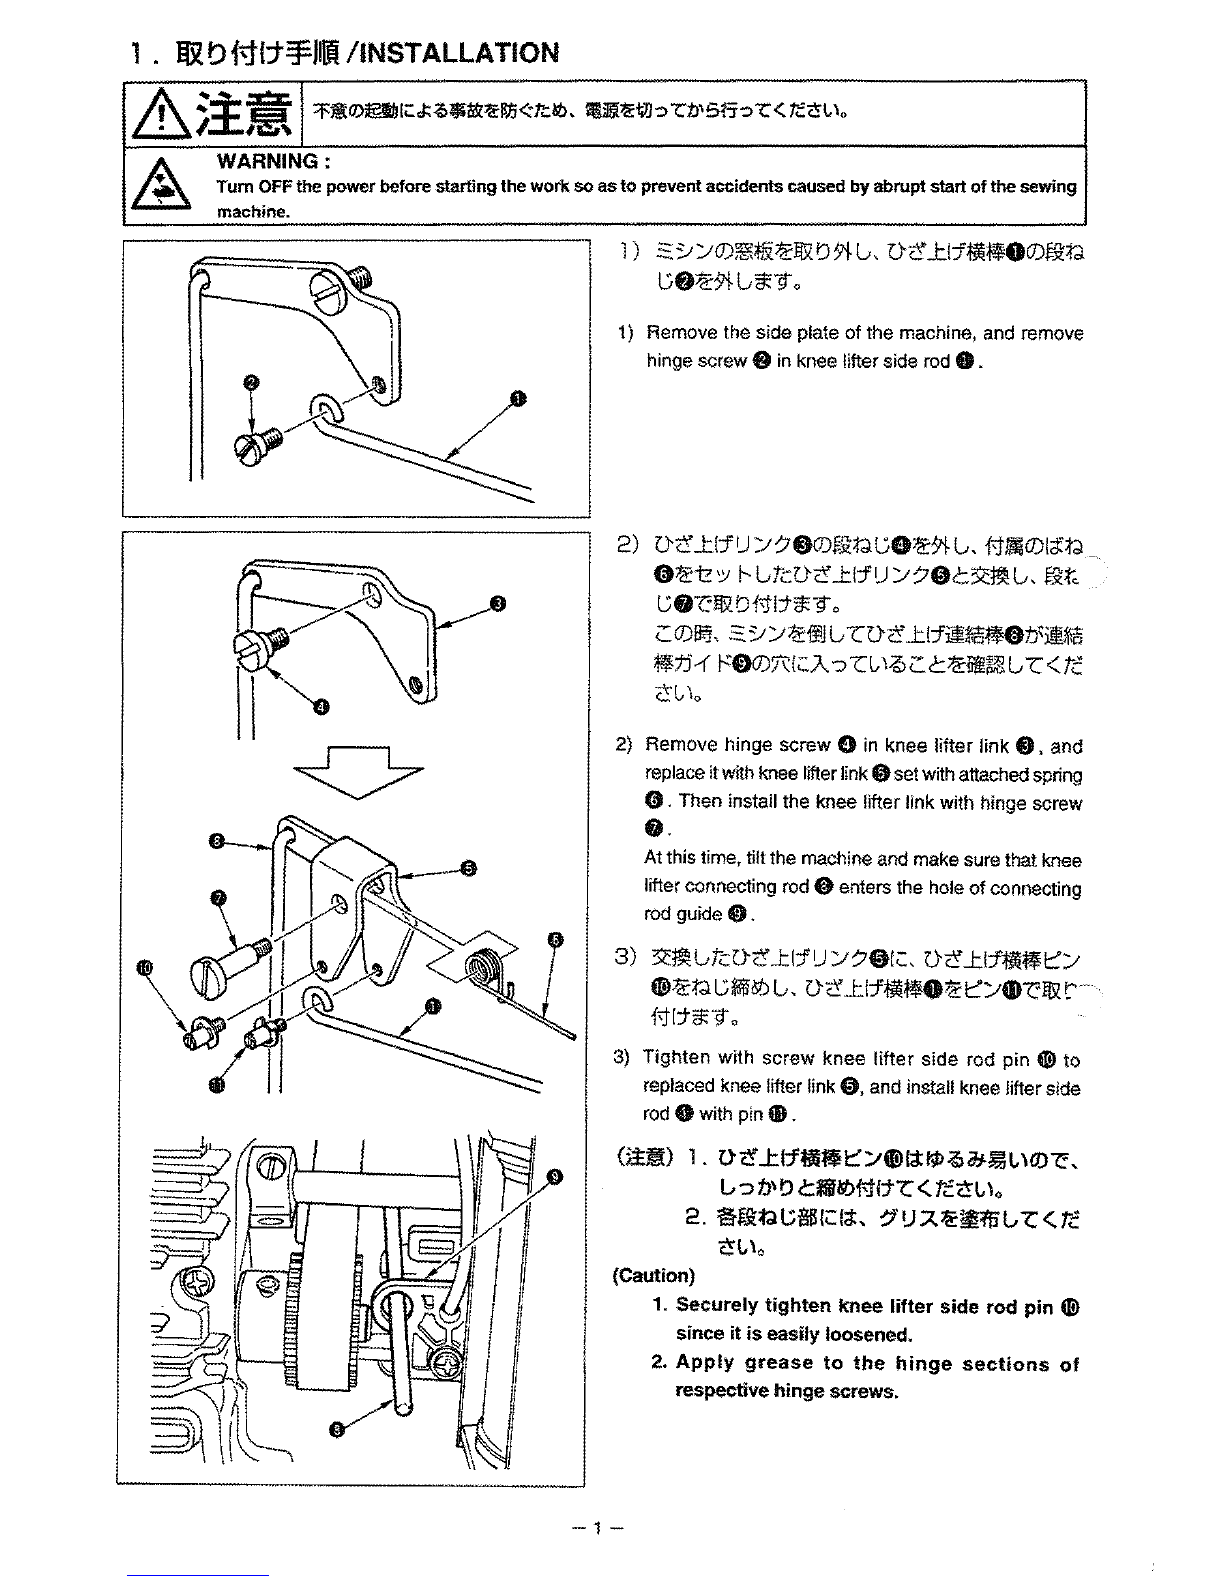
l )
:::r:;
1--D-J
[.;itt'
'Y::/
.Art-90:::Z-1
'-"
:f01i::J!ll
G:ta:t.J'
Slt~:::Z-1
'Y:fllf
ON
G*9
o
2)
"t::'
"c§cc=tJiz:LED
tJ'~mO
(FL
ON)
(;::ta:
o
!3~JJ:J!llX...t11iilfiW:ij"l<1Jc:ta:
o
*9,
3)
l1?
tcM!U~'i:::Z-1
'Y:f~OFFG.
ilil.lil:ON
G*9
o
4)
1)
-
3)
O)Ji{'F~ilil.lii<
Dll&9c
LED
~mb'
"Fl
OFF
c:ta:fJ.
!31JJ:J!ll7l..t11iilmlb'lllt.J':ta:<
:ta:o
~9 o
FLON
FL
OFF
!311J:J!llX...tl1iil~~~cl:.
IIJ~~ttfuo
(
::10~5
.U*il
1lfG7~=tJI'E\l:l\lli;::J!ll~..t)
[j'[;j;EJIJJ_tj'?U*'ttfuo
(i.Ht)
1.
UO).Aflmi:GI;t,
!01" l
t'i>J..~ililG
Z'b'5fi1d:?Z'<.tcC:l\o
(00)
ON/
OFFIIJfl:tJl!j!t,\C:mEb'?*<
li1Jt>,.t>51d:l\il15't.>t<VJIJ~9
o)
2.
~~llfiEG<.~GtcJ:l\C:EI!Illlfii~J::Iflcl:lbfi:G~ttlvo
3.
EIU~..tlf~llllf&t>M!:t?l;:
"FL
ON"
llf~9QC:Sl
\~!itll<::
-~t.>'il!!fl~9
o
;R,
17
':1
7
Jt
':1
·::r:A
-1
':1
7b'lllfF
G
tcJ:
<.
ta;Q
<:
C:t.>'®
t>
iJ;90)c,
EIIIJJIII~..tl~lllllf&
t>MI:t
Z'ta:l\~1;:1:,
!01"
"FL
OFF"
llf~G
Z'<.tcC:l\o
1)
Tum
ON
the powerswitch while pressing switch 0 inside the control box.
2} LED display is turned to
f)
(FL ON) with "beep", and the function
of
auto-lifterbecomes effective.
3) Turn
OFF
the powerswitch once and
tum
it
ON again.
4) When repeating operations 1) through 3), LED displays "FL OFF" and the function
of
auto-lifter does notwork.
FL ON : Auto-lifter device becomes effective.
FL
OFF
: Auto-lifter function does not work.
(Similarly, the presser foot is notautomatically lifted when programmed stitching is completed.)
(Caution) 1. To perform re-turning
ON
of
the power,
be
sure
to
performafterthetime
of
one second
or
more
has passed.
(If
ON/OFF
operation
of
thepower
is
performed quickly, setting may
be
not
changed over well.)
2. Auto-lifter is
not
actuated unless
this
function
is
properly selected.
3.
When
"Fl
ON"
is
selectedwithoutinstallingtheauto-lifterdevice, starting
is
momentarilydelayed
atthestart
of
sewing. Inaddition,
be
sure
to
select
"Fl
OFF" when theauto-lifter
is
not
installed
since thetouch-backswitch may
not
work.
-4-