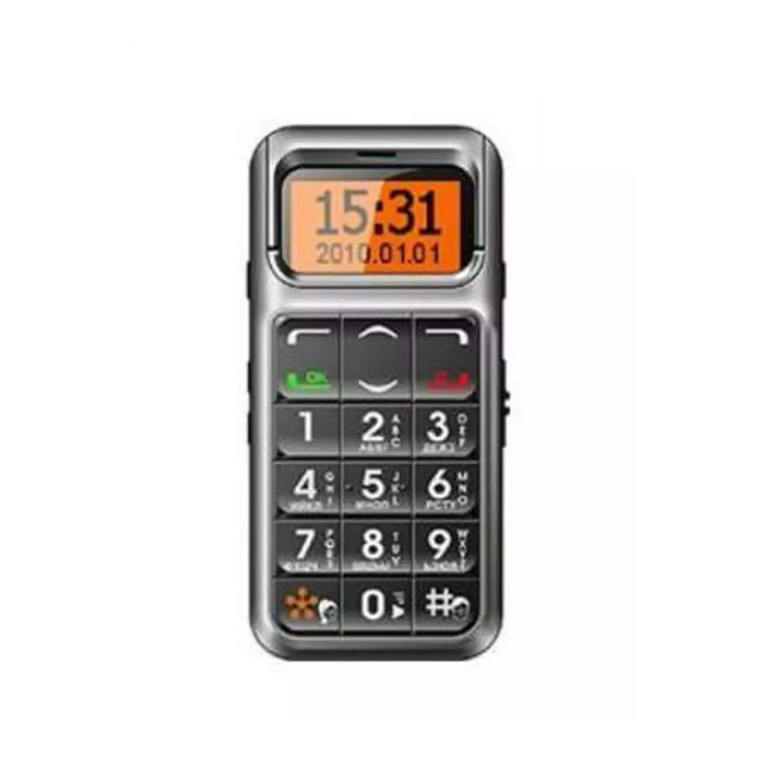
Just5 Brick User manual

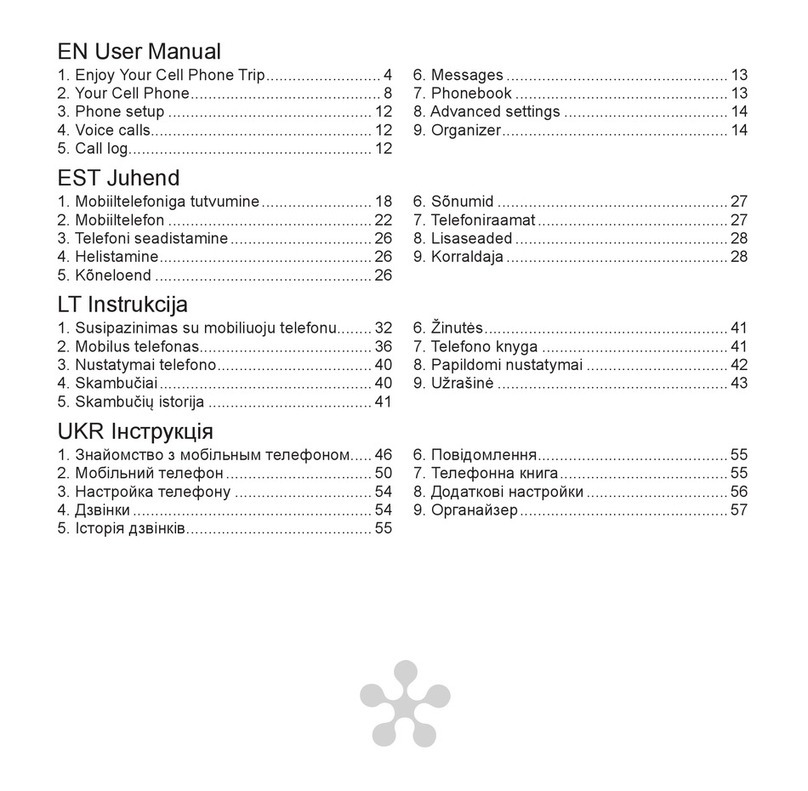
EN User Manual
1. Enjoy Your Cell Phone Trip..........................4
2. Your Cell Phone...........................................8
3. Phone setup ..............................................12
4. Voice calls..................................................12
5. Call log.......................................................12
6. Messages ..................................................13
7. Phonebook ................................................13
8. Advanced settings .....................................14
9. Organizer...................................................14
FR Guide d’utilisateur
1. Le téléphone portable: introduction ...........32
2. Téléphone portable....................................36
3. Congurations de téléphone......................40
4. Appels........................................................40
5. Histoire d’appels........................................41
6. Messages ..................................................41
7. Répertoire..................................................41
8. Autres applications ....................................42
9. Organisateur..............................................43
DE Bedienungsanleitung
1. Kennenlernen des Telefons.......................18
2. Handy ........................................................22
3. Einstellung des Telefons............................26
4. Anrufe ........................................................26
5. Anrufprotokoll.............................................27
6. Nachrichten ...............................................27
7. Telefonbuch ...............................................27
8. Zusätzliche Einstellungen..........................28
9. Organizator................................................29
IT Istruzioni
1. Informazioni sul dispositivo........................46
2. Funzioni di base ........................................50
3. Impostazioni del telefono...........................54
4. Chiamate ...................................................54
5. Registro chiamate......................................55
6. Messaggi ...................................................55
7. Rubrica ......................................................56
8. Impostazioni aggiuntive.............................56
9. Organizer...................................................57

ES Instrucciones
1. Introducción al teléfono móvil (celular)......60
2. El teléfono móvil (celular) .......................... 64
3. Conguración del teléfono móvil (celular) .68
4. Llamadas...................................................68
5. Historial de llamadas .................................69
6. Mensajes ...................................................69
7. Agenda de contactos.................................69
8. Ajustes adicionales....................................70
9. Organizador...............................................71
RU Инструкция
1. Знакомство с мобильным телефоном.... 88
2. Мобильный телефон ............................... 92
3. Настройка телефона ...............................96
4. Звонки.......................................................96
5. История звонков....................................... 97
6. Сообщения...............................................97
7. Телефонная книга....................................97
8. Дополнительные настройки.................... 98
9. Органайзер...............................................99
LV Instrukcija
1. Iepazīšanās ar mobilo tālruni.....................74
2. Mobilais tālrunis.........................................78
3. Mobilā tālruņa iestatījumi...........................82
4. Zvani..........................................................82
5. Zvanu arhīvs..............................................82
6. Īsziņas .......................................................83
7. Tālruņu katalogs........................................83
8. Papildus iestatījumi....................................84
9. Rīki ............................................................85

User Manual
EN
www.just5.com

4
1. Enjoy Your Cell Phone Trip
1.1.1 Install the battery
1. Open the battery cover.
2. Put the battery in the battery slot 3 metal contact points
towards back and in line with the metal bolts at the bottom
line of the cell phone, ensuring the battery’s 3 metal contact
points are in close alignment with the 3 metal bolts of the cell
phone.
3. Cover the battery, insuring the battery cover entirely closed
with a «Click» sound.
1.1.2 Remove the battery
1. Open the battery cover.

5
Note: be sure to turn off the cell phone and disconnect the connection with the charger
before removing the battery, and use only batteries designed for this type of cell phone.
2. The battery could easily be removed by pressing the edge of
it and making a lift with your fingers.
3. Cover the battery, ensuring the battery cover properly placed
with a «Click» sound.
1. Insert the SIM card:
Remove the battery cover; make sure the SIM card’s metal
contacts pointing downward and gap upward, and then slide
the SIM card towards the direction pointed by the battery slot
arrow until it is properly placed in the SIM card slot.
2. Remove the SIM card:
Hook the gap corner of the SIM card with one finger and
make a lift with another finger.
1.2 Install/Remove SIM Card (phone card)

6
1.3 Battery Charging
The cell phone could be charged either under power-on or power-off state. Before
charging: make sure the battery has been installed in the phone.
Note: if the battery has been overly-discharged, the battery level indicator may be shown
after a few minutes.
1. Plug the charger in the power socket.
2. After charging finished: unplug the charger from
the power socket, unplug its other end from the
phone.
1.4 Battery level indicator
Charging Charging completed
Low battery warning
Should low battery occur, the cell phone will sound a warning alarm and show a message
of «battery low». If you receive a «battery low» warning during your making/answering call
time, please charge the phone so as to continue the call.
1.5 Turn on/off the Cell Phone
Turn on
Press and hold the button to turn on the cell phone. Enter the PIN code supplied by

7
mobile provider for your SIM card and press Call button. If necessary, you may switch off
PIN code request, (see p. 8.4. Advanced settings) , but it would cause unsecure situation
in case your cell phone is lost or stolen.
Warning: if you enter incorrect PIN codes consecutively for 3 times, the SIM card will be
locked, and the phone will ask you to enter the PUK code (to solve this problem please
contact your network service provider).
Turn off
To turn off your cell phone under standby mode press and hold the button .

8
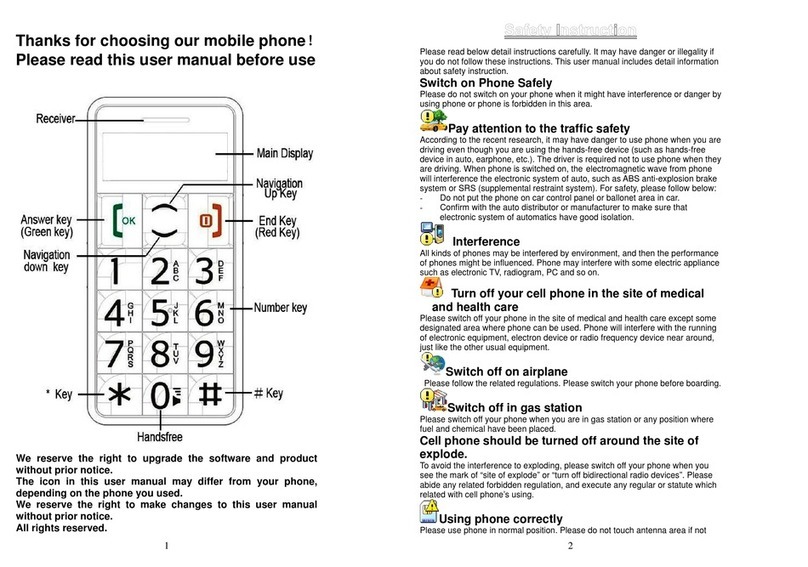
2.1 Stanby mode
When your cell phone is ready to be operated but not used, it stays in standby mode.
2. Your Cell Phone
Press to enter main
menu
Press to enter
phonebook
Call button. Press to
enter call log
Press and hold for
2 sec. to switch on
silent mode
Button for
cancelling, end and
denial

9
Light button
Volume
adjustment
Radio button
Keypad lock

10
2.2 Screen icons
Following icons may appear on the screen.
2.3 Functions of buttons
Button Function
Call button
Make a call.
Incoming call: answer the incoming call.
Standby mode: open call history.
Operating: select or confirm the function.
Battery status
Signal status
Alarm
Unread messages
Ring
Vibration
Vibration + silent mode
Call forwarding
Missed calls
Headphones
Keyboard locked
Flight mode
Roaming

11
Cancelling, end and
denial button.
Switch on/off
Cell phone is switched off: press and hold 2 seconds to power on.
Cell phone is swithed on: press and hold 2 seconds to power off.
Operating: return to previous menu.
Press and hold 2 seconds: delete all typed text, return to standby
mode.
Up navigation button Standby mode: open main menu.
Operating: move the cursor up in menu or back while typing text.
Down navigation button Standby mode: open phonebook search.
Operating: move the cursor down in menu or forward while editing
text.
Button Short press to input «#».
Switch between input modes when typing text.
Button Short press to enter «*,P,+».
Input commonly used symbols when typing text.
Silent mode button Press and hold for 2 seconds to switch on/off silent mode. The phone
vibrates only on incoming call.
Volume button
Press «+» to increase volume, press «-» to decrease volume
(could be used when making/answering calls, listening to radio,
conversation).
Radio button Press and hold for 2 seconds to switch on/off FM radio.
Light Push up to turn on the light; push down to turn off the light.
Keyboard lock button Press and hold for 2 sec. to lock/unlock the keyboard.

12
5. Call log
You can enter call log by pressing Call button in standby mode. You can find last incoming,
outgoing and missed calls. Missed calls and highlighted with red and marked with ,
incoming calls are marked with .
3.1 Setup time and date
•Select [SETTINGS] - [phone settings] - [time and date] - [set time] to setup the time.
•Select [SETTINGS] - [phone settings] - [time and date] - [set date] to setup the date.
3.2 Setup language
Select [SETTINGS] - [phone settings] - [language] to setup the language.
3.3 Setup sound
Select [SETTINGS] - [sound] - [tone settings] to choose melodies for incoming calls, sms
and alarms.
To setup signal type (melody, vibration) enter [SETTINGS] - [sound] - [alert type].
3. Phone setup
4. Voice calls
•Enter the area code and phone number, and press Call button.
•If the entered number is not correct, you can press End button to delete the number on
the left of the cursor, or press and hold End button to delete all the numbers.

13
6. Messages
•Icon in the right down corner of the screen means incoming message. If your mailbox
is full, the icon will blink until you delete some messages.
•To create a message, select [MESSAGES] - [write message].
•Enter message by using number buttons. To switch the mode (first letters, numbers)
use button #. Button * provides additional symbols (rackets, punctuation signs, etc.). To
delete last symbol press End button. To delete the entire message press and hold End
button for 2 sec.
•Incoming messages are saved in incoming folder, outgoing messages – in outgoing
folder. In draft folder you may save unsent messages.
7. Phonebook
•You may save phone number with corresponding name in the phone memory and on the
SIM-card. Contact information of the phone memory is marked as .
•You may add new contact as follows: Enter phone number in standby mode, press Call
button - [save to phonebook] – choose storage (phone or SIM) - enter contact name and
press End button.
• Second mode: choose [PHONEBOOK] in the menu - press Call button - [add new
contact]. Choose storage place, enter the name and number of the contact, then confirm
by pressing Call button.
•Contact search: in standby mode press down button to call the contact list. Enter first
letters of the contact name (up to 5 letters) for quick search. Button # switches the input
mode (123, abc) to look through the entire list.
•Press Call button for the contact and choose the operation (call, message, edit etc.).
• [PHONEBOOK] – Call button - [speed dial]: You may enter up to 10 numbers for speed
dial and dial by pressing and holding appropriate buttons for 2 sec. (buttons 2-9 and «#»
or «*» in standby mode).

14
9. Organizer
9.1 Alarm
Select [ORGANIZER] - [alarm] - [set time]. After you enter time and confirm with call
button, alarm clock will be activated automatically. While alarm beeps, you may postpone it
for 10 minutes pressing the Call button.
9.2 Calculator
Select [ORGANIZER] - [calculator] to enter calculator. Use buttons up/down to choose the
operation, button # calls decimal symbol. Pressing Call button you get the result on the
screen. To delete numbers and exit calculator use End button.
8. Advanced settings
8.1 Network setup
Select [SETTINGS] - [call settings] to select network setup: call waiting, call forwarding,
call barring. You may also select automatic or manual network search.
8.2 Flight mode
For security reasons many airlines recommend to switch of cell phones or use flight
mode during the flight. Radio functions of the phone are switched off and do not cause
interference with plane electronics. Select [SETTINGS] - [flight mode] to activate/
deactivate it.
8.3 PIN-code setup
To activate/deactivate PIN request for switching on the phone select [SETTINGS] - [PIN]
- [sim lock]. Enter PIN-code and confirm with call button. To change PIN-code choose
[SETTINGS] - [PIN] - [change PIN].

15
9.3 Calendar
Select [ORGANIZER] - [calendar]. Choose necessary date using call button.
9.4 Radio fm
Select [ORGANIZER] - [fm radio] to switch on radio. For automatic search of channels
press call button and select [auto search]. Function [manual input] activates/deactivates
manual search with buttons up/down. Use menu [channel list] to play, edit or delete the
channels. Adjust volume by using side buttons of volume adjustment. To switch off the
radio use End button.
9.5 just trip®
The function allows to enter and to save a route in the memory of the phone and also
name it. Use special navigation symbols (NAV – navigation). In this mode number buttons
serve as direction arrows. Button * calls special symbols for different objects(restaurant,
underground, parking etc.) Use button # to switch between input modes (NAV, Abc, 123).
Choose [ORGANIZER] - [just trip] – call button - [trip name] – to enter the name of the
route. Then choose [trip] to create a route. You may look through, edit and delete saved
routes.
9.6 Hand counter
This function allows to count manually events or objects. To start counting choose
[ORGANIZER] - [counter]. Pressing the button once increases the counter value by one.
Maximum possible counting is till 99. End button resets counting results to zero. By
pressing the button twice you close the application.
9.7 Game
There is a race type game «F1 race». Choose [ORGANIZER] - [game] - [F1 race] to start
the game. Advanced sound settings are in menu [game settings].


Bedienungsanleitung
DE
www.just5.com

18
1. Kennenlernen des Telefons
1.1.1 Einsetzen vom Akku
1. Nehmen Sie die rückseitige Abdeckung ab.
2. Setzten Sie den Akku in das entsprechende Fach. Dabei
halten Sie drei Metallkontakte des Akkus so, dass die
nach unten gerichtet sind und entsprechen den drei
metallischen Anschlusspunkten im Handy. Somit werden die
Kontaktflächen der drei metallischen Kontakte des Akkus
sich mit drei metallischen Punkten des Handys berühren.
3. Bringen Sie das rückseitige Cover wieder an. Vergewissern
Sie sich, dass das Cover vollkommen geschlossen ist, dabei
werden Sie einen ausgeprägten Knack hören.
1.1.2 Entnehmen des Akkus
1. Nehmen Sie die rückseitige Abdeckung ab.

19
Anmerkung: vergewissern Sie sich, dass das Telefon ausgeschaltet und Ladegerät nicht
angeschlossen ist, bevor Akku entnommen wird.
2. Akku kann man leicht entfernen. Um Akku zu entfernen,
drücken Sie am vorderen Ende und gleichzeitig schieben sie
den Akku mit dem Akku nach oben.
3. Bringen Sie das rückseitige Cover wieder an. Vergewissern
Sie sich, dass das Cover vollkommen geschlossen ist, dabei
werden Sie einen ausgeprägten Knack hören.
1. Einsetzen von SIM-Karte
Nehmen Sie die rückseitige Abdeckung ab. Vergewissern
Sie sich, dass die metallischen Kontakte der SIM-Karte nach
unten und der abgeschnittene Rand nach oben gewiesen
ist. Danach schieben Sie die SIM-Karte entsprechend der
nachstehend aufgeführten Pfeilrichtung, bis die SIM-Karte in
den richtigen Steckplatz eingestellt wird.
2. Entnehmen von SIM-Karte:
Halten Sie den abgeschnittenen Rand der
SIM-Karte mit einem Finger an und heben Sie die Karte mit
dem anderen Finger hoch.
1.2 Einsetzen und Entnehmen von SIM-Karte (Telefonkarte)

20
1.3 Aufladen des Akkus
Das Telefon kann aufgeladen werden unabhängig davon, ob es eingeschaltet oder
ausgeschaltet ist. Vor dem Aufladen vergewissern Sie sich, dass Akku ins Telefon
eingestellt ist.
Anmerkung: ist der Akku leer, so wird es ein paar Minuten dauern, bis auf dem Display
Akkuindikator gezeigt wird.
1. Stecken Sie das Ladegerät in den Steckplatz.
2. Nachdem das Telefon aufgeladen wurde, trennen
Sie das Ladegerät vom Netzteil. Dann trennen Sie
das Ladegerät vom Telefon.
1.4 Indikator für den Stand der Akkuladung
Wird aufgeladen Ist aufgeladen
Meldung über die Entladung des Akkus
Wird der Akku leer, wird das Telefon darüber mit einem Warnungssignal signalisieren, auf
dem Display wird die Anzeige «batterie schwach» gezeigt. Haben Sie diese Mitteilung
«batterie schwach» während des Gespräches bekommen, so laden Sie bitte das Telefon
auf, um Telefonat fortzusetzen.
Table of contents
Languages:
Other Just5 Cell Phone manuals

Just5
Just5 FREEDOM C105 User manual

Just5
Just5 Freedom M303 User manual

Just5
Just5 J509 User manual

Just5
Just5 Blaster 2 User manual

Just5
Just5 Freedom X1 User manual

Just5
Just5 J509 User manual

Just5
Just5 Trip User manual

Just5
Just5 CP09 User manual

Just5
Just5 CP09 User manual

Just5
Just5 Spacer 2S User manual