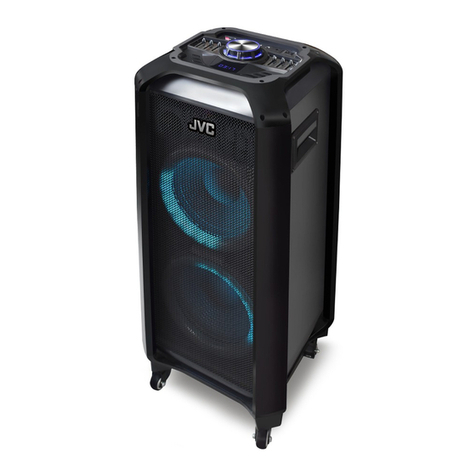
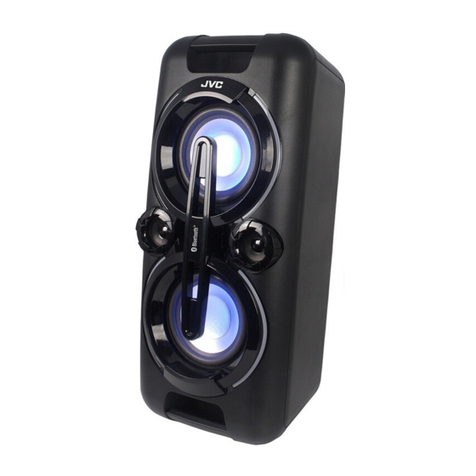
JVC XS-N618PBA User manual

PARTY SPEAKER WITH DVD PLAYER
XS-N618PBA


IMPORTANT SAFETY INSTRUCTIONS...............................................................................1.2
ACCESSORIES / TOP PANEL FUNCTIONS...........................................................................3
FRONT PANEL-CONTROLS AND FUNCTIONS.....................................................................4
TECHNICAL / REAR PANEL FUNCTIONS..............................................................................5
SYSTEM CONNECTION..........................................................................................................6
REMOTE CONTROL FUNCTIONS..........................................................................................7
HOW TO USE BLUETOOTH CONNECTION...........................................................................8
OTHER FUNCTIONS...............................................................................................................9
DVD FUNCTIONS....................................................................................................10.11.12.13
FAULT GUIDE.........................................................................................................................14

Safety Precautions
Warning: To prevent fire or electric shock, do not expose this appliance to rain
or moisture.
IMPORTANT SAFEGUARDS
Caution: Please carefully read all of the following imp
operation.
ortant safeguards to ensure safe
1.Read Instructions:
All the safety and operating instructions should be read before the appliance is
operated.
2.Retain Instructions:
The safety and operating instructions should be retained for future reference.
3.Follow Instructions:
All operating instructions should be followed.
4.Heed Warnings:
All warnings on the unit and the operating instructions should be adhered to.
5.Power Source:
The appliance should be connected based on instructions.
6.Heat:
Keep the unit away from heat sources such as radiators,refrigerators,stoves
or other appliances that may radiate heat.
7.Non-Use Periods:
The power cord of the unit should be unplugged from the outlet when you do not use
it for a long time.
8.Damage Requiring Service:
The unit should be repaired by qualified service personnel in the following cases:
a. The power plug or cable has been damaged;
b. Objects have fallen or liquid has been spilled on the appliance;
c. The appliance has been exposed to rain;
d. The appliance is functioning abnormally.
CAUTION
RISK OF ELECTRIC SHOCK,
DO NOT OPEN!
The lightning flash with the arrowhead symbol within an equilateral triangle is intended
to alert the user to the presence of "uninsulated dangerous voltage" within the product's
enclosure that may be of sufficient magnitude to constitute a risk of electric shock to a
person.
The exclamation point within an equilateral triangle is intended to alert the user to the
presence of important operating and maintenance (servicing) instructions in the literature
accompanying the unit.
1

2
8. Do not expose batteries to high temperatures
(eg. direct sunlight, heat or fire).

TOP PANEL FUNCTIONS
USB Input SD Input MIC Input Jack DVD Deck
Bluetooth Indicator
3
Accessories
Video Cable
One Wireless Microphone
AUX-in Cable
REMOTE
CONTROL BATTERY
FM ANTENNA

4
1.STANDBY:Standby key, Press this key to turn on the unit or set it to standby.
2.MUTE: Press once for mute mode and then again to cancel mute mode
3.AUX: Set the input source to AUX.
4.B.T: Set the input source to Bluetooth.
5.FM /FM SCAN: Press once to switch to FM mode. Press and hold to start auto-scanning channels.
6.MEDIA, DVD/USB/SD: First press the MEDIA key to switch to DVD/USB/SD mode. Then press the
DVD/USB/SD key to switch between DVD, USB and SD inputs.
7. : Previous key
8. : Play/ Pause key
9. : Next key
10.OPEN: DVD open and close door
11.TRE-: Treble decrease key
12.TRE+: Treble increase key
13.BASS-:Bass decrease key
14.BASS+:Bass increase key
15.ECHO-:Echo decrease key
16.ECHO+: Echo increase key
17.MIC VOL-:Volume decrease key for connected microphones.
18.MIC VOL+: Volume increase key for connected microphones.
19.POWER: Press this button to set the device to standby mode (device starts receiving power).
The other keys on the unit and remote control are active only when this button is pressed.
1 2 3 4 5 6 7 8 9 10 1112 13 14 15 16 17 18 19
VOLUME CONTROL
FRONT PANEL-CONTROLS AND FUNCTIONS
IMPORTANT: First press the POWER button to set the unit to Standby mode. After that, you can use
the other buttons on the unit or remote control.

5
TECHNICAL SPECIFICATIONS
REAR PANEL FUNCTIONS
FM Antenna Jack
AUX Input Jack
Component Output
DVD Audio Output Jack
DVD Video Output Jack
Power Input
Wireless Microphone Switch
Supported Disc Formats DVD,VCD,CD,MP3-CD
Supported Audio Format MP3
Colour System: PAL/NTSC
Audio System: Audio DAC 24 bit/96KHz
Video output: 1Vpp(at 75ohm)
Audio output(Stereo): 2Vrms(1KHz,0dB)
20Hz-20KHz (±3dB)
Signal/Noise Ratio S/N >80dB
Audio Distortion THD <0.5% @1W output
Output terminals Video(Composite ) output x1
Audio output(Left and Right) x1
Power input
Product Dimension
Product Net Weight
W34cm x D27.5cm x H104cm
19.8kg
AC 220-240V~50Hz 150W(Max.)
Signal Output
Audio Frequency
Response
This player is compatile with:CD-R/ CD-RW/ Photo CD/ VCD/ 8cm Disc/ DVD-R/ DVD+R/
DVD-RW/ DVD+RW
Supported media format: MP3/JPEG/Divx/MPEG1
Note:MPEG1 animation file can be played in DVD-RW, but it can not be played in CD-R.

SYSTEM CONNECTION
6
VID EO IN
TV
(Yellow)
(Yellow)
Video Connecting Wire
cr
cb
y
TV
(cb)
(Green)
(Y/CR/CB Termina l)
(Yellow)(Yellow)
(Red) (Red) (Red)
(White) (White)
Please note: The component output terminals Y/g C/b C/r are the same as Y, U, and V.
TV
R
L
(Red) (Red)
TV Audio Input
(White)(White)
TV
TV
R
L
(Red) (Red)
(3.5mm jack)
TV Audio Output
(White)(White)
Caution: Always disconnect the unit from the power when making or changing any connections to avoid
risk of electric shock.
Video Connection:
Choose one of the following two methods to connect to the TV.
1.Composite (AV) Connection
2. Component (YCbCr) Connection
Audio Output Connection (optional - to play sound through the TV speakers):
Connect Audio Out (LR) to the Audio input of the TV to play audio through the TV speakers
Audio Input Connection (optional - to play TV sound through the unit speakers):
Connect the audio output from the TV to the Audio In (AUX -LR) of the unit to play TV sound through the
unit speakers.
(White)
(Red)
(White)
(Red)
(AUX-in cable provided)
(4 pin cable - not provided)
OR

REMOTE CONTROL FUNCTIONS
7
1. STANDBY: Standby key
2. MEDIA: Press this key if you want to use DVD,
USB or SD input.
3. DVD/USB/SD: Switch between DVD,
USB and SD modes.
5. AUX: AUX input key
6. BT: Bluetooth input key
7. FM:FM radio input
8. OSD: on screen display key
9. TRE+: Treble increase key
10.TRE-: Treble decrease key
11. BASS+: Bass increase key
12. BASS-: Bass decrease key
13. MIC+: Mic increase key
14. MIC-: Mic decrease key
15. VOL+: Volume increase key
16. VOL-: Volume decrease key
17. ECHO-: Echo decrease key
18. ECHO+: Echo increase key
19.
20.
21.
22.
23. ENTER: enter key
24. SETUP: System setup button
25. MENU/PBC: Open the menu/ playback control
26. TITLE: title key
27. RETURN: return key
28. SUBTITLE:subtitle key
29. LANGUAGE: Language/audio change key
30. REPEAT: repeat key
31. A-B: a-b repeat key
32. L/R: Left/right channel select key
33. PROG: prog key
34. 1.2.3.4.5.6.7.8.9.0.10.10+: numerical key
35. TIME: choose the starting time of the song
36.
37.
38. PAL/ NTSC: NTSC / PAL TV system select
39. FM SCAN:FM programs auto scan
40.
41. MEMORY:
42. MUTE: Mute/unmute the sound
: up key
: down key
: left key
: right key
: rewind key
: fast forward key
: previous key
: next key
: play/pause key
: stop key
ECHO+
MIC
MIC+
ECHO
-
TRE
-
BASS
TRE +BASS
+
34
7 8
ENTER
10 +
1 2
56
90
DV D/ US B/ SD
SETUP
OSD
AUX
MUTE
TITLE
MENU
FM
OPEN/CLOSE
VOL +
VOL
P
B
C
REPEAT PROG
TIME
MEMORY
BT
FM SCAN
AB
RM-SXSN618P
MEDIA
STANDBY
RETURN SU BTITLE LA NGUAGE
PAL/N TSC
L/R/ST
4. OPEN/CLOSE: open or close key
To insert the remote control batteries:
1. Open the battery compartment.
2. Insert 2xAAA batteries with correct polarity(+/-) as indicated.
3. Close the battery compartment.
Please Note:
·If you are not going to use the remote for a long time, remove the batteries.
·Do not use old and new or different types of batteries in combination.
·Batteries contain chemical substances, so they should be disposed of properly.
1
3
2
Store your favourite FM channels to memory.
HOW TO USE BLUETOOTH CONNECTION
BLUETOOTH SPEAKER.
ENTER BLUETOOTH MODE
1.Press the “ BT ” input button on remote
2.OR Press the “ BT ” button on front
panel.
control
Speaker is in "BLUETOOTH" mode.
AUTOSEARCH FOR DEVICES
Speaker will enter auto seach:for the first 15
seconds, it will search for the last connected
device.
( Bluetooth indicator LED blinks 3 times
every 2 seconds)
The unit will automatically
connect to the last
connected device within
10 metres.
Last connected device: for example IPAD A
Turn on IPAD A's Bluetooth.
When speaker cannot find the
last connected device.
New device: for example IPAD B
Turn on IPAD B's Bluetooth.
Connect to "XS-N618" and enter
the password "0000" if required.
CONNECT TO NEW DEVICES
/ ENTER PAIRING MODE
First restart Bluetooth by selecting any other
input like AUX or DVD, then switch to BT
again. Bluetooth is now on and can connect
to the new device.
( Bluetooth indicator LED blinks fast)
Successful Connection.
The Bluetooth connection is complete.
( Bluetooth indicator LED blinks once
every 5 seconds)
control.
8

OTHER FUNCTIONS
9
FM RADIO OPERATION
Listen to FM radio broadcasts. Press the “FM” button on the unit/remote control, the display reads FM and the
radio frequency.
Press “FM SCAN” to scan the different channels and save it automatically.
Note: in order to get the best reception, extend the FM ANT. on the rear of the unit before use to its full length.
CD/USB/SD OPERATION
1.Plug the CD disk/USB/SD memory stick into the appropriate terminal.
(The unit can support up to 64G USB/SD device). Playback will start automatically from Track 1. First, press the
MEDIA button to switch to DVD/USB/SD mode. Then press the DVD/USB/SD button to choose the correct input
among the three.
2.To pause playback, press the button on unit or remote control.
3.To resume playback, press the button on unit or remote control again.
4.To select a desired track, press the or button respectively during playing until the desired track appears
on the display. Or press the number buttons to choose the track number. The unit will start play automatically.
5.To search for a particular passage during playback, press and hold the or button to scan the current
playing track at high speed until desired point (passage) appears, then press for normal playback mode.
6.To select a song which track number exceeds 10, press the 10+ button each time to skip forward, then
press the correct number button to select desired track.
AUX-IN OPERATION
1.Press the AUX button on unit/remote control to select the “AUX” mode.
2.Connect your audio device to the AUX IN jack on the back panel of the unit with an AUX IN cable.
(audio cable is offered in accessories)
3.Rotate the VOLUME knob on the unit/remote control or adjust the volume on the external device to increase
or decrease the music volume to your desired level.
4.Control the playback with your audio device.
MIC JACK OPERATION
Microphone input is available in all modes.
1.Connect your microphone to the 6.3mm MIC JACK found on the top panel of the unit.
2.Rotate the MIC+/MIC-. button on the unit/remote control to increase or decrease the microphone volume.
3.Press the ECHO+/ECHO-. button on the unit/remote control to increase or decrease the echo effect of the
microphone.
WIRELESS MICROPHONE
Turn on the wireless microphone switch on back of unit, and push ON of the microphone. Battery type: AA*2
WIRED MICROPHONE
Insert the terminal of wired microphone to the "MIC" jack of unit, and push ON the microphone.

DVD FUNCTIONS
10
Notices for System Setup
Firstly, press【SETUP】key on the remote to enter
into setup menu interface, and press Up, Down,
Left, and Right keys on the remote to select it, and
then press 【ENTER】key to make the selection
take effect. Exit the setup menu interface by
pressing 【SETUP】key.
I. System Setup
TV System
【TV SYSTEM】option, and press
【►】key to enter into next menu and select
corresponding one according to the connected TV
working system; there are following systems for
your option: NTSC, PAL60, PAL and AUTO.
Power Resume
Source
【SOURCE 】option, and press
【►】
key to enter into next menu and select
corresponding one according to the Source;
there are following sources for your option:
DISC,
CARD and USB.
DISC
CARD
USB
TV Type
【TV TYPE】option, and press
【►】key to enter into next menu. According to
your needs, there are three m odes for your option:
4:3PS, 4:3LB, 16:9. For different TV,please choose the
mode according to actual requirements.
Enter
Enter
Enter
ON
OFF
mute/ restore
Enter 【POWER RESUME】option, and
press 【►】key to enter into next menu, so that the
Power Resume can be set to two states of “On” and
“Off”. When setting to “On”, resume to the position
played last time to play again after Open/Close.
When setting to “Off”, start to play again after Open/Close.
Note:
1. Volume goes back to the default value after power off.
2. Treble, bass and system set up details are remembered
after power off.
Password
【PASSWORD】option, and press 【►】key
t o enter into next menu. When the initial setting is
in the “Password Lock” state, the “Rating” cannot
be set and the password cannot be modified; if you
need to modify the “Rating” and password, firstly
enter the current password or the initial password
and press 【ENTER】key to unlock (initial password
: 0000 ). The new password entered must be four
significant digits, and then press 【ENTER】
key
to take effect.
Enter

11
►
N
Subtitle Lang
【SUBTITLE LANG】option, and press 【►】
key to enter into next menu and select the subtitle
language you want; this function needs disc support.
II. Language Setup
The setup operations are as follows:
OSD Language
【OSD LANGUAGE】option, and press 【►】
key to enter into next menu and select the interface
display language you want.
Audio Lang
【AUDIO LANG】option, and press 【►】
key to enter into next menu and select the audio
language you need; this function needs disc support.
Default
【DEFAULT】option, and press
【】
key to select “Restore”, and then press
【E TER
】
key, so each setup will restore to factory default
automatically.
Rating
ENGLISH
CHINESE
GERMAN
SPANISH
FRENCH
PORTUGESE
RUSSIAN
CHINESE
ENGLISH
JAPAN
FRENCH
SPANISH
PORTUGUESE
RUSSIAN
LATIN
CHINESE
ENGLISH
JAPAN
FRENCH
SPANISH
PORTUGUESE
RUSSIAN
OFF
Enter
When playing a disc with a locking function, select
the suitable play control rating. This setup can only
be carried out after a password has been set. Unlock
to change the play control rating.
Note: The Rating restrictions only apply when password
has been set.
Enter
Enter
Enter
Menu Lang
【MENU LANG】option, and press 【►】
k
language
ey to enter into next menu and select the menu
you need; this function needs disc support.
CHINESE
ENGLISH
JAPAN
FRENCH
SPANISH
PORTUGUESE
RUSSIAN
LATIN
Enter

12
MIC SETUP
KEY
ECHO
MIC VOL
AUTO
OFF
MIC Setup
【MIC SETUP】option, and press
【►】
】
key to enter into next menu, and then press
【ENTER key to turn on or turn off the MIC
function. The MIC will be on if selecting “Auto”,
and The MIC will be off if selecting “Off”.
MICVOL
【MICVOL】option, and press
【►】key
to enter into next menu, and then use the
direction keys “Up” and “Down” to adjust MIC
volume to the volume effect you desire.
【KEY】option, and press
【►】key to enter
into next menu, and then use the direction keys
“Up” and “Down” to adjust KEY volume to the
effect you desire.
III. Audio Setup
The setup operations are as follows:
Audio Out
Audio out is system default and cannot be modified.
MIC SETUP
KEY
ECHO
MIC VOL
8
6
4
2
OFF
MIC SETUP
KEY
ECHO
MIC VOL
8
6
4
2
OFF
Echo
【ECHO】option, and press
【►】key to
enter into next menu, and then use the direction
keys “Up” and “Down” to adjust ECHO to the
ECHO effect you desire.
MIC SETUP
KEY SPDIF/RAW
SPDIF/PCM
ECHO
MIC VOL
Key
MIC SETUP
KEY
ECHO
MIC VOL
#
+4
+2
0
-2
-4
Enter
Enter
Enter
IV. Video Setup
The setup operations are as f ollows:
Brightness
【BRIGHTNESS】option, and press 【►】
key to enter into next menu, and then use the
direction keys “Up” and “Down” to adjust
brightness parameters.
SHARPNESS
Enter
Enter

13
【OP MODE 】option, and press 【►】
key to enter into ne d select the
Op mode
xt menu an
want.
Contrast
【CONTRAST】option, and then press
【►】key to enter into next menu, and then
use the direction keys “Up” and “Down” to adjust
contrast parameters.
V.Digital Setup
The setup operations as follows:
Op mode
OP MODE LINE OUT
RF REMOD
DYNAMIC RANGE
DUAL MONO
SHARPNESS
Hue
【HUE】option, and then press 【►】
key to enter into next menu, and then use
the direction keys “Up” and “Down” to adjust
contrast parameters.
Saturation
【SATURATION】option, and then press
【►】key to enter into next menu, and then
use the direction keys “Up” and “Down” to adjust
the parameters.
SHARPNESS
SHARPNESS
DIGITAL SETUP
you
【DUAL MONO 】option, and press
【►】key to enter into ne d select
the mode
xt menu an
want.
Dual mono
OP MODE STEREO
MONO L
MONO R
MIX MONO
DYNAMIC RANGE
DUAL MONO
DIGITAL SETUP
you
【DYNAMIC RANGE 】option, and press
【►】key to enter into ne d select
the Dynamic range
xt menu an
want.
Dynamic range
OP MODE
DYNAMIC RANGE
DUAL MONO
DIGITAL SETUP
you
FULL
6/8
4/8
2/8
OFF
SHARPNESS
+6
+4
+2
-2
-4
-6
0
Enter
Enter
Enter
Sharpness
【SHARPNESS】option, and then press 【►】
key to enter into next menu, and then use the direction
keys “Up” and “Down” to adjust sharpness parameters.
Enter
Enter
Enter
Enter

FAULT GUIDE
14
TROUBLESHOOTING:
This section summarises a few common issues you might encounter when using this
unit. Please contact Customer Service if you continue to experience problems.
Problem Possible solution
No image Check whether the TV is set to the correct output, and that the
connections are proper.
No sound Check whether the correct MODE has been chosen, and whether
the connections are proper.
Not able to
connect via
Bluetooth
When connecting to a new device, first set the MODE to some
other input (eg. AUX) and then switch back to BT. You should be
able to connect now. See page 8 for details on how to use
Bluetooth mode.
Not able to
choose the
correct mode
Use BT, AUX and FM buttons respectively for Bluetooth, AUX and
FM functions.
To choose DVD, USB or SD inputs, first press the MEDIA button;
then press the DVD/USB/SD button repeatedly to choose the
correct input among the three.
Bad image
quality
DVD/CD might be dirty or of bad quality. Try inserting another
disc.
Remote control
not working
properly
Check if the remote control is aimed correctly at the receiver, and
whether there are any obstacles blocking the receiver.
If not, try replacing the batteries.
Not playing my
audio files
My audio formats are not supported. The unit supports: MP3,
WMA audio etc.


Table of contents
Other JVC Speakers manuals

JVC
JVC UX-L40R User manual

JVC
JVC XS-N6211PBA Operator's manual

JVC
JVC XS-N5320PBBA User manual

JVC
JVC XS-N1129AA User manual

JVC
JVC KD-DV5308 Guide

JVC
JVC SX-WD8 - Left / Right CH Speakers User manual

JVC
JVC SP-XE5 User manual

JVC
JVC SP-AP1-B User manual

JVC
JVC SP-AD85-A User manual

JVC
JVC XS-N438BA User manual