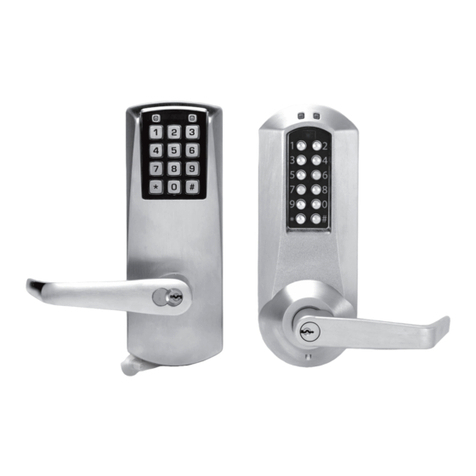
Kaba 4000 User manual

PK2971
USER
GUIDE 4000 Programmable
Electronic
Pushbutton Lock

4000 Programmable Electronic Pushbutton Lock
4000 Programmable Electronic Pushbutton Lock User Guide
A publication of KABA ILCO, Inc.
7301 Decarie Blvd.
Montreal, Quebec
Canada H4P 2G7
Printed in Canada, 2003
Copyright by Kaba Ilco Inc., 2003
All rights reserved.
No part of this book may be reproduced or transmitted in any form or by any means,
electronic or mechanical, including photocopying, recording, or by any information
storage and retrieval system, without prior written permission from the Publisher.
The information contained in this publication is accurate to the best of KABA ILCO's
knowledge.
Specifications are subject to change without notice.
PK 2971/09/03

4000 Programmable Electronic Pushbutton Lock
1. Basic Features and Operation ............................................1
1.1 Lock Hardware Features: ..................................................2
1.2 Lock Software Features:....................................................2
1.3 Unlocking with a User PIN Code: ....................................3
1.3.1 Passage Mode and Access Restrictions..........................3
1.3.2 Privileged Users ..............................................................4
1.4 Low Batteries and Battery Replacement: ........................4
1.5 Tamper Shutdown: ............................................................5
1.6 Mechanical Key Override: ................................................5
2. Programming PIN Codes and Setting Features ................6
2.1 User Levels and Features ..................................................6
2.1.1 User Levels ......................................................................6
2.1.2 Access Privileges..............................................................6
2.1.3 Lock Features ..................................................................7
2.2 Operational Modes............................................................7
2.3 Getting Started ..................................................................7
2.4 Security ............................................................................10
2.4 Manual Programming Procedures..................................10
2.4.1 Programming Rules ......................................................10
2.4.2 Perform a Programming Session ................................11
2.4.3 Sample Programming Session......................................12
2.4.4 Commands Available with a
Manager Authorization Code......................................13
2.5 Manual Programming Reference Chart ........................14
2.5.1 Setting Parameters using Default Configuration ......15
2.6 Locking Out Specific Users ..............................................15
2.7 Clearing a Tamper Shutdown ........................................16
2.8 Reset Button (Forgotten Master Code)..........................16
2.9 Manual Diagnostics ........................................................17
Environmental Specifications ..............................................18
Code Record Log Sheet ........................................................19
Technical Support ..................................................................20
TABLE OF CONTENTS

4000 Programmable Electronic Pushbutton Lock
4000 Programmable Electronic Pushbutton Lock • PK2971
Page 1
1. BASIC FEATURES AND OPERATION
The 4000 lock is a completely stand-alone electronic programmable pushbutton lock
powered by AA alkaline batteries. There is no wiring, cabling or computer required to
operate the lock. The 4000 lock can be programmed and operated entirely by entering
codes on the keypad, by following the instructions in this booklet.
To enter the room, users enter their personalized access code (or PIN) previously
programmed using a Manager or Master level code, and turn the handle. The lock
grants access if the code is valid, shows a flashing green LED and emits a short beep.
Front View Back View
Physical characteristics of the 4000 lock.
Green light, red light
and buzzer located
behind a dark window.
Plastic cover for
the battery holder.
Telephone - style 12
key metal pushbutton
keypad.
Best* compatible
removable core
cylinder or equivalent.

4000 Programmable Electronic Pushbutton Lock
4000 Programmable Electronic Pushbutton Lock • PK2971
Page 2
Physical characteristics of the 4000 lock
1.1 Lock Hardware Features:
• Durable, heavy-duty mortise or cylindrical lock
• Force-protected handle with clutch mechanism
• ANSI/BMHA 156.2 certified Grade 1 lock
• 3-hour UL/ULC fire rating for "A" labeled doors
• Weather resistant, indoor/outdoor operation
• Indoor temperature range: 32ºF to 120ºF (0ºC to 49ºC)
• Outdoor temperature range: -31ºF to 151ºF (-35ºC to 66ºC)
• ADA (Americans with Disabilities Act) compatible handles
• Key override, accepting Best and compatibles, Medeco/ASSA, Schlage
and Yale removable core cylinders
• Vandal resistant, telephone-style metal pushbutton keypad
• Durable finishes (brass, chrome and duranodic dark bronze)
• Red/green LED and high/low tone provide feedback to the user
• Powered by 4 standard AA alkaline batteries
• Audible and visible warning of low batteries (lock continues to function until
batteries are completely discharged)
1.2 Lock Software Features:
• Three security levels: one 8-digit master authorization code, six 7-digit group manager
authorization codes, 54 user access codes and one service access code.
• Passage mode, lockout mode and privacy/lockout override available to privileged users.
• Programmable user code length, from 3 to 6 digits
• Programmable unlock time from 1 to 20 seconds
• The lock is programmed by using the keypad
• Programmable tamper shutdown after 3 to 6 successive invalid access codes,
for a duration of 30 seconds to 15 minutes
• Volume control for audible feedback (10 levels).

1.3 Unlocking with a User PIN Code:
1. To unlock the door, a user simply enters their previously programmed PIN code.
When each key is pressed, the green LED will flash once, and the lock will beep once.
2. If the code is valid, the clutch will engage, the green light will flash continuously,
and the lock will emit a 0.5-second beep (high tone). The user can enter the room
by turning the handle while the green LED is flashing.
Any other combination of indicator lights and buzzes (low tone) indicates that an error has
been made when entering the code, the code is invalid, a lockout is in place, the user has been
temporarily disabled by management, the lock is in tamper shutdown mode due to attempted code
guessing, or that the batteries are low.
Table 1.3: Audible and visible feedback when entering a user access code
1.3.1 Passage Mode and Access Restrictions
A Manager or a Master level code can be used to place the lock in Passage Mode (no access
code required to open the door), or in Lockout Mode (all access codes except privileged users
are temporarily locked out, for example if a room contains valuables or is closed for the season.
Management can also choose to temporarily deactivate specific codes or all codes, in order to
fully protect a room (for example, if it contains evidence of a crime).
See Chapter 2 for information on programming the lock using a Master or Manager authorization code.
Situation Indicator Light Buzzer
Key pressed Short green flash Short beep
Keypad timeout Solid red (1 second) Buzz (1 second)
Access granted Flashing green Beep (0.5 second)
(until the door is opened or
the unlock time period expires)
Access denied Solid red (1 second) Buzz (1 second)
Low batteries* Alternating green and red when Buzz (with each flash
access is granted with a valid of the red indicator)
code
4000 Programmable Electronic Pushbutton Lock
4000 Programmable Electronic Pushbutton Lock • PK2971
Page 3
4000 Programmable Electronic Pushbutton Lock
4000 Programmable Electronic Pushbutton Lock • PK2971
Page 4
1.3.2 Privileged Users
A privileged user with a valid access code (not disabled, deleted or modified) will always be
granted access to the lock, even if there is a lockout in place or the optional deadbolt is
engaged. As long as they enter their code correctly, they will see the flashing green light, and
the clutch will engage, allowing them to open the door.
Privileged Managers can also remove or impose Lockout Mode or Passage Mode. In order to
do so, they enter their access code without turning the handle, wait until the green LED starts
flashing, and then enter a command code.
• To enable Passage Mode for a specified time period, enter 1-#-HH-#,
where HH = 1 to 24 hours or 99 to infinity.
• To enable Lockout Mode, enter 2-#. Only privileged users will have access
until this mode is disabled.
• To disable Passage Mode or Lockout Mode, enter 0-#.
1.4 Low Batteries and Battery Replacement:
When batteries need replacement, the lock will give the warning sequence of lights and buzzes
described in Table 1.3 above (*). Access will be granted normally until the batteries are too
weak to operate the lock. The batteries are located on the inside of the door. Replace the
batteries promptly to avoid having to use the mechanical key override to open the door
if batteries become too weak to operate the lock.
To replace the batteries, remove the two hex-head battery compartment screws using a
5/64" (2mm) Allen key. Replace the batteries with four AA alkaline batteries, according to the
polarity (+/-) indications on the battery compartment. (Remove the shrink-wrapping covering
the old batteries if necessary.) Reinstall the battery compartment with the two screws.
Test the lock to ensure that it operates properly. All PIN codes and settings remain unchanged
following battery replacement, except for the Passage Mode setting. If the lock was in Passage
Mode when the batteries were changed, it reverts to normal locked mode

1.5 Tamper Shutdown:
The programmable tamper shutdown feature allows the master user to select the number
of wrong code attempts needed to lock out all users temporarily, and the length of time that
all access code are disabled. This feature prevents random guessing of codes.
All user codes are locked out until the end of the tamper shutdown period, or until the tamper
shutdown is cleared by a manager or master code (see section 2.7, "Clearing a Tamper
Shutdown"). Entering further invalid codes during a tamper shutdown re-initializes the timer,
beginning another full shutdown period.
A person can exit the room from inside at any time by turning the inside handle.
Table 1.5: Audible and visible feedback during a tamper shutdown
1.6 Mechanical Key Override:
In an emergency, or if the batteries are dead, the override key can be used to open the door.
Insert the key and turn it 90º, then turn the lever. Note that turning the key alone does not
retract the latch. Do not force the key. If the key is turned but the lever will not retract the latch,
turn the key in the opposite direction.
WARNING: Never turn the key and the lever at the same time. Turn the key a full 90º
and then turn the lever. Never force the key.
Situation Indicator Light Buzzer
Start of Tamper Shutdown Solid red (2.5 seconds) Buzz (2.5 seconds)
During Tamper Shutdown Flashing red (once every 10 seconds) None
End of Tamper Shutdown Solid green (2.5 seconds) Beep (2.5 seconds)
4000 Programmable Electronic Pushbutton Lock
4000 Programmable Electronic Pushbutton Lock • PK2971
Page 5

4000 Programmable Electronic Pushbutton Lock
4000 Programmable Electronic Pushbutton Lock • PK2971
Page 6
2. PROGRAMMING PIN CODES AND SETTING FEATURES
The lock can be programmed and operated using the keypad, following the instructions
in this chapter.
2.1 User Levels and Features
2.1.1 User Levels
The 4000 lock is managed using three security levels, Master, Manager and User:
• The Master authorization code can modify all feature settings and all PIN codes
of the lock, including adding, deleting, or locking out all user access codes and
Manager authorization codes. The factory Master PIN Code is set to 12345678.
For your protection, you MUST change this code as soon as the lock is installed.
• Until this default Master code is changed, the only valid access code is 4000
and the only available function is to change the Master code.
• Each Manager authorization code controls the access codes and privileges
of a group of 9 users, and also controls the Service user access code.
• Master and Manager codes are authorization codes that are for programming only
and do not open the door. There are a total of 54 user codes, which can open the
door (6 groups of 9 users, plus the Service user which can only be set up using
the Master authorization code).
• The Master code is 8 digits long; each Manager code is 7 digits long.
All user codes are the same length as the first user code programmed into the lock,
from 3 to 6 digits.
2.1.2 Access Privileges
When programming the lock manually, each group of 6 users can be assigned as privileged
users by their Manager or using the Master authorization code. Privileged users can set or
remove access restrictions (deadbolt and lockout) and turn Passage Mode on or off.
6
Grp. 1
User 2 Grp. 1
User3 Grp. 1
User4 Grp. 1
User5 Grp. 1
User6 Grp. 1
User9
Grp. 1
User 1
......
Grp. 2
User 2 Grp. 2
User3 Grp. 2
User4 Grp. 2
User5 Grp. 2
User6 Grp. 2
User9
Grp. 2
User 1
......
Grp.3
User 2 Grp.3
User3 Grp.3
User4 Grp.3
User5 Grp.3
User6 Grp.3
User9
Grp.3
User 1
......
Grp.6
User 2 Grp.6
User3 Grp.6
User4 Grp.6
User5 Grp.6
User6 Grp.6
User9
Grp.6
User 1
......

2.1.3 Lock Features
The Master and Manager authorization codes control lock features as follows
Lock Function Control
MASTER GROUP MANAGERS
Access Code Access code within the manager’s group
Passage Mode Passage Mode
Lock-out Mode Lock-out Mode
Unlock Time User Privileges
Tamper Shutdown Time
Tamper Shutdown Counter
Buzzer Volume
Lock Configuration
User Privileges
2.2 Operational Modes:
The 4000 lock has four modes of operation:
Normal The lock unlocks when a valid access code is entered.
Programming A Master or Manager level authorization code has been used to
open a programming session.
Passage The lock allows access without an access code.
Tamper Shutdown The lock is temporarily disabled due to a series of invalid entries.
2.3 Getting Started
IMPORTANT: After the lock is installed, open the door, using the factory default code
(4000). Then you must immediately program a new Master code and a new User code
for the door. When the Master code is changed, the factory default code (4000) will be
automatically disabled.
The shipping Master code is 12345678, and the factory default access code to open the
door during installation is 4000. There are no manager or user codes defined when the lock
is shipped. The first operation should always be to change the Master code of the lock. When
the Master code is changed, the factory default code (4000) will be automatically inactivated.
4000 Programmable Electronic Pushbutton Lock
4000 Programmable Electronic Pushbutton Lock • PK2971
Page 7

4000 Programmable Electronic Pushbutton Lock
4000 Programmable Electronic Pushbutton Lock • PK2971
Page 8
For your protection, program a new Master code:
1. Press <#> to begin programming.
2. Enter the factory default Master code <12345678>.
3. Press <#>.
4. Enter < 299# >, then enter your new Master code (8 digits).
If you make a mistake, press <*> and re-enter the Master code.
5. Press <#>.
6. Re-enter your new Master code (8 digits).
7. Press <#>.
The green LED should light for 1 second and the lock should beep in the pattern long,
short, short. If you see or hear any other pattern, there is an error. The factory default
Master code is still valid. Start again at step 1.
8. Press <#> to end programming.
9. Write down your master code on the Code Record Log Sheet on the last page
of this manual, and keep it in a safe place accessible only to authorized persons.
Do not use the factory default Master code. The lock will not accept the factory default
Master code as a valid new master code.
User Code Length
The length of the first user code programmed into the lock determines the length of ALL the
User access codes and of the Service access code. For more combinations, use more digits.
6 digits = 1,000,000 combinations
5 digits = 100,000 combinations
4 digits = 10,000 combinations
3 digits = 1,000 combinations

4000 Programmable Electronic Pushbutton Lock
4000 Programmable Electronic Pushbutton Lock • PK2971
Page 9
Select the User Code Length and enter the first User code:
1. Press <#> to begin programming.
2. Enter your Master code (8 digits).
3. Press <#>.
4. Enter < 211# >, and then enter the new User code (3 to 6 digits).
5. Press <#>.
6. The green LED should light for 1 second and the lock should beep in the pattern
long, short, short. If you see or hear any other pattern, there is an error.
7. Press <#> to end programming.
8. Write down the User code on the Code Record Log Sheet (User 1, Group 1).
Recommandations: For security reason do not use factory default access code 4000 as
user access code.
The lock ships from the manufacturer with the following default parameters in memory
Refer to sections 2.4 and 2.5 for the procedure to program more user codes and Manager codes,
and for selecting lock features.
Situation Indicator Light
All Manager authorization codes Blank
All User access codes Blank, (except for user code
just programmed)
Service access code Blank
Passage Mode Off
Lockout Mode Off
Configuration "Commercial setup"
Unlock Time 5 seconds
Buzzer Volume 5
Tamper Shutdown time 4 minutes
Tamper Shutdown counter 6 times
Lock ID 0000
Privileged users none defined 0000
Master Code 12345678
Access Code 4000

4000 Programmable Electronic Pushbutton Lock
4000 Programmable Electronic Pushbutton Lock • PK2971
Page 10
2.4 Security:
• Change the Master Authorization code from the factory default; you must do this.
• Record Master, manager and user codes, (as you program them) in the Code Record
Log Sheet located at the end of this manual. Keep this sheet securely under lock
and key so that it will be accessible only to authorized personnel. If the log sheet
is properly maintained, you can avoid having to reprogram locks if a PIN code is
forgotten, particularly the Master code.
• Keep the mechanical override key in a secure location accessible to authorized
personnel in an emergency, but safe from theft.
• Choose a longer user code for higher security. Six digits provide 1,000,000 unique
combinations, making random guessing of codes extremely difficult.
• Increase the tamper shutdown time and/or reduce the number of attempts required
before the lock shuts down, if you are concerned about code guessing.
• Do not lend codes to persons other than the assigned user, at any time.
Codes must be kept secret.
2.4 Manual Programming Procedure
2.4.1 Programming Rules
A programming session is used to manage PIN codes and lock feature settings. During a
programming session, the following rules apply:
• Use the 8-digit Master authorization code or a 7-digit Manager authorization code
to start programming.
• Press the <#> key to start or end programming, and to separate each authorization
code, command code, or parameter entered using the keypad.
• Press the <#> key to separate each authorization code, command code, or parameter
entered using the keypad.
• Press the <*> key immediately to clear an incorrect command or parameter
(before pressing the <#> key). Once the <#> is pressed, the command is executed.
• If too much time elapses between key presses (more than 5 seconds), or too much
time to enter all the key sequence (more than 15 sec. the lock will leave programming
mode and return to normal mode.
• Press <#> after the last command is accepted to end the programming session.
During a programming session, you can continue entering commands one after the
other, until you have completed all desired programming. Then press <#>.

• The LED indicators and the buzzer will provide important feedback, according to
the following table:
• Managers can only affect the users that are in their user group and the privileged
/normal user setting for their entire group.
• The Master code can change any setting or code.
Table 2.4.1: Audible and visible feedback during a tamper shutdown
2.4.2 Perform a Programming Session
To place the lock in Programming Mode and enter commands, do the following:
1. Press <#> to begin programming.
2. Enter your Master code (8 digits) or Manager code (7 digits).
3. Press <#>.
4. Enter a 3-digit command code from the chart in Section 2.5, then press <#>.
The command code is made up of the first digit, which identifies the type of command,
followed by two digits that specify the user affected or the value of a setting in the lock
features.
5. Enter any additional parameters that the command code requires, then press <#>.
Examples of additional parameters include user access codes or manager authorization
codes and the length of time to remain in Passage mode.
Situation Indicator Light Buzzer
Key pressed Short green flash Short beep
Invalid key pressed Short red flash Short buzz
Programming command Solid green (1 second) 3 beeps (1 long, 2 short)
accepted (correct entry)
Programming command Solid red (1 second) Buzz (1 second)
rejected (error in command)
Keypad timeout Solid red (1 second) Buzz (1 second)
4000 Programmable Electronic Pushbutton Lock
4000 Programmable Electronic Pushbutton Lock • PK2971
Page 11

4000 Programmable Electronic Pushbutton Lock
4000 Programmable Electronic Pushbutton Lock • PK2971
Page 12
6. If you make an error at any time, press <*> to cancel the command
(before pressing <#>).
7. Press <#>. The green LED should light for 1 second and the buzzer should sound
1 long and 2 short beeps to indicate acceptance of the programming command.
8. Enter another command, or press <#> to end the programming session.
For a complete list of command codes, refer to section 2.5.
2.4.3 Sample Programming Session
The following commands could all be performed in sequence in a single programming session,
or entered individually, starting with the Master Authorization code to open each programming
session.
1. Start the programming session (if the Master authorization code is 45657890).
#-4-5-6-5-7-8-9-0-#
2. Delete all existing Manager authorization and User access codes so that you can
change the code length to 6 digits for maximum security.
3-0-0-#
3. Define the Group 1 Manager authorization code (as 1176548). In this example,
the Master user makes an error when entering the code (enters 202 instead of 201),
and uses the <*> key to correct the mistake.
2-0-2-*-2-0-1-#-1-1-7-6-5-4-8-#
4. Define the access codes for Users 2, 3 and 4 in Group 1 (with codes 349023,
496756 and 090988).
2-1-2-#-3-4-9-0-2-3-#
2-1-3-#-4-9-6-7-5-6-#
2-1-4-#-0-9-0-9-8-8-#
5. Set the users in Group 1 as privileged users who can operate Passage Mode
and override or set a lockout.
9-6-1-#
6. Set the lock configuration to Handicapped.
8-0-2-#

7. Enable Passage mode with a 2-hour time limit (the lock will remain in Passage Mode
for the next 2 hours before returning to normal operation).
9-4-1-#-0-2-#
8. Exit the programming session.
#
2.4.4 Commands Available with a Manager Authorization Code
• Add, delete, modify, lock out or re-activate users within the Manager's group.
• Assign all users in the Manager's group as "Privileged" users or normal users.
• Add, delete, modify, lock out or re-activate the Service user.
• Enable or disable Passage Mode, with or without a time limit.
• Enable or disable Lockout Mode, which removes access temporarily from all users.
4000 Programmable Electronic Pushbutton Lock
4000 Programmable Electronic Pushbutton Lock • PK2971
Page 13

4000 Programmable Electronic Pushbutton Lock
4000 Programmable Electronic Pushbutton Lock • PK2971
Page 14
2.5 Manual Programming Reference Chart
Command Name
Disable Users 0 00 # ALL codes (except Master)
0M # Manager of group M (from 1 to 6)
G0 # All users in group G (from 1 to 6) YES
GU # User U (from 1 to 9) in group G (from 1 to 6) YES
77 # Service access code YES
Activate Users 1 00 # ALL codes (except Master)
0M # Manager of group M (from 1 to 6)
G0 # All users in group G (from 1 to 6) YES
GU # User U (from 1 to 9) in group G (from 1 to 6) YES
77 # Service access code YES
Add/Modify Users 2 0M # Manager of group M (from 1 to 6)
KKKKKKK # Enter 7-digit code
GU # User U (from 1 to 9) in group G (from 1 to 6)
KKK{KKK} # Enter 3 to 6-digit code, same length as all
other access codes YES
77 # Service access code
KKK{KKK} # Enter 3 to 6-digit code, same length as all
other access codes YES
99 # Master authorization code
MMMMMMM Enter 8-digit code
M # Re-enter 8-digit code to confirm
MMMMMMMM #
Delete Users 3 00 # ALL codes (except Master)
0M # Manager of group M (from 1 to 6)
G0 # All users in group G (from 1 to 6) YES
GU # User U (from 1 to 9) in group G (from 1 to 6) YES
77 # Service access code YES
Passage Mode 4 00 # OFF (normal operation) YES
01 # ON (no code required to open door) YES
Lock-out Mode 4 90 # OFF (normal operation) YES
91 # ON (all user access codes temporarily locked out, YES
Master and Manager codes still accepted for
programming)
Unlock Time Setup 5 SS # Select from 01 to 20 seconds to turn the handle
after entering a valid code
Tamper Parameters Setup 6 MM # Shutdown period, from 00 to 15; 00 = 30 sec,
1 to 15 = minutes
9N # Tamper counter, from 3 to 6 invalid codes
prior to shutdown
Buzzer Volume Setup 7 00 # OFF
0N # Volume level control, from 1 to 9
Configuration Setup 8 00 # Commercial configuration
01 # Residential configuration
02 # Handicapped configuration
Manual Diagnostics 9 30 # Start Manual Diagnostics
123456789*0 Press each key in sequence to test the keypad.a
#
Passage Mode with Timer 9 41 # Set timer for HH = 1 to 24 hours, 99 = no time limit.
HH # The lock will enter Passage Mode immediately and return
to locked mode (normal operation) after the timer has elapsed. YES
Privileged User Setup 9 5G # Set all users in group G (from 1 to 6) as privileged YES
9 6G # Set all users in group G (from 1 to 6) as normal YES
Factory Defaults 9 99 # Restore factory default settings, erases all codes except
the Master code
Command
(1st digit) Arguments
(2nd & 3rd digit ) Description Available
to group
Manager

2.5.1 Setting Parameters Using Default Configurations:
When the lock is shipped, it is configured in the Commercial setup (command 800). There are
two other choices of configuration, which affect the unlock time, buzzer and tamper shutdown
parameters, as described in the table below. The access and authorization codes are not affect-
ed when one of the default configurations is selected.
Command code Commercial Residential Handicapped
800 801 802
Unlock time 5 sec 5 sec 20 sec
Buzzer sound loud (9) medium (5) loud (9)
Tamper shutdown time 4 minutes 2 minutes 1 minute
2.6 Locking Out Specific Users
There are two ways to lock out users.
• User codes can be disabled individually or
• in groups without deleting the codes, using command 0.
This technique is useful if a specific person or group of people will be absent, is temporarily
reassigned, or has an access pattern which changes from time to time.
To stop access by all user access codes temporarily, use the Lockout function (command 49),
or the Disable Users function (command 0).
Note: Passage Mode can be enabled without a time limit (command 401), or with a time
limit (command 941). To disable Passage Mode, always use command 400.
Note: Master authorization code cannot be deleted by typing on the keypad. It can be
modified, but only if the existing Master authorization code is known. If your Master code
has been forgotten, refer to section 2.9.
Note: "Disable Users" is more powerful than "Lockout". A Privileged user with a valid
access code can enter a room that is locked out, but not a room for which their code is
disabled. If a room must be completely sealed, for example if it contains evidence of a
crime, disable all codes using command 0.
4000 Programmable Electronic Pushbutton Lock
4000 Programmable Electronic Pushbutton Lock • PK2971
Page 15

4000 Programmable Electronic Pushbutton Lock
4000 Programmable Electronic Pushbutton Lock • PK2971
Page 16
2.7 Clearing a Tamper Shutdown
The 4000 lock enters a tamper shutdown after the number of successive invalid code attempts
specified under the Tamper Counter setting (command 69). While in the ‘tamper shutdown’
state, the LED indicator gives a half-second red pulse repeated every 10 seconds. All access
codes are locked out until the shutdown time specified in command 6 expires. If an access
code (valid or invalid) or an invalid master or manager authorization code is keyed in during the
tamper shutdown, the lock discards it and re-initializes the tamper shutdown timer back to its
programmed value, thus extending the tamper shutdown period.
There are two ways to open the door from the outside before the end of the shutdown time.
• Keying in a valid master or manager authorization code places the lock in programming
mode, and also ends the tamper shutdown. Ex: #master# and # to finish programming.
• Alternatively, the manual override key can be used in an emergency, if there is no time
to program the lock using a manager or a master level code. The override key does not
remove the tamper shutdown, which will continue until the shutdown time has expired.
2.8 Reset Button (Forgotten Master Code)
In order to completely reset all the PIN codes and parameters of the lock if moving it to a new
location, if completely reprogramming all locks in your access control system, or in the event of
master authorization code being forgotten, perform the following sequence of steps:
1. On the inside of the door, the inside lever and the inside cover. Loosen the mounting
screws and remove the inside housing from the door.
2. Using a pen or small screwdriver, press the reset switch through the hole in the inside
housing. Hold the switch down for 1 second.
3. Replace the, cover, handle and batteries.
4. Proceed to reprogram the lock, including changing the Master authorization code,
which has been reset to the factory default value (12345678).

2.9 Manual Diagnostics
When you enter programming mode using the Master code, followed by the manual diagnostics
command (930#), the lock is prepared to test the keypad. Press each digit on the keypad in the
following order: 1-2-3-4-5-6-7-8-9-*-0-#. If one of the keys is not functioning correctly, the lock will
buzz and the red LED will light. The diagnostic function will be terminated, but the lock will remain
in programming mode. To confirm that a key is not working, re-enter the manual diagnostic com-
mand (930#) and re-test the keypad.
3. Troubleshooting
Problem
Possible cause
Solution
The lock does not respond at all—no lights and no sound—when a key is pressed.
1. The connector end of the ribbon cable connecting the front housing and the inside
housing is not snugly pushed in.
Push in the connector so that it locks snugly and makes a good connection.
2. The batteries are missing, the battery connector is not connected, one or more
batteries are placed with the wrong polarity, the batteries are completely discharged,
or non-alkaline batteries are in use.
Correct the above condition and retry.
3. The lock is currently in tamper shutdown mode.
To open the lock, use the mechanical override key, or simply wait until the tamper
shutdown time period (30 seconds to 15 minutes) has elapsed.
A User access or Service access code is not accepted—will not unlock the lock.
The access code is not programmed into the lock, the access code is deactivated,
or the lock is in lockout mode.
Program the lock to add the access code (command 2)
Ensure the access code is activated (command 1)
Ensure the lock is not in lockout mode (command 490)
?
?
?
4000 Programmable Electronic Pushbutton Lock
4000 Programmable Electronic Pushbutton Lock • PK2971
Page 17
Table of contents
Other Kaba Lock manuals

Kaba
Kaba PowerPlex 2000 Series User manual

Kaba
Kaba SIMPLEX 900 Series User manual

Kaba
Kaba Simplex 6200 Series User manual

Kaba
Kaba Simplex 3000 Series User manual

Kaba
Kaba Simplex 6200 Series User manual

Kaba
Kaba E-Flash EF680 User manual

Kaba
Kaba LA GARD 1947 User manual

Kaba
Kaba Gege User manual

Kaba
Kaba PowerLever PROX 9000 User manual

Kaba
Kaba simplex 7106 series User manual

Kaba
Kaba 1546-K5 User manual

Kaba
Kaba SIMPLEX LD450 User manual

Kaba
Kaba C-lever User manual

Kaba
Kaba SIMPLEX LD470 User manual

Kaba
Kaba E-PLEX 2000 User manual

Kaba
Kaba C-lever compact User manual

Kaba
Kaba E-Plex 50 Series User manual

Kaba
Kaba EX3600 User manual

Kaba
Kaba X-09 User manual

Kaba
Kaba Simplex 7104 Series User manual