Do Not Disturb ON: Active.
Phone Lock ON: Phone locked.
Three Party Conference -
Pager ON: Active.
• Up to 9 Private Pool Numbers, each at most 16
digits, may be stored in Memory Keys.
• By choosing one of the following Auto Setting
options, you may program all of your Memory
Keys at the same time.
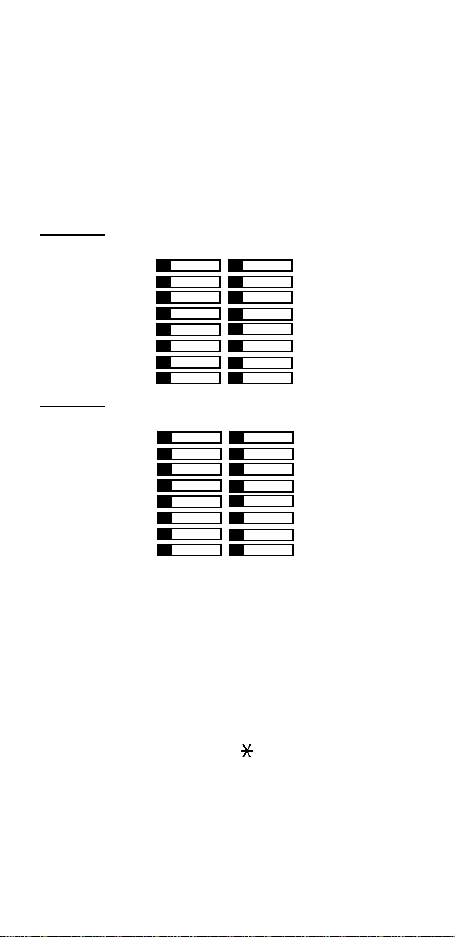
Option 1:
Second. Primary Primary Second.
E 1126 E. 1110 E. 1118 E 1134
E 1127 E. 1111 E. 1119 E 1135
E 1128 E. 1112 E. 1120 E 1136
E 1129 E. 1113 E. 1121 E 1137
E 1130 E. 1114 E. 1122 E 1138
E 1131 E. 1115 E. 1123 E 1139
E 1132 E. 1116 E. 1124 E 1140
E 1133 E. 1117 E. 1125 E 1141
Option 2:
Second. Primary Primary Second.
E. 1116 FN01 FN09 E. 1124
E. 1117 FN02 FN10 E. 1125
E. 1118 FN03 E. 1110 E. 1126
E. 1119 FN04 E. 1111 E. 1127
E. 1120 FN05 E. 1112 E. 1128
E. 1121 FN06 E. 1113 E. 1129
E. 1122 FN07 E. 1114 E. 1130
E. 1123 FN08 E. 1115 E. 1131
FN : Feature Number (Refer to pg 8)
To clear the above settings, select Clear from the
Auto Settings menu.
If the all the above programming options are not
enough to match your requirements, the Function
Code sub-menu can be used. By using this sub-
menu, codes (as DTMF tones) of the desired
features can be programmed to the keys. The code
may have at most 8 digits. The Flash and Transfer
keys are used for # and respectively and the
digits are dialed through the 3x4 numeric keypad.
E.g. To program a key to transfer a call to extension
1215, the keys “Flash 1 2 1 5 Transfer” must be
pressed in order.