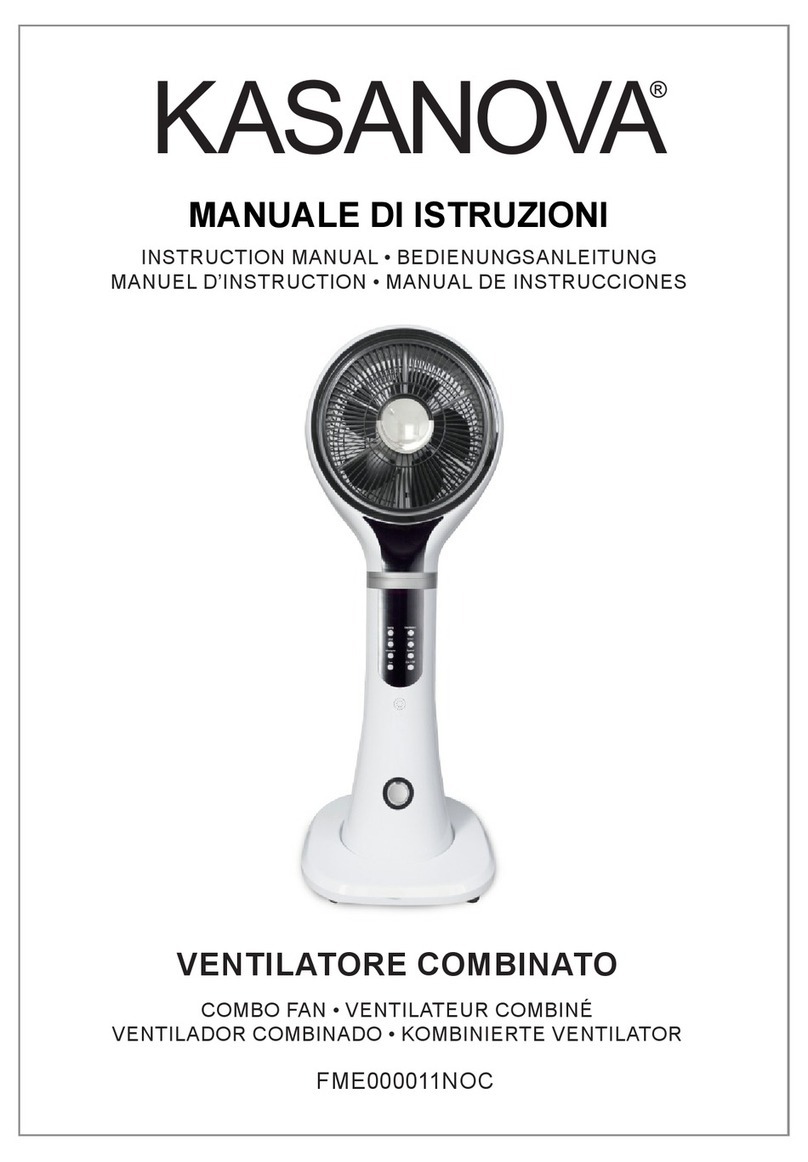
Kasanova ELR000500NOC User manual

VENTILATORE COMBINATO
COMBO FAN • VENTILATEUR COMBINÉ
VENTILADOR COMBINADO • KOMBINIERTE VENTILATOR
INSTRUCTION MANUAL • BEDIENUNGSANLEITUNG
MANUEL D’INSTRUCTION • MANUAL DE INSTRUCCIONES
MANUALE DI ISTRUZIONI
ELR000500NOC

2VENTILATORE COMBINATO
Gentile cliente, grazie per aver scelto uno dei nostri prodotti. Per ottenere i
risultati migliori e non correre rischi, prima di usarlo leggere attentamente
questo manuale, conservandolo in un luogo sicuro per future consultazioni.
DESCRIZIONE DEL PRODOTTO:
Questo prodotto fa parte della nostra serie di ventilatori con umidicatore e si
basa su un concetto di design ultra moderno.
Non è solo piacevole esteticamente e dotato di una struttura rinnovata, ma è
anche funzionale e facile da usare e pulire. Si basa sull’idea che sia possibile
combinare caratteristiche nuove per i ventilatori, come la funzione antizanzare
e quella di umidicazione, per orire agli utenti un’esperienza ancora più
ecace. Il generatore di ioni negativi è in grado di rilasciare ioni negativi di
ossigeno che permettono di migliorare la qualità del sonno e la sterilizzazione
degli ambienti, oltre ad alleviare la stanchezza.
Grazie alla funzione umidicazione,nell’ambiente viene nebulizzata acqua
tramite il ventilatore. Questa nebbiolina fredda ha anche un eetto cosmetico,
poiché idrata la pelle. Gli ioni negativi con oscillazione ad alta frequenza
sono in grado di eliminare l’elettricità statica e tenere pulita l’aria, in modo da
poter vivere in un ambiente sano e confortevole. Le quattro rotelle nella parte
inferiore del prodotto si muovono a destra e a sinistra, avanti e indietro con
più angolazioni. Ovunque ci si trovi, è possibile godere della brezza fresca
prodotta dal ventilatore. Un prodotto di prima scelta, adatto all’uso a casa in
ucio.
ELENCO DELLE PARTI
1. Uscita nebulizzazione
2. Griglia anteriore
3. Pannello di controllo
4. Pannello ioni negativi
5. Pannello anteriore
6. Indicatore livello acqua
7. Base
8. Maniglia
9. Griglia posteriore
10. Pannello posteriore
11. Fessura antizanzare
12. Serbatoio rimovibile
13. Boccadi scarico
14. Ruota

3
VENTILATORE COMBINATO
MODO D’USO
1. Prima di usare il prodotto, assicurarsi che sia intatto. Usare un impianto
elettrico con le stesse caratteristiche indicate sulla targhetta sul retro del
ventilatore. Una volta collegata la spina alla presa di corrente, si sentirà un bip.
Qualche secondo dopoil display e la spia si accendono e il ventilatore entra in
posizione di stand-by.
2. Accensione
Quando il ventilatore è fermo, premere l’interruttore. Si sentiranno due bip e
il ventilatore entrerà in funzione a bassa potenza. A questo punto è possibile
selezionare la modalità velocità premendo il tasto corrispondente sul pannello
di controllo o sul telecomando.
3. Regolazione velocità
Dopo aver accesoil ventilatore, se si desidera cambiare il volume del usso
d’aria, premere leggermente il tasto “Speed” sulla parte relativa alle funzioni sul
pannello di controllo. È possibile selezionare una velocità bassa, media o alta.
La relativa modalità di circolazione dell’aria è regolabile sempre dal pannello di
controllo.
4. Regolazione modalità movimento a destra e a sinistra
Premendo il tasto “Swing” sul pannello di controllo o sul telecomando, si
attiva la modalità movimento automatico a destra e a sinistra per migliorare la
circolazione dell’aria. Premendolo di nuovo, la funzione si disattiva.
5. Regolazione modalità oscillazione
Premendo il tasto “Oscillation” sul pannello di controllo o sul telecomando, si
attiva la modalità oscillazione automatica in direzione circolare per migliorare la
circolazione dell’aria. Premendolo di nuovo, la funzione si disattiva.
6. Funzione ionizzazione
Quando il ventilatore è acceso, premendo leggermente il tasto “lon” si attiva
questa funzione. Sul pannello di controllo si accende il simbolo corrispondente.
Premendolo di nuovo, la funzione di disattiva.
7. Funzione umidicazione / nebulizzazione
Quando il ventilatore è acceso, premendo il tasto “Mist” sul pannello di controllo
o sul telecomando, sul display appare lo schema della funzione umidicazione.
La spia verde indica la normale funzione di umidicazione, mentre quella rossa
indica che nel serbatoio non c’è abbastanza acqua ed è necessario riempirlo.
Premendolo di nuovo, la funzione di disattiva.
8. Funzione antizanzare a ultrasuoni
Quando il ventilatore è acceso, premendo il tasto “Mosquito”, sul display
appareil relativo simbolo, che indica che la funzione antizanzare è attiva.
Premendolo di nuovo, la funzione di disattiva. Questa funzione opera in
maniera indipendente sia quando il ventilatore è acceso sia quando è in stand-
by. Inserire una piastrina antizanzare (non inclusa) nell’apposita fessura sul
4VENTILATORE COMBINATO
retro del ventilatore.
9. Funzione timer
Quando il ventilatore è acceso, premendo il tasto “Timer” sul pannello di
controllo o sul telecomando è possibile impostare il tempo desiderato. Ogni
volta che si preme il tasto, sul display appare il tempo impostato, che può
essere compreso tra 0,5 e 9,5 ore, con intervalli di mezz’ora (0,5, 1, 1.5 ore
no a 9.5 ore). Premendolo di nuovo, la funzione di disattiva.
10. Funzione telecomando
Il telecomando accende e spegne il ventilatore e attiva e disattiva le
funzioni MIST, SWING, TIMER e SPEED. Funziona con 2 batterie AAA
(non incluse).
FUNZIONAMENTO DEL SERBATOIO DELL’ACQUA
1. Aprire il serbatoio di 45 gradi.
2. Svitare il coperchio e versare acqua all’interno del serbatoio.
3. Richiudereil serbatoio. Un “clic” indica la posizione corretta.
NOTA: Assicurarsi che il serbatoio e il ventilatore siano in posizione stabile,
onde evitare che cadano durante gli spostamenti.
AVVERTENZE
1. Prima di riempire il serbatoio e di eettuare operazioni scollegare la spina
dalla presa di corrente.
2 L’uso di questo apparecchio non è indicato per persone (bambini compresi)
con ridotte capacità siche, sensoriali o mentali, mancanza di esperienza e
conoscenze, a meno che ricevano supervisione o indicazioni da una persona
responsabile della loro sicurezza.
3. È necessario sorvegliare i bambini anché non giochino con l’apparecchio.
Coperchio
del serbatoio

5
VENTILATORE COMBINATO
PULIZIA E MANUTENZIONE
1. Prima di pulire l’apparecchio, spegnerlo e scollegare la spina dalla presa di
corrente.
2. Non immergere la spina o la parte principale del ventilatore in liquidi di
alcun tipo.
3. Per pulire il corpo principale del ventilatore, usare un panno umido con un
detergente neutro, facendo attenzione a non graare le superci.
4. Per pulire il serbatoio dell’acqua, lasciare agire per 5-10 minuti una
soluzione a base di acqua e qualche goccia di acido citrico leggero,
in modo da eliminare lo sporco accumulato.
5. Se si prevede che il ventilatore non verrà usato per un certo periodo di
tempo, prima di riporlo svuotare il serbatoio dall’eventuale acqua rimasta e
asciugarlo.
RISOLUZIONE PROBLEMI
4. Se il cavo di alimentazione è danneggiato, per evitare pericoli deve essere
sostituito dal produttore, dal servizio assistenza o da personale analogamente
qualicato.
PROBLEMA POSSIBILE CAUSA SOLUZIONE
Accendendo il ventilatore,
non si ottiene risposta
1. La corrente non arriva al
ventilatore
2. Si sta premendo
l’interruttore nel modo sbagliato
3. Il motore l’interruttore sono
danneggiati
1. Collegare la spina alla presa di
corrente nel modo corretto
2. Premerel’interruttore
3. Sono necessarie riparazioni
Il movimento a destra e a sinistra
non si attiva
1. Si sta premendo il tasto Swing nel
modo sbagliato
2. |l motore o l’interruttore sono
danneggiati
1. Trovare il tasto corretto e
premerlo per attivare il movimento
a destra a sinistra
2. Sono necessarie riparazioni
Il ventilatore emette
un rumore anomalo
1. All’interno ci sono dei detriti
2. La turbina è allentata
3. C’è un’anomalia del motore
1. Spegnere il ventilatore e, se la
garanzia è ancora in corso di validi-
tà, rivolgersi al servizio assistenza
2. Sono necessarie riparazioni
Non si riesce ad
accendere il ventilatore
1. Si sta premendo il tasto sbagliato
2. L’interruttore è danneggiato
1. Trovare l’interruttore e per
accendere il ventilatore
premendolo una volta
2. Sono necessarie riparazioni

6VENTILATORE COMBINATO
PROBLEMA POSSIBILE CAUSA SOLUZIONE
L’umidicatore non
nebulizza l’acqua
1. Nel serbatoio non c’è acqua
2. Il dispositivo umidicatore
potrebbe avere un problema
3. Il sensore del livello dell’acqua
potrebbe essere danneggiato
1. Riempire d’acqua il serbatoio
2 e 3. Sono necessarie riparazioni
La nebulizzazione è scarsa 1. L’acqua è sporca
2.Il dispositivo umidicatore è sporco
1. Sostituirla con acqua pulita
2.sono necessarie riparazioni
CARATTERISTICHE TECNICHE DEL PRODOTTO
Modello: VE1850K
Tensione / Frequenza: 220V- 50 Hz
Capacità serbatoio: 2,3 l
Potenza: 80 W
Peso della struttura: 6,2
Contenuto della confezione: ventilatore, telecomandoa infrarossi,
manuale di istruzioni
TRATTAMENTO DEL DISPOSITIVO ELETTRICO ED ELETTRONICO A FINE VITA
Informazione agli utenti per il corretto smaltimento del prodotto ai sensi della Direttiva Europea 2002/96/CE e del D.lgs N.
151/2005
Caro consumatore,
è importante ricordarti che, come buon cittadino, avrai l’obbligo di smaltire questo prodotto non come riuto urbano, ma di
eettuare una raccolta separata. Il simbolo sopra indicato e riportato sull’apparecchiatura indica che il riuto deve essere oggetto
di “raccolta separata”. I dispositivi elettrici ed elettronici non devono essere considerati riuti domestici. Pertanto, il prodotto alla
ne della sua vita utile, non deve essere smaltito insieme ai riuti urbani. L’utente dovrà conferire (o far conferire) il riuto ai centri
di raccolta dierenziata predisposti dalle amministrazioni locali, oppure consegnarlo al rivenditore contro l’acquisto di una nuova
apparecchiatura di tipo equivalente. La raccolta dierenziata del riuto e le successive operazioni di trattamento, recupero e
smaltimento favoriscono la produzione di apparecchiature con materiali riciclati e limitano gli eetti negativi sull’ambiente e sulla
salute eventualmente causati da una gestione impropria del riuto.
Grazie!

7
VENTILATORE COMBINATO

8VENTILATORE COMBINATO
Dear customer, thank you for purchasing one of our products. Please read the
instruction manual carefully before using this product for best performance and
keep for future reference.
PRODUCT DESCRIPTION
This product is part of our range of fans combined with humidier and stands
out for its ultra-modern design concept. Aesthetically pleasing, it oers a
modern structure, while being also functioning, user-friendly and convenient
to clean. Its design is based on the combination of the traditional features of
a fan and new technologies, such as the anti-mosquito and the moistening
function for delivering a greater and more ecient user experience. The
negative ion generator releases negative oxygen ions that allow to improve
the sleep quality, to sterilize home environments and to relieve your fatigue.
Thanks to the moistening function, the fan will spray water. This cold mist has
also a cosmetic eect as it moisturizes the skin. The negative ions, thanks to
the high-frequency oscillation, are able to get rid of static and to purify the air,
so you can live in a comfortable and healthy environment. The four wheels
of the product stir to the right and left, back and forth with multiple angles.
Wherever you are, you can benet from this fresh mist produced by the fan.
A top-quality product, suitable for home or oce use.
LIST OF COMPONENTS
1. Mist outlet
2. Front fan grill
3. Control panel
4. Negative ions panel
5. Front panel
6. Water level indicator
7. Base
8. Handle
9. Rear fan grill
10. Rear panel
11. Anti-mosquito slot
12. Detachable tank
13. Discharge outlet
14. Wheel
VENTILATORE COMBINA-
TO

9
VENTILATORE COMBINATO
HOW TO USE
1. Before using, ensure that the product is not damaged. Check if the voltage
indicated on the device corresponds to the voltage in your house. Once you
connect plug to power source, you will hear a beep sound. After a few seconds,
the display and the indicator light will be switched on and the fan enters into
standby mode.
2. Power on
When the fan is at rest, press the switch. You will hear a beep sound twice,
then the fan starts working at low power. Now, you can select the speed mode
pressing the corresponding button on the control panel or on the remote control.
3. Speed adjustment
After starting the fan, you can adjust the volume of airow by lightly pressing
the “Speed” button placed on the control panel where there is the part related to
the functions. You can select three types of speed: low, medium and high. The
corresponding air circulation mode can be adjusted on the control panel.
4. Left and right movement adjustment
Press the “Swing” button on the control panel or on the remote control to turn
on the self-winding movement to the right and left to improve air circulation in
the room. Press again the button to disable this function.
5. Oscillation adjustment
Press the “Oscillation” button on the control panel or on the remote control
to turn on the automatic swinging mode that works in a circular direction to
improve air circulation in the room. Press again the button to disable this
function.
6. Ionization function
When the fan is on, lightly press the “Ion” button to turn on this function. The
corresponding symbol will light up on the control panel. Press again the button
to disable this function.
7. Moistening/misting function
When the fan is on, press the “Mist” button on the control panel or on the
remote control, the display will show the diagram of the moistening function.
The green light indicates the normal moistening function, while the red light
warns you that there is not enough water in the tank and that it must be lled.
Press again the “Mist” button to disable this function.
8. Ultrasonic anti-mosquito function
When the fan is on, press the “Mosquito” button, the display will show the
corresponding symbol indicating that the anti-mosquito function is on. Press
again the button to disable the function. This mode operates independently
both when the fan is on and when in standby. Insert an anti-mosquito plate (not
included) in the appropriate slot on the back of the appliance.
9. Timer function

10 VENTILATORE COMBINATO
When the fan is on, press the “Timer” button on the control panel or on the
remote control to set the desired time. Every time you press the button, the
display will show the set time that can be between 0.5 and 9.5 hours, with
half-hour intervals (0.5, 1, 1.5 hours up to 9.5 hours). Press again the button to
disable the function.
10. Remote control function
The remote control turns the fan on and o, enable and disable the MIST,
SWING, TIMER and SPEED functions. It runs on 2 AAA batteries (not
included).
WATER TANK OPERATION
1. Open the tank 45 degrees.
2. Unscrew the cover and add water into the tank.
3. Close the tank. You will hear a click indicating that the tank is properly
installed.
NOTE: Make sure the tank and the fan remain stable to prevent accidental
falls.
WARNINGS
1. Before lling the tank and cleaning the product, unplug the appliance.
2. This appliance is not intended to be used by persons (including children)
with reduced physical, sensory or mental capabilities, or with lack of
experience and knowledge, unless they have been given supervision or
instruction concerning use of the appliance by a person responsible for their
safety.
3. Children should be supervised to ensure that they do not play with the
appliance.
4. If the power cord is damaged, please stop using the appliance. In order
Tank cover
VENTILATORE COMBINA-
TO

11
VENTILATORE COMBINATO
CLEANING AND MAINTENANCE
1. Before cleaning, turn o and unplug the appliance.
2. Do not immerse the plug or the body of the appliance in water or any other
liquid.
3. For cleaning the main unit, use a damp cloth with mild detergent, taking
care not to scratch the surface.
4. For cleaning the water tank, use a solution containing water and a few
drops of light citric acid and leave on for 5-10 minutes in order to remove even
the toughest stains.
5. If you expect not to use the fan for an extended period, empty the tank and
dry it before storing the fan.
TROUBLESHOOTING
to avoid danger, do not repair the cord by yourself. Replacement and repair
shall be performed by the manufacturer, the customer service or any other
professional sta.
PROBLEM POSSIBLE CAUSE SOLUTION
Pressing the switch on button, the
fan still does not operate
1. There is no power.
2. You didn’t press the switch
properly.
3. The motor or the switch are
damaged.
1. Properly connect the plug to
power source.
2. Press the switch.
3. Repairs are needed.
Movement to the right and left does
not activate
1. You didn’t press the “Swing”
button properly.
2. The motor or the switch are
damaged.
1. Find the right button and press to
activate the movement to the right
and left.
2. Repairs are needed.
Abnormal noise emitted by the fan
1. Debris inside the motor.
2. Loose turbine.
3. There is an anomaly in the motor.
1.Switch off the fan and, if the
warranty is still valid, contact the
customer service.
2.Repairs are needed.
The fan won’t turn on
1. You didn’t press the switch
properly.
2. The switch is damaged.
1. Find the switch to turn on the fan
and press once.
2. Repairs are needed.

12 VENTILATORE COMBINATO
PROBLEMA POSSIBILE CAUSA SOLUZIONE
The humidier does not nebulize
water
1. No water in the tank.
2. The humidier device might have
a problem.
3. The water level indicator might be
damaged.
1. Fill the tank with water
2 and 3. Repairs are needed.
Little misting 1. Water is dirty.
2. The humidier device is dirty.
1. Replace with clean water.
2. Some repairs are needed.
TECHNICAL SPECIFICATIONS
Model: VE1850K
Voltage/Frequency: 220V – 50 Hz
Tank capacity: 2,3 l
Power: 80 W
Weight: 6,2
The package includes: fan, IR remote control, instruction manual
INFORMATION FOR USERS OF DOMESTIC APPLIANCES
This marking indicates that this product should not be disposed with other household
wastes throughout the EU. To prevent possible harm to the environment or human health from
uncontrolled waste disposal, recycle it responsibly to promote the sustainable reuse of material
resources. To return your used device, please use the return and collection systems or contact
the retailer where the product was purchased. They can take this product for environmental safe
recycling.
VENTILATORE COMBINA-
TO

13
VENTILATORE COMBINATO

14 VENTILATORE COMBINATO
Sehr geehrter Kunde, vielen Dank, dass Sie sich für eines unserer Produkte
entschieden haben. Um die besten Ergebnisse zu erzielen und keine
Risiken einzugehen, lesen Sie bitte vor der Verwendung dieses Geräts
dieses Handbuch sorgfältig durch und bewahren Sie es für ein späteres
Nachschlagen an einem sicheren Ort auf.
BESCHREIBUNG DES PRODUKTS
Dieses Produkt gehört unserem Ventilatorsortiment mit Luftbefeuchter an
und basiert auf einem hochmodernen Design. Es ist nicht nur ästhetisch
ansprechend und hat eine überarbeitete Struktur, es ist auch praktisch,
einfach bedienen und zu reinigen. Es basiert auf der Idee, dass es möglich
ist, Ventilatoren mit neuen Funktionen zu kombinieren, wie z.B. Anti-Mücken-
Funktion und Luftbefeuchtung, um den Benutzern weitere Vorzüge zu bieten.
Der Ionisator ist dazu in der Lage, negative Sauersto-Ionen abzugeben,
die zur Verbesserung der Schlafqualität und zur Sterilisation der Raumluft
beitragen, sowie Müdigkeit lindern. Dank der Befeuchtungsfunktion wird über
den Ventilator Wasser zerstäubt und im Raum verteilt. Dieser kalte Nebel hat
auch eine kosmetische Wirkung, da er der Haut Feuchtigkeit zuführt. Negative
Ionen mit hochfrequenter Schwingung sind in der Lage, statische Elektrizität
zu beseitigen und die Luft sauber zu halten, so dass Sie in einer gesunden
und komfortablen Umgebung leben können. Die vier Räder an der Unterseite
des Produkts bewegen sich nach rechts und links, vor und zurück mit
verschiedenen Winkeln. Wo immer Sie auch sind, können Sie die frische, vom
Ventilator erzeugte Brise genießen. Ein Produkt erster Wahl, das sich sowohl
für die Nutzung zu Hause als auch im Büro eignet.
STÜCKLISTE
1. Zerstäubungsausgang
2. Frontgitter
3. Bedienfeld
4. Gerätekomponente negative Ionen
5. Vorderes Gehäuseteil
6. Wasserstandsanzeige
7. Basis
8. Gri
9. Hinteres Gitter
10. Hinteres Gehäuseteil
11. Anti-Mücken-Schlitz
12. Abnehmbarer Wassertank
13. Ablassönung
14. Rad

15
VENTILATORE COMBINATO
VERWENDUNG
1. Vergewissern Sie sich vor der Verwendung des Produkts, dass es intakt ist.
Die Elektroinstallation am Aufstellungsort muss die Eigenschaften aufweisen,
die auf dem Typenschild auf der Ventilatorrückseite angegeben sind. Sobald
der Stecker in die Steckdose gesteckt wird, hören Sie einen Piepton. Einige
Sekunden später leuchten das Display und die Kontrollleuchte auf, und der
Ventilator geht auf Standby.
2. Einschalten
Wenn der Ventilator stillsteht, den Schalter betätigen. Es ertönen zwei Pieptöne
und der Ventilator nimmt seinen Betrieb auf einer geringen Leistungsstufe
auf. Jetzt kann der Geschwindigkeitsmodus ausgewählt werden, hierzu
die entsprechende Taste auf dem Bedienfeld oder auf der Fernbedienung
betätigen.
3. Geschwindigkeitseinstellung
Wenn man nach dem Einschalten des Ventilators den Luftstrom ändern möchte,
die „Speed“ Taste im Funktionsteil des Bedienfelds leicht betätigen. Man hat die
Wahl unter einer niedrigen, mittleren oder hohen Geschwindigkeit. Der jeweilige
Luftzirkulationsmodus wird immer vom Bedienfeld aus geregelt.
4. Einstellung der Bewegungsart von rechts nach links Durch Drücken der Taste
„Swing“ auf dem Bedienfeld oder der Fernbedienung wird die automatische
Bewegung von rechts nach links aktiviert, um die Luft ezienter zirkulieren zu
lassen. Durch ein erneutes Betätigen der Taste wird die Funktion deaktiivert.
5. Einstellung der Schwingungsart
Durch Drücken der Taste „Oscillation“ auf dem Bedienfeld oder der
Fernbedienung wird die automatische Oszillation mit kreisförmiger Bewegung
aktiviert, um die Luft ezienter zirkulieren zu lassen. Durch ein erneutes
Betätigen der Taste wird die Funktion deaktiviert.
6. Ionisier-Funktion
Wenn der Ventilator eingeschaltet ist, aktiviert man durch einen leichten
Druck auf die Taste „Ion“ diese Funktion. Auf dem Bedienfeld leuchtet das
dazugehörige Symbol auf. Durch ein erneutes Betätigen der Taste wird die
Funktion deaktiviert.
7. Befeuchtungs- / Zerstäubungsfunktion
Wenn der Ventilator eingeschaltet ist und die Taste „Mist“ auf dem Bedienfeld
oder der Fernbedienung gedrückt wird, erscheint auf dem Display das Schema
der Befeuchtungsfunktion. Die grüne Kontrollleuchte weist auf die normale
Befeuchtungsfunktion hin, während die rote Kontrollleuchte Wassermangel im
Wassertank signalisiert, der wieder aufgefüllt werden muss. Durch ein erneutes
Betätigen der Taste wird die Funktion deaktiviert.
8. Mit Ultraschall arbeitende Anti-Mücken-Funktion
Wenn der Ventilator eingeschaltet ist und die Taste „Mosquito“ auf dem

16 VENTILATORE COMBINATO
Display betätigt wird, erscheint das entsprechende Symbol und weist darauf
hin, dass die Anti-Mücken-Funktion aktiv ist. Durch ein erneutes Betätigen
der Taste wird die Funktion deaktiviert. Diese Funktion ist unabhängig vom
Betrieb des Geräts; sie arbeitet sowohl bei eingeschaltetem Ventilator als
auch im Standby. Ein (nicht nicht im Lieferumfang enthaltenes) Anti-Mücken-
Plättchen in den eigens dafür vorgesehenen Schlitz auf der Ventilatorrückseite
einführen.
9. Timerfunktion
Wenn der Ventilator eingeschaltet ist und die Taste „Timer“ auf dem
Bedienfeld oder der Fernbedienung gedrückt wird, kann man die gewünschte
Betriebsdauer eingeben. Jedes Mal, wenn die Taste gedrückt wird, erscheint
die eingestellte Zeit auf dem Display, die zwischen 0,5 und 9,5 Stunden liegen
kann, mit Halbstunden-Intervallen (0,5; 1; 1,5 bis 9,5 Stunden). Durch ein
erneutes Betätigen der Taste wird die Funktion deaktiviert.
10. Fernbedienungsfunktion
Die Fernbedienung schaltet den Ventilator ein und aus und aktiviert bzw.
deaktiviert die Funktionen MIST, SWING, TIMER und SPEED). Funktioniert
mit 2 AAA Batterien (nicht im Lieferumfang einhalten).
FUNKTIONSWEISE DES WASSERTANKS
1. Den Tank um 45 Grad önen.
2. Die Abdeckung losschrauben und den Tank mit
Wasser befüllen.
3. Den Tank wieder schließen.
Ein „Klick“ weist auf die richtige Position hin.
HINWEIS: Sich vergewissern, dass sich Wassertank
und Ventilator in einer stabilen Position benden, um
zu vermeiden, dass sie beim Versetzen herunter- bzw.
umfallen könnten.
SICHERHEITSHINWEISE
1. Vor dem Befüllen des Tanks und vor irgendwelchen Reinigungsarbeiten den
Stecker aus der Steckdose ziehen.
2. Dieses Gerät ist nicht für die Verwendung durch Personen (einschließlich
Kinder) mit eingeschränkten körperlichen, sensorischen oder geistigen
Fähigkeiten, fehlender Erfahrung und fehlendem Wissen bestimmt; es sei
denn, sie werden beaufsichtigt oder erhalten Anweisungen von einer für ihre
Sicherheit verantwortlichen Person.
3. Kinder müssen beaufsichtigt werden, damit sie nicht mit dem Gerät spielen.
Tankdeckel

17
VENTILATORE COMBINATO
REINIGUNG UND PFLEGE
1. Das Gerät vor der Reinigung ausschalten und den Netzstecker aus der
Steckdose ziehen.
2. Den Stecker oder den Hauptteil des Ventilators nicht in irgendeine
Flüssigkeit tauchen.
3. Zum Reinigen des Ventilatorhauptgehäuses ein feuchtes Tuch mit
einem neutralen Reinigungsmittel verwenden und darauf achten, dass die
Oberächen nicht zerkratzt werden.
4. Den Wassertank zunächst 5-10 Minuten mit einer Lösung aus Wasser und
einigen Tropfen leichter Zitronensäure befüllen und weichen lassen, damit sich
angesammelter Schmutz besser löst.
5. Wenn der Ventilator für eine gewisse Zeit nicht benutzt werden soll, das
restliche Wasser aus dem Tank entleeren und diesen abtrocknen, bevor der
Ventilator eingelagert wird.
FEHLERBEHEBUNG
4. Wenn das Netzkabel beschädigt ist, muss es durch den Hersteller, den
Kundendienst oder ähnlich qualiziertes Personal ersetzt werden, um
Gefahren zu vermeiden.
PROBLEM MÖGLICHE URSACHE ABHILFE
Beim Einschalten des Ventilators
reagiert dieser nicht
1. Der Strom erreicht den Ventilator
nicht
2. Der Schalter wird falsch gedrückt
3. Motor oder Schalter sind
beschädigt
1. Den Stecker richtig in die Steck-
dose einsetzen
2. Den Schalter drücken
3. Es ist eine Reparatur erforderlich
Die Bewegung nach rechts und links
startet nicht
1.Die Swing Taste wird falsch
gedrückt
2.Motor oder Schalter sind be-
schädigt
1.Die richtige Taste nden und
drücken, um die Bewegung nach
rechts und links zu starten
2.Es ist eine Reparatur erforderlich
Der Ventilator gibt anormale Geräus-
che von sich
1. Innen benden sich kaputte Teile
2. Die Turbine hat sich gelockert
3. Beim Motor liegt ein Fehler vor
1. Den Ventilator ausschalten und
sich bei gültiger Garantie an den
Kundendienst wenden
2. Es ist eine Reparatur erforderlich
Der Ventilator lässt sich nicht
einschalten
1. Es wird die falsche Taste gedrückt
2. Der Schalter ist beschädigt
1. Den Schalter ausmachen und
zum Einschalten des Ventilators
erneut drücken
2. Es ist eine Reparatur erforderlich

18 VENTILATORE COMBINATO
PROBLEMA POSSIBILE CAUSA SOLUZIONE
Der Befeuchter zerstäubt kein
Wasser
1. Im Tank ist kein Wasser
2. Bei der Befeuchtungseinheit
könnte eine Störung vorliegen
3. Der Wasserstandssensor könnte
beschädigt sein
1. Tank 2 und 3 mit Wasser füllen.
Es ist eine Reparatur erforderlich
Es wird wenig Wasser zerstäubt
1. Das Wasser ist verschmutzt
2. Die Befeuchtungseinrichtung ist
verschmutzt
1. Durch sauberes Wasser ersetzen
2. Es ist eine Reparatur erforderlich
TECHNISCHE DATEN DES PRODUKTES
Modell: VE1850K
Spannung / Frequenz: 220V— 50 Hz
Tankinhalt: 2,3 I
Leistung: 80 W
Gewicht der Struktur: 6,2
Packungsinhalt: Ventilator, Infrarot-Fernbedienung, Bedienungsanleitung
UMWELTGERECHTE ENTSORGUNG
Helfen Sie mit beim Umweltschutz!
Bitte denken Sie an ihre örtlichen Umweltschutzauagen:
Geben Sie elektrische Geräte zur Entsorgung bei den entsprechenden Sammelstellen ab.

19
VENTILATORE COMBINATO

20 VENTILATORE COMBINATO
Cher client, merci d’avoir choisi l’un de nos produits. Pour des performances
optimales et pour ne pas prendre de risques, veuillez lire attentivement le
manuel d’instruction avant d’utiliser le produit et le conserver en lieu sûr pour
toute référence ultérieure.
DESCRIPTION DU PRODUIT
Ce produit fait partie de notre gamme de ventilateurs avec humidicateur,
se distinguant par un concept de design ultra moderne. Esthétiquement
plaisant à regarder, sa structure est moderne, fonctionnelle, facile à utiliser
et à nettoyer. Son design repose sur la combinaison des caractéristiques
traditionnelles du ventilateur et des nouvelles technologies, telles que la
fonction anti-moustiques et d’humidication pour orir une expérience
utilisateur meilleure et plus ecace. Le condensateur d’ions négatifs libère
des ions d’oxygène négatifs permettant d’améliorer la qualité du sommeil,
stériliser les environnements domestiques et soulager la fatigue. La fonction
d’humidication permet au ventilateur de pulvériser l’eau. Cette brume froide
a également un eet cosmétique car elle hydrate la peau. Les ions négatifs,
grâce à l’oscillation à haute fréquence, éliminent l’électricité statique et
purient l’air, an que vous puissiez vivre dans un environnement confortable
et sain. Les quatre roues du produit se déplacent à droite et à gauche, d’avant
en arrière avec des angles multiples. Où que vous soyez, vous pouvez
bénécier de cette brise fraîche produite par le ventilateur. Un produit haut de
gamme, parfait à utiliser à la maison ou au bureau.
LISTE DES COMPOSANTS
1. Sortie de pulvérisation
2. Grille avant
3. Panneau de contrôle
4. Panneau ions négatifs
5. Panneau avant
6. Indicateur du niveau d’eau
7. Base
8. Poignée
9. Grille arrière
10. Panneau arrière
11. Emplacement pour plaquettes anti-moustique
12. Réservoir amovible
13. Conduite de décharge
14. Roue
Table of contents
Languages:
Other Kasanova Fan manuals

Kasanova
Kasanova FME000017NOC User manual

Kasanova
Kasanova HOH000002NOC User manual

Kasanova
Kasanova ARTIK SRI000001NOC User manual

Kasanova
Kasanova FME000006NOC User manual

Kasanova
Kasanova FME000011NOC User manual

Kasanova
Kasanova HB-FS-L2 User manual

Kasanova
Kasanova SKI000004 User manual

Kasanova
Kasanova HOH000008 User manual
Popular Fan manuals by other brands

Sauber
Sauber TFN-123627 Instructions for use

Trox Technik
Trox Technik JZ Series installation manual

Monte Carlo Fan Company
Monte Carlo Fan Company 5HV52 Series Owner's guide and installation manual

Panasonic
Panasonic FV-10NLF1E Service manual

Eurocool
Eurocool FSH-75 user manual

WINDCHILL
WINDCHILL FG166B instruction manual