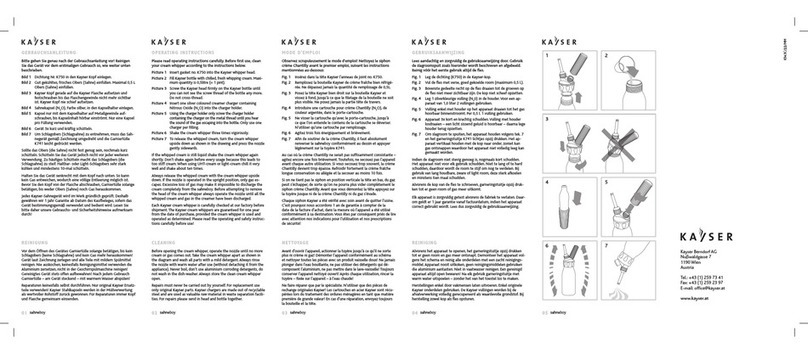
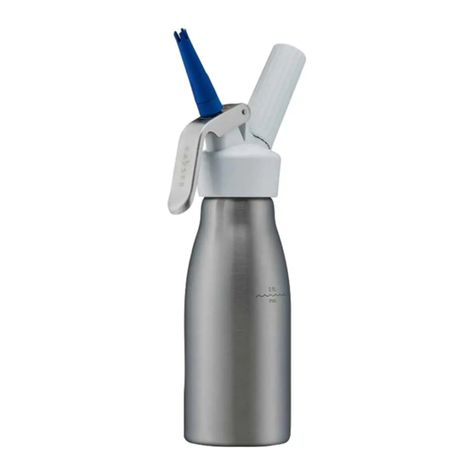
KAYSER GASTROnomie User manual

GEBRAUCHSANLEITUNG | OPERATING INSTRUCTIONS | MODE D’EMPLOI
GASTROnomie
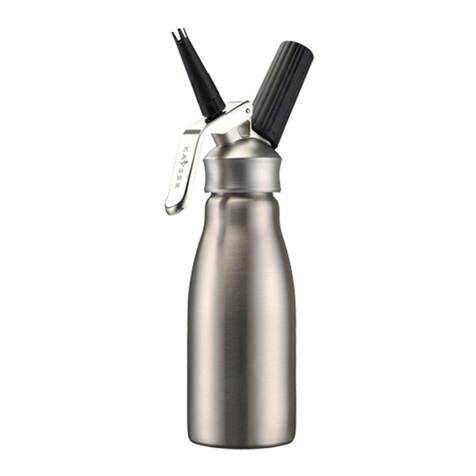
Sahnegerät
Cream Whipper
Siphon Crème Chantilly
0,5 Lt
1,0 Lt

GEBRAUCHSANLEITUNG
Bild 1 Dichtung Nr. K750 in den Kayser-Kop einlegen.
Bild 2 Gut gekühltes, risches Obers (Sahne) ein üllen.
Maximal 0,5 Liter Obers (Sahne) ein üllen. Nur bei
1 Liter GASTROnomie-Sahnegerät 1 Liter Obers
(Sahne) ein üllen.
Bild 3 Kayser-Kop gerade au die Kayser-Flasche au setzen
und estschrauben, bis das Flaschengewinde nicht mehr
sichtbar ist. Kayser-Kop niemals schie au setzen.
Bild 4 Eine Sahnekapsel (N2O), Farbe silber, in den Kapsel-
halter einlegen. Bei 1 Liter GASTROnomie-
Sahnegerät verwenden Sie bitte 2 Kapseln.
Bild 5 Kapsel nur mit dem Kapselhalter au Metallgewinde
au schrauben, bis Kapselinhalt hörbar einströmt.
Nur eine Kapsel pro 0,5 Liter verwenden, d.h.
2 Kapseln ür 1 Liter GASTROnomie-Sahnegerät!
Bild 6 Gerät 3x kurz und krä tig schütteln, dann Kapselhalter
mit der Kapsel abschrauben (der Restdruck entweicht
durch den Kapselhalter) und Staubkappe wieder
au setzen.
Bild 7 Um Schlagobers (Schlagsahne) zu entnehmen, muss
das Sahnegerät gemäß Zeichnung umgedreht und der
Hebel leicht gedrückt werden, Sollte das Obers (die
Sahne) nicht est genug sein, nochmals kurz schütteln.
Schütteln Sie das Gerät jedoch nicht vor jeder
weiteren Verwendung. Zu häu iges Schütteln macht
das Schlagobers (die Schlagsahne) zu stei . Haltbar-
oder Light-Schlagobers sehr stark kühlen und
mindestens 10mal schütteln.
Halten Sie das Gerät senkrecht mit dem Kop nach
unten. So kann kein Gas entweichen, wodurch eine
völlige Entleerung möglich ist. Bevor Sie den Kop
von der Flasche abschrauben, Hebel so lange betätigen,
bis weder Obers (Sahne) noch Gas herauskommen.
Jedes GASTROnomie-Sahnegerät wird im Werk gründlich
geprü t. Deshalb gewähren wir 1 Jahr Garantie ab Datum
des Kau beleges, so ern das Gerät bestimmungsgemäß
verwendet und bedient wird. Lesen Sie bitte daher unsere
Gebrauchs- und Sicherheitshinweise au merksam durch!
Bitte gehen Sie genau nach der Gebrauchsanleitung
vor Reinigen Sie das Gerät vor dem erstmaligen
Gebrauch so, wie es auf Seite 9 beschrieben ist.
GASTROnomie
1

Pict. 1 Insert gasket no. K750 into the Kayser whipper head
Pict. 2 Fill Kayser bottle with chilled, resh whipping cream.
Never exceed the ill level. Maximum quantity is
0,5 litre (= 1 pint). Only or 1 litre (=1 quart) cream
whipper use 1 litre cream.
Pict. 3 Screw the Kayser head irmly on the Kayser bottle
until you can not see the screw thread o the bottle
any more. Do not crossthread.
Pict. 4 Insert one silver coloured creamer charger containing
Nitrous Oxide (N2O) into the charger holder. For 1
litre cream whipper use two chargers.
Pict. 5 Holding the Kayser bottle upright and using the
charger holder only, screw the charger holder
containing the charger on the metal thread until
you hear the sound o the gas escaping the bottle.
Only use one charger per 0,5 litre (= 1 pint).
Pict. 6 Shake the cream whipper three times vigorously. When
using UHT-cream, heavy-cream or light-cream, cool
it very well and shake about ten times. Remove the
charger holder with the charger (a slight hissing sound
is per ectly normal). Replace the cap on the metal
thread. (1 litre cream whipper comes without cap.)
Pict. 7 To release the whipped cream, turn the cream whipper
upside down as shown in the drawing and press the
lever gently. To increase the thickness o the whipped
cream, shake the bottle again. However, do not shake
too long or to vigorously, as overshaking can thicken
the cream so much that it cannot be discharged.
Always release the whipped cream with the cream
whipper upside down. I the lever is operated in the
upright position, only gas escapes. Excessive loss o
gas may make it impossible to discharge the cream
completely rom the cream whipper.
Be ore attempting to remove the head o the cream
whipper, always operate the lever until all the whipped
cream and gas in the creamer have been discharged.
Each Kayser cream whipper is care ully checked at our actory
be ore shipment. The Kayser cream whippers are guaranteed
or one year rom the date o purchase, provided the cream
whipper is used and operated as determined. Please read the
operating and sa ety instructions care ully be ore use!
Please read operating instructions carefully
Before first use, clean your cream whipper according
to instructions on page 9.
GASTROnomie
2
OPERATING INSTRUCTIONS

MODE D’EMPLOI
Fig. 1 Insérez dans la tête Kayser l’anneau de joint no. K750.
Fig. 2 Remplissez de crème raîche, épaisse ou liquide, bien
ré rigérée. Ne dépassez jamais la quantité de
remplissage qui est de 0,5 litre. Seulement pour le
siphon GASTROnomie 1 litre remplissez 1 litre de
crème raîche.
Fig. 3 Posez la partie supérieure Kayser bien droit sur la
bouteille Kayser et vissez à ond, jusqu’à ce que le
iletage de la bouteille ne soit plus visible. Ne posez
jamais la partie supérieure de travers.
Fig. 4 Introduire une cartouche pour crème Chantilly (N2O),
de couleur argentée, dans la porte-cartouche.
Seulement pour le siphon GASTROnomie 1 litre
utilisez deux cartouches.
Fig. 5 Ne visser la cartouche qu’avec le porte-cartouche,
jusqu’à ce que l’on entende le contenu de la cartouche
se déverser. N’utiliser qu’une cartouche par 0,5 litre.
Fig. 6 Agitez trois ois énergiquement et brièvement.
Dévissez ensuite le porte-cartouche. (La pression
restante se dégage par le porte-cartouche).
Fig. 7 A in de soutirer de la crème Chantilly, il aut absolu-
ment renverser le siphon con ormément au dessin et
appuyer légèrement sur le levier. Au cas où la crème
Chantilly ne serait pas su isamment consistante -
agitez encore une ois brièvement. Toute ois, ne secouez
pas l’appareil avant chaque autre utilisation.
Si vous secouez trop souvent, la crème Chantilly de-
vient trop épaisse. Re roidir ortement la crème raîche
longue conservation ou allégée et la secouer au moins
10 ois. Si on ne tient pas le siphon en position verti-
cale la tête en bas, du gaz peut s’échapper, de sorte
qu’on ne pourra plus vider complètement le siphon
crème Chantilly. Avant de démonter la tête, appuyez sur
le levier jusqu’à ce qu’il ne sorte plus ni crème, ni gaz.
Chaque siphon Kayser GASTROnomie a été véri é avec soin
avant de quitter l’usine. C’est pourquoi nous accordons 1 ans
de guarantie à compter de la date de la acture d’achat, dans
la mesure où l’appareil a été utilisé con ormément à sa
destination. Vous êtes par conséquent priés de lire avec
attention nos indications pour l’utilisation et nos
prescriptions de sécurité!
Observez scrupuleusemet le mode d’emploi
Nettoyez le siphon crème Chantilly avant le premier
emploi, suivant les instructions (voir page 9).
GASTROnomie
3
GASTROnomie
4
12
3
5
76
4

GASTROnomie
5
Wichtige Gebrauchshinweise
Für die Sahnekapseln gelten die au der Kapselverpackung
angegebenen Sicherheitsbestimmungen. Geleerte Kapseln
sollten nicht au dem Gerätekop verbleiben, sondern mit
dem Kapselhalter abgeschraubt werden. Nur Kayser Einweg-
kapseln verwenden. Gerät weder Wärme noch direkter
Sonneneinwirkung aussetzen! Nur in den Kühlschrank,
aber nicht in die Tie kühltruhe oder ins Ge rier ach geben.
Gerätekop nicht abschrauben, solange das Gerät unter
Druck steht - siehe Gebrauchsanleitung, Punkt 7.
Veränderungen am Gerät und dessen Sicherheitseinrichtungen
dür en nicht durchge ührt werden. Es dür en nur Kayser
Originalteile verwendet werden. Wenden Sie sich im Bedar s-
all an Kayser. Die Flasche ist p legeleicht innenbeschichtet,
verwenden Sie keine schar en Gegenstände beim Reinigen.
Zerlegen Sie das Gerät nur in jene Teile, die au der Zeichnung
(siehe Seite 8) dargestellt sind. War die Flasche längere Zeit
nicht in Verwendung, muss sie vor dem Wiedergebrauch
unbedingt mit warmen Wasser ausgespült werden.
Sicherheitshinweise
Sahnegeräte sind Druckbehälter, ür welche besondere Vor-
sichtsmassnahmen gelten. Verwenden Sie keine beschädigten
Geräte; ein hinunterge allenes Gerät muss von uns geprü t
werden, ehe es wiederverwendet wird! Sahnegeräte und
Sahnekapseln sind ür Kinder unerreichbar au zubewahren!
Beugen Sie sich während des Einschraubens der Kapsel nicht
über das Gerät! Der Kayser-Gerätekop lässt sich sehr leicht
au die Kayser-Flasche schrauben. Wenden Sie niemals Gewalt
an. Kayser-Kop niemals schie au setzen. Dieses Gerät ist
mit einer Druckbegrenzungseinrichtung nach DIN 32.615
ausgestattet, die sich in dem metallenen Gewindestutzen
be indet. Bitte vermeiden Sie jegliche eigenmächtige Mani-
pulation, da dies das Erlöschen der Garantie sowie den
Ha tungsausschluß zur Folge hat. Heben Sie diese Gebrauchs-
anweisung zur Vermeidung von Bedienungs ehlern gut au .
Dieses Gerät dient ausschließlich den in dieser Gebrauchs-
anweisung genannten Verwendungszwecken.
ACHTUNG
Kayser-Geräteköp e dür en nur au Kayser-Flaschen au ge-
schraubt werden. Au dem Gerätekop sowie au dem Boden
der Flasche ist der Schri tzug Kayser angebracht.
Die Verwendung von Fremdteilen kann ge ährlich sein.

GASTROnomie
6
Creamer chargers are to be handled according to the sa ety
instructions on the package o the chargers.
Empty chargers are to be removed rom the creamer head
with the charger holder. Use Kayser one-way chargers only!
Keep the cream whipper out o sun and away rom heat.
Store the cream whipper only in the re rigerator - never in
the reezer compartment or the deep- reezer.
Do not remove the head o the creamer when there is
pressure in the bottle (Operating instructions, point 7).
Always operate the lever and release the pressure irst.
Do not change anything on the creamer or its sa ety-devices.
Only original Kayser spare parts have to be used. When you
need some parts, please contact us. Clean only by rinsing.
Do not use sharp-edged objects or materials as this will
damage the easy-clean inner coating.
To take the creamer apart, only remove the parts shown on
the drawing on page 8. I the creamer has been out o use or
a rather long time, clean with water as above.
Cream whippers work with pressurized gas and there ore
there is a need to take special sa ety precautions. Never use
a damaged creamer; i a creamer alls on the loor, it must be
checked by us be ore using it again. Creamer and creamer
chargers are to be stored out o reach o children. Do not lean
above the creamer when you screw in the charger. The head
o the creamer screws easily on to the bottle right up.
Never ever use orce to screw the Kayser head on to the inal
tightening (2 or 3 turns). Do not cross thread.
This creamer has a valve which prevents overpressurization
according to DIN 32.615. It is located inside the metal piercing
assembly. Do not tamper with this assembly or attempt any
adjustments as this would end the guarantee and our liability.
Keep these operating instructions - they help you to work
the creamer correctly. Use this creamer only or the purpose
indicated in these operating instructions.
WARNING
Only screw Kayser creamer-heads on Kayser bottles.
The head as well as the bottle is marked with Kayser.
Usage o other than Kayser components or Kayser spare
parts may result in mal unction causing serious injury.
Safety instructions
Important Instructions for use

Les dispositions de sécurité indiquées sur l’emballage des
cartouches s’appliquent aux cartouches pour la crème de
Chantilly. Les cartouches vidées ne devraient pas rester sur
la tête du siphon crème Chantilly, mais être devissées avec
le porte-cartouche. N’utilisez que des cartouches jetables
Kayser. Ne pas exposer le siphon crème Chantilly à la chaleur
ou au soleil direct! Ne conserver le siphon qu’au ré rigérateur,
mais non pas au congélateur ou dans le compartiment de
surgélation! Ne pas dévisser la tête du siphon crème Chantilly
tant que l’appareil est sous pression - c . mode d’emploi,
pt. 7. Ne pas procéder à des modi ications de l’appareil
et de ses dispositi s de sécurité. Utiliser exclusivement
des pièces originales Kayser. Adressez-vous en cas de besoin
à Kayser. La bouteille possède un revêtement intérieur
acile à entretenir, n’utilisez pas d’ustensiles abrasi s lors
du nettoyage. Ne démontez que les pièces indiquées sur
le dessin (voir page 8). Si la bouteille est restée inutilisée
pendent un certain temps, il aut absolument la rincer
à l’eau chaude avant de la réutiliser.
Les siphons crème Chantilly sont des récipients à pression
pour lesquels des précautions particulières s’imposent.
N’utilisez pas d’appareils endommagés; si votre siphon crème
Chantilly est tombé par terre, aites-le véri ier par nous avant
de le réutiliser! Conservez le siphon crème Chantilly et les
cartouches pour crème Chantilly dans un endroit inaccessible
aux en ants! Ne vous penchez pas au-dessus de la tête du
siphon crème Chantilly en vissant la cartouche!
La partie supérieure de l’appareil Kayser peut être aisément
vissée sur la bouteille Kayser. Ne orcez jamais. Ne posez
jamais la partie supérieure du siphon Kayser de travers.
Cet appareil est équipé d’un dispositi de limitation de pression
con orme à DIN 32.615 se trouvant dans la tubulure iletée
en métal. Veuillez éviter toute manipulation de votre propre
initiative, car ceci invaliderait la guarantie et aurait pour con-
séquence l’exclusion de la guarantie. A in d’éviter des erreurs
de manipulation, veuillez conserver avec précaution ce mode
d’emploi. Cet appareil sert exclusivement aux ins d’utilisation
citées dans ce mode d’emploi.
ATTENTION
Ne visser les parties supérieures des appareils Kayser que
sur des bouteilles Kayser. A l’intérieur de la partie supérieure
de l’appareil ainsi que sur le ond de la bouteille se trouve
l’inscription Kayser. L’utilisation de pièces étrangères peut
être dangereuse.
Prescription de sécurité
Indications importantes pour l’utilisation

Geprü t nach Erlaß 72 des BM . B. u. T.
Geprü t nach DIN 32.615
Teile | Parts | Pieces Detachées
GASTROnomie
8
Vor dem Ö nen des Gerätes Hebel solange betätigen, bis kein
Schlagobers (keine Schlagsahne) und kein Gas mehr heraus-
kommen! Gerät laut Zeichnung zerlegen und alle Teile mit
mildem Spülmittel reinigen. Nie auskochen, nicht in die
Geschirrspülmaschine! Gereinigtes Gerät stets o en au be-
wahren! Nach jedem Gebrauch Garniertülle mit warmen
Wasser abspülen! Reparaturen keines alls selbst durch ühren.
Nur original Kayser Ersatzteile verwenden! Kayser Stahl-
kapseln werden in der Müllverwertung als wertvoller Rohsto
zurückgewonnen. Für Reparaturen immer Kop und Flasche
gemeinsam einsenden.
Be ore opening the cream whipper, operate the lever until no
more cream or gas comes out. Take the cream whipper apart
as shown in the diagramm and wash all parts with a mild
detergent. Always rinse the nozzle with warm water a ter use.
Never boil; do not wash in the dish-washer. Always store the
clean cream whipper open. For replacement use only original
Kayser parts. Repairs must never be carried out by yoursel .
For repairs please send in head and bottle together.
Avant d’ouvrir l’appareil, actionner le levier jusqu’à ce qu’il
ne sorte plus ni crème ni gaz! Démonter l’appareil con ormé-
ment au schéma et nettoyer toutes les pièces avec une pro-
duit vaisselle doux! Ne jamais plonger dans l’eau bouillante, ne
pas mettre dans le lave-vaisselle! Toujours conserver l’appareil
nettoyé ouvert! Après chaque utilisation, rincer la tuyère à
l’eau chaude! Ne aire réparer que par le spécialiste. N’utiliser
que des pièces de réchange originales Kayser! Les cartouches
en acier Kayser sont récuperées lors du traitement des ordures
ménagères en tant que matière première de grande valeur!
Reinigung | Cleaning | Nettoyage
K513A
K902
K799
K745A
K515
K750

Kayser Berndorf AG
Leobersdorfer Straße 26
A-2560 Berndorf
Tel.: (+4 )02672/85 97
Fax: (+4 )02672/8 4 24
E-mail: office@kayser.at
www.kayser.at
Verwenden Sie nur Einwegkapseln von Kayser.
Use only Kayser one way chargers.
N’utiliser que des cartouches Kayser.
Rohstoff
wiederverwertbar
©vertical | design force
Table of contents
Languages:
Other KAYSER Kitchen Appliance manuals

KAYSER
KAYSER INOXcreamer User manual

KAYSER
KAYSER WHIPcreamer INOX User manual

KAYSER
KAYSER Sahneboy User manual

KAYSER
KAYSER Sahneboy User manual

KAYSER
KAYSER SYMphonie User manual

KAYSER
KAYSER SYMphonie User manual

KAYSER
KAYSER SYMphonie User manual

KAYSER
KAYSER WHIPcreamer STYLE User manual

KAYSER
KAYSER WHIPcreamer INOX User manual