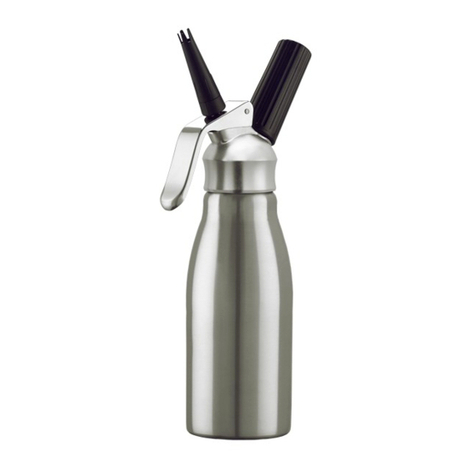
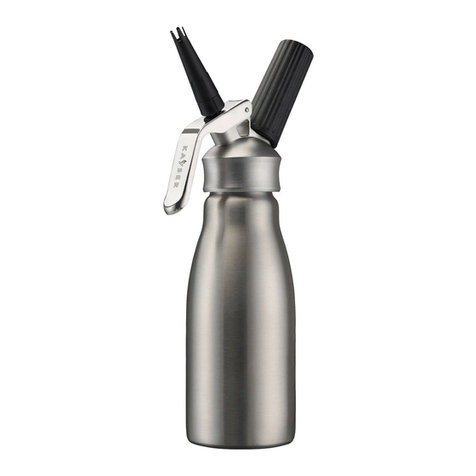
KAYSER WHIPcreamer INOX User manual

EN Cream whipper 2
OPERATING INSTRUCTIONS
ET Koorevahustaja 12
KASUTUSJUHEND
LT Grietinėlės plakiklis 22
NAUDOJIMO INSTRUKCIJA
LV Putukrējuma sifons 32
LIETOŠANAS INSTRUKCIJA
PL Syfon do bitej śmietany 42
INSTRUKCJA OBSŁUGI
RU Взбиватель для сливок 52
ИНСТРУКЦИЯ ПО ПРИМЕНЕНИЮ
WHIPcreamer
INOX
1,0 L: 4101
0,5 L: 4051

2
EN
Table 1.1 WHIPcreamer INOX
Filling volume 0.5 l 1.0 l
Operating pressure (PS) 20 bar 30 bar
Permitted temperature range +1°C to 70°C
Suitable intended uses
Household yes
Commercial sector yes
Permitted ingredients
Cream and similar products yes
Other foodstuffs yes
Cleaning
Hand wash yes
Dishwasher yes
Maximum permitted number of
Kayser chargers 1 2
Table 1.2 Spare Parts
Nozzle adapter K515A
Decorating nozzle straight K515B
Decorating nozzle tulip K515C
Charger holder K799
Dust cap K735
Device piston K513i
Head gasket K750
Cleaning brush K737
2. IMAGES
Charger
holder
Head gasket Device piston
Decorating
nozzle
straight
Nozzle adapter Dust cap
Decorating nozzle tulip
Cleaning brush
2.1
Device head
Bottle
1. TABLES

3
EN
2.2
2.7 2.8
2.6
2.9
2.4
2.5
2.3
max.

4
3. SAFETY INSTRUCTIONS
Cream whippers are pressurised containers for
which special safety precautions apply.
1. Please read the entire operating instructions
carefully.
2. Keep these instructions safely for future use.
3. The WHIPcreamer is intended solely for the appli-
cations specied in these operating instructions
(see Table 1.1).
4. The WHIPcreamer is operated under pressure.
The maximum permitted operating pressure
PS is indicated on the base of the bottle and in
Table 1.1. Improper use may result in injury.
Please refer to Table 1.1 for suitable intended
use and ingredients.
5. Liqueed gases may never be added as an
ingredient in the bottle. This is the only way to
prevent blockage or a sudden pressure increase
and to guarantee safe operation.
6. Please refer to Table 1.1 for information concerning
the maximum permitted number of chargers,
lling volume and temperature range.
7. Incorrect operation, over-lling of the WHIP-
creamer, use of more chargers than specied
and/or exceeding of the temperature will cause
overpressure in the WHIPcreamer. For this reason
the bottle is tted with a safety base which is
curved inwards. In the event the safety base
bends outwards, please follow the instructions
in section “9. Pressure relief” and contact the
company Kayser. Under no circumstances may
the WHIPcreamer be used again.
8. The device head is tted with a pressure limiting
device, which is located in the metallic threaded
connection.
9. The WHIPcreamer may no longer be used if it is
cracked or deformed.
10. Never drop the WHIPcreamer, neither when
pressurised nor depressurised. A WHIPcreamer
that has been dropped may no longer be used.
11. Do not use a damaged WHIPcreamer or damaged
parts.
12. Only original Kayser spare parts and components
may be used.
13. Kayser device components may only be used with
the corresponding parts of the same device type.
The Kayser lettering is featured on the base of
the bottle and on the charger holder. The use of
third-party parts is hazardous and therefore not
permitted!
14. Never disassemble into more parts than specied
(see image 2.1). Any unauthorised manipulation
which exceeds the instructions provided in these
operating instructions can be hazardous and will
void both the warranty as well as exclude our
liability!
EN

5
15. Please contact the company Kayser for any
necessary spare parts (Table 1.2).
16. Never use other media than Kayser cream chargers
to pressurise the WHIPcreamer.
17. Thoroughly clean the device before each new
lling (see section “5. Cleaning”) - always dis-
assemble it into the specied parts (see image 2.1)
and clean these individually. Device heads made
of plastic and bottles made of aluminium must
never be cleaned in a dishwasher.
18. Check that the WHIPcreamer is not blocked
before every use by carefully pressing the lever.
(In the event of a blockage please refer to the
section “8. Troubleshooting”.)
19. Never force the pressurised WHIPcreamer open.
If the device head cannot be easily unscrewed,
follow the instructions for pressure relief in
section “9. Pressure relief”.
20. Never force the device head of the WHIPcreamer
open. If the device head cannot be easily
unscrewed, follow the instructions for pressure
relief in section “9. Pressure relief”. Should this
not solve the problem, please contact the
company Kayser.
21. Do not store the lled WHIPcreamer horizontally
in order to prevent a blockage.
22. Store the WHIPcreamer and the corresponding
Kayser cream chargers out of the reach of
children!
23. Only use the WHIPcreamer within the permitted
temperature range (see Table 1.1) and do not
expose it to direct sunlight. Immediately cool and
empty the device in the event of the temperature
being exceeded and follow the instructions in
section “9. Pressure relief”. The WHIPcreamer
may no longer be used after the temperature has
been exceeded.
24. Never use more than the maximum permitted
number of Kayser cream chargers, see base of
the bottle or Table 1.1.
25. Never ll the WHIPcreamer with a volume above
that indicated in Table 1.1.
26. Never use ingredients other than those indicated
in Table 1.1.
EN

6
4. OPERATING INSTRUCTIONS
Intended use: The WHIPcreamer is to be used for
the whipping of the ingredients specied in Table
1.1. Please follow the operating instructions exactly:
1. Unscrew the device head (image 2.2). Clean the
WHIPcreamer before every use as described
in section “5. Cleaning”. Then reassemble the
device head by inserting the device piston in
the designated opening, screw on the nozzle
adapter and the decorating nozzle and place the
head gasket into the device head - all parts are
described in image 2.1.
2. Verify the maximum permitted lling volume that
is indicated on the base and the side of the bottle
as well as in Table 1.1.
3. Verify the maximum permitted number of Kayser
cream chargers to be used, see base of the bottle
or Table 1.1.
4. Verify the permitted ingredients, see Table 1.1.
If “other foodstuffs” are also permitted, these
must be available in liquid form. If such ingre-
dients should contain solids they must rst be
passed through a sieve, mashed or dissolved to
ensure the liquid is completely free of particles.
5. Use a measuring beaker, or other suitable
measuring device, to measure the permitted
lling volume.
6. Fill the measured amount into the bottle
(image 2.3) taking care not to exceed the
lling mark on the side of the bottle.
7. Verify the permitted temperature range for
the use and storage of the WHIPcreamer - see
Table 1.1.
8. Place the device head straight on the bottle and
screw it on tightly (image 2.4).
9. Insert the silver-coloured Kayser cream charger
in the charger holder (image 2.5).
10. Screw the maximum permitted number of
Kayser cream chargers in compliance with
Section 4.3 one after the other onto the metal
thread of the device head with the charger holder
(image 2.6), until the gas is audibly released
into the bottle. Always shake the WHIPcreamer
4 - 5 times quickly and vigorously with the
charger holder screwed on every time after the
gas has been released into the bottle (image 2.7).
The contents will be whipped rmer or more
liquid depending on the length and intensity with
which the WHIPcreamer is shaken.
11. Next unscrew the charger holder with the empty
Kayser cream charger from the device head and
place the dust cap on the metal thread.
12. To release the contents, the WHIPcreamer must
be turned upside down so the bottle with the
device head is vertical facing downwards and
the lever slowly actuated (image 2.8). To enable
compete release of the whipped contents actuate
the lever only in this position.
EN
7
13. Unscrew the decorating nozzle from the nozzle
adapter after every use, wash it with warm water
and the cleaning brush provided and then screw
it back onto the nozzle adapter and store upright
at the permitted temperature (see Table 1.1).
14. To relieve the pressure after complete release
of the contents actuate the lever of the WHIP-
creamer until the gas has been released
completely (image 2.9). The device head can
then be unscrewed easily from the bottle.
Always hold the WHIPcreamer vertically with
the device head facing downwards while relieving
the pressure.
15. The cases of the Kayser cream chargers are
made of steel. For this reason please dispose of
empty Kayser cream chargers as steel scrap or
scrap metal in compliance with local regulations
for waste disposal.
5. CLEANING
Note: The WHIPcreamer should be cleaned thoroughly
before rst use and always after the bottle contents
have been completely removed.
1. Before opening the WHIPcreamer actuate the
lever until no bottle content nor gas is discharged
from the device any longer (see image 2.9).
2. Unscrew the device head from the bottle
(image 2.2) and disassemble it only into the
specied parts as shown in image 2.1. Slide the
device piston out of the opening, unscrew the
decorating nozzle and the nozzle adapter and
remove the head gasket from the device head -
all parts are specied in image 2.1.
3. Verify the permitted cleaning method,
see Table 1.1.
In the case of “hand wash” clean the parts of the
WHIPcreamer with a mild washing-up liquid and
the cleaning brush provided. Never use sharp
objects when cleaning. Never boil, never use
detergents that decompose aluminium or plastic.
If the cleaning method “dishwasher” is permitted
in Table 1.1, the parts of the WHIPcreamer may
be cleaned in a dishwasher.
4. Once all parts are dry reassemble the device
head by inserting the device piston in the
designated opening, screw on the nozzle adapter
and the decorating nozzle and place the head
gasket into the device head - all parts are
specied in image 2.1.
EN

8
6. STORAGE
1. Only ever store the WHIPcreamer within the
permitted temperature range (see Table 1.1)
and do not expose it to direct sunlight.
2. Store the cleaned WHIPcreamer in a cool and dry
place.
3. Store the WHIPcreamer and the corresponding
Kayser cream chargers out of the reach of
children!
7. MAINTENANCE AND REPAIR
1. If the device piston cannot be inserted easily
into the device head during reassembling after
cleaning, smooth movement can be restored by
lubricating the piston gaskets with cooking oil.
2. Please contact the company Kayser should any
other problems arise.
3. Check the condition of the head gasket and of
the two gaskets on the piston before each use -
see image 2.1. If signs of wear become visible or
leakage occurs during use, these parts must be
replaced. Before each use check the bottle, the
device head and the thread for possible signs of
wear or damage. If any such wear or damage is
found, the WHIPcreamer may no longer be used.
4. If you need any spare parts or repairs, please
contact the company Kayser.
5. Modications or repairs to the WHIPcreamer and
its safety devices must not be carried out by
customers themselves. Any unauthorised
manipulation which exceeds the instructions
provided in these operating instructions can
be hazardous and will void both the warranty
as well as exclude our liability!
6. For repairs, always send the WHIPcreamer empty,
clean and with all of its parts to the company
Kayser.
EN

9
8. TROUBLESHOOTING
1. The cream charger cannot be pierced.
- Possible cause: You are using an incorrect
charger.
Troubleshooting: Only use Kayser cream
chargers. Never use refill chargers.
- Possible cause: The piercing pin was damaged.
Troubleshooting: Please contact the company
Kayser.
2. Gas or liquid escapes between the head and
bottle when screwing in the Kayser cream
charger.
Please follow the instructions in section
“9. Pressure relief”. Make sure you followed
the instructions in the operating instructions.
Do not use any damaged spare parts.
- Possible cause: The head was not screwed on
tightly enough.
Troubleshooting: Screw the head tightly onto
the bottle.
- Possible cause: The head gasket is missing.
Troubleshooting: Insert the head gasket into
the head.
- Possible cause: The head gasket is damaged.
Troubleshooting: Replace the damaged head
gasket with a new head gasket. Please contact
the company Kayser.
- Possible cause: The bottle seal is damaged.
Troubleshooting: Please contact the company
Kayser.
3. No inflow of gas is audible when screwing
in the Kayser cream charger, or gas escapes
between device head and charger holder
when unscrewing the charger holder.
- Possible cause: The device is overfilled.
Troubleshooting: Please observe the filling mark
of the device. Please follow the instructions in
section “9. Pressure relief”. Make sure you
followed the instructions in the operating
instructions. Please follow sections 4.2, 4.5 and
4.6 for filling the device bottle.
4. The cream remains liquid and gas hisses out
of the charger holder when the charger is
screwed in.
- Possible cause: The charger holder was screwed
in too slowly with the result that gas escaped at
the side of the pin opening.
Troubleshooting: Screw the charger holder into
the thread until you feel slight resistance. Then
give another vigorous 3/4 turn.
EN

10
5. The cream is too liquid.
- Possible cause: The WHIPcreamer has not been
shaken enough.
Troubleshooting: Shake 3 times. If the cream is
still liquid, shake another 3 times.
- Possible cause: The cream used has too little
fat content.
Troubleshooting: Give the WHIPcreamer another
3 - 4 short shakes. As a rule use cream with a
higher fat content (~35%).
- Possible cause: Light or UHT cream was used.
Troubleshooting: Cool light or UHT cream at
least down to 6°C and shake it approximately
10 times. The WHIPcreamer must not be shaken
before each further use.
- Possible cause: The WHIPcreamer was not
stored at the correct temperature.
Troubleshooting: Store the WHIPcreamer within
the permitted temperature range (see Table 1.1).
6. The cream is too solid or crumbly.
- Possible cause: The WHIPcreamer has been
shaken too much.
Troubleshooting: Check the consistency of the
cream in advance and shake if too liquid.
DO NOT shake before EACH use! If the contents
are too solid, please let the device stand at
room temperature for approx. 15 minutes and
then try again. If necessary please follow the
instructions in section “9. Pressure relief”.
Please only use and store the device within the
permitted temperature range (see Table 1.1).
7. Nothing comes out of the WHIPcreamer
despite using it correctly - the device is
blocked.
- Possible cause: Blockage due to liquid turning
to cheese or particles that have not dissolved etc.
Troubleshooting: First follow the instructions in
section “9. Pressure relief” and then the
instructions in section “5. Cleaning”. Please
only ever fill the device with liquids and
ingredients that are free of particles! If the
problem can still not be remedied, please
contact the company Kayser.
8. Base of the bottle is deformed.
- Possible cause: Exceptional increase in pressure.
Troubleshooting: Immediately follow the
instructions in section “9. Pressure relief” and
under no circumstances continue to the use
the WHIPcreamer! Please contact the company
Kayser.
EN

11
9. Some of the foamed contents remain in
the WHIPcreamer after the gas has been
emptied.
- Possible cause: The WHIPcreamer was used at
an angle of 45° during emptying.
Troubleshooting: When releasing the foamed
contents, always turn the WHIPcreamer upside
down so the bottle with the device head is
vertical and facing downwards - see image 2.8.
9. PRESSURE RELIEF
If the WHIPcreamer is used correctly according to
the instructions, the pressure can be relieved
without problem by actuating the lever. If the head
cannot be easily unscrewed from the emptied device,
there is the risk that the bottle is still pressurised.
If this should be the case, place the WHIPcreamer
upright on a level surface, cover the decorating
nozzle with a cloth and actuate the lever until the
pressure in the WHIPcreamer has been completely
relieved. However, should the device head still be
difcult to remove, please contact the company
Kayser.
10. WARRANTY
Every Kayser cream whipper is thoroughly inspected
at the factory. For this reason, we grant a warranty
of 2 years from the date of purchase, provided the
device is used and operated correctly. The warranty
is voided if third-party parts or chargers are used.
For this reason, please keep your proof of purchase
and read our operating instructions and the safety
precautions carefully.
EN
Only ever use cream chargers
from Kayser.
Typesetting and printing errors reserved.

12
ET
Tabel 1.1 WHIPcreamer INOX
täitemaht 0,5 l 1,0 l
töörõhk (PS) 20 bar 30 bar
lubatud temperatuurivahemik +1 °C - 70 °C
Sobiv kasutusala
kodukasutus jah
kommertskasutus jah
Lubatud koostisosad
koor ja sarnased toiduained jah
muud toiduained jah
Puhastamine
käsipesu jah
nõudepesumasin jah
Maksimaalne lubatud Kayseri
kapslite arv 1 2
Tabel 1.2 Varuosad
otsaku adapter K515A
sirge kaunistusotsak K515B
lillekujuline kaunistusotsak K515C
kapslihoidik K799
tolmukork K735
seadme kolb K513i
ülaosa tihend K750
puhastushari K737
1. TABELID
2. JOONISED
kapslihoidik
ülaosa tihend seadme kolb
sirge
kaunistusotsak
otsaku adapter tolmukork
lillekujuline kaunistusotsak
puhastushari
2.1
seadme
ülaosa
seadme anum

13
ET
2.2
2.7 2.8
2.6
2.9
2.4
2.5
2.3
max

14
3. OHUTUSJUHISED
Koorevahustajad on surveanumad, mille puhul läheb
vaja erilisi ettevaatusabinõusid.
1. Lugege kogu kasutusjuhend hoolikalt läbi.
2. Hoidke see kasutusjuhend heas seisundis alles.
3. WHIPcreamerit tohib kasutada ainult selles
kasutusjuhendis määratud otstarbel (vt tabelit 1.1).
4. WHIPcreamer töötab rõhu all. Maksimaalne lubatud
töörõhk PS on kirjas seadme anuma põhjal ja
tabelis 1.1. Vale kasutamine võib põhjustada
vigastusi. Sobiv kasutusotstarve ja koostisosad
on kirjas tabelis 1.1.
5. Mitte mingil juhul ei tohi seadme anumasse
lisada koostisosadena vedelaid gaase. Ainult nii
on võimalik vältida ummistumist või rõhu järsku
tõusu ja tagada ohutu kasutamine.
6. Maksimaalselt lubatud kapslite arvu, täitemahu
ja temperatuurivahemiku andmed on kirjas
tabelis 1.1.
7. WHIPcreameris võib tekkida ülerõhk kasuta-
misvigade, lubatust rohkema arvu kapslite
kasutamise ja/või temperatuuri ületamise tõttu.
Seepärast on seadme anumal sissepoole kaarega
turvapõhi. Kui turvapõhja kaar peaks väljapoole
paisuma, tegutsege vastavalt juhistele lõigus
„9. Rõhu vähendamine” ja võtke ühendust
ettevõttega Kayser. WHIPcreamerit ei tohi
mingil juhul rohkem kasutada.
8. Seadme ülaosal on rõhuvähendaja, mis asub
metallist keermestatud otsakus.
9. Kui märkate WHIPcreameris pragusid või defor-
matsioone, ei tohi seda enam kasutada.
10. WHIPcreamerit ei tohi mingil juhul maha pillata,
ei rõhuta ega rõhu all olekus. Maha kukkunud
WHIPcreamerit ei tohi rohkem kasutada.
11. Ärge kasutage kahjustatud WHIPcreamerit ega
kahjustatud osi.
12. Kasutada tohib ainult Kayseri originaalvaruosi ja
-komponente.
13. Kayseri seadmeosi tohib kasutada ainult koos
teiste, sama seadmetüübi osadega. Seadme
ülaosal, seadme anuma põhjal ja kapslihoidikul
on kiri „Kayser“. Võõrosade kasutamine on ohtlik
ja seega keelatud!
14. Ärge eemaldage kunagi näidatust rohkem osi
(joonis 2.1). Igasugune omavoliline manipu-
leerimine, mis ületab siin kasutusjuhendis
kirjeldatut, võib olla ohtlik ning tühistab
garantii ja tootjavastutuse!
15. Vajalike varuosade jaoks (tabel 1.2) võtke
ühendust ettevõttega Kayser.
16. Mitte mingil juhul ei tohi kasutada WHIPcreameris
rõhu tekitamiseks muid vahendeid kui Kayseri
koorekapslid.
17. Puhastage põhjalikult iga kord enne uuesti täitmist
(vt lõiku „5. Puhastamine“) – võtke näidatud osad
alati lahti (vt joonist 2.1) ja puhastage neid
ükshaaval. Seadme plastist ülaosi ja seadme
alumiiniumist anumaid ei tohi kunagi nõudepe-
sumasinas puhastada.
ET

15
18. Iga kord enne kasutamist vajutage hooba ette-
vaatlikult, et kontrollida, ega WHIPcreamer ei ole
ummistunud. (Ummistuse korral vaadake lõiku
„8. Probleemid ja lahendused“.)
19. Rõhu all olevat WHIPcreamerit ei tohi mingil juhul
jõuga avada. Kui seadme ülaosa ei saa kergelt
maha keerata, järgige juhiseid lõigus „9. Rõhu
vähendamine“.
20. Mitte mingil juhul ei tohi WHIPcreameri seadme
ülaosa avada jõuga. Kui seadme ülaosa ei saa
hõlpsalt avada, järgige juhiseid lõigus „9. Rõhu
vähendamine“. Kui see ei vii soovitud tulemuseni,
võtke ühendust ettevõttega Kayser.
21. Ärge hoidke täidetud WHIPcreamerit pikali
asetatuna, kuna seade võib nii ummistuda.
22. WHIPcreamer ja selle juurde kuuluvad Kayseri
koorekapslid ei tohi sattuda laste kätte!
23. Kasutage WHIPcreamerit ainult lubatud tempera-
tuurivahemikus (vt tabelit 1.1) ja ärge hoidke
seda otsese päikesevalguse käes. Jahutage seadet
temperatuuri ületamise korral kohe ja järgige
juhiseid lõigus „9. Rõhu vähendamine“. WHIP-
creamerit ei tohi pärast temperatuuri ületamist
rohkem kasutada.
24. Mitte mingil juhul ei tohi kasutada maksimaalselt
lubatust rohkem Kayseri koorekapsleid, vaadake
seadme anuma põhja või tabelist 1.1.
25. Mitte mingil juhul ei tohi WHIPcreamerit täita
rohkem kui tabelis 1.1 näidatud.
26. Mitte mingil juhul ei tohi kasutada teisi koostisosi
kui on tabelis 1.1 näidatud.
ET

16
4. KASUTUSJUHEND
Kasutusotstarve. WHIPcreamer on ette nähtud
tabelis 1.1 märgitud koostisosade vahustamiseks.
Järgige kasutusjuhendit täpselt.
1. Keerake seadme ülaosa lahti (joonis 2.2).
Puhastage WHIPcreamerit iga kord enne
kasutamist nii, nagu on lõigus „5. Puhastamine“
kirjeldatud. Seejärel pange seadme ülaosa taas
tagasi; lükake selle jaoks seadme kolb selleks
ettenähtud avasse, keerake otsaku adapter ja
kaunistusotsak peale ning asetage ülaosa tihend
seadme ülaosasse – kõik need osad on näha
joonisel 2.1.
2. Tuvastage maksimaalne lubatud täitemaht, mis
on kirjas seadme anuma põhjal ja küljel ning
tabelis 1.1.
3. Tuvastage maksimaalne lubatud Kayseri
koorekapslite arv, vt seadme anuma põhja
või tabelit 1.1.
4. Tuvastage lubatud koostisosad, vt tabelit 1.1.
Isegi siis, kui „muud toiduained“ on lubatud,
peavad need olema vedelal kujul saadaval; mis
tahes tahked koostisosad tuleb eelnevalt läbi
sõela suruda, püreestada või lahustada, et
vedelik oleks täielikult osakestevaba.
5. Mõõtke täitemahtu mõõteanumaga või mõne
muu sobiva mõõtmisvahendiga.
6. Lisage seadme anumasse sobiv kogus (joonis 2.3)
ja ärge ületage seejuures seadme anuma küljel
olevat täitmismärgistust.
7. Tuvastage lubatud temperatuurivahemik
WHIPcreameri kasutamiseks ja hoidmiseks –
vt tabelit 1.1.
8. Asetage seadme ülaosa täpselt seadme anumale
ja keerake kinni (joonis 2.4).
9. Asetage hõbedast värvi Kayseri koorekapslid
kapslihoidikusse (joonis 2.5).
10. Keerake koos kapslihoidikuga maksimaalne lubatud
arv Kayseri koorekapsleid vastavalt punktile 4.3.
järgemööda seadme ülaosa metallist keermeot-
sakule (joonis 2.6), kuni gaas voolab kuuldavalt
sisse. Raputage pealekeeratud kapslihoidikuga
WHIPcreamerit iga kord pärast gaasi sissevoola-
mist 4–5 korda lühidalt ja jõuliselt (joonis 2.7).
Sõltuvalt raputamise kestusest ja intensiivsusest
vahustatakse sisu vedelamaks või tahkemaks.
11. Keerake seejärel tühjade Kayseri koorekapslitega
kapslihoidikud seadme ülaosalt maha ja pange
tolmukork metallist keermeotsakule.
12. Sisu kättesaamiseks võtke WHIPcreamer ja
pöörake see ümber selliselt, et seadme anum
oleks koos seadme ülaosaga vertikaalselt alla
suunatud, ja vajutage aeglaselt päästikut
(joonis 2.8). Selleks, et vahustatud sisu täielikult
kätte saada, vajutage päästikut ainult selles
asendis.
ET

17
13. Keerake kaunistusotsak iga kord pärast kasutamist
otsaku adapterilt maha, puhastage sooja veega
ja kaasasoleva puhastusharjaga ning keerake
seejärel tagasi otsaku adapterile ning hoidke
seadet lubatud temperatuuril (vt tabelit 1.1)
püstiselt.
14. Kui sisu on täielikult otsas, vajutage WHIPcreameri
päästikut rõhust vabastamiseks seni, kuni gaas
on täielikult väljunud (joonis 2.9). Pärast seda
on seadme ülaosa seadme anumalt lihtne maha
keerata. Hoidke WHIPcreamerit rõhust tühjen-
damisel alati vertikaalselt, allasuunatud seadme
ülaosaga.
15. Kayseri koorekapslite ümbrised on valmistatud
terasest. Seepärast andke tühjad Kayseri
koorekapslid kohalikke eeskirju järgides
jäätmete kogumispunkti metallijäätmetena.
5. PUHASTAMINE
Märkus. WHIPcreamerit tuleb enne esmakordset
kasutamist ja alati pärast pudeli sisu täielikku
tühjendamist hoolikalt puhastada.
1. Vajutage enne WHIPcreameri avamist päästikut
seni, kuni pudeli sisu ja gaas on täielikult väljunud
(vt joonist 2.9).
2. Keerake seadme ülaosa seadme anumalt maha
(joonis 2.2) ja võtke lahti ainult need osad, mis
on joonisel 2.1 näidatud. Lükake seadme kolb
avast välja, keerake kaunistusotsak ja otsaku
adapter maha ja võtke ülaosa tihend seadme
ülaosast välja – kõik koostisosad on näha
joonisel 2.1.
3. Tuvastage lubatud puhastusmeetod, vt tabelit
1.1.
Käsipesu korral puhastage WHIPcreameri osi
õrnatoimelise nõudepesuvahendiga ja kaasasoleva
puhastusharjaga. Mitte mingil juhul ei tohi
puhastamiseks kasutada teravaid esemeid.
Mitte mingil juhul ei tohi seadet keeta või
kasutada puhastusvahendeid, mis lagundavad
roostevaba terast, alumiiniumi või plasti.
Kui tabelis 1.1 on lubatud puhastada nõude-
pesumasinas, tohib kõiki WHIPcreameri osi
puhastada nõudepesumasinas.
4. Kui kõik osad on kuivad, pange seadme ülaosa
taas tagasi; lükake selle jaoks seadme kolb
ettenähtud avasse, keerake otsaku adapter ja
kaunistusotsak peale ning asetage ülaosa tihend
seadme ülaosasse – kõik need osad on näha
joonisel 2.1.
ET

18
6. HOIDMINE
1. Hoidke täidetud WHIPcreamerit ainult lubatud
temperatuurivahemikus (vt tabelit 1.1) ja ärge
hoidke seda otsese päikesevalguse käes.
2. Hoidke puhastatud WHIPcreamerit jahedas ja
kuivas kohas.
3. WHIPcreamer ja selle juurde kuuluvad Kayseri
koorekapslid ei tohi sattuda laste kätte!
7. HOOLDUS JA REMONT
1. Kui seadme kolbi ei saa pärast puhastamist
seame ülaosa kokkupanemisel enam kergelt
seadme ülaosasse sisestada, võib liikumise
kergendamiseks määrida kolvi tihendeid
toiduõliga.
2. Kui tekib muid probleeme, võtke ühendust
ettevõttega Kayser.
3. Kontrollige iga kord enne kasutamist ülaosa
tihendi seisundit ja seadme kolvi kumbagi tihendit –
vt joonist 2.1. Silmanähtava kulumise või
kasutamisel esinevate lekete korral tuleb need
osad välja vahetada. Kontrollige iga kord enne
kasutamist ka seadme anumat, seadme ülaosa
ja keeret, et tuvastada kulumist või kahjustusi.
Nende tuvastamise korral ei tohi WHIPcreamerit
enam kasutada.
4. Kui seadme jaoks läheb tarvis varuosi või kui
seadet tuleb parandada, võtke ühendust
ettevõttega Kayser.
5. WHIPcreamerit ja selle ohutusseadmeid ei tohi
ise muuta ega parandada. Igasugune omavoliline
manipuleerimine, mis ületab siin kasutusjuhendis
kirjeldatut, võib olla ohtlik ning tühistab garantii
ja tootjavastutuse!
6. Parandamiseks tuleb WHIPcreamer alati tühjen-
dada, puhastada ja saata koos kõikide osadega
ettevõttele Kayser.
ET

19
8. PROBLEEMID JA LAHENDUSED
1. Koorekapslit ei saa läbistada.
- Võimalik põhjus: te kasutate vale kapslit.
Probleemi lahendus: kasutage ainult Kayseri
koorekapsleid. Ärge kasutage täidetavaid
kapsleid.
- Võimalik põhjus: läbistamisnõel on kahjustatud.
Probleemi lahendus: võtke ühendust ettevõttega
Kayser.
2. Kayseri koorekapsli sissekeeramisel tungib
seadme ülaosa ja seadme anuma vahelt
gaasi või vedelikku.
Järgige juhiseid lõigus „9. Rõhu vähendamine“.
Kontrollige, kas kasutusjuhendi juhiseid on
järgitud. Ärge kasutage kahjustatud varuosi.
- Võimalik põhjus: seadme ülaosa pole piisavalt
tugevalt kinni keeratud.
Probleemi lahendus: keerake seadme ülaosa
korralikult seadme anumale.
- Võimalik põhjus: ülaosa tihend puudub.
Probleemi lahendus: asetage ülaosa tihend
ülaosasse.
- Võimalik põhjus: ülaosa tihend on kahjustatud.
Probleemi lahendus: asendage kahjustatud
ülaosa tihend uue ülaosa tihendiga. Võtke
ühendust ettevõttega Kayser.
- Võimalik põhjus: seadme anuma tihendipesa on
kahjustatud.
Probleemi lahendus: võtke ühendust ettevõttega
Kayser.
3. Kayseri koorekapsli sissekeeramisel ei
ole kuulda gaasi sissevoolamist või kapsli-
hoidiku pealekeeramisel tungib gaas välja
seadme ülaosa ja kapslihoidiku vahelt.
- Võimalik põhjus: seade on liiga täis.
Probleemi lahendus: ärge ületage seadmele
märgistatud täitmismärgist. Järgige juhiseid
lõigus „9. Rõhu vähendamine“. Kontrollige, kas
kasutusjuhendi juhiseid on järgitud.
Järgige seadme anuma täitmiseks lõikusid 4.2,
4.5 ja 4.6.
4. Koor jääb vedelaks ja gaas sisiseb kapsli
sissekeeramisel kapslihoidikust välja.
- Võimalik põhjus: kapsli hoidik keerati sisse liiga
aeglaselt, nii et gaas tungis nõelaava kõrvalt
välja.
Probleemi lahendus: keerake kapslihoidik
otsaku keermele, kuni tunnete kerget takistust.
Seejärel keerake hoogsalt umbes 3/4 pöörde
jagu edasi.
ET

20
5. Koor on liiga vedel.
- Võimalik põhjus: WHIPcreamerit raputati liiga
vähe.
Probleemi lahendus: raputage 3 korda. Kui koor
on ikka veel liiga vedel, raputage veel 3 korda.
- Võimalik põhjus: kasutatud koore rasvasisaldus
on liiga madal.
Probleemi lahendus: raputage uuesti 3–4 korda.
Kasutage alati kõrgema rasvasisaldusega koort
(~35%).
- Võimalik põhjus: kasutati lahjat koort või pika
säilivustähtajaga koort.
Probleemi lahendus: jahutage lahja / pika
säilivustähtajaga koor vähemalt 6 °C peale ja
raputage umbes 10 korda. WHIPcreamerit ei
tohi enne edasisi kasutuskordi rohkem raputada.
- Võimalik põhjus: WHIPcreamerit ei hoitud õigel
temperatuuril.
Probleemi lahendus: hoidke WHIPcreamerit
lubatud temperatuurivahemikul (vt tabelit 1.1).
6. Koor on liiga tahke või tükkis.
- Võimalik põhjus: WHIPcreamerit raputati liiga
palju.
Probleemi lahendus: kontrollige koore konsistentsi
eelnevalt, raputage siis, kui see on liiga vedel.
ÄRGE RAPUTAGE enne IGAT koore laskmist! Kui
sisu on liiga tahke, jätke seade toatemperatuuril
umbes 15 minutiks rahulikult seisma ja proovige
uuesti. Vajaduse korral järgige juhiseid lõigus
„9. Rõhu vähendamine“. Kasutage ja hoidke
seadet ainult lubatud temperatuurivahemiku
piires (vt tabelit 1.1).
7. Hoolimata õigest kasutamisest ei tule
WHIPcreamerist midagi välja – seade on
ummistunud.
- Võimalik põhjus: ummistus juustuks muutumise,
mittelahustunud osakeste vms tõttu.
Probleemi lahendus: järgige esmalt juhiseid
lõigus „9. Rõhu vähendamine“ ja seejärel
juhiseid lõigus „5. Puhastamine“. Kasutage
seadme täitmiseks alati ainult vedelaid ja
osakesteta koostisosi! Kui probleemi ei õnnestu
kõrvaldada, võtke ühendust ettevõttega Kayser.
8. Seadme anuma põhi on deformeerunud.
- Võimalik põhjus: liiga kõrge rõhk.
Probleemi lahendus: järgige viivitamatult
juhiseid lõigus „9. Rõhu vähendamine“ ja
lõpetage WHIPcreamer kasutamine täielikult!
Võtke ühendust ettevõttega Kayser.
9. Pärast kogu gaasi väljalaskmist jääb osa
vahustatud sisust WHIPcreamerisse.
- Võimalik põhjus: WHIPcreamerit hoiti tühjenda-
misel 45° nurga all.
Probleemi lahendus: kui hakkate vahustatud
sisu välja laskma, keerake WHIPcreamer alati
tagurpidi selliselt, et seadme anum ja seadme
ülaosa oleksid vertikaalselt alla suunatud –
vt joonist 2.8.
ET
Other manuals for WHIPcreamer INOX
1
This manual suits for next models
2
Table of contents
Languages:
Other KAYSER Kitchen Appliance manuals

KAYSER
KAYSER SYMphonie User manual

KAYSER
KAYSER Sahneboy User manual

KAYSER
KAYSER Sahneboy User manual

KAYSER
KAYSER WHIPcreamer STYLE User manual

KAYSER
KAYSER GASTROnomie User manual

KAYSER
KAYSER SYMphonie User manual

KAYSER
KAYSER INOXcreamer User manual

KAYSER
KAYSER SYMphonie User manual

KAYSER
KAYSER WHIPcreamer INOX User manual