Carefully Unpack and Sort All Components on the Parts List
Important:
SAVE YOUR INSTRUCTIONS FOR FUTURE REFERENCE
If your new pet home has experienced damage during shipping, please do not return your
cage to the store. Our Customer Service Department is available to help with any problems.
Our Toll-Free Number (within the USA and Canada only) is 888-255-4527, Monday - Friday
from 8:00 a.m. to 4:00 p.m. (Central Standard Time).
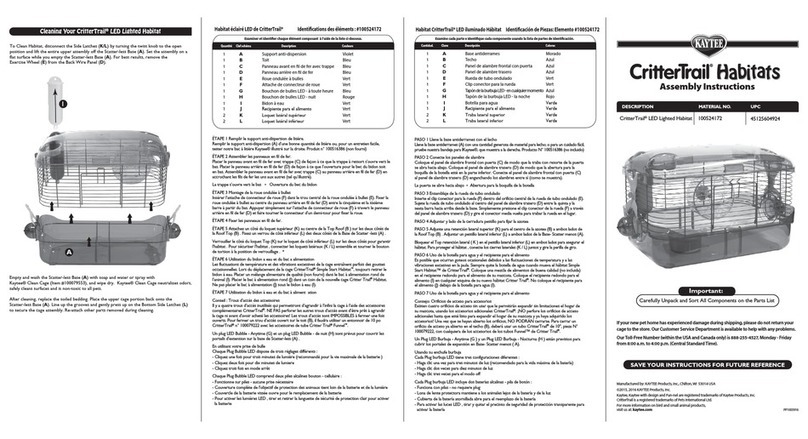
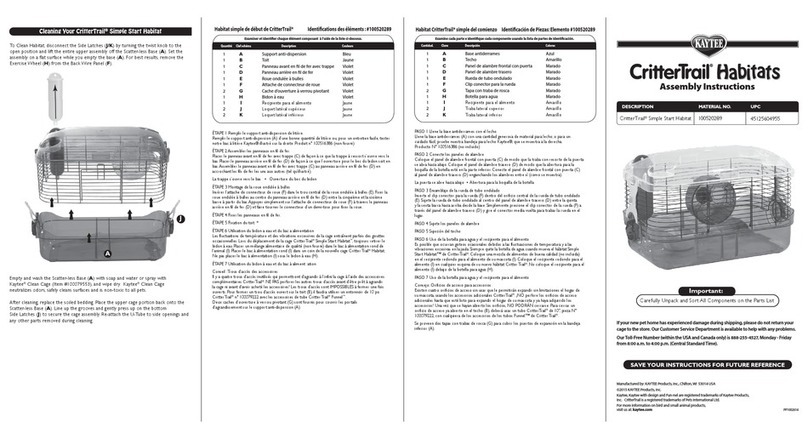
Push the bottom Side Latches (J) down and lift the entire upper assembly off the
Scatter-less Base (A). Set the assembly on a flat surface while you empty the base (A).
For best results, remove the Bubble Wave Wheel (E) from the BackWire Panel (D).
Empty and wash the Scatter-less Base (A) with soap and water or spray with
Kaytee®Clean Cage (Item #100079553),and wipe dry. Kaytee®Clean Cage
neutralizes odors, safely cleans surfaces and is non-toxic to all pets.
After cleaning, replace with new tray. Place the upper cage portion back onto the
Scatter-less Base (A). Line up the grooves and gently press up on the bottom Side
Latches (J) to secure the cage assembly. Re-attach the U-Tube to side openings and any
other parts removed during cleaning.
For easy care and cleaning, dispose the Kaytee Crittertrail®Bedding Tray weekly and
replace with a fresh CritterTrail®Bedding Tray product number 100516386.
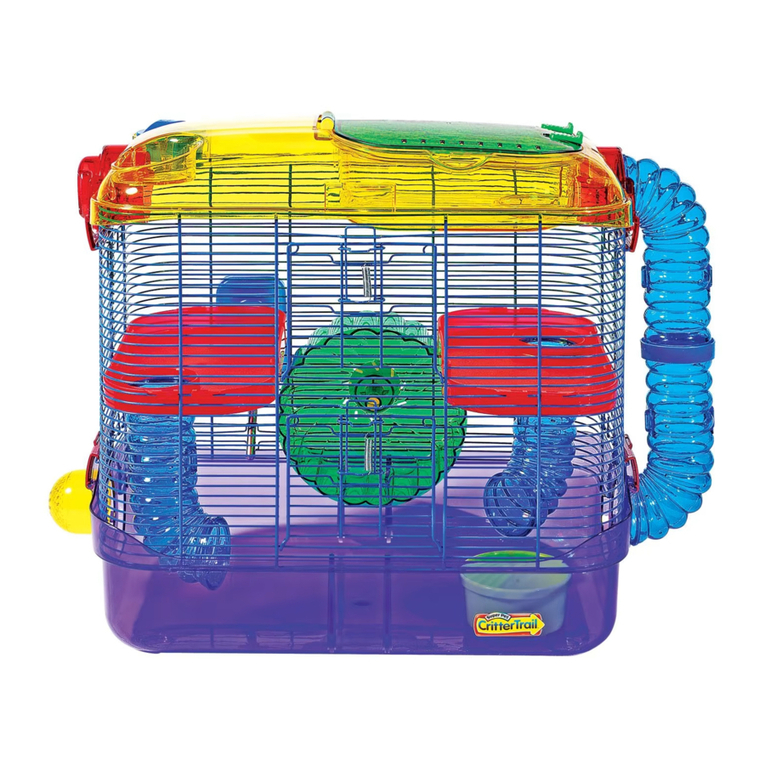
Cleaning Your CritterTrail®Quick Clean Habitat
Quantité Clef schéma Description Couleurs
Cantidad. Clave Descripción Colores
1 A Base antiderrames Verde
1 B Techo Verde
1 C Panel de alambre frontal con puerta Plata
1 D Panel de alambre trasero Plata
1 E Rueda de tubo ondulado
Azul
1 F Clip conector para la rueda
Azul
2 G Tapa con traba de rosca
Azul
1 H Botella para agua Azul
1 IRecipiente para el alimento Azul
1
JPestillo lateral Azul
1 A Support anti-dispersion Vert
1 B Toit Vert
1 C Panneau avant en l de fer avec trappe Silver
1 D Panneau arrière en l de fer Silver
1 E Roue ondulée à bulles Bleu
1 F Attache de connecteur de roue Bleu
2 G Cache d’ouverture à verrou pivotant Bleu
1 H Bidon à eau Bleu
1IBac à alimentation Bleu
1
JLoquet latéral Bleu
Cage CritterTrail® Habitat rapide Clean Identications des éléments : #
100520310
Hábitat CritterTrail® Quick Clean Identicación de Piezas: Elemento #
100520310
Assembly Instructions
UPCMATERIAL NO.DESCRIPTION
CritterTrail®Quick Clean Habitat 45125605280
100520310
Examine cada parte e identique cada componente usando la lista de partes de identicación.
PASO 1 Llene la base antiderrames con el lecho
Inserte la bandeja para lecho Kaytee provista (producto N° 100516386) dentro
de la base antiderrames (A).
PASO 2 Conecte los paneles de alambre
Coloque el panel de alambre frontal con puerta (C) de modo que la traba con resorte de la puerta se
abra hacia abajo.Coloque el panel de alambre trasero (D) de modo que la abertura para la boquilla de la
botella esté en la parte inferior. Conecte el panel de alambre frontal con puerta (C) al panel de alambre
trasero (D) enganchando los alambres entre sí (como se muestra).
La puerta se abre hacia abajo • Abertura para la boquilla de la botella
PASO 3 Sujete los paneles de alambre
Coloque el panel de alambre frontal con puerta ensamblado (C) y el panel de alambre trasero
ensamblado (D) sobre la base antiderrames (A).El ensamblaje del panel de alambre deberá encajar
dentro de las lengüetas de la base antiderrames (A).Para asegurar,encaje a presión las dos trabas
laterales (J) sobre la base antiderrames (A) al ensamblaje del panel de alambre (C y D).
PASO 4 Ensamblaje de la rueda de tubo ondulado
Inserte el clip conector para la rueda (F) dentro del orificio central de la rueda de tubo ondulado (E).
Sujete la rueda de tubo ondulado al centro del panel de alambre trasero (D) entre la quinta y la sexta
barra hacia arriba desde la base. Simplemente presione el clip conector de la rueda (F) a través del panel
de alambre trasero (D) y gire el conector media vuelta para trabar la rueda en el lugar.
PASO 5 Sujeción del techo
Coloque el techo (B) sobre el tope de la sección inferior ensamblada del hábitat.Alinee el techo (B)
sobre el montaje del panel de alambre ensamblado (C y D).Para asegurar,conecte las dos trabas
laterales (J) del techo (B) al ensamblaje del panel de alambre (C y D).
PASO 6 Aditamento de accesorio
Consejo: Orificios de acceso para accesorios
Existen cuatro orificios de acceso sin usar que le permitirán expandir sin limitaciones el hogar de su
mascota, usando los accesorios adicionales CritterTrail®.¡NO perfore los orificios de acceso adicionales
hasta que esté listo para expandir el hogar de su mascota y ya haya adquirido los accesorios! Una vez
que se hayan abierto los orificios,NO PODRÁN cerrarse.
Para cerrar un orificio de acceso ya abierto en el techo (B), deberá usar un tubo CritterTrail®de 10",
pieza N° 100079222, con cualquiera de los accesorios de los tubos Funnel™ de Critter Trail®. Se
proveen dos tapas con trabas giratorias (G) para cubrir los puertos de expansión en la base antider-
rames (A).
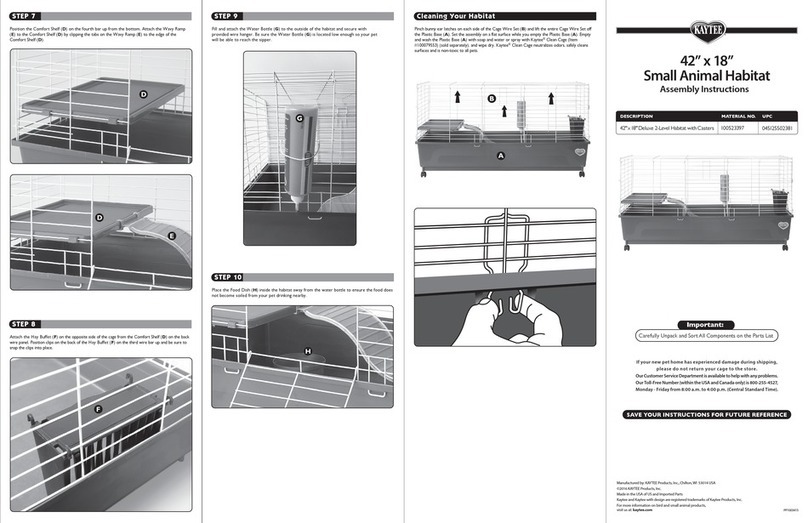
PASO 7 Uso de la botella para agua y el recipiente para el alimento
Para llenar la botella para agua (H), quite la tapa de rosca con un tapón de caucho. Llene por completo la
botella para agua colocándola bajo el chorro ligero de agua corriente.Cierre la botella empujando con
el tapón de caucho y girando la tapa.Voltee la botella hacia arriba para permitir que se forme el vacío.Es
posible que gotee un poco al principio.Localice el porta botellas de alambre adjunto y la ubicación del
orificio del tubo sorbedor en el panel de alambre trasero (D).Coloque el tubo sorbedor dentro del
orificio y empuje hacia abajo el porta botellas de alambre para asegurar la botella en su lugar. Nunca
apriete la botella de agua cuando la vuelva a llenar. Esto puede hacer que el plástico se rompa y que no
se forme el vacío necesario.
Nota: Es posible que ocurran goteos ocasionales debidos a las fluctuaciones de temperatura y a las
vibraciones excesivas en la jaula. Siempre quite la botella de agua cuando mueva el hábitat Quick Clean
Habitat™ de CritterTrail® . Coloque una mezcla de alimentos de buena calidad (no incluida) en el
recipiente redondo para el alimento de su mascota (I).Coloque el recipiente redondo para el alimento
(I) en cualquier esquina de su nuevo hábitat CritterTrail®. No coloque el recipiente para el alimento (I)
debajo de la botella para agua (H).
ÉTAPE 1 Remplir le support anti-dispersion de litière.
Insérer le bac à litière Kaytee fourni (produit n°100516386) dans le support anti-dispersion (A).
ÉTAPE 2 Assembler les panneaux en fil de fer.
Placer le panneau avant en fil de fer avec trappe (C) de façon à ce que la trappe à ressort s’ouvre vers le
bas. Placer le panneau arrière en fil de fer (D) de façon à ce que l’ouverture pour le bec du bidon soit en
bas.Assembler le panneau avant en fil de fer avec trappe (C) au panneau arrière en fil de fer (D) en
accrochant les fils de fer les uns aux autres (tel qu’illustré).
La trappe s’ouvre vers le bas • Ouverture du bec du bidon
ÉTAPE 3 Fixer les panneaux en fil de fer.
Placer le panneau avant en fil de fer avec trappe assemblé (C) et le panneau arrière en fil de fer assemblé
(D) sur le support anti-dispersion (A). L’ensemble des panneaux en fil de fer doit s’enclencher dans les
languettes du support anti-dispersion (A). Pour sécuriser l’ensemble,fermer les deux loquets latéraux (J)
sur le support anti-dispersion (A) sur les panneaux en fil de fer (C et D).
ÉTAPE 4 Montage de la roue ondulée à bulles
Insérer l’attache de connecteur de roue (F) dans le trou central de la roue ondulée à bulles (E). Fixer la
roue ondulée à bulles au centre du panneau arrière en fil de fer (D) entre la cinquième et la sixième
barre à partir du bas.Appuyer simplement sur l’attache de connecteur de roue (F) à travers le panneau
arrière en fil de fer (D) et faire tourner le connecteur d’un demi-tour pour fixer la roue.
ÉTAPE 5 Fixation du toit
Placer le toit (B) sur le dessus de la section inférieure assemblée de l’habitat.Aligner le toit (B) sur
l’ensemble des panneaux en fil de fer (C et D). Pour fixer le tout, fixer les deux loquets latéraux (J) du
toit (B) à l’ensemble des panneaux en fil de fer (C et D).
ÉTAPE 6 Fixation des accessoires
Conseil: Trous d’accès des accessoires
Il y a quatre trous d’accès inutilisés qui permettront d’agrandir à l’infini la cage à l’aide des accessoires
complémentaires CritterTrail®. NE PAS perforer les autres trous d’accès avant d’être prêt à agrandir la
cage ni avant d’avoir acheté les accessoires! Les trous d’accès sont IMPOSSIBLES à fermer une fois
ouverts.
Pour fermer un trou d’accès ouvert sur le toit (B), il faudra utiliser un entonnoir de 10 po CritterTrail
n°100079222 avec les accessoires de tube Critter Trail®Funnel™. Deux caches d’ouverture à verrou
pivotant (G) sont fournis pour couvrir les portails d’agrandissement sur le support anti-dispersion (A).
ÉTAPE 7 Utilisation du bidon à eau et du bac à alimentation
Pour remplir le bidon à eau (H),enlever le capuchon en le faisant tourner avec le bouchon en
caoutchouc. Remplir le bidon entièrement en le plaçant sous un filet d’eau du robinet.
Fermer le bidon en enfonçant le bouchon en caoutchouc et en faisant tourner le capuchon.Retourner
le bidon et laisser un vide se former. Quelques gouttes peuvent tomber.Localiser le porte-bidon en fil de
fer fixé et l’emplacement du trou du tube à boire du bidon sur le panneau arrière (D). Placer le tube à
boire dans le trou et tirer le support en fil de fer vers le bas pour fixer le bidon en place. Lors du
nouveau remplissage du bidon à eau,ne jamais le comprimer.Ceci peut entraîner une fracture du
plastique et empêcher la formation du vide nécessaire.
Remarque: les fluctuations de température et des vibrations excessives de la cage entraînent parfois des
gouttes occasionnelles. Lors du déplacement de la cage CritterTrail®Quick Clean Habitat™, toujours
retirer le bidon à eau.Placer un mélange alimentaire de qualité (non fourni) dans le bac à alimentation
rond de l’animal (I).Placer le bac à alimentation rond (I) dans un coin de la nouvelle cage CritterTrail®
Habitat. Ne pas placer le bac à alimentation (I) sous le bidon à eau (H).
Examiner et identier chaque élément composant à l’aide de la liste ci-dessous.
Manufactured by: KAYTEE Products, Inc., Chilton, WI 53014 USA
©2015 KAYTEE Products, Inc.
Kaytee, Kaytee with design and Fun-nel are registered trademarks of Kaytee Products, Inc.
CritterTrail is a registered trademarks of Pets International Ltd.
For more information on bird and small animal products,
visit us at: kaytee.com
A
J
PP1002514

