KCI PREVENA PLUS Series User manual

Rx Only
EN
PREVENA PLUS™
INCISION MANAGEMENT SYSTEM
PREVENA PLUS™ CUSTOMIZABLE™
DRESSING
WITH SENSAT.R.A.C.™ TECHNOLOGY
INSTRUCTIONS FOR USE
FOR CLINICIANS ONLY

DISCLAIMER OF WARRANTY AND LIMITATION OF REMEDY
KCI HEREBY DISCLAIMS ALL EXPRESS OR IMPLIED WARRANTIES, INCLUDING WITHOUT LIMITATION
ANY IMPLIED WARRANTY OF MERCHANTABILITY OR FITNESS FOR A PARTICULAR PURPOSE, ON
THE KCI PRODUCT(S) DESCRIBED IN THIS PUBLICATION. ANY WRITTEN WARRANTY OFFERED BY KCI
SHALL BE EXPRESSLY SET FORTH IN THIS PUBLICATION OR INCLUDED WITH THE PRODUCT. UNDER
NO CIRCUMSTANCES SHALL KCI BE LIABLE FOR ANY INDIRECT, INCIDENTAL, OR CONSEQUENTIAL
DAMAGES AND EXPENSES, INCLUDING DAMAGES OR INJURY TO PERSON OR PROPERTY, DUE IN
WHOLE OR IN PARTTOTHE USE OF THE PRODUCT OTHER THAN THOSE FOR WHICH DISCLAIMER OF
WARRANTY OR LIMITATION OF LIABILITY IS EXPRESSLY PROHIBITED BY SPECIFIC, APPLICABLE LAW.
NO PERSON HAS THE AUTHORITY TO BIND KCI TO ANY REPRESENTATION OR WARRANTY EXCEPT AS
SPECIFICALLY SET FORTH IN THIS PARAGRAPH.
Descriptions or specifications in KCI printed matter, including this publication, are meant
solely to generally describe the product at the time of manufacture and do not constitute any
express warranties except as set forth in the written limited warranty included with this product.
Information in this publication may be subject to change at any time. Contact KCI for updates.

TABLE OF CONTENTS
Product Description and Indication for Use................................................................................................................5
Important Information for Users......................................................................................................................................5
Optimum Use Conditions...................................................................................................................................................6
Contraindication....................................................................................................................................................................6
Warnings...................................................................................................................................................................................6
Precautions..............................................................................................................................................................................7
PREVENA PLUS™ Incision Management System Dressings....................................................................................8
PREVENA PLUS™ Incision Management System Site Preparation.......................................................................9
Drain Tubes and Pain Management Control Devices....................................................................................9
PREVENA PLUS™ Incision Management System with
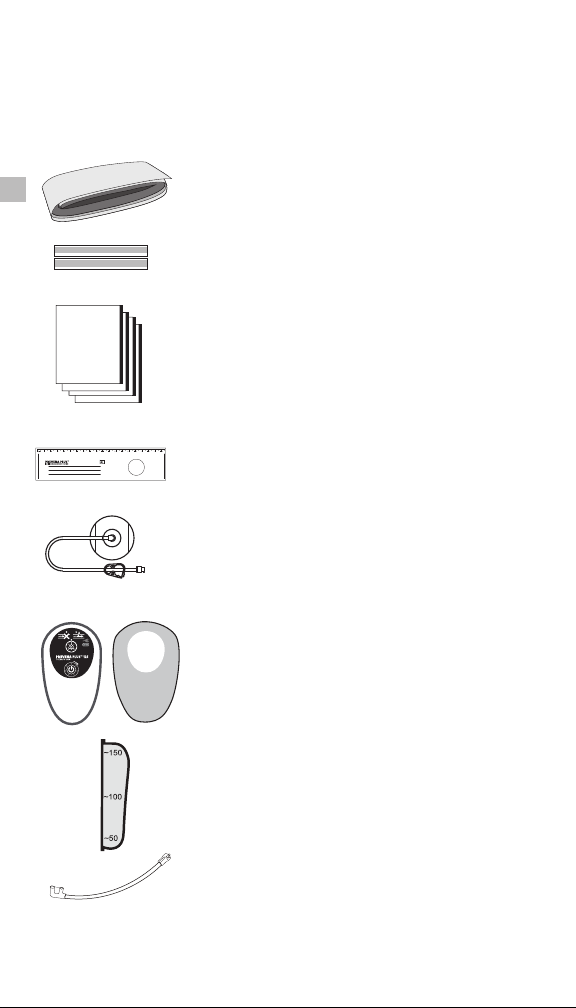
PREVENA PLUS™ CUSTOMIZABLE™ Dressing Components................................................................................ 10
PREVENA PLUS™ CUSTOMIZABLE™ Dressing Applications................................................................................. 11
Dressing Application for Linear Incisions ...................................................................................................... 12
Dressing Application for Non-linear Incisions............................................................................................... 14
Dressing Application for Intersecting Incisions............................................................................................ 15
Drape Application................................................................................................................................................... 16
SENSAT.R.A.C.™ Pad Application......................................................................................................................... 18
PREVENA PLUS™ Canister Installation......................................................................................................................... 19
Connecting the Dressing to the PREVENA PLUS™ 125Therapy Unit............................................................... 19
Beginning Therapy............................................................................................................................................................. 20
Unit Troubleshooting............................................................................................................................................. 21
Therapy Life Indicators..................................................................................................................................................... 21
Duration of PREVENA PLUS™ Therapy ........................................................................................................................ 22
Alerts....................................................................................................................................................................................... 22
Correcting a Leak Condition........................................................................................................................................... 24
Check Canister Tubing Connection................................................................................................................... 24
Indications That a Leak Condition Has Been Corrected............................................................................. 25
Battery Charging................................................................................................................................................................. 25
Canister Removal and Replacement ........................................................................................................................... 27
Using the PREVENA PLUS™ Dressing with KCI V.A.C.® Therapy Units............................................................... 27
Connecting the PREVENA PLUS™ Dressing to V.A.C.® Therapy Units.................................................... 27
Setting Negative Pressure on the V.A.C.® Therapy Units ........................................................................... 28
Alarm Resolutions ................................................................................................................................................... 28
PREVENA PLUS™ 125 Therapy Unit Disposal ............................................................................................................ 28
Instructions for Patients................................................................................................................................................... 28
Daily Use..................................................................................................................................................................... 28
TABLE OF CONTENTS CONTINUED ON THE NEXT PAGE.

Sleeping...................................................................................................................................................................... 28
Showering and Bathing ........................................................................................................................................ 29
Strenuous Activity................................................................................................................................................... 29
Cleaning...................................................................................................................................................................... 29
Dressing Removal............................................................................................................................................................... 29
Warnings and Important Information for Users - PREVENA PLUS™ 125 Therapy Unit.............................. 30
Customer Contact Information..................................................................................................................................... 31
PREVENA PLUS™ Therapy System Specifications ................................................................................................... 31
PREVENA PLUS™ 125 Therapy Unit Electromagnetic Compatibility................................................................ 32
Included Power Supplies................................................................................................................................................. 37
Bibliography of Published Studies............................................................................................................................... 38
Symbols Used ....................................................................................................................................................................121

5
INSTRUCTIONS FOR USE
PREVENA PLUS™ INCISION MANAGEMENT SYSTEM
KCI CUSTOMER CONTACT INFORMATION IS LOCATED
IN THE BACK OF THIS GUIDE.
PRODUCT DESCRIPTION AND INDICATION FOR USE
The PREVENA PLUS™ Incision Management System is intended to manage the environment of
surgical incisions that continue to drain following sutured or stapled closure by maintaining a closed
environment and removing exudate via the application of negative pressure wound therapy.
The system consists of:
A PREVENA™ Dressing and a source of negative pressure, which may be one of the following KCI
therapy units:
• PREVENA PLUS™ 125 Therapy Unit
• ACTIV.A.C.™ Therapy Unit
• V.A.C. FREEDOM™ Therapy Unit
• V.A.C.ULTA™ Therapy Unit
• V.A.C.RX4™ Therapy Unit
• V.A.C. SIMPLICITY™ Therapy Unit
Clinical studies have been conducted on KCI Negative Pressure Incision Management Systems. Refer
to the Bibliography of Published Studies in the back of this guide.
IMPORTANT INFORMATION FOR USERS
WARNING: DO NOT use withV.A.C. VERAFLO™ Therapy (Instillation) provided by the
V.A.C.ULTA™ Therapy Unit. Instillation into the incision site may result in pooling of fluid which
may result in maceration.
WARNING: The V.A.C.ULTA™ andV.A.C.RX4™ Therapy Units are only indicated for use in
acute care settings. Before transitioning the patient to home care, these therapy units must
be replaced with one for home use, such as the PREVENA PLUS™ 125, ACTIV.A.C.™, V.A.C.
SIMPLICITY™ or V.A.C. FREEDOM™ Therapy Unit.
For pressure settings and connection information for use of the PREVENA PLUS™ Dressings with the
V.A.C.® Therapy Units listed above, see the Using the PREVENA PLUS™ Dressing with KCI V.A.C.®
Therapy Units section.
CAUTION: The PREVENA PLUS™ Incision Management System should be applied and removed
only by qualified physicians or nurses.
As with any prescription medical device, failure to carefully read and follow all instructions and safety
information prior to use may lead to improper product performance.
The PREVENA PLUS™ Incision Management System dressings and therapy unit canisters are
disposable and are for single use only. Re-use of disposable components may result in wound
contamination, infection and/or failure of the wound to heal.

6
OPTIMUM USE CONDITIONS
For maximum benefit the PREVENA PLUS™ Incision Management System should be applied
immediately post surgery to clean surgically closed wounds. It is to be continuously applied for a
minimum of two days up to a maximum of seven days. It can transition home with the patient.
The PREVENA PLUS™ Incision Management System will not be effective in addressing complications
associated with:
•ischemia to the incision or incision area
•untreated or inadequately treated infection
•inadequate hemostasis of the incision
•cellulitis of the incision area
The PREVENA PLUS™ Incision Management System should not be used to treat open or dehisced
surgical wounds.
The V.A.C.® Therapy System should be considered for treatment of these wounds.
Consider using the smallest available canister for the selected V.A.C.® Therapy Unit.
The PREVENA PLUS™ Incision Management System should be used with caution in the following
patients:
•patients with fragile skin surrounding the incision as they may experience skin or tissue
damage upon removal of the PREVENA PLUS™ Dressing
•patients who are at an increased risk of bleeding from the incision associated with the use of
anticoagulants and/or platelet aggregation inhibitors
CONTRAINDICATION
•sensitivity to silver
WARNINGS
The PREVENA PLUS™ Incision Management System is not intended to manage open or
dehisced wounds.
DO NOT use with V.A.C. VERAFLO™Therapy (Instillation) provided by the V.A.C.ULTA™ Therapy
Unit. Instillation into the incision site may result in pooling of fluid which may result in
maceration.
Bleeding: Before applying the PREVENA PLUS™ Incision Management System to patients who
are at risk of bleeding complications due to the operative procedure or concomitant therapies
and/or co-morbidities, ensure that hemostasis has been achieved and all tissue planes have been
approximated. If active bleeding develops suddenly or in large amounts during therapy, or if frank
blood is seen in the tubing or in the canister, the patient should leave the PREVENA PLUS™ Dressing
in place, turn off the therapy unit and seek immediate emergency medical assistance.
Infected Wounds: As with any wound treatment, clinicians and patients/caregivers should
frequently monitor the patient’s wound, periwound tissue and exudate for signs of infection or
other complications. Some signs of infection are fever, tenderness, redness, swelling, itching, rash,
increased warmth in the wound or periwound area, purulent discharge or strong odor. Infection
can be serious, and can lead to complications such as pain, discomfort, fever, gangrene, toxic shock,
septic shock and/or fatal injury. Some signs or complications of systemic infection are nausea,
vomiting, diarrhea, headache, dizziness, fainting, sore throat with swelling of the mucus membranes,
disorientation, high fever, refractory and/or orthostatic hypotension or erythroderma (a sunburn-like

7
rash). Silver in the interface layer of the PREVENA PLUS™ Dressing is not intended to treat infection,
but to reduce bacterial colonization in the fabric. If infection develops, PREVENA PLUS™ Therapy
should be discontinued until the infection is treated.
Allergic Response: The PREVENA PLUS™ Dressing has an acrylic adhesive coating and a skin
interface layer with silver, which may present a risk of an adverse reaction in patients who are allergic
or hypersensitive to acrylic adhesives or silver. If a patient has a known allergy or hypersensitivity to
these materials, do not use the PREVENA PLUS™ Dressings. If any signs of allergic reaction, irritation
or hypersensitivity develop, such as redness, swelling, rash, urticaria or significant pruritus, patient
should consult a physician immediately. If bronchospasm or more serious signs of allergic reaction
appear, the patient should turn off the therapy unit and seek immediate emergency medical
assistance.
Defibrillation: Remove the PREVENA PLUS™ Dressing if defibrillation is required in the area of
dressing placement. Failure to remove the dressing may inhibit transmission of electrical energy and/
or patient resuscitation.
Magnetic Resonance Imaging (MRI): All KCI Therapy Units, including the PREVENA PLUS™ 125
Therapy Unit, are MR unsafe. Do not take therapy units into the MR environment. The PREVENA
PLUS™ Dressings can typically remain on the patient with minimal risk in an MR environment.
Interruption of PREVENA PLUS™ Therapy during MRI may reduce the effectiveness of the PREVENA
PLUS™ Incision Management System. The PREVENA PLUS™ Dressings pose no known hazards in an
MR environment with the following conditions of use: static magnetic field of 3 Tesla or less, spatial
gradient field of 720 Gauss/cm or less and maximum whole-body-averaged specific absorption rate
(SAR) of 3W/kg for 15 minutes of scanning.
Diagnostic Imaging: The PREVENA PLUS™ Dressing contains metallic silver that may impair
visualization with certain imaging modalities.
Hyperbaric Oxygen Therapy (HBO): Do not take the PREVENA PLUS™ 125 Therapy Unit, V.A.C.®
Therapy Units or PREVENA PLUS™ Dressings into a hyperbaric oxygen chamber. They are not
designed for this environment and should be considered a fire hazard. If PREVENA PLUS™ Therapy is
reinitiated after HBO treatment, do not readhere the same dressing; a new dressing must be applied.
Canister Full: If at any time while using the PREVENA PLUS™ Incision Management System the
canister becomes full of fluid, indicated by a therapy unit alert or visual inspection, the patient should
turn off the therapy unit and contact the treating physician for additional instruction.
Standard Operation: Do not use accessories or materials not provided with the PREVENA PLUS™
Incision Management System. For a list of acceptable therapy units with which PREVENA PLUS™
Dressings may be used, see the Product Description and Indication for Use section.
PRECAUTIONS
Standard Precautions: To reduce the risk of transmission of bloodborne pathogens, apply standard
precautions for infection control with all patients, per institutional protocol, regardless of their
diagnosis or presumed infection status.

8
Circumferential Dressing Application: Avoid applying the PREVENA PLUS™ Dressing
circumferentially. In cases where the clinician determines that the benefits of applying the PREVENA
PLUS™ Dressing circumferentially outweigh the risk of circulatory compromise, extreme care should
be taken not to stretch or pull the dressing when securing it. Attach the dressing loosely and stabilize
edges with an elastic wrap if necessary. It is crucial to systematically and recurrently palpate distal
pulses and assess distal circulatory status. If circulatory compromise is suspected, discontinue
therapy and remove dressing.
Electrodes or Conductive Gel: Do not allow the PREVENA PLUS™ Dressing to come in contact with
EKG or other electrodes or conductive gels during electronic monitoring or when taking electronic
measurements.
Dressing Components: The PREVENA PLUS™ Dressing contains ionic silver (0.019%). Application of
products containing silver may cause temporary tissue discoloration.
•Always use PREVENA PLUS™ Dressings and canisters from sterile packages that have not been
opened or damaged.
•All dressing components and canisters of the PREVENA PLUS™ Incision Management System
are for single use only. Do not re-use any component of this system.
•To avoid trauma to the skin, do not pull or stretch the adhesive border of the dressing during
application.
Compressive Garments or Dressings: Avoid tight compressive garments or dressings (such as
surgical bras, elastic bandage wraps or abdominal binders) to prevent forcibly pressing the PREVENA
PLUS™ Dressing into soft tissue.
PREVENA PLUS™ INCISION MANAGEMENT SYSTEM DRESSINGS
The PREVENA PLUS™ Incision Management System features PREVENA PLUS™ CUSTOMIZABLE™
Dressings. These dressings contain a skin interface layer that includes 0.019% ionic silver. Silver in
the interface layer of the PREVENA PLUS™ Dressing is not intended to treat infection, but to reduce
bacterial colonization in the fabric. In vitro log reduction tests, conducted without application of
negative pressure, exposed samples of the skin interface layer to a six log challenge of each of
the microorganisms listed below. Following inoculation, samples were tested for microbial counts
immediately (day 0) and after incubation at 90˚F (32˚C) in diluted nutrient broth for 1, 3, 5 and 7 days.
The log reductions from the day 0 values are provided in the table below.
Challenge Organism Mean Log Reduction from Day 0
Day 1 Day 3 Day 5 Day 7
Escherichia coli (ATCC 8739) 2.2 4.0 3.9 4.5
Pseudomonas aeruginosa (ATCC 09027) 2.0 3.9 3.5 3.7
Staphylococcus aureus (ATCC 6538) 1.6 3.6 3.6 3.5
Klebsiella pneumonia (ATCC 4352) 1.4 1.8 2.7 3.5
Candida albicans (ATCC 10231) 2.5 3.1 3.2 3.2
Aspergillus niger (ATCC 16404) 2.2 4.1 4.0 3.6

9
PREVENA PLUS™ INCISION MANAGEMENT SYSTEM SITE
PREPARATION
1. Prior to surgery, shave or clip the surgical area where the dressing will be applied to improve
dressing adhesion and seal integrity.
2. Gather all items needed for application:
•sterile wound cleaning solution, e.g. water, saline or alcohol
•sterile gauze or other material to clean application site
•all components of the PREVENA PLUS™ Incision Management System (dressing and therapy
unit)
3. After surgery, cleanse the application site with sterile gauze and sterile wound cleaning solution
using a circular motion beginning at the center of the surgical area and extending outward to
ensure that the site is free of foreign material.
4. Pat the application site dry with sterile gauze. To ensure proper adhesion, the application site
must be completely dry before dressing is applied.
DRAIN TUBES AND PAIN MANAGEMENT CONTROL DEVICES
The PREVENA PLUS™ Incision Management System can be used with both drain tubes and pain
devices, provided the dressing is not placed over tubing where it exits the skin. Surgical drains must
be routed under the skin beyond the boundary of the dressing and function independently of the
PREVENA PLUS™ Incision Management System.
NOTE: While the concomitant use of surgical drains is allowable with the PREVENA PLUS™
Incision Management System, the system must not be used as an outlet or reservoir for the
drain.

10
PREVENA PLUS™ INCISION MANAGEMENT SYSTEM WITH
PREVENA PLUS™ CUSTOMIZABLE™ DRESSING COMPONENTS
The PREVENA PLUS™ INCISION MANAGEMENT SYSTEM with PREVENA PLUS™ CUSTOMIZABLE™
Dressing can be used for linear/non-linear incision applications and contains the following single use,
disposable components.
PREVENA PLUS™ CUSTOMIZABLE™ Dressing (folded) - a specially
designed dressing for application to the surgical area
Sealing Strips - used to create a continuous adhesive seal around the
PREVENA PLUS™ CUSTOMIZABLE™ Dressing
KCI Drapes - used to cover dressing and provide a seal for negative
pressure
Ruler - used to measure incision before cutting. The removable label
may be used as needed to record date of dressing application or
removal.
SENSAT.R.A.C.™ Pad - used to connect the PREVENA PLUS™
CUSTOMIZABLE™ Dressing to a KCI therapy unit
PREVENA PLUS™ 125 Therapy Unit - delivers negative pressure to the
surgical area. The unit is battery and electrically powered. The non-
sterile PREVENA PLUS™ 125 Therapy Unit Carrying Case is provided
to facilitate patient mobility.
PREVENA PLUS™ 150 ml Canister - a sterile reservoir for collection of
wound fluids
PREVENA PLUS™ Connector - Connects the SENSAT.R.A.C.™ Pad
tubing to the canister

11
PREVENA PLUS™ 125 Therapy Unit Power Supply with Power Cord - a
charging system provided with the PREVENA PLUS™ 125 Therapy
Unit to charge the internal battery.
PREVENA PLUS™ CUSTOMIZABLE™ DRESSING APPLICATIONS
The PREVENA PLUS™ CUSTOMIZABLE™ Dressing can be used for the following wound types:
•linear incisions
•non-linear incisions
•intersecting incisions
The following figures show completed dressing applications using the PREVENA PLUS™
CUSTOMIZABLE™ Dressing, KCI Drape and SENSAT.R.A.C.™ Pad.
WARNING: DO NOT use withV.A.C. VERAFLO™ Therapy (Instillation) provided by the
V.A.C.ULTA™ Therapy Unit. Instillation into the incision site may result in pooling of fluid which
may result in maceration.
Linear Incision
Dressing Application
Non-linear Incision
Dressing Application
Intersecting Incision
Dressing Application

12
DRESSING APPLICATION FOR LINEAR INCISIONS
CAUTION: If the dressing covers the umbilicus, the umbilicus must first be fully filled with an
anti-microbial petroleum gauze prior to dressing application.
1. Open the sterile dressing package, remove and unfold foam dressing using aseptic technique. Do
not use if package has been torn or the sterile seal has been compromised.
2. Use the enclosed ruler to measure incision before cutting.
3. Cut foam dressing to the length necessary to cover the incision.
CAUTION: Do not cut the foam over the wound, as fragments may fall into the wound. Away
from wound site, rub foam edges to remove any fragments or loose particles that may fall
into or be left in the wound upon dressing removal.
4. Remove bottom release liner 1 on the foam dressing to expose
adhesive seal and white fabric located on the bottom of the foam
dressing. The white fabric covers the incision.
5. Add sealing strips to the ends of the foam dressing.
NOTE: Use the PREVENA PLUS™ CUSTOMIZABLE™ Dressing to
size the sealing strip as needed to fit the width of the dressing,
approximately 3 in (8 cm).
• Liner 1 must be removed from the dressing before applying
sealing strips.
• Remove one of the liners from the sealing strip. Sealing strips are
tacky on both sides.
• Place sealing strip on end of foam dressing (creating a
continuous seal). The strip should be placed half on dressing
and half off dressing and overlap the adhesive seal on each side
of the dressing. This ensures a seal all around the edge of the
dressing.
• Remove the remaining liner from the sealing strip. Repeat strip
application on other end of foam dressing.

13
6. With sealing strips applied, position the foam dressing until the
adhesive seal and white fabric are facing down.
7. Center the foam dressing over the incision/surgical closure. Ensure
the adhesive seal and white fabric are facing down.
8. Press down around the length of the adhesive seal to ensure
adhesion to the skin.
9. Peel off release liner 2 from the top of the adhesive seals.
10. Once the foam dressing has been applied to the incision, continue
with the drape application (see Drape Application section).

14
DRESSING APPLICATION FOR NONLINEAR INCISIONS
CAUTION: If the dressing covers the umbilicus, the umbilicus must first be fully filled with an
anti-microbial petroleum gauze prior to dressing application.
1. Open the sterile dressing package, remove and unfold foam dressing using aseptic technique.
Do not use if package has been torn or the sterile seal has been compromised.
2. Use enclosed ruler to measure incision before cutting.
3. Cut foam dressing to the length and shape necessary to cover the incision.
CAUTION: Do not cut the foam over the wound, as fragments may fall into the wound. Away
from wound site, rub foam edges to remove any fragments or loose particles that may fall
into or be left in the wound upon dressing removal.
4. Make straight cuts at the desired angles to
ensure the foam dressing pieces and seals make
a flush/even connection with no gaps.
CAUTION: Gaps at foam junctions may
potentially cause erythema due to pinching of
the skin when negative pressure is applied.
5. Use a sealing strip to bridge where the foam
dressing pieces meet. Sealing strip should have
equal overlap on both foam dressing pieces.
NOTE: Use the PREVENA PLUS™ CUSTOMIZABLE™
Dressing to size the sealing strip as needed to fit
the width of the dressing, approximately
3 in (8 cm).
•Liner 1 must be removed from the dressing
before applying sealing strips.
•Place sealing strip on end of foam dressing
(creating a continuous seal). The strip should be
placed half on dressing and half off dressing and
overlap the adhesive seal on each side of the
dressing. This ensures a seal all around the edge
of the dressing.
NOTE: Having exposed adhesive material around
all edges of the dressing provides a greater seal
when the drape is applied.
•Remove the remaining liner from the sealing
strip. Repeat strip application on other end of
foam dressing.

15
6. With sealing strips applied, position the foam
dressing until the adhesive seal and white
fabric are facing down.
NOTE: It is acceptable if sealing strips cover the
incision line.
7. Place the foam dressing over the incision/surgical closure. Ensure the adhesive seal and white
fabric are facing down.
8. After foam dressing placement is completed, ensure all liners are removed before continuing with
the drape application (see Drape Application section).
DRESSING APPLICATION FOR INTERSECTING INCISIONS
CAUTION: If the dressing covers the umbilicus, the umbilicus must first be fully filled with an
anti-microbial petroleum gauze prior to dressing application.
1. Open the sterile dressing package, remove and unfold foam dressing using aseptic technique. Do
not use if package has been torn or the sterile seal has been compromised.
2. Use enclosed ruler to measure incision before cutting.
3. Cut dressing as needed to fit incision.
CAUTION: Do not cut the foam over the wound, as fragments
may fall into the wound. Away from wound site, rub foam edges
to remove any fragments or loose particles that may fall into or
be left in the wound upon dressing removal.
4. Ensure the foam dressings and seals meet with no gaps.
CAUTION: Gaps at foam junctions may potentially cause
erythema due to pinching of the skin when negative pressure
is applied.
CAUTION: Do not overlap foam dressing pieces on top of each
other.
5. Use sealing strips at the ends of the foam dressing to create a
continuous seal. Sealing strip should have equal overlap on both
foam dressing pieces.
NOTE: Use the PREVENA PLUS™ CUSTOMIZABLE™ Dressing to
size the sealing strip as needed to fit the width of the dressing,
approximately 3 in (8 cm).
• Liner 1 must be removed from the dressing before applying
sealing strips.
6. With sealing strips applied, position the foam dressing until the adhesive seal and white fabric
are facing down.
NOTE: It is acceptable if sealing strips cover the incision line.

16
7. Place the foam dressing over the incision/surgical closure. Ensure the adhesive seal and white
fabric are facing down.
8. After foam dressing placement is completed, ensure all liners are removed before continuing with
the drape application (see Drape Application section).
DRAPE APPLICATION
CAUTION: Do not cover the umbilicus with drape. Before or after placement, ensure a small
hole is cut in the drape in relation to the umbilicus.
Multiple pieces of drape may be needed when using PREVENA PLUS™ CUSTOMIZABLE™
Dressings depending on incision size. Drapes should always overlap each other by at least
1.2 in (3 cm). All dressing liners must be removed before any drape is used.
1. Trim KCI Drape as necessary. Ensure a minimum overlap of 1.2 in
(3 cm) when using multiple pieces of KCI Drape.There is no drape
under the blue handling bars.
2. Carefully remove the middle section of layer 1 from KCI Drape to
expose adhesive. Leave the two end sections of layer 1 intact to
maintain drape stability during application. The KCI Drape should
be held by the blue handling bars.
3. With adhesive side down, apply KCI Drape over foam and onto intact
skin. Ensure KCI Drape covers a minimum of 1.2 in (3 cm) of intact
periwound skin.
4. Lift the drape at both ends and remove the two remaining end
sections of layer 1. Smooth out any wrinkles in the KCI Drape.
CAUTION: Do not press blue handling bars down onto the
sealing material.
5. Carefully remove striped layer 2 from KCI Drape.

17
6. Remove the two blue handling bars.
7. Add additional drape as needed to cover foam dressings in various
configurations, as shown.
• Smooth KCI Drape to remove creases and seal joints ensuring an
occlusive seal.
• All liners must be removed before additional drape is used.
• Press drape down around the length of the adhesive seal to
ensure adhesion to the skin.
• Press down to seal all drapes.
• Minimize any creases/wrinkles in drape.
• Excess KCI Drape can be used to seal leaks.
1
2
3

18
SENSAT.R.A.C.™ PAD APPLICATION
CAUTION: Do not place the SENSAT.R.A.C.™ Pad directly over the umbilicus.
NOTE: Do not cut off the pad or insert the tubing into the foam dressing. This may occlude the
tubing and cause the PREVENA PLUS™ 125 Therapy Unit to alert.
1. Choose pad application site. Give particular consideration to fluid flow and tubing positioning
to allow for optional flow and avoid placement over bony prominences or within creases in the
tissue.
2. Pinch drape and carefully cut an approximately 2.5 cm hole through
the drape. The hole should be large enough to allow for removal of
fluid and/or exudate. It is not necessary to cut into the foam.
NOTE: Cut a hole rather than a slit, as a slit may self-seal during
therapy.
3. Apply pad, which has a central disc and a surrounding outer
adhesive skirt.
• Remove both backing layers 1 and 2 to expose adhesive.
• Place pad opening in central disc directly over hole in the drape.
• Apply gentle pressure on the central disc and outer skirt to
ensure complete adhesion of the pad.
• Pull back on blue tab to remove pad stabilization layer.
4. Connect to the therapy unit. For connection to the PREVENA PLUS™ 125 Therapy Unit, see the
Connecting the Dressing to PREVENA PLUS™ 125Therapy Unit section. For connection to
other KCI V.A.C.®Therapy Units, see the Connecting the PREVENA PLUS™ Dressing with V.A.C.®
Therapy Units section.
For dressing removal, see the Dressing Removal section.
NOTE: The removable label on the supplied ruler may be used as
needed to record date of dressing application or removal.
2.5
cm
1
222
1
1
1
1
1
1
2

19
PREVENA PLUS™ CANISTER INSTALLATION
The canister used with the PREVENA PLUS™ 125Therapy Unit is a single-use, sterile, 150 mL container
with graduated markings of approximately 50 cc/mL increments.
NOTE: If the canister is not fully engaged, the PREVENA PLUS™ 125 Therapy Unit will alert.
NOTE: Only use the recommended PREVENA PLUS™ 125 Therapy Unit Canister with this
product.
NOTE: Never reuse a canister.
1. Remove the canister from the sterile package.
2. Hold therapy unit and canister, vertically or horizontally, one in each
hand, and slide bottom of canister into slot on bottom of therapy
unit.
3. Close canister against therapy unit. The upper locking tab will click
when canister is secured.
CONNECTING THE DRESSING TO THE PREVENA PLUS™ 125 THERAPY
UNIT
For connecting to other KCI V.A.C.® Therapy Units, see the Using the PREVENA PLUS™ Dressing
with KCIV.A.C.® Therapy Units section.
1. Connect the SENSAT.R.A.C.™ Pad tubing to the PREVENA PLUS™
Connector:
• Push the connectors together
• Twist the connectors to lock
2. Connect the PREVENA PLUS™ Connector to the canister by aligning
and plugging connector at end of tubing onto tubing ports on side
of canister. Push together firmly. Ensure clamp on tube is open.
Position clamp away from patient.
3. Begin therapy.
Canister
Therapy
Unit
Locking
Tab
Tubing
Ports/
Caps

20
BEGINNING THERAPY
1. Ensure the PREVENA PLUS™ Dressing has been applied as described in the PREVENA PLUS™
CUSTOMIZABLE™ Dressing Application section.
2. To begin therapy, press and hold center of the On/Off button for
three seconds. The PREVENA PLUS™ 125 Therapy Unit, while in
operation, may have a moderate sound emanating from the unit.
All seven Therapy Life Indicators will illuminate with a green LED,
indicating therapy is running.
NOTE: To interrupt therapy or turn unit off, press and hold center of the On/Off button for three
seconds.
Once therapy is on for one hour non-stop, the seven day lifespan begins and continues even if
unit is turned off.
3. With therapy on, assess dressing to ensure integrity of seal.
• The dressing should have a wrinkled appearance and the foam
bolster should be compressed.
• If the foam bolster is not compressed or the therapy unit alerts,
see the Alerts section.
4. If there is any evidence of a leak, check the SENSAT.R.A.C.™ Pad and the dressing seals, tubing
connectors, and canister connection, and ensure clamp is open. Refer to the Correcting a Leak
Condition section for more information.
Leak Alert
Blockage Alert
Alert Mute
Button
Power Connected
Battery Level
Therapy Life
Indicator
On/Off
Button
3
X
Other manuals for PREVENA PLUS Series
1
This manual suits for next models
1
Table of contents
Languages:
Other KCI Medical Equipment manuals

KCI
KCI ActiV.A.C. User manual

KCI
KCI ActiV.A.C. Application guide

KCI
KCI ActiV.A.C. User manual

KCI
KCI FIRST STEP Plus User manual

KCI
KCI NuTech PlexiPulse Installation instructions

KCI
KCI ActiV.A.C. Application guide

KCI
KCI PREVENA PLUS User manual

KCI
KCI ActiV.A.C. User manual

KCI
KCI infoV.A.C Application guide

KCI
KCI V.A.C.Via User manual