Before plugging in
O Make sure your electricity supply is the same as the one shown on the underside of your
appliance.
O WARNING: THIS APPLIANCE MUST BE EARTHED.
O This appliance conforms to EC Regulation 1935/2004 on materials and articles intended
to come into contact with food.
Before Using For The First Time
O Wash the parts: see ‘Care and
Cleaning’ section.
Key
1Mixer head
2Attachment outlet
3Outlet cover
4Tool socket
5Bowl
a Stainless steel (if supplied)
b Glass (if supplied)
6On/Off and speed control
7Mixer ready indicator light
8Mixer body
9Head release lever
10 Cord storage
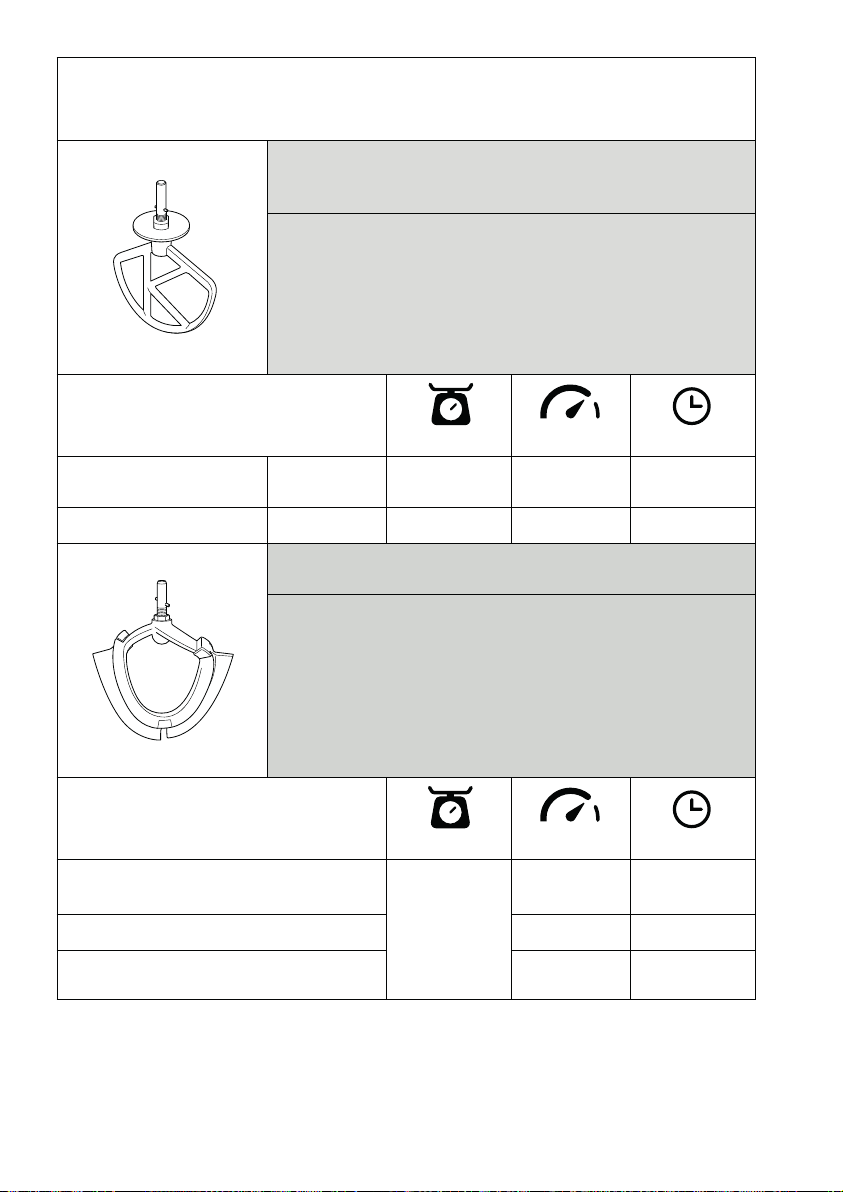
11 K-beater
12 Whisk
13 Dough tool
14 Creaming beater (if supplied)
15 Folding tool (if supplied)
16 Spatula
17 Splashguard
To Use Your Mixer
1 Lift the head release lever at the
back of the Stand mixer and at
the same time lift the head until
it locks in the raised position .
2 Place the required tool into the
socket. Then push up and
turn the tool to lock into
position.
3 Fit the bowl onto the base. Place
the handle directly over the unlock
symbol ,then gently turn the bowl
clockwise until the handle is directly
above the lock symbol .DO NOT
USE excessive force and DO NOT
overtighten .
4 Lift the head release lever at the
back of the Stand mixer and at the
same time lower the mixer head .
5 Plug into the power supply and
the ‘mixer ready indicator light’ will
illuminate.
6 Switch on by turning the speed
control to the desired setting.
7 Release the tool by turning
clockwise to unlock from the tool
socket and then remove.
Special Care Instructions
Glass is a natural material, during the manufacture
of this bowl every care has been taken to ensure a
perfect appearance, however some small imperfections
may be visible, this is normal and to be expected, the
performance of the bowl will not be affected.
4