manuals.online logo
Brands
  1. Home
  2. •
  3. Brands
  4. •
  5. KERN
  6. •
  7. Measuring Instrument
  8. •
  9. KERN DAB-BA-e-1511 User manual

KERN DAB-BA-e-1511 User manual

KERN & Sohn GmbH
Ziegelei 1
D-72336 Balingen
E-Mail: info@kern-sohn.com
Phone: +49-[0]7433- 9933-0
Fax: +49-[0]7433-9933-149
Internet: www.kern-sohn.com
Operating manual
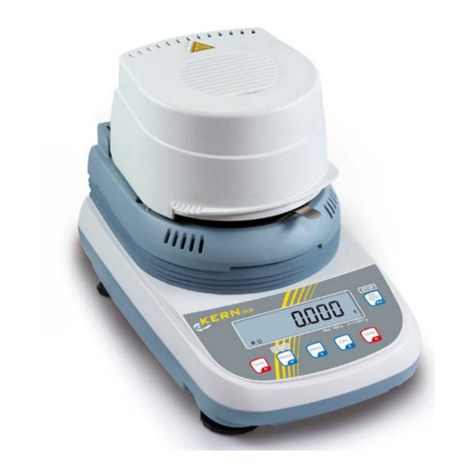
Electronic Moisture Analyser
KERN DAB
Version 1.1
10/2015
GB
DAB-BA-e-1511
2DAB-BA-e-1511
GB
KERN DAB
Version 1.1 10/2015
Operating manual
Electronic Moisture Analyser
Contents
1TECHNICAL DATA............................................................................................. 5
2APPLIANCE OVERVIEW ................................................................................... 7
2.1 Keyboard overview....................................................................................................................... 9
2.2 Overview of display.................................................................................................................... 10
3BASIC INFORMATION (GENERAL)................................................................ 11
3.1 Proper use ................................................................................................................................... 11
3.2 Improper Use............................................................................................................................... 11
3.3 Warranty ...................................................................................................................................... 11
3.4 Monitoring of Test Resources................................................................................................... 11
4BASIC SAFETY PRECAUTIONS..................................................................... 12
4.1 Pay attention to the instructions in the Operation Manual .................................................... 12
4.2 Symbols used in the operating instructions............................................................................ 12
4.2.1 Warning pictograms............................................................................................................. 13
4.3 Personnel training ...................................................................................................................... 13
4.4 Danger Information..................................................................................................................... 14
5TRANSPORT AND STORAGE......................................................................... 16
5.1 Testing upon acceptance........................................................................................................... 16
5.2 Packaging / return transport...................................................................................................... 16
DAB-BA-e-15113
6UNPACKING, SETUP AND COMMISSIONING ............................................... 16
6.1 Installation Site, Location of Use.............................................................................................. 16
6.2 Unpacking and checking ........................................................................................................... 17
6.2.1 Scope of delivery / serial accessories:................................................................................. 17
6.3 Placing ......................................................................................................................................... 18
6.4 Levelling ...................................................................................................................................... 19
6.5 Mains connection........................................................................................................................ 20
6.6 Switching on and off................................................................................................................... 20
6.6.1 Initial Commissioning ........................................................................................................... 21
6.7 Connection of peripheral devices............................................................................................. 21
7ADJUSTMENT.................................................................................................. 22
7.1 Weight adjustment...................................................................................................................... 22
7.2 Calibrate / adjust temperature of the heating module ............................................................ 24
7.2.1 Temperature calibration ....................................................................................................... 24
7.2.2 Temperature adjustment...................................................................................................... 27
8CARRY OUT YOUR FIRST MEASUREMENT ................................................. 28
9DEFINE DRYING PARAMETERS .................................................................... 30
1. Enter ident number for drying method..................................................................................... 30
2. Set heating profile....................................................................................................................... 31
3. Selecting switch-off criterion .................................................................................................... 33
4. Set drying temperature .............................................................................................................. 34
5. Setting the drying period for time-controlled switching-off................................................... 35
10 CARRYING OUT DRYING AND MEASURING PROCESSES ..................... 36
11 RS 232 INTERFACE ..................................................................................... 39
11.1 Technical data......................................................................................................................... 39
11.2 Setting the baud rate.............................................................................................................. 39
11.3 Print out protocol:.................................................................................................................. 40
4DAB-BA-e-1511
12 GENERAL INFORMATION CONCERNING MOISTURE ANALYSIS........... 42
12.1 Application.............................................................................................................................. 42
12.2 Basics...................................................................................................................................... 42
12.3 Adjustment to existing measuring method ......................................................................... 42
12.4 Preparing a sample ................................................................................................................ 43
12.5 Sample material...................................................................................................................... 44
12.6 Sample size / originally weighted in quantity...................................................................... 44
12.7 Drying temperature ................................................................................................................ 45
12.8 Recommendations / Guidelines............................................................................................ 45
13 SERVICING, MAINTENANCE, DISPOSAL .................................................. 46
13.1 Cleaning .................................................................................................................................. 46
13.2 Servicing, maintenance ......................................................................................................... 46
13.3 Disposal................................................................................................................................... 46
14 INSTANT HELP............................................................................................. 47
15 DECLARATION OF CONFORMITY.............................................................. 48
DAB-BA-e-15115
1 Technical data
Data DAB 100-3
Radiator type Halogen (1 x 400 W)
Temperature range 40°C - 199°C
1°C steps selectable
Maximum load (Max) 110 g
Minimum weight (min) 0.02 g
Readability (d) 0.001g / 0.01 %
Reproducibility Weighed-in quantity 2 g: 0.15 %
Weighed-in quantity 5g: 0.05 %
Weighed-in quantity 10 g:
0.02 %
Heating profiles Standard drying
Fast drying
Soft drying
Linearity ± 0.003 g
Stabilization time (typical) 3 sec.
Warm-up time 2 h
Recommended adjustment
weight, not added (class) 100g (F2)
Environmental conditions 5°C….+40°C ambient temperature
max 80% air humidity non-condensing
6DAB-BA-e-1511
Shutoff criterion
•Automatic switch off
(2mg weight loss in 45 s)
•Time-controlled switch off,
selectable 3 min – 99h 59 min (10s steps)
•Manual switch-off by pressing stop key
Sample dishes included Ø 95 mm
Displays of result [%] moisture content
[%] dry content
[ g ] residual weight in grams
Internal memory Method memory 15 memory locations for
drying methods
Sample memory 5 memory locations for measurement
results
Interface RS232
Dimensions (W x D x H) Housing 240 x 365 x 180 mm
Available
drying room Ø 92 mm, 20 mm high
Net weight 4.8 kg
Electric Supply 220V 50 Hz AC
DAB-BA-e-15117
2 Appliance overview
Pos. Designation
1
Viewing panel
2 Heating hood
3 Halogen lamp
4 Heat shield
5 Sample dish
6
Windshield
7 Removal aid
8 Display
9 Keyboard
10
Adjustable foot
8DAB-BA-e-1511
Pos. Designation
11 RS232C-interface connection
12
Bubble level
13 Fan
14 Mains connection socket
DAB-BA-e-15119
2.1 Keyboard overview
Button Function
•Call up menu
•Switch over display of result
•Cancel
•Start / finish drying and measuring process
•Taring
•Confirm / store settings
•Turn on/off
•Select parameter (forward)
•Increase digit
•Switch on background illumination of display
•Select parameter (backward)
•Reduce digit
•Switch off background illumination of display
10 DAB-BA-e-1511
2.2 Overview of display
Example: Working window during drying process
Pos. Designation
1
Status display - drying process enabled
2 Enabled heating profile flashes
Standard drying
Fast drying
Soft drying
3 Enabled switch-off criterion flashes
Automatic switch-off
Time controlled switch-off
Manual switch off
4 Previous drying time
5 Current temperature
6 Display in % moisture
7 Subtotal
DAB-BA-e-151111
3 Basic Information (General)
3.1 Proper use
The device purchased by you is designed for a fast and reliable determination of
material moisture in liquid, porous and solid materials by applying the method of
thermogravimetrics.
3.2 Improper Use
Impacts and overloading exceeding the stated maximum load (max) of the device,
minus a possibly existing tare load, must be strictly avoided.
This could cause damage to the integrated balance.
Never operate device in explosive environment. The serial version is not explosion
protected.
Changes to the unit's design are not permitted. This may lead to incorrect weighing
results, safety-related faults and destruction of the appliance.
The unit may only be operated in accordance with the described default settings.
Other areas of use must be released by KERN in writing.
3.3 Warranty
Loss of warranty due to
•Our conditions in the operation manual are ignored
•The appliance is used outside the described uses
•Changing or opening instrument
•Mechanical damage and damage caused by media, liquids
•Natural wear and tear
•The appliance is improperly set up or incorrectly electrically connected
•The measuring system is overloaded
3.4 Monitoring of Test Resources
In the framework of quality assurance the measuring-related properties of the
integrated balance and, if applicable, the testing weight, must be checked regularly.
The responsible user must define a suitable interval as well as type and scope of this
test. Information is available on KERN’s home page (www.kern-sohn.com) with
regard to the monitoring of balance test substances and the test weights required for
this. In KERN's accredited DKD calibration laboratory test weights and balances may
be calibrated (return to the national standard) fast and at moderate cost.
12 DAB-BA-e-1511
4 Basic Safety Precautions
4.1 Pay attention to the instructions in the Operation Manual
Carefully read this operation manual before setup and
commissioning, even if you are already familiar with KERN balances.
All language versions contain a non-binding translation.
The original German is binding.
4.2 Symbols used in the operating instructions
Please pay due attention to information denoted by the signal
words CAUTION or WARNING as well as a warning
pictogram.
The signal word WARNING indicates a hazardous situation
where disregard of the safety information may result in fatal or
severe injury.
The signal word CAUTION indicates a hazardous situation
where disregard may result in minor injury.
NOTE (or LOOK OUT) indicates actions that may result in
damage to property.
This symbol indicates helpful information.
Call to action.
This prompts you to perform certain operations
DAB-BA-e-151113
4.2.1 Warning pictograms
High voltage
Chemical burn / corrosion
General hazard
Fire or explosion
Poisoning
Hot Surface
4.3 Personnel training
The instrument may only be operated and maintained by trained personnel.
14 DAB-BA-e-1511
4.4 Danger Information
!
The moisture analyser is used to analyse the moisture content of materials.
This instrument must be used exclusively for this purpose. Any other usage
may cause a risk to personnel, damage to the instrument or other material
damage.
!
The moisture analyser should be used mainly for the drying of aqueous
substances.
!
The moisture analyser may not be used in a hazardous area.
!
Do not use the moisture analyser in an explosive environment.
!
The operation and maintenance of the moisture analyser is restricted to
trained competent specialist staff.
!
Carefully read this operation manual before setup and commissioning, even if
you are already familiar with KERN instruments.
!
Never make any modifications or design changes to the equipment
whatsoever. Always use original spare parts and accessories.
!
Make sure that liquids cannot penetrate the interior of the device, the terminals
at the rear of the device and the connected peripherals (such as printer, PC).
If you spill liquid on the device, disconnect it immediately.
Afterwards do not operate the moisture meter and have it checked by a
competent KERN stockist before any further use.
Hazards during and after measuring
!
Ensure correct installation of all components, see chap. 6.3
!
Careful when removing the sample.
The sample itself, the sample dish and the
heating unit may be very hot.
!
Use the sample retainer at all times as it allows safe working and prevents
burns.
!
Individual parts of the case (e. g. the ventilation grids) may heat up
considerably during operation.
DAB-BA-e-151115
The moisture analyser operates using heat!
+Maintain sufficient space in the environment of the instrument to
prevent heat build-up (distance from the instrument 20cm,
upwards 1m).
+The heat extractor of the sample must never be covered, blocked,
taped up or altered in any other way.
+Never place combustible materials on, under or next to the
instrument, as the environment of the instrument heats up to a
high temperature.
+Careful when removing the sample. The sample itself, the sample
dish and the heating unit may be very hot.
Fire or explosion
+Explosive, easily flammable samples and samples that go into a
chemical reaction when subjected to heat, may not be analysed
with the moisture analyser.
+If in doubt, conduct a risk analysis.
+Select a drying temperature for samples of this kind that is low
enough to prevent ignition or explosion.
+Wear safety goggles.
Substances that contain toxic or corrosive ingredients,
produce toxic gases when drying, cause irritation (eyes, skin,
airways), induce nausea or result in death
+Sample materials emitting toxic substances must be dried with a
special extraction system in place. Create an environment that
prevents the inhalation of vapours hazardous to health.
Substances that liberate corrosive gases when heated up (such as
acids)
+In that case, work with smaller sample amounts as the liberated
gases may condense on cooler casing parts and later cause
corrosion.
16 DAB-BA-e-1511
5 Transport and storage
5.1 Testing upon acceptance
When receiving the appliance, please check packaging immediately, and the
appliance itself when unpacking for possible visible damage.
5.2 Packaging / return transport
Keep all parts of the original packaging for a possibly required
return.
Only use original packaging for returning.
Prior to dispatch disconnect all cables and remove
loose/mobile parts.
Secure all parts against shifting and damage.
6 Unpacking, Setup and Commissioning
6.1 Installation Site, Location of Use
The instrument is designed to achieve reliable weighing results under normal
conditions of use.
You will work accurately and fast, if you select the right location for your moisture
analyser.
On the installation site observe the following:
!
Remove explosion prone and easily flammable material in the immediate
vicinity.
Emerging vapours, sample dish and all parts of the sample chamber are hot!
!
Protect the instrument against direct draughts due to open windows and
doors.
!
Avoid extreme heat and temperature fluctuations e.g. due to installation next
to radiators.
!
Do not expose the instrument to extreme dampness for longer periods of time.
Non-permitted condensation (condensation of air humidity on the instrument)
may occur if a cold instrument is taken to a considerably warmer environment.
In this case, acclimatize the disconnected instrument for ca. 2 hours at room
temperature.
!
Avoid direct sunlight
!
The air humidity should be between 45% and 75%, non-condensing.
DAB-BA-e-151117
!
Sufficient distance from heat-sensitive materials in area around instrument.
!
Protect the instrument against high humidity, vapours and dust,
!
Major display deviations (incorrect weighing results) may be experienced
should electromagnetic fields (e.g. due to mobile phones or radio instruments),
static electricity accumulations or instable power supply occur. Change
location or remove source of interference.
!
Avoid static charging of the material to be weighed, weighing container and
windshield
!
Place the instrument on a firm, level surface.
!
Avoid jarring during weighing.
6.2 Unpacking and checking
Take the moisture analyser carefully out of its packaging, remove the plastic jacket
and install it at the designated work space.
6.2.1 Scope of delivery / serial accessories:
•Moisture analyser, see illustration chap. 2
•50 sample dishes
•Power cable
•Operating manual
18 DAB-BA-e-1511
6.3 Placing
The moisture analyser is supplied part-assembled. Control whether the delivery is
complete immediately after unpacking the individual parts and assemble the separate
component parts according to the sequences.
1. Put heat shield into the sample chamber.
2. Place windshield in a way that the pin in the heat shield is aligned to the hole
in the heat shield.
3. Place removal aid into the windshield. Ensure that the lug lies exactly in the
groove of the windshield.
4. Attach the sample dish holder carefully and rotate it until it locks.
5. Put the sample dish on the removal aid.
1
2
4
5
3
DAB-BA-e-151119
6.4 Levelling
Precise alignment and stable installation are a precondition for repeatable results. To
compensate for minor unevenness or tilts of the base, level the instrument.
Level instrument with foot screws until the air bubble of the
water balance is in the prescribed circle.
Check levelling regularly
20 DAB-BA-e-1511
6.5 Mains connection
Power supply is provided via the supplied mains cable.
Check, whether the voltage acceptance on the device is set correctly.
Do not connect the appliance to the power grid unless the information
on the instrument (sticker) matches the local mains voltage.
Do not eliminate the protective effect by using an extension lead
without earth terminal. For power supplies from power grids without
earth terminals call a specialist to establish equivalent protection
according to the relevant installation regulations.
The mains plug must be accessible at any time.
Prior to commissioning check the mains cable for damage.
Place the cable in a way that it cannot be damaged or handicaps
the measuring process.
Important:
Does the rating match the standard local mains current?
Do not connect if mains voltages are different!
If matching, connect the moisture analyser.
6.6 Switching on and off
Turn on appliance by pressing the ON/OFF key.
The display lights up and the equipment conducts a self-test. Wait
until basic configuration appears.
To switch off press the ON/OFF button, the display disappears.

Other KERN Measuring Instrument manuals

KERN KFB-TM User manual

KERN

KERN KFB-TM User manual

KERN DAB-SH-e-1610 User manual

KERN

KERN DAB-SH-e-1610 User manual

KERN DLB-A01 User manual

KERN

KERN DLB-A01 User manual

KERN DBS 60-3 User manual

KERN

KERN DBS 60-3 User manual

KERN MSF 200N User manual

KERN

KERN MSF 200N User manual

KERN ORA 10 BA User manual

KERN

KERN ORA 10 BA User manual

KERN DLB 160-3A User manual

KERN

KERN DLB 160-3A User manual

KERN MLS 50-3...N series User manual

KERN

KERN MLS 50-3...N series User manual

KERN DLT-N User manual

KERN

KERN DLT-N User manual

KERN TMBA-A01-A User manual

KERN

KERN TMBA-A01-A User manual

KERN ORA 3AA/AB Beer User manual

KERN

KERN ORA 3AA/AB Beer User manual

KERN MSF 200 User manual

KERN

KERN MSF 200 User manual

KERN ABP User manual

KERN

KERN ABP User manual

KERN ORA 3 HA User manual

KERN

KERN ORA 3 HA User manual

KERN ORD 45BM User manual

KERN

KERN ORD 45BM User manual

KERN ORA 90 BE User manual

KERN

KERN ORA 90 BE User manual

KERN YDB-02 User manual

KERN

KERN YDB-02 User manual

KERN DLB-A User manual

KERN

KERN DLB-A User manual

KERN MRS120-3 User manual

KERN

KERN MRS120-3 User manual

KERN ORA 1 GG User manual

KERN

KERN ORA 1 GG User manual

KERN MSA 80 User manual

KERN

KERN MSA 80 User manual

KERN KKP V40 Series User manual

KERN

KERN KKP V40 Series User manual

KERN ORA 10 BB User manual

KERN

KERN ORA 10 BB User manual

KERN TMBA-A01-A User manual

KERN

KERN TMBA-A01-A User manual

Popular Measuring Instrument manuals by other brands

Lippmann Geophysikalische Messgeräte 4point light operating instructions

Lippmann Geophysikalische Messgeräte

Lippmann Geophysikalische Messgeräte 4point light operating instructions

Knick PORTAVO 904X PH user manual

Knick

Knick PORTAVO 904X PH user manual

Fluke 305 user manual

Fluke

Fluke 305 user manual

Interacoustics MT10 Instructions for use

Interacoustics

Interacoustics MT10 Instructions for use

Victor VC6243 Operation manual

Victor

Victor VC6243 Operation manual

GF Signet 2552 operating instructions

GF

GF Signet 2552 operating instructions

SKF Multilog IMx-S Series user manual

SKF

SKF Multilog IMx-S Series user manual

Radio Shack Sound Level Meter owner's manual

Radio Shack

Radio Shack Sound Level Meter owner's manual

IFM SDG 50 Series operating instructions

IFM

IFM SDG 50 Series operating instructions

MESSKO D1272AT operating instructions

MESSKO

MESSKO D1272AT operating instructions

Pitney Bowes DM400c series instructions

Pitney Bowes

Pitney Bowes DM400c series instructions

HBK 2255 Getting started

HBK

HBK 2255 Getting started

Level Developments LCH-45 Use guide

Level Developments

Level Developments LCH-45 Use guide

Tecnosystemi Toolsplit 11131043 user manual

Tecnosystemi

Tecnosystemi Toolsplit 11131043 user manual

Kodak REELZ Film Digitizer user manual

Kodak

Kodak REELZ Film Digitizer user manual

GE SS-131ER Installation and operating instructions

GE

GE SS-131ER Installation and operating instructions

Polimaster PM1401MA Operation manual

Polimaster

Polimaster PM1401MA Operation manual

Milwaukee PRO MW801 user manual

Milwaukee

Milwaukee PRO MW801 user manual

manuals.online logo
manuals.online logoBrands
  • About & Mission
  • Contact us
  • Privacy Policy
  • Terms and Conditions

Copyright 2025 Manuals.Online. All Rights Reserved.