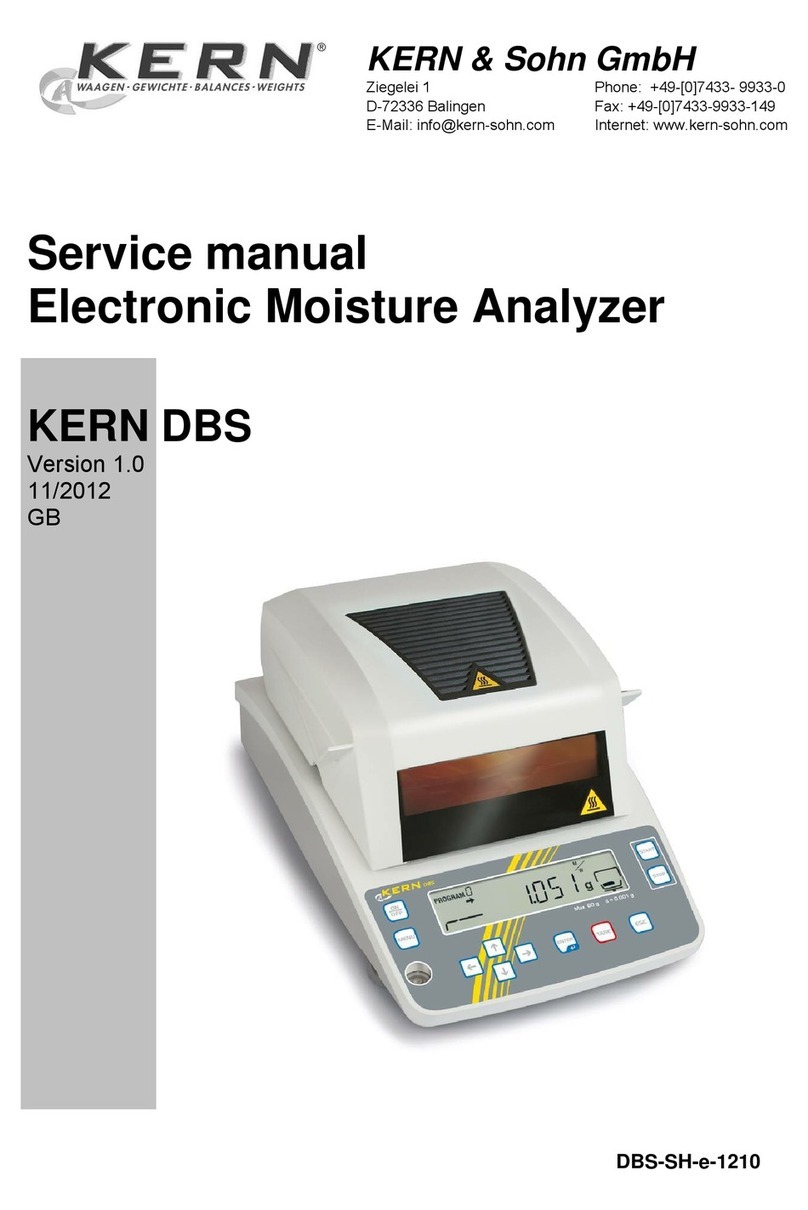
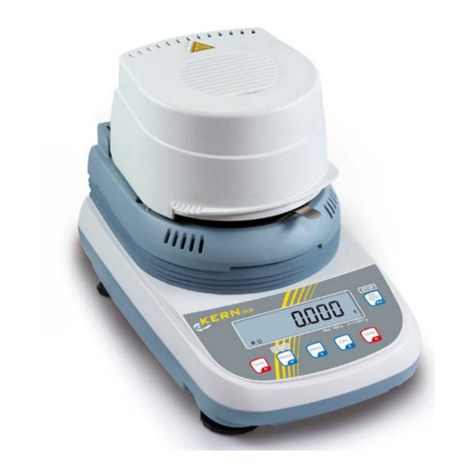
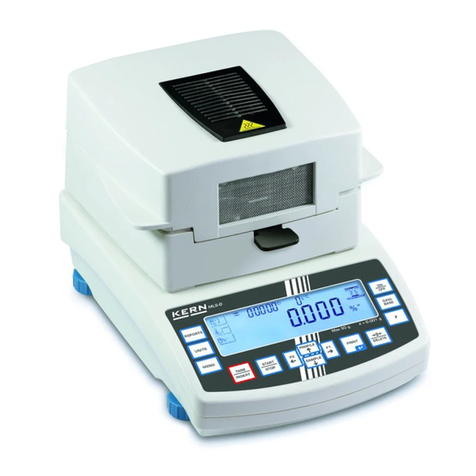
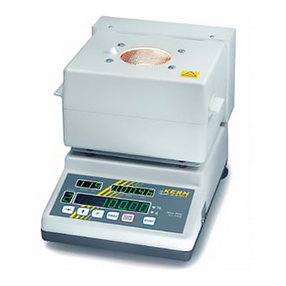
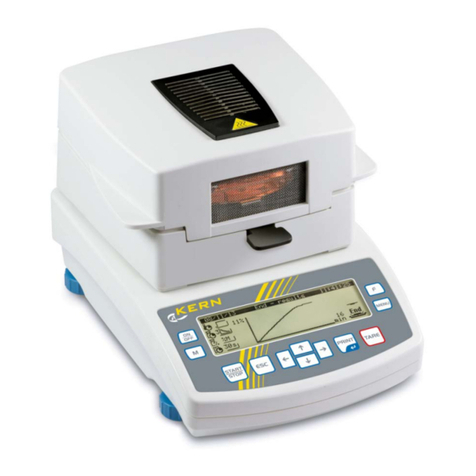
KERN MRS120-3 User manual

75 MRS-BA-defsi-0410
GB KERN MRS120-3
Version 1.0 01/2004
Operating Instructions
Moisture Analyzer
Contents
1.Introduction ................................................................................77
1.1 Useful tips on the Operating Instructions...............................77
1.2 Declaration of conformity.......................................................79
2 Safety ................................................................................80
2.1 Representations and symbols................................................80
2.2 Safety instructions .................................................................80
3 Set up ................................................................................82
3.1 Unpacking..............................................................................82
3.2 Transport, storage .................................................................83
3.2.1 Transport and shipping.................................................83
3.2.2 Storage.........................................................................83
3.3 Inspection and assembly .......................................................84
3.4 Choosing a suitable location..................................................85
3.5 Connecting it to the mains .....................................................86
3.6 Safety measures....................................................................87
3.7 Levelling.................................................................................87
3.8 Weight calibration ..................................................................88
3.9 First measurement.................................................................89
4 Operation ................................................................................93
4.1 Panel Sheet...........................................................................93
4.2 Menu control operation principle............................................94
4.3 Setting and saving the configuration......................................96
4.4 Instrument configuration ........................................................96
4.4.1 Activating the configuration menu ................................97
4.4.2 Language function........................................................97
4.4.3 Configuring the report printout......................................98
4.4.4 Configuring the application menu...............................100
4.4.5 Balance calibration.....................................................100
4.4.6 Temperature calibration .............................................100
4.4.7 Interface functions......................................................101
4.4.8 Date and time.............................................................101
4.4.9 Password protection...................................................102
4.4.10 Anti-theft encoding .....................................................104
4.4.11 Key tone.....................................................................105
4.5 Application menu operation .................................................106
4.5.1 Activating the application menu..................................107
4.5.2 Methods .....................................................................107
4.5.2.1 Saving a method....................................................108
4.5.2.2 Loading a method..................................................109

MRS-BA-defsi-0410 76
4.5.2.3 Deleting a method .................................................109
4.5.2.4 Setting method name.............................................................110
4.5.3 Starting weight ...........................................................110
4.5.4 Units...........................................................................110
4.5.5 Print rate.....................................................................112
4.5.6 Standby temperature..................................................112
4.5.7 Autostart.....................................................................112
4.6 Special operating keys.........................................................113
4.6.1 The tare key ...............................................................113
4.6.2 The print key ..............................................................114
4.6.3 The change key..........................................................117
4.6.4 The start/stop key.......................................................117
5 Determining moisture levels........................................................118
5.1 Fundamental principles........................................................118
5.1.1 Adjusting to the existing measuring process..............119
5.2 Sample preparation .............................................................119
5.2.1 Preventing samples being encrusted .........................120
5.3 Setting drying parameters....................................................121
5.3.1 Heating program ........................................................121
5.3.2 Temperature...............................................................123
5.3.3 Timer stop ..................................................................123
5.3.4 Switch-off criteria........................................................124
5.4 Application table (recommendations)...................................125
6 Data transfer ..............................................................................127
6.1 Connection scheme.............................................................128
6.2 Remote control commands..................................................129
6.2.1 Examples of the remote control of the instr................130
7 Service ..............................................................................131
7.1 Maintenance and servicing..................................................131
7.2 Replacing the mains fuse.....................................................132
7.3 Calibration............................................................................133
7.3.1 Calibrating the balance...............................................133
7.3.2 Calibrating the temperature........................................135
7.4 Software update via Internet................................................137
7.5 Error messages ..................................................................137
7.4.1 Notes on correcting faults...........................................137
8 Overview ..............................................................................139
8.1 Technical data .....................................................................139
8.2 Configuration menu tree ......................................................141
8.2.1 Application menu tree.................................................143
8.2.2 Key menus.................................................................145
8.2.3 Setting drying parameters..........................................146
8.2.4 Setting and saving the configuration ..........................146
77 MRS-BA-defsi-0410
1. Introduction
The MRS 120-3 moisture analyzer is simple and functional to
operate. It is used as a quick and reliable means of determining the
moisture content in powders and liquids by the thermogravimetric
principle.
The key features of the MRS 120-3:
• high-end balance technology built to the highest
international standard
• optimum resolution
• easy-to-read vacuum fluorescent display
• large viewing window for perfect sample monitoring
• a memory for 5 methods, with all the drying settings
• automatic detection that the measurement has ended by
means of ADAPTSTOP
• password protection to prevent unauthorized changes to
the instrument configuration and drying parameters
• anti-theft code
• printout in line with GLP guidelines (Good Laboratory
Practice)
• software update via the Internet
1.1 Useful tips on the Operating
Instructions
Take the time to read these Operating Instructions from start to
finish so that you can make full use of the many benefits and
possibilities of the MRS 120-3 in your day-to-day work.
These Operating Instructions contain guidance in the form of
pictographs and keypad diagrams, which should help you in finding
the required information:
– Key names are presented inside quotation marks and are
highlighted in bold font: «ON/OFF» or « ».
– In order to aid clarity in the explanation of the operating steps, the
display for each step is shown graphically on the left alongside
the list of operating steps:

MRS-BA-defsi-0410 78
•
Display shows List of operating steps
Sprache Deutsch
or
Langue francaise
or
language english
• If you press the « » key
repeatedly,
“SPRACHE DEUTSCH”,
“LANGUAGE ENGLISH” or
“LANGUE FRANCAISE” appears
in the display.
– See section 2 "Safety" for the symbols to indicate risks and tips.

79 MRS-BA-defsi-0410
1.2 Declaration of conformity
KERN & Sohn GmbH
Ziegelei 1
D – 72336 Balingen
E-Mail: info@kern-sohn.com
Tel: 0049-[0]7433- 9933-0
Fax: 0049-[0]7433-9933-149
Internet: www.kern-sohn.com
Declaration of conformity
Declaration of conformity for apparatus with CE mark
Konformitätserklärung für Geräte mit CE-Zeichen
Déclaration de conformité pour appareils portant la marque CE
Declaración de conformidad para aparatos con disitintivo CE
Dichiarazione di coformitá per apparecchi contrassegnati con la marcatura CE
English We hereby declare that the product to which this declaration refers conforms
with the following standards.
Deutsch Wir erklären hiermit, daß das Produkt, auf das sich diese Erklärung bezieht, mit
den nachstehenden Normen übereinstimmt.
Français Nous déclarons avec cela responsabilité que le produit, auquel se rapporte la
présente déclaration, est conforme aux normes citées ci-après.
Español Manifestamos en la presente que el producto al que se refiere esta declaración
est´´a de acuerdo con las normas siguientes
Italiano Dichiariamo con ciò che il prodotto al quale la presente dichiarazione si riferisce
è conforme alle norme di seguito citate.
Moisture Balance: KERN MRS120-3
Mark applied EU Directive Standards
73/23EEC Low voltage
EN 61010
89/336EEC EMC EN 61326
Date: 02.03.2004 Signature:
Gottl. KERN & Sohn GmbH
Management
Gottl. KERN & Sohn GmbH, Ziegelei 1, D-72336 Balingen, Tel. +49-[0]7433/9933-0,Fax +49-[0]7433/9933-149

MRS-BA-defsi-0410 80
2 Safety
2.1 Representations and symbols
Important safety-related instructions are highlighted visually at the
description of what to do: DANGER
Warning of a possible danger which may lead to death or to
serious injury.
CAUTION
Warning of a possible danger which may lead to minor injury or
damage.
NOTE
Tips and important rules on how to use the MRS 120-3 moisture
analyzer correctly.
2.2 Safety instructions
• When using the instrument in surroundings with increased
safety requirements, pay careful attention to the appropriate
regulations.
• Only use an extension cord with a protective earth conductor.
• If the mains cord is damaged, disconnect the instrument from
the electrical supply immediately and replace the mains cord.
• If there is any reason to believe that it is no longer possible to
operate the MRS 120-3 safely, unplug the instrument
immediately from the electrical supply and secure it so that it
cannot be operated inadvertently.
• When carrying out maintenance work, it is essential to heed the
tips in (cap. 7.1 Maintenance and servicing).
• The Operating Instructions must be read by everyone who has
to operate the instrument and must be kept handy on-site at all
times.

81 MRS-BA-defsi-0410
DANGER
Do not place any flammable materials on, under or beside the
instrument.
Leave enough clear space around the instrument to prevent a build-
up of heat.
The MRS 120-3 may not be used to analyze explosive, highly
flammable samples.
Do not operate the MRS 120-3 moisture analyzer in areas where
there is any risk of explosion.
Sample materials which release toxic substances must be dried in a
fume hood. Take care not to inhale any harmful vapors.
Ensure that no liquid seeps inside the instrument or into the
connection ports on the back of the instrument.
If you spill any liquid onto the instrument, unplug it from the electrical
supply immediately.
Do not operate the moisture analyzer again until you have had it
checked by a KERN service engineer.
CAUTION
Some of the parts, like the heating element and the viewing window,
may become considerably hotter while it is in operation. Only touch
the instrument using the handles provided.
Take care when you remove the sample. The actual sample, the
heating unit and sample pans used may still be very hot.
The MRS 120-3 should generally be used for drying substances
containing water. Sample materials which give off aggressive vapors
(like acids) may cause corrosion problems to develop on parts of the
instrument.
If any damage or injury occurs, liability and responsibility rest with the
user.

MRS-BA-defsi-0410 82
3 Set up
3.1 Unpacking
The MRS 120-3 moisture analyzer comes in environmentally-
friendly packaging, specifically developed for this precision
instrument, which provides optimum protection for the instrument
during transportation.
NOTE
Retain the original packaging in order to avoid the MRS 120-3
moisture analyzer becoming damaged in transit when it is shipped or
transported and to store the MRS 120-3 under optimum conditions if
it is out of operation for an extended period.
Follow instructions carefully when you unpack the MRS 120-3
moisture analyzer in order to avoid damaging it:
• Unpack the instrument carefully and gently. This is a precision
instrument.
• When temperatures outside are very low, the balance should
first be stored for a few hours in the unopened transport
package in a dry room at normal room temperature, so that no
condensation settles on the balance when it is unpacked.
• Check the moisture analyzer for any external visible signs of
damage immediately after you unpack it. If you find that it has
been damaged in transit, notify your KERN service agent
immediately.
• If the MRS 120-3 moisture analyzer is not being put into
operation immediately after purchase, store it in a dry place
with minimal fluctuations in temperature (Cap.3.2.2 “Storage”)
•
Read these Operating Instructions carefully before operating the
balance, even if you have used KERN equipment before and pay
particular attention to the safety instructions (Cap.2 “Safety”).

83 MRS-BA-defsi-0410
3.2 Transport, storage
3.2.1 Transport and shipping
Your MRS 120-3 moisture analyzer is a precision instrument. Treat
it with care.
Avoid shaking it or subjecting it to any heavy jolts or vibrations
during transport.
Avoid serious temperature fluctuations and getting the instrument
damp (condensation) during transport.
NOTE
The MRS 120-3 moisture analyzer should ideally be shipped and
transported in its original packaging to avoid damage in transit.
3.2.2 Storage
If you do not intend to use the instrument for a long time, unplug it
from the electrical supply, clean it thoroughly and store it in a place
that meets the following conditions:
• No serious shaking or vibrations
• No serious fluctuations in temperature
• No direct exposure to sunlight
• No moisture
NOTE
The MRS 120-3 moisture analyzer should ideally be stored in its
original packaging because it gives it optimum protection.

MRS-BA-defsi-0410 84
3.3 Inspection and assembly
The moisture analyzer does not come fully assembled. Once you
have unpacked all the parts, check that the delivery is complete
and assemble the individual components in the order indicated
below.
Components delivered Components delivered
MRS 120-3 moisture analyzer In-use cover for the display
Mains cord 30 sample pans (4)
Draftshield (1) Operating Instructions
Pan support (2) Warranty card
Sample holder (3) Declaration of conformity

85 MRS-BA-defsi-0410
• Assemble the in-use cover for the display
• Open the hood and insert the draftshield (1), making sure that it
is placed on flat.
• Insert the pan support (2) and turn it so that it locks securely in
place.
• Insert the sample holder (3) as shown.
• You can now place an aluminium pan (4) on the pan support.
NOTE
All the parts must be attached together without exerting undue force.
Do not apply any force. If you have any problems, the KERN
customer service will be happy to help.
3.4 Choosing a suitable location
In order to ensure that the moisture analyzer functions properly,
select a location that fulfils the following criteria:
• Permissible ambient temperatures
- Temperature: 5°C ... 40°C
- Relative humidity: 25% ... 85%, non-condensing
• Put the instrument on a rigid, firm horizontal base, preferably
exposed to no vibrations
• Make sure that the instrument cannot be shaken or knocked
over
• Do not expose it to direct sunlight
• Avoid drafts and excessive temperature fluctuations
• Leave enough clear space around the instrument to prevent a
build-up of heat.
Do not expose the instrument to high levels of moisture for long
periods of time. Avoid letting condensation form on the instrument.
If instruments are cold, let them warm up to room temperature
(approx. 20°C) before connecting them to the mains.
Condensation is practically impossible on instruments which are
connected to the mains.

MRS-BA-defsi-0410 86
3.5 Connecting it to the mains
Follow safety instructions when connecting the instrument to the
mains:
DANGER
The instrument may only be operated using the original mains cord
supplied.
If the mains cord supplied is not long enough, only use an extension
cord fitted with a protective earth conductor.
Plug the mains cord into a socket which has been installed in
accordance with regulations and is fitted with a PE terminal.
For technical reasons, the heating unit is designed in the factory to
accommodate a voltage of 230 V or 115 V and in accordance with
your order. Check that the setting matches the local setting?

87 MRS-BA-defsi-0410
3.6 Safety measures
The safety class 1 instrument, the MRS 120-3, may only be
plugged into a socket which has been installed in accordance with
regulations and is fitted with a protective earth terminal. The safety
effect may not be undone by using an extension lead without an
earth wire. If the voltage is coming from mains supplies without a
protective earth terminal, arrange for an electrician to create a
comparable level of protection in accordance with valid installation
regulations.
3.7 Levelling
In order to function properly, the MRS 120-3 moisture analyzer
must be precisely horizontal.
The instrument is fitted with a “levelling bubble” and two rotatable
feet for level-control, with the aid of which it is possible to
compensate for small height differences and/or unevennesses in
the surface on which the instrument is standing.
The two screw feet must be adjusted so that the air bubble is
precisely in the center of the sight glass of the levelling bubble.
NOTE
The instrument must be carefully relevelled each time it is moved in
order to obtain accurate measurements.
Incorrect Correct

MRS-BA-defsi-0410 88
3.8 Weight calibration
Since the Earth's gravity is not the same everywhere, each balance
must be adjusted to compensate for the gravity at each location, in
accordance with the underlying physical weighing principle. This
adjustment process, which is known as “calibration”, must be
carried out on initial installation and then each time the instrument
is moved to another location. However, in order to get exact
measurements, the instrument should also be recalibrated
periodically.
NOTE
The MRS 120-3 moisture analyzer must be calibrated when it is
initially installed and then each time it is moved to another location.
If you work in accordance with “Good Laboratory Practice GLP”, observe
the prescribed intervals between calibrations (adjustments).
The calibration is set in the configuration menu (see chapter 4.4.5
"Balance calibration")
With the aid of the “Intelligent Calibration Mode” (ICM), the
instrument can determine the size of the calibration weight itself,
facilitating exact calibration with different size weights (in 10 g
increments);(see chapter 7.3.1 "Calibrating the balance")

89 MRS-BA-defsi-0410
3.9 First measurement
Once the MRS 120-3 moisture analyzer is successfully up and
running, you can perform an initial measurement to familiarize
yourself with the new instrument and to test it for any malfunctions.
Switch the instrument on using the «ON/OFF» key. The instrument
performs a self-diagnostics test to check the main functions. After
completion of the start-up process (which takes about ten
seconds), “Zero” appears in the display; this means that the
instrument is now ready for operation.
During the first measurement, the instrument uses the drying
parameters set in the factory.
• Open the hood of the instrument
• Place the sample holder with an
empty weighing pan onto the
weighing pan holder.
Note: The weighing pan must sit
flat on the weighing pan holder.
Always work with the sample
holder; it allows you to work
safely and prevents possible
burning ones self.
• Press the « TARE » key.
The instrument is ready to weigh
the sample.

MRS-BA-defsi-0410 90
• Pour approx. 1.0 g of water into
the weighing pan.
• Close the hood
The instrument is prepared for
the first measurement.
• Start the measurement by
pressing the «START/STOP»
key.
The heating element heats up to
105°C, and the fan starts to cool.
• The dryer display is divided into
+ 100.00 %
STd-- °C 0.1MIN
• the measurement display and
the info line

91 MRS-BA-defsi-0410
+ 93.27 %
STD 105°C 2.3MIN
• The result appears in the
measurement display in the unit
of measurement set.
• The info line displays the heating
mode used (standard), the
current temperature (105°C) and
the current duration of the
measurement (2.3 min.).
If the temperature is under 40°C,
three dashes are displayed: "---
°C".
• Once the drying has ended, an
audio signal sounds, and the
heating is switched off.
The fan keeps running until the
temperature in the sample room
drops below 40°C.
+ XX.xx %
DURATION XX.X MIN
• The measurement display shows
the result in the unit of
measurement set.The
measurement result is displayed
in the other units of
measurement by pressing the
«F» key.
• The info line shows how long the
measurement takes.

MRS-BA-defsi-0410 92
• Open the hood
• Carefully remove the weighing
pan, only gripping the sample
holder by the handle.
Caution! All the parts of the
sample chamber are hot.
Allow the weighing pan and
holder to cool down before
doing anything else with them.
• Insert a new weighing pan into
the instrument.
• Press the «TARE» key; the
instrument is ready for you to
perform a new measurement.
CAUTION
The weighing pan and holder are hot!

93 MRS-BA-defsi-0410
4 Operation
The MRS 120-3 moisture analyzer has two main menus: the
configuration menu and the application menu.
Instrument-specific parameters and the layout of the report printout
are defined in the configuration menu. You can either work with
the basic configuration programmed in the factory or define and
save a user configuration which is adapted to suit your specific
needs.
Dryer-specific parameters can be set in the application menu.
The weighing help is also activated and defined in this menu.
4.1 Panel Sheet

MRS-BA-defsi-0410 94
4.2 Menu control operation principle
The configuration menu and the application menu each have a
main path and up to two sub-paths in which the parameters for the
different functions of the instrument are defined.
Use the cursor keys « », « », « » and « »to move
within the paths.
Table of contents
Other KERN Measuring Instrument manuals

KERN
KERN KFE-TM User manual

KERN
KERN DLB 160-3A User manual

KERN
KERN ORA 20 BA User manual

KERN
KERN ORA 10 BB User manual

KERN
KERN TMBA-A01-A User manual

KERN
KERN KFE-TM User manual

KERN
KERN MLS 50-3...N series User manual

KERN
KERN ORA 90 BE User manual

KERN
KERN DAB 200-2 User manual

KERN
KERN MAP 80K1 User manual