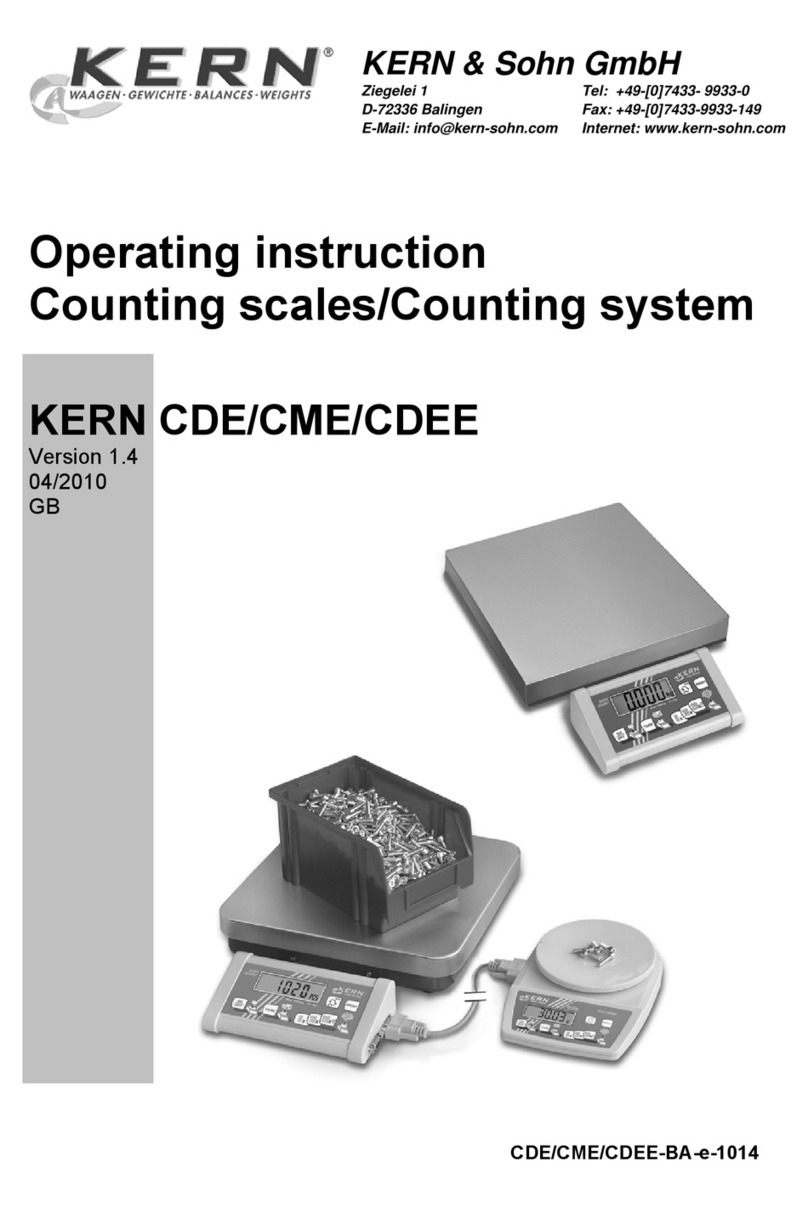
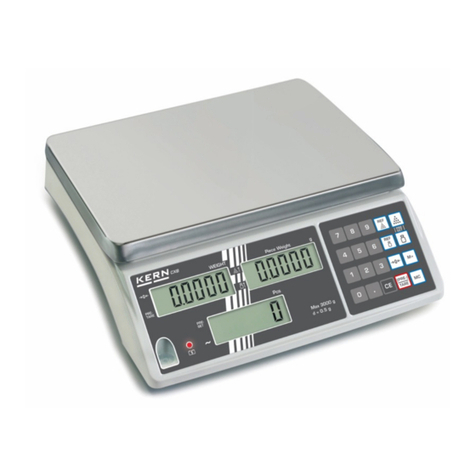
KERN CKE 360-3 User manual

KERN & Sohn GmbH
Ziegelei 1
D-72336 Balingen
email: info@kern-sohn.com
Phone: +49-[0]7433- 9933-0
Fax: +49-[0]7433-9933-149
Internet: www.kern-sohn.com
Operating Manual
Counting balances
KERN CKE/CDS
Version 2.6
01/2015
GB
CKE-BA-e-1526

GB
KERN CKE/CDS
Version 2.601/2015
Operating Manual
Counting balances
Table of Contents
1MODE – MENU .......................................................................................................3
2Technical Data .......................................................................................................4
2.1 KERN CKE.......................................................................................................................................... 4
2.2 KERN CDS.......................................................................................................................................... 7
3Basic Information (General)..................................................................................9
3.1 Proper use........................................................................................................................................... 9
3.2 Improper Use ...................................................................................................................................... 9
3.3 Warranty.............................................................................................................................................. 9
3.4 Monitoring of Test Resources............................................................................................................. 9
4Basic Safety Precautions....................................................................................10
4.1 Pay attention to the instructions in the Operation Manual................................................................. 10
4.2 Personnel training ............................................................................................................................. 10
5Transport and storage.........................................................................................10
5.1 Testing upon acceptance.................................................................................................................. 10
5.2 Packaging / return transport.............................................................................................................. 10
6Unpacking, Setup and Commissioning.............................................................11
6.1 Installation Site, Location of Use....................................................................................................... 11
6.2 Unpacking......................................................................................................................................... 11
6.2.1 Placing .............................................................................................................................................. 11
6.3 Mains connection.............................................................................................................................. 11
6.4 Battery operation CKE....................................................................................................................... 12
6.5 Connection of peripheral devices...................................................................................................... 12
6.6 Initial Commissioning........................................................................................................................ 12
6.7 Adjustment........................................................................................................................................ 13
6.8 Adjusting (see chapter 7.2.1)............................................................................................................ 13
6.9 Verification ........................................................................................................................................ 13
7Operation..............................................................................................................14
7.1 Control panel CKE/CDS.................................................................................................................... 14
7.2 Operation .......................................................................................................................................... 15
7.2.1 Adjusting ........................................................................................................................................... 15
7.2.2 Speed................................................................................................................................................ 15
7.2.3 Auto Off............................................................................................................................................. 15
7.2.4 Display background illumination........................................................................................................ 17
7.2.5 Swap: ................................................................................................................................................ 17
7.2.6 Contents of the form printout: ........................................................................................................... 17
7.3 Data output RS 232 C....................................................................................................................... 18
7.4 Interface RS 232C............................................................................................................................. 19
7.4.1 There are 4 kinds of data output via RS 232C.................................................................................. 19
7.4.2 Explanation of the data transfer........................................................................................................ 19
7.4.3 Numerator......................................................................................................................................... 19
7.5 Printer................................................................................................................................................ 20
7.6 Underfloor weighing.......................................................................................................................... 20
8Service, maintenance, disposal .........................................................................21
8.1 Cleaning............................................................................................................................................ 21
8.2 Service, maintenance........................................................................................................................ 21
8.3 Disposal ............................................................................................................................................ 21
9Instant help ..........................................................................................................21
10 Declaration of conformity ...................................................................................22
CKE/CDS-BA-e-15262
1 MODE – MENU
How to invoke the mode menu: Turn on balance, press and hold the tare key and press the ON/OFF key.
Let go of the tare key.
Using the automatic reference optimization (OPT) the counting accuracy is automatically increased when
applying up to 100 items.
Factory settings:
9600bd: YES
Fast: 3
Keyboard overview / Function
No Yes
/CDS
CKE/CDS-BA-e-1526 3

2 Technical Data
2.1 KERN CKE
KERN
CKE 360-3
CKE 2000-2
CKE 3600-2
CKE 6K0.02
Readability (d)
0,001 g
0,01 g
0,01 g
0,02 g
Weighing range (max)
360 g
2.000 g
3.600 g
6.000 g
Taring range (subtractive)
360 g
2.000 g
3.600 g
6.000 g
Reproducibility
0,002 g
0,01 g
0,02 g
0,04 g
Linearity
±0,005 g
±0,03 g
±0,05 g
±0,1 g
Smallest piece weight
0,001 g
0,01 g
0,01 g
0,02 g
Adjustment point 100/200/300/
360 g
0,5/1,0/1,5/2,0 kg 1,0/2,0/3,0/3,6 kg 2/4/5/6 kg
Recommended
adjustment weight (F1),
not added
300 g 2 kg 2 kg + 1 kg 5 kg
Appropriate for verification
max. 80% rel. (non-condensing)
Stabilization time (typical)
3 sec.
Allowable ambient
temperature
+10 °C ... + 40 °C
Warm-up time
2 hours
2 hours
4 hours
4 hours
Housing (B x D x H) mm
167 x 250 x 85
167 x 250 x 85
167 x 250 x 85
350 x 390 x 120
Vibration filter
yes
Weighing plate, stainless steel
Ø 81
150 x 170
150 x 170
340 x 240
Units
see menu
Weight kg (net)
1,1
1,7
1,7
6,5
Data interface
yes (RS232)
Rechargeable battery
pack with
7,2 V/2000mAh
yes no
Battery operation with
6 x 1.5 V; Size C
no yes
CKE/CDS-BA-e-15264

KERN
CKE 8K0.05
CKE 16K0.05
CKE 16K0.1
Readability (d)
0,05 g
0,05 g
0,1 g
Weighing range (max)
8.000 g
16.000 g
16.000 g
Taring range (subtractive)
8.000 g
16.000 g
16.000 g
Reproducibility
0,05 g
0,1 g
0,1g
Linearity
±0,15 g
±0,25 g
± 0,3 g
Smallest piece weight
0,05 g
0,05 g
0,1 g
Adjustment point
2/4/5/7/8 kg
5/10/15/16 kg
5/10/15/16 kg
Recommended adjustment
weight (F1), not added
5 kg + 2 kg 10 kg + 5 kg 10 kg + 5 kg
Appropriate for verification
max. 80% rel. (non-condensing)
Stabilization time (typical)
3 sec.
Allowable ambient
temperature
+10 °C ... + 40 °C
Warm-up time
2 hours
4 hours
2 hours
Housing (B x D x H) mm
350 x 390 x 120
Vibration filter
yes
Weighing plate, stainless steel
340 x 240
Units
see menu
Data interface
6,5
Data interface
yes (RS232)
Battery operation with
6 x 1.5 V; Size C
yes
CKE/CDS-BA-e-1526 5

KERN
CKE 36k0.1
CKE 65k0.2
CKE 65k0.5
Readability (d)
0,1 g
0,2 g
0,5 g
Weighing range (max)
36.000 g
65.000
65.000
Taring range (subtractive)
36.000 g
65.000
65.000
Reproducibility
0,2 g
0,4 g
0,5 g
Linearity
±0,5 g
±1,0 g
± 1,5 g
Smallest piece weight
0,1 g
0,2 g
0,5 g
Adjustment point
10/20/30/36 kg
20/30/50/60 kg
20/30/50/60 kg
Recommended
adjustment weight (F1),
not added
20 kg + 10 kg 50 kg 50 kg
Appropriate for verification
max. 80% rel. (non-condensing)
Stabilization time (typical)
3 sec.
Allowable ambient
temperature
+10 °C ... + 40 °C
Warm-up time
2 hours
4 hours
2 hours
Housing (B x D x H) mm
350 x 390 x 120
Vibration filter
yes
Weighing plate, stainless steel
340 x 240 mm
Units
see menu
Weight kg (net)
6,5
Data interface
yes (RS232)
Battery operation with
6 x 1.5 V; Size C
yes
CKE/CDS-BA-e-15266

2.2 KERN CDS
KERN
CDS
4K0.02
CDS
15K0.05
CDS
16K0.1
CDS
30K0.1
CDS
30K0.1L
Readability (d)
0,02 g
0,05 g
0,1 g
0,1 g
0,1 g
Weighing range (max)
4.000 g
15.000 g
16.000 g
30.000 g
30.000 g
Taring range (subtractive)
4.000 g
15.000 g
16.000 g
30.000 g
30.000 g
Reproducibility
0,02 g
0,2 g
0,1 g
0,2 g
0,2g
Linearity ±
±0,06 g
±0,25 g
±0,3 g
±0,5 g
± 0,5 g
Smallest piece weight
0,02 g
0,05 g
0,1 g
0,1 g
0,1 g
Adjustment point kg
1/2/4
2/5/10/15
2/5/10/15/16
10/15/20/30
10/15/20/30
Recommended
adjustment weight (F1),
not added
2 kg + 2 kg 10 kg + 5 kg 10 kg + 5 kg 20 kg + 10 kg 20 kg + 10 kg
Appropriate for verification
max. 80% rel. (non-condensing)
Stabilization time (typical)
3 sec.
Allowable ambient
temperature
+10 °C ... + 40 °C
Warm-up time
2 hours
4 hours
4 hours
2 hours
4 hours
Housing (B x D x H) mm
315 x 305 x 70
450 x 350 x 115
Vibration filter
yes
Weighing plate, stainless steel
315 x 305 mm
450 x 350 mm
Units
see menu
Weight kg (net)
7,5
9,5
Data interface
yes (RS232)
Rechargeable battery
pack with
7,2 V/2000mAh
yes
CKE/CDS-BA-e-1526 7

KERN
CDS 36K0.2L
CDS 60K0.2
CDS 100K0.5
Readability (d)
0,2 g
0,2 g
0,5 g
Weighing range (max)
36.000 g
60.000 g
100.000 g
Taring range (subtractive)
36.000 g
60.000 g
100.000 g
Reproducibility
0,2 g
0,4 g
0,5 g
Linearity ±
±0,6 g
±1,0 g
±1,5 g
Smallest piece weight
0,2 g
Adjustment point kg
10/15/20/30/36
20/30/50/60
20/50/100
Recommended
adjustment weight (F1),
not added
20 kg + 10 kg 50 kg 50 kg + 50 kg
Appropriate for verification
max. 80% rel. (non-condensing)
Stabilization time (typical)
3 sec.
Allowable ambient
temperature
+10 °C ... + 40 °C
Warm-up time
2 hours
2 hours
2 hours
Housing (B x D x H) mm
450 x 350 x 115
Vibration filter
yes
Weighing plate, stainless steel
mm
450 x 350
Units
see menu
Weight kg (net)
9,5
Data interface
yes (RS232)
Rechargeable battery
pack with
7,2 V/2000mAh
yes
CKE/CDS-BA-e-15268

3 Basic Information (General)
It is absolutely necessary that you read and understand the operating instructions prior to installation and
commissioning and follow the instructions during the process!
3.1 Proper use
The balance you purchased is intended to determine the weighing value of material to be weighed. It is
intended to be used as a “non-automatic“ balance, i.e. the material to be weighed is manually and carefully
placed in the centre of the weighing plate. As soon as a stable weighing value is reached the weighing value
can be read.
3.2 Improper Use
Do not use balance for dynamic weighings. In the event that small quantities are removed or added to the
material to be weighed, incorrect weighing results can be displayed due to the “stability compensation“ in the
balance. (Example: Slowly draining fluids from a container on the balance.)
Do not leave permanent load on the weighing plate. This may damage the measuring system.
Impacts and overloading exceeding the stated maximum load (max) of the balance, minus a possibly existing
tare load, must be strictly avoided. Balance may be damage by this.
Never operate balance in explosive environment. The serial version is not explosion protected.
The structure of the balance may not be modified. This may lead to incorrect weighing results, safety-related
faults and destruction of the balance.
The balance may only be used according to the described conditions. Other areas of use must be released by
KERN in writing.
3.3 Warranty
Warranty claims shall be voided in case
- Our conditions in the operation manual are ignored
- The appliance is used outside the described uses
- The appliance is modified or opened
- mechanical damage and damage caused by media, liquids
- natural wear and tear
- The appliance is improperly set up or incorrectly electrically connected
- The measuring system is overloaded
3.4 Monitoring of Test Resources
In the framework of quality assurance the measuring-related properties of the balance and, if applicable, the
testing weight, must be checked regularly. The responsible user must define a suitable interval as well as type
and scope of this test. Information is available on KERN’s home page (www.kern-sohn.com) with regard to the
monitoring of balance test substances and the test weights required for this. Our accredited DKD calibration
laboratory offers fast and inexpensive adjustment for test weights and weighing balances (reset to national
normal weight).
CKE/CDS-BA-e-1526 9

4 Basic Safety Precautions
4.1 Pay attention to the instructions in the Operation Manual
Carefully read this operation manual before setup and commissioning, even
if you are already familiar with KERN balances.
Versions in other languages are non-binding translations.
The only binding version is the original document in German.
4.2 Personnel training
The appliance may only be operated and maintained by trained personnel.
5 Transport and storage
5.1 Testing upon acceptance
When receiving the appliance, please check packaging immediately, and the appliance itself when unpacking
for possible visible damage.
In case of visible damage have the damage verified by the messenger’s signature. Do not alter goods or
packaging and do not remove any parts of the delivery. Report the damage immediately (within 24 hours) in
writing to the parcel service.
5.2 Packaging / return transport
Keep all parts of the original packaging for a possibly required return.
Only use original packaging for returning.
Prior to dispatch disconnect all cables and remove loose/mobile parts.
Reattach possibly supplied transport securing devices.
Secure all parts such as the glass wind screen, the weighing platform, power
unit etc. against shifting and damage.
CKE/CDS-BA-e-152610

6 Unpacking, Setup and Commissioning
6.1 Installation Site, Location of Use
The balances are designed in a way that reliable weighing results are achieved in common conditions of use.
You will work accurately and fast, if you select the right location for your balance.
Therefore, observe the following for the installation site:
- Place the balance on a firm, level surface;
- Avoid extreme heat as well as temperature fluctuation caused by installing next to a radiator or in the
direct sunlight;
- Protect the balance against direct draughts due to open windows and doors;
- Avoid jarring during weighing;
- Protect the balance against high humidity, vapours and dust;
- Do not expose the device to extreme dampness for longer periods of time. Non-permitted
condensation (condensation of air humidity on the appliance) may occur if a cold appliance is taken to
a considerably warmer environment. In this case, acclimatize the disconnected appliance
for ca. 2 hours at room temperature.
- Avoid static charging of the material to be weighed, weighing container and windshield.
If electro-magnetic fields or static charge occur, or if the power supply is unstable major deviations on the
display (incorrect weighing results) are possible. In that case, the location must be changed.
6.2 Unpacking
Carefully remove the balance from the packaging, remove plastic cover and setup balance at the intended
workstation.
6.2.1 Placing
The balance must be installed in a way that the weighing plate is exactly in horizontal position.
6.3 Mains connection
Power is supplied via the external mains adapter. The stated voltage value must be the same as the local
voltage.
Only use original KERN mains adapters. Using other makes requires consent by KERN.
CKE/CDS-BA-e-1526 11

6.4 Battery operation CKE
To insert the batteries (6 x 1.5 V) remove the battery compartment cover. Remove it with the help of a coin.
In the each battery tube insert three batteries in the same polarity sense.
Screw down again the battery cover.
To save the battery, the background illumination can be switched off (see chap. 1 Mode Menu).
Moreover the AUTO-OFF function can be activated (see chap. 1 Mode Menu).
If the battery voltage drops below a critical value for operational safety, this will be indicated in the display with
the “BATT LOW“ information.
6.5 Connection of peripheral devices
Before connecting or disconnecting of additional devices (printer, PC) to the data interface, always disconnect
the balance from the power supply.
With your balance, only use accessories and peripheral devices by KERN, as they are ideally tuned to your
balance.
6.6 Initial Commissioning
A warming up time of 2 hours after switching on stabilizes the measuring values.
The accuracy of the balance depends on the local acceleration of gravity.
Strictly observe hints in chapter “Adjustment”.
CKE/CDS-BA-e-152612

6.7 Adjustment
As the acceleration value due to gravity is not the same at every location on earth, each balance must be
coordinated - in compliance with the underlying physical weighing principle - to the existing acceleration due to
gravity at its place of location (only if the balance has not already been adjusted to the location in the factory).
This adjustment process must be carried out during the initial start-up, after change in location and variation of
surrounding temperature. To receive accurate measuring values it is also recommended to adjust the balance
periodically in weighing operation.
6.8 Adjusting (see chapter 7.2.1)
With an adjustment weight, the weighing accuracy can be checked and re-adjusted at any time.
Attention: In the verified balances the adjustment is not possible.
Procedure when adjusting:
Observe stable environmental conditions. A short warming up time of ca. 15 minutes is recommended for
stabilization.
6.9 Verification
General introduction:
According to EU directive 90/384/EEC balances must be officially verified if they are used as follows (legally
controlled area):
a) For commercial transactions if the price of goods is determined by weighing.
b) For the production of medicines in pharmacies as well as for analyses in the medical and
pharmaceutical laboratory.
c) For official purposes
d) For manufacturing final packages
In cases of doubt, please contact your local trade in standard.
Verification instructions
An EU type approval exists for balances described in their technical data as verifyable. If a balance is used
where obligation to verify exists as described above, it must officially verified and re-verified in regular intervals.
Re-verification of a balance is carried out according to the respective national regulations. The validity for
verification of balances in Germany is e.g. 2 years.
The legal regulation of the country where the balance is used must be observed!
CKE/CDS-BA-e-1526 13

7 Operation
7.1 Control panel CKE/CDS
ON/OFF
Taring;
Invoke the mode menu by pressing the ON/OFF key.
Generate reference using 5 parts;
In mode menu: NO function
Generate reference using 10 parts
Generate reference using 20 parts;
In mode menu: YES function
Switchover pcs ↔ g;
In menu: Mode function.
Print out weighing result.
Display icon
Significance
==OVERLOAD==
Overload: Weighing range exceeded
=============
Underload: Weighing range not achieved
<< .
In add-up and % mode: Part too light
.
Balance in add-up mode show the weight value of the
counted quantity
CKE/CDS-BA-e-152614

7.2 Operation
7.2.1 Adjusting
7.2.2 Speed
7.2.3 Auto Off
CKE/CDS-BA-e-1526 15

CKE/CDS-BA-e-152616

7.2.4 Display background illumination
Switch on the balance and the zero display, then call-up the balance menu as specified in
chapter 1. Select menu item „Backlight“ using the button necessary for the respective
model. Acknowledge by pressing the „YES“ button in order to switch on the background
illumination permanently. By pressing the „NO“ button, the background illumination is
switched off.
If the background illumination shall be switched off time-controlled (to save the battery),
press the respective button for continuing the menu to select the menu point „Backlight
auto“ and confirm by pressing the „YES“ button. The background illumination will be
switched off automatically 10 sec after having reached a stable weighing value.
7.2.5 Swap:
Strong filtering - Setting under point 1 (Mode-Menu)
7.2.6 Contents of the form printout:
MODE / PRINTER / PRINTERFORM
Var 1 Type xx = Gross
MODE
Var 1 Row xx XXxx
MODE
Var 1 Type 02 = Gross
Var 1 Row 02
Var 1 Col 14
Gross value active
Line 2
Column 14
REF / YES
MODE
Var 2 Type xx = Net
Var 3 Type xx = Tare
Var 4 Type xx = Pretare
Var 5 Type xx = Pcs / %
Var 6 Type xx = * / Mw
Var 7 Type xx = Numerator
Printerform
Var 1 Col xx
Printout “Gross“ line 2 / column 14
xxxxxxxxxxxxxxxxxxxxxxxxxxxxxxx 1. line
xxxxxxxxxxxxxG 15000.0g xxxxxx 2. line
CKE/CDS-BA-e-1526 17

7.3 Data output RS 232 C
Technical Data
8-bit ASCII Code
1 start bit, 8 data bits, 1 stop bit, no parity bit
Baud rate selectable from 2400, 4800, 9600 Baud (factory setting) and 19200 Baud.
Sub-D plug 9-channel required
For operation with interface faultless operation is only ensured with the correct KERN – interface cable
(max. 2m)
Pin allocation of the balance output socket (front view)
Sub-D jack 9-channel
51
9 6
Pin 2: Transmit data
Pin 3: Receive data
Pin 5: Signal ground
Baud rate
The MODE key is used to set the Baud rate used for the transfer of measured values. In the following example
the baud rate is set to 4800 baud.
Setting Baud rate KERN CKE
Display
1. Switch on balance
2. Press and hold tare key
3. Tap ON/OFF key and let go of tare key
"Cal?" will appear on the display.
4. Keep holding the switch over key „pcs ↔ g“ until "Printer" appears on the
display and confirm by pressing the "20x" key. 2.400 Bd will appear on the
display.
5. Press the switchover key "pcs ↔ g" to select the Baud rate and confirm
by the “20x” key. To return to weighing mode, press the tare key.
PRINTER?
2400
Baud
4800
Baud
4800 Baud X
0.00 oz
CKE/CDS-BA-e-152618

7.4 Interface RS 232C
Data output via interface RS 232C
General Information
The previous condition for the data transfer between balance and a peripherical device (e.g. printer, PC ...) is
that the appliances are set to the same interface parameters (e.g. baud rate, parity ...).
7.4.1 There are 4 kinds of data output via RS 232C
Data output using the PRINT key
The printing process can be triggered by pressing the PRINT key.
The settings AUTOPRINT and AUTOPRINT PC should be disabled for this process.
AUTOPRINT (data output according to weight application)
The setting AUTOPRINT is located on the PRINTER path where you can turn it on or off. When AUTOPRINT
is active, the current weighing value will be sent via the RS 232 date interface after unloading and subsequent
loading of the balance as soon as the balance is in resting position.
AUTOPRINT PC (continuous data output)
The setting AUTOPRINT PC is located on the PRINTER path and where you can turn it on or off. When
AUTOPRINT PC is active, the current weighing values will be sent continuously via the RS 232 data interface.
Data output and remote control commands
Remote control commands transferred as ASCII characters to the balance can be used to trigger the following
functions on the balance (always finish with CR, LF!):
t Taring
w The balance sends a weighing value (also unstable) via the serial interface.
s The balance sends a stable weighing value via the serial interface.
After receiving either character w or s, the balance will send without a printer pause between the characters.
7.4.2 Explanation of the data transfer
Each data transfer is structured as follows:
Bit-Nr.
1
2
3
4
5
6
7
8
9
10
11
12
13
14
15
16
17
18
N
N
N
N
B
B
B
B
B
0
.
0
0
E
E
E
CR
LF
N = Numerator
B*: = Blank or for autotare on in zero range.
B, 0, ., g: = Blank or weighing value giving unit according to loading of the balance
E = Unit
CR: = Carriage Return
LF: = Line Feed
7.4.3 Numerator
The numerator is situated under the menu item "Printer" where it can be activated or deactivated.
When data output takes places via the printer key, it will be increased by one digit per key stroke.
CKE/CDS-BA-e-1526 19

7.5 Printer
The serial interface RS 232 facilitates the connection of a printer. The printout shows the weight in grams. In
counting mode either the piece number or the weight details will be printed out.
In percentage mode the percentage proportion or the weight details will be printed out.
Printout will take place after pressing the PRINT key.
It is possible to number each printout continuously with the help of the numerator.
The numerator will be reset to (000) each time the balance is turned off or the CLEAR function is actuated.
7.6 Underfloor weighing
Objects which are unsuitable for placement on the weighing tray due to their size or shape can be weighed with
the help of the underfloor weighing facility.
Proceed as follows:
•Switch off balance.
•Turn over the balance and in doing so take care that the weighing plate is not loaded.
•Open the closing lid on the bottom of your balance.
•Mount the hooks for underfloor weighing.
•Put the balance over an opening
•Suspend the goods to be weighed from the hook and carry out the weighing.
! Caution!
Pay attention that the hooks used for underfloor weighing are stable enough to provide a secure
support for the desired items to be weighed (risk of breakage). Always ensure that there are no
persons, animals or objects that might be damaged underneath the load.
! Note!
After completing the underfloor weighing the opening on the bottom of the balance must always be
closed (dust protection).
CKE/CDS-BA-e-152620
This manual suits for next models
16
Table of contents
Other KERN Scale manuals